Tag Archive for: foundation repair

Concrete Foundations Western WA: Expert Guide & Services

A lot of people start paying attention to concrete foundations the same way. A wet winter goes by in Tacoma or West Seattle, then a garage crack catches your eye, a basement smells damp, or a planned addition suddenly turns into a conversation about footings, drainage, and permits.

That can feel like a big jump. But the basic idea is simple. Your foundation is the part of the building that carries everything else. If it's well designed, well drained, and matched to the soil, the rest of the structure has a fair chance to stay straight, dry, and serviceable. If it isn't, small symptoms tend to show up all over the building.

In Western Washington, that matters even more. We deal with steady rain, wet soils, fill of mixed quality, hillsides, and seismic design considerations that make “just pour some concrete” a bad way to think about foundation work. Homeowners, property managers, and business owners in Seattle, Bellevue, Issaquah, and North Bend usually need a practical answer, not a sales pitch.

Your Home's Anchor Understanding Concrete Foundations

A February rain in Tacoma can soak a yard for days, and that is often when foundation questions stop being abstract. Water stands near the downspouts. The crawlspace smells damp. A crack shows up at the garage corner, or a basement wall starts leaving a dark line a few inches above the floor. Some of those signs are cosmetic. Some point to drainage pressure, settlement, or movement that needs a closer look.

A concrete foundation carries the building, but in Western Washington it also has to deal with ground conditions that change block by block. One lot may be dense glacial till that drains reasonably well once grading is corrected. The next may include loose fill, silty soil, or a seasonally high water table that keeps concrete and footing drains under stress for months. Add earthquake loading, hillside construction, and strict local review in cities like Seattle and Bellevue, and foundation work becomes a soil, water, and structural problem all at once.

What a foundation actually does

A sound concrete foundation handles several jobs at the same time:

  • Transfer loads into the ground: Roof, walls, floors, and point loads from beams all need a clear path into soil that can carry them without excessive movement.
  • Limit uneven settlement: Foundations help spread loads across soil that is rarely uniform, especially on older sites with patched fill or previous excavation.
  • Control moisture at the base of the building: In the Puget Sound area, that means dealing with wet backfill, runoff, perched groundwater, and hydrostatic pressure against below-grade walls.
  • Hold the structure in shape during movement: Small shifts below often show up above as sticking doors, sloped floors, drywall cracks, or windows that stop operating cleanly.

That last point matters. Houses rarely announce foundation trouble with one dramatic failure. More often, they show a pattern.

Practical rule: If cracking, moisture, and doors or windows going out of square start showing up together, treat it as one building issue and trace the cause from the ground up.

Why local conditions change the answer

Western Washington foundations live in a wet environment, and water management is part of foundation performance, not an optional add-on. On many sites, the long-term difference between a stable, dry foundation and a problem job comes down to excavation depth, subgrade prep, footing drain layout, backfill choice, surface runoff control, and whether the concrete was matched to the exposure conditions. For homeowners dealing with damp walls or seepage, this guide on waterproofing basement walls helps explain what coatings can and cannot fix after the structure is already in the ground.

Permitting and engineering also matter more here than many owners expect. A new addition in Bellevue, a rebuild in Seattle, or structural work on a slope in Issaquah can trigger geotechnical review, drainage requirements, seismic detailing, and inspections that shape the foundation plan before concrete is ever scheduled. For a broader look at how excavation and site prep affect long-term performance, I like Booms Up Civil Group's expertise because it reflects the same lesson contractors learn on wet Northwest sites. Good results start with the hole, the soil, and the drainage plan, then the concrete has a fair chance to do its job.

Slab Basement or Crawlspace Choosing Your Foundation

Foundation choice gets real fast in Western Washington. A homeowner in Tacoma may be dealing with a wet crawlspace under a 1940s house, while a new build in Bellevue may need engineering that accounts for slope, drainage, and seismic design before anyone pours concrete. Slab, crawlspace, and basement foundations can all work here. The right one depends on site conditions, water control, access needs, and how much risk and maintenance the owner is willing to take on.

A cutaway illustration comparing three home foundation types: a concrete slab, a shallow crawlspace, and a full basement.

Slab-on-grade

A slab-on-grade foundation sits close to finished grade, usually with thickened edges or separate footings carrying the load. On the right lot, it can be a practical choice for new construction because it keeps the building profile low and avoids creating an underfloor cavity that can trap moisture.

That said, slabs in this region are only as good as the prep under them. Wet subgrade, fill that was not compacted properly, or poor drainage around the perimeter can lead to settlement, cracking, and cold, damp floor conditions. Utility layout also matters more with slabs because plumbing and other embedded lines are harder to change once the concrete is in place.

For readers comparing regional practices, this overview of concrete solutions for Central Florida homeowners shows how slab decisions shift with climate and soil. Here in the Puget Sound area, heavy rainfall, groundwater, and local frost and drainage requirements change the calculation.

Crawlspace foundations

Crawlspaces are common in older homes across Tacoma, Seattle, and nearby neighborhoods built before slab construction became the default for many tract homes. They raise the wood framing off the ground and give crews access to plumbing, wiring, and ductwork, which is a real advantage during repairs and remodels.

I like crawlspaces when the site is damp but manageable and the owner understands that access comes with maintenance. In Western Washington, a crawlspace can go from serviceable to nasty if roof runoff, clogged footing drains, poor grading, or open soil are left alone through one wet season after another. Older homes in Tacoma and Seattle often show the same pattern. Musty insulation, standing water, rusty hardware, and joists that have lived too long in high humidity.

A dry crawlspace starts outside. Gutters have to discharge away from the house, grade has to move water away from the foundation, and the space needs the right moisture strategy for the house and code requirements. Hoping air movement will solve a bulk water problem usually leads to more repair work later.

Full basements

Basements make sense on many Western Washington lots, especially where the grade falls away and the excavation can get you useful square footage instead of just extra cost. In Bellevue, Newcastle, and parts of North Bend, that can mean storage, mechanical space, a lower-level apartment, or finished living area that fits the site better than a tall crawlspace or a complicated stepped slab.

The trade-off is higher exposure to water and more structural demands. Basement walls hold back soil, deal with hydrostatic pressure, and in many cases need closer coordination with drainage, waterproofing, and reinforcement details. In cities like Bellevue and Seattle, design review, engineering, and permit comments can also be more demanding when the project includes deeper excavation, retaining conditions, or seismic design issues.

If you already own a below-grade home, it helps to understand how basement wall waterproofing works before finishing or repairing the space.

Quick comparison

Foundation type Often works best when Main trade-off
Slab Level or moderate sites, efficient new construction, low-profile homes Fixing plumbing changes or subgrade mistakes later is harder
Crawlspace Older homes, remodels, houses that benefit from utility access Moisture control and inspection need regular attention
Basement Sloped lots, added living space, storage or mechanical rooms Water pressure, drainage, and permitting are more demanding

The Anatomy of a Strong Foundation Materials and Methods

A foundation earns its keep before the first wall goes up. Around Tacoma, Seattle, and Bellevue, the jobs that hold up well usually have the same pattern. Careful excavation, compacted base material, reinforcement placed where the engineer called for it, and a plan for drainage before concrete is poured. In our wet soil, shortcuts stay hidden until the first long rainy season, then the slab settles, the crawlspace stays damp, or a wall starts showing movement.

A construction worker uses a hose to pour fresh concrete into wooden foundation forms for a building.

Good foundations begin below the concrete

Western Washington soils can be forgiving in one spot and soft a few feet away. Glacial till may bear well. Wet fill, organics, and disturbed soils do not. That is why excavation is more than digging to depth and setting forms. Crews need to remove unsuitable material, proof the subgrade, and, where needed, bring back properly compacted structural fill.

On many projects, the footing size and reinforcement schedule are not guesswork. They come from the plans, soils report, and local code review. Seattle and Bellevue permit review often pushes this further on sloped lots, poor soils, and houses with retaining conditions. In seismic design categories common around Puget Sound, connections and reinforcement details matter just as much as the concrete itself. The Seattle Department of Construction and Inspections bases foundation work on the Seattle Building Code and Seattle Residential Code, with engineering requirements that can go beyond rule-of-thumb field practice on more complex sites.

Reinforcement has to be placed, supported, and protected

Concrete is strong in compression. Foundations still crack and bend if steel is missing, poorly tied, or left sitting in mud at the bottom of the trench.

This is one of the most common field mistakes.

Rebar needs to stay at the right height and distance from soil and forms so the concrete can fully surround it. Chairs, dobies, and proper tie-off are simple details, but they make the difference between reinforcement that works and reinforcement that only looks good in a pre-pour photo. In a damp region like ours, cover over steel matters because moisture intrusion and long-term corrosion can turn a small placement mistake into a repair job years later.

For seismic performance, the details count. Footings, stem walls, anchor bolts, holdowns, and shear transfer all need to work together as one load path. That is especially important in the Puget Sound region, where the code focus is not just vertical load from the house but lateral movement during an earthquake. The Washington State Building Code Council and local jurisdictions adopt code provisions that require that kind of continuity, and engineered plans often add site-specific reinforcement based on soil and structure.

Mix design and slab thickness should match the job

A residential slab for normal foot traffic is one thing. A garage slab, shop slab, or foundation supporting heavier point loads is another. The right answer depends on use, subgrade quality, drainage, and reinforcement, not just on how thick the finish crew wants to pour.

On wet sites, I would rather see money spent on base prep and drainage than on surface appearance. A smooth slab over weak, wet ground is still sitting on weak, wet ground. Compacted gravel base, vapor control where the assembly requires it, and concrete suited to the exposure conditions usually do more for long-term performance than cosmetic finishing upgrades.

For readers comparing regional approaches, these concrete solutions for Central Florida homeowners are useful as a contrast. Florida builders fight different moisture and soil conditions, but the core lesson carries over. Reinforcement, subgrade preparation, and water management decide whether a foundation stays stable.

Materials are only half the method

Strong concrete does not fix poor sequencing. If drain lines shift during the pour, if forms move, if anchor bolts are off layout, or if backfill goes in before the wall has enough strength, the whole assembly pays for it later.

The best foundation crews in Western Washington treat the work like a system. Soil, steel, concrete, drainage, waterproofing, and inspection all have to line up. That is what gives a house a foundation that can handle heavy rain, variable soils, and the seismic demands that come with building anywhere near Seattle, Bellevue, Tacoma, or the rest of Puget Sound.

Identifying Common Foundation Problems and When to Worry

Most foundation calls start with one symptom. A crack. A stuck door. Water at the wall. A floor that feels off. The mistake is assuming the visible symptom tells you the cause.

A chart illustrating common benign concrete foundation issues and signs of serious structural worry indicators.

What may be minor

Some concrete cracks are part of normal curing and shrinkage. A small, isolated hairline crack in a slab or a minor surface blemish doesn't automatically mean the structure is in trouble.

Look at context:

  • Single small crack: Less concerning than multiple growing cracks in different areas.
  • No movement nearby: If doors, windows, and floors still behave normally, monitor before panicking.
  • Dry conditions: A dry crack is different from one carrying moisture or staining.

That doesn't mean ignore it. It means document it, keep an eye on it, and look for patterns.

Signs that deserve faster action

You should take foundation movement more seriously when symptoms stack up.

  • Stair-step cracking: This can point to differential movement.
  • Uneven or sloping floors: That often means support conditions have changed.
  • Sticking doors and windows: Frames go out of square when portions of the structure move.
  • Water seepage or persistent dampness: Water changes soil behavior and can worsen movement over time.

A short visual overview can help if you're trying to compare what you're seeing at home or on a commercial property:

The cause is often not the concrete

Many foundation issues are misdiagnosed. The root cause is often poor soil compaction or trapped moisture causing movement, rather than the concrete itself failing. Proper diagnosis from a structural expert is key to choosing the right repair, as discussed in this foundation movement explanation.

That point matters a lot in Western Washington. Heavy rain, groundwater, and variable fill can create movement that looks like “bad concrete” when the actual issue is drainage, heave, settlement, or overloading.

If a contractor jumps straight to crack filling or replacement without talking about drainage, soil, and load path, slow the conversation down.

For owners who want a broader perspective on how concrete defects and dispute issues are evaluated, Awesim Building Consultants on concrete defects is a worthwhile read.

Waterproofing and Coatings for Puget Sound Properties

In this region, waterproofing isn't an upgrade for picky owners. It's part of responsible foundation work. Seattle, Tacoma, Bellevue, and Snoqualmie properties all deal with repeated wet seasons, and below-grade concrete is only as reliable as the drainage and protection around it.

A construction worker applying a waterproof sealant to a residential concrete foundation wall using a paint roller.

The outer layer matters most

The best waterproofing strategy starts outside the wall, not inside the room. If water is allowed to collect against the foundation, interior coatings alone won't solve the problem.

A sound approach usually includes:

  • Site drainage: Grade should move surface water away from the building.
  • Perimeter drainage systems: These help relieve water around below-grade walls.
  • Exterior membrane protection: A waterproofing layer on the outside of the wall reduces direct moisture entry.
  • Thoughtful backfill and discharge planning: Water needs somewhere to go.

That combination is often more important than any single product.

Interior protection still has a role

Interior work can improve usability and service life, especially in basements, utility rooms, and garages. Sealers, floor coatings, and moisture-tolerant finishes don't replace drainage correction, but they can help protect surfaces and make spaces easier to maintain.

For property owners comparing systems, it helps to understand what waterproofing in construction includes. The term gets used loosely, but a proper waterproofing plan usually involves several layers of defense working together.

Coatings for garages, basements, and work spaces

Many owners think only about looks. Appearance matters, but performance matters more. A basement slab or garage floor in Western Washington benefits from a coating system that can handle damp conditions, cleaning, and day-to-day wear.

One option some owners consider as part of broader restoration or facility work is Wheeler Painting & Restoration Services, which provides waterproofing and specialty coating work along with general contracting services in the Puget Sound area. That kind of combined scope can be useful when the project touches concrete, wall finishes, and moisture control at the same time.

A good coating is the finishing layer of a dry assembly. It is not a substitute for fixing why the assembly gets wet.

Navigating Costs Permits and Timelines in Washington

A homeowner in Seattle calls after spotting a stair-step crack and asks the question I hear every week. “What will it cost, and how long will it take?” The honest answer is that foundation work in Western Washington does not price out cleanly from a photo. Rainy conditions, soft or variable soils, hillside rules, access, and city review can change the job fast.

Two houses on the same street can land in different buckets. One may need a straightforward repair with drainage work. The next may trigger engineering, shoring, a geotechnical report, and several rounds of permit review because of slope conditions or the size of the addition.

What actually drives the budget

Start with site conditions, not online averages.

The biggest cost drivers in this region are usually:

  • Soil and groundwater conditions: Wet clay, fill, and poorly draining soils often mean more excavation support, more base preparation, and tighter inspection sequencing.
  • Access: A tight lot in Seattle, Queen Anne, or West Seattle can require smaller equipment, hand work, traffic control, or more debris hauling.
  • Engineering needs: If the work changes loads, supports an addition, or addresses movement, stamped drawings may be part of the job.
  • Drainage and discharge work: Downspouts, footing drains, sump discharge, and grading fixes add scope, but skipping them is how people end up paying twice.
  • Foundation type and repair method: Spot repairs, underpinning, full replacement, and new footings all carry very different labor and inspection demands.

In practice, footing size and depth often change after the site is opened up and the actual soil conditions are visible. That is common here. Western Washington soils can look acceptable at the surface and turn soft, wet, or disturbed a little deeper down.

Permit review in Seattle, Bellevue, and nearby cities

Permit requirements depend on whether the work is repair, replacement, an addition, or part of a larger remodel. Cosmetic patching is one thing. Structural foundation work is another.

In Seattle, foundation work tied to an addition or major structural alteration often takes longer than owners expect because plan review can stretch out, corrections are common, and inspection slots need to line up with excavation and rebar placement. On lots with steep slopes, slide risk, or mapped critical areas, the review gets more involved. Seattle's Environmentally Critical Areas rules can trigger added documentation, and some projects need geotechnical input before the city will sign off on the design.

Bellevue has its own friction points. Hillside properties and sites with drainage sensitivity often need a soils or geotechnical report, especially when excavation is close to a slope, retaining elements are involved, or the project changes how water moves across the lot. That report affects design, permit review, and cost.

Tacoma, Kirkland, Issaquah, and other cities each have their own process, but the pattern is similar. The more the job touches structure, slope, stormwater, or setbacks, the more paperwork and coordination you should expect.

A realistic sequence

Most foundation jobs that are more than minor repair follow a sequence like this:

  1. Site visit and diagnosis
    Confirm whether the problem is settlement, water intrusion, poor drainage, failed concrete, or a mix of issues.

  2. Engineering or geotechnical input
    Bring in design help when loads, slopes, unstable soils, or major structural changes are involved.

  3. Permit application and review
    Submit drawings, site information, and supporting reports required by the city.

  4. Excavation, shoring, and inspections
    Open the work safely, protect nearby structures if needed, and get inspection approval before the pour.

  5. Concrete placement and cure time
    Finish the structural work, then allow for cure time before loading the new section as appropriate.

  6. Water control and site restoration
    Complete drainage, backfill correctly, and restore surfaces so the repair is not undermined by the next heavy rain.

If the job includes basement moisture issues, exterior drainage corrections, or protective coatings, it helps to coordinate that work with a contractor who understands both structure and water management. Homeowners comparing scopes often start by talking with local waterproofing contractors for foundation-related moisture problems.

Timeline expectations

Simple work can move quickly once the scope is clear. Structural work rarely does.

A small repair with no permit complications may be scheduled and completed much faster than an addition foundation in Seattle or a hillside project in Bellevue. Once engineering, city comments, weather delays, utility locates, and inspection calendars enter the picture, the schedule gets less predictable. Winter work can slow excavation and backfill, especially on muddy sites where keeping the hole stable and safe takes extra care.

The reliable answer is the one that accounts for uncertainty. If a contractor gives a firm price and a fast schedule before checking drainage, soil conditions, access, and permit triggers, that bid is probably missing something.

How to Hire a Foundation Contractor A Checklist

Hiring the right contractor matters as much as the repair method. Foundation work is one area where a smooth salesperson can cost you a lot if the diagnosis is sloppy.

Questions worth asking

Use this checklist when you talk to any residential contractor near me or commercial construction near me option in Tacoma, Seattle, Bellevue, or Kirkland.

  • What do you think is causing the problem?
    Listen for discussion about drainage, soil, load path, and building history. Be careful with anyone who only talks about the visible crack.

  • Who determines whether this is structural?
    For significant movement, there should be a path to structural evaluation rather than a one-size-fits-all repair.

  • What foundation alternatives do you consider?
    This is a big one. For repairs or additions on difficult sites, helical piles or specialized underpinning may be better than pouring more concrete, reducing excavation and disruption, as discussed in this underpinning overview.

  • How do you handle water management?
    If the answer skips drainage, waterproofing, discharge, and grading, the scope may be incomplete.

What good answers sound like

A solid contractor usually talks in terms of conditions, not slogans. They'll tell you when concrete is the right answer, when a hybrid system may be safer, and when a drainage-first approach should come before structural work.

They should also be comfortable discussing:

  • Local experience: Work in wet Western Washington conditions is different from drier regions.
  • Permits and inspections: You want someone who respects the process instead of trying to dodge it.
  • Communication: You should know who's running the job, when the next step happens, and what changes if site conditions shift.

The best foundation contractor is often the one who narrows the scope before expanding it.

One last check before signing

Read the proposal carefully. It should identify the problem being addressed, what work is included, what is excluded, and how unexpected site conditions will be handled. If waterproofing, excavation, coatings, or related repairs may follow, it's also smart to compare providers who handle adjacent scopes such as local waterproofing contractors, especially when foundation issues overlap with moisture intrusion and finish restoration.

If you own a home, manage a facility, or are planning a tenant improvement project, the safest move is to slow down, get the diagnosis right, and choose a contractor who explains the trade-offs plainly.


If you're dealing with cracks, moisture, settlement concerns, or planning an addition in Tacoma, Seattle, Bellevue, Issaquah, West Seattle, Kirkland, Newcastle, North Bend, or Snoqualmie, Wheeler Painting & Restoration Services can help you evaluate the condition, coordinate practical next steps, and sort out the waterproofing, restoration, and construction issues that often come with foundation-related work.

How to Waterproof Basement Walls in Your Puget Sound Home

Walking into your basement after a solid week of rain and finding damp, weeping walls is a feeling every property owner dreads. It’s a common problem, but thankfully, one with a clear solution. Fixing it really boils down to three things: finding where the water is getting in, shoring up your foundation, and then applying the right kind of waterproofing barrier. The process can feel overwhelming, but a dry, usable basement is absolutely achievable with a clear plan.

Why Puget Sound Basements Are So Prone to Leaks

If you live anywhere in Western Washington, you know our climate is defined by one thing: relentless, soaking rain. That constant saturation creates a unique headache for property owners, turning what should be valuable square footage into a major source of stress. For homeowners, business owners, and facilities managers alike, the first step to a real, long-term fix is understanding why our local conditions are working against us.

The main issue is the ground itself. Much of the Puget Sound region is built on dense, clay-heavy soil. Unlike sandy soil that lets water drain right through, clay holds onto water like a sponge, keeping it pressed directly against your foundation walls. This creates what we call hydrostatic pressure—the constant, powerful force of water trying to push its way inside.

The Real Impact of Our Wet Climate

Over time, that constant pressure finds every little weakness. Water will force its way through tiny pores in the concrete, hairline cracks you can barely see, and the cold joints where the walls meet the floor. That musty smell you can’t get rid of or that chalky white powder (called efflorescence) on your walls? Those are the classic early warnings of this slow-motion water invasion.

Making matters worse is our region’s high water table, especially from fall through spring. When the ground becomes completely saturated, the groundwater level can rise dramatically, essentially putting the lower part of your foundation underwater. For many properties around here, it's not a question of if this will happen, but when.

This isn't just a local problem, either. It’s a surprisingly widespread issue. A staggering 98% of basements in the US will experience some form of water damage in their lifetime. For property owners here in the Pacific Northwest, that statistic feels particularly real. You can read more about the prevalence of basement water damage and see why getting ahead of the problem is so important.

Playing Detective: Identifying Your Basement's Symptoms

Not all basement moisture is created equal. The clues your basement gives you—a damp patch here, a trickle there—can help you and a trusted contractor zero in on the root cause. Knowing what to look for is the key to choosing the right fix.

To get you started, here’s a straightforward table we put together to help property owners connect what they're seeing with what's likely causing it.

Common Basement Moisture Issues and First-Step Solutions

Symptom Likely Cause First Action Step
Water trickling down from top of wall Poor exterior grading, clogged gutters, or faulty downspouts Check and clean gutters; ensure downspouts direct water at least 6-10 feet away from the foundation.
Damp patches low on walls or near floor Hydrostatic pressure pushing groundwater through the concrete Investigate interior sealing options and consider exterior drainage solutions for a long-term fix.
Musty smells and high humidity with no visible water Condensation from humid air meeting cool basement walls Improve ventilation with a dehumidifier and check for air leaks around pipes or windows.
Water seeping up from the floor High water table creating pressure from below the slab Evaluate the need for an interior drainage system and a sump pump installation.

Think of these as your first leads. Understanding these specific challenges is crucial before you commit to any one solution. At Wheeler Painting, we help homeowners and commercial property managers across the Puget Sound area diagnose and solve these exact problems every day. By getting to the root cause, we can finally turn that damp, unusable basement into a dry, secure, and valuable part of your property.

Where Is That Water Really Coming From?

Before you buy a single tube of sealant or call a "residential contractor near me," you need to play detective. The biggest and most expensive mistake property owners make is jumping to a solution before they've found the real problem.

Slapping a coat of waterproof paint on the walls is a waste of time and money if your gutters are dumping gallons of water right against the foundation. Getting the diagnosis right from the start is the single most important step. The good news is, you can often figure it out yourself just by paying attention. Water always leaves clues.

Is It a Leak or Just Humid Air?

First, let's figure out if the water is coming from inside or outside. The moisture you're seeing usually falls into one of three buckets: interior condensation, surface water runoff from outside, or groundwater being pushed through your foundation.

Think about the conditions when you notice the dampness. A basement that feels consistently clammy and damp, especially in the warmer months, is often just dealing with condensation. This is when warm, moist air hits your cool foundation walls and forms water droplets—just like on a cold can of soda on a summer day. It's a humidity problem, not a structural leak.

But if the damp spots, water stains, or trickles appear or get worse right after a heavy rain, you're almost certainly looking at water getting in from the outside.

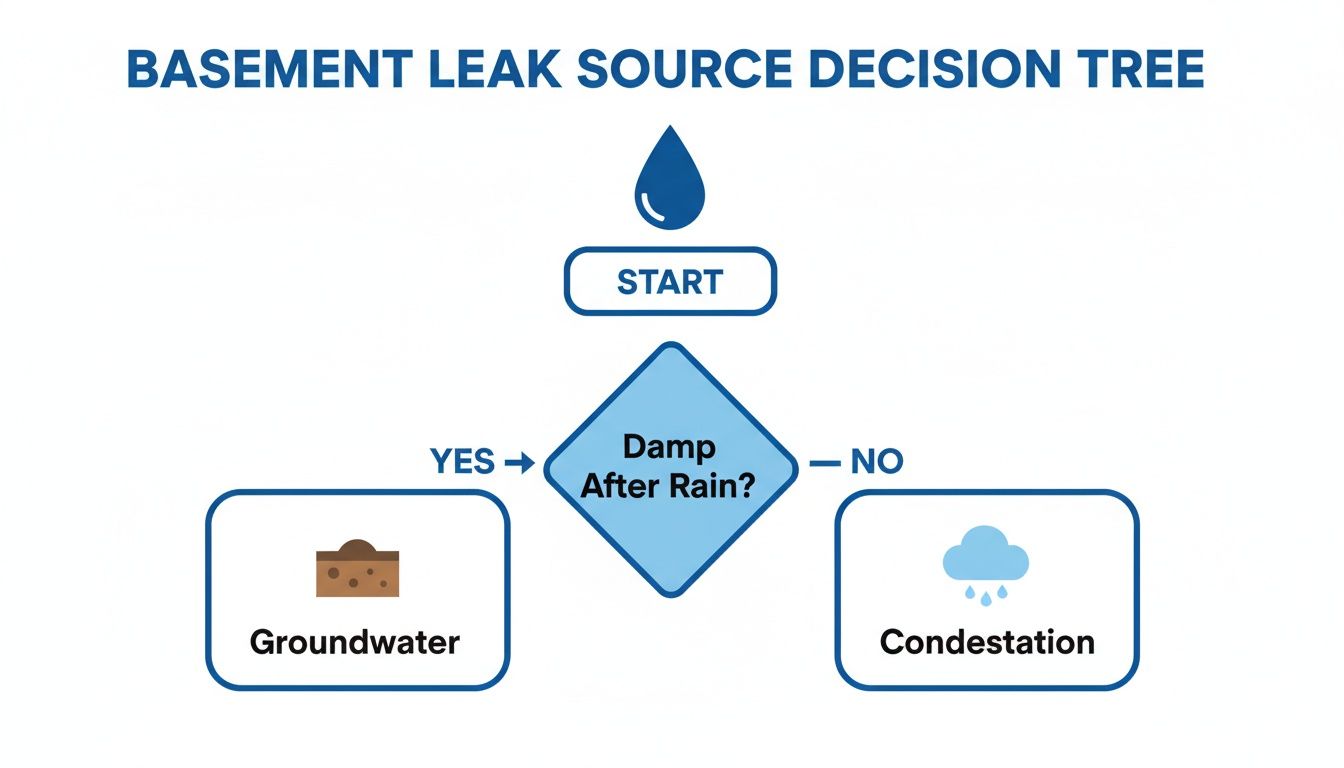
This flowchart can help you visualize the process and narrow down the cause.

A decision tree flowchart identifying basement leak sources based on dampness after rain, leading to groundwater or condensation.

As you can see, moisture that shows up with rain points toward groundwater or runoff. If it’s a constant issue regardless of the weather, condensation is the likely culprit.

The Easiest Way to Get a Definitive Answer

There's a classic, incredibly simple method we use to know for sure: the plastic sheet test.

Find a damp spot on your basement wall and firmly tape a one-foot square of plastic sheeting over it. Use heavy-duty duct tape or painter's tape to seal all four sides completely, making sure it's airtight.

Now, just leave it alone for a day or two.

When you come back, check the plastic. Is the moisture on the outside of the plastic, facing the room? That’s condensation. Your basement air is too humid. If the moisture is trapped behind the plastic, against the wall, you’ve confirmed it: water is coming through the foundation from the outside.

Our Two Cents: Don't skip this test. It takes five minutes to set up and tells you everything. Knowing if water is coming from the air or through the wall dictates your entire waterproofing strategy. The fixes are completely different.

Follow the Water Trail Outside

If your plastic sheet test proves water is penetrating the foundation, your next job is to head outside. The source is often simpler than you think. If you can do it safely, take a walk around your property during a steady rain and look for obvious flaws.

Pay close attention to these problem areas:

  • Gutters & Downspouts: Are your gutters overflowing? This is a huge red flag. Downspouts should be clear and discharge water at least six to ten feet away from your foundation. If they're dumping water right at the base of your building, you’ve found a major part of your problem.
  • Grading & Landscaping: Look at the soil around your foundation. It needs to slope away from the building to carry water away. If it's flat or, even worse, slopes toward it, you're basically funneling every raindrop straight to your basement.
  • Window Wells: These are classic weak points. If a window well doesn't have a good drain or a solid cover, it will fill up like a bathtub, creating intense hydrostatic pressure against that one section of your wall.

Here in the Puget Sound, with our notoriously wet seasons, these exterior drainage issues are the cause of most "leaky basements." Correcting them is always the first, most effective line of defense before you even think about more complex solutions.

Effective Interior Waterproofing Methods and Materials

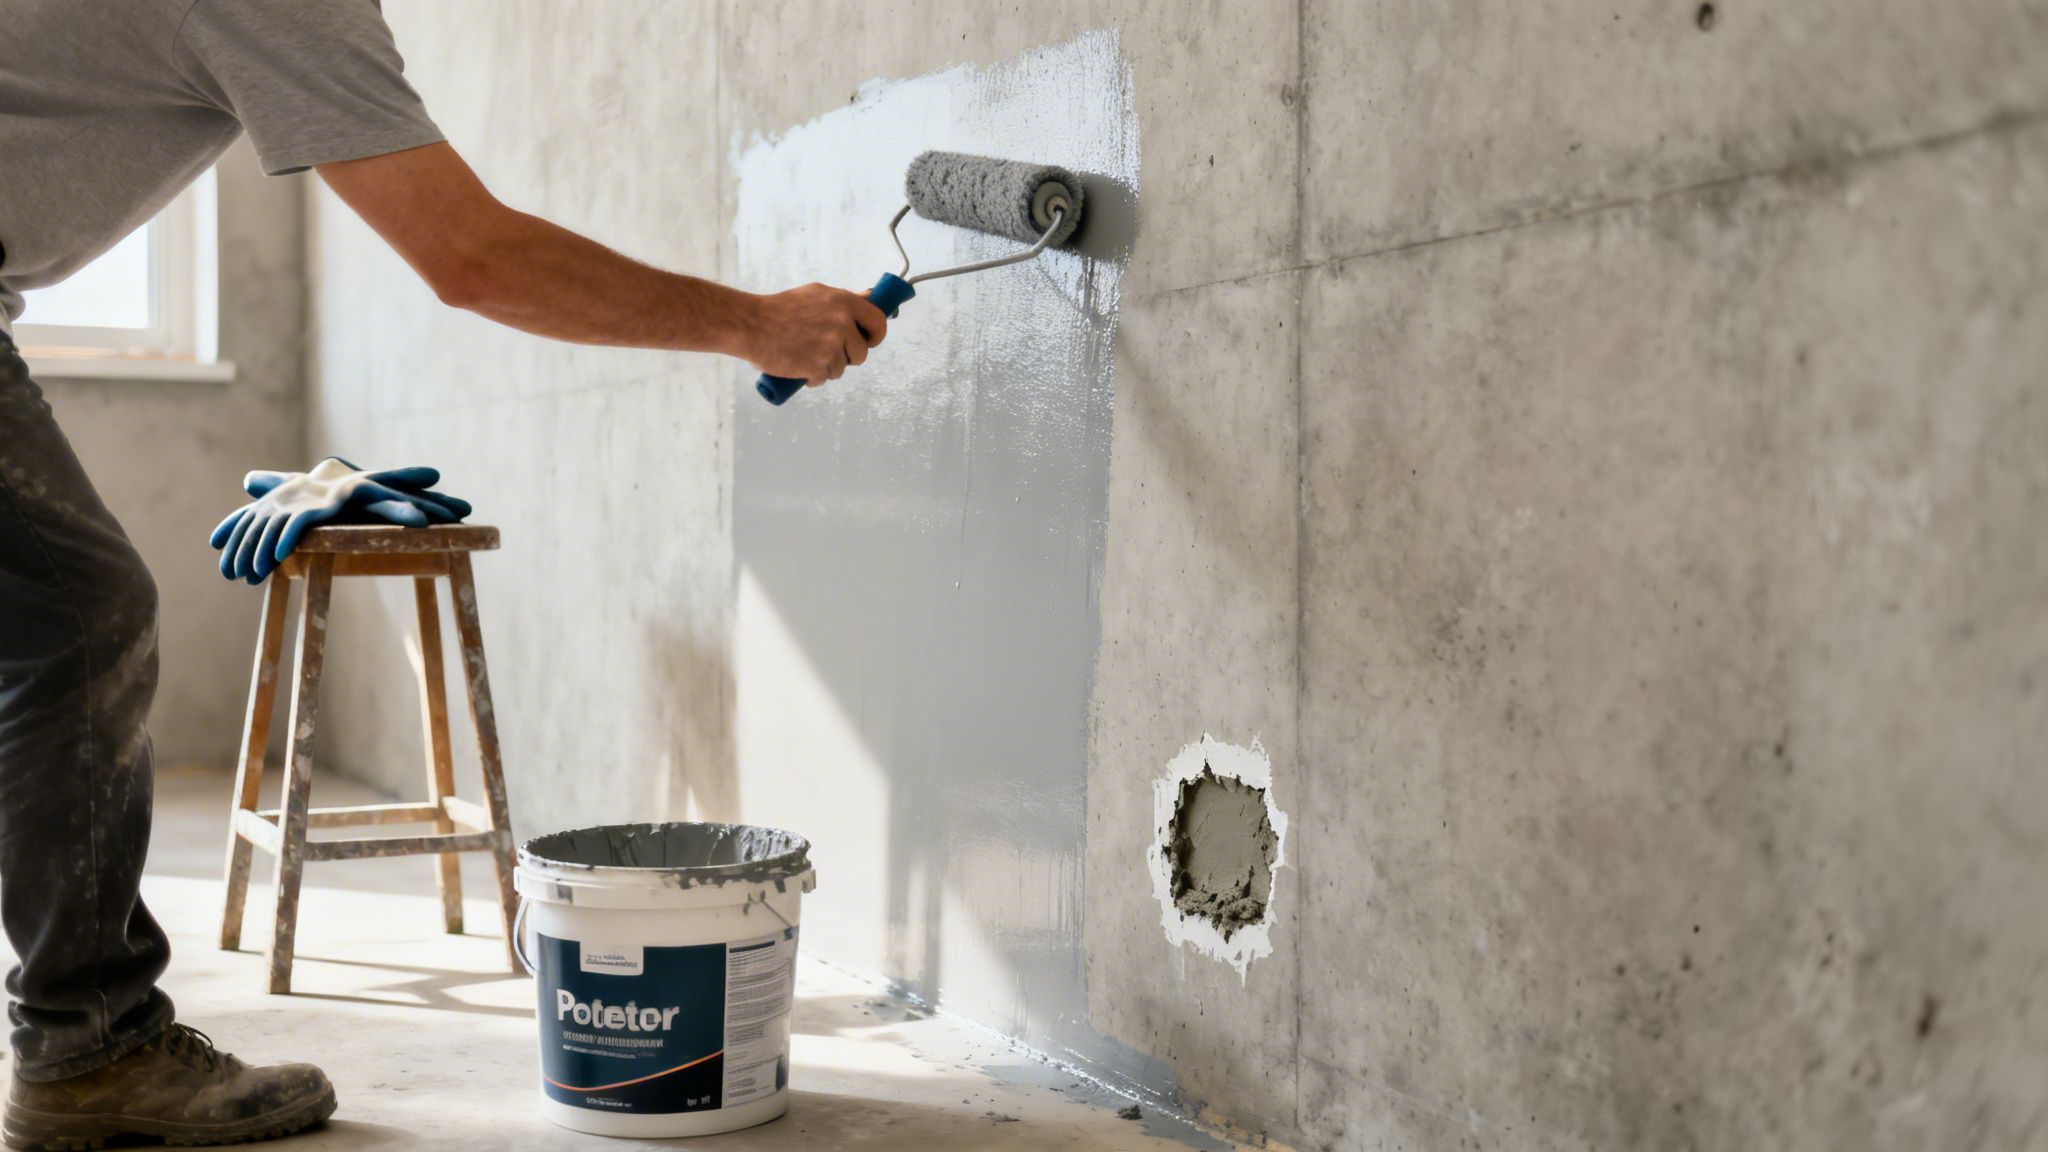
Person applies grey waterproofing coating to a concrete basement wall with a roller.

If you've traced your moisture problems to water seeping directly through the foundation walls, your first and most direct line of defense is creating a barrier from the inside. For minor dampness or general humidity, this approach can completely transform a basement from a damp storage area into a usable living or operational space.

This can sometimes be a manageable project for a determined property owner. But we can't stress this enough: the success of any interior coating comes down to how well you prepare the walls. Slapping a coat of "waterproof paint" over a dirty, cracked surface is a recipe for failure. It won't be long before it blisters and peels, and you're right back where you started.

It All Starts with Meticulous Wall Prep

You have to get this part right. Before you even think about popping the lid on a can of sealant, your basement walls need to be clean, dry, and structurally sound. This prep work is absolutely non-negotiable.

First, deal with any existing problems. If you see a chalky, white powder on the walls, that’s efflorescence. You need to get it all off using a stiff wire brush and a masonry cleaning solution. Efflorescence is a salt deposit left behind as water evaporates, and trying to paint over it is like painting over dust—the new coating simply won't stick.

Next, get up close and personal with your walls. Inspect every square inch for cracks, holes, or gaps. Even a tiny, hairline fracture is a potential path for water to sneak past your new waterproof barrier.

A Pro's Tip for a Permanent Fix: For any active leaks or visible cracks, your standard patch or filler just won't cut it. You need to use hydraulic cement. This product is incredible—it actually expands as it cures, forcing its way into the crack to form a powerful, watertight plug. It can even stop flowing water in its tracks, which is why it's a go-to for professionals and a must-have for any serious repair.

Choosing Your Interior Waterproofing Product

With your walls finally clean, patched, and dry, you’re ready to pick your sealant. The waterproof coatings aisle at the hardware store can be overwhelming, but most products fall into three main categories, each designed for different levels of moisture.

  • Waterproof Paint (Acrylic Formulas): This is the most common DIY-friendly product you'll find. It's basically an extra-thick acrylic paint that creates a water-resistant film on the surface. It works well for handling minor dampness and cutting down on that musty basement smell, but it is not designed to hold back any real water pressure.

  • Silicate-Based Concrete Sealers: These are a significant step up. Instead of just forming a film on top, these sealers penetrate deep into the concrete. They trigger a chemical reaction with the lime and minerals already there, forming a hard, crystalline barrier inside the concrete's pores. This makes the wall itself the barrier, and it's fantastic for stopping moisture from wicking through the foundation.

  • Epoxy Coatings: When you need the most robust interior barrier possible, epoxy is the answer. These are two-part systems that, when mixed, cure into an incredibly thick, hard, and durable waterproof shell. Epoxies are far more resilient than any paint and can withstand moderate hydrostatic pressure. This makes them a perfect choice for workshops, commercial basements, or any area that demands a high-performance, long-lasting finish.

The application itself is a skill, especially for high-solids epoxies. Mixing ratios, application thickness, and cure times have to be spot on. A professional crew ensures these systems are applied perfectly to deliver the full, warrantied protection you're paying for. These concepts are key to many residential and commercial construction services, from institutional painting to office space renovations.

Proper Application for a Lasting Barrier

Applying these coatings is a lot more involved than a simple paint job. For any of these products to work as advertised, you'll need to apply at least two generous coats. Keep in mind that a single gallon might only cover 75-100 square feet—far less than standard interior paint—so measure your walls and buy accordingly.

Work the first coat into the wall's texture with a thick-nap roller or a high-quality brush. You want to force the material into every little pore and crevice. Let it dry completely, which can take several hours depending on the product and basement humidity. Then, apply your second coat, ideally in the opposite direction (e.g., vertical strokes first, horizontal strokes second) to ensure a seamless, pinhole-free finish.

While interior coatings are an excellent solution for many basements, it's important to remember what they do: they stop water that has already made it through the concrete. They are a defensive measure. For homes and businesses with serious, ongoing water intrusion, the real solution often lies on the other side of the wall.

When to Use Exterior Waterproofing and Drainage

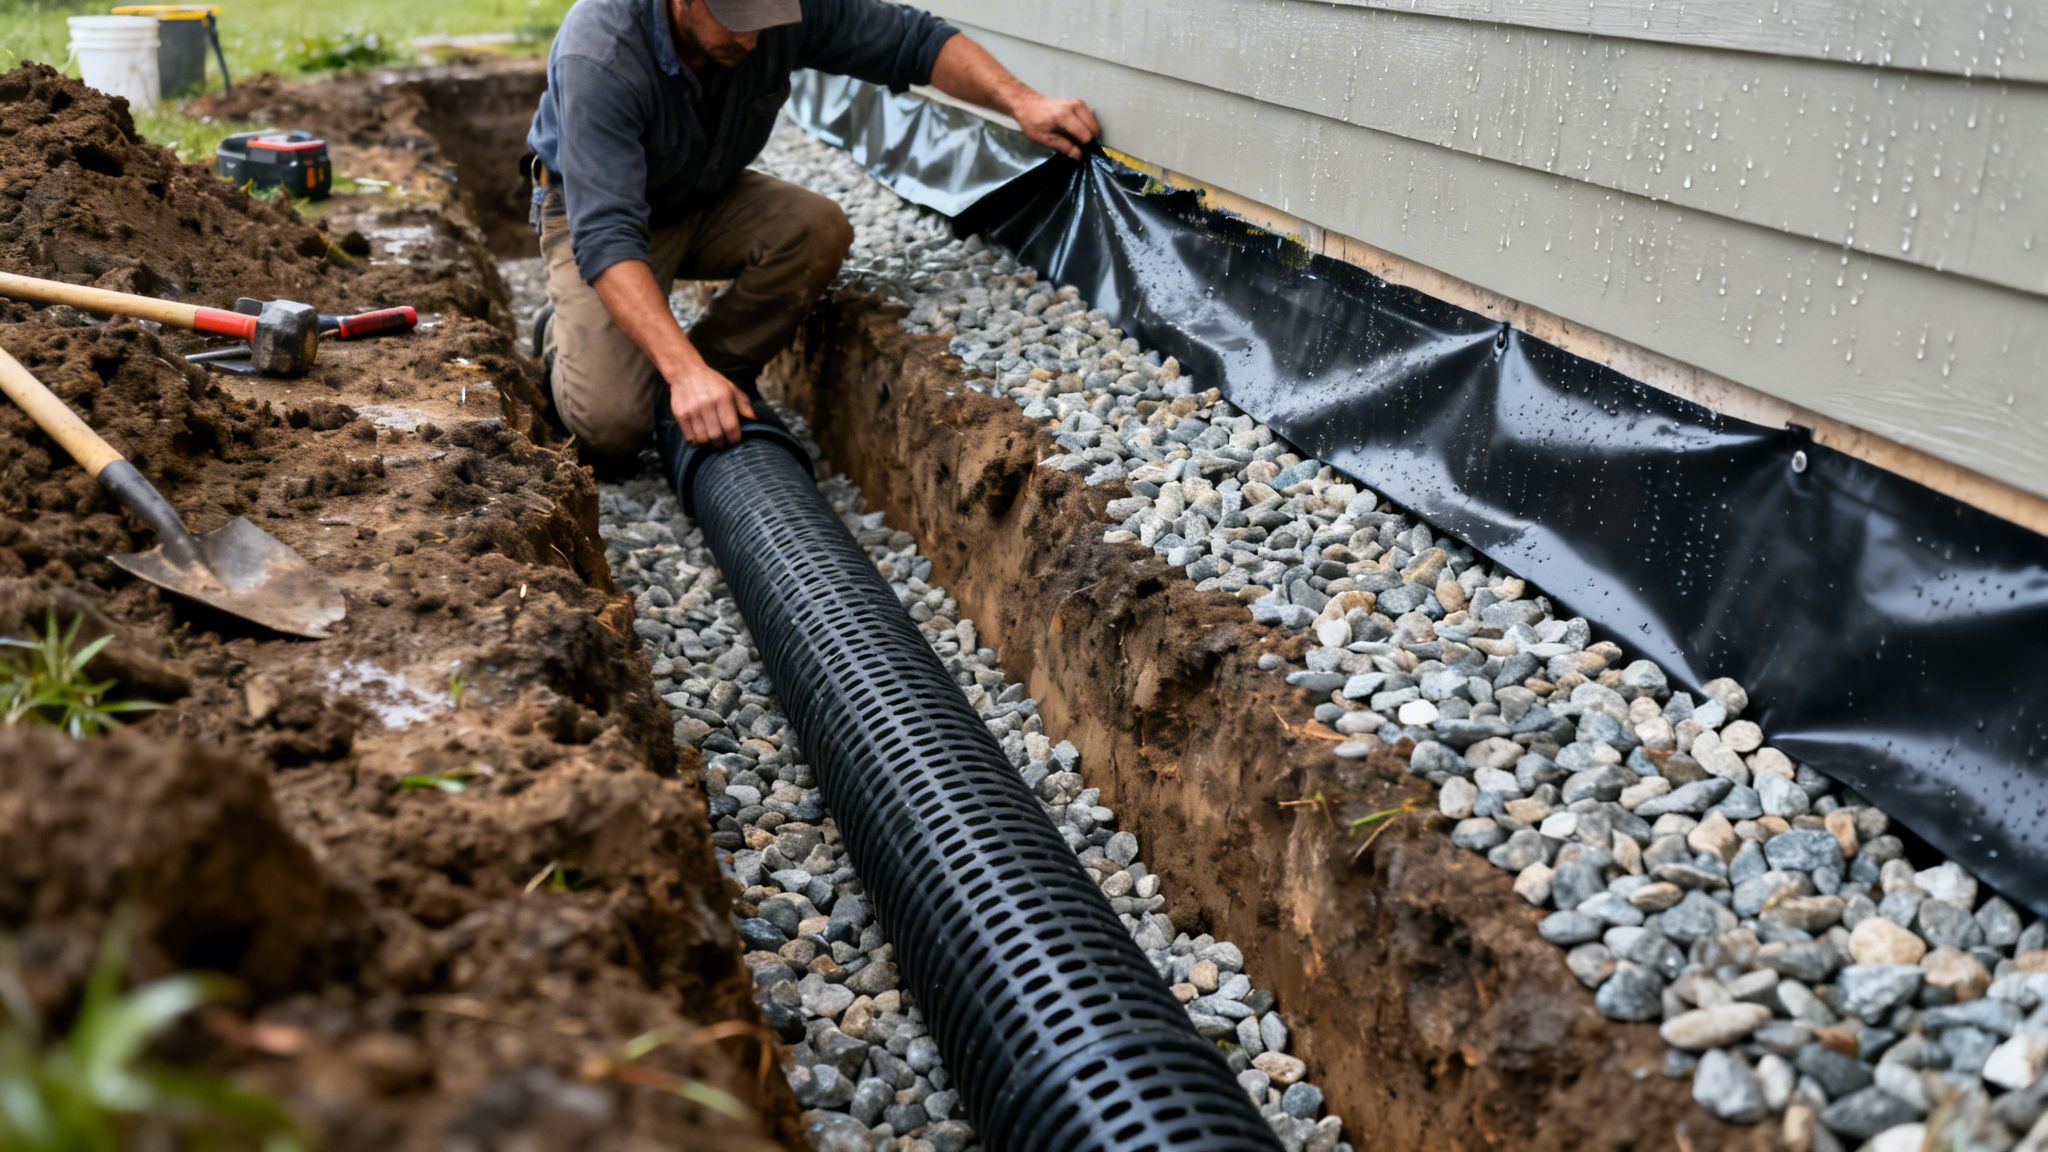
A person installs a black perforated French drain pipe in a gravel trench next to a house foundation.

Interior sealants and coatings are great for handling minor dampness, but they're ultimately playing defense. They only stop water after it has already pushed its way through your foundation. When you're dealing with serious, persistent water intrusion—especially from the kind of heavy hydrostatic pressure we get here in Western Washington—you have to get to the root of the problem.

The only truly permanent solution is on the other side of the wall.

Exterior waterproofing is the offensive strategy. It stops water from ever touching your foundation in the first place. This is the definitive answer for protecting the structural integrity of your home or commercial building for the long haul.

The Professional Exterior Waterproofing Process

Let's be clear: this isn't a weekend DIY job. True exterior waterproofing is a major project that requires heavy equipment and a deep understanding of excavation, foundations, and drainage. It’s a job for a qualified "commercial construction near me" contractor who has done this before.

The process is intensive, but it creates a completely sealed building envelope. It starts with digging. A crew will carefully excavate all the soil around your foundation's perimeter, going all the way down to the footing. This gives them full access to the walls.

Once the foundation is exposed, it gets power-washed to strip away all the dirt, clay, and any old, failing sealant. The crew then inspects the bare concrete, looking for cracks, holes, or crumbling mortar joints. Any weak spots are patched with hydraulic cement or other high-strength compounds to create a solid, uniform surface.

Next comes the barrier itself. A thick, rubberized waterproof membrane is applied directly to the foundation. This could be a liquid-applied coating that cures into a seamless barrier or a self-adhering sheet membrane. Either way, it creates a flexible, impermeable shield that water simply can't get through.

Why Proper Drainage Is Half the Battle

Just sealing the walls isn't enough. You have to give all that groundwater a new place to go. This is where a modern drainage system becomes non-negotiable, as it’s the key to relieving the intense pressure pushing against your new waterproof barrier. To effectively manage water around your property and prevent basement leaks, exploring various drainage solutions for homes is essential.

Nearly every exterior waterproofing job includes a new French drain system. Here’s how it works:

  • A perforated pipe is laid in a trench filled with gravel right at the base of the foundation.
  • The pipe collects groundwater as it flows toward your building.
  • Gravity then carries the water away from your foundation to a lower point on the property or into a sump basin to be pumped out.

Key Insight: A proper exterior system is a one-two punch: the waterproof membrane is the shield, and the French drain is the moat. The membrane stops the water, and the drain relieves the pressure. One without the other is an incomplete job that's bound to fail.

The Investment in Long-Term Protection

Exterior waterproofing is a significant investment in your property—there's no way around it. It involves excavation, specialized materials, and a lot of skilled labor. But for homes and commercial buildings with chronic water problems, it is the only permanent fix.

Think of it as an investment in your primary asset. You're preventing the slow-motion destruction of your foundation, stopping structural damage before it starts, and eliminating the source of musty smells and dangerous mold. A well-installed exterior system can last for decades, giving you a level of peace of mind that interior methods just can't match.

The principles of managing water on this scale often overlap with other large landscaping projects. In fact, many of the same concepts are critical to our local guide on retaining wall design.

Whether you're a homeowner or a facilities manager, hiring a contractor experienced in large-scale residential and commercial construction is crucial. You need a team that can handle the complexities of excavation safety and drainage to deliver a dry, secure basement that will last.

Knowing When to Call a Waterproofing Professional

We get it. You see a little dampness on the basement wall and your first thought is, "I can fix that." A trip to the hardware store for some high-quality sealant seems like an easy weekend project, and sometimes, for minor condensation, it's the right move.

But you have to know when you're in over your head. Some water problems are simply beyond a DIY fix, and trying to patch a major issue can do more harm than good. You might just be hiding a serious problem behind a fresh coat of paint, letting structural damage get worse just out of sight. Here in the Puget Sound, knowing when to call in a professional is one of the most important things you can do to protect your property.

When Your Basement Is Crying for Help

Some symptoms are your foundation's way of telling you that the forces at play are way bigger than a little seepage. These aren't the kind of things you can solve with a bucket of hydraulic cement. If you spot any of these, it's time to pick up the phone.

Here are the warning signs we tell every property owner to watch for:

  • Large, Horizontal Cracks: Small, vertical hairline cracks are often just the concrete settling. But large, horizontal cracks are a different beast entirely. They signal that immense pressure from water-logged soil is pushing against your foundation, threatening its integrity.
  • Bowing or Bulging Walls: If you look down the length of your basement wall and it appears to be curving or bulging inward, that’s a serious red flag. You're witnessing severe hydrostatic pressure in real-time, and this is a structural emergency that needs an expert, fast.
  • Water Coming Up from the Floor: Is water seeping in where the floor meets the wall, or even right up through cracks in the concrete slab? That's a classic sign the water table is high and pushing up from below. No amount of wall sealant will fix this. You're likely looking at a job that requires an interior drainage system and sump pump.
  • Efflorescence That Won't Quit: You scrub off that chalky white residue, and a week later, it’s back with a vengeance. This means a significant amount of moisture is constantly being forced through the concrete.

These aren’t just cosmetic blemishes. They're symptoms of a serious battle between your foundation and the ground it sits in. A professional has the tools and experience to figure out exactly what’s happening and design the right solution.

The Real Cost of a Failed DIY Fix

Trying to tackle a major water issue yourself can quickly become a very expensive mistake. The numbers don't lie. Data shows that a staggering 60% of basements in the US leak, and the average cost to repair water damage hovers around $4,250. Those figures are even more pointed in a rainy climate like ours. You can learn more about basement leak statistics to see just how common this is. A failed DIY project only adds to that final bill.

Hiring a professional isn't admitting defeat; it's a strategic move to safeguard your property. An expert contractor brings an arsenal of tools, materials, and experience that simply aren't available to the average property owner. They provide an accurate diagnosis, implement a solution with industrial-grade materials, and offer a warranty for their work.

This is doubly true for commercial buildings, where a leak can shut down operations, ruin inventory, and create serious liability. Whether it's your home or your business, a professional waterproofing job protects your property's value and buys you priceless peace of mind. And if the water has already done its damage, your first call should be to one of the best local restoration companies near me to manage the cleanup.

Ultimately, calling a team like Wheeler Painting means bringing in a local partner who knows the unique challenges of building in Western Washington. From single-family homes to large-scale commercial renovations, we make sure the job is done right the first time, protecting your biggest investment from the ground up.

Common Questions About Basement Waterproofing

Alright, we've covered a lot of ground on how to diagnose and fix a wet basement. But we know from experience that this is usually where the real questions start popping up for homeowners and property managers. Let's tackle some of the most common ones we hear from clients all over the Puget Sound area.

Our goal here is simple: to give you the straight answers you need to protect your property with confidence.

How Long Does Waterproofing Last?

This is the big one, and the honest answer is: it completely depends on the method you choose. The lifespan can vary dramatically.

  • DIY Interior Coatings: If you're using a good acrylic waterproof paint for minor dampness, you can probably expect it to last 3-5 years before needing a touch-up.
  • Professional Interior Sealants: When a pro applies a high-quality silicate or epoxy system, you're looking at a much more durable solution. These can easily last 10 years or more because they bond with the concrete itself.
  • Exterior Waterproofing Systems: This is the gold standard for a reason. A full exterior excavation with a modern membrane and drainage system is considered a permanent fix. When done right, it can last the life of your home—often 50 years or longer.

Is Waterproofing Paint Really Effective?

Waterproofing paint definitely has its place, but it's critical to know its limits. Think of it as a good raincoat. It's great for keeping you dry in a light drizzle (like minor humidity or damp spots) but it’s not going to do much if someone is pointing a firehose at you.

That "firehose" is hydrostatic pressure—the force of groundwater pushing against your foundation. The paint creates a surface barrier, but it can't stop the pressure from building up behind the wall. Eventually, that pressure will cause the paint to bubble, peel, and fail.

The Takeaway: Waterproof paint is a decent tool for managing slight dampness and musty smells. It is not a real solution for active leaks or significant water pressure.

What's the Difference Between Damp Proofing and Waterproofing?

People mix these terms up all the time, but they refer to two very different things.

Damp proofing is a basic moisture control measure, usually done during new construction. It's typically a thin, black, asphalt-based coating sprayed onto the outside of a foundation to block moisture from the soil. It's designed to stop water vapor, not liquid water under pressure.

Waterproofing, on the other hand, is a complete system designed to keep both moisture and liquid water out. A true waterproofing barrier is robust enough to withstand hydrostatic pressure, creating a seal that stops water from getting through even when the ground is completely saturated. For more insights on various approaches, you can review some general resources on Basement Waterproofing.

Can Waterproofing Increase My Property Value?

Absolutely. In fact, a wet basement can seriously tank your property's value. Studies from the National Association of Realtors have shown that a basement with water issues can slash a home's market value by 10% to 25%.

Fixing the problem not only restores that lost value but also becomes a major selling point. For a homeowner, it means gaining dry, usable living or storage space. For a commercial property owner, it means having a safe, leasable area without the constant threat of water damage to inventory or equipment. A dry basement is also a key feature in retail build-outs and facility construction services.

A professionally waterproofed basement with a warranty tells potential buyers that the building is solid from the ground up. That kind of peace of mind is priceless.


Figuring out the right way to waterproof your basement walls can feel like a huge task, but you don't have to tackle it alone. For over three decades, Wheeler Painting has been providing expert residential and commercial construction services to the Puget Sound community. If you have questions about your property, we have answers.

Contact us today for a professional consultation and let’s create a plan to protect your investment.