Tag Archive for: kitchen remodel seattle

White Shaker Kitchens: Your Seattle & Tacoma Guide

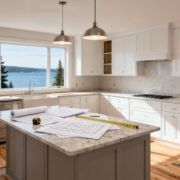
If you're standing in a Seattle, Kent, or Tacoma kitchen wondering whether to follow the latest trend or choose something that will still look right ten years from now, that's a common place to be. Kitchen remodels carry a lot of pressure. You want the room to feel brighter, work harder, clean easier, and still make sense when it’s time to sell or lease the property.

That’s why so many homeowners and property managers keep coming back to white shaker kitchens. They aren’t flashy. They aren’t tied to one short-lived design cycle. They solve practical problems well, and in the Puget Sound climate, practical matters.

Why White Shaker Kitchens Are a Timeless Puget Sound Investment

A man looking out of a large kitchen window at a serene lake and mountain view.

A kitchen has to do more than photograph well. In Western Washington, it has to hold up through gray winters, damp air, busy households, and the kind of daily wear that exposes weak materials fast.

White shaker kitchens make sense because they cover both value and function. They look clean without feeling cold, and they fit older homes in Tacoma just as naturally as newer builds in Seattle or Kent. That flexibility matters when you're remodeling for long-term use, resale, or a tenant improvement that needs broad appeal.

Why buyers and owners keep choosing them

The market data is unusually clear here. According to this white shaker cabinet market summary, homes with white Shaker kitchens sold for about 4.5% more than expected in Zillow’s 2022 data. The same source notes a 2023 Houzz survey found 61% of homeowners upgrading cabinets chose the Shaker style, and white was the most popular color at 43%.

Those numbers line up with what contractors see on the ground. This style reaches a wide audience because it doesn’t box the kitchen into one narrow look.

A white shaker kitchen can lean:

  • Traditional with warm wood floors and polished hardware
  • Coastal with soft blue accents and brushed nickel
  • Modern with slab backsplash panels and simple pulls
  • Transitional with quartz counters and understated lighting

Practical rule: If a finish works with several design directions instead of only one, it usually ages better.

Why it works so well in Puget Sound homes

Natural light in this region changes all year. Many kitchens deal with cloud cover, tree shade, or narrow lot placement. White cabinet faces help bounce available light around the room, so the space feels more open without changing the footprint.

That matters in:

Property type Why white shaker works
Older homes Brightens compact layouts and pairs well with original trim details
Rental upgrades Appeals to a wide range of future occupants
Family homes Keeps the kitchen feeling clean and easy to update over time
Small commercial breakrooms Creates a professional, neutral backdrop

A lot of remodel decisions get harder the more options you compare. This one usually gets easier. White shaker kitchens are a durable design baseline. If the cabinets are built correctly and finished for local conditions, they rarely become the part of the remodel people regret.

The Anatomy of a Classic Shaker Cabinet

White shaker kitchens have lasted because the design starts with restraint. The style traces back to the Shaker religious communities established around 1774, where simplicity, utility, and durable craftsmanship shaped the furniture they built. Those principles still define the look today.

You can see that history in the door itself. Nothing is fussy. Nothing exists just for decoration.

What makes a cabinet door a shaker door

A classic shaker cabinet door has a framed face with a flat recessed center panel. That clean outline is the signature.

The basic construction uses 5-piece cope-and-stick joinery:

  • Two vertical stiles form the sides
  • Two horizontal rails form the top and bottom
  • One recessed flat panel sits in the middle

That five-part build is one reason the style looks balanced. The frame gives the door visual structure, and the flat center keeps it from feeling busy.

Why that simple look matters

Shaker design works because it gives the eye a break. In a kitchen with counters, tile, appliances, fixtures, and lighting all competing for attention, the cabinet face shouldn’t add noise.

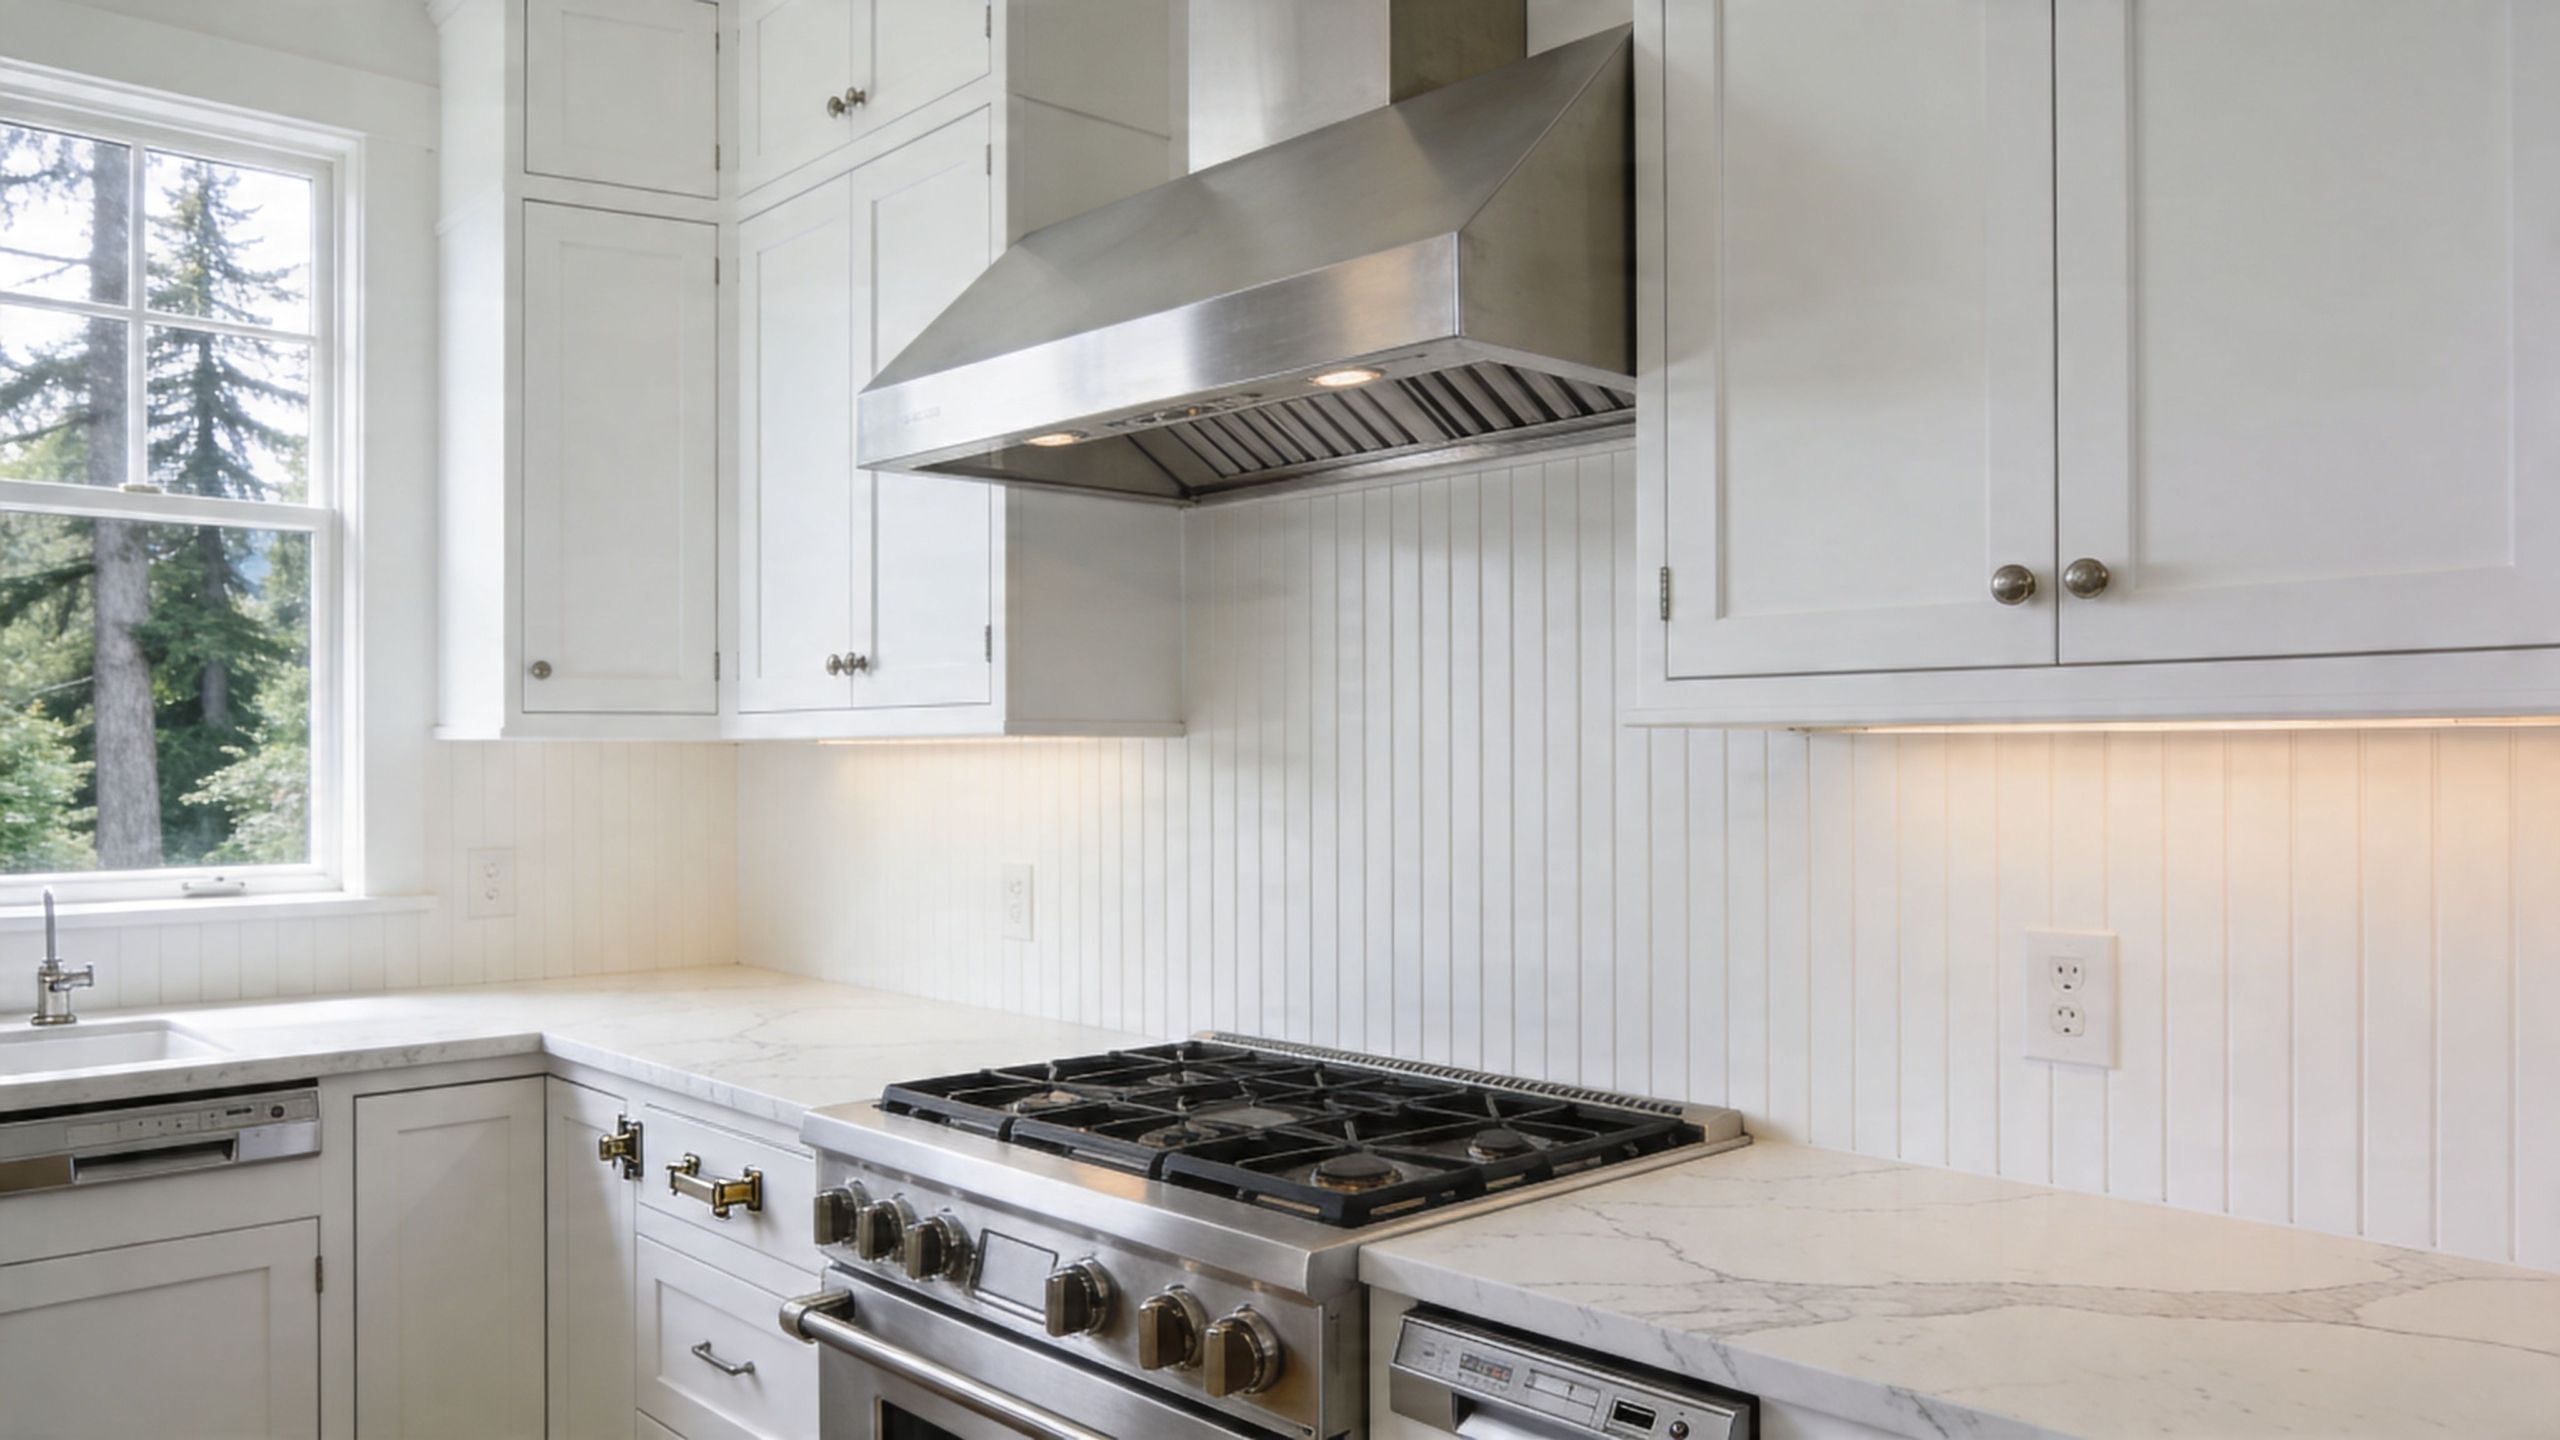
That’s also why white is such a strong match. The profile creates enough shadow line to give the door character, while the painted finish keeps the room bright.

The best cabinet styles usually don’t need constant explaining. People understand them right away.

What to inspect before you buy or refinish

Not every shaker cabinet is built to the same standard. Two doors can look similar online and perform very differently after a few wet winters and a few years of use.

Look at these details first:

  1. Door construction
    Ask whether the door is a five-piece frame-and-panel build or a cheaper imitation.

  2. Substrate choice
    Wood species, center panel material, and box construction all affect movement, durability, and refinish potential.

  3. Edge quality
    Crisp, even profiles usually signal better machining and a cleaner paint result.

  4. Finish system
    A proper cabinet coating behaves differently than standard wall paint. It cures harder and stands up better to cleaning.

If you're comparing cabinet wood options, this guide on types of kitchen cabinet woods is a useful place to start. Material choice affects everything that follows, from paint adhesion to moisture response.

The difference between style and structure

Many homeowners focus on the face profile first. That’s natural. But in practice, structure decides whether the kitchen stays attractive.

A good shaker cabinet should feel steady when the door opens. It should close square. The corners should stay tight. The paint film should sit smoothly on the profile without pooling in inside edges.

When those details are right, the style feels effortless. When they’re wrong, white cabinets expose every flaw.

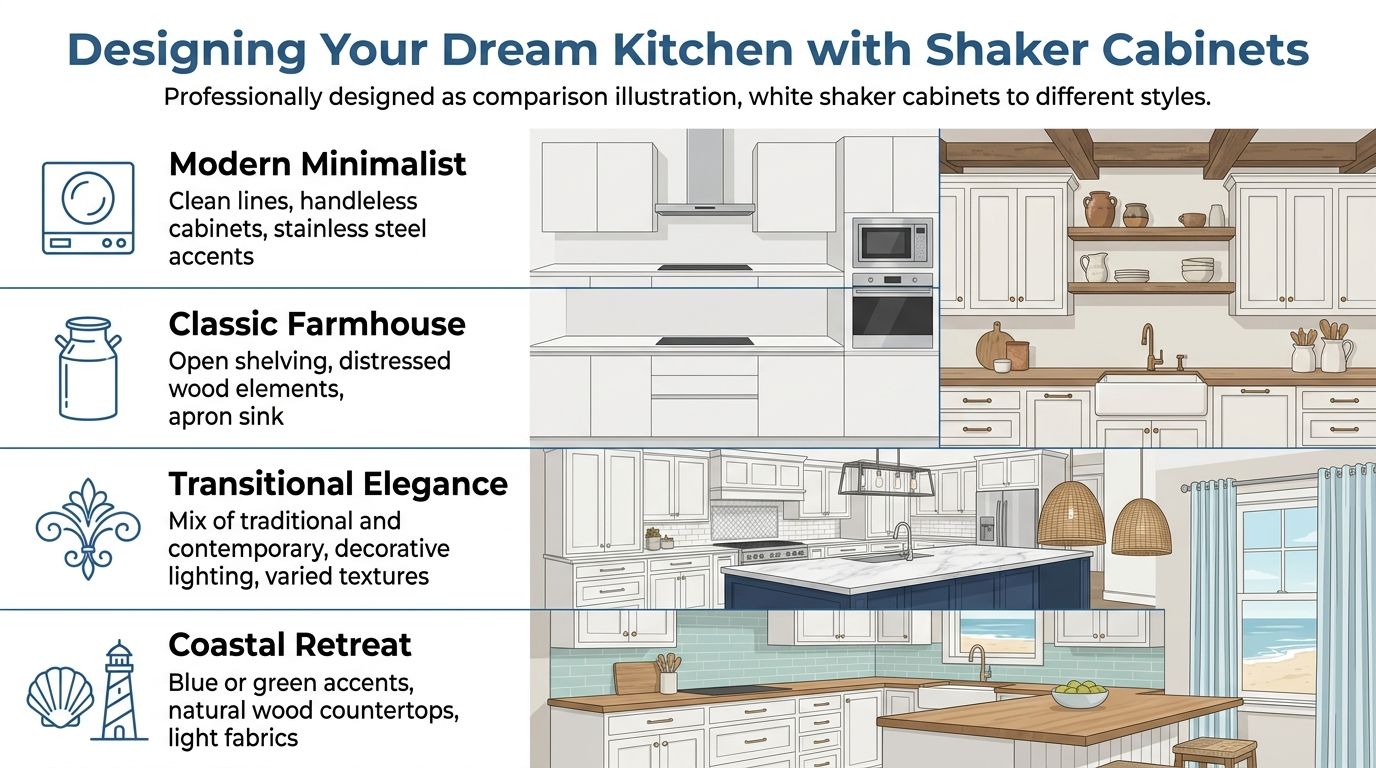
Designing Your Dream Kitchen with Shaker Cabinets

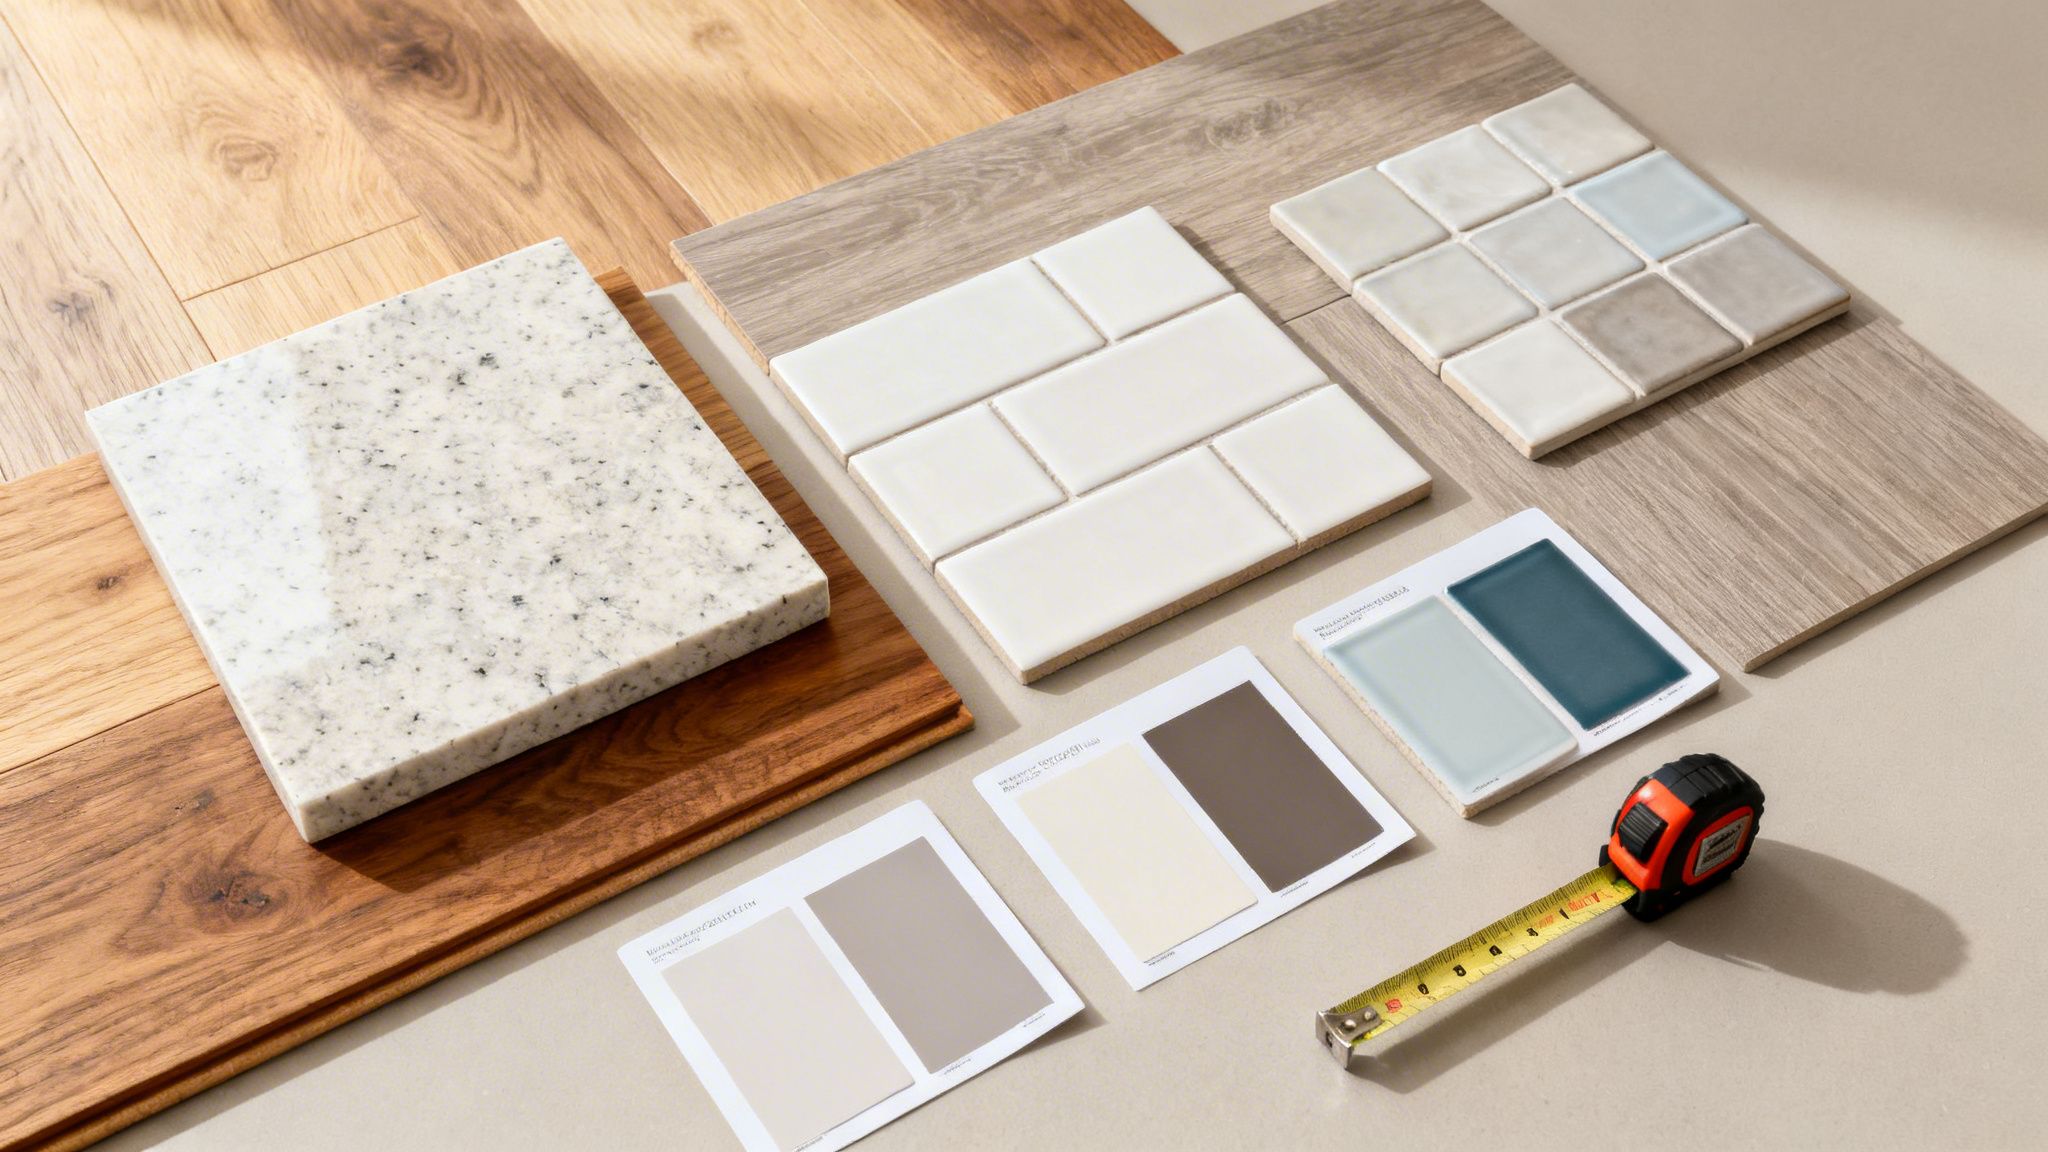
A white shaker kitchen gives you a strong starting point, not a finished answer. The final result depends on the choices around it. Countertops, hardware, backsplash, lighting, and the cabinet finish itself all push the room in a different direction.

A comparison chart illustrating four distinct interior design styles using white shaker cabinets in kitchen spaces.

Start with cabinet construction, not color swatches

Before choosing pulls or tile, make sure the cabinet door is worth finishing. White shaker cabinet doors are typically built with 5-piece cope-and-stick joinery, using two vertical stiles, two horizontal rails, and a recessed flat panel. That frame resists warping and racking, which matters in a working kitchen with regular moisture and temperature shifts, as shown in these white shaker cabinet specifications.

A white finish won’t hide poor construction. It highlights it.

What holds up better

Cabinet option What it looks like What to watch for
Painted wood shaker Crisp, classic, refinishable Shows brush marks or prep flaws if rushed
Thermofoil shaker Smooth and uniform Heat and edge failure can become the weak point if product quality is low
Low-cost imitation shaker Similar from a distance Details often soften, joints age poorly, finish may not last

Choose the right shade of white

Not every white cabinet should be bright white. In Puget Sound homes, light is often cooler and softer. Stark whites can feel flat in some rooms and too harsh in others.

A better approach is to test the cabinet color against:

  • Your flooring tone
  • Countertop undertone
  • Natural light at different times of day
  • Wall color and trim color
  • Appliance finish

Warmer whites and soft off-whites often sit more comfortably in Northwest homes than a pure, clinical white. If the house has warm wood floors or mixed metal finishes, the wrong white can make the whole kitchen feel slightly off.

A white that looks perfect on a sample card can turn gray, yellow, or blue once it meets your actual light.

Countertops change the personality fast

The cabinet style may be fixed, but the counters decide the tone.

Quartz

Quartz is the low-drama option for many households. It gives a consistent look, cleans easily, and works well with white shaker kitchens because it can either blend quietly or add contrast through veining.

Good fit for busy family kitchens and rental-ready upgrades.

Granite

Granite brings more movement and a more natural pattern. Some slabs look great with shaker cabinets. Others overwhelm the simple door style.

If the stone is busy, keep the backsplash restrained.

Butcher block

Butcher block can soften a white kitchen and make it feel warmer. It pairs especially well with farmhouse and coastal versions of the shaker look.

It also asks more of the owner. Wood counters need ongoing care and don't suit every use pattern.

Hardware is small, but it sets the tone

Cabinet hardware changes the room more than is often realized.

  • Black pulls give sharper contrast and a more modern edge.
  • Brushed nickel stays easy to live with and fits most homes.
  • Warm brass adds depth, especially with warmer whites.
  • Small knobs can feel more traditional.
  • Long bar pulls push the kitchen toward a cleaner, updated look.

Keep the choice consistent with the house, not just the mood board. A hardware finish that works in a downtown Seattle condo might feel out of place in a craftsman near Tacoma.

Backsplash and lighting finish the room

Subway tile remains a dependable match because it echoes the shaker cabinet’s straightforward geometry. If you want less grout and a quieter backdrop, a slab backsplash can make the kitchen feel more current.

Lighting deserves the same attention as tile. White cabinets reflect light well, but they also reveal shadows, glare, and uneven color temperature. If you’re planning the room from scratch, this explanation of layered lighting in a kitchen remodel is worth reading. It helps homeowners think through ambient, task, and accent lighting before fixtures are locked in.

A few design combinations that work

For a modern look
Use a softer white shaker door, simple pulls, pale quartz, and minimal backsplash pattern.

For a farmhouse kitchen
Pair white cabinets with wood accents, an apron-front sink, and lighting with a bit of texture.

For transitional homes
Blend shaker cabinets with quartz counters, mixed finishes, and cleaner pendant lighting.

The point isn’t to force one style. It’s to build around a cabinet form that can handle change without looking dated.

Protecting Your Investment in the Puget Sound Climate

Most design articles treat white shaker kitchens like they live in a controlled showroom. They don’t. Kitchens in Seattle, Kent, and Tacoma deal with damp air, cooking moisture, window condensation, and long stretches of overcast light that change how finishes age.

A bright white kitchen with shaker cabinets, marble countertops, stainless steel stove, and a farmhouse window view.

Generic advice misses the local problem. In humid environments like Puget Sound, with average relative humidity of 70% to 80%, standard painted MDF shaker doors can see a failure rate of up to 25% within 5 years, which is why region-specific options such as maple with marine-grade epoxy topcoats and specialty coatings matter, according to this discussion of white shaker cabinet durability in humid climates.

What usually goes wrong first

White finishes make moisture problems easier to spot. That’s a downside and an advantage.

Common trouble areas include:

  • Sink base doors that absorb repeated splashes
  • Cabinets near dishwashers where steam escapes during unloading
  • Upper cabinets by ranges that catch grease and humidity
  • Panels near windows where condensation and light combine
  • Lower toe-kick areas that take mopping moisture and minor impacts

The failure often starts small. A seam swells. A corner edge softens. Paint loses its tight bond around a profile edge. Once that begins, standard touch-up paint doesn’t solve the underlying issue.

What works better in this region

If the goal is long service life, material selection has to come before color.

Better substrate choices

Maple and other stable wood options usually give a stronger long-term base than low-grade MDF in moisture-prone kitchens. They cost more up front, but they reduce the chance of swollen edges and failed corners.

Stronger finish systems

Marine-grade epoxy topcoats and professional cabinet coatings make sense where kitchens see real humidity swings. A cabinet finish needs hardness, adhesion, and moisture resistance. Wall paint doesn't belong on cabinet doors.

One option homeowners compare during repaint projects is cabinet door painting services, especially when the existing boxes are sound and the layout already works.

Better ventilation

A good finish still loses if the room stays wet. Range hoods, bath fans in nearby spaces, and consistent airflow matter more than people think. For homeowners dealing with persistent dampness, this guide on how to avoid mold in your home is a practical companion to any kitchen planning conversation.

Moisture management starts long before you see mold. It starts with material choice, sealing details, and ventilation habits.

Maintenance that actually helps

White shaker kitchens don't need fussy care, but they do need the right care.

Use a soft cloth and a cleaner appropriate for painted cabinetry. Wipe standing water near sinks and dishwashers instead of letting it sit on lower edges. Check caulk lines and sink splashes before they become panel damage.

Avoid these shortcuts:

Bad idea Why it causes problems
Harsh degreasers used constantly They can wear down the finish
Soaking cabinet faces while cleaning Water finds seams and edges
Delaying small paint failures Minor breaches let moisture reach the substrate
Choosing cabinets by appearance alone The finish system may be wrong for local conditions

A white shaker kitchen is still one of the safest cabinet choices for this market. It just performs best when the build and finish match the climate.

Budgeting for Your White Shaker Kitchen Remodel

Kitchen budgets get easier to control when you separate the visible choices from the structural ones. Most overruns happen when owners price a kitchen by cabinet style alone and miss the labor, preparation, finishing, and correction work underneath it.

White shaker kitchens can be built at several budget levels. The trick is knowing which upgrades actually affect performance.

Where the money usually goes

Cabinets are the first major cost driver, but not the only one. Layout changes, electrical updates, plumbing moves, countertop fabrication, tile, flooring transitions, and finish carpentry all shape the final number.

A simple refresh usually costs less because the footprint stays in place. A full remodel costs more because every trade touches the room.

Cabinet tiers in plain terms

  • Stock cabinets
    Faster to source and often good for straightforward layouts. Fewer size options can mean more fillers and less customized storage.

  • Semi-custom cabinets
    A practical middle ground for many homes. Better flexibility on sizing, finish options, and details.

  • Custom cabinets
    Best suited for unusual layouts, high-end design goals, or projects where every inch matters.

Painting vs replacing

If the cabinet boxes are solid and the door profile works, repainting or replacing doors can be smarter than tearing everything out. If the boxes are failing, moisture-damaged, or badly laid out, refinishing won’t fix the underlying problem.

That’s why budgeting should start with an on-site evaluation, not a rough guess from photos.

The cheapest cabinet decision is often the one that avoids paying twice.

Questions that tighten the budget early

Ask these before requesting pricing:

  1. Are you keeping the current layout?
  2. Are the cabinet boxes worth saving?
  3. Do you need new countertops because of sink or appliance changes?
  4. Will lighting, outlets, or ventilation be upgraded?
  5. Are you trying to match the rest of the home, or create a different style?

The answers narrow the scope fast.

Why detailed proposals matter

A useful remodeling proposal should separate materials, labor, prep, finish work, and any likely repair items. Lump-sum numbers are hard to compare because they hide assumptions.

If you want a clearer picture of how remodeling costs are usually organized, this kitchen remodel cost breakdown is a helpful reference. It gives homeowners a better way to read estimates and understand what drives pricing up or down.

A good budget isn’t about chasing the lowest number. It’s about matching the cabinet system, finish quality, and scope of work to how the kitchen will be used.

Local Transformations by Wheeler Painting

A clean, modern white shaker kitchen featuring bright cabinets, metallic hardware, and a smooth countertop surface.

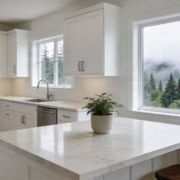
The strongest case for white shaker kitchens usually isn’t a trend report. It’s what happens when an outdated room finally starts working again.

In homes and small commercial spaces between Seattle and Tacoma, the same pattern shows up. The old kitchen or breakroom feels dark, cluttered, and harder to maintain than it should. White shaker cabinetry fixes the visual noise first, then supports better function when the layout and finish details are handled properly.

Kent home with a dated, heavy kitchen

One common remodel starts with dark doors, busy granite, and not enough reflected light. The cabinets may still be usable, but the room feels smaller than it is.

In that kind of Kent project, a white shaker approach works because it strips away the heaviness. Cleaner door profiles, quieter finishes, and updated hardware make the kitchen feel more open without forcing a dramatic architectural change.

The key is discipline. If every surrounding finish competes for attention, the cabinets lose their advantage.

Seattle tenant improvement with a breakroom upgrade

In a Seattle office or small commercial suite, the breakroom often needs to look professional without appearing sterile. White shaker cabinetry lands in that middle ground.

It feels finished. It also gives property managers a cabinet style that future tenants usually accept without asking for immediate changes.

A good commercial application keeps the lines simple, uses durable surfaces, and avoids trendy details that date the space too quickly.

Tacoma kitchen where durability mattered more than novelty

Some Tacoma remodels are less about style experimentation and more about replacing failing materials with something that will last. That’s where white shaker kitchens earn their keep.

When the homeowner wants:

  • a layout that still feels current years from now,
  • cabinet doors that can be maintained or refinished,
  • and finishes that won’t fight the rest of the house,

shaker construction gives a dependable foundation.

A successful remodel doesn’t just look newer. It feels easier to live with every day.

What these local projects usually have in common

The properties differ, but the decisions that lead to a good result are similar:

Good project choice Why it matters
Matching cabinet style to the building The kitchen feels intentional, not imported from another house
Choosing durable coatings The finish stands up better to use and cleaning
Resisting trend overload The room stays relevant longer
Planning for maintenance Small issues are easier to manage before they spread

That’s why white shaker kitchens keep showing up in both residential remodeling and smaller commercial renovation work. They solve real problems cleanly.

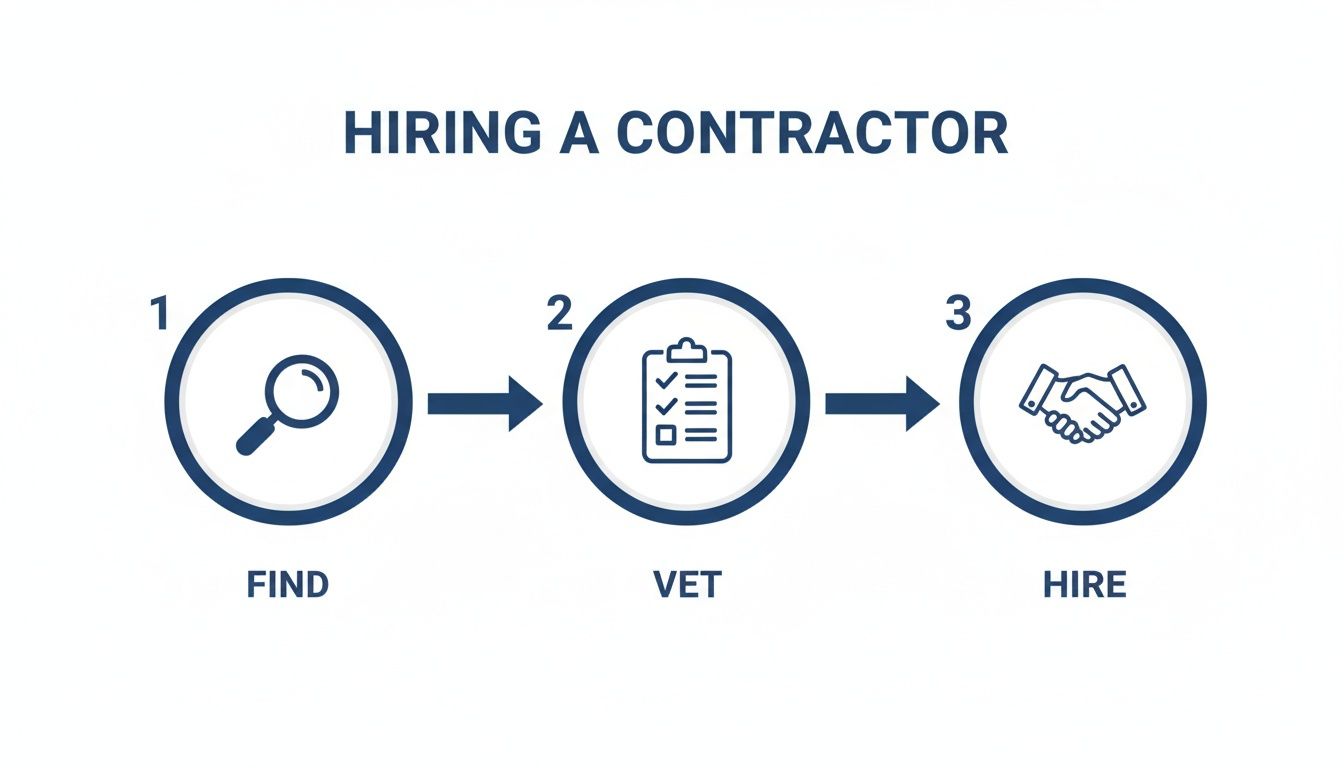
Finding the Right Residential Contractor in Washington

The cabinet style matters. The contractor matters more. A white shaker kitchen can fail because of poor prep, vague scope, weak coordination, or the wrong finish system just as easily as it can fail because of cheap materials.

Hiring well protects the whole investment.

What to verify before signing anything

Start with the basics, then get more specific.

  • License and insurance
    Confirm the contractor is properly credentialed for the work being done in Washington.

  • Itemized proposal
    Ask for a written scope that separates demolition, prep, carpentry, painting or finishing, installation, and cleanup.

  • Local references
    Talk to clients in Seattle, Kent, Tacoma, or nearby communities where weather and housing conditions are similar to yours.

  • Communication process
    Ask who you’ll hear from during the project, how changes are documented, and how scheduling updates are handled.

Questions worth asking in a kitchen consultation

Not every contractor is comfortable answering detailed finish questions. That’s useful information.

Ask things like:

  1. What cabinet material do you recommend for a damp kitchen?
  2. How will you protect areas around the sink, range, and dishwasher?
  3. What surface prep is included before painting or refinishing?
  4. How do you handle hidden damage if it appears after demolition?
  5. Who coordinates the different trades?

A solid contractor should be able to answer clearly without hiding behind vague language.

Warning signs to take seriously

Shortcuts usually show up in the estimate before they show up in the work.

Watch for:

  • Unclear allowances that leave major selections undefined
  • Verbal promises that aren’t included in writing
  • One-number bids with no scope detail
  • Rushed timelines that don’t match the amount of work
  • No discussion of moisture, ventilation, or substrate condition

A kitchen remodel is easier when one accountable team manages the moving parts. That matters for homeowners, and it matters just as much for property managers handling tenant improvements or smaller facility upgrades.

Start Your Kitchen Transformation with Confidence

White shaker kitchens stay relevant because they solve more than style. They brighten Northwest homes, fit a wide range of properties, and give owners a cabinet design that’s easier to maintain and easier to live with over time. In Puget Sound, the difference comes down to construction quality, finish selection, and climate-aware planning.

If you’re weighing a kitchen remodel in Seattle, Tacoma, Kent, or the communities between them, start with a practical conversation and a clear scope. Good results come from good decisions early.


If you're planning a residential remodel, cabinet repaint, or a smaller commercial renovation, Wheeler Painting & Restoration Services can help you review the condition of your existing kitchen, talk through material and finish options, and build a clear proposal for the work.

A Homeowner’s Guide to the Best Kitchen Remodeling in Puget Sound

A truly great kitchen remodel is about more than just a fresh look—it’s about creating a space that genuinely improves your daily life while adding real value to your home. It’s a careful balance of your personal style, smart, functional design, and durable materials that can stand up to our Pacific Northwest climate. Finding a residential contractor you trust is the key to bringing it all together, from the first sketch to the final reveal. At Wheeler Painting, our goal is to be that trusted local partner for homeowners in Kent, Seattle, and Tacoma, guiding you through the process with clarity and reassurance.

Starting Your Puget Sound Kitchen Remodel Journey

A couple reviews kitchen design blueprints and color swatches on a table by a window.

Does your kitchen feel like it’s fighting you every step of the way? A cramped layout, outdated appliances, or just a tired look can make the heart of your home feel less than welcoming. Taking on a remodel, especially in Western Washington, might seem overwhelming, but it’s a process that becomes exciting once you break it down into clear, manageable steps. This is your chance to reshape your home’s most important room into a space that works for you.

If you’re frustrated with your kitchen, you’re not alone. Many homeowners remodel simply because they can’t stand the old look anymore or because the kitchen is literally falling apart or just doesn’t function well. Here in the Puget Sound, where many of us live in older homes, an upgrade is one of the smartest investments you can make for your happiness and your property value.

First Things First: What’s Your “Why”?

Before you even think about tile or countertops, it’s important to get clear on your goals. What’s the main driver behind your project?

  • Do you need a more durable, family-friendly hub for your busy Tacoma household?
  • Are you dreaming of a sleek, modern kitchen for entertaining in your Seattle condo?
  • Is your priority creating an accessible, age-in-place design for the future?

Figuring out your "why" sets the entire tone for the project. When you’re clear on your motivation, every decision that follows becomes easier. Nailing down the fundamentals of how to plan a kitchen remodel from the outset is the single best way to avoid expensive changes and regrets later on.

A great remodel starts with a clear vision, a realistic budget, and the right contractor. Our goal at Wheeler Painting is to provide a reassuring roadmap, showing how a trusted local partner can turn your vision into reality without the typical stress.

What It Takes to Succeed in the Puget Sound

A successful remodel in our region means designing with local context in mind. We understand how to maximize natural light during our gray winters and choose materials that can handle our damp climate without warping or molding. It also means navigating the unique quirks of renovating older homes found throughout Kent, Seattle, and the surrounding areas.

As a dedicated residential contractor near you, Wheeler Painting has spent years helping homeowners through this exact process. We’re here to help you build a kitchen that’s not just beautiful, but perfectly suited to your life here in the Puget Sound.

Matching Your Vision With a Realistic Budget

It's the age-old dilemma of any remodel: how do you get the kitchen you’re dreaming of without a budget that gives you nightmares? Finding that balance is a critical part of planning a successful kitchen project. It’s easy to get swept away by glossy magazines, but a solid financial plan is what will actually get your project off the ground and over the finish line.

Before you think about materials, let's talk about how you really use your kitchen. The old "work triangle" concept is a bit dated. Today, we think in terms of work zones. Is your morning routine built around a dedicated coffee station? Do you need a baking zone with marble countertops for rolling out dough? Maybe a small desk area for homework or managing the household? Designing around your family's actual activities is what makes a new kitchen truly life-changing.

Defining Your Wants Versus Your Needs

Now for a dose of reality. It's time to get honest and make two lists: your absolute must-haves (needs) and the things that would be great to have (wants). This simple exercise is the key to keeping your budget from spiraling.

  • Needs: These are the non-negotiables. Think functional appliances that will last, enough cabinet space to end clutter, and a layout that finally solves the traffic jam in front of the fridge. In many older Puget Sound homes, this list often includes critical updates like replacing old plumbing or leveling a sloping floor.
  • Wants: This is the fun stuff! A high-end induction range, that stunning waterfall-edge countertop, or custom pantry inserts that feel like magic. These are the upgrades that bring in the "wow" factor.

Once your lists are made, you can build your budget around them. Fund all your needs first. This way, you won't fall in love with a pricey faucet only to discover you don't have enough set aside for essential floor repairs and replacements.

Building a Budget for Your Puget Sound Remodel

Budgeting for a kitchen remodel in the Seattle area means knowing where your money will likely go. Having a realistic breakdown from the start helps you make smarter decisions and avoid sticker shock.

The most important line item in your budget isn't for cabinets or countertops—it's your contingency fund. We tell every client to set aside 10-20% of the total project cost for the unexpected. When you open up walls in an older Puget Sound home, you never know what you'll find.

We've created a sample budget to give you a clearer picture of how costs are typically allocated for a mid-range kitchen remodel in our area.

Sample Kitchen Remodel Budget Breakdown for Puget Sound

Use this estimated cost allocation for a mid-range kitchen remodel in the Seattle area to help plan your finances effectively.

Expense Category Typical Cost Percentage Notes for Washington Homeowners
Cabinetry & Hardware 25-35% This is often the largest expense. Custom cabinets from local makers can increase this percentage.
Labor & Installation 20-30% Skilled labor is a sound investment in our market, and it's not the place to cut corners. This covers demo, install, and finishing.
Appliances 10-15% Prices vary wildly. Look for sales at local retailers to maximize your budget.
Countertops 10-15% Quartz and granite are popular and durable. The cost depends heavily on the material and complexity of the fabrication.
Contingency Fund 10-20% Crucial for older homes in Tacoma, Seattle, and surrounding areas. Covers surprises like mold, pests, or wiring issues.
Flooring 5-7% LVP (Luxury Vinyl Plank) is a popular, waterproof option for our damp climate.
Plumbing & Electrical 5-10% Bringing an older home up to current code can be a significant part of this.
Backsplash & Finishes 2-5% Includes tile, paint, and lighting fixtures. This is a place where you can often find savings without sacrificing style.

This table is a great starting point, but remember that every project is different. For an even more detailed analysis, check out our complete kitchen remodel cost breakdown. Knowing the real numbers behind material choices, like how much porcelain slabs cost for kitchen remodels, helps you make trade-offs that align with your budget.

Knowing Where to Save and Where to Splurge

A beautiful, functional kitchen isn't about buying the cheapest of everything. It's about being smart with your money.

  • Splurge: Spend your money on the things you touch and interact with every single day. A high-quality faucet, durable countertops, and solid cabinet hardware will make your kitchen a joy to use. The other big one? Don't skimp on your residential contractor. Good craftsmanship from a trusted local provider prevents expensive, frustrating problems down the road.
  • Save: Look for savings on items that are easier to change later. A simple, classic subway tile backsplash is inexpensive and timeless, but can be swapped out for something trendier in five years. You can also opt for reliable, well-reviewed appliances instead of the absolute top-of-the-line professional models.

Choosing Designs and Materials for the Pacific Northwest

A collection of home renovation samples including granite, wood flooring, various tiles, paint swatches, and a measuring tape on a table.

Now for the fun part—choosing the finishes that bring your new kitchen’s personality to life. In the Pacific Northwest, this is all about striking a balance between style, durability, and a sense of warmth that can stand up to our famously gray winter days.

It's no secret that kitchens aren't just for cooking anymore. They're the command center for homework, the hub for entertaining, and the heart of family life. A recent industry report confirms this, noting that 76% of homeowners now want larger, more open kitchens. This shift is a huge reason why the best kitchen remodeling projects focus on creating multifunctional spaces. If you're curious about where design is headed, you can discover more insights in the full 2026 Kitchen Trends Report.

Selecting Materials That Last

For homeowners from Kent to Tacoma, materials have to do more than just look good. They need to be resilient enough to handle moisture, heavy use, and the occasional dropped pot. It's a practical decision.

Here are a few of the most popular and reliable choices we consistently see in Puget Sound homes:

  • Countertops: Engineered quartz is still king. Its non-porous surface is a workhorse, fighting off stains and bacteria. Granite delivers natural, one-of-a-kind beauty with great heat resistance. Butcher block can introduce a wonderful warmth, but it requires a bit more upkeep.

  • Flooring: Luxury Vinyl Plank (LVP) is a true superstar in our climate. It’s totally waterproof, incredibly durable, and does a fantastic job mimicking the look of real wood and tile floors without the high price tag. Of course, hardwood is always a classic, but you'll want a top-tier finish to protect it from our damp environment.

  • Cabinetry: Cabinets form the architectural backbone of your kitchen. Shaker-style doors are a go-to for their timeless look that fits both modern and traditional homes. Investing in quality construction—think solid wood frames and soft-close hardware—is something you’ll appreciate every single day. We cover this in detail, so you might want to learn about the different types of cabinets available for your remodel.

Designing for Light and Flow

Any good Pacific Northwest kitchen design should obsess over one thing: natural light. Big windows, glass doors, or a well-placed skylight can absolutely transform a space.

You can then amplify that light with smart design choices. Lighter paint colors from a professional color consultation, a reflective backsplash, and even some open shelving can make a kitchen feel significantly brighter and more spacious.

When you're thinking about layout, picture your daily routine. An open-concept design that flows into the living or dining room is a game-changer for families and anyone who loves to entertain. It just makes life easier.

The Power of a Strategic Lighting Plan

A great lighting plan is every bit as critical as your countertop choice. You can't rely on one overhead light to do all the work. The best designs layer different types of lighting to create a space that’s both perfectly functional and full of atmosphere.

  • Ambient Lighting: This is your general, room-filling light, usually from recessed cans or a central fixture.

  • Task Lighting: This is the focused light you need for your work zones. Think under-cabinet strips that light up your counters for chopping and prep.

  • Accent Lighting: This is where you add a little personality and drama. Pendants over an island or in-cabinet lights to show off your favorite glassware are great examples.

Working with an experienced residential contractor like Wheeler Painting helps ensure all these pieces come together. We can guide you toward materials and designs that not only match your style but are also a perfect fit for life here in our beautiful corner of Washington.

Finding the Right Contractor in Puget Sound

If there's one piece of advice we can give homeowners, it's this: your contractor can make or break your entire kitchen remodel. They're the partner who determines the quality of the work, how smoothly the project runs, and ultimately, whether you're smiling or stressed at the end of it all.

This is especially true here in the Puget Sound. Our region is full of beautiful older homes that can hide surprises behind the drywall—outdated plumbing, quirky wiring, or unexpected structural issues. An experienced local contractor has seen it all before and knows how to handle it without derailing your project. Finding that right-hand pro in Kent, Seattle, or Tacoma is your ticket to a remodel you'll love for years.

Where to Find Reputable Local Pros

Finding a great contractor isn't about a single Google search. It’s about tapping into trusted networks to build a shortlist of real professionals. We always recommend starting with people, not just pixels.

  • Ask Around: Talk to friends, family, and neighbors who’ve had work done recently. Ask them the nitty-gritty: What was the communication like? How did they handle problems? Would you hire them again? A personal referral is worth its weight in gold.
  • Tap the Trade Network: The folks at your local lumberyard or specialty tile shop see contractors every day. They know who does quality work, who communicates well, and—just as importantly—who pays their bills on time.
  • Review Their Work (Critically): Once you have a few names, dive into their websites and social media. Look past the perfectly staged photos. Do their finished kitchens match the style and quality you envision? Scour reviews on multiple sites, not just the cherry-picked ones on their homepage.

After this initial legwork, you should have a solid shortlist of 3-4 potential candidates. Now it’s time to really put them to the test.

Don't Skip the Vetting Process

We can't stress this enough: never skip the vetting process, no matter how charming a contractor seems. A true professional will expect you to do your homework and will have all their information ready for you.

A contractor’s hesitation to provide their license, insurance, or references is the biggest red flag you can encounter. If they can't or won't provide this basic information, walk away immediately—no matter how low their bid is.

Before you even schedule a consultation, you can do some critical background checks. First, head over to the Washington State Department of Labor & Industries website to check their contractor status. This simple search confirms they are legally registered, bonded, and insured.

Next, ask for a copy of their insurance certificate. You're looking for two things: liability coverage (to protect your home from accidental damage) and workers' compensation (to protect you if a crew member gets injured on your property).

Finally, when they provide references, actually call them. Ask about the experience from start to finish. Was the crew respectful of their home? Did the project stay on schedule and on budget? And most importantly, how were problems resolved when they popped up?

The Value of a Full-Service General Contractor

For a project as complex as a kitchen remodel, hiring a full-service general contractor like Wheeler Painting is the smartest path forward. Think of it this way: instead of you trying to line up a plumber, an electrician, a drywall contractor, and a cabinet installer, a general contractor coordinates everything. We become your single point of contact and accountability for the entire job.

This integrated approach means we manage everything under one roof. We’re the ones pulling permits in Seattle, scheduling our trusted subcontractors in Tacoma, and overseeing the final hardware installation in your Kent home. It closes communication gaps and ensures every detail—from floor repairs and replacements to those perfect finishing touches—is executed as part of a cohesive plan. We handle the logistics so you can focus on the exciting parts of bringing your dream kitchen to life.

Navigating the Remodel From Demolition to Final Walkthrough

You’ve vetted the bids, checked the references, and hired your contractor. Now, the real fun begins. This is where the dust flies and your vision starts taking shape, turning all that planning into a tangible reality.

Knowing the sequence of events is the key to a low-stress remodel. It helps you understand what’s happening, why it’s happening, and what’s coming next. Let's walk through the typical construction flow for a Puget Sound kitchen.

The Construction Sequence: What to Expect

Every remodel has its own quirks—especially in our region's charming older homes—but the fundamental order of operations is pretty universal. A good contractor follows a logical path to keep the project efficient and on track.

Here’s a general roadmap of the process:

  • Prep and Containment: Before a single hammer swings, our crew will prep the site. This means sealing off the kitchen with plastic sheeting to control dust and laying down protection for your floors. It's a simple step, but it shows a contractor's respect for your home.
  • Demolition Day: This is the fastest and most dramatic part of the job. Old cabinets, countertops, appliances, and flooring are torn out and hauled away. If walls are coming down, this is when your space will suddenly feel huge (and very, very empty).
  • The "Rough-In" Phase: Once the space is stripped to the studs, the plumbers and electricians get to work. They’ll run new water lines, drains, and electrical wiring for your future layout. This is a critical stage that requires inspections from your local municipality—whether that’s Seattle, Bellevue, or Tacoma—to ensure everything is safe and up to code before any walls get closed up.

From Bare Walls to a Beautiful Kitchen

After the rough-in work passes inspection, the project really picks up steam. This is the exciting part where the visual elements you chose start coming together, and the empty shell begins to look like a kitchen again.

The infographic below illustrates the simple, three-step process that gets you to this exciting construction phase.

Three-step process diagram illustrating how to hire a contractor: find, vet, and hire.

As you can see, finding and vetting the right professional is the groundwork for a smooth and successful project.

Your Final Walkthrough: The Punch List
As work wraps up, you'll conduct a final walkthrough with your contractor. This isn't just a quick glance; it's your chance to create a "punch list." This is a detailed list of every minor correction needed, from a paint scuff to a sticky cabinet drawer. A true professional won't consider the job done until every single item is checked off to your 100% satisfaction.

Once the rough-in is complete, the finishing work begins in a very specific order:

  1. Drywall, Texture, and Paint: The walls are closed up with new drywall, which is then taped, mudded, and sanded for a smooth finish. After that, our professional painters apply a coat of primer, followed by the first layers of your chosen wall color.
  2. Flooring and Cabinetry: Next, your new flooring is laid down. With the floors in place, the crew will begin carefully installing your custom cabinets, which truly start to define the space.
  3. Countertop Templating and Installation: Your countertop fabricator will visit to make a precise digital or wood template of your cabinets. About a week or two later, they’ll return with the finished stone or quartz slabs for installation.
  4. Finishing Touches: This is the home stretch. Plumbers and electricians come back to install the sink, faucet, garbage disposal, and appliances. They'll also install light fixtures, outlets, and switches. The tile backsplash is one of the last items to go in, followed by cabinet hardware and any final interior painting touch-ups.

This process reflects a major shift in kitchen design. We're seeing more homeowners prioritize smart, functional layouts. In fact, studies show 76% of renovators are incorporating features like built-in pantries and dedicated storage to improve organization.

A well-executed remodel isn't just an upgrade for your lifestyle; it's a solid investment. With a national ROI often landing between 50-70%—and frequently higher here in the competitive Puget Sound market—it makes financial sense. You can read more about how future-proof kitchen designs are trending to see why this is one of the smartest places to put your money.

Answering Your Top Kitchen Remodel Questions

No matter how much planning you do, a few big questions always seem to pop up right before you’re ready to pull the trigger on a remodel. We get it. You want to feel confident before the work begins.

Here are the straightforward answers to the questions we hear most often from homeowners around Puget Sound.

How Long Will My Kitchen Remodel Actually Take?

This is the million-dollar question. The honest answer depends entirely on the scope of your project.

A quick cosmetic refresh—maybe some new paint, updated cabinet hardware, and a faucet swap—can often be completed in just 2 to 4 weeks.

But if we're talking about a full tear-out that involves moving walls, installing custom cabinets, and running new plumbing or electrical lines, you should realistically plan for 6 to 12 weeks. Sometimes, especially in older homes, it can take a bit longer.

A few things can stretch out a timeline:

  • Permitting: Getting the green light from local offices in Seattle, Tacoma, or Kent can sometimes be a waiting game.
  • Material Lead Times: If you've fallen in love with special-order cabinets or one-of-a-kind tile, their creation and shipping time is a major factor.
  • The "Surprise" Factor: You never truly know what’s behind a wall until you open it up. Discovering old rot or faulty wiring from a previous DIY job means we have to stop and fix it right, which takes time.

A good contractor, like Wheeler Painting, will provide a detailed project schedule before starting. This is your roadmap. It sets clear expectations and helps you plan your life around the construction.

What Kind of ROI Can I Expect on a Kitchen Remodel in Washington?

A kitchen remodel is almost always a smart investment, consistently ranking as one of the best projects for boosting your home's value. Nationally, you can expect to recoup 50-70% of the cost, but here in the competitive Puget Sound real estate market, a well-done kitchen can deliver an even higher return.

Here’s a little secret: a thoughtful, minor remodel often gets you a better percentage return than a massive, luxury overhaul. The goal is to make smart, timeless choices that you'll love living with and that will also appeal to a wide range of future buyers. An experienced residential contractor near you is your best asset here, helping you put your money where it will add the most real-world value.

Can I Actually Live in My House During the Remodel?

Yes, you can, but it takes some planning and a healthy dose of patience. The biggest hurdle, obviously, is having no kitchen.

Pro Tip: Set up a "survival kitchen" in your dining room, laundry room, or even the garage. A microwave, mini-fridge, coffee maker, and a stack of paper plates will be your best friends.

You also have to be prepared for the dust and noise. Even with the most careful crews, it's a construction zone. At Wheeler Painting, we go to great lengths to contain the mess by sealing off the work area, running dust extraction systems, and cleaning up thoroughly at the end of every single day. Good communication with your project manager is key to making it all bearable.

Do I Really Need a Permit for My Kitchen Remodel in Kent, WA?

Most of the time, yes. Here in Kent and across the Puget Sound region, you'll need a building permit for any project that alters your home’s structure, electrical, or plumbing systems.

That includes common jobs like:

  • Moving or knocking down walls
  • Relocating a sink or major appliance
  • Adding new outlets or changing the lighting layout

If you’re just doing simple cosmetic work, like painting the cabinets you already have or replacing a faucet in the exact same spot, you typically won't need a permit.

Any reputable, licensed contractor will manage the entire permitting process for you. It’s our job to ensure every bit of work is done safely, meets current building codes, and passes every inspection. This protects your family, your investment, and your home’s long-term value.


Starting a residential remodel is a huge undertaking, but you don’t have to go it alone. If you’re ready to create your dream kitchen with a team that believes in clear communication and expert craftsmanship, Wheeler Painting is here to help. As a local provider specializing in residential remodeling, we serve homeowners throughout Kent, Seattle, and Tacoma. Contact us today to schedule your on-site consultation and get started. Learn more and get your free estimate here.