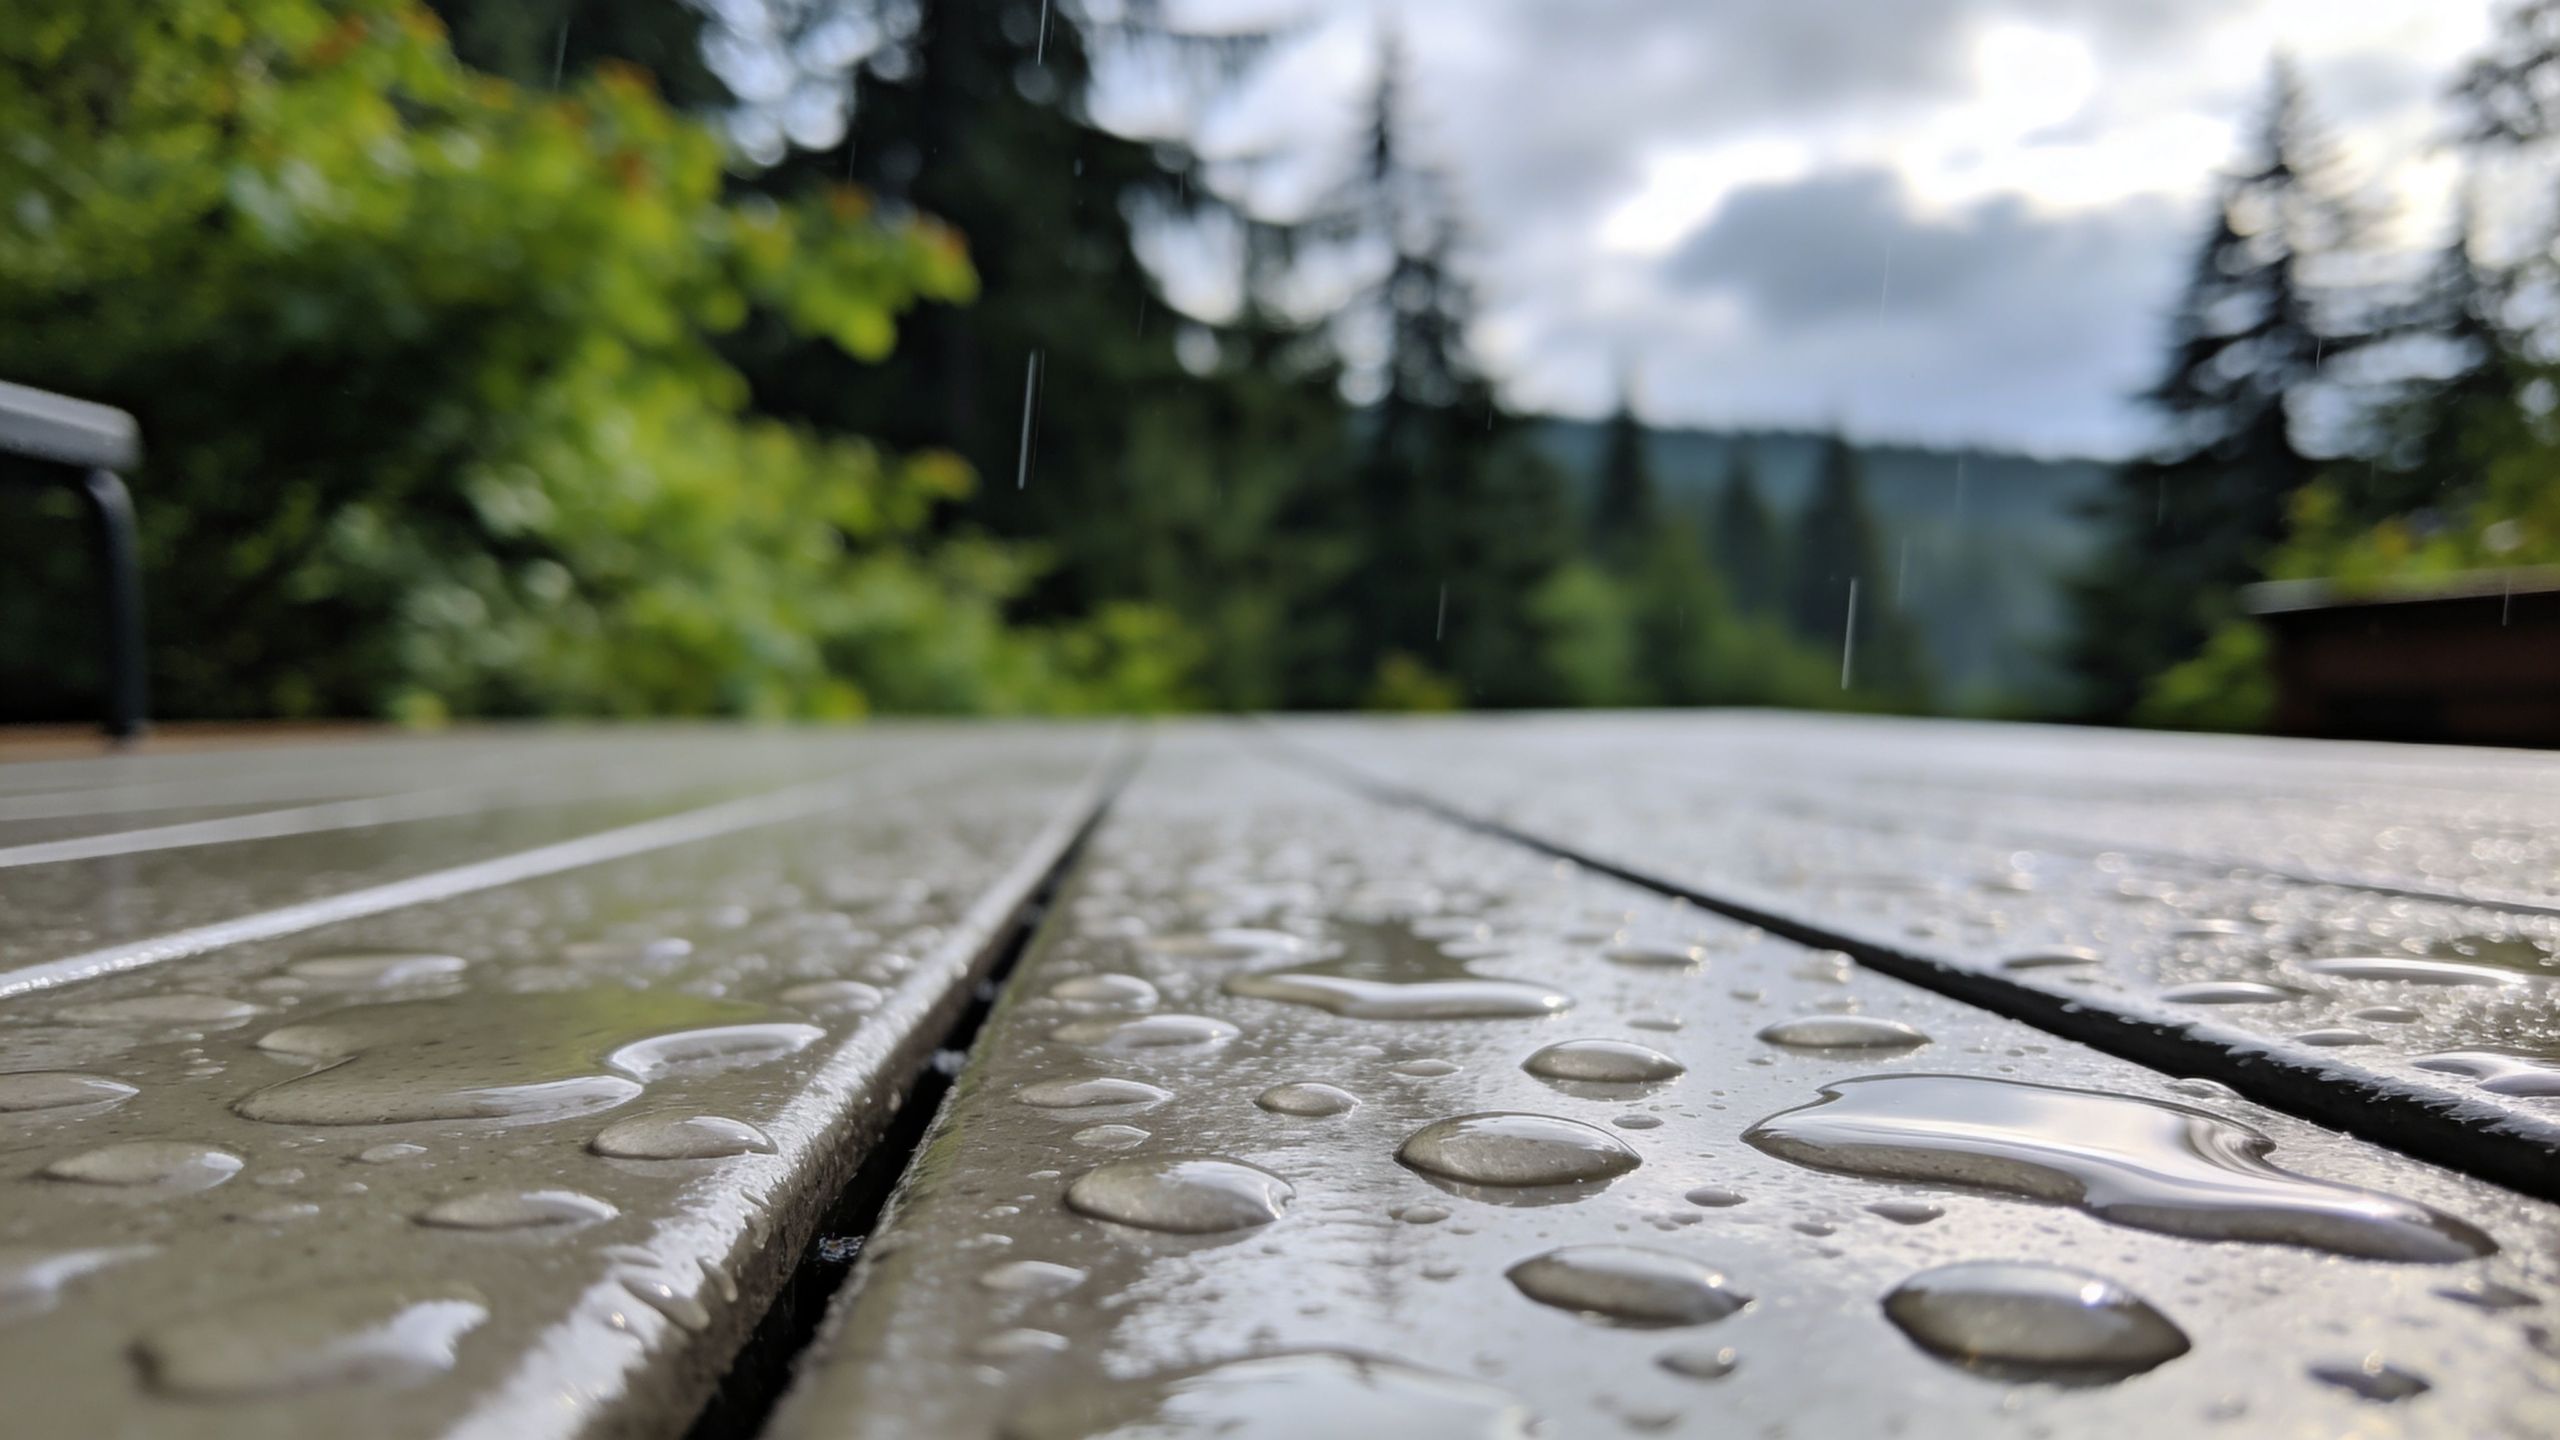
Tag Archive for: residential contractor seattle

Seattle Foundation Waterproofing Guide 2026

A lot of people in the Puget Sound area notice foundation trouble the same way. They walk into a basement storage room, open a crawl space hatch, or check a lower-level wall after a stretch of rain and catch a musty smell that wasn't there before. Then they see damp concrete, peeling paint, a dark line near the slab, or water showing up where it shouldn't.

That kind of moisture gets your attention fast, and it should. In Seattle, Tacoma, Bellevue, Issaquah, Kirkland, and surrounding communities, wet weather, saturated soils, and drainage problems can turn a small leak into a larger repair if it's ignored. Water doesn't just stain surfaces. It can feed mold, damage finishes, and put long-term stress on the structure below grade.

Protecting Your Puget Sound Property from Water Damage

A damp basement in this region usually doesn't mean you did something wrong. It often means the building is doing battle with exactly what the Pacific Northwest delivers for much of the year. Soil stays wet, runoff builds around the house or commercial building, and older coatings that were never designed to stop standing water start to fail.

For homeowners, that often shows up as a wet corner near a foundation wall, a crawl space that smells earthy, or flooring that starts to cup along an exterior wall. For property managers, the pattern may be broader. Tenants report odors, stored materials get damaged, or a lower utility room develops visible moisture after storms.

Ignoring it is expensive in the practical sense, even before anyone talks about repairs. Moisture can spread into insulation, trim, drywall, flooring systems, and framing. It can also turn a manageable waterproofing project into a larger restoration job that affects schedules, occupancy, and maintenance planning. If you're thinking through the broader risk side of property protection, this overview of NW Claims Management on property risks is a useful companion read.

Waterproofing has become a bigger focus across construction for good reason. The global foundation waterproofing membrane market was valued at USD 10.5 billion in 2024 and is forecast to reach USD 15.8 billion by 2033, growing at a CAGR of 5.8% according to this foundation waterproofing membrane market overview. That growth reflects how central below-grade protection has become in modern building work.

If you want a plain-language look at the basics before getting into methods and materials, this guide on what waterproofing means in construction gives a solid starting point.

Water problems below grade rarely fix themselves. They usually get easier to solve only when they're caught early.

Why Foundations Leak in the Pacific Northwest

Foundation leaks in Western Washington usually come from pressure, pathways, and weak details. The wet climate is the obvious part. The less obvious part is how local soils and site drainage keep water in contact with the foundation long after the rain stops.

Hydrostatic pressure and saturated soil

When the soil around a foundation gets saturated, that water pushes against the wall and footing. The easiest way to think about hydrostatic pressure is a bathtub pressing on the drain area. The deeper the water sits, the more force it applies. Below grade, that force keeps looking for any seam, crack, tie hole, cold joint, or weak coating.

In Seattle and West Seattle neighborhoods with tight sites, drainage can be harder to improve because buildings, paving, fences, and nearby properties limit where water can go. In places like Snoqualmie or North Bend, the site may offer more room, but slope and runoff can create their own problems.

A damp concrete house foundation covered in moss near green ferns in a wet forest environment.

Common leak points homeowners miss

A lot of leaks don't come through the middle of a wall. They show up at transitions and openings.

  • Window wells and stairwells: These collect runoff fast if drains clog or grading settles.
  • Footing-to-wall joints: This cold joint is one of the most vulnerable areas in any below-grade assembly.
  • Cracks from settling or shrinkage: Even small cracks can become reliable water paths under pressure.
  • Pipe penetrations and utility entries: Sealant failure around these openings is common.
  • Aging dampproof coatings: Many older buildings have a black coating that was meant to resist soil moisture, not stop active water pressure.

If you're trying to sort out symptoms before deciding on repairs, this article on identifying basement dampness causes is helpful because it breaks down how moisture can show up in different ways.

Soil movement and drainage patterns

In parts of Bellevue, Issaquah, and New Castle, clay-heavy soils can hold water and expand when wet. That doesn't just increase pressure. It also changes how water moves along the wall and where it pools. Add in roof runoff, short downspouts, settled backfill, or landscaping beds that trap water near the house, and the leak isn't mysterious anymore.

Practical rule: If water is allowed to stay beside the foundation, it will eventually find the weakest detail in the wall assembly.

Comparing Foundation Waterproofing Methods

There isn't one cure for every wet basement or crawl space. The right method depends on whether you need to stop water before it reaches the wall, manage water that's already getting in, or fix a very specific entry point. In the Puget Sound climate, that distinction matters.

An infographic comparing three different foundation waterproofing methods including exterior excavation, interior drainage, and crack repair.

Exterior excavation and membrane

This is the gold standard when the goal is true foundation waterproofing. The work starts outside. Soil is excavated down to the footing, the wall is cleaned and prepared, defects are repaired, a membrane is applied, and drainage components are added before backfill.

This method works because it stops water at the outside face instead of allowing it to enter and dealing with it later. It also gives the installer access to the most failure-prone details, especially the footing-to-wall connection and corners.

The technical details matter here. Effective systems follow the Three D principle: Drain Down, Drain Along, Drain Out. A dimple mat creates a 0.5-inch air gap that redirects hydrostatic pressure laterally toward a perimeter French drain, and the cold joint between footing and wall needs a 1.2 cm (0.5 in) bead of elastomeric sealant because that interface sees the highest pressure, as explained in this Three D waterproofing reference.

Exterior systems are usually the best fit when:

  • The wall is accessible from outside: No hardscape, retaining structures, or neighboring obstructions make excavation impossible.
  • Water entry is broad, not isolated: Multiple damp areas usually mean pressure along the exterior wall.
  • You want the most complete correction: This approach addresses the cause, not just the symptom.

Interior drainage systems

Interior systems don't stop water from touching the outside of the wall. They manage it after it gets in. Typically, that means collecting water at the slab edge or base of the wall and directing it to a sump pump for discharge.

That makes interior drainage useful when exterior excavation is too disruptive, too limited by access, or not the first move a property needs. For some commercial spaces and occupied residential basements, it can be the least invasive path. It's often chosen in dense Seattle or Kirkland locations where excavation equipment access is limited and exterior hardscape replacement would add complexity.

The trade-off is straightforward. Interior drainage controls water inside the building envelope. It does not reduce the same way an exterior membrane and drainage board reduce outside wall exposure.

Crack repair and localized sealing

Some leaks come from one or two identifiable cracks. In those cases, localized crack repair can make sense. This is a targeted fix, not a whole-foundation strategy. If the wall is otherwise dry and the issue is clearly tied to a specific crack, injection repair or sealing can be effective.

It's the right tool when:

  • one crack is actively leaking
  • the rest of the wall shows no broad moisture pattern
  • you need a focused repair before considering broader drainage work

It's the wrong tool when moisture is showing up in several places, when the wall coating is failing generally, or when site drainage is poor.

Coatings and the myth about trapped moisture

A common mistake is assuming any roll-on coating from a store counts as waterproofing. Most don't. Some help with minor dampness. They are not a substitute for a full exterior membrane system when hydrostatic pressure is present.

There's also an old myth that exterior waterproofing somehow pushes curing moisture inward and creates interior moisture problems for a long period. That claim doesn't hold up against how modern assemblies function. A proper exterior system with membrane, drainage layer, and protection components is designed to stop capillary and vapor transmission while moving water away from the structure, not trapping it in the building.

If a system doesn't control drainage, protect corners, and seal the footing joint properly, the label on the bucket won't save it.

Foundation Waterproofing Costs in the Seattle Area

Cost is usually the first question after a leak is confirmed, and the honest answer is that foundation waterproofing isn't priced from a single flat number. The final budget depends on access, depth, site conditions, the repair method, and how much of the building perimeter needs work. A house tucked tightly into a West Seattle lot may require more labor and more careful staging than a property with easier access in North Bend.

Still, rough budgeting helps. The ranges below reflect the kinds of numbers property owners in the Seattle area often see when comparing common approaches.

An infographic showing the cost range for various foundation waterproofing services in the Seattle area.

Typical project ranges

Service Typical range
Exterior waterproofing $15,000 – $30,000
Interior drainage system $5,000 – $15,000
Crack repair per crack $500 – $1,500
Sump pump installation $1,000 – $2,500

These ranges are useful for planning, not for replacing an on-site evaluation. One property may need targeted crack work and drainage corrections. Another may need full excavation, membrane installation, drainage board, perimeter drain improvements, and restoration of landscaping or concrete after the work is complete.

What moves the price up or down

Several job conditions have more impact on price than most owners expect.

  • Excavation access: Tight side yards, fences, decks, retaining walls, and utility congestion make exterior work slower.
  • Foundation depth: Deeper walls require more excavation, more spoil handling, and more safety planning.
  • Site drainage conditions: If downspouts, grading, or perimeter drainage are poor, the repair may need to address those conditions too.
  • Finish restoration: Walkways, plantings, patios, and stairs often need to be protected, removed, or rebuilt.
  • Commercial occupancy concerns: For facility managers, scheduling and access coordination can change labor planning.

A good estimate should show where the money is going. If a proposal is vague on excavation, waterproofing membrane type, drainage layer, protection board, discharge routing, or site restoration, it's hard to compare one contractor to another.

Why drainage details affect the budget

Drainage is often the hidden line item that separates a short-lived fix from a durable repair. A membrane alone isn't enough if water has nowhere to go. That's why perimeter drain function matters so much. If you want a helpful plain-English breakdown of how this part of the system works, this Encano Plumbing & Drainage guide is worth reviewing.

The cheapest waterproofing quote is often missing the exact detail that keeps the wall dry during the next long stretch of rain.

DIY Fixes vs Professional Waterproofing Solutions

Some moisture problems do improve with homeowner maintenance. Others need full professional waterproofing. The key is knowing which is which before time and money go into the wrong fix.

What you can handle yourself

Basic water management around the building is worth doing, and it often reduces the load on the foundation.

  • Clean gutters and downspouts: Overflow near the foundation creates avoidable saturation.
  • Extend discharge away from the building: Water should leave the immediate perimeter, not dump beside the wall.
  • Improve grading where possible: Soil should encourage runoff to move away from the foundation.
  • Keep window wells clear: Leaves and debris turn them into collection points.
  • Watch for new stains or odor changes: Early signs are easier to investigate than active leaks.

These are smart maintenance steps. They are not substitutes for a real below-grade system when water pressure is involved.

Where DIY stops

The line is usually crossed when water is entering through concrete, through the footing joint, or through repeated leak points after heavy rain. At that stage, store-bought coatings and patch products tend to become temporary cover-ups. They can hide symptoms while water keeps moving behind the surface.

The code side matters too. IRC Section R406.2 requires foundation walls in areas with high water tables or severe soil-water conditions to be fully waterproofed, not just dampproofed, and professionally applied systems typically last 10 to 20 years depending on material quality, application, and conditions, according to this IRC foundation waterproofing overview. That's one reason professional installation matters so much. Product choice alone doesn't create a durable result.

Why professional work protects value

Professional waterproofing isn't just labor. It's diagnosis, surface preparation, detail work, drainage planning, and code-compliant installation. A good contractor should know when a leak is really a site drainage issue, when it's a cold-joint problem, and when the building needs a full exterior assembly instead of an interior workaround.

For a homeowner comparing options, this practical guide to how to waterproof basement walls helps clarify what real system work involves versus cosmetic patching.

A dry wall surface doesn't always mean the problem is solved. It may only mean the water hasn't shown itself again yet.

Hiring a Contractor in Tacoma and Bellevue

Choosing the right contractor for foundation waterproofing is less about advertising and more about how they think through the job. In Tacoma, Bellevue, Seattle, Issaquah, Snoqualmie, and New Castle, local experience matters because drainage, access, slope, and soil conditions vary a lot from one site to the next.

Screenshot from https://wheelerpainting.com/

What to ask before you sign

Start with the basics, but don't stop there.

  • Licensing and insurance: Ask for current documentation.
  • Local project experience: A contractor who works regularly in Puget Sound conditions will usually diagnose faster and propose more realistic solutions.
  • Clear written scope: You want to see excavation limits, prep work, membrane approach, drainage details, and restoration expectations.
  • Detail knowledge: Ask how they handle corners, footing transitions, and reinforcement strips.
  • Communication during the job: Water intrusion repairs often uncover site conditions once digging starts. You need a contractor who explains changes clearly.

One of the best homeowner questions is simple: how do you protect the most leak-prone transitions? That tends to separate general promises from real field knowledge.

Technical details that reveal experience

Codes and manufacturer requirements include details that an experienced contractor should know without hesitation. Exterior corners require two layers of membrane for protection, and the membrane should cover two-thirds of the footing while overlapping reinforcement strips by at least 1 inch, according to this below-grade wall waterproofing guide. Those aren't flashy details, but they're exactly where failures often start.

If a contractor can explain those transitions in plain language, that's a good sign. If they stay vague and keep returning to generic terms like “seal it up” or “coat the wall,” keep asking questions.

A useful next step is reviewing what a specialist service includes. This page on waterproofing contractors near me gives a practical view of what owners should expect from a qualified local partner.

For property owners who want to see related construction work in action, this video is a helpful reference point.

Why smaller firms often fit mid-size projects better

For many homeowners, facility managers, and property managers, the best fit isn't always the largest company. Mid-size repairs, tenant improvement coordination, facility maintenance planning, and occupied-site work often benefit from a smaller firm that communicates directly, keeps scope realistic, and doesn't treat the job like a number in a queue.

That matters whether you're managing a lower-level leak in a Bellevue office, planning facility maintenance in Kirkland, or addressing moisture before a bath remodel, kitchen remodel, siding replacement, or office space renovation.

Long Term Maintenance and Spotting Warning Signs

Once a waterproofing repair is complete, the next job is keeping the site working the way it should. In the Pacific Northwest, routine checks are part of protecting the investment. Water management around foundations is never something to ignore for years at a time.

A simple maintenance rhythm

Walk the exterior during and after heavy rain when you can safely do it. That's when drainage issues show themselves most clearly.

  • Check downspout discharge: Make sure roof water is moving away from the building.
  • Look at grade near the wall: Soil and mulch shouldn't trap water against the foundation.
  • Inspect window wells and drains: Clear debris before it blocks flow.
  • Test sump pump operation: Don't wait until the next storm to find out it failed.
  • Watch the inside perimeter: Basement corners and crawl space edges often show the first warning signs.

Early signs worth taking seriously

Some of the most important clues are subtle.

Musty odor, white chalky residue on concrete, bubbling paint, damp carpet edges, and recurring stains near the floor line all deserve attention.

If you see any of the following, it's time to investigate:

  • Persistent odors: Especially in basements, utility rooms, or crawl spaces.
  • Efflorescence: White residue on concrete or masonry means moisture is moving through the wall.
  • Peeling coatings or swollen trim: Finishes often react before structural materials do.
  • New cracks or widening cracks: These may become active leak paths.
  • Mold around stored items or lower wall areas: Moisture may be present even if standing water isn't visible.

Catching these signs early usually keeps the repair smaller, cleaner, and easier to schedule.


If you're seeing damp walls, musty odors, crawl space moisture, or repeat leaks around your home or commercial property in Tacoma, Seattle, New Castle, Issaquah, Bellevue, Kirkland, North Bend, West Seattle, or Snoqualmie, contact Wheeler Painting & Restoration Services. Wheeler is a trusted local general contractor for homeowners, building owners, facility managers, and property managers who need clear answers, practical waterproofing solutions, and dependable help on smaller to mid-size projects, tenant improvements, facility maintenance, residential remodeling, commercial renovations, and related repair work.

Dream Bathroom Remodel with Tub in Seattle 2026

A bathroom remodel with tub usually starts the same way. You know what you want the room to feel like, but you are less sure about what happens between the idea and the finished space.

For homeowners around Kent, Seattle, and Tacoma, that uncertainty is real. Older layouts, moisture-prone walls, tight footprints, and mixed generations in the home all affect what kind of tub remodel will work. Online galleries make the decision look simple. The build itself is not simple.

A good tub remodel balances four things at once. It has to fit the room, fit the household, hold up in the Puget Sound climate, and stay inside a budget that makes sense for your property. When those pieces line up, the bathroom feels better every day and performs better behind the walls too.

Starting Your Bathroom Remodel Journey

Many homeowners begin with finishes. They save photos of tile, freestanding tubs, wood vanities, and warm lighting. That is helpful, but the first real decision is not the color palette. It is scope.

If you are planning a bathroom remodel with tub, decide early whether you are doing a cosmetic refresh or a full rebuild. A cosmetic project keeps most of the room where it is. A full remodel changes layout, plumbing locations, wall surfaces, and often the subfloor or framing around the wet area.

Start with the three questions that matter most

  1. Who uses this bathroom every day
    A hall bath for kids needs different priorities than a primary bath for two adults. A rental or guest bath has another set of needs entirely.

  2. What must stay
    If the current tub location works, keeping plumbing in place often makes planning easier and reduces risk.

  3. What cannot fail
    In Western Washington, that usually means waterproofing, ventilation, and durable materials around the tub surround.

Many homeowners also need a realistic path, not just inspiration. If your goal is a faster update with less disruption, this overview of a one day bath remodel helps clarify what can be done quickly and what still requires a deeper rebuild.

Tip: If you are unsure whether to replace a tub, refinish it, or redesign the whole room, start by listing daily frustrations instead of desired finishes. That gives the remodel a practical backbone.

Build your plan in this order

  • Layout first: Make sure the room functions before you pick materials.
  • Budget second: Set a spending range that matches the scope.
  • Tub selection third: Choose the tub only after you know the room can support it.
  • Finish choices last: Tile, fixtures, lighting, and paint should reinforce the plan, not drive it.

That sequence saves a lot of rework. It also keeps a remodel grounded in what works for your house, not just what looks good in a showroom.

Planning Your Puget Sound Bathroom Remodel

Good planning solves most tub remodel problems before demolition starts. In Kent and the surrounding area, the biggest planning mistakes usually show up in small bathrooms, older homes, and projects where the homeowner tries to make one room do too many jobs without adjusting the layout.

A professional interior design mood board for a bathroom remodel featuring tile samples and a laptop.

Make the layout carry the project

A bathroom remodel with tub works best when the tub choice follows the room, not the other way around.

A compact bathroom often does better with an alcove tub or a tub and shower combination. That layout keeps circulation simple and usually leaves more usable wall space for a vanity, storage, and a comfortable entry path.

A larger room opens up more options. Freestanding tubs can look beautiful, but they ask more from the floor plan. You need visual breathing room around them, enough clearance for cleaning, and a plumbing plan that does not create awkward access problems later.

Here is a practical side-by-side view.

Tub style Best fit What works well Common trade-off
Alcove tub Small to medium bathrooms Efficient footprint, easy to combine with a shower Less of a focal point
Freestanding tub Larger primary bathrooms Strong design impact, open feel Needs more floor space and careful plumbing placement
Soaking tub Homes prioritizing comfort Deeper bathing experience Can affect room layout and structure depending on model
Tub and shower combo Family bathrooms and guest baths Flexible daily use Requires strong waterproofing around the full wet zone
Corner tub Rooms with unusual geometry Can free up some wall runs in the right plan Not every small bathroom benefits from it

Budget for the full scope, not just the tub

The tub itself is only one piece of the spend. A lot of online advice skips that, which is why homeowners get surprised after the first contractor walkthrough.

The most useful national benchmark in current planning comes from the Houzz study. The median spend on major bathroom remodels involving tubs rose to $22,000, and larger bathrooms of 100 or more square feet reached a median of $25,000 according to the 2025 U.S. Houzz Bathroom Trends Study.

That number is helpful because it confirms what many homeowners already sense. A true tub-centered remodel is a major project, not a weekend update.

Where the budget usually goes

Without inventing regional percentages, the practical framework looks like this:

  • Demolition and prep: Removal, disposal, protection of nearby finishes, and opening walls or floors.
  • Plumbing work: Drain location, supply lines, valve placement, and corrections to older plumbing.
  • Structural work: Subfloor repair, framing updates, and tub support where needed.
  • Waterproofing: Backer board, membrane, seam treatment, flange transitions, and flood testing.
  • Tile and surround finishes: Wall tile, floor tile, setting materials, grout, and trim pieces.
  • Tub and fixtures: The actual tub, filler, shower trim, drain hardware, and accessories.
  • Electrical and ventilation: Lighting updates, fan work, switches, GFCI protection, and inspections.
  • Paint and final trim: Drywall repair, moisture-tolerant coatings, caulk, and punch-list work.

If you want a planning worksheet before you request bids, this bathroom remodel planning guide can help organize the conversation: bathroom remodel planning.

Regional planning matters more than generic calculators

Puget Sound homes have quirks that broad national content does not capture well. A Seattle bungalow may hide older framing and patchwork plumbing. A Tacoma craftsman may have out-of-level floors and long-term moisture staining around the tub wall. A suburban Kent home may have builder-grade materials that look fine on the surface but need upgrading behind the tile.

That is why cost range conversations should start with the room condition, not a sample picture from the internet.

Key takeaway: The cleanest-looking bathroom often starts with the least glamorous decisions. Layout, structure, and moisture control determine whether the finished room still performs well years later.

Choosing the Perfect Tub for Your Home

The right tub is not always the one that looks best in a photo. It is the one that fits the room, the people using it, and the kind of maintenance you are willing to live with.

Infographic

How to narrow the choice

Start with daily use.

If the bathroom handles the morning rush, an alcove tub or a tub and shower combination usually makes the most sense. If the room is primarily for unwinding, a soaking tub can be worth giving more square footage to.

For homes with aging family members or anyone planning long-term accessibility, walk-in tubs belong in the conversation early. They affect layout, door swing, wall clearances, and how the plumbing rough-in gets handled.

Tub Type Comparison for Your Remodel

Tub Type Best For Typical Cost (Material Only) Space Requirement Installation Notes
Alcove Tub Hall baths, family bathrooms, tub and shower combos Varies by brand and material Compact Straightforward for many standard layouts
Freestanding Tub Primary baths with open floor area Midrange modern soaking tubs $2,000 to $4,000 and premium spa tubs $5,000 to $7,500 Larger footprint Needs careful placement and exposed or floor-mounted plumbing planning
Drop-in Tub Custom surrounds and built-in deck designs Varies by material and surround scope Moderate to large Requires deck framing and finish coordination
Walk-in Tub Safety-focused households Varies widely by feature set Moderate Access, sealing details, and entry clearance are critical

The material-only cost range above comes from the verified trend summary that notes midrange modern soaking tubs at $2,000 to $4,000 and premium spa tubs at $5,000 to $7,500.

What works in real homes

Alcove tubs remain the practical standard for many Puget Sound homes. They are easier to integrate into compact bathrooms and they work especially well when the room needs one wet zone that does everything.

Freestanding tubs work when the room can support the visual space around them. If the tub feels jammed between walls, the effect usually falls flat and cleaning becomes more annoying than most homeowners expect.

Drop-in tubs can still make sense, especially when a homeowner wants a custom tiled deck or integrated ledge space. The caution is maintenance. More horizontal surfaces can mean more places for water to sit if detailing is not done well.

Walk-in tubs prioritize safety. They are not for every project, but for the right household they can solve a real use problem without making the bathroom feel institutional if the rest of the design is handled thoughtfully.

Small bathroom decisions need discipline

In tighter bathrooms, every choice has a ripple effect. Tub shape changes floor clearance. Faucet placement changes cleaning access. Shower glass changes how open the room feels.

For homeowners working through compact layouts, this roundup of genius bathtub designs for small bathrooms is useful because it shows how tub style and room size interact in practical ways.

Tip: If the bathroom is small, choose the tub after you confirm vanity depth, toilet clearance, and door swing. The tub should support the room, not dominate it.

Refinishing versus replacing

Not every bathroom remodel with tub needs a brand-new unit. If the existing tub is structurally sound and the layout already works, refinishing can be a smart move. It preserves the room geometry and can free up budget for better tile work, ventilation, or storage.

Replacement makes more sense when the tub is damaged, uncomfortable, poorly sized, or tied to a layout that no longer serves the household.

The best choice usually comes down to this. Keep the tub if it supports the plan. Replace it if it fights the plan.

Preparing for Installation Demo and Structural Work

The visible part of a remodel gets the attention. The hidden part decides whether the bathroom lasts.

Exposed pipes and wall framing inside a bathroom remodel area above white tiled shower walls

Demo is where the room's true condition shows up. Once old tile, drywall, and fixtures come out, you may find soft subfloor areas, old plumbing patches, framing modifications from previous remodels, or signs of long-term moisture behind the tub wall.

That is normal in older bathrooms. What matters is how those conditions get addressed.

Structural support comes first

A tub changes the load on the floor. The verified installation guidance states that proper tub installation requires verifying the floor can support a 40 to 50 psf live load and aligning 1/2-inch supply lines, and that projects handled by licensed plumbers have a 92% success rate compared to 65% for DIY attempts according to the NKBA data cited in this bath remodel checklist reference.

That gap matters. In practical terms, licensed trades are more likely to catch the issues that homeowners cannot see until later. Joist problems. Drain alignment. Overflow mistakes. Venting problems. Bad tub support.

What should happen before the tub goes in

A disciplined prep phase usually includes:

  • Controlled demolition: Remove finishes without damaging framing that needs to stay.
  • Subfloor inspection: Check for soft spots, swelling, and previous leak damage.
  • Framing review: Confirm the floor system and walls can support the selected tub and surround.
  • Plumbing rough-in: Set drain and supply locations to the actual tub spec, not a rough guess.
  • Electrical planning: Confirm lighting, fan, switches, and protection in wet areas.

Many bathrooms in Kent, Seattle, and Tacoma also need small corrections that were hidden by the old finish materials. A floor that is slightly out of plane can create tile problems later. A wall bow near the tub flange can complicate waterproofing. Those are easier to fix now than after finish materials arrive.

Waterproofing details start during rough work

Homeowners often think waterproofing begins with membrane application. It starts earlier than that. It starts when the framing is corrected, the substrate is flattened, and the plumbing penetrations are planned to avoid weak points in the wall system.

This short video is a good visual reminder of how much coordination happens before the room looks finished.

Why cutting corners here costs more later

The rough phase is where rushed projects create long-term headaches. A tub can look level and still be poorly supported. Tile can look straight and still be sitting over a bad substrate. Plumbing can function on day one and still be vulnerable to leaks if fittings, venting, or drain geometry are off.

A contractor should be able to explain what is being corrected, why it matters, and how it affects the next step. That level of clarity usually separates a durable bathroom remodel with tub from one that looks good only at handoff.

Mastering Waterproofing for a Lasting Renovation

In the Puget Sound, waterproofing is not a detail. It is the system that protects the entire remodel.

Bathrooms often fail without obvious signs. Water gets through a seam, around a valve, or behind the tub flange. Then it sits where nobody sees it. By the time the paint bubbles or the base feels soft, the damage has already spread.

Industry reports cited in this waterproofing discussion note that improper waterproofing accounts for 70% to 80% of long-term bathroom failures, 25% of remodel claims stem from moisture intrusion within 5 years, and remediation for resulting mold and rot can average $5,000 to $15,000 according to this contractor guidance on common bathroom remodel mistakes.

What proper waterproofing looks like

A durable tub surround is built in layers.

The substrate needs to be stable and flat. Cement backer board or an equivalent product is fastened securely, and seams are treated with alkali-resistant mesh tape.

After that, a liquid-applied waterproof membrane goes on in two coats. The verified methodology specifies a total dry film thickness of 30 to 40 mils and a 24 to 48 hour flood test to confirm there are no leaks before finishes cover the work.

The most vulnerable transitions also need special attention. Preformed waterproofing sheets such as Schluter-KERDI or a comparable product are used at the tub flange and at changes of plane so the system does not depend on caulk alone.

The common failures are predictable

These are the problems that show up again and again:

  • Skipped flood testing: Hidden leaks stay hidden until the room is complete.
  • Wrong sealants at the tub-to-wall joint: That shortcut often fails early.
  • Poor membrane coverage: Thin spots become weak points.
  • Bad flange integration: Water gets behind the wall assembly instead of returning to the tub.
  • Uneven substrate: Tile installation suffers and corners become harder to seal correctly.

For a plain-language outside reference on the basics, this article on waterproofing a bathroom is useful because it reinforces the idea that waterproofing is a layered process, not a single product.

Why this matters so much in Western Washington

A bathroom already deals with regular water exposure. In our climate, it also deals with long stretches of ambient moisture in the home. That combination punishes weak detailing.

This is one point where product selection and execution both matter. Some homeowners also want adjacent surfaces protected with coatings or sealants, and services such as construction waterproofing can be part of a broader moisture-management plan depending on the scope of the remodel.

Key takeaway: Tile is not waterproof. Grout is not waterproof. Caulk is not a waterproofing system. The protection comes from the assembly behind the finish.

When waterproofing is done well, nobody notices it. That is exactly the goal.

Finishing Touches Finishes Ventilation and Accessibility

The final stage is where the room starts to feel personal. This is also where a lot of remodels either become easy to live with or harder than they should be.

A modern minimalist bathroom featuring a floating vanity, double towel rails, and a walk-in glass shower enclosure.

A well-finished bathroom remodel with tub is not just attractive. It is easy to clean, easy to ventilate, and comfortable for the people using it now and later.

Finishes should support maintenance

Tile, paint, trim, and fixture choices all affect upkeep.

Large wall tile can reduce grout lines around the tub surround. Simple edge details are often easier to maintain than highly layered trim assemblies. Matte finishes can look great, but in some homes they show residue differently than brushed or polished surfaces.

Flooring deserves special attention. According to the National Kitchen & Bath Association's 2025 Bath Trends Report, nearly 40% of bathroom remodels include new flooring, while safety features like grab bars are a close second, as noted in this 2025 bathroom trends summary. That lines up with what many homeowners prioritize during real remodels. They want the room to hold up and they want it to feel safer.

Ventilation protects the finished work

A beautiful tub surround can still struggle if the room stays damp after every shower or bath.

Look for a ventilation plan that does more than check a code box. The fan should be properly sized for the room and ducted correctly. Placement matters too. In some bathrooms, poor fan placement leaves the tub zone slow to dry even if the fan itself is running.

A few practical finish decisions also support ventilation:

  • Use durable paint: Choose coatings suited for bathroom humidity on ceilings and non-tiled walls.
  • Keep air moving: Doors, transoms, and undercuts can affect how well moist air clears the room.
  • Avoid unnecessary ledges: Extra horizontal trim and deep niches collect moisture and soap film.

Accessibility works best when it is designed in early

Accessibility does not have to look clinical. In many cases, the smartest accessible features are subtle.

Consider options such as:

  • Grab bars integrated into the design: They can coordinate with the rest of the hardware.
  • Handheld shower sprayers: Helpful for bathing children, cleaning the tub, and future mobility needs.
  • Low-threshold entries where appropriate: Easier use now and later.
  • Comfortable clearances: Space around the tub and vanity matters as much as the fixtures themselves.

Tip: Even if you do not need accessibility upgrades today, add backing in the walls where future grab bars may go. It is far easier during a remodel than after tile is finished.

The strongest finish packages are the ones that connect design, cleaning, moisture control, and long-term usability. That is what makes the room feel settled instead of merely new.

Your Partner for a Stress-Free Remodel in Kent

A bathroom remodel with tub asks for more coordination than most homeowners expect. Layout, structure, plumbing, waterproofing, finishes, and ventilation all have to work together. If one part is weak, the rest of the room eventually feels it.

Budgeting is another place where local guidance matters. Online videos may show a tub remodel at around $13,800, but there is still a real lack of guidance on how costs vary by region. That is why working with a local contractor who understands the Puget Sound market matters for realistic planning and fewer surprises, as noted in this bathroom renovation video example.

For homeowners in Kent, Seattle, Tacoma, and the communities in between, the best remodels are usually the ones built around clear scope, careful moisture control, and honest decisions about how the room will be used.

If you are comparing options right now, start with the fundamentals. Confirm the layout. Choose the right tub for the household. Build the waterproofing correctly. Then finish the room in a way that supports daily life, not just the first impression.


If you are ready to plan a bathroom remodel with tub that fits your home and your budget, contact Wheeler Painting & Restoration Services. A clear site visit and detailed proposal can make the whole process easier, especially when your bathroom needs structural, waterproofing, or layout work common in Puget Sound homes.

Epoxy Deck Coating: Durable Protection for Washington Decks

A lot of decks in the Puget Sound region don’t fail all at once. They wear down in small, familiar ways. The boards stay damp longer than they should. Dark patches show up near rail posts. The walking surface starts to feel rough, tired, or a little soft in the spots that never seem to dry out. On commercial properties, the problem looks different but comes from the same place. Water gets into the surface, traffic grinds the finish down, and maintenance becomes a repeat job instead of a long-term fix.

That’s why epoxy deck coating gets so much attention from property owners who are tired of short-lived solutions. In a wet climate like Seattle, Kent, Tacoma, and the communities in between, the right coating isn’t just about appearance. It’s about keeping moisture out, reducing surface wear, and giving the deck a finish that can handle the environment.

Protecting Your Deck from the Puget Sound Weather

You see it all the time around Puget Sound. A deck looks fine at a glance in June, then by fall the coating is peeling near the stairs, the shaded corners stay slick, and the traffic path is worn down to bare material. The structure may still be serviceable, but the surface has already started letting water in.

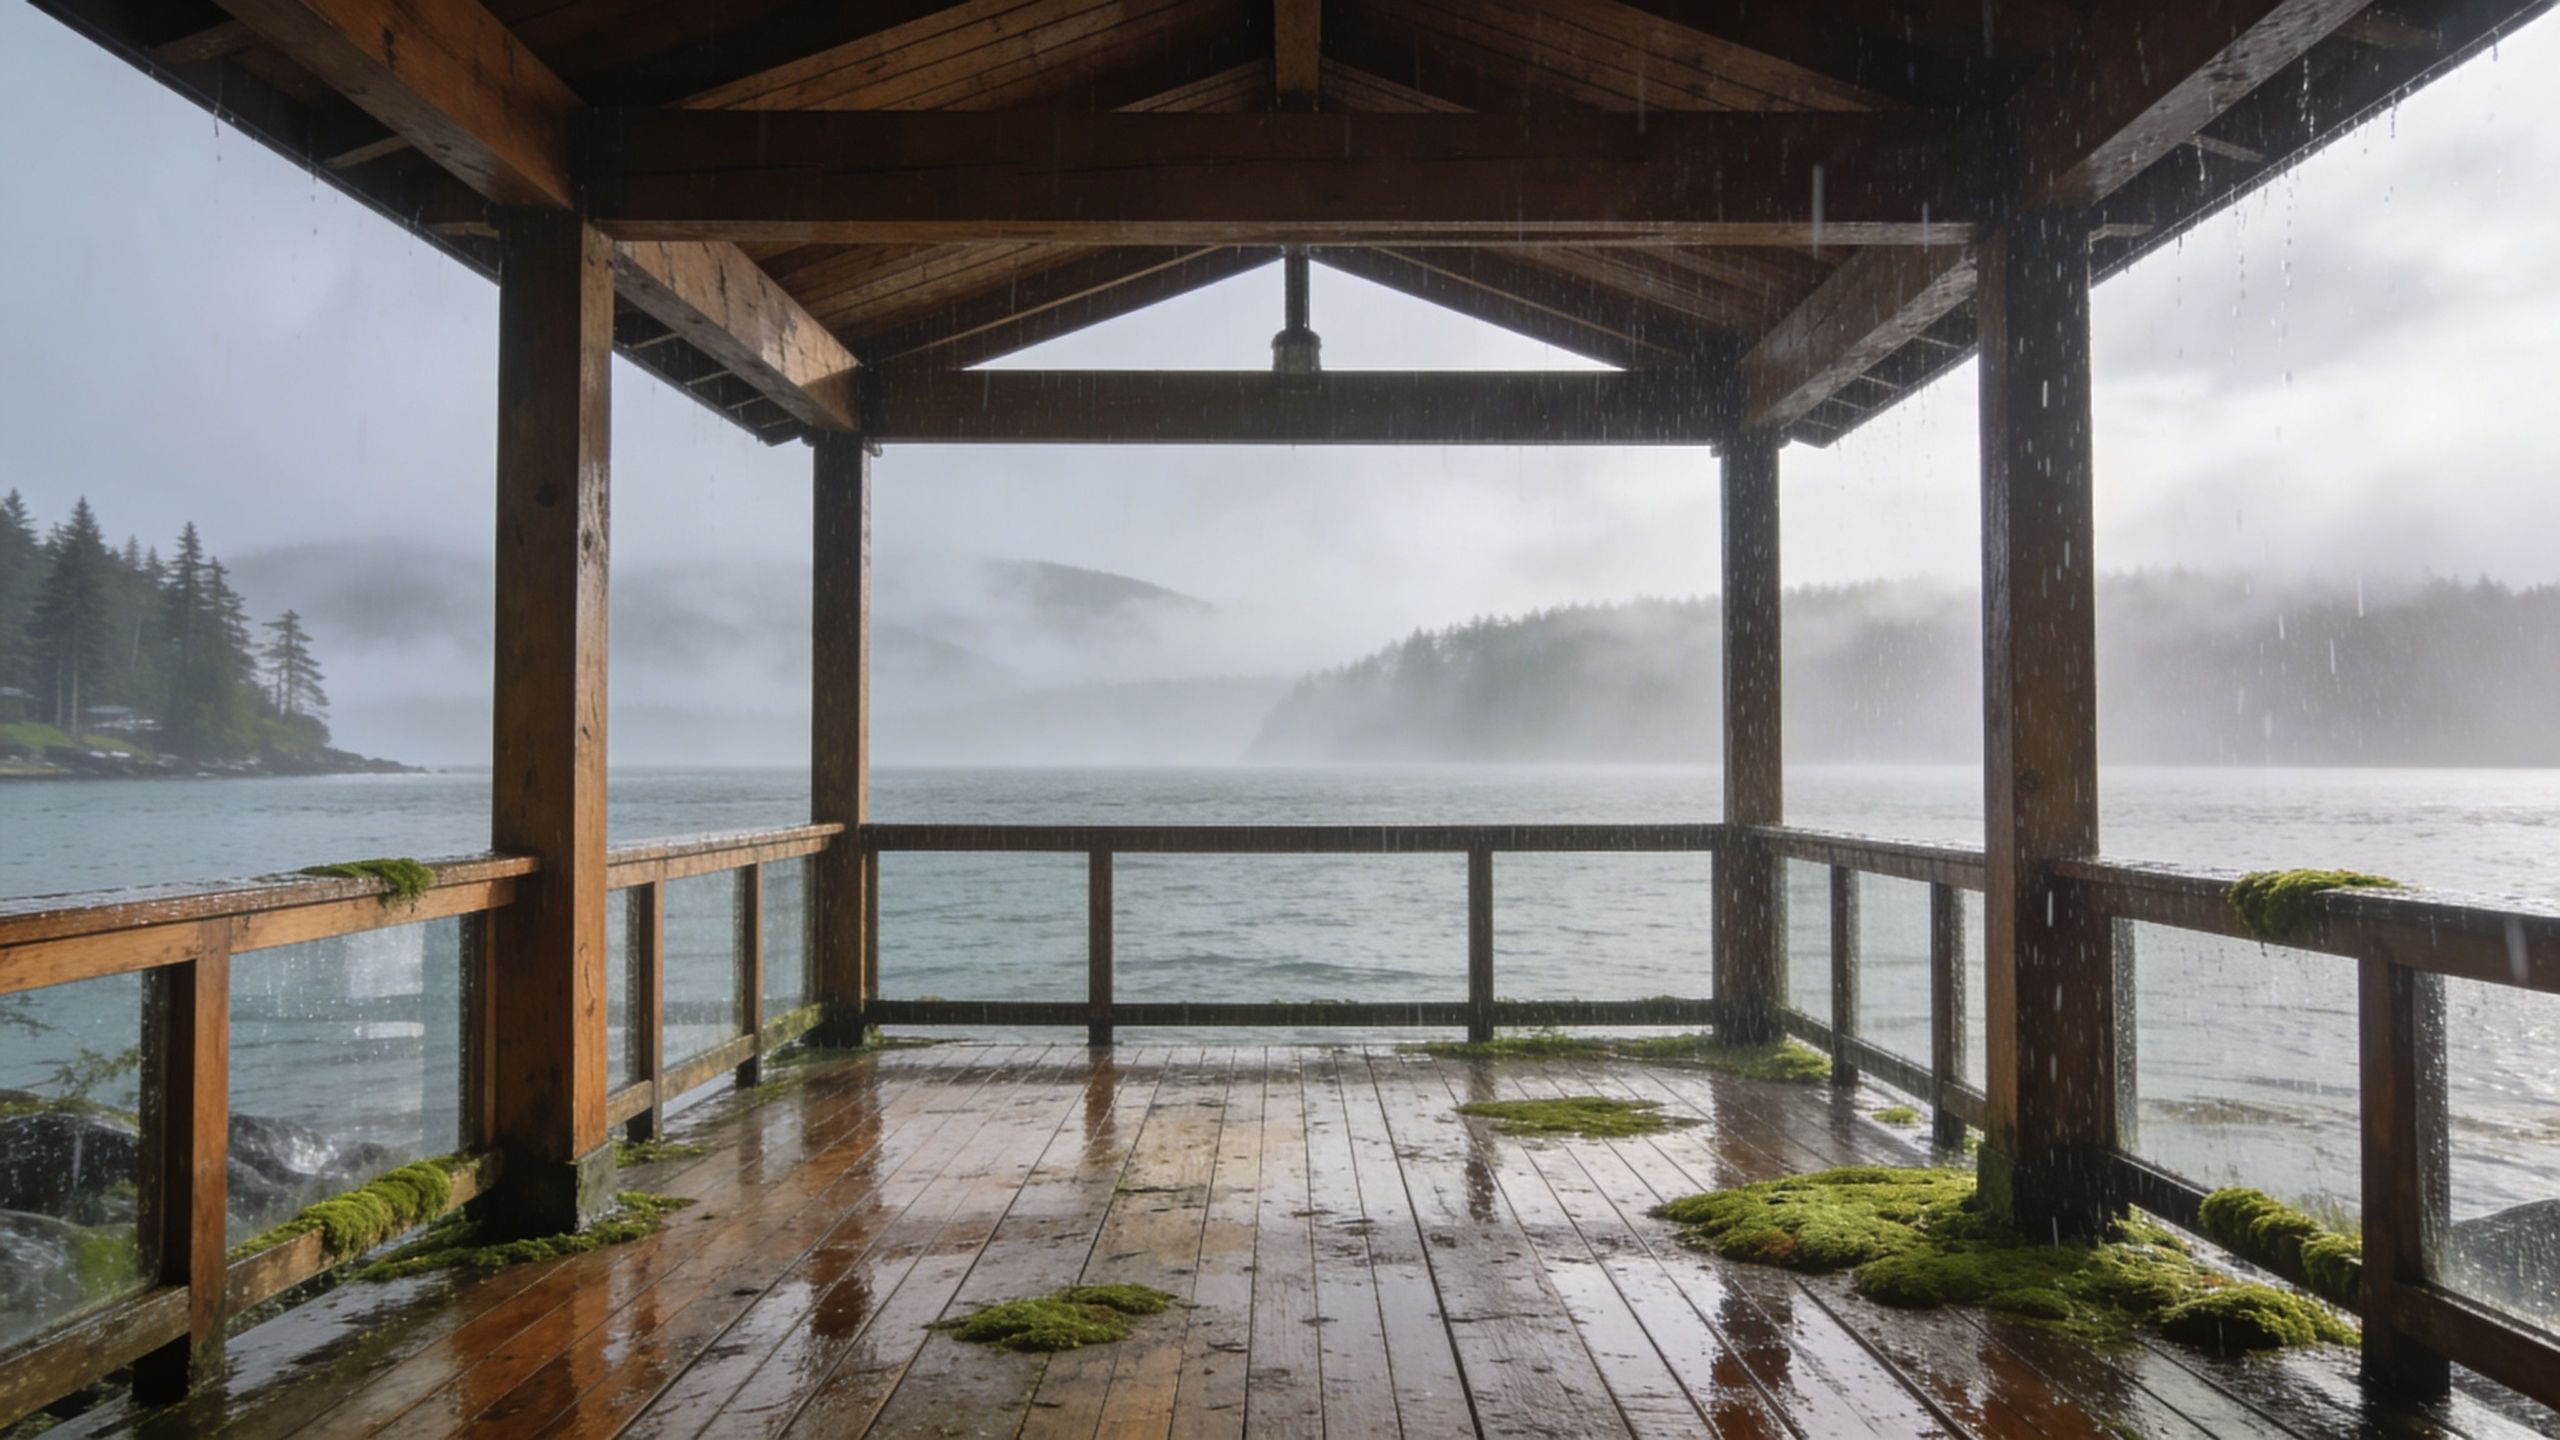
A wooden deck covered with moss overlooking a misty lake during a rainy day in the forest.

That cycle is common here because our weather keeps testing the same weak spots. Residential wood decks hold moisture around fasteners, rail bases, and board gaps. Commercial concrete walkways and balconies have a different build, but they face the same pressure. Water sits on the surface, foot traffic grinds contaminants into the finish, and short dry spells rarely give failing coatings much of a recovery window.

Locally, this means your deck needs a finish that is tougher than what looks good on day one.

Why weather beats ordinary deck finishes here

In Western Washington, surface failure usually comes from repeated exposure rather than one major storm. I tell property owners to watch for the conditions that keep a deck wet longer than expected and wear a coating down faster than the label suggests.

  • Long damp periods: Rain, fog, shade, and cool air slow drying and keep moisture at the surface.
  • Organic buildup: Moss, mildew, pollen, and dirt trap water against wood and concrete.
  • Seasonal movement: Wood swells and shrinks. Concrete can develop hairline cracking and moisture-related stress.
  • Daily wear: Foot traffic, furniture, planters, deliveries, and routine cleaning wear out weak films fast.

The practical question is not whether a coating can survive a nice week in August. The question is how it handles nine months of moisture, dirt, temperature swings, and regular use.

Property owners who are already looking at moisture control often benefit from understanding waterproofing in construction, because deck protection works best as part of the full water-management plan for the building.

A good coating helps. Surface prep matters just as much. On wood, trapped moisture, rot, or unstable boards can ruin a coating job no matter what product goes on top. On concrete, contamination, laitance, and hidden moisture vapor can cause bond failure if they are not addressed first. That is why product choice has to match the substrate and the site conditions, especially in the Puget Sound climate.

The same coating logic applies in harsher moisture environments. This overview of superior vessel protection shows how coating systems are selected when water exposure is constant and failure has real consequences.

What Exactly Is an Epoxy Deck Coating

An epoxy deck coating is a two-part system made from resin and hardener. Once those parts are mixed at the right ratio, they cure into a bonded film that is much harder and thicker than ordinary deck paint.

On the right surface, that film does more than add color. It creates a wear layer that helps resist water, abrasion, and chemical exposure, which is why epoxy shows up on garage floors, commercial walkways, mechanical rooms, and some deck assemblies that need more protection than a stain or sealer can provide.

In Puget Sound, that distinction matters.

A deck in this region may stay damp for long stretches, collect organic buildup, and see regular foot traffic even outside the dry season. For residential owners, the question is often whether epoxy makes sense on a wood deck, a plywood traffic coating assembly, or a concrete patio or balcony. For commercial properties, it usually comes down to whether the system can bond well, hold up to use, and stay serviceable under wet conditions.

How epoxy behaves on a deck surface

Once cured, epoxy forms a dense, tightly bonded coating over the substrate. On concrete, that can produce a hard, continuous surface with much better wear resistance than standard paint. On traffic-bearing deck systems, epoxy often serves as part of a larger build that can include primers, aggregate, intermediate coats, and a UV-stable topcoat.

That last point is where owners get tripped up. “Epoxy deck coating” is not one universal product. It is a category of materials used in different ways depending on whether the surface is wood, plywood, or concrete, and whether the goal is waterproofing, abrasion resistance, easier cleaning, or all three.

For a closer look at how these systems differ from standard coatings on hard surfaces, this guide on what epoxy floor coating is gives helpful background.

The main epoxy types you’ll hear about

The type of epoxy affects odor, cure speed, application limits, and long-term performance.

  • 100% solids epoxy
    These are thicker, higher-build products often used where film strength and wear resistance matter. Product specifications published by ArmorGarage’s epoxy floor specifications show that some professional-grade systems are formulated with zero VOC content and can deliver strong adhesion, impact resistance, and low abrasion loss. In deck work, that can be useful on concrete or protected traffic surfaces where a thicker build is part of the system.

  • Water-based epoxy
    These products usually have lower odor and can be easier to work with on occupied properties. Industry analysts cited earlier reported that water-based epoxy holds a large share of the market and continues to grow, which lines up with what contractors see in the field. Owners often ask for lower-odor options, especially in multifamily and commercial settings. The trade-off is that the right choice still depends on the substrate, moisture conditions, and expected wear.

  • Solvent-based epoxy
    These systems are still used, but they are less common where odor control, VOC restrictions, or occupied spaces are part of the job.

What epoxy is, and what it is not

Epoxy is strong, but it is not a cure-all. On exterior decks in Western Washington, epoxy usually performs best as part of a full coating system, not as a stand-alone promise. Many assemblies need a compatible primer and a UV-resistant topcoat because epoxy by itself can amber or chalk in sunlight.

Wood decks need extra caution. Natural wood moves with moisture and temperature swings, and rigid coatings do not always tolerate that movement well. Some wood or plywood deck assemblies can be coated successfully, but only if the structure is sound, the moisture content is acceptable, and the coating system is designed for that use. Concrete is often a better fit because it is more dimensionally stable, though it brings its own issues with moisture vapor and surface contamination.

Material choice always follows exposure. The same principle shows up in marine work, where constant water contact pushes owners to compare resin types carefully. This article on understanding boat epoxy options is a good example of how environment and use drive the selection.

The practical takeaway is simple. Epoxy deck coating means a high-performance resin system that can protect the right deck very well, but only when the product, the substrate, and the Puget Sound conditions are matched correctly.

Epoxy Coatings Compared to Traditional Deck Finishes

A deck owner usually isn’t choosing between “good” and “bad.” The choice is between finishes that solve different problems.

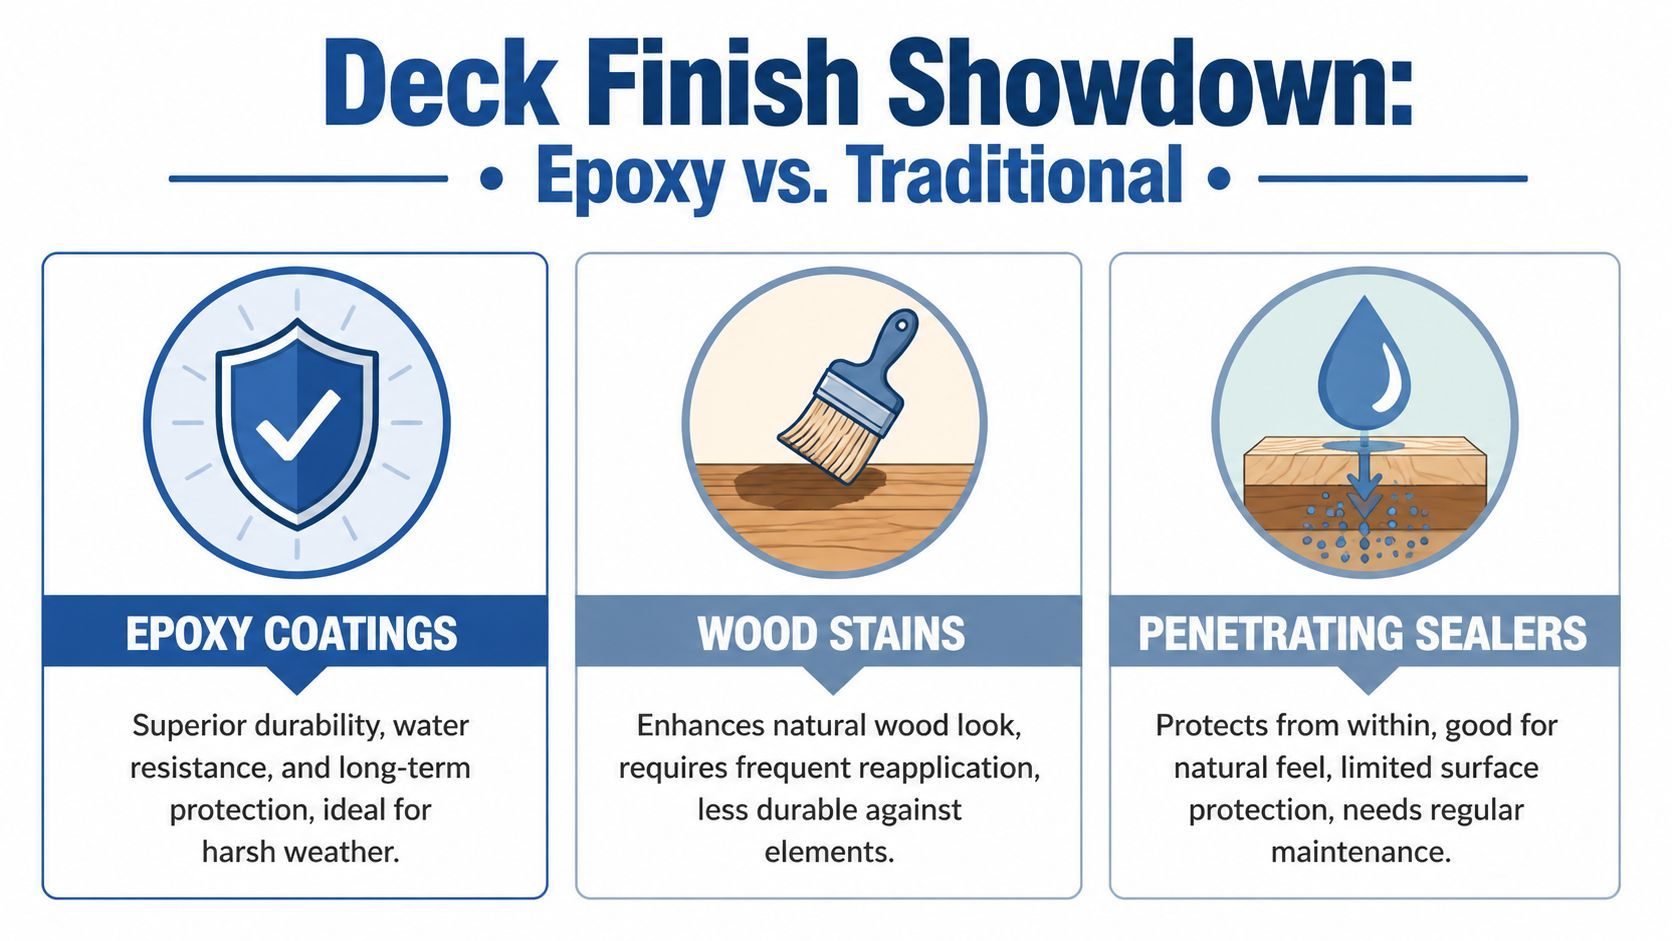
If you want to keep a natural wood look and don’t mind regular upkeep, a stain may be the right answer. If you want a breathable treatment that penetrates wood fibers, a sealer may fit. If you want a more substantial protective surface on the right substrate, epoxy moves into a different class.

A comparison chart showing benefits and features of epoxy deck coatings, wood stains, and penetrating sealers.

Where epoxy stands apart

In Western Washington, owners usually care about five things more than anything else:

  1. How well the finish handles water.
  2. How it stands up to foot traffic and furniture.
  3. Whether sunlight breaks it down.
  4. Whether the surface encourages mildew and grime.
  5. How often it needs attention.

Traditional stains do a good job of preserving the look of wood, but they don’t build much surface thickness. Penetrating sealers can help reduce water absorption, but they don’t create a wear layer. Standard deck paints can improve appearance quickly, yet they often struggle when the underlying surface stays damp or moves too much.

Epoxy can outperform those options when the substrate and system are a good match. On concrete decks, balconies, walkways, and similar surfaces, it provides a more substantial barrier and stronger wear surface. That’s one reason epoxy is central to the parking deck coatings market, which is valued at USD 2.49 billion in 2025 and projected to reach USD 4.00 billion by 2033 at a 6.1% CAGR according to Data Bridge Market Research on parking deck coatings. The same source notes water-based variants hold 45.70% market share in 2026, which shows how important lower-emission systems have become in this category.

Deck Coating Performance in Western Washington

Coating Type Waterproofing Durability (Foot Traffic) UV Resistance Lifespan (Typical) Best For
Epoxy Coating Strong surface barrier when properly installed High on suitable substrates Needs protective topcoat for exterior use Varies by exposure, substrate, and installation quality Concrete decks, balconies, commercial walking surfaces, select specialty systems
Wood Stain Moderate water repellency Lower surface wear protection Usually better for preserving wood appearance than building a thick film Requires regular maintenance Residential wood decks where natural grain matters
Penetrating Sealer Good absorption-based moisture resistance Limited surface wear protection Depends on product and sun exposure Requires routine reapplication Owners wanting a natural feel with less film build

The trade-offs owners should understand

Epoxy isn’t automatically the best answer for every deck.

  • For natural wood appearance: Stain usually wins.
  • For rigid surface protection on concrete: Epoxy is often stronger.
  • For wood that moves a lot: A rigid coating can become a liability if the system isn’t designed for that movement.
  • For long-term exterior appearance: Topcoat choice matters as much as the epoxy itself.

Owners who are deciding between a film-forming coating and a more traditional finish often benefit from reading about paint or stain first, because the wrong expectation causes a lot of disappointment. Some people want protection but still expect to see raw wood character. Others want a clean, uniform, easier-to-clean surface and don’t mind a more coated look.

A deck finish should match the deck’s job. A lakefront wood deck, an apartment balcony, and a loading-area walkway don’t need the same system.

The Professional Epoxy Application Process An Overview

Most epoxy failures start before the coating is opened. The weak point is usually preparation, not the material itself.

A professional crew doesn’t treat epoxy deck coating like ordinary repainting. The work begins with substrate evaluation, moisture concerns, existing coating compatibility, repair needs, and how the deck drains.

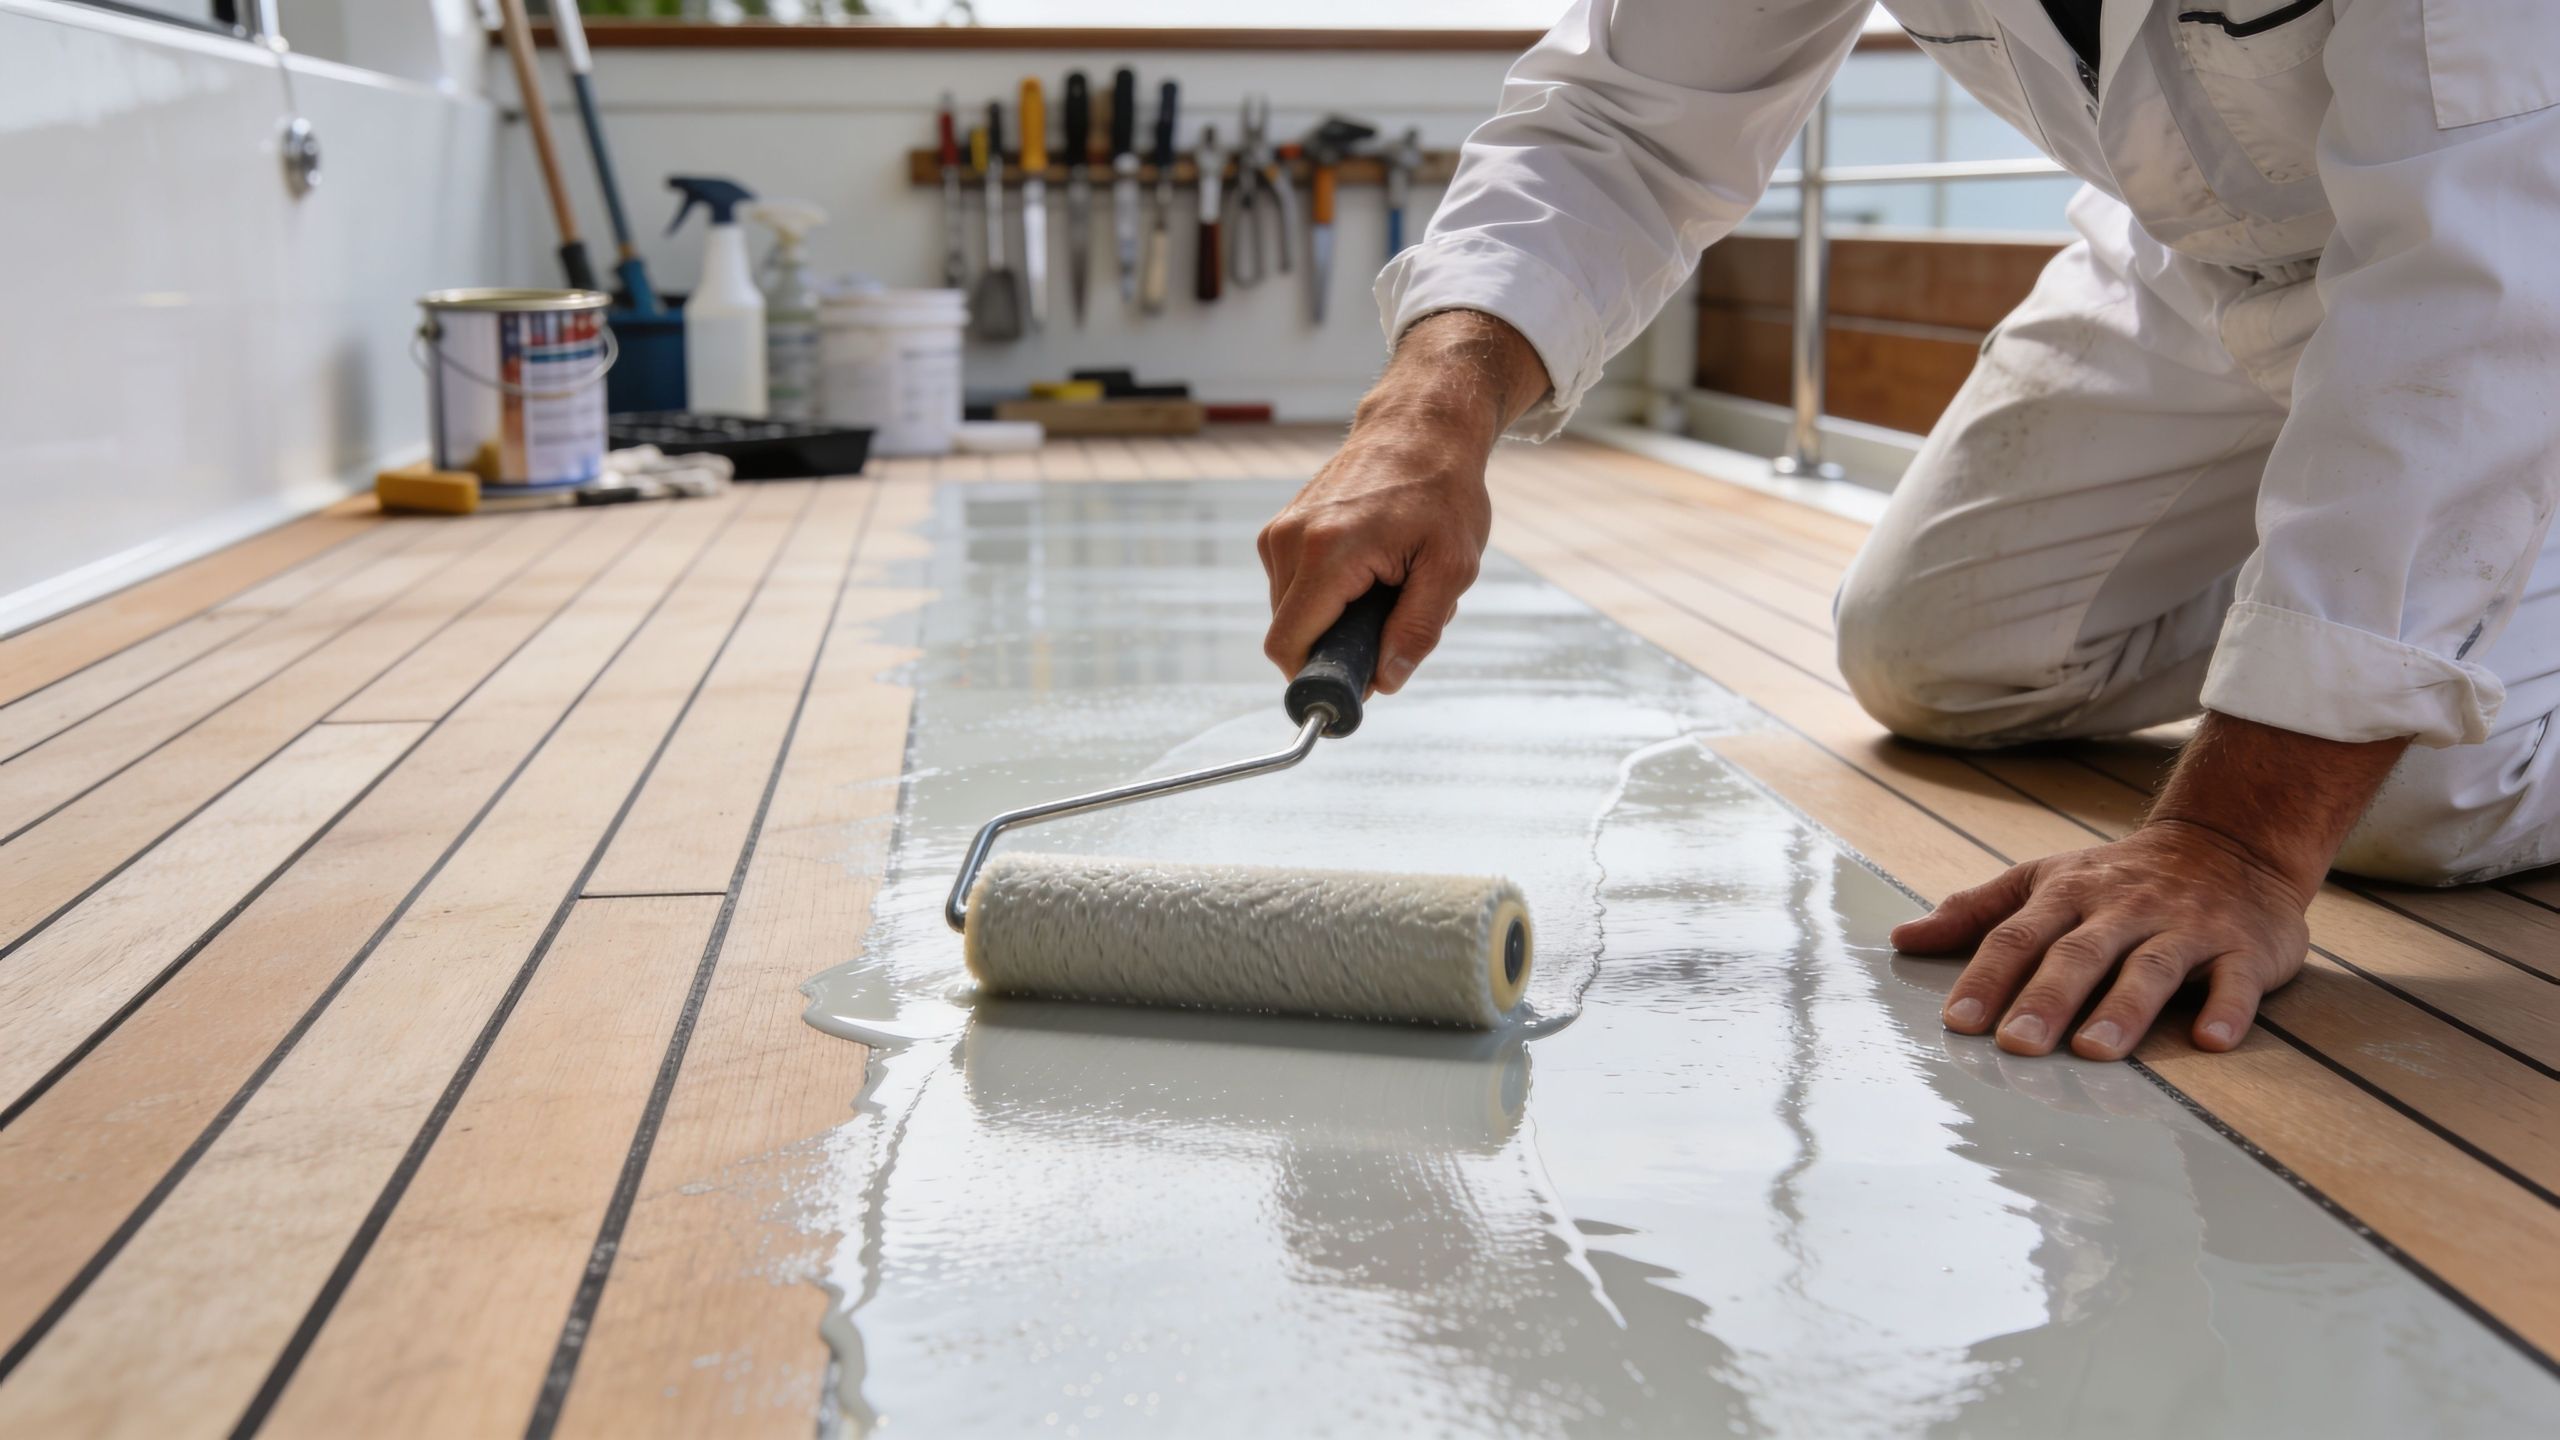
A professional painter applies a smooth coat of gray epoxy sealant to a wooden boat deck.

Inspection and preparation come first

Before coating starts, the deck has to be checked for issues that no coating can solve on its own. That includes rot, loose boards, failing concrete, active cracks, trapped moisture, and bad slope. If the substrate is wrong, the finish won’t save it.

Preparation often includes:

  • Cleaning the surface thoroughly: Dirt, chalking, mildew, oils, and old failing coatings have to go.
  • Removing weak material: Loose paint, delaminated layers, and contaminants break bond strength.
  • Repairing defects: Cracks, spalls, soft spots, and damaged transitions need attention first.
  • Creating the right profile: Concrete may need grinding or mechanical preparation. Wood may require sanding and selective repair.

Even cleaning methods need judgment. Composite and specialty surfaces can be damaged by aggressive washing, which is why a practical piece like how to power wash Trex decks is a good reminder that prep has to fit the material.

Mixing, placement, and timing matter

Epoxy is unforgiving about ratios and working time. Once mixed, the clock starts.

Verified product data for professional 100% solids systems shows coverage rates often run 200 to 300 square feet per gallon for primer and topcoat applications, while certain trowel or squeegee methods and roller methods change actual spread rates. The same product data notes cure times are highly temperature dependent. A system ready for light traffic in 24 hours at 75°F can take up to 96 hours at 50°F according to Life Specialty Coatings technical information. In the Puget Sound region, that scheduling difference is not minor. It affects occupancy planning, weather windows, and how long a deck stays out of service.

Field note: Cool weather doesn’t just slow curing. It changes jobsite planning, staging, and when people can safely get back onto the surface.

A short look at application in action helps show why technique matters:

The finish coat is only part of the system

A professional installation usually involves more than one layer. Depending on the system, there may be a primer, build coat, broadcast texture for slip resistance, and a protective topcoat. Each layer has a job.

Some layers improve adhesion. Some build film thickness. Some create texture. Some protect the epoxy from wear or sun exposure. If any layer is skipped without a good reason, the whole system can become the weak point.

Special Considerations for Puget Sound Decks

A deck that looks fine in July can stay damp for days by October. In the Puget Sound area, that long wet season changes what works and what fails. Coating choices here need to account for steady moisture, cool temperatures, shade, moss, and the stop-and-start drying cycle that hits both backyard decks and commercial walking surfaces.

Raindrops resting on a smooth, modern grey composite deck after a light summer rain shower outdoors.

Why wet regional conditions change the coating decision

In Western Washington, the main problem is rarely one big weather event. It is repeated moisture exposure. Water gets into small cracks, open grain, fastener penetrations, and weak coating edges. Then the surface stays cool and shaded long enough that it never fully dries before the next round of rain.

That pattern is hard on decks.

A properly selected coating system can limit water intrusion and make the surface easier to wash down, especially on concrete walk decks, exterior corridors, podium areas, and entries. Owners usually notice the appearance first. The bigger benefit is that a continuous film leaves fewer places for water and dirt to sit.

That said, epoxy is not automatically the right answer just because the climate is wet. Drainage still has to work. Low spots still need to be corrected. If water ponds on the surface, even a good coating system ends up under more stress than it should.

Wood decks need more caution than concrete decks

Many homeowners ask about epoxy after getting tired of re-staining a wood deck every few years. I understand the appeal, but wood creates real limits for rigid coatings.

Wood swells when it takes on moisture and shrinks as it dries. It also flexes under foot traffic and moves at joints, seams, and board ends. Standard epoxy handles bond and wear well, but it does not stretch much. On an older residential deck, that mismatch often leads to cracking, edge failure, or peeling around board movement.

That is why wood decks need an honest inspection before anyone talks about coatings. I look at moisture exposure, board condition, fastener movement, joint spacing, cupping, and how much shade the deck gets. If the framing and surface boards are moving too much, a flexible exterior system or a traditional finish is usually the safer recommendation.

A few practical filters help:

  • Weathered or unstable boards usually do not hold a rigid film for long.
  • Seasonal joint movement can split the coating or break the bond line.
  • Visible wood grain goals do not match an epoxy build.
  • Covered or more controlled deck areas may allow specialty systems, but only after careful prep and realistic expectations.

For many Puget Sound wood decks, restraint is part of good advice. The right call is the one that fits the substrate, not the one that sounds toughest on paper.

Concrete decks are usually the better epoxy candidate

Concrete is generally a stronger fit for epoxy, especially on balconies, breezeways, podium decks, exterior stairs, service areas, and commercial entries. Those surfaces are more dimensionally stable than wood, and they benefit from epoxy’s adhesion, wear resistance, and easy-to-clean finish.

This matters on commercial properties in our area. Wet shoes, grit, planters, de-icing residue, and regular foot traffic wear down unprotected concrete fast. A properly built coating system helps protect the surface while giving owners a cleaner, more uniform walking area.

Common good candidates include:

  • Apartment and condo balconies
  • Exterior corridors and breezeways
  • Retail and office entry platforms
  • Utility and service walkways
  • Some parking-adjacent concrete surfaces

Even on concrete, the details decide the outcome. Cracks need to be evaluated, not just covered. Expansion and control joints need the right treatment. Slip resistance matters more here than it does in drier climates, because a smooth exterior finish can become risky during long wet stretches. Sun exposure matters too, especially on decks that get direct afternoon light after months of cloud cover. A system that works well in Tacoma or Seattle often includes texture and a protective topcoat chosen for exterior use, not just a basic epoxy layer.

Expected Lifespan Cost and Maintenance

Property owners usually ask three direct questions. How long will it last, what will it cost, and what do I need to do after it’s installed.

The honest answer is that lifespan and cost vary too much by substrate, prep needs, repair scope, texture requirements, and topcoat selection to give one universal number without seeing the deck. A simple concrete balcony in good shape is not priced or maintained like a weathered exterior platform with repairs, drainage issues, and coating removal.

What affects service life most

The coating itself matters, but these factors usually matter more:

  • Surface preparation quality: Poor prep shortens life fast.
  • Substrate condition: Coating over weak material doesn’t produce a durable result.
  • Sun exposure: Exterior UV breaks down unprotected epoxy.
  • Traffic and use: Chairs, planters, carts, grit, and cleaning methods all affect wear.
  • Water management: Ponding water and bad drainage stress any coating system.

One important long-term consideration: Standard epoxy coatings are not UV-stable and require a polyurethane or polyaspartic topcoat to help prevent yellowing and chalking in exterior use, as explained in this guide to deck coating options and topcoat requirements. If someone prices an exterior epoxy deck coating without talking seriously about UV protection, that’s a warning sign.

Maintenance is simple, but it isn’t optional

Epoxy is lower maintenance than many traditional finishes when it’s installed correctly, but it’s not maintenance-free.

A practical care plan usually includes:

  • Regular cleaning: Remove grit, wet debris, leaves, and dirt before they grind into the finish.
  • Fast response to damage: Address chips, cuts, or bond loss before water gets underneath.
  • Drainage checks: Keep scuppers, drains, and edges clear so water doesn’t sit.
  • Protective habits: Use care with heavy furniture, sharp metal edges, and dragged equipment.

A deck coating lasts longer when owners treat it like a protective system, not a permanent surface that can be ignored.

When recoating becomes the smart move

Owners don’t need to wait for full failure. A review is usually worth scheduling when you notice:

  • surface chalking or fading,
  • worn traffic paths,
  • localized peeling,
  • cracking around details,
  • persistent staining that no longer cleans up well,
  • or a topcoat that has clearly thinned in exposed areas.

On commercial properties, early maintenance is often cheaper and less disruptive than waiting for larger breakdown. On residential decks, catching wear early helps prevent moisture from turning a coating issue into a substrate repair issue.

Why Choose Wheeler Painting for Your Deck Project

Epoxy deck coating only performs as well as the planning behind it. That’s why local experience matters so much. A contractor working in Seattle, Kent, Tacoma, and the surrounding communities has to understand more than product labels. They need to know how damp weather affects scheduling, how different substrates behave after a long rainy season, and when a deck should be repaired, coated, or handled with a different system entirely.

Wheeler Painting & Restoration Services has served the Puget Sound and Western Washington region since 1991, with residential and commercial experience that fits both homeowners and facility managers. That range matters. A residential wood deck, a commercial walkway, and a tenant improvement surface each need a different approach, even when people use the same general term for the job.

For property owners looking for a dependable residential contractor near me, or managers searching for commercial painting services near me and practical specialty coating support, the value is having one accountable team that can evaluate the substrate, explain the trade-offs clearly, and carry the project through with discipline. That’s especially useful for smaller to mid-size tenant improvement work, facility maintenance, and deck-related protection where communication and follow-through matter just as much as the finish itself.

Frequently Asked Questions About Epoxy Deck Coatings

Is an epoxy deck coating slippery when wet

It can be if the system is installed as a smooth finish without texture. That’s why professionals often build in slip resistance with broadcast aggregate or a textured topcoat. The right texture depends on whether the deck is residential, commercial, barefoot traffic, or heavy-use pedestrian traffic.

Can epoxy be applied to any wood deck

No. That’s one of the biggest misconceptions. Wood movement, moisture content, board condition, and joint behavior all matter. Some wood decks are poor candidates for rigid epoxy systems, and a responsible contractor should say so.

Why do DIY epoxy deck projects fail so often

Most failures come from bad preparation, incorrect mixing, moisture issues, wrong weather conditions, or choosing a system that doesn’t fit the substrate. Epoxy is less forgiving than ordinary paint. Small mistakes during prep or application often turn into peeling, bubbling, or uneven cure.

How soon can the deck be used again

That depends on the system and temperature. Verified technical guidance shows some professional 100% solids systems can be ready for light traffic in about a day at warmer temperatures, while cooler conditions can extend that timeline significantly. In Western Washington, cure planning should always be based on actual site conditions, not best-case assumptions.

Does exterior epoxy need another coating over it

Yes, in many cases. Exterior epoxy usually needs a UV-stable topcoat to help protect against yellowing and chalking. That topcoat is part of the long-term system, not an optional extra.


If your deck, balcony, walkway, or exterior concrete surface needs a coating system that makes sense for Western Washington weather, Wheeler Painting & Restoration Services can help you evaluate the substrate, explain the trade-offs, and recommend a practical path forward. Whether you’re a homeowner planning an upgrade or a property manager coordinating maintenance or tenant improvement work, reach out to schedule a conversation about the right deck protection for your Seattle, Kent, or Tacoma area property.