Tag Archive for: bathroom renovation

Transform Your Bathroom with a One Day Bath Remodel

Imagine this: you leave for work in the morning with a drab, dated bathroom and come home that evening to a sparkling new shower. It sounds like a dream, but for homeowners and property owners across the Puget Sound, it's the reality of a one-day bath remodel—a smart, efficient alternative to a traditional renovation that can drag on for weeks.

The Secret to a New Bathroom in Just One Day
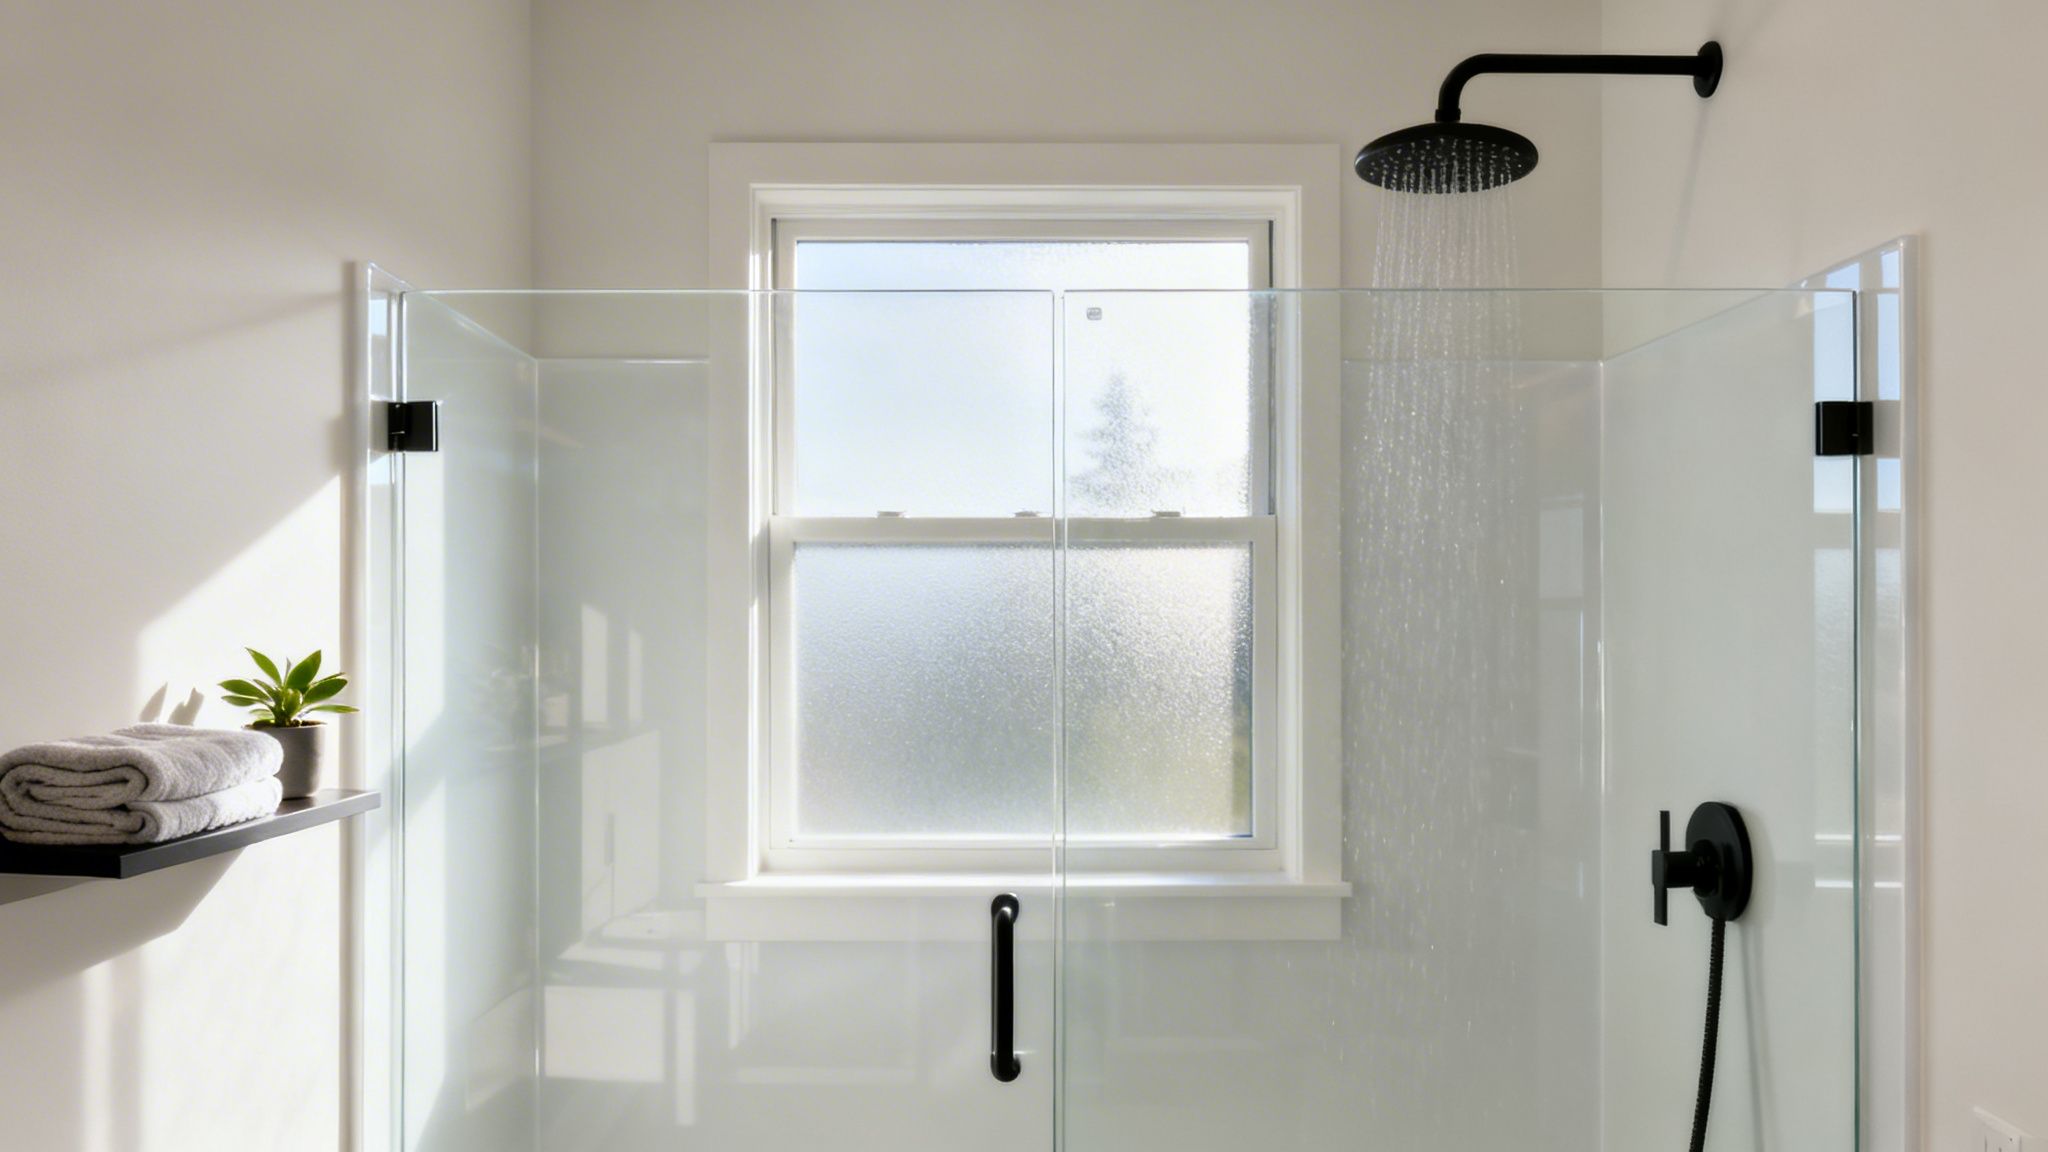
A modern walk-in shower with a clear glass enclosure, black fixtures, and a frosted window.

So, how is this even possible? The magic isn't in cutting corners; it's in a focused, professional approach. Instead of a full gut job that tears your bathroom down to the studs, a one-day remodel concentrates exclusively on the “wet area”—your tub, shower, and the walls around them. This delivers the biggest visual impact without the weeks of dust, noise, and disruption.

It’s a game-changer for anyone in Seattle, Kent, or Tacoma who can’t afford to have their primary bathroom out of commission. The process usually involves one of these core updates:

  • Bathtub or Shower Replacement: A tired, cracked unit is swapped out for a pristine, high-quality acrylic model.
  • Tub-to-Shower Conversions: That old, high-sided tub you never use becomes a safe, modern, and accessible walk-in shower—a popular residential remodeling choice.
  • Durable Wall Surrounds: Old tile and crumbling grout are covered with beautiful, non-porous wall panels that are a breeze to clean.

The key is that everything is measured and custom-fabricated ahead of time. When our installation team arrives at your home, it’s all about precise, clean fitting, not weeks of demolition.

Fast, Focused, and Surprisingly Affordable

This targeted strategy also makes a one-day remodel incredibly cost-effective. A traditional, full-scale bathroom remodel can easily top $12,000, but a one-day project typically falls in the $7,500 to $22,500 range. You save big because the existing layout, plumbing, and electrical stay put.

By focusing on the part of your bathroom that sees the most wear and tear, you get a beautiful and highly functional new space with almost no interruption to your life. Take a look at how one-day remodel costs compare to traditional projects, and you'll see why it's such a popular choice for homeowners who want fast results without sacrificing quality—a solution we're proud to offer at Wheeler Painting.

How Can a Bathroom Be Transformed So Quickly?

It seems almost unbelievable, doesn't it? A complete bathroom transformation in a single day sounds more like a TV show gimmick than reality. But the secret isn't magic—it's all about meticulous preparation and focusing on what matters most.

The term "one-day" really refers to the on-site installation. The real work actually happens weeks before our team ever sets foot in your Kent or Tacoma home. It all starts when we take incredibly precise, digital measurements of your current bathtub or shower space. From there, we custom-fabricate your new acrylic bath system off-site, built to fit your bathroom down to the millimeter. It’s like having a bespoke suit made, but for your bathroom; it’s designed to slide perfectly into place over your existing footprint.

Smart Systems for Rapid Results

When installation day finally arrives, our technicians aren't showing up with a sledgehammer and a dumpster. There's no chaotic, dusty demolition. Instead, they're installing a finished product that was built just for you. This approach is what allows for such a stunning change without the headache of moving plumbing, re-routing pipes, or tearing down walls.

This is how we deliver on the one-day promise. We concentrate all our effort on the "wet area"—the tub and shower surround, which is the most used and most impactful part of the bathroom. It’s a method that has become a lifesaver for Puget Sound families who need a functional, beautiful upgrade without having their home turned into a construction zone for weeks on end. You can get a closer look at how we tackle these projects with our bathtub and shower conversions.

The One-Day Advantage: Cost and Efficiency

A traditional, midrange bathroom remodel can easily run you $26,000 or more. One-day remodels, on the other hand, offer a much more accessible price point. Because we're using pre-fabricated systems and a streamlined process, most projects land somewhere between $6,000 and $15,000. Our skilled teams can have the entire job done in just 8-10 hours because every component is designed for efficiency.

Part of that speed also comes from making smart choices on materials that work well together. For instance, knowing what flooring is best for bathroom remodels in our damp Puget Sound climate can prevent delays and future issues, making the whole process smoother.

The key is focusing on high-impact changes without messing with the bathroom's existing layout. This is why 75% of one-day projects stay under $15,000, putting a modern, worry-free bathroom within reach for more homeowners.

One Day Remodel vs. Full Renovation

So, you’re ready to update your bathroom, but you’re stuck on a big question: should you go for a quick one-day update or a full-blown, down-to-the-studs renovation? It’s a common dilemma for homeowners around Seattle, and honestly, the right answer really depends on what you’re trying to achieve.

A one day bath remodel is all about speed and precision. It’s the perfect choice if you're dealing with a specific problem—like a grimy, outdated shower or a cracked tub that’s seen better days. It's also a fantastic way to improve safety with a tub-to-shower conversion or add a quick burst of value to your home before selling. The entire focus is on the "wet area," which is where you get the most bang for your buck.

On the other hand, a full renovation is your ticket to total creative control. This is the path you take when you’re dreaming of a brand-new layout, moving plumbing, or creating a custom spa-like retreat from scratch. It’s a much bigger undertaking, but the payoff is a space that is completely, uniquely yours.

Scope and Timeline

The biggest difference between the two really comes down to scope. A one-day project is surgical, while a full renovation is an all-encompassing overhaul.

  • One Day Remodel: All the work happens right in your tub or shower space. We’re talking about replacing the old unit, fitting a new acrylic surround, and installing fresh fixtures. Because the plumbing and electrical stay put, the whole job can be done in just a matter of hours, not weeks.

  • Full Renovation: This means tearing everything out. We’re talking new floors, vanity, toilet, lighting—maybe even taking out a wall. A project of this scale requires coordinating plumbers, electricians, and tile setters, which is why it often stretches into several weeks or even months.

This handy chart can help you see which direction makes the most sense for your project.
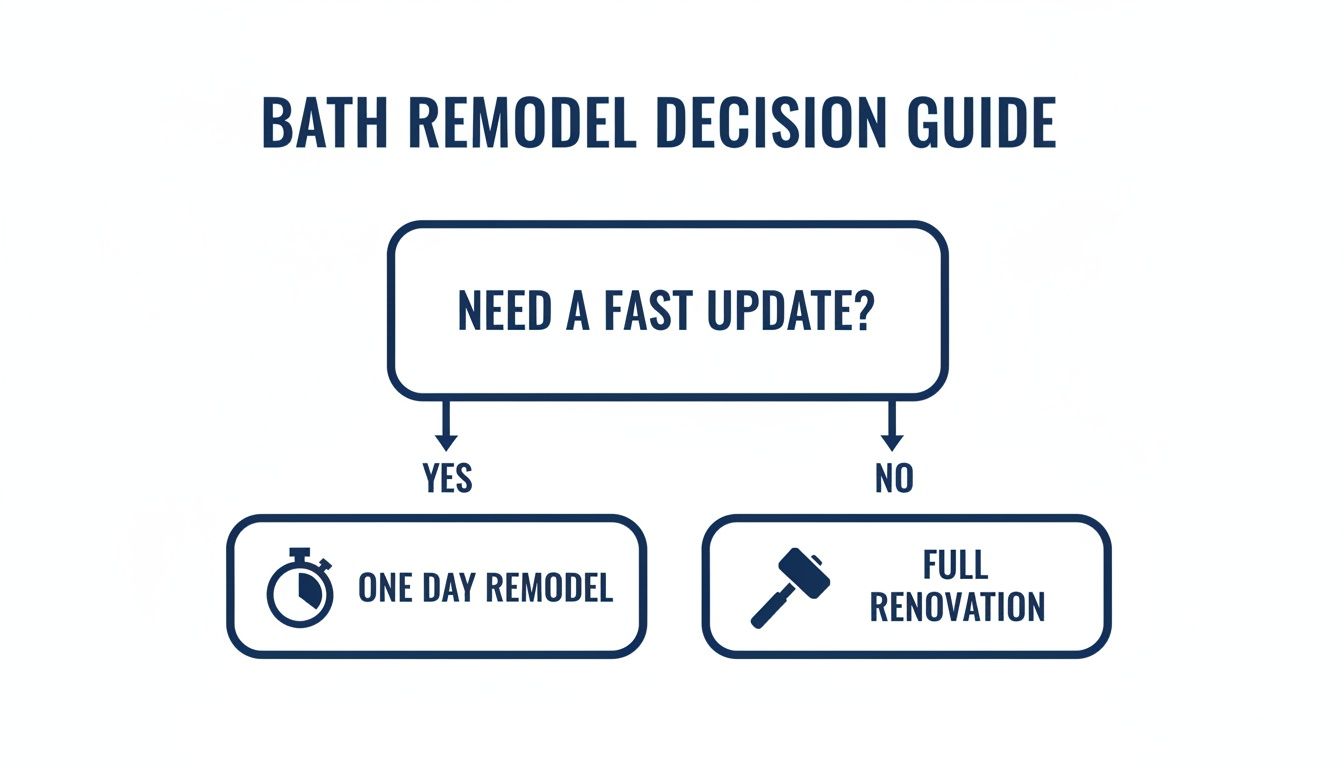
A bath remodel decision guide flowchart comparing one day updates vs. full renovations.

As you can see, if getting it done fast and without a major disruption is your main goal, a one-day remodel is the clear winner.

To make the comparison even clearer, here’s a side-by-side look at the key differences.

One Day Remodel vs. Full Bathroom Renovation

Feature One Day Remodel Full Renovation
Timeline Typically 8-12 hours 3-8 weeks or more
Scope Focused on the wet area (tub/shower) Entire bathroom, including layout changes
Disruption Minimal; bathroom is usable same day Major; bathroom is unusable for weeks
Cost Significantly lower Substantially higher
Customization Limited to pre-selected styles & colors Nearly unlimited design freedom
Best For Fixing specific issues, safety updates, quick cosmetic lifts Complete redesign, changing layouts, high-end custom finishes

Ultimately, choosing the right path comes down to balancing your immediate needs with your long-term vision for the space.

Budget and Customization

Your budget and how much you want to personalize the space are, of course, huge factors. A one day bath remodel is much friendlier on the wallet, mainly because you're skipping the massive labor costs of demolition and re-routing plumbing. You get a clean, modern look without the sticker shock of a complete tear-out.

A full renovation gives you endless opportunities for customization—from intricate tile patterns to that unique vanity you saw online—but that level of freedom comes with a much higher price tag and a longer wait. A one-day project streamlines the process with a carefully chosen selection of high-quality, durable materials that are designed to look great and be installed efficiently.

At the end of the day, there’s no single "best" choice—only the best choice for you. As a trusted local contractor who has served homeowners and businesses across Kent, Tacoma, and the Puget Sound for years, we at Wheeler Painting have seen it all. We can walk you through the pros and cons of each approach to make sure the final result perfectly matches your goals, budget, and timeline.

Understanding Your One-Day Remodel Costs in 2026

So, what does a one-day bath remodel actually cost here in the Seattle-Tacoma area? It’s one of the first questions we get from local property owners, and for good reason. While the speed and convenience are huge draws, the affordability is what often seals the deal for homeowners.

Of course, there’s no single price tag. The final cost really depends on what you want to accomplish and the materials you choose. Your decisions are what shape the final bill.

What Influences the Final Price

The biggest factor, hands down, is the scope of the project. Are we talking about a clean, simple acrylic tub liner that fits right over your old, worn-out tub? Or are you dreaming of a full tub-to-shower conversion? That conversion involves more work, so naturally, it will sit at the higher end of the price range.

From there, the specific materials and features you select will layer into the cost. Think of it like customizing a new car—the base model is great, but the premium upgrades will add up.

  • High-end fixtures like a luxurious rain showerhead or a specific designer faucet.
  • Accessibility features that add safety and comfort, such as strategically placed grab bars or a built-in shower seat.
  • Glass door options, which can range from a standard sliding door to a show-stopping, heavy frameless glass enclosure.

Here's a number that really highlights the value: one-day bath remodels save homeowners money primarily by keeping the existing plumbing right where it is. That single decision avoids a massive amount of labor and materials, slashing project costs by 25-35% on average compared to a tear-out renovation.

Local Costs and How We Save You Money

In the Puget Sound market, we're fortunate to have competitive pricing compared to other big coastal cities. A full, down-to-the-studs bathroom renovation can easily run into the tens of thousands. A one-day remodel delivers a stunning new look for a fraction of that by being smarter and more efficient. We dive deeper into this topic in our guide to affordable bathroom remodel options.

At Wheeler Painting, our entire process was designed to give you that value without ever compromising on quality. We custom-fabricate your new tub or shower system in our workshop before we ever set foot in your home.

This simple step is a game-changer. It dramatically cuts down on the expensive on-site labor hours. Our team arrives with everything they need, ready to install quickly and with minimal disruption. We get in, get the job done beautifully, and get out—passing those efficiency savings directly on to you. It's how we deliver exceptional results for homeowners in Kent, Tacoma, and across the region.

How to Prepare for a Flawless Installation Day
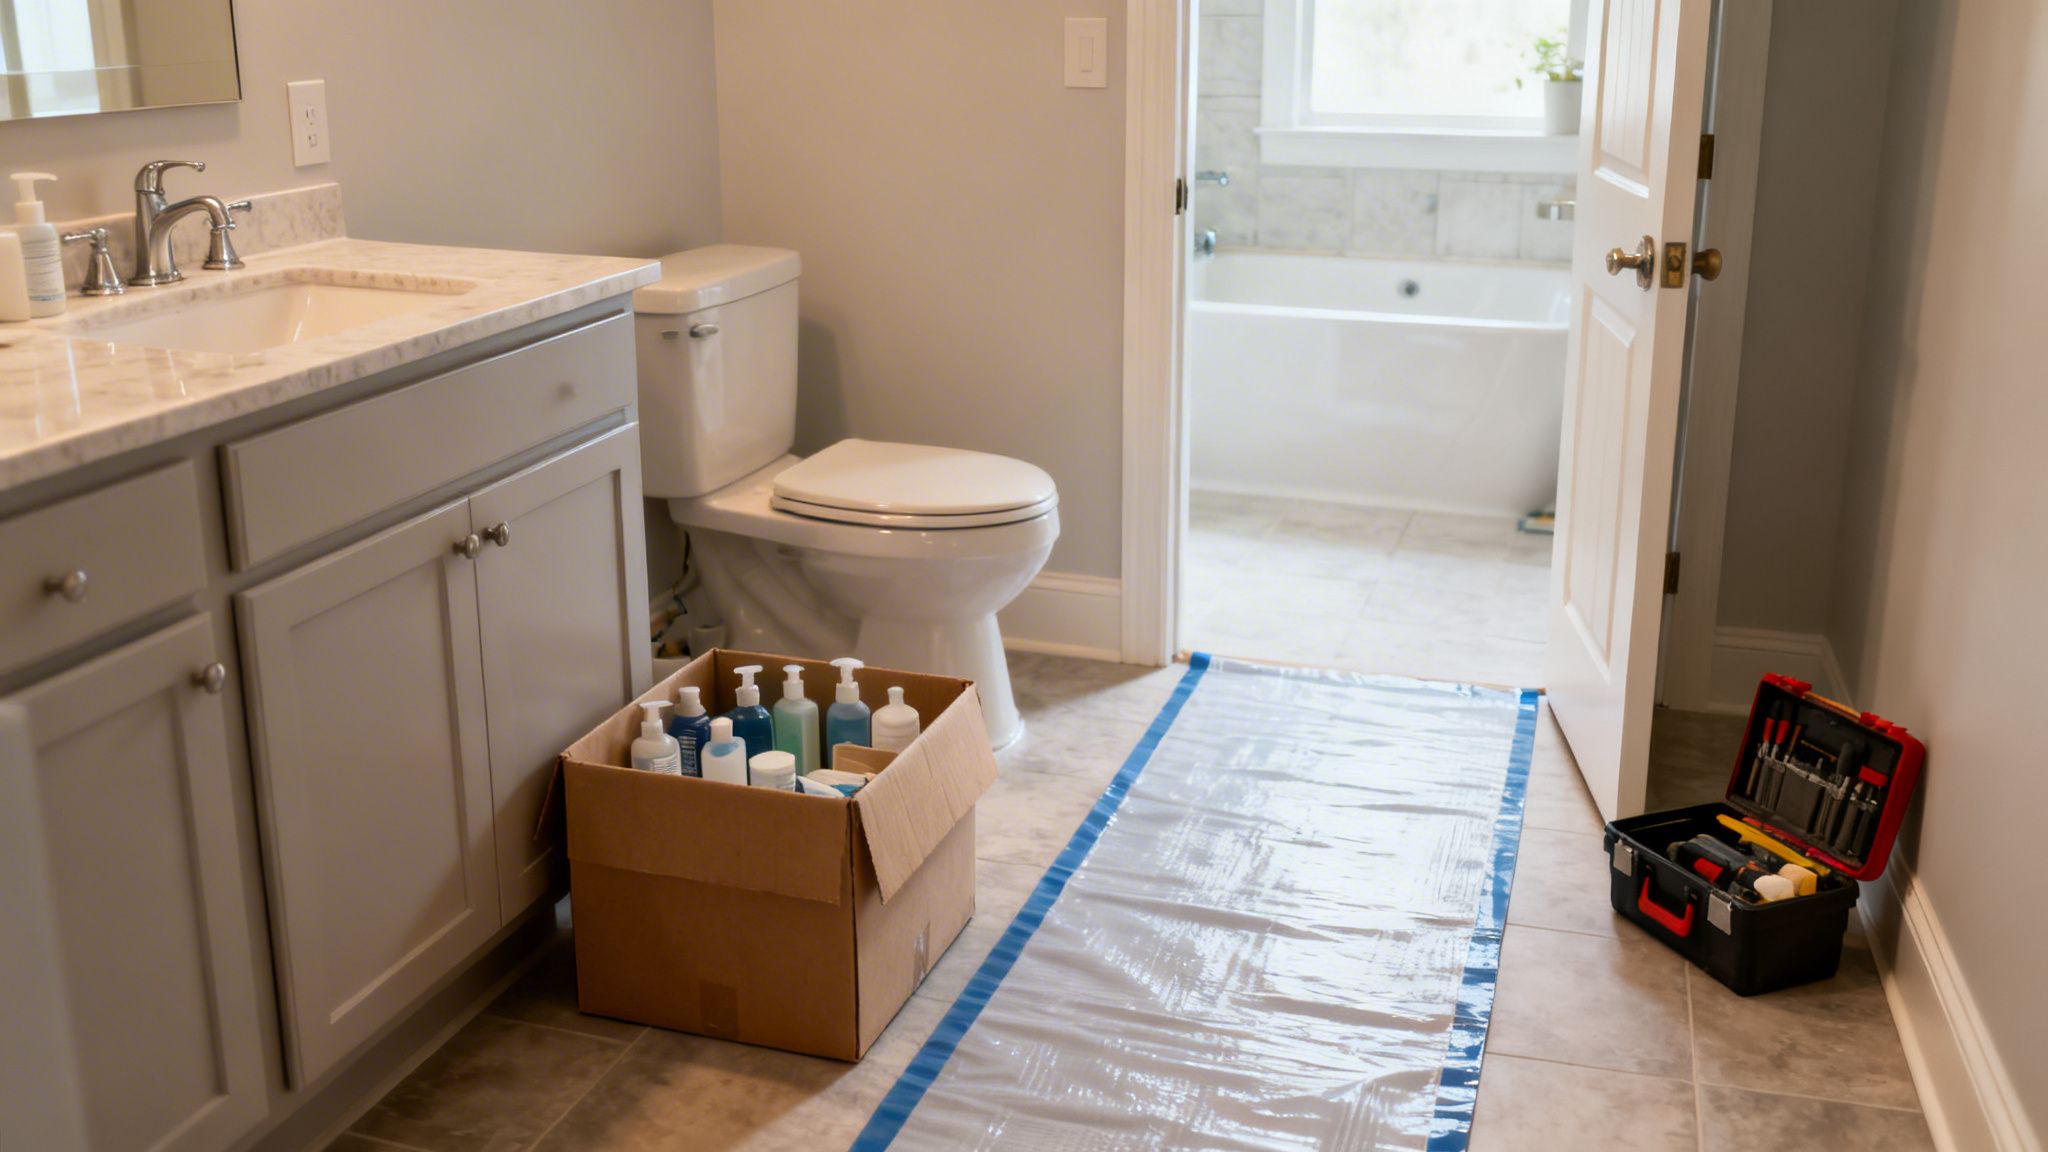
A bathroom with a vanity, toilet, and tools, showing a clear protective floor sheet for a remodel.

The beauty of a one-day bath remodel is how little it disrupts your life. But a small amount of prep work from you can make a huge difference, helping our installation day go off without a hitch.

Think of it like clearing the runway before a plane takes off. By taking a few quick steps before we arrive, you ensure our team can get straight to work safely and efficiently. The result? You get to enjoy your beautiful new bathroom even faster.

Your Pre-Installation Checklist

To set us up for success, we suggest running through this simple checklist the night before we're scheduled to arrive.

  • Completely Clear the Bathroom: Please remove everything from the countertops, shower, tub surround, and floor. This includes shampoo, soap, toothbrushes, towels, bathmats, and any decorations. An empty bathroom protects your belongings and gives our crew the access they need.

  • Create a Clear Path: Our installers will be carrying large, custom panels and all their tools from our truck to your bathroom. Make sure there’s a clear walkway from the entrance of your home to the bathroom door. This means moving things like shoes, area rugs, or small furniture that could be tripping hazards.

  • Plan for Pets and Children: The safety of your family is paramount. The work can get a bit noisy, and we'll be moving around with tools and materials. It’s always best to keep children and pets safely away from the work area throughout the day.

Taking care of these few things allows our crew to put 100% of their focus on the craftsmanship, protecting your home and delivering the quality finish Wheeler Painting is known for.

Handling Debris and Clean-Up

People often ask about the mess. And it's a fair question! Removing an old tub or shower surround definitely creates some waste, so it's smart to think about managing construction debris.

The good news? We handle all of it. We pride ourselves on leaving your home as clean as we found it, and that includes hauling away and disposing of all project-related debris. You won’t have to worry about a thing. It’s a core part of the straightforward, full-service experience we provide for homeowners in Kent and Seattle.

Finding the Right Residential Contractor Near Me

The success of your one-day bath remodel really comes down to one thing: the team you hire. With so many contractors to choose from in the Seattle and Tacoma area, it can feel a little daunting. But honestly, picking the right partner is the most important decision you'll make in this entire process.

A top-notch contractor won't stumble over your questions; they'll have clear, confident answers. They should be able to immediately show you that they are fully licensed, bonded, and insured for residential work right here in Washington. This isn't just a piece of paper—it's your single biggest protection as a homeowner.

Key Questions to Ask Your Contractor

Before you even think about signing a contract, you need to get good answers to a few critical questions. Treat it like an interview, because that's exactly what it is. A true professional will appreciate your diligence.

  • Can I see your portfolio of recent projects? Any contractor worth their salt will be eager to show off their work. Ask to see examples of one-day bath remodels they've done locally in the Kent area.
  • What warranties do you offer? You need to know about the warranty on the materials (like the acrylic surround) and, just as importantly, the labor. A company that stands behind its work will have a solid warranty.
  • Do you specialize in bathroom remodels? A one-day project isn't a job for a general handyman. It takes a specialized skill set and deep experience with factory-fabricated systems to get it right.

Experience and Trust Are Non-Negotiable

There's no substitute for experience, especially with the specific materials used in these quick remodels. As a local firm, a seasoned team from Wheeler Painting understands the unique quirks of working in older Seattle homes just as well as they know the new construction styles in places like Kent and Tacoma. They’ve seen it all and know how to handle the unexpected.

An experienced contractor with a strong local reputation often has a better relationship with municipal inspectors. This can be a huge advantage, as permit approvals and final inspections are critical steps that can delay a project if not handled correctly.

At Wheeler Painting, we've always believed in total transparency. We've spent decades building our reputation by walking homeowners through every step, from the first design ideas to the final inspection. Our goal is to make your project feel straightforward and stress-free. For more tips on getting started, feel free to check out our guide on bathroom remodel planning. We're committed to delivering the high-quality work our Puget Sound community expects and deserves.

Common Questions About One Day Bath Remodels

Even after seeing the benefits, it’s smart to have a few questions before committing to a one day bath remodel. This is a big deal for your home, and you should feel completely confident in your decision. We hear a lot of the same questions from homeowners across Seattle and Tacoma, so we’ve put together some straight answers to help you out.

Are the Materials Durable?

Absolutely. This is probably the number one concern we hear, and for good reason. The answer is a definite yes.

The materials used in modern one-day systems are a world away from what you might be used to. We're talking about high-quality, non-porous acrylic that's built to resist all the usual suspects—chipping, cracking, and fading. Even better, because it’s a seamless surface, you can say goodbye to scrubbing grout lines. It’s naturally resistant to mold and mildew, making it a fantastic, low-maintenance solution for our damp Puget Sound climate.

What if You Find a Problem Behind My Old Tub?

That's a great question, and it’s where hiring a true professional like Wheeler Painting really pays off. It's not uncommon to pull out an old tub and find some hidden water damage or even rot underneath.

When that happens, we don't just cover it up. We stop, assess the situation, and fix it properly. As a full-service residential contractor, we have the in-house expertise to handle the structural and plumbing repairs needed to make sure your new bathroom is built on a solid foundation.

It's crucial to understand that not all "one-day" companies are equipped to handle these surprises. A company that only installs liners may not be licensed or skilled enough to perform necessary structural or plumbing repairs, which could lead to major problems down the road.

What Can’t Be Done in One Day?

It's just as important to know what a one-day remodel isn't. The magic of a single-day project is its focus on the "wet area"—the tub and shower enclosure itself. Anything beyond that scope moves you into a more traditional, multi-day renovation.

A one day bath remodel won't include:

  • Moving Walls or Changing Layouts: Knocking down walls or altering the bathroom's footprint is a major construction job.
  • Relocating Plumbing: If you want to move your toilet or sink, that requires significant plumbing work, permits, and inspections.
  • Extensive Electrical Work: Adding things like a new circuit for heated floors is a task for a full remodel.
  • New Flooring or Vanities: While we can certainly handle floor repairs and replacements or install custom cabinets as part of a larger project, they aren't part of the one-day package.

We believe in being completely upfront about what’s possible in a day. Our goal is to set you up for success with no surprises—just a beautiful new bath you can start enjoying that very evening.


Ready to see how a one-day remodel can transform your home? The team at Wheeler Painting is here to answer your questions and provide a clear, transparent estimate for your project. Contact us today to start planning your stress-free bathroom update. Learn more at https://wheelerpainting.com.
Your Guide to an Affordable Bathroom Remodel in Puget Sound

An affordable bathroom remodel isn’t about cutting corners—it’s about making smart, high-impact choices. For homeowners and business owners alike, the key to keeping costs in check is focusing on cosmetic updates and, most importantly, avoiding changes to the existing layout. That’s how you sidestep expensive plumbing and electrical work. A stunning, functional bathroom is absolutely within reach, and this guide will help you understand the process in simple, helpful terms.

What an Affordable Bathroom Remodel Really Costs

When property owners in the Puget Sound area hear "bathroom remodel," their minds often jump to massive, budget-busting projects. But an affordable remodel is a different beast entirely. It’s all about maximizing your return on investment, transforming the space with strategic upgrades that deliver a fresh look without the full-demolition price tag.

Getting a handle on the potential costs is the first step. It helps you plan with confidence. A recent nationwide survey from This Old House gives us a pretty clear picture, finding the average project comes in at a manageable $15,586. Of course, that’s a big range—projects can run from $6,456 for smaller powder rooms to $24,715 for larger primary baths. You can dig into the specifics by checking out their in-depth bathroom cost research.

Breaking Down the Numbers

So, what does an "affordable" project actually look like? It almost always means sticking to a cosmetic refresh. These are the updates that give you the most bang for your buck, whether in a home or a commercial facility:

  • Professional Painting: A fresh coat of quality, moisture-resistant paint can completely change the feel of a room. It’s the fastest way to make things feel new.
  • Fixture Swaps: Simply replacing an old, dated faucet, showerhead, or light fixture can instantly modernize the space.
  • Hardware Updates: Never underestimate the power of new cabinet pulls, drawer handles, and towel bars. These are small details with a huge visual impact.
  • Surface-Level Fixes: Instead of ripping out a perfectly good tub or shower surround, consider reglazing. This process can restore the finish for a fraction of the cost of a full replacement.

The single most significant way to save money on any bathroom project is to preserve the current footprint. As soon as you decide to move a toilet or a shower, you're talking about re-routing plumbing and electrical lines. That one decision can add thousands of dollars to your budget.

To help you visualize where your project might land, we've put together some typical budget ranges for different remodel scopes we see here in the Puget Sound.

Here’s a look at what you can expect for different levels of bathroom remodels in our area. These estimates can help you set realistic expectations, whether you're just sprucing up a powder room or doing a more involved update.

Sample Bathroom Remodel Budgets for 2026

Remodel Type Typical Cost Range Common Inclusions
Cosmetic Refresh $4,000 – $9,000 New paint, hardware, light fixture, faucet, mirror, and minor repairs.
Mid-Range Update $9,000 – $18,000 Includes all cosmetic updates plus a new vanity, toilet, and flooring (like LVT).
Layout-Change Remodel $20,000+ All of the above plus moving plumbing/electrical for a new layout, new shower/tub.

These numbers give you a solid starting point for a conversation with a local contractor, helping you align your vision with your budget right from the get-go.

How to Plan a Remodel for Maximum Value

A beautiful, affordable bathroom remodel doesn’t just happen. It all starts with a smart plan, long before the first tile comes off the wall. The real secret is figuring out the difference between what your bathroom needs and what you want. This is your best tool for fighting off "budget creep"—that sneaky tendency for costs to spiral once a project gets going.

Grab a notepad and draw a line down the middle. On one side, list your needs. These are the essentials, the things you can't ignore. Think of that constantly dripping faucet, the cracked floor tile that’s a water-damage risk waiting to happen, or an ancient toilet that wastes gallons with every flush. These are the non-negotiables.

On the other side, list your wants. This is the fun stuff: heated floors for those chilly Puget Sound mornings, a luxurious rain shower head, or custom-built cabinetry. They're great to have, but they're also the first things you can scale back or postpone to keep your budget in check.

By clearly separating needs from wants, you take back control. It’s a simple but powerful exercise that lets you put your money where it matters most, ensuring every dollar you spend delivers real, tangible value.

Focus on High-Impact Surfaces and Fixtures

With your priorities sorted, you can now focus on the changes that give you the most bang for your buck. You don’t always need to tear everything down to the studs to get that "wow" factor. In fact, some of the most dramatic transformations are purely cosmetic.

Here are a few high-impact areas we always recommend focusing on:

  • A Professional Paint Job: Seriously, never underestimate what a fresh coat of paint can do. Using a high-quality, moisture-resistant formula instantly makes a space feel brighter and cleaner, hiding years of minor wear and tear.
  • Strategic Fixture Swaps: Swapping out an old, clunky vanity, a dated mirror, and a tired light fixture can single-handedly modernize a bathroom. These three items work as a team to define the room’s style, and upgrading them offers a massive visual return.
  • Tub and Tile Reglazing: If your tub or tile looks a bit sad but is still in good shape structurally, reglazing is a fantastic alternative to a full tear-out. The process restores the surface to a glossy, like-new finish for a fraction of the cost and mess of replacement.

The following graphic shows how budgets tend to scale with the scope of work, from a simple cosmetic update to a more involved renovation.

As you can see, a "Refresh" keeps costs manageable by focusing on surface-level updates instead of major construction. That’s the heart of an affordable remodel strategy. This is exactly where we come in. At Wheeler Painting, we've helped countless homeowners and property managers across the Puget Sound area make smart choices that bring their vision to life without breaking the bank.

Choosing Budget-Friendly Materials That Last

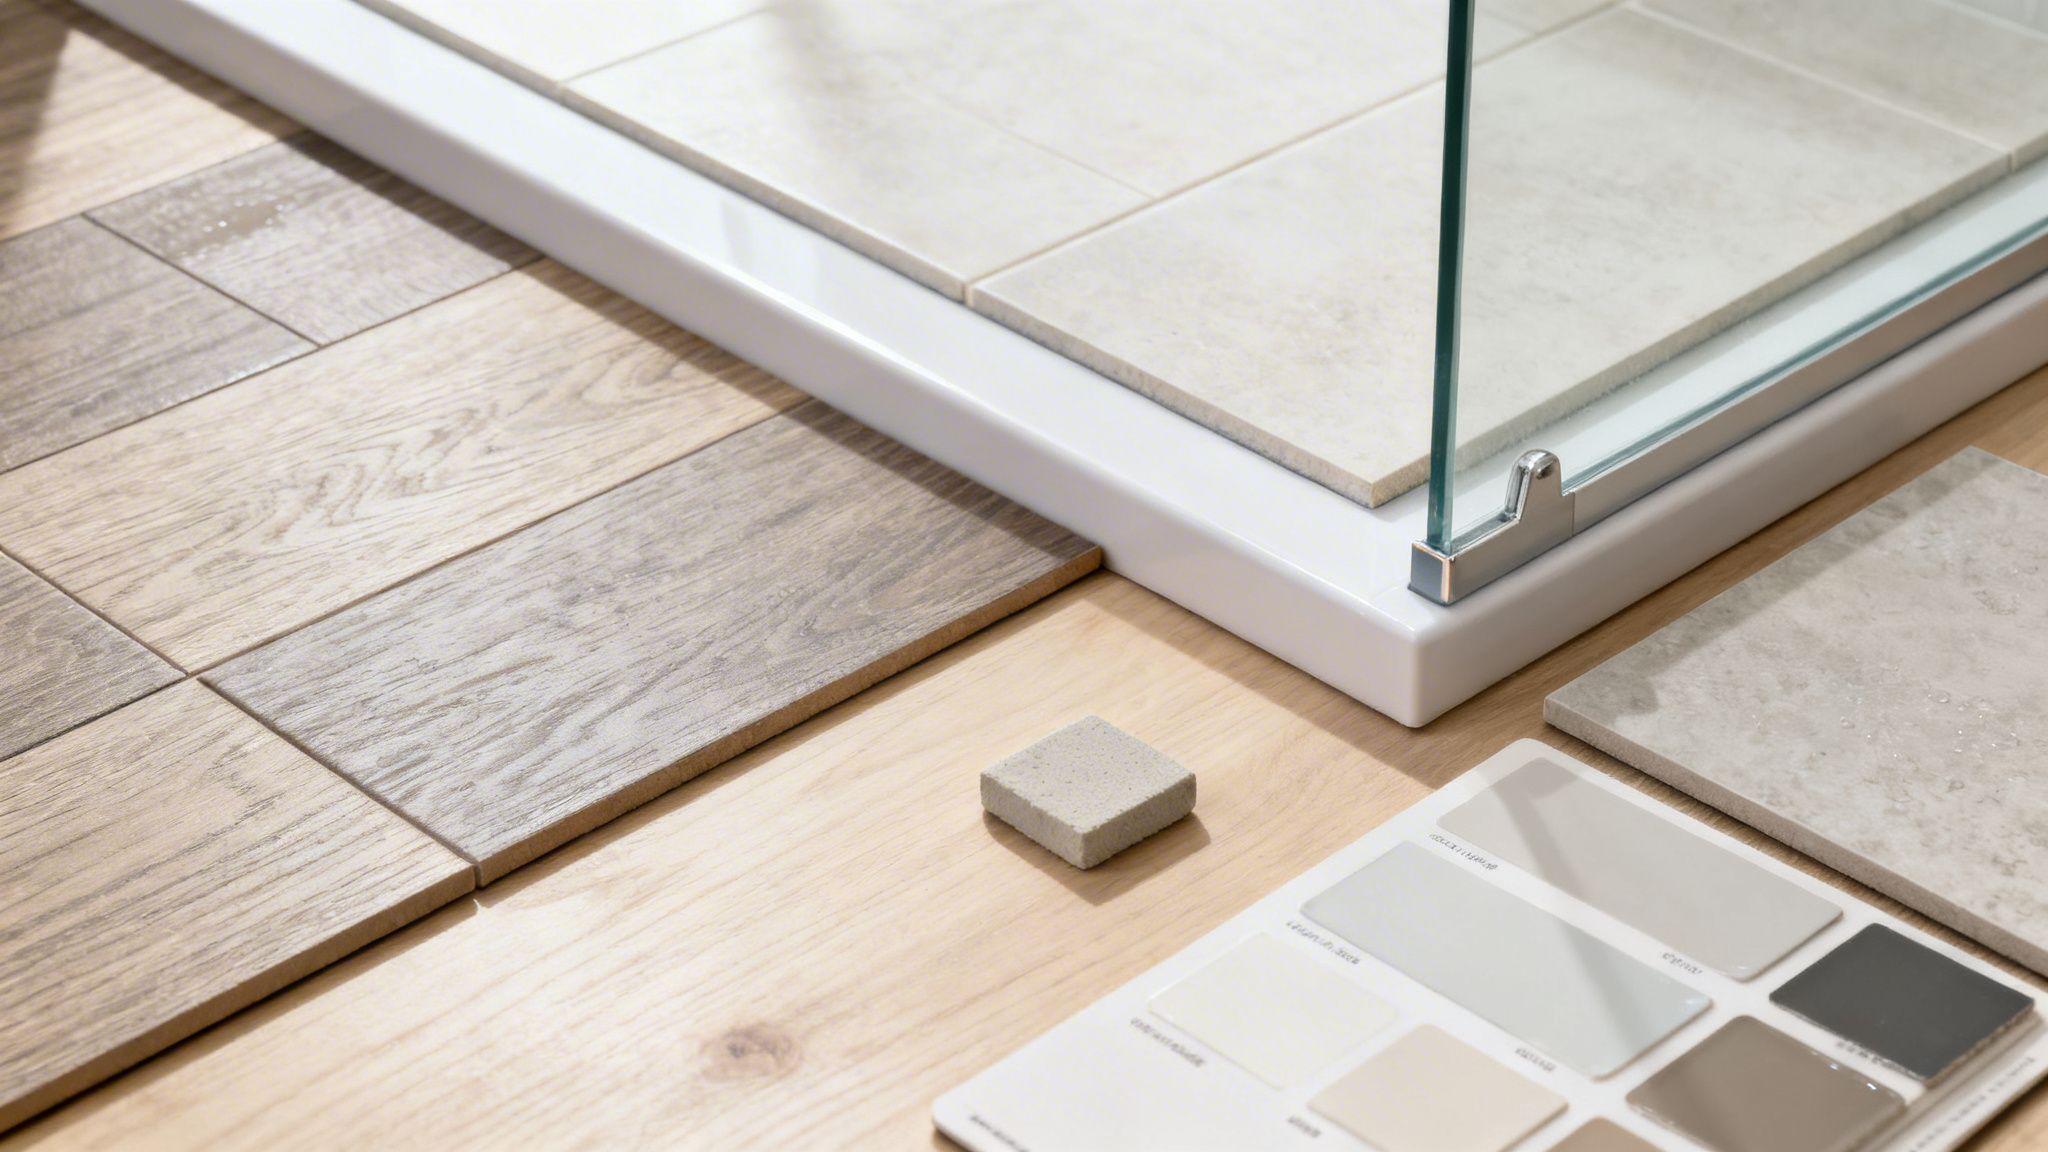
Various bathroom renovation samples including wood-look tiles, light floor tiles, and a color palette.

When you're trying to keep a bathroom remodel affordable, your material choices are where the real savings happen. This is especially true here in the Puget Sound, where constant dampness means you can’t just pick the cheapest option—you need finishes that will last.

The great news? You don't have to sacrifice a high-end look to stick to your budget.

It’s all about finding smart alternatives that give you the look of expensive materials without the hefty price tag. For example, instead of shelling out for natural stone, consider luxury vinyl tile (LVT). Modern LVT looks incredibly convincing, mimicking real wood or stone, but it’s far more water-resistant and much easier on the wallet. It’s a perfect fit for our Pacific Northwest homes and commercial spaces.

High-Impact, Low-Cost Material Swaps

Getting the most bang for your buck comes down to knowing where to look and what to prioritize. A few strategic swaps can save you thousands without anyone knowing the difference.

  • Flooring and Walls: Porcelain tile is a fantastic workhorse. It’s tougher and less prone to chipping than some ceramic options, and if you choose larger format tiles, you’ll have fewer grout lines to scrub.
  • Showers and Tubs: Instead of a complex and costly custom-tiled shower, look into a high-quality prefabricated shower enclosure. These one-piece units give you a sleek, modern look for a fraction of the cost and labor. Plus, no grout means easier cleaning.
  • Vanities and Countertops: One of our favorite pro tips is to ask your contractor about using stone remnants for your vanity top. These smaller leftover pieces of beautiful granite or quartz are often deeply discounted but deliver the same luxurious feel as a full slab.

Here’s one of the biggest budget-savers we recommend: restoration. Reglazing an existing bathtub or tile surround can make it look brand new, saving you up to 70% compared to a full replacement. It’s a game-changer for making a dramatic visual impact without breaking the bank.

Experts are seeing a big trend for 2026: basic refreshes costing between $4,000 to $9,000, especially in smaller bathrooms where the existing layout is kept to avoid expensive plumbing work. While labor can be 40-60% of the total bill, hiring a pro prevents costly mistakes down the road. Overall, you might see costs from $6,600 to $18,000, but don't discount sub-$5,000 updates. Simple changes like a new vanity or reglazing the tub can completely transform a space.

The Transformative Power of Paint and Tile

Never, ever underestimate what new surfaces can do. A fresh, professional paint job with high-quality, moisture-resistant paint is more than just cosmetic—it’s your first line of defense against mildew and damage in a humid environment. This is absolutely critical in any bathroom, where proper waterproofing is non-negotiable. Our guide on effective waterproofing for wet rooms dives deeper into why this step is so important for longevity.

For more inspiration, check out the latest bathroom tile trends to see how you can adapt stylish designs to fit your budget. As local contractors, the Wheeler Painting team knows exactly which materials deliver the best blend of cost, style, and durability for our climate, and we’re here to help you make the right choices.

Deciding Between DIY and Hiring a Local Pro

So, you’ve got your vision. Now comes the big question: should you roll up your sleeves and tackle this yourself, or is it time to call in a professional residential or commercial contractor?

There's no doubt that going the DIY route can save you some serious cash. If you're comfortable with a paintbrush and basic tools, tasks like demolition, painting, or installing a simple vanity and faucet are well within reach. It’s satisfying work, and it can definitely make a dent in your costs—after all, labor often accounts for 40% to 60% of a total remodeling bill.

Where DIY Can Go Wrong

But here’s where you need to be brutally honest with yourself about your skills. In our years of experience, we've seen the line between a successful DIY project and a full-blown disaster drawn at two specific trades: plumbing and electrical.

A tiny, seemingly insignificant mistake with a plumbing fitting behind your new shower wall can lead to a slow, silent leak. You won't notice it for months, but it will be there, causing catastrophic water damage, rot, and mold. Likewise, a wiring error isn't just a minor issue; it's a major fire and safety hazard.

Trying to save a few hundred dollars on these trades can easily lead to thousands in repairs, completely torpedoing your "affordable" remodel and turning it into a financial headache.

An experienced residential or commercial contractor isn't just another line item on your budget—they're an investment in peace of mind. Their real value is in their efficiency, their network of skilled trades, and their deep knowledge of Puget Sound building codes.

The Value of a Professional Contractor

This is where bringing in a trusted local provider like Wheeler Painting really pays off. We manage the hundred little details that can overwhelm a homeowner or facilities manager.

  • We Sweat the Small Stuff (and the Big Stuff): We ensure every single piece of the project, especially the critical plumbing and electrical work, is done correctly and up to the latest local codes. This protects your property and its long-term value.
  • We Know the Right People: Forget spending weeks vetting and chasing down reliable plumbers, electricians, and tile setters. We have a trusted network of local experts we work with every day.
  • We Keep Things Moving: A professional crew operates on a clear, established timeline. This is the difference between a project that’s finished in a couple of weeks and a DIY remodel that drags on for months, leaving your home or business in chaos.

If you’re planning a more involved project like a full tub-to-shower conversion, leaning on a general contractor's expertise is almost essential. You can see what that process involves in our guide to tub-to-shower conversions in the Puget Sound area.

Ultimately, a partnership with a pro ensures your bathroom remodel is done right the first time, giving you a beautiful, durable space without the hidden risks and sleepless nights.

Finding a Partner to Bring Your Vision to Life

This is the point where all your planning starts to pay off. But it's also where things can go wrong. A bathroom remodel is notorious for budget creep, scheduling nightmares, and those "uh-oh" moments that pop up after demolition. Bringing in an experienced local partner isn't just a good idea—it’s how you sidestep the headaches.

It’s no surprise that bathroom remodels have become one of the most popular property updates. A recent industry report found that 38% of homeowners tackled a bathroom renovation, making it a top project nationwide. Here in the Puget Sound, we see it all the time. Sometimes it's a planned upgrade for a home or office space, but often it’s a necessary repair after a flood or leak, where getting it done right and on budget is critical.

That’s where a team like Wheeler Painting & Restoration comes in. We’ve been navigating these projects for homeowners and businesses since 1991, and we know that clear, transparent proposals are the key to keeping everything on track.

How We Keep Your Project On Track

When you hear that labor can account for 40-65% of a bathroom remodel's cost, it underscores the importance of efficiency. Mistakes, delays, and rework—especially with tricky tile or plumbing—are what blow up a budget. Our entire process is built to prevent that.

With over three decades of experience in Western Washington, we’ve refined our approach to make your remodel as straightforward as possible.

  • It Starts With a Conversation: We meet you on-site to see the space, listen to your goals, and get a feel for your budget and style.
  • A Clear, Itemized Plan: You'll get a detailed proposal that breaks down every cost and task. No vague estimates, no hidden fees.
  • We Handle the Headaches: Our project managers coordinate all the moving parts—from scheduling the plumber and electrician to ordering materials—so you don't have to.
  • The Final Stamp of Approval: We aren’t finished until we’ve done a final walkthrough with you to ensure every last detail is perfect and you're completely happy with the result.

This same commitment to quality, communication, and craftsmanship is what we bring to our commercial construction services, too. The principles are the same whether we're upgrading a single residential bathroom, renovating an entire office, or installing new siding and fixtures on a retail space. For those who want a high-end look with even less fuss, some people are even exploring options like a demolition-free bathroom renovation to minimize mess and downtime.

Partnering with an experienced general contractor means you have a single, accountable partner dedicated to quality outcomes. It’s the most effective way to protect your investment and ensure a stress-free experience from start to finish.

Ultimately, picking the right partner is the single most important decision you'll make for your project. To help you navigate that choice with confidence, we created a practical guide on how to choose a general contractor.

Common Questions About Affordable Bathroom Remodels

Every property owner we talk to has questions, and that's a good thing. Getting clear answers is the first step toward a successful remodel. To get you started, we’ve put together some straightforward answers to the questions we hear most often from homeowners and property managers right here in the Puget Sound area.

What Is the Cheapest Way to Remodel a Bathroom?

Without a doubt, the most budget-friendly option is a cosmetic refresh. This approach is all about high-impact, low-cost changes that make the room feel brand new without getting into heavy-duty construction.

A cosmetic refresh usually involves a few key things:

  • A professional paint job: Nothing transforms a dated bathroom faster than fresh paint. It instantly brightens the space and hides minor flaws.
  • New hardware: You’d be surprised what a difference swapping out old drawer pulls, faucets, and towel bars can make.
  • Updated light fixtures: A modern fixture can completely change the mood and feel of the room.
  • Reglazing surfaces: Instead of a full replacement, giving your existing tub and tile a new, durable finish can save you thousands.

If there’s one piece of advice we give every client on a tight budget, it’s this: avoid changing the bathroom's layout. Keeping the toilet, sink, and shower right where they are lets you sidestep the expensive plumbing and electrical work that can quickly blow up an affordable project.

How Much Should I Budget for a Small Bathroom Remodel?

Here in the Puget Sound region, the numbers can vary, but we can give you a solid baseline. For a basic cosmetic update on a small bathroom (around 40-50 sq. ft.), homeowners are typically looking at a cost between $4,000 and $9,000 in 2026. This range covers those surface-level improvements and fixture swaps.

Want to take it a step further? If you're planning to replace the vanity, toilet, and flooring with quality, standard-grade options but keep the layout the same, your budget will likely land somewhere between $6,500 to $15,000. Whatever your scope, we always recommend setting aside a contingency fund of 15-20%. It’s just smart planning for any surprises that might be hiding behind the walls.

Can I Remodel a Bathroom for Under $5000?

Yes, you absolutely can remodel a bathroom for under $5,000. It just requires some smart planning and discipline in your material choices.

At this price point, you can realistically afford a new vanity and faucet, a new toilet, an updated light fixture, fresh paint, and affordable flooring like Luxury Vinyl Tile (LVT). To make that $5,000 budget work, you'll probably need to handle some of the labor yourself—like painting or demolition—and plan on keeping your existing shower or tub.

How Long Does an Affordable Bathroom Remodel Take?

The timeline really comes down to the scope of your project. A simple cosmetic refresh with just painting and new hardware can often be wrapped up in a few days to a week, meaning very little disruption to your routine.

For a more involved project where you're replacing major fixtures but not changing the layout, you should set aside about 2 to 4 weeks. Working with an experienced residential or commercial contractor is the best way to get a reliable schedule from the start and make sure your project stays on track without any frustrating delays.


A beautiful, high-quality bathroom remodel is well within your reach. With a solid plan and a partner you can trust, you can transform your space without the headaches.

Wheeler Painting & Restoration Services has been that reliable general contractor for homeowners and commercial clients across Western Washington since 1991. We simplify the entire process, from the first design ideas to the final, flawless walkthrough. Ready to see what’s possible? Contact us today for a straightforward consultation and a transparent proposal.

Learn more about our services at https://wheelerpainting.com.

Your Guide to Replacing a Shower in Puget Sound

Thinking about replacing a shower in your home or commercial property? It's a great way to update a dated bathroom, improve accessibility, or finally tackle nagging leaks and mold issues. But it's a lot more involved than just picking out new tile. A successful shower replacement hinges on solid planning and a clear understanding of the process, which can feel overwhelming. This guide is here to walk you through it, making you feel confident in your decisions.

Whether you're a homeowner in need of a residential contractor near you or a facilities manager looking for commercial construction services, we'll explain the process in simple, helpful terms.

Defining Your Shower Replacement Project

Before you fall in love with a high-end rain shower head or a specific tile pattern, the most important work happens on paper. A well-thought-out plan is what keeps a project on track, on budget, and ensures the end result is something you’ll love for years.

So, what are you trying to accomplish? Are you just swapping out a leaky, old fiberglass unit for a new one in an office restroom? Or are you dreaming bigger, picturing a spacious walk-in shower for your home that feels like a personal spa? Getting clear on your goals—whether it's a simple update or a full-blown transformation—will steer every decision you make.

Setting a Realistic Budget

Once you have a vision, it’s time to talk money. Budgeting for a shower replacement involves more than just the cost of the visible materials. From our experience serving the Puget Sound community, the real costs are often hiding behind the walls.

A common mistake is underestimating the full scope of expenses. Your budget needs to account for:

  • Materials: This includes the shower pan, wall materials (like tile or solid-surface panels), fixtures, glass, and all the crucial waterproofing membranes and sealants.
  • Labor: Unless you’re a seasoned pro, you’ll be hiring a contractor. This cost covers demolition, plumbing adjustments, installation, tiling, and finishing. For commercial projects, this may include coordinating multiple trades.
  • Permits: Depending on your city and the extent of the work (especially if you’re moving plumbing lines), a permit is often required. A trusted local provider will handle this, ensuring your project is fully compliant with local codes.
  • Contingency Fund: This is non-negotiable. Plan on setting aside an extra 15-20% of your total budget. You never know when you’ll open up a wall and find hidden water damage or old plumbing that needs immediate replacement, especially in older buildings.

To give you a clearer picture, here’s a breakdown of what you can generally expect to spend. These are averages, and costs can vary based on project complexity and material choices.

Shower Replacement Budget Snapshot

Expense Category Average Cost Range (DIY) Average Cost Range (Pro Install)
Materials (Pan, Walls, Fixtures) $800 – $3,500 $1,200 – $7,000+
Plumbing & Labor $0 (Self-performed) $1,500 – $4,000
Demolition & Debris Removal $100 – $300 $400 – $800
Permits & Inspections $150 – $500 $250 – $750
Contingency Fund (15-20%) $225 – $860 $500 – $2,500+
Total Estimated Cost $1,275 – $5,160 $3,850 – $15,050+

Remember, a higher-end custom tile job with premium fixtures will naturally sit at the top of these ranges, while a straightforward swap of a pre-fabricated unit will be more budget-friendly.

Creating a Practical Timeline and Plan

A detailed timeline is your best friend for managing expectations and minimizing how long your bathroom is out of commission. It all starts with the foundational planning process.

Shower project plan infographic showing define, budget, and plan stages with icons.

This process boils down to three key phases: defining your scope, setting your budget, and creating a step-by-step plan. A simple replacement might only take a few days, but a custom tile shower can easily stretch over a week or more, factoring in all the necessary prep, waterproofing, and tile setting.

Working with an experienced local pro like Wheeler Painting means you get a detailed schedule upfront. We coordinate all the necessary trades—plumbers, tile setters, electricians—to make the process as seamless as possible, whether it's a home remodel or a commercial facility construction project.

Of course, sometimes during planning, you might realize a bathtub better suits your needs. If that's the case, you can learn more about how to convert a shower to a bathtub in our guide on that topic.

Key Takeaway: The success of your shower replacement depends heavily on the initial planning phase. Rushing this stage often leads to budget overruns and compromises on quality. Take the time to define your scope, set a comprehensive budget, and consult with a professional.

By putting in the effort at the beginning, you set the stage for a smooth project that results in a beautiful, functional shower you can enjoy for years to come.


Choosing Materials That Last in the Pacific Northwest

When it’s time to pick materials for your new shower, you’re deciding on more than just the look. You’re choosing its durability and how much time you'll spend cleaning it. Here in the perpetually damp Pacific Northwest, moisture resistance isn't just a nice feature—it's essential for keeping mold and mildew at bay in both residential and commercial settings.

Making the right call now will save you from headaches down the road. Let’s walk through the most common choices we see property owners make, weighing the pros and cons so you can find a solution that looks great and holds up to daily use.

Shower Wall Surfaces

The shower walls take the brunt of the water. From classic tile to sleek, modern panels, each material brings its own unique balance of style, maintenance, and performance in our wet climate.

Porcelain and Ceramic Tile

Tile is the classic go-to for a reason; it offers endless design freedom. If you can dream it, you can probably do it with tile. For a shower, you'll want to lean toward porcelain, which is denser and less porous than ceramic, making it a champion in high-moisture zones. The real weakness of any tile job, though, is the grout.

  • What’s to love: You get a huge variety of colors, sizes, and patterns to create a truly custom look. Porcelain is incredibly tough and water-resistant.
  • What to watch out for: Those grout lines need regular cleaning and sealing to keep stains and mold from taking hold. Installation is a skilled craft—this isn't the place for a "good enough" job if you want it to be waterproof.

Our advice: If you love the tile look, go for the largest format tiles your space can handle. Fewer grout lines mean less cleaning. We also strongly recommend upgrading to a high-performance epoxy grout. It's stain-proof and resists mold, making it a brilliant investment for any shower.

Solid Surface Panels

For anyone who dreads cleaning grout, solid surface panels are a game-changer. These are large sheets of material, often acrylic or an engineered composite, that create a seamless and totally waterproof surface.

  • What’s to love: No grout lines means nowhere for mold and grime to hide. They are incredibly easy to wipe down and can often be installed much faster than tile, which is a great benefit for commercial renovations.
  • What to watch out for: The initial cost can be higher than a basic tile job. Your design choices are a bit more limited, though many modern options mimic natural stone or even tile patterns.

Shower Material Comparison

So, how do you choose? It usually comes down to aesthetics versus your tolerance for long-term maintenance. This table breaks down the key differences to help you decide what’s best for your property.

Material Type Pros Cons Best For
Porcelain Tile Highly durable, waterproof, and offers endless design options for a custom look. Grout lines require maintenance, and professional installation is critical for a leak-proof finish. Homeowners and commercial properties wanting a classic, high-end look and are prepared for routine cleaning.
Ceramic Tile A budget-friendly choice with a wide variety of styles and colors available. Less dense than porcelain; can be more prone to chipping and water absorption if the glaze is compromised. Projects with a tighter budget where a traditional tiled appearance is the goal.
Solid Surface Grout-free, making it extremely low-maintenance and quick to install. The initial cost is higher, and there are fewer custom design options compared to tile. Busy households, rental properties, and commercial facilities (like office space renovations or retail build-outs) where durability and easy cleaning are key.
Acrylic/Fiberglass Often the most affordable option, available as a single, integrated unit for fast installation. Can look and feel less premium. It's also more susceptible to scratching and can yellow over time. Quick bathroom updates, secondary baths, or projects where the budget is the primary concern.

Ultimately, a beautiful and functional shower can be achieved with any of these materials. The best one is simply the one that fits your lifestyle, budget, and design vision.

Selecting the Right Shower Pan and Fixtures

The shower pan—the floor of your shower—is arguably the most critical component. A failing pan is one of the most common and destructive sources of bathroom leaks.

  • Acrylic & Fiberglass Pans: These pre-fabricated bases are the industry standard for a reason. They are cost-effective, completely non-porous, and relatively straightforward to install correctly.
  • Custom Tiled Pans: A tiled shower floor gives you that high-end, seamless look. Be warned: this requires expert skill. A proper tiled pan involves a complex, multi-layered waterproofing system. One small mistake here can cause catastrophic water damage.

Finally, let's talk fixtures. Your showerhead, valve, and handle are the workhorses of your shower. Stick with reputable brands to ensure you get reliable performance. When picking a finish—whether it's chrome, brushed nickel, or matte black—think about how it will stand up to water spots and daily cleaning. Working with a professional ensures all these pieces fit together perfectly, from plumbing compatibility to a flawless final look.

Demolition: Uncovering What’s Really Behind Your Shower Walls

Before you can get to the exciting part—setting beautiful new tile or installing a sleek glass door—the old shower has to go. This demolition phase is more than just swinging a hammer; it's an investigation. This is the moment you finally see what’s been happening behind the walls, and for many older properties here in the Puget Sound, it’s when you discover the real scope of your project.

First, we shut off the water supply to the shower. Once the water is off, we remove the old showerhead, faucet handles, and the shower door.

Modern chrome shower faucet, beige tiles, and a shower drain sample on a wet surface.

Once the fixtures are out, it's time to tear out the old surround. This gets messy fast. We make sure to cover your vanity, toilet, and floor with heavy-duty drop cloths and have a plan for hauling away the debris.

The Big Reveal: Inspecting the Studs and Subfloor

With the walls stripped down to the bare studs, the real inspection begins. Don't rush this part. What you find now will dictate the next steps and determine whether your new shower lasts five years or twenty-five.

We see this all the time, especially in older buildings: slow, undetected leaks that have been silently rotting wood for years. Even a hairline crack in old grout can let just enough water in to cause major damage over time.

A shower remodel is one of the few times you get a clear look at your property’s framing and subfloor. Ignoring problems at this stage is the most expensive mistake a property owner can make. Addressing rot, mold, or bad plumbing now is non-negotiable for a lasting result.

This is your one shot to make things right before it all gets covered up again. We grab a good flashlight and closely examine every stud, the subfloor, and the surrounding insulation.

Common Problems to Look For

As you inspect the exposed shower bay, you're hunting for specific red flags. Spotting them now can save you thousands in structural repairs down the road.

  • Water Damage and Rot: Look for dark, stained wood on the studs or subfloor. A tell-tale sign of rot is wood that feels soft or spongy. Poke any suspicious-looking spots with a screwdriver; if it sinks in easily, that wood must be replaced.
  • Active Mold or Mildew: Mold isn't always black. It can be green, white, or even pinkish. Any drywall, insulation, or wood affected by mold has to be carefully removed and the area treated to ensure it doesn't come back.
  • Outdated or Failing Plumbing: This is the perfect time to assess your plumbing. Look for corrosion on copper pipes or heavy rust on old galvanized steel. Upgrading to modern PEX or new copper lines now is a smart investment.
  • Pest Damage: Damp, soft wood is a dinner bell for pests like carpenter ants and termites. Keep an eye out for tunnels in the wood or small piles of sawdust-like frass.

Finding and correctly fixing these hidden issues is what separates a DIY job from a professional-grade remodel. As a commercial and residential contractor, we use a detailed construction quality control checklist on every project to make sure nothing gets missed. This careful, methodical approach is the only way to guarantee the foundation for your new shower is solid and dry.

The One Step You Can't Afford to Get Wrong: Waterproofing

If there's one part of a shower replacement where you absolutely cannot cut corners, it's waterproofing. It’s easy to get excited about the tile and fixtures—the parts you'll see every day. But the most important work is hidden behind the walls. A single pinhole-sized leak in a bad waterproofing job can quietly cause thousands of dollars in mold and rot.

A person with a flashlight inspects severe mold behind a removed bathroom shower wall.

We tell every client to think of waterproofing as the foundation of the entire project. It's a meticulous system designed to create a completely sealed box that guarantees water stays exactly where it belongs.

Building a Bulletproof Water Barrier

Older showers used a flawed "water in, water out" system. Today, we use far superior methods that stop water right at the surface, just behind the tile. Here’s a look at how we build a truly modern, waterproof shower enclosure:

  • Start with the Right Board: We always use waterproof backer boards, like cement board or specialty foam panels. Unlike drywall, these materials won't rot or feed mold.
  • Seal Every Single Weak Point: Every screw head, seam, and corner is a potential point of failure. We meticulously cover them all with waterproof banding and specialized sealant to create one continuous surface.
  • Apply a Waterproof Membrane: Finally, we apply a liquid membrane (which cures into a seamless rubber barrier) or install a sheet membrane over the entire assembly. This is the final layer of defense that makes the shower truly watertight.

This modern approach ensures the structure behind your tile stays bone dry. It's the single biggest reason professionally built showers last for decades, a major concern for property owners here in the damp Puget Sound region.

Peace of Mind Is Priceless: An estimated 98% of basements will experience water damage at some point. While your shower isn't in the basement, the principle holds true: where there's water, there's always risk. Proper waterproofing is your best defense.

This Is a Job for a Licensed Pro

Installing a modern waterproofing system isn't just a matter of following steps; it requires real-world experience and precision. Nowhere is this more true than around the shower valve and plumbing penetrations.

A licensed professional knows how to install the valve flawlessly, tightening every connection and correctly integrating it into the wall. They have the experience to flash the valve body into the waterproofing membrane, creating a bombproof seal.

This is the one stage we always advise property owners against trying to DIY. A tiny mistake here won't show itself for months or even years. But when it does, you could be looking at a catastrophic failure that has rotted out your subfloor and walls.

Fixing a failed shower is far more expensive than building it right the first time. You can learn more about the detail involved by reading our guide on waterproofing a wet room. When you hire a trusted local provider, you’re buying confidence that the job meets code, protects your property, and will stand the test of time.

Bringing Your New Shower to Life

Once all the waterproofing is in, the satisfying work begins. This is when a messy construction zone transforms back into a bathroom—and you finally get to see your vision come together.

Whether you went with timeless tile or a sleek solid-surface system, this stage is all about precision. A pro's experience really shows here, making sure every cut is perfect and every line is true. The goal is a shower that doesn’t just look good on day one, but holds up beautifully for years.

Installing Your Chosen Shower Walls

How we tackle the walls depends on the material you picked. Each one demands a different approach to get that flawless, professional finish.

With a custom tile shower, we start by dry-fitting the layout to create a balanced look and avoid awkward, sliver-thin tiles in the corners. Once the plan is set, we mix the thin-set mortar and start setting the first course, using spacers to keep grout lines perfectly uniform.

Pro Tip for Tile: If you love the look of tile but hate scrubbing grout, pick the largest tiles that look right in your space. Fewer grout lines mean way less cleaning. Pair them with a high-performance epoxy grout, and your shower will be nearly stain-proof and incredibly resistant to mold.

If you chose solid surface panels, the game changes. We meticulously measure and cut the large panels, which are custom-fit to your shower walls and bonded with a high-strength adhesive. A perfect fit is essential to ensure every seam is tight before it gets sealed for good.

Achieving a Perfect Water-Tight Finish

With the walls up, the next job is to seal every single seam, corner, and hole. This is where a shower remodel can either succeed or fail.

Grouting and Sealing Tile

After the tile mortar has cured (24-48 hours is typical), it's time to grout. We work the grout into every joint, packing it in so there are no hidden air pockets. Then comes the tricky part: cleaning the excess haze off the tile face without pulling fresh grout from the joints.

Installing the Shower Door

A well-installed shower door is the final gatekeeper. The process looks something like this:

  • Measure and Mark: We take careful measurements to get the door frame perfectly plumb (vertically straight) and level.
  • Drill with Care: Drilling into brand-new tile or a solid panel requires special drill bits and a steady hand to avoid causing any chips or cracks.
  • Set and Seal: The frame is secured, the glass panels are carefully set, and a clean, continuous bead of high-quality silicone caulk is run along every edge of the frame.

The Final Details That Make the Difference

The project isn't done until the last little details are handled. These are the touches that separate a "finished" job from a professionally finished one.

Installing the Trim Kit

This means putting on the faucet handle, the escutcheon plate behind it, and the showerhead. We caulk the top and sides of the plate but always leave the bottom unsealed. This tiny gap allows any moisture that might get behind the plate to escape, preventing a hidden mold problem.

Final Caulking and Painting

Next, we caulk every transition point with 100% silicone: where the tile meets the shower pan, where the door frame hits the wall, and in all the corners. This flexible seal handles the tiny movements that naturally occur in a building.

Finally, a fresh coat of high-quality, mold-resistant paint goes on the surrounding walls. It’s the finishing touch that makes everything look clean and polished and adds one last layer of moisture protection. This focus on every detail ensures your new shower isn't just beautiful, but built to last.

Answering Your Shower Replacement Questions

A person in a glove applies white sealant with a caulk gun to a shower base.

If you're thinking about replacing your shower, you probably have a few questions. After decades of handling residential and commercial construction projects all over the Puget Sound, we've heard just about everything. Here are some straight answers to the questions we get asked the most.

How Long Does It Really Take to Replace a Shower?

This is always the first thing people want to know, and the honest answer is: it depends.

For a straightforward swap—pulling out an old prefabricated unit and putting in a new one—you're typically looking at 3 to 5 days. That’s assuming we don't find any major surprises.

A full custom tile shower is a different story. The process is much more involved, with demolition, plumbing, meticulous waterproofing, tiling, grouting, and sealing. Each of those steps has its own required curing time. For a custom job, a more realistic timeline is 7 to 12 days. A good contractor will always give you a clear schedule so you know exactly what to expect.

What Are the Most Common Hidden Problems?

Once we get the old shower out, the most common issues we find are water damage and mold. It's shocking how much rot can happen over the years from even a tiny, slow leak.

In older Puget Sound properties, we also frequently run into outdated and failing plumbing, like old corroded galvanized pipes that are waiting to cause a problem.

This is exactly why the demolition phase is so important. It's our one and only chance to uncover and properly fix these hidden issues before your beautiful new shower goes in. It’s a critical step that protects your investment.

Do I Need a Permit for a Shower Replacement?

More often than not, yes. Most local jurisdictions in our service area require a permit any time you alter plumbing supply lines or drains. If you’re doing a simple like-for-like fixture swap, you might not need one, but it’s always best to check.

This is one of the big advantages of hiring a licensed commercial or residential contractor. A professional firm like ours manages the entire permitting process for you, from the initial application straight through to the final inspection. It ensures your project is done right and fully up to code.

Can I DIY a Shower Replacement to Save Money?

We understand the temptation to save money. If you're handy, you could probably handle the demolition or the final painting.

However, we strongly caution anyone against DIY-ing the plumbing and waterproofing. A tiny mistake in either of these areas can lead to a catastrophic failure down the road—one that you might not discover for years. The resulting water damage can be incredibly expensive to fix.

Paying a professional to handle those critical stages isn't just buying labor; it's buying peace of mind and protecting the value of your home or commercial property.


Ready to transform your bathroom without the stress? Whether you're looking for a "residential contractor near me" or "commercial construction near me," the team at Wheeler Painting has the experience to handle your project with skill and precision. Contact us today to schedule your consultation.