Tag Archive for: kitchen remodel

How to Choose a Kitchen Remodeling Contractor: 2026 Tips

You're probably doing what most homeowners do at the start of a kitchen remodel. Saving photos. Comparing cabinet colors. Thinking about better lighting, more storage, a layout that finally works. At the same time, you're also wondering how to avoid the stories everyone hears about projects that ran long, changed price, or turned into daily stress.

That tension is normal in Seattle, Tacoma, Bellevue, and across the Puget Sound. A kitchen remodel is exciting because it changes how you live every day. It's also one of the easiest home projects to get wrong if you choose the wrong contractor.

Your Dream Kitchen Starts with the Right Partner

A kitchen remodel usually starts with a simple thought. Maybe the space feels dark. Maybe the traffic flow is awkward. Maybe the cabinets have reached the point where repainting or refacing won't solve the underlying issue anymore.

Then the questions pile up. Who do you trust? Who understands older Puget Sound homes? Who can deal with permits, scheduling, and trades without turning your house into a jobsite that drags on?

A smiling woman uses a digital tablet on a kitchen counter to review kitchen remodeling design options.

In this region, that decision matters even more than many homeowners expect. Kitchens often involve a mix of finish work, plumbing, electrical coordination, inspections, and sometimes layout changes that affect several trades at once. If your contractor is organized, the project feels manageable. If your contractor is vague, the remodel can become exhausting fast.

That's why learning design-build vs general contractor differences early can help. The right setup depends on whether your project is mostly finish-driven or whether it needs heavier coordination between planning, trades, and execution.

Practical rule: The contractor you hire shapes the schedule, the communication, the permit path, and how problems get solved when the walls open up.

Homeowners in West Seattle, Issaquah, Kirkland, and Tacoma often focus first on style. That's understandable. But the key turning point is choosing the right partner. Good remodeling isn't just about pretty materials. It's about scope control, clean handoffs between trades, realistic planning, and a contractor who tells you the truth before work starts.

That's the part that makes the rest of the process easier.

Preparing for Your Kitchen Remodel Before You Hire

The homeowners who make the best decisions usually do a little homework before the first contractor visit. Not because they need final answers, but because clear priorities lead to better conversations. If you don't define what matters most, every estimate starts to look different for reasons that are hard to evaluate.

A Kitchen Remodel Pre-Planning Checklist infographic illustrating five essential steps to take before hiring a renovation contractor.

Define the scope before you define the price

Start with two lists.

The first list is what must change. That might include poor storage, damaged cabinets, failing flooring, outdated lighting, or a layout that doesn't function. The second list is what would be nice to have if the project allows it.

That distinction matters because kitchen bids vary widely when scope is still fuzzy. One contractor may assume cabinet replacement. Another may assume partial reuse. One may include demolition and permit handling. Another may not mention either until later.

A simple pre-planning sheet should include:

  • Layout goals like keeping the existing footprint or opening the room up.
  • Core selections such as custom cabinets, stock cabinets, wood and tile floors, or specific countertop preferences.
  • Appliance decisions including whether existing appliances stay or new ones require different clearances or hookups.
  • Non-negotiables like a vent hood, island seating, pantry storage, or under-cabinet lighting.

Build a budget range, not a fantasy number

A budget works better as a range than a single fixed number at the planning stage. That gives you room to talk openly about priorities, substitutions, and where quality matters most.

In real remodels, cost swings usually come from decisions such as cabinetry level, layout changes, utility relocation, finish materials, and how much hidden work shows up once demolition begins. In older homes around Seattle and Tacoma, that last part deserves respect.

If you want bids you can actually compare, give each contractor the same basic project description, the same must-have list, and the same timeline expectations.

Create a design brief you can hand to every bidder

You don't need architectural plans to start. You do need a clean summary. A few inspiration photos, rough dimensions, notes about style, and a list of fixed priorities will go a long way.

If you want a good outside resource, these Blanc Haute kitchen planning tips are useful because they help homeowners organize ideas before the first design or contractor meeting.

For a more local planning approach, a detailed kitchen remodel planning guide can help you think through schedule, finishes, and the sequence of decisions that tend to slow projects down.

Think about timing early

Timing affects more than convenience. In Washington, permit review, trade scheduling, lead times on cabinets, and inspection sequencing all influence when a remodel can realistically start and finish.

A short timing checklist helps:

  1. Choose your preferred window for construction.
  2. Note life events like travel, school schedules, or hosting plans.
  3. Decide how you'll live through the work if the kitchen is out of service.
  4. Identify long-lead selections early if you already know what you want.

The more clarity you bring in, the easier it is to learn how to choose a kitchen remodeling contractor based on fit instead of guesswork.

How to Find Reputable Local Contractors

A strong shortlist doesn't come from one source. It comes from overlap. If a contractor keeps showing up through referrals, reviews, and documented project work, that's worth paying attention to.

Start local and stay project-specific

Ask people in your area who've done work recently. A neighbor in Bellevue or Snoqualmie who just finished a kitchen can tell you more about communication, cleanliness, and follow-through than a polished website ever will.

But don't stop with referrals. A contractor may be excellent at exterior painting, drywall repair, or smaller residential remodeling jobs and still not be the right fit for a kitchen that needs cabinetry coordination, permit handling, and multiple trades working in sequence.

Look for evidence that the company actively does kitchen-specific work, not just general home improvement.

Use online reputation as a filter, not the final answer

Homeowners should treat online reputation and proof of past work as measurable screening tools. One industry source recommends using a Google rating of 4.5+ as a benchmark, while also reviewing before-and-after photos and recent client feedback to verify performance through documented project history in the Ruvati contractor guide.

That benchmark is useful as a starting point. It is not enough on its own.

Read reviews for patterns:

  • Communication: Do people mention clear updates or days of silence?
  • Schedule discipline: Do comments suggest the crew showed up consistently?
  • Problem handling: When issues came up, did the contractor respond directly?
  • Finish quality: Do clients talk about details, punch-list completion, and care?

Study the portfolio like an owner, not a fan

A portfolio should answer practical questions. Can this contractor show kitchens that feel close to your project in scale, finish level, and complexity? If you want a simple footprint refresh, don't be distracted by dramatic luxury showpieces. If you're planning a full rework with custom cabinets and utility changes, don't rely on photos that only show cosmetic updates.

A useful screen is whether the photos show enough detail to judge the work. Wide hero shots are nice. Better signs are cabinet alignment, tile termination, trim transitions, lighting integration, and how materials meet at edges and corners.

A good portfolio doesn't just show taste. It shows repeatable execution.

If you want a broad homeowner view of how people search for and evaluate builders online, this resource on finding local contractors is worth scanning. Not because it picks a contractor for you, but because it reflects how homeowners now combine referrals with digital vetting.

Build a shortlist you can manage

At this stage, keep your shortlist tight. Too many consultations create noise. Too few limit your perspective.

A practical shortlist should include contractors who clearly serve your area, understand local permit realities, and can point to kitchen work that matches your goals. If you're looking at firms in Seattle, Tacoma, Issaquah, or North Bend, local familiarity matters. Permit process, inspection expectations, parking access, delivery logistics, and home age all affect how smoothly a remodel runs.

Essential Questions for Interviewing Candidates

The interview is where many homeowners either gain clarity or get sold a story. A polished personality can make a weak process sound reassuring. A steady, organized contractor may sound less flashy but give far better answers.

The goal isn't to ask a huge list of questions. It's to ask the few that reveal how the contractor runs work.

Ask about fit, not just experience

Homeowners should compare contractors not just by reviews but by whether they can show recent projects similar in style and scope, explain their design-build or subcontractor coordination model, and demonstrate a project-management plan. The higher-value question is, Have you delivered the same type of kitchen transformation, at this level of complexity, with documented milestones and communication? That framing comes directly from Kitchen Solvers' guidance on choosing the right kitchen remodeling contractor.

That question gets past vague claims like “we do kitchens all the time.”

Ask for specifics such as:

  • Recent comparable work in homes like yours.
  • Photos from start and finish, not just the final glamour shots.
  • The coordination model if cabinets, electrical, plumbing, flooring, and finish carpentry involve different crews.
  • Milestones the contractor uses to keep the project moving.

An infographic listing five essential questions to ask when interviewing a potential kitchen remodeling contractor.

Verify credentials the right way

This part is basic, but it still matters. Ask whether the contractor is licensed, insured, and bonded, and ask how permit handling works for your project.

In Washington, that permit question matters more than many people realize. A capable contractor should be able to explain whether your project needs permits, who pulls them, what inspections are likely, and how that affects schedule. In cities like Seattle and Bellevue, a vague answer is a warning sign.

Listen for practical language. Good answers usually sound calm and specific. Weak answers tend to sound dismissive, irritated, or overly casual about code and inspections.

Ask how they run the job week to week

Your selection determines whether your experience will be manageable or frustrating.

A few strong questions:

  1. Who is my day-to-day contact?
    If you don't know who answers questions during the project, communication will drift.

  2. How often do you give updates?
    Weekly check-ins, milestone updates, or shared scheduling notes are all reasonable if they're done consistently.

  3. How do you manage subcontractors?
    You want to hear that the contractor coordinates sequencing, checks completed work, and keeps trades from stepping on one another.

  4. What happens if hidden conditions show up?
    In kitchen remodels, wall openings sometimes reveal surprises. The contractor should explain how they document the issue, price the change, and get approval before extra work proceeds.

Here's a useful video about the mindset homeowners should bring into contractor conversations:

Watch for green flags and red flags

A good interview often feels less like a sales pitch and more like a planning discussion.

Green flags Red flags
Specific answers about similar projects Vague claims with no examples
Clear permit and inspection explanation “You probably won't need permits” without context
Defined communication process No single point of contact
Thoughtful questions about your priorities Immediate pressure to sign
Straight talk about unknowns Overpromising that everything will be easy

The best contractors don't pretend remodels are free of surprises. They show you how they handle surprises without losing control of the project.

Ask about the payment process and closeout

Before you end the meeting, ask how payments are structured, how changes are approved, and what closeout looks like. You should also ask what happens after substantial completion if small corrections remain.

A contractor such as Wheeler Painting & Restoration Services may be one option if you're comparing firms that handle remodeling, coordination, and finish work in the Puget Sound area. What matters most in any case is whether the company can explain its process clearly and match the complexity of your project.

Decoding Bids and Finalizing the Contract

A kitchen estimate isn't just a price. It's a map of what the contractor thinks the job includes. If the map is incomplete, the project usually gets more expensive, more confusing, or both.

Compare written bids line by line

A practical rule is to compare at least three written bids because kitchen remodeling is a high-variance project. The same scope can produce very different prices, and homeowners should look for itemized estimates that separate labor, materials, timelines, and subcontractor work to avoid unusually low offers that hide missing scope, as explained in the Wyoming Building Supply kitchen remodel contractor guide.

That advice holds up in real projects. One bid may include demolition, haul-off, permit coordination, and cabinet installation. Another may show a lower total because several of those items are missing or buried in vague language.

A comparison chart showing what to look for and red flags in remodeling contractor bids.

What a useful estimate should show

A solid bid gives you enough detail to compare one contractor's assumptions against another's. It doesn't need to read like a legal manual, but it should be concrete.

Look for these elements:

  • Scope clarity including demolition, installation, finish work, and what stays untouched.
  • Material descriptions that identify product level or allowance categories clearly enough to avoid confusion.
  • Trade breakout showing where plumbing, electrical, cabinetry, flooring, or drywall work sits.
  • Timeline language that outlines sequence and expected duration in a realistic way.
  • Exclusions so you know what is not included.

If you're trying to understand how different line items affect overall cost, a kitchen remodel cost breakdown can help you read proposals more critically.

The cheapest bid is often the least reliable bid

Low pricing gets attention because remodeling numbers can feel big. But if one estimate is dramatically lighter than the others, treat that as a question, not a win.

There are a few common reasons:

  • Missing permit or disposal work.
  • Thin labor assumptions.
  • Unclear cabinet or finish allowances.
  • No contingency for expected complexity.
  • Gaps in subcontractor coordination.

A low bid can mean efficiency. It can also mean the contractor hasn't fully priced the job yet.

The safest move is to ask each bidder to explain differences in writing. When a contractor can walk you through why their price is higher or lower, you learn a lot about their process.

The contract should protect both sides

Once you choose a contractor, the contract is where verbal understanding becomes real protection. A strong contract lowers the chance of arguments because it defines expectations before work begins.

Review these points carefully:

Contract item Why it matters
Detailed scope of work Prevents “that wasn't included” disputes
Payment schedule tied to milestones Keeps payments connected to progress
Change order process Requires written approval before added work
Project timeline Sets expectations for sequence and duration
Warranty terms Explains what is covered after completion
Lien and closeout paperwork Helps confirm the project wraps up cleanly

A good contract should also name who handles permits, what selections must be finalized by certain dates, and how delays caused by owner changes or product lead times are addressed.

Final review before signing

Before you sign, slow down and read the proposal and contract together. Check that the scope, finishes, allowances, and exclusions all match the conversations you had. If something matters to you, it should appear in writing.

Homeowners often feel pressure to “just get started” at this stage. Resist that impulse. During the contract phase, how to choose a kitchen remodeling contractor becomes a practical decision instead of a hopeful one.

Begin Your West Seattle Kitchen Remodel with Confidence

A good kitchen remodel doesn't start with demolition. It starts with clarity. Once you know your priorities, narrow the field carefully, interview with purpose, and read bids like a homeowner protecting a major investment, the entire project gets steadier.

That's the goal. Not perfection on paper. A process that lowers risk and helps you make clean decisions.

What confidence looks like before work starts

By this point, you should be able to answer a few basic questions with confidence:

  • Does this contractor do kitchens like mine?
  • Can they explain permits, scheduling, and trade coordination clearly?
  • Does the bid show what's included and what isn't?
  • Does the contract protect the project once work begins?

If the answer to any of those is no, keep looking.

Why local context matters in Puget Sound

Kitchen remodeling in West Seattle, Tacoma, Bellevue, Kirkland, or North Bend isn't just about materials and labor. Access, permitting, older home conditions, neighborhood logistics, and inspection timing all shape the experience.

That's why a grounded local contractor is often a better fit than a polished operation that feels distant or overly scripted. Homeowners usually want someone accessible. Someone who answers plainly. Someone who can manage a smaller to mid-sized project with care instead of treating it like a number in a pipeline.

The right contractor should make you feel informed, not rushed.

A methodical process beats a lucky guess

If you've made it this far, you're already ahead of many homeowners. You're less likely to be swayed by a slick pitch, less likely to compare proposals unfairly, and more likely to recognize whether a contractor is prepared for your kitchen's level of complexity.

That preparation pays off. It leads to better communication, cleaner expectations, and a remodel that feels far more manageable from the first meeting to the final walkthrough.

If you're planning a kitchen remodel in Seattle, Tacoma, New Castle, Issaquah, Bellevue, Kirkland, West Seattle, Snoqualmie, or North Bend, take your time and choose carefully. The right contractor won't just build the kitchen. They'll shape the entire experience of getting there.


If you want to talk through your project with a local team that handles residential remodeling and construction work across the Puget Sound, contact Wheeler Painting & Restoration Services for a no-pressure consultation. A clear conversation early can help you define scope, understand next steps, and decide whether the fit is right for your kitchen remodel.

Kitchen Remodel Guide for Puget Sound Homes

If you're standing in your kitchen wondering whether to live with the cramped layout for one more year, you're not alone. A lot of homeowners in Tacoma, Bellevue, and West Seattle reach the same point. The cabinets still work, technically. The counters are still there. But the room doesn't fit the way you cook, gather, unload groceries, or get through a weekday morning.

That frustration is usually what starts a kitchen remodel. Not just wanting something prettier, but wanting the room to function better every day. And right now, that impulse is common. As of January 2025, 51% of homeowners surveyed planned to remodel their kitchens that year, and the National Association of Home Builders found that 68% of homeowners prioritized a kitchen remodel according to This Old House kitchen remodeling trends coverage.

In Puget Sound homes, the decision often comes with extra questions. Is the layout worth saving? Will permits slow things down? What happens if the walls open up and reveal old moisture damage or outdated wiring? Those are fair concerns. The good news is that a kitchen remodel becomes much more manageable when you understand the sequence, the trade-offs, and the local conditions that shape the job.

Starting Your Kitchen Remodel Journey

Monday morning is a good test of a kitchen. One person is packing lunches, someone else is reaching for coffee, the dishwasher is open, and the path between the sink and fridge turns into a traffic jam. That is the point where many homeowners in Tacoma, Bellevue, and Seattle stop talking about “updating the kitchen” and start asking what it would take to make the room work better.

In older Puget Sound homes, the problem often runs deeper than dated cabinets. The layout may reflect a time before larger refrigerators, wider ranges, charging stations, and the amount of storage a busy household expects now. In this region, I also look early for signs of moisture wear around windows, exterior walls, and sink bases. Our damp climate can turn a cosmetic project into a repair-and-remodel job once demolition starts.

The starting point is simple. Define what frustrates you every day and what you want the room to do better.

A good kitchen remodel starts with function. Finishes come after the workflow makes sense.

A homeowner may ask for new cabinets, but the core issue is often poor circulation, weak storage, bad lighting, or surfaces that do not hold up to heavy use. Kitchens are central to home life, taking heavy use and carrying significant resale weight. That is why the first conversation should focus on habits, not colors. How do you cook? Where do groceries pile up? Does one person work in the kitchen, or three?

What homeowners want to fix first

The patterns are consistent, even if every house is different:

  • Better flow: Clearer paths between the sink, refrigerator, and range make the room easier to use.
  • Storage that fits real life: Deep drawers, pantry pullouts, tray storage, and cabinet organizers often solve more than adding square footage.
  • Materials that hold up: In Puget Sound homes, finishes need to handle moisture, muddy shoes, wet jackets, steam, and frequent cleanup.
  • Better light: Gray winters make kitchen lighting more important here than many homeowners expect. Good task lighting changes how the room feels at 7 a.m. and 5 p.m.

The project feels more manageable once those priorities are separated into must-haves and nice-to-haves. That is also where a contractor's process helps. At Wheeler, we start by measuring the room, talking through pain points, and checking the parts of the kitchen that can change the budget fast, including electrical capacity, plumbing locations, ventilation, and any signs of hidden damage. Homeowners who want a clearer sense of price ranges can review this kitchen remodel cost breakdown for Tacoma-area projects before settling on scope.

It also helps to compare costs in other markets to see how labor, materials, and project size affect pricing. For reference, this overview of a typical Toronto kitchen renovation investment shows how quickly totals shift once cabinetry, layout changes, and finish level move up.

Clear decisions at the start prevent expensive changes later. That is especially true here, where permitting, older housing stock, and moisture-related repairs can affect the plan before the first cabinet comes out.

Planning Your Budget and Project Scope

The biggest budgeting mistake is assuming every kitchen remodel needs to be a complete gut renovation. In practice, some of the strongest returns come from targeted updates that improve how the room looks and works without rebuilding everything.

According to the 2026 Zonda Cost vs. Value report, minor kitchen remodels recoup an average of 112.9% of their cost in resale value, while major upscale remodels return 35.7% as summarized in this 2026 kitchen ROI report. That's a strong argument for looking closely at what can be improved before deciding to remove every cabinet and surface.

A modern kitchen countertop with a calculator and a tile sample board for home renovation planning.

Minor remodel or major remodel

A minor remodel usually makes sense when the cabinet layout still works, the room footprint is staying put, and the goal is to refresh the space. That can include cabinet fronts, counters, flooring, appliances, paint, and lighting.

A major remodel makes more sense when the layout is clearly wrong, the room has hidden problems, or you want to move plumbing, walls, windows, or major electrical components.

Budget rule: Spend first on the parts that improve function, then on the parts you touch every day, then on purely decorative upgrades.

How to set a realistic budget

Start with three buckets:

  • Core construction costs: Demolition, framing, drywall, plumbing, electrical, cabinetry, flooring, and installation.
  • Finish selections: Countertops, backsplash tile, fixtures, hardware, paint, and appliances.
  • Contingency planning: Older Puget Sound homes sometimes reveal water damage, uneven floors, outdated wiring, or hidden repairs once walls and cabinets come out.

Homes in Tacoma, Kirkland, and North Bend can vary a lot in age and condition, so scope matters more than broad averages. A compact kitchen with a stable layout may be a good candidate for a phased refresh. A home with long-term moisture issues or earlier remodel shortcuts may need deeper corrective work.

If you're trying to compare spending frameworks, even outside our market, this overview of a typical Toronto kitchen renovation investment is useful because it shows how cabinetry, finishes, and labor decisions shift the total depending on scope.

Where homeowners usually overspend

The most common budget drift comes from changing the plan after materials are ordered or after rough work has started. A few examples:

  • Moving fixtures late: Shifting the sink or range after layout decisions are set can trigger plumbing and electrical changes.
  • Mixing too many premium choices: Custom cabinets, luxury appliances, specialty tile, and high-end counters all at once can push the project out of balance.
  • Underestimating prep work: Leveling floors, repairing subfloor damage, and correcting old patchwork repairs aren't glamorous, but they affect everything installed after.

A detailed line-by-line estimate helps sort those choices before construction begins. This kitchen remodel cost breakdown is the kind of planning tool that helps homeowners see where the money goes.

Designing Your Ideal Kitchen Layout and Materials

A kitchen can look beautiful in photos and still be frustrating to use. Layout comes first. Materials come second. If the room doesn't flow, no countertop or cabinet finish will fix it.

A bright, modern kitchen featuring light wood cabinetry, marble countertops, an island with a sink, and high-end appliances.

Start with the work triangle

The classic work triangle connects the stove, sink, and refrigerator. It still matters because those are the points people move between constantly. Kitchen design standards recommend that the sum of the three sides should not exceed 26 feet, with each leg measuring between 4 and 9 feet according to this kitchen layout guide.

That doesn't mean every kitchen has to look the same. It means the layout should reduce wasted steps and avoid collisions. In a narrow Tacoma bungalow kitchen, that may mean keeping the main run simple and resisting the urge to force in an oversized island. In a larger Bellevue home, it may mean making sure the refrigerator doesn't end up isolated from the prep zone.

Layout choices that usually work

Here are a few practical patterns:

  • Galley kitchens: Efficient when the aisle width is handled correctly and the workflow stays compact.
  • L-shaped kitchens: Good for open living areas and often flexible for dining integration.
  • U-shaped kitchens: Strong for storage and work surface, but they need careful spacing to avoid feeling boxed in.
  • Island kitchens: Great when the room is large enough to support circulation, seating, and appliance clearances without crowding.

When homeowners want help visualizing that traffic flow, a planning resource like this kitchen layout planning guide can help frame the early decisions.

Material choices that hold up

Once the layout is solid, material selection gets easier because each choice has a purpose.

  • Custom cabinets: Best when you need to fit uneven walls, maximize storage, or match a specific style.
  • Semi-custom cabinets: A good middle ground for many remodels.
  • Wood and tile floors: Both can work well in a kitchen remodel. The right choice depends on your tolerance for maintenance, your household traffic, and how much moisture the room sees.
  • Backsplashes: Tile is usually the practical choice because it's durable and easy to clean.
  • Lighting: Layer task lighting, ambient lighting, and accent lighting so the room works at every hour.

For homeowners comparing fixture styles, browsing examples of modern lighting for culinary spaces can help narrow down the look before final electrical placement is set.

Countertop Material Comparison

Material Average Cost (per sq. ft.) Durability Maintenance Level
Quartz Varies by product and fabricator High Low
Granite Varies by slab and edge detail High Moderate
Marble Varies by slab and finish Moderate Higher
Laminate Varies by brand and profile Moderate Low
Butcher block Varies by wood species and finish Moderate Moderate to High

Because verified pricing data wasn't provided for these materials, it's better to compare them qualitatively and then request project-specific quotes.

One useful way to think about counters is simple. Quartz is usually chosen for low maintenance. Granite balances durability and natural variation. Marble has a strong visual appeal but asks more of the homeowner. Butcher block brings warmth, but it needs care around water and wear.

After you've narrowed layout and material choices, it helps to see a remodel discussion in motion. This short video gives useful visual context for how design decisions come together.

The Remodeling Process From Start to Finish

Construction feels stressful when it seems unpredictable. It feels manageable when you know what should happen next and why each stage matters.

A four-phase infographic roadmap titled The Kitchen Remodel Roadmap outlining construction steps from demolition to finishing.

Phase one through phase four

A typical kitchen remodel moves through four broad phases.

  1. Demolition and site prep
    The old cabinets, flooring, fixtures, and finishes come out. The crew protects adjacent spaces, manages debris, and exposes the conditions behind the finished surfaces.

  2. Structural work and utilities Framing changes, plumbing updates, electrical work, and any mechanical adjustments occur during this phase. If the plan includes moving a sink, adding circuits, or changing appliance locations, these modifications get built into the walls and floor at this stage.

  3. Installation
    Drywall, paint, cabinets, flooring, countertops, backsplash, trim, and fixtures go in. This is the stage homeowners usually picture, but it only goes smoothly when the earlier rough work was handled correctly.

  4. Finishing and punch list
    Appliances are set, hardware is adjusted, touch-up work is completed, and the team walks the space for final corrections.

Why rough-in inspection matters

The rough-in stage is one of the most important checkpoints in the whole remodel. The rough-in phase, where plumbing and electrical lines are installed in walls, must pass a professional inspection before drywall can be hung. Failure to pass this inspection can halt a project for weeks and lead to significant cost overruns if remediation is needed according to this explanation of the typical kitchen remodel process.

That requirement protects the homeowner. Once walls are closed, hidden mistakes get much more expensive to fix.

On-site reality: If a kitchen remodel feels slow during rough-in, that usually means the job is being checked carefully where it counts most.

What homeowners can do during construction

You don't need to manage the trades, but you should stay involved in key decisions. The practical ones matter most:

  • Confirm selections early: Cabinet hardware, plumbing fixtures, appliances, and tile should be finalized before their install window.
  • Ask about access: Know which entrance crews will use, where materials will be staged, and how dust will be contained.
  • Plan a temporary kitchen: A microwave, coffee maker, and a small prep area in another room can make the disruption much easier.
  • Expect noise and downtime: There will be days when progress is visible and days when the work is hidden inside walls.

In a professionally managed kitchen remodel, the schedule should be clear enough that you know what phase you're in, what inspection is next, and what decisions still need your approval.

Puget Sound Remodeling and Permitting Insights

A kitchen remodel in Puget Sound isn't the same as one in a drier climate or a newer subdivision with consistent building stock. The region has older homes, damp conditions, and municipal permitting processes that can vary from one city to the next. That's why local experience matters.

Moisture changes the conversation

In Tacoma, Seattle, and Snoqualmie, moisture isn't an abstract concern. It affects flooring choices, window detailing, ventilation planning, caulking, and how carefully crews inspect walls and subfloors once demolition starts.

If a kitchen has had a small leak over time, the visible stain is often the least important part of the problem. The bigger issue is whether the subfloor, wall framing, or nearby finishes have been absorbing moisture unnoticed. That kind of discovery can change the order of work and the repair scope.

In this region, ventilation and waterproofing aren't upgrades. They're part of building the kitchen so it lasts.

Permitting is local, not generic

Homeowners often ask one simple question: do I need a permit? The honest answer is that it depends on the scope and the city. Cosmetic updates are one thing. Moving plumbing, changing electrical, altering walls, or adding new exhaust routes is another.

A project in Seattle, WA may move through a different review path than the same kitchen remodel in Tacoma, WA or Issaquah, WA. That's why it helps to have a contractor who understands local expectations for inspections, documentation, and sequencing.

Material choices for this climate

Some finishes perform better than others in homes that see damp winters, wet shoes, and fluctuating indoor humidity.

A few examples:

  • Cabinet finishes: Painted surfaces need good prep and proper curing.
  • Flooring: Material choice should account for spills, pet traffic, and moisture near exterior doors.
  • Sealants and trim details: Small waterproofing details make a big difference around sinks, windows, and backsplashes.
  • Vent hoods: Proper exhaust matters for cooking moisture, not just odors.

For homeowners searching for a residential contractor near me or even a smaller commercial construction near me partner for mixed-use or tenant improvement work, regional familiarity isn't just a convenience. It affects durability, code compliance, and how smoothly the job moves.

How to Choose and Partner With Your Contractor

The contractor you choose will shape your kitchen remodel more than any single material decision. Good planning can be undone by poor communication, weak scheduling, or sloppy supervision. On the other hand, a clear process makes even a complicated remodel feel controlled.

What to check before hiring anyone

Start with the basics, and don't skip them:

  • License and insurance: Verify that the contractor is properly credentialed for residential work in Washington.
  • Relevant project history: A company that handles kitchens regularly will spot layout and sequencing issues earlier.
  • Detailed proposals: You want scope clarity, not a vague allowance-heavy estimate.
  • Communication habits: If calls and emails are confusing before the contract, they usually won't improve during construction.

A homeowner comparing firms can also use practical vetting questions like the ones in this guide on how to choose a general contractor.

A woman and a male construction worker reviewing kitchen remodel plans on a tablet in a renovation site.

What a healthy contractor relationship looks like

The strongest remodels usually share a few traits:

  • The scope is defined early. Homeowners know what is included, what isn't, and where allowances or owner selections still apply.
  • Decisions are documented. Appliance specs, cabinet details, paint selections, and change requests are tracked so there aren't competing assumptions on site.
  • The homeowner gets realistic expectations. Good contractors don't promise a friction-free remodel. They explain where uncertainty exists and how they'll handle it.
  • There is one accountable point of contact. That matters when questions come up about scheduling, access, inspections, or substitutions.

A straightforward process matters

For a kitchen remodel, Wheeler Painting & Restoration Services handles on-site consultation, project review, detailed proposals, and coordinated construction for residential remodeling work in Tacoma, WA, Seattle, WA, Bellevue, WA, and nearby communities. That kind of single-source process is helpful because kitchens involve multiple trades and a lot of sequencing.

The contractor's job isn't just to build the kitchen. It's to keep decisions, timing, and workmanship lined up so the project doesn't drift.

If you're comparing options in New Castle, WA, Kirkland, WA, or West Seattle, ask each contractor the same direct questions. Who handles permits if needed? When are selections due? What happens if hidden damage is found? How often will updates be provided? The answers usually tell you a lot.

Your Pre-Project and Post-Project Checklists

A kitchen remodel gets easier when you prepare for the disruption before demo day and know what to review before sign-off.

Pre-project checklist

  • Set up a temporary kitchen: Pick a spot for a microwave, toaster oven, coffee maker, and basic dishwashing setup.
  • Pack by category: Box dishes, pantry goods, cookware, and small appliances separately so daily essentials stay accessible.
  • Clear access routes: Move furniture, rugs, and wall décor near the work area to protect them and give crews room.
  • Plan for kids and pets: Noise, dust, and open work zones can be hard on routines.
  • Confirm final selections: Make sure appliances, cabinet hardware, plumbing fixtures, paint colors, and tile choices are approved before installation windows arrive.

Post-project checklist

  • Do a full walkthrough: Test drawers, doors, lights, outlets, faucets, and appliances. Write down anything that needs adjustment.
  • Review the punch list: Small fixes are normal at the end. The important thing is that they get documented clearly.
  • Collect product information: Keep warranty details, care instructions, and finish information in one folder.
  • Learn surface care: Ask how to clean countertops, cabinet finishes, wood floors, and tile without damaging them.
  • Check final details: Caulk lines, paint touch-ups, hardware alignment, and trim joints are worth a close look.

If you're planning a kitchen remodel in Tacoma, WA, Seattle, WA, Bellevue, WA, Issaquah, WA, Kirkland, WA, North Bend, WA, Snoqualmie, WA, New Castle, WA, or West Seattle, Wheeler Painting & Restoration Services is available for consultation and project discussions. A clear scope, realistic schedule, and local Puget Sound knowledge can make the process much easier from the first walkthrough to the final punch list.

Top Types of Kitchen Cabinet Woods: A 2026 Guide

Your kitchen cabinets are more than just storage; they are a defining element of your room's character, durability, and overall value. For homeowners and business owners planning a remodel in areas from Kent to Seattle, selecting the right material is a critical first step. With the Pacific Northwest's unique climate, understanding the different types of kitchen cabinet woods and how they perform is essential for a long-lasting, beautiful result.

This guide breaks down the most popular and practical options, from timeless hardwoods like Oak and Maple to versatile engineered materials. We'll explore the specific characteristics of each, including hardness, grain patterns, and how well they accept stains and paint. Making an informed decision on your kitchen's foundation starts with understanding these materials. To dig deeper into the specifics, a great resource is Choosing the Right Hardwood for longevity and style.

Whether you're a homeowner in Tacoma embarking on a full residential remodeling project or a facility manager overseeing tenant improvements, knowing your wood options ensures your investment stands the test of time. As a trusted local contractor, Wheeler Painting provides the professional insights needed to navigate these choices, helping you start your project on a solid footing. We will cover the pros and cons of ten distinct materials, giving you the clarity needed to match the perfect wood to your design vision and functional requirements.

1. Oak (Red & White)

Oak stands as one of the most reliable and popular types of kitchen cabinet woods in North America, prized for its strength, availability, and classic appeal. It is a go-to hardwood for both large-scale manufacturers and custom cabinet makers throughout the Pacific Northwest. Oak is divided into two primary species, red and white, each offering unique characteristics for your kitchen remodel in the Seattle or Tacoma area. Red oak typically has a warmer, pinkish hue with a more pronounced, open grain, while white oak is lighter, often with golden or gray undertones, and features a tighter, more linear grain.

Characteristics and Suitability

Oak's strong grain pattern is its defining feature, making it an excellent choice for traditional and farmhouse kitchens, a style often seen in homes from Kent to Bellevue. Its Janka hardness rating is impressive, with red oak at approximately 1290 and white oak even higher at around 1360. This durability ensures it can withstand the daily wear and tear of a busy kitchen.

  • Red Oak: Known for its dramatic, wavy grain. It readily absorbs stains, but its porous nature can sometimes lead to a blotchy finish without proper preparation.
  • White Oak: Slightly harder and more water-resistant due to its closed-grain structure (tyloses). This makes it a superior option for kitchens with high humidity or frequent moisture exposure, a key consideration in the Puget Sound climate.

Finishing and Maintenance Tips

Proper finishing is crucial to bring out oak's natural beauty and protect it for years. To achieve an even finish, especially on porous red oak, applying a pre-stain wood conditioner is a critical first step. For homeowners looking to tackle this themselves, our guide on how to stain wood cabinets provides a detailed walkthrough. A water-based polyurethane topcoat offers excellent moisture resistance and durability without the yellowing that oil-based finishes can develop over time. Careful sanding between each coat of finish will create a smooth, professional-quality surface that is easy to clean and maintain.

2. Maple

Hard maple is a premium cabinet wood, prized for its fine, uniform grain and exceptional hardness. Native to North America, maple offers superior durability and stability, making it an excellent choice for high-use kitchen environments. Its light, creamy color provides a clean, bright canvas, making it a favorite for contemporary and transitional kitchen designs in high-end homes and commercial spaces from Seattle to Tacoma. This tight grain structure makes it suitable for both natural stains and flawless painted finishes, a quality valued by professional cabinet makers and painting contractors.

Characteristics and Suitability

Maple’s defining trait is its smooth, subtle grain pattern, which lends a refined and modern look to cabinetry. With a Janka hardness rating of around 1450, it is one of the more durable types of kitchen cabinet woods, easily resisting dents and scratches from daily activity. This resilience makes it a practical investment for busy family kitchens and high-traffic commercial settings. Its clean aesthetic is particularly well-suited for minimalist, contemporary, and transitional styles, offering a sleek alternative to more pronounced grains like oak.

  • Grain & Color: Features a fine, consistent texture with colors ranging from creamy white to a light golden hue. The subtle grain avoids overpowering the kitchen's overall design.
  • Stability: Maple is a very stable wood, less prone to shrinking and expanding with the temperature and humidity shifts common in the Puget Sound region. For optimal performance, it's still crucial to allow the wood to acclimate in the environment before installation.

Finishing and Maintenance Tips

Maple's non-porous surface creates a perfect base for paint, resulting in a smooth, even, and professional-grade finish without a heavy grain texture showing through. For those who prefer a natural look, a clear coat can protect the wood while highlighting its delicate beauty. However, natural maple can yellow over time when exposed to sunlight. To prevent this, it is essential to apply a high-quality, water-based polyurethane with UV protection. Partnering with an experienced residential contractor like Wheeler Painting ensures a durable and beautiful result, whether you choose a crisp white paint for a modern kitchen in Kent or a clear, natural finish for a transitional look in Tacoma.

3. Cherry

Cherry is an elegant hardwood highly valued for kitchen cabinets, known for its rich, warm reddish-brown color and fine, straight grain. It stands out among the various types of kitchen cabinet woods for its smooth texture and sophisticated appearance. Over time, cherry wood naturally darkens, developing a deeper, more lustrous patina when exposed to light, a prized characteristic that adds depth and character to upscale kitchens. This graceful aging process makes it a favorite for high-end residential renovations and luxury commercial build-outs from Tacoma to Seattle, where quality craftsmanship is paramount.

Characteristics and Suitability

Cherry’s defining trait is its beautiful color evolution and satiny finish, making it a perfect fit for traditional, transitional, and Arts and Crafts style homes. With a Janka hardness rating of around 950, it is softer than oak but still offers good durability for everyday kitchen use. Its workability allows for intricate details and clean lines, a feature often highlighted in custom cabinetry projects.

  • Color & Grain: Starts as a light pinkish-brown and deepens to a rich reddish-brown. The grain is fine, simple, and straight, though it can occasionally feature distinctive pitch pockets or mineral streaks.
  • Aging: The color change is a natural feature, not a flaw. Property owners in the Pacific Northwest should be aware that cabinets exposed to more sunlight will darken faster, so planning for this evolution is key to long-term satisfaction.

Finishing and Maintenance Tips

A proper finish on cherry wood both protects it and accentuates its natural warmth. While it takes stain well, many homeowners and designers in the Seattle area prefer a clear, natural finish to let the wood's inherent beauty shine and age gracefully. An oil-based finish can enrich the color, while a water-based polyurethane with UV inhibitors can help slow the darkening process if desired. To maintain a cohesive look, ensure all cabinet doors and fronts are from a similar batch to promote consistent color and grain patterns. Pairing these rich cabinets with warm metal hardware like bronze or copper creates a timeless and luxurious feel.

4. Hickory

Hickory is a native North American hardwood renowned for its dramatic grain variation, exceptional strength, and distinctly rustic character. Among the various types of kitchen cabinet woods, hickory stands out for its visual drama. It often features a pronounced contrast between its creamy white sapwood and darker, reddish-brown heartwood, sometimes within the same plank. This striking appearance has made it a popular choice for rustic, farmhouse, and even transitional kitchen designs, especially in Western Washington homes from Tacoma to Kent, where its authentic American character is highly valued.

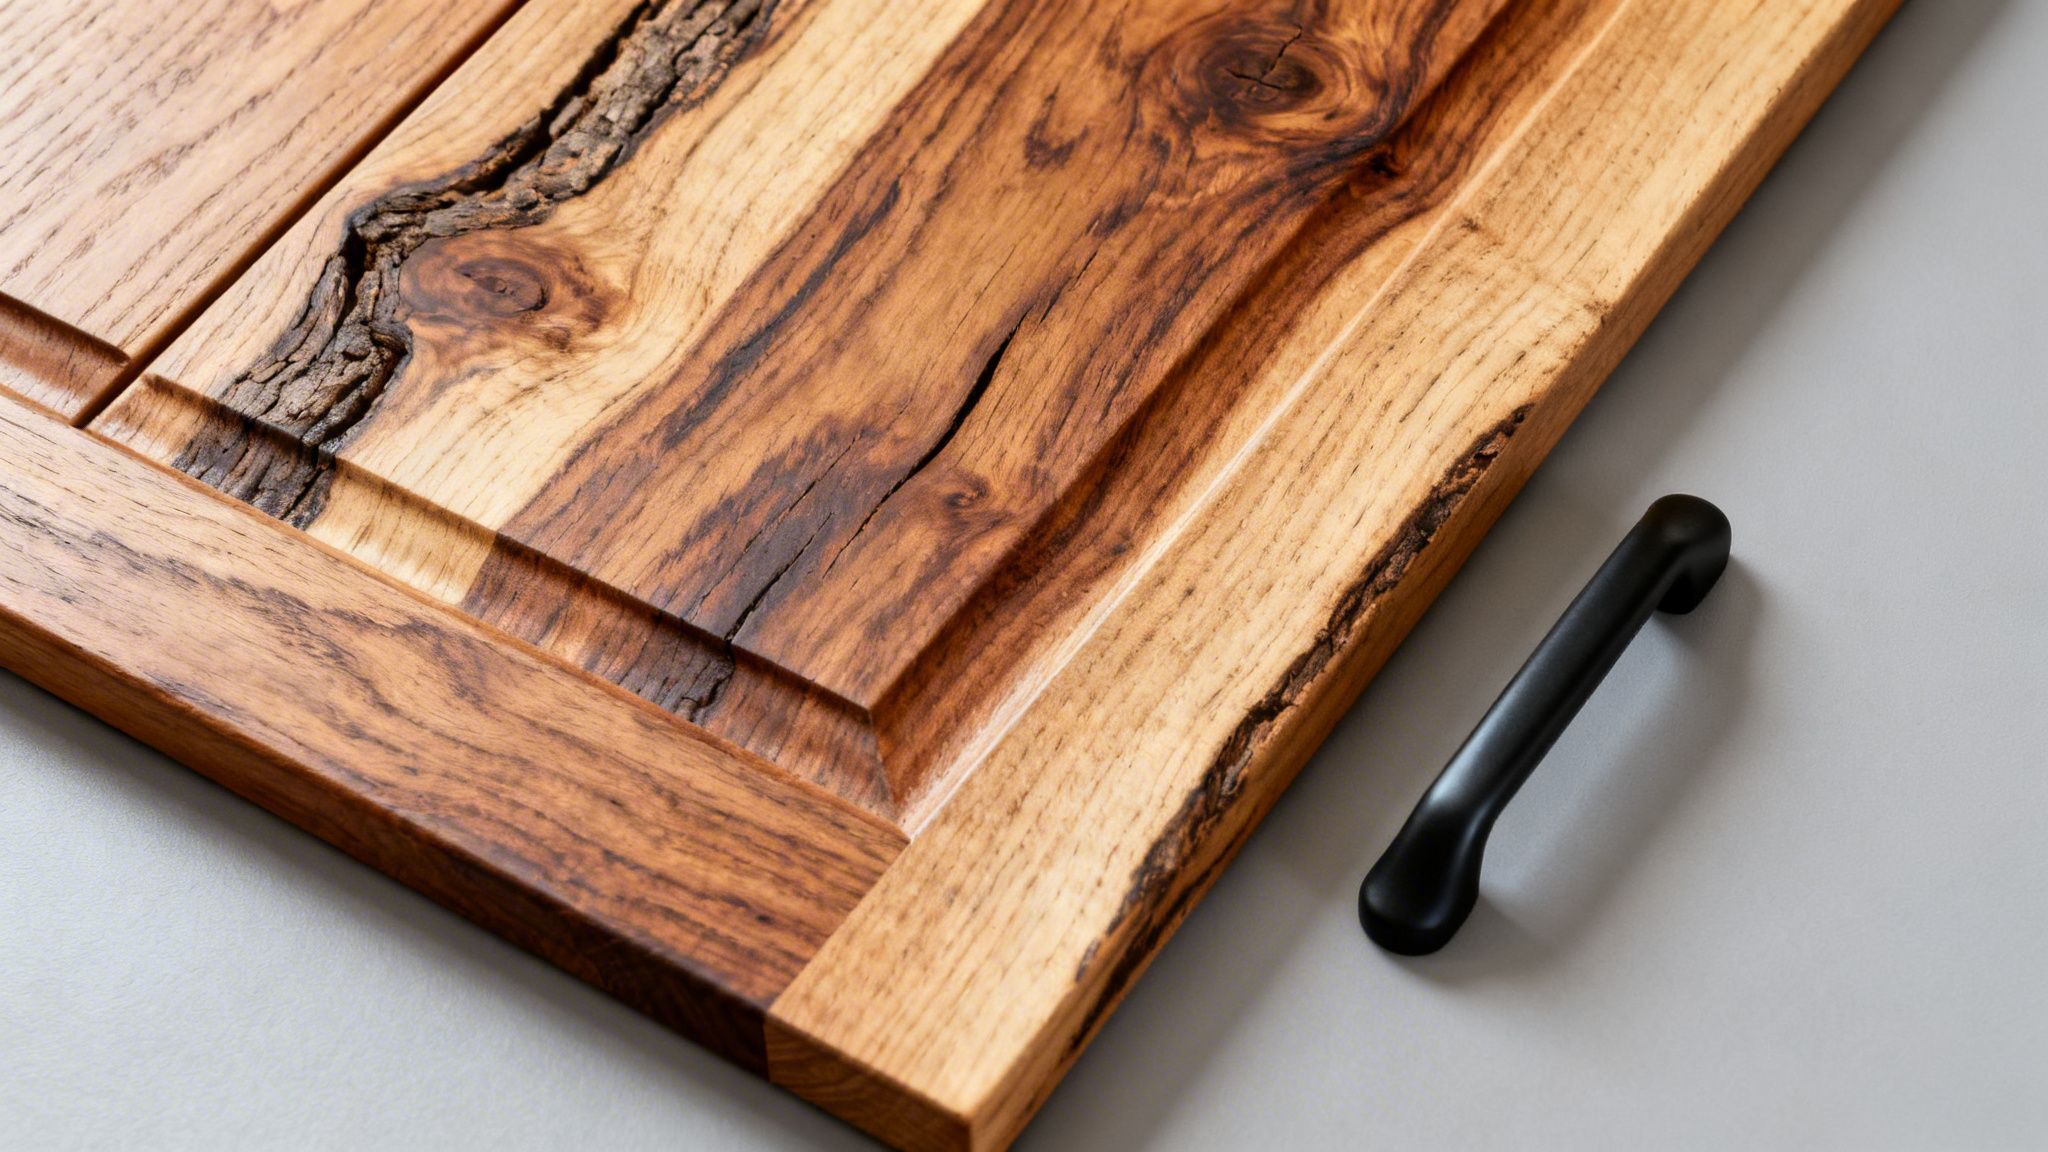
Beautiful natural wood kitchen cabinet door with visible grain and a minimalist black handle.

Characteristics and Suitability

Hickory's defining trait is its powerful, often unpredictable grain and color variation. With a Janka hardness rating of around 1820, it is one of the hardest and most durable domestic woods available, significantly surpassing oak and maple. This incredible toughness makes it a fantastic option for high-traffic kitchens and commercial spaces, ensuring it can resist dents, dings, and the general wear of a busy family or business.

  • Grain and Color: The strong visual contrast is hickory's signature. This natural variation is not a defect but a feature that gives each kitchen a unique, one-of-a-kind look.
  • Durability: Its exceptional hardness makes it a workhorse material, ideal for homeowners and facility managers who need cabinets that will stand the test of time and activity. It is well-suited for both traditional face-frame and modern frameless cabinet construction.

Finishing and Maintenance Tips

The key to a successful hickory kitchen is to embrace its natural character rather than try to hide it. Stains can sometimes appear blotchy due to density variations, so using a pre-stain wood conditioner is a good practice for a more uniform look. However, many property owners in the Seattle area prefer clear or light-toned finishes that celebrate the wood's inherent beauty. A matte or satin polyurethane topcoat protects the wood without creating a glossy sheen, preserving its rustic charm. For maintenance, a simple wipe-down with a soft, damp cloth is typically all that is needed to keep hickory cabinets looking their best.

5. Birch

Birch is a versatile, light-colored hardwood that offers exceptional value, making it a popular choice for kitchen cabinet woods. This fine-grained, sustainable domestic wood provides a clean, contemporary appearance that adapts well to various design aesthetics. Its smooth texture and uniform grain make it an outstanding candidate for both paint and stain, allowing for a high degree of customization. For budget-conscious residential or commercial renovations in the Pacific Northwest seeking quality without a premium price tag, birch presents an excellent mid-range solution.

Characteristics and Suitability

Birch has a Janka hardness rating of approximately 1260, placing it on par with red oak in terms of durability and resistance to dents and scratches. This makes it a dependable material for busy kitchens from Seattle to Kent. Its grain is typically straight or slightly wavy with a fine, even texture, which lends itself beautifully to modern, minimalist, and Scandinavian-inspired designs. Unlike the prominent grain of oak, birch's subtle pattern provides a smooth, uniform canvas.

  • Paint-Grade Quality: Its smooth surface and low porosity make birch one of the best woods for a painted finish. It requires less prep work to achieve a flawless, even coat compared to open-grained woods, making it a favorite for interior painting professionals.
  • Sapwood/Heartwood Variation: Birch lumber often includes both creamy white sapwood and reddish-brown heartwood. This combination can be used to create subtle visual interest in a natural finish or can be easily covered with paint or dark stain.

Finishing and Maintenance Tips

To achieve a professional-grade finish on birch, proper preparation is key. When staining, applying a pre-stain wood conditioner is essential to prevent a blotchy or uneven appearance, as birch can sometimes absorb stain inconsistently. It is an ideal wood for any painted cabinet project; its smooth surface creates a superior result. For homeowners and business owners in the moist Puget Sound climate, sealing birch cabinets with a high-quality polyurethane topcoat is critical to protect them from moisture, humidity, and staining. A well-sealed birch cabinet is easy to clean and will maintain its beauty for years, whether in a Tacoma residential home or a commercial office space renovation in Seattle.

6. Walnut

Walnut is a premium domestic hardwood celebrated for its rich, chocolate-brown color and sophisticated appearance. As one of the more luxurious types of kitchen cabinet woods, its use is often reserved for high-end, custom kitchen projects and upscale commercial interiors where its dramatic beauty justifies the investment. The fine, straight grain and natural luster make walnut a statement wood, ideal for luxury residential renovations and retail build-outs in areas like Seattle and Tacoma, where discerning clients seek exceptional quality and a standout design feature.

Characteristics and Suitability

Walnut's signature appeal lies in its deep color and smooth grain, which can range from straight to wavy and adds a layer of organic elegance to modern and contemporary designs. Its Janka hardness rating is around 1010, making it softer than oak but still durable enough for cabinet use with proper care. Its rich tones pair exceptionally well with light-colored countertops, such as marble or quartz, creating a striking contrast that is popular in designer kitchens and high-end office spaces.

  • Color & Grain: Black walnut features a deep brown heartwood, sometimes with purplish undertones and lighter sapwood. Its grain is typically fine and straight, providing a sleek, uniform look.
  • Best Use Cases: Perfect for creating a focal point, such as a statement kitchen island or a reception desk in a commercial space. It is also used in two-tone designs, paired with lighter woods or painted cabinets to balance its visual weight and cost.

Finishing and Maintenance Tips

The goal with walnut is to protect the wood without obscuring its stunning natural color. A minimal clear finish is often the best approach. A water-based polyurethane or a quality lacquer can provide excellent protection against moisture and wear while remaining crystal clear. To truly showcase its depth, consider installing under-cabinet lighting, which will highlight the grain and warm tones. Because of its premium nature and finishing requirements, working with a professional is highly recommended to ensure the final product is flawless. For a consultation on custom walnut cabinetry, our residential and commercial construction team can guide you through the process.

7. Alder

Alder, a hardwood native to the Pacific Northwest, has become a cherished material for kitchen cabinets, particularly for its warm, natural character and sustainable local sourcing. It presents a light tan to reddish-brown color with a straight, fine-grained texture that is subtle yet attractive. For property owners in the Puget Sound area looking to infuse their spaces with authentic regional charm, alder offers a beautiful and affordable solution. Its workability and consistent appearance make it a favorite for custom cabinet makers creating everything from rustic to transitional designs.

Characteristics and Suitability

Alder is one of the softer hardwoods, with a Janka hardness rating of around 590, making it susceptible to dents and scratches in a high-traffic kitchen. However, this softness also makes it easy to work with, allowing for intricate designs and detailing. Its fine grain provides a smooth surface that readily accepts stains and finishes, making it exceptionally versatile. For rustic or farmhouse styles, often seen in homes from Kent to Tacoma, "knotty" alder is a popular choice, where the natural knots are seen as character marks rather than defects.

  • Grain & Color: Features a straight, uniform grain with a consistent color that ranges from light honey to a reddish-brown. It closely mimics cherry when stained, offering a premium look at a lower cost.
  • Workability: Its softer nature makes it excellent for machining and sanding, resulting in a very smooth finish. This makes it a great candidate for both stained and painted cabinet projects.

Finishing and Maintenance Tips

To protect alder from the demands of a busy kitchen, a durable topcoat is essential. While it stains beautifully, applying a pre-stain wood conditioner will help prevent any potential for blotchiness and ensure a deep, even color. Medium to dark stains are particularly effective at adding richness and depth. For a long-lasting and protective finish, a high-quality polyurethane or conversion varnish is recommended. These finishes create a hard shell that resists moisture and daily wear, a crucial consideration for any residential remodeling or facility maintenance project in the Seattle or Tacoma area.

8. Ash

Ash is a light-colored hardwood that has become a favored option among the various types of kitchen cabinet woods, especially for property owners looking for an alternative to oak. Its attractive, open grain pattern creates significant visual interest but often presents a more refined and consistent appearance than oak's prominent grain. As a North American native hardwood, ash offers a great balance of durability, workability, and moderate cost, making it an excellent choice for custom and semi-custom cabinetry in homes and businesses from Seattle to Tacoma.

Characteristics and Suitability

The defining feature of ash is its straight, prominent grain and creamy light color, which lends itself beautifully to contemporary, modern farmhouse, and transitional designs. Its Janka hardness rating sits around 1320, placing it right between red and white oak in terms of durability, ensuring it can handle the demands of a busy kitchen. Its lighter tone can make a space feel larger and more open, a desirable quality in many Puget Sound homes and office spaces.

  • Grain and Color: The consistent, straight grain is less wild than red oak's, offering a clean yet textured look. Its natural pale-yellow or light-brown hue is perfect for creating a bright, airy aesthetic.
  • Workability: Ash is known for being strong yet flexible. It holds details well, accepts screws and nails without issue, and is a reliable material for residential contractors to work with, allowing for diverse door styles and designs.

Finishing and Maintenance Tips

To get the most out of ash, proper finishing is key, particularly because of its open-pored grain structure. Applying a pre-stain wood conditioner is a vital first step to ensure any stain is absorbed evenly and to prevent blotching. For a soft, contemporary look popular in modern farmhouse renovations, consider a whitewash or liming wax finish. This technique subtly highlights the grain while maintaining a light, neutral palette. To protect the surface and seal the open grain, multiple coats of a high-quality polyurethane are recommended, which also makes the cabinets easier to clean and more resistant to the moisture common in the Pacific Northwest climate.

9. Pine (Eastern & Knotty Pine)

Pine stands out as one of the most affordable types of kitchen cabinet woods, offering a distinct rustic charm. It's a softwood that appeals to those seeking an authentic, casual, or cottage-style kitchen. Pine is generally divided into clear-grained eastern pine and the more character-rich knotty pine. While knotty pine's swirling grain and prominent knots are its main appeal, these features require careful finishing to ensure longevity in a kitchen environment, a common need for budget-conscious updates in residential properties or smaller commercial spaces from Kent to Seattle.

Characteristics and Suitability

As a softwood, pine has a low Janka hardness rating, typically ranging from 380 to 420, making it susceptible to dents and scratches. This characteristic makes it better suited for upper wall cabinets rather than high-impact base cabinets. However, its prominent grain and knots are what define its appeal, creating an ideal canvas for farmhouse, cottage, and rustic designs that are popular in classic Pacific Northwest homes.

  • Eastern Pine: Features a straighter, more subtle grain with fewer knots, offering a cleaner look while still providing warmth.
  • Knotty Pine: Celebrated for its dramatic, rustic appearance. The knots can "bleed" resin, so sealing them with a shellac-based primer before painting or finishing is a critical step for any interior painting job.

Finishing and Maintenance Tips

Proper finishing is essential to protect pine from moisture and wear. Painting is often the best choice, as it provides a durable, easy-to-clean surface and can modernize the rustic look. If you prefer to showcase the wood's character, a heavy-duty polyurethane topcoat is mandatory to prevent damage. For a mixed-wood design, consider using a resilient hardwood for base cabinets and pine for an accent island or uppers. For those taking on a DIY project, learning about proper prep is key, and our guide on kitchen cabinet door painting offers valuable techniques. Due to its softness, regular maintenance involves gentle cleaning and prompt attention to any nicks or scratches.

10. Plywood & Engineered Woods (Veneer Panels)

While not a solid hardwood species, plywood faced with hardwood veneer is a foundational material in modern cabinet construction. Valued for its stability, resource efficiency, and cost-effectiveness, it has become a staple for residential and commercial projects alike. In addition to solid wood options, understanding what engineered wood is and its various forms, including veneer panels, is important for modern cabinet design. Engineered wood cores, like plywood or MDF, are constructed by layering or pressing wood fibers and adhesives, creating large, stable sheets that resist the warping and splitting common in solid wood, especially in the humid Puget Sound climate. These cores are then covered with a thin layer of real wood veneer, offering the exact appearance of solid wood at a much lower cost.

Characteristics and Suitability

The primary advantage of engineered wood is its dimensional stability. This quality makes it ideal for the large, seamless flat-panel doors and oversized island end-panels popular in contemporary and minimalist kitchens and office spaces from Seattle to Tacoma. Because the veneer can be any wood species, property owners can achieve the look of exotic or expensive woods like walnut or teak without the premium price tag.

  • Plywood Core: Consists of thin layers of wood (plies) glued together with alternating grain directions. It is strong, holds screws well, and offers good moisture resistance, making it a durable choice for cabinet boxes in both residential and commercial applications.
  • MDF/Particle Board Core: Medium-Density Fiberboard (MDF) provides an exceptionally smooth and uniform surface, perfect for painting. It is heavier and less moisture-resistant than plywood, often used in budget-friendly cabinet lines and tenant improvement projects.

Finishing and Maintenance Tips

The key to a long-lasting engineered wood cabinet is protecting it from moisture, particularly at the edges. Professional-grade edge banding is crucial to seal the core material and prevent swelling or delamination. The veneer surface can be stained and finished just like solid wood, allowing for a perfectly matched look throughout your space. A quality polyurethane topcoat will protect the veneer from scratches and daily wear. These materials pair well with a wide range of types of cabinet doors and styles, from sleek modern designs to more traditional looks, offering great design flexibility for any Kent home or Seattle office renovation.

Top 10 Kitchen Cabinet Woods Comparison

Wood Type Implementation Complexity Resource Requirements Expected Outcomes Ideal Use Cases Key Advantages
Oak (Red & White) Moderate — easy to machine and finish Widely available, affordable material Durable cabinets with prominent grain; good for stained or painted finishes Budget to mid-range traditional and transitional kitchens Affordable, strong grain character, reliable supply
Maple Higher — dense wood needs skilled machining and finishing Premium cost, requires experienced craftsmen Very durable, smooth uniform finish ideal for paint High-use, contemporary or painted cabinet projects Exceptional hardness, dimensional stability, excellent for paint
Cherry Moderate — workable but needs UV-protective finishing Premium pricing, limited availability Warm, elegant cabinets that deepen in color over time Upscale residential renovations and custom kitchens Rich patina with age, sophisticated appearance
Hickory Higher — very hard, requires careful machining and selection Moderate to premium cost, selection for consistency needed Dramatic rustic appearance with strong durability Farmhouse, rustic, and transitional kitchens Unique grain contrast, extremely durable
Birch Moderate — good workability for paint and stain Mid-range cost, sustainable domestic option Clean, contemporary look; takes paint and stain evenly Budget-conscious modern or Scandinavian-inspired kitchens Affordable hardwood, excellent for painted finishes
Walnut Moderate — requires expert finishing to showcase grain High cost, specialty sourcing Luxury, deep-colored cabinets that make visual statements High-end custom projects, statement islands, office renovations Rich natural color and luster, upscale aesthetic
Alder Low–Moderate — easy to machine but softer wood needs protection Affordable, locally sourced in Pacific Northwest Warm, regional character; softer and more dent-prone Casual, rustic, transitional kitchens with local appeal Budget-friendly, easy to finish, sustainable local option
Ash Moderate — open grain needs additional sealing/finish coats Moderate cost, less common than oak/maple Refined open-grain look with good durability Contemporary, modern farmhouse, transitional designs Oak-like grain with more refinement, versatile finishes
Pine (Eastern & Knotty) Low — very easy to machine, requires heavy-duty finish Lowest cost, widely available Rustic, cottage appearance; lower durability under heavy use Budget renovations, cottage/farmhouse styles, facility maintenance Most affordable, strong rustic character, easy to customize
Plywood & Engineered Woods (Veneer Panels) Low–Moderate — requires edge banding and moisture sealing Cost-effective, stable panels; veneer allows species appearance Stable, consistent large panels that mimic solid wood Modern flat-panel kitchens, tenant improvements, budget-conscious projects Superior dimensional stability, sustainable, consistent appearance

Bringing Your Vision to Life with an Expert Partner

Choosing the right material for your cabinets is a foundational step in any kitchen remodel, but it represents just one piece of a much larger puzzle. As we've explored the distinct characteristics of various types of kitchen cabinet woods, from the enduring strength of Oak and Hickory to the refined elegance of Cherry and Walnut, a clear theme emerges. The ultimate success of your project depends not just on the wood you select, but on the quality of craftsmanship that brings it to life. The journey from a raw slab of Alder or a sheet of engineered plywood to a beautifully finished and perfectly installed cabinet is complex, requiring a deep understanding of material behavior, finishing techniques, and structural integrity.

This is especially true in the unique climate of the Puget Sound region. Homeowners and property managers from Seattle to Tacoma must consider how seasonal humidity shifts can affect different woods. A material that performs well in a dry climate might warp or swell in our damp environment without proper sealing and finishing. This is where the value of professional guidance becomes undeniable. An experienced residential and commercial contractor can help you navigate these decisions, ensuring the wood you love is also a practical, long-lasting choice for your specific home or commercial space.

From Material Selection to Flawless Execution

The difference between a good project and a great one often lies in the details of execution. The most beautiful slab of maple can be undermined by poor construction, and a budget-friendly choice like birch can look exceptional with a professional-grade paint finish. The process involves much more than just picking a wood species.

Key considerations that a professional partner like Wheeler Painting manages include:

  • Proper Acclimation: Before installation, wood must be acclimated to your property's specific environment to prevent future shrinking or expanding. This is a critical step often overlooked in DIY projects, especially for properties in Kent and the surrounding moisture-rich areas.
  • Precision Finishing: Achieving a durable, even finish is an art form. It requires a controlled environment, professional-grade sprayers, and knowledge of how different stains and paints interact with various wood grains and pore structures.
  • Expert Installation: Ensuring cabinets are level, plumb, and securely fastened is essential for both function and longevity. A professional ensures that doors hang correctly, drawers glide smoothly, and the entire system can withstand daily use for years.

For business owners planning a tenant improvement or a retail build-out, these details are even more critical. The durability and appearance of your cabinetry directly impact your brand's image and operational efficiency. A professional contractor like Wheeler Painting provides the necessary project management to ensure your commercial renovation is completed on time, within budget, and to the highest standard, minimizing disruption to your business. We specialize in the smaller to mid-size facility maintenance and improvement projects that many larger firms overlook.

Why Expert Partnership Matters for Your Puget Sound Project

Ultimately, selecting from the many types of kitchen cabinet woods is about defining the aesthetic and functional heart of your space. Whether you're a homeowner dreaming of a modern kitchen remodel or a facility manager overseeing a multi-unit renovation, the goal is the same: a beautiful, durable result that adds value to your property.

Making that vision a reality requires a partner who can bridge the gap between design and construction. It requires a team that understands the local environment, specializes in both residential and commercial projects, and prioritizes clear communication. By working with a seasoned professional, you are not just buying custom cabinets; you are investing in a seamless process and a guarantee of quality craftsmanship that will stand the test of time. This frees you to focus on the exciting parts of your renovation, confident that the technical complexities are in expert hands.


Ready to transform your kitchen or commercial space with stunning, expertly crafted cabinets? The team at Wheeler Painting offers comprehensive residential remodeling and commercial construction solutions, from material selection and custom cabinets to professional finishing and installation. Contact us to discuss how we can bring your project in Seattle, Tacoma, or Kent to life with unmatched local expertise and build a lasting relationship for all your facility maintenance needs.

10 Fresh Kitchen Cabinets Paint Color Ideas for Your Puget Sound Home in 2026

Your kitchen is the heart of your home or business, a central hub for daily life. Yet, outdated or worn cabinets can make the entire space feel tired and uninviting. Fortunately, a professional paint job is one of the most effective ways to revitalize your kitchen, whether you're a homeowner in the Puget Sound area planning a remodel or a facilities manager aiming to update a commercial property. A fresh coat of paint not only modernizes the aesthetic but also protects your cabinetry investment for the long term.

This guide explores 10 inspiring kitchen cabinets paint color ideas, complete with expert advice on finishes, hardware pairings, and local Western Washington trends. A well-chosen color can completely change the atmosphere of a room, impacting everything from perceived size to overall mood. As a trusted local provider, Wheeler Painting has helped countless homeowners and businesses achieve stunning results, and we're here to help you navigate the options with confidence.

From timeless whites and warm grays to bold, moody hues like navy and forest green, this curated list provides actionable insights for any project. You will discover the perfect color palette and practical details needed to create a kitchen you'll love for years to come. We will cover specific paint finishes, complementary hardware suggestions, and even layout considerations to help you make an informed decision for your residential or commercial space. Let's find the right color to refresh your kitchen.

1. White Options — Soft Sheen & Eggshell Finishes

White kitchen cabinets remain a timeless choice, offering a clean, bright, and versatile foundation for any design. By strategically combining different finishes, you can achieve a look that is both beautiful and practical. This approach pairs a soft sheen (often satin or semi-gloss) on cabinet doors and drawer fronts with a lower-luster eggshell finish on the cabinet boxes and frames, creating a subtle, sophisticated contrast that elevates the classic white kitchen.

A bright modern kitchen featuring white upper cabinets, cream lower cabinets, and a wood island with a marble countertop.

This dual-finish technique is one of the most effective kitchen cabinets paint color ideas because it balances aesthetics with durability. The slightly higher gloss of a soft sheen on doors makes them easier to wipe clean, a key benefit in high-traffic residential kitchens and commercial break rooms alike. Meanwhile, the eggshell finish on the cabinet boxes offers a soft, elegant look without the high reflectivity that can show imperfections. This method is frequently seen in modern farmhouse designs throughout the Seattle and Portland metro areas, where its bright, airy feel combats the region's gray days.

Implementation Tips for a Flawless Finish

To ensure your white cabinets look pristine and last for years, especially in the humid Puget Sound climate, follow these professional tips:

  • Choose High-Quality Paint: Opt for a premium paint with mildew-resistant properties to prevent moisture-related issues. A high-quality formula also ensures better coverage and longevity.
  • Warm Up the White: To keep a white kitchen from feeling cold or clinical, introduce warm elements. A walnut island, butcher block countertops, or warm wood flooring can add natural texture and balance.
  • Mix Your Metals: Create a curated, designer look by using different hardware finishes. Consider warm brass on lower cabinets and polished chrome or nickel on uppers for a layered effect.
  • Prioritize Prep: Proper preparation is non-negotiable for a durable finish. This includes thorough cleaning, sanding, and applying a high-quality primer. We always recommend at least two top coats for uniform color and maximum durability. You can explore our detailed process to learn more about professional kitchen cabinet door painting.

2. Warm Gray with Matte Finish & Mixed Metal Hardware

Warm gray, or "greige," cabinets finished in a contemporary matte offer a refined alternative to traditional whites and stark grays. This choice brings depth and modern elegance to a kitchen, creating a look that feels both current and enduring. The matte finish minimizes light reflection, producing a velvety, uniform surface that is forgiving of minor imperfections and feels soft to the touch.

This particular kitchen cabinet paint color idea shines in contemporary Seattle homes and modern office space renovations where a touch of warmth is desired without sacrificing a clean aesthetic. The matte surface diffuses light beautifully, which is a significant benefit in the Pacific Northwest where natural daylight can be soft. Pairing warm gray cabinets with mixed metal hardware, such as brass and brushed nickel, introduces a layered, custom-designed feel that prevents the space from feeling one-note. The result is a versatile and welcoming environment suitable for both high-end residential remodels and upscale commercial break rooms.

Implementation Tips for a Flawless Finish

To successfully execute this look and ensure its longevity, especially in high-use kitchens, consider these professional recommendations:

  • Test Colors in Natural Light: Request multiple greige samples and observe them at different times of the day in your kitchen. The specific quality of light in the Puget Sound region can dramatically alter how a color appears.
  • Balance with Light Elements: To prevent the warm gray from feeling heavy, pair it with a light-colored backsplash like white subway tile or light wood flooring. This contrast keeps the room feeling bright and open.
  • Mix Metals Thoughtfully: Create visual balance by using warm brass hardware on lower cabinets and cooler brushed nickel on uppers. This popular designer technique adds interest and sophistication.
  • Prioritize a Durable Topcoat: A matte finish requires protection. We recommend a high-quality matte sealant topcoat for added durability, especially on high-touch surfaces and in moisture-prone areas near sinks and dishwashers.

3. Navy Blue with High-Gloss Finish & Brass Knobs

For a look that is both dramatic and timelessly elegant, deep navy blue cabinets offer a powerful statement. Paired with a high-gloss or semi-gloss finish and warm brass hardware, this combination creates a rich, polished aesthetic that feels both traditional and modern. The glossy finish is a key part of this kitchen cabinets paint color idea, as it amplifies the color’s intensity while reflecting light, preventing the dark hue from overwhelming the space.

This sophisticated style is frequently seen in high-end residential kitchens across the Pacific Northwest, from showcase homes in Bellevue to upscale commercial hospitality spaces in downtown Seattle. The reflective quality of a high-gloss finish makes it surprisingly practical for a dark color, brightening the room and making the cabinet surfaces easy to clean. This dramatic choice is often popularized by design influencers and luxury home magazines, proving its staying power in modern design.

Implementation Tips for a Flawless Finish

To achieve a professional, durable navy finish that elevates your space, consider these expert tips. Proper planning is crucial for a project of this nature, and you can learn more about how to plan a kitchen remodel to ensure every detail is covered.

  • Balance with Lightness: To avoid a cavernous feel, apply navy to lower cabinets only and pair them with white or light-colored uppers. This two-tone approach maintains an open, airy atmosphere.
  • Maximize Lighting: This look thrives in kitchens with ample natural or architectural lighting. The glossy finish will catch the light beautifully, adding depth and dimension.
  • Choose the Right Hardware: Warm metallic hardware, such as brass or antique gold, is essential. The warmth of the metal contrasts perfectly with the cool navy, adding richness and a touch of luxury.
  • Focus on Preparation: Achieving a smooth, high-gloss finish requires meticulous surface prep. Ensure cabinets are thoroughly cleaned, sanded, and primed with a high-quality bonding primer for maximum adhesion and a flawless look.
  • Provide Proper Care Tools: For residential or commercial clients, provide microfiber cloths for regular maintenance. A high-gloss finish can show fingerprints, and microfiber is the best tool for keeping it pristine.

4. Sage Green with Matte Finish & Oil-Rubbed Bronze Hardware

Embracing a nature-inspired palette, sage green cabinetry brings a sense of calm and organic appeal to any kitchen. When paired with a modern matte finish, this earthy hue feels both current and timeless, creating a sophisticated backdrop that doesn't overwhelm the space. The soft, non-reflective surface of a matte finish diffuses light beautifully, lending an almost velvety texture to the cabinets and enhancing the color's inherent tranquility. This combination is a fantastic kitchen cabinets paint color idea for creating a restorative and inviting atmosphere.

A cozy kitchen corner with sage green cabinets, light countertops, open wooden shelves, and a vase of greenery.

The style’s popularity, boosted by designers like Joanna Gaines and the enduring modern farmhouse trend, is evident in Western Washington residential remodels and even wellness-focused commercial spaces. To complete the look, oil-rubbed bronze or gunmetal hardware provides a warm, grounding contrast against the cool green. This pairing moves away from brighter metals, offering a subdued yet impactful detail that feels both rustic and refined. The result is a kitchen that feels connected to the natural beauty of the Pacific Northwest, making it a perfect choice for homeowners and designers in the region.

Implementation Tips for a Flawless Finish

To achieve a durable and beautiful sage green kitchen, focus on balancing color with texture and the right finishing touches.

  • Amplify with Natural Wood: Incorporate a natural wood island, butcher block countertops, or open shelving. These elements reinforce the nature-inspired theme and add organic warmth.
  • Create Contrast with Countertops: Pair the green cabinets with white or cream countertops, such as quartz or marble. This contrast keeps the room feeling bright and prevents the muted green from looking too dark.
  • Select Authentic Hardware: Choose oil-rubbed bronze hardware that has a subtle patina. This detail adds a sense of history and an authentic, vintage-inspired aesthetic.
  • Enhance with Warm Lighting: Use light bulbs with a warm color temperature (around 2700K). Warm light will bring out the yellow undertones in the sage green, making the kitchen feel cozier.
  • Protect the Matte Finish: For high-traffic areas near sinks or stoves, ask your professional painter about a durable matte topcoat. This will provide extra protection against scuffs and moisture without adding shine.

5. Black with Velvet or Flat Finish & Minimalist Hardware

For a look that is dramatic, modern, and undeniably chic, black cabinetry in a velvet or flat finish stands out. This bold choice creates an atmosphere of depth and sophistication, making it a powerful contender among kitchen cabinets paint color ideas. The non-reflective surface of a matte finish absorbs light, giving the cabinets a soft, rich appearance that feels both luxurious and contemporary. Paired with minimalist hardware like integrated pulls or subtle knobs, the focus remains on the clean lines and strong form of the cabinetry itself.

This aesthetic is frequently seen in high-end modern homes in Bellevue and design-forward commercial office kitchens in Seattle, where it makes a confident statement. The key to its success lies in balance. Black cabinets ground the space, while the flat finish prevents them from overpowering it with reflections. It's a design choice that works exceptionally well in contemporary, industrial, and minimalist settings, especially when supported by excellent lighting and contrasting elements that keep the room feeling open and inviting.

Implementation Tips for a Flawless Finish

To ensure your black cabinets serve as a stunning focal point without making your kitchen feel too dark, follow these professional recommendations:

  • Ensure Proper Lighting: Black cabinets demand great lighting. Abundant natural light is ideal, but a well-planned architectural lighting design with under-cabinet, pendant, and recessed lights is essential to illuminate the space and prevent it from feeling somber.
  • Create Strong Contrast: Pair black cabinets with light-colored countertops, like white quartz or cream marble, and a bright backsplash. This contrast is critical for creating visual balance and reflecting light throughout the room.
  • Break It Up with Open Shelving: To avoid a monolithic wall of black, incorporate open shelving. Natural wood or crisp white shelves provide a visual break and offer a space to display decorative items, adding personality and warmth.
  • Use Warm Accents: Prevent the design from feeling cold by introducing warm materials. Accents in gold, copper, or brass for faucets and light fixtures add a touch of glamour and warmth that complements the deep black.
  • Prioritize a Professional Application: A matte finish can be less forgiving when it comes to showing marks from application. For a flawless, durable velvet finish, proper prep with a high-quality primer and expert spraying techniques are non-negotiable for both residential and commercial projects.

6. Soft Cream with Satin Finish & Vintage Brass Hardware

Pairing soft cream cabinetry with vintage brass hardware creates a kitchen that feels both timeless and deeply inviting. This combination moves beyond the starkness of pure white, introducing a layer of warmth and historical charm. A satin finish is the perfect complement, offering a subtle glow that highlights the cream's warm undertones without being overly reflective, making it one of the most enduring kitchen cabinets paint color ideas for a reason.

This aesthetic is highly versatile, fitting seamlessly into classic farmhouse kitchens and traditional homes in established Seattle neighborhoods like Queen Anne or Capitol Hill. It’s also a go-to choice for commercial spaces, such as boutique hotel pantries or upscale office break rooms, that require an elegant, non-trendy atmosphere. The satin finish provides practical durability, resisting scuffs and simplifying cleaning, which is essential for both busy family kitchens and high-traffic commercial environments.

Implementation Tips for a Flawless Finish

To achieve a warm, sophisticated look that stands the test of time, especially in the damp Pacific Northwest climate, consider these professional tips:

  • Choose the Right Cream: Select a cream paint with distinct warm, yellow, or beige undertones. Avoid creams with cool gray or green hints, as they can appear dingy in the often-overcast light of the Puget Sound region.
  • Embrace Natural Materials: Pair cream cabinets with butcher block, light oak, or white marble countertops to enhance the natural warmth. These materials add texture and prevent the design from feeling one-dimensional.
  • Mix Your Metals: For a transitional feel, combine vintage brass hardware with contemporary stainless steel appliances. This creates a curated look that bridges classic and modern styles.
  • Warm Up the Lighting: Use warm lighting, around 2700K, to bring out the welcoming quality of the cream paint. Cooler light temperatures can wash out the color and make it feel sterile.

7. Forest Green with Matte Finish & Antique Copper Hardware

Evoking the deep, lush forests of the Pacific Northwest, forest green cabinets with a matte finish offer a look of profound sophistication and drama. This bold color choice moves beyond fleeting trends to create a timeless and grounding atmosphere. When paired with the warm, subtle glow of antique copper or antiqued brass hardware, the result is a kitchen that feels both luxurious and intimately connected to nature, a perfect aesthetic for distinctive homes and high-end commercial spaces.

This combination stands out among kitchen cabinets paint color ideas for its ability to feel both daring and comforting. The non-reflective matte finish absorbs light, giving the deep green a velvety, rich appearance that can make a space feel cozy and enveloping. This luxurious palette is increasingly popular in high-end residential remodels in Seattle and throughout Western Washington, where it resonates with the region's natural beauty. It's also an excellent choice for commercial renovations, such as a boutique hotel bar or an upscale office break room, aiming for a curated, memorable design.

Implementation Tips for a Flawless Finish

To successfully execute this dramatic look and ensure it enhances rather than overwhelms your space, consider these professional recommendations:

  • Maximize Lighting: A deep, matte color can absorb a significant amount of light. Ensure your kitchen has ample natural light or a well-planned architectural lighting scheme to keep the room from feeling too dark.
  • Create Contrast: Pair the dark green cabinets with light-colored countertops. White marble, quartz, or a light butcher block will create a stunning visual contrast that brightens the space and highlights the richness of the cabinet color.
  • Warm Up the Walls: Avoid stark white walls, which can create a harsh contrast. Instead, opt for warm white, cream, or a soft greige to complement the green and copper tones, creating a more cohesive and inviting atmosphere.
  • Choose a Durable Matte: Modern matte paints are more durable than their predecessors, but for a high-traffic area like a kitchen, it's wise to select a high-quality, washable formula with a protective topcoat to resist scuffs and simplify cleaning.

8. Two-Tone Pairing: White Upper Cabinets with Dark Lower Cabinets

The two-tone kitchen cabinet trend offers a balanced and visually engaging approach, combining the brightness of white upper cabinets with the grounding depth of dark lower cabinets. This bipartite design, using colors like navy, black, or deep forest green for the base, creates a sophisticated contrast that keeps the space feeling open and airy up top while adding a practical, modern edge below. The result is one of the most dynamic kitchen cabinets paint color ideas for creating a custom, designer look.

This color-blocking strategy is highly effective in both residential and commercial settings, from contemporary remodels in the Seattle area to luxury apartment kitchens with a modern aesthetic. The dark lower cabinets are excellent at hiding scuffs and spills in high-traffic zones, while the white uppers reflect light, making the room feel larger. This look is a staple in modern farmhouse and transitional designs throughout the Pacific Northwest, valued for its ability to be both classic and current.

Implementation Tips for a Flawless Finish

To execute a two-tone cabinet design that feels intentional and professionally done, precision is key. Follow these tips to ensure a beautifully balanced kitchen:

  • Establish a Clean Break: The color transition should occur at a natural horizontal line, typically the countertop. This creates a crisp, deliberate separation between the upper and lower sections.
  • Coordinate Hardware: Use matching or coordinated hardware finishes across both cabinet colors to create a unified and cohesive look. For example, brushed brass pulls on both white and navy cabinets tie the design together.
  • Vary the Sheen: Apply a satin or semi-gloss finish to the white uppers to maximize light reflection and ease of cleaning. Use a matte or eggshell finish on the dark lowers for a rich, velvety appearance that adds depth.
  • Unify with a Backsplash: Select a single backsplash material, like a classic white subway tile or a dramatic marble slab, to run behind both the upper and lower cabinets. This prevents the design from looking too busy. A thoughtful renovation can make a significant impact; you can explore a kitchen remodel cost breakdown to better plan your project.

9. Warm Taupe with Satin Finish & Brushed Nickel Hardware

Warm taupe offers a sophisticated, earthy alternative to gray or beige, creating a welcoming and upscale atmosphere. This brownish-gray hue, when applied with a satin finish and paired with brushed nickel hardware, strikes a perfect balance between classic warmth and modern sleekness. It’s an ideal choice for property owners seeking a versatile neutral that feels both current and enduring.

This combination is one of the most effective kitchen cabinets paint color ideas because it provides a refined backdrop that supports various design elements. The satin finish delivers a subtle glow that is easy to clean, a crucial feature for high-use residential kitchens and commercial break rooms in the Puget Sound area. The cool tone of brushed nickel hardware contrasts beautifully against the warmth of the taupe, creating a cohesive and polished look that elevates the entire space. This palette is frequently specified in upscale remodels and new commercial build-outs, from professional office kitchens to interior design showrooms.

Implementation Tips for a Flawless Finish

To achieve a professional and durable warm taupe kitchen, proper execution and material selection are key, especially when aiming for a high-end result.

  • Test Your Taupe: Taupe can have various undertones, from golden to gray. Always view multiple paint samples in your kitchen's specific lighting conditions throughout the day before making a final decision.
  • Create Contrast: Pair warm taupe cabinets with a crisp, light backsplash, such as white subway tile or Calacatta marble, to create a clean visual break and keep the space from feeling too heavy.
  • Commit to Cohesion: For a clean, contemporary feel, use brushed nickel or chrome for all hardware and fixtures, including faucets and light pendants. This ensures a consistent, thoughtfully designed aesthetic.
  • Introduce Natural Wood: Incorporate elements like natural wood open shelving or a butcher block island. The organic texture and warmth of the wood complement the earthy taupe, adding depth and character.
  • Mind Your Lighting: Use warm-toned lighting, around 2700K, to enhance the inviting quality of the taupe. Harsh, cool lighting can make the color appear flat or dull.

10. Charcoal Gray with Flat Finish & Matte Black Hardware

For a modern, industrial-chic statement, deep charcoal gray cabinetry offers a bold yet refined aesthetic. This contemporary palette uses a completely non-reflective flat finish paired with matte black hardware to create a seamless, sophisticated look. This combination is especially effective in urban renovations and contemporary homes where a dramatic, moody atmosphere is desired.

Sleek dark gray kitchen cabinets with white marble counters and under-cabinet lighting in a modern home.

This monochromatic scheme is one of the most striking kitchen cabinets paint color ideas because it delivers high-impact style with minimal fuss. The flat finish absorbs light, giving the deep gray a velvety, uniform appearance that hides minor surface imperfections well. This look is frequently seen in Seattle loft conversions and modern residential projects, where it complements concrete floors, exposed ductwork, and minimalist design. It is also an excellent choice for commercial office break rooms or retail build-outs aiming for a sleek, high-end feel.

Implementation Tips for a Flawless Finish

To ensure your charcoal gray kitchen feels intentional and not just dark, follow these professional recommendations:

  • Prioritize Lighting: A flat, dark color can make a space feel smaller. Counteract this with abundant natural light or a well-planned architectural lighting scheme, including under-cabinet LEDs and strategically placed pendants.
  • Create Contrast: Pair the dark cabinets with light-colored countertops, such as white quartz or light gray marble, to create a sharp visual contrast and prevent the design from feeling too heavy.
  • Maintain Cohesion: Use matte black hardware consistently across all cabinets and drawers. This dedication to a single finish creates a cohesive and polished look that reinforces the modern aesthetic.
  • Select the Right Paint: A high-quality, professional-grade paint is critical for achieving a durable and even flat finish. At Wheeler Painting, we use premium products designed for superior coverage and scrubbability, even in a matte sheen.

Kitchen Cabinet Paint Color Comparison — 10 Options

Cabinet Style Implementation complexity Resource requirements Expected outcomes Ideal use cases Key advantages
White Options — Soft Sheen & Eggshell Finishes Low–Moderate (standard prep; eggshell needs careful application) High-quality paint & primer, mildew-resistant options, ventilation, 2+ coats Bright, timeless, professional appearance; easy to refresh Residential remodels, commercial tenant spaces, model homes Maximizes light, practical cleanability, widely appealing
Warm Gray with Matte Finish & Mixed Metal Hardware Moderate (color matching and hardware coordination required) Multiple samples, matte sealant option, coordinated hardware Sophisticated, modern look that conceals minor wear Upscale residential, transitional kitchens, professional spaces Versatile neutral, hides dust, pairs with many accents
Navy Blue with High-Gloss Finish & Brass Knobs High (professional prep and spraying for flawless gloss) High-gloss paint, quality primer, professional application, frequent maintenance Dramatic, luxe focal point with strong color depth High-end remodels, design-forward homes, well-lit kitchens Distinctive, depth-enhancing finish, highly durable gloss
Sage Green with Matte Finish & Oil-Rubbed Bronze Hardware Moderate (careful undertone selection; matte durability concerns) Color samples, durable matte topcoat, coordinated hardware Calming, organic aesthetic that feels warm and welcoming Farmhouse, cottage, nature-focused homes and studios On-trend, forgiving color, complements natural materials
Black with Velvet or Flat Finish & Minimalist Hardware High (requires excellent lighting design and flawless finish) Professional-grade flat/velvet paint, primer, strong lighting plan Dramatic, modern, high-contrast look that reads luxury Modern luxury homes, industrial lofts, commercial spaces Sophisticated, hides imperfections, strong visual impact
Soft Cream with Satin Finish & Vintage Brass Hardware Low–Moderate (straightforward application; attention to undertone) Satin paint, primer, sourced vintage-style hardware Warm, inviting, timeless kitchen aesthetic Traditional homes, family kitchens, historic restorations Welcoming, less stark than white, enduring appeal
Forest Green with Matte Finish & Antique Copper Hardware High (bold color needs precise coordination and lighting) High-quality matte paint + protective topcoat, curated hardware Luxurious, nature-inspired focal point with curated feel Luxury residential, designer showcase homes, nature settings Rich, designer-quality look, pairs well with natural materials
Two-Tone Pairing: White Upper with Dark Lower Moderate–High (precise transitions and coordination) Multiple paints, careful masking/transition planning, matched hardware Balanced, intentional design that maintains brightness and practicality Contemporary/transitional kitchens, designer remodels Combines lightness above with durable, stain-hiding lowers
Warm Taupe with Satin Finish & Brushed Nickel Hardware Low–Moderate (standard prep; attention to undertones) Satin paint, primer, sample viewing in real lighting Versatile, sophisticated neutral backdrop Upscale residential, transitional spaces, commercial kitchens Extremely versatile, hides wear, complements many materials
Charcoal Gray with Flat Finish & Matte Black Hardware Moderate–High (needs good lighting and flawless prep) Flat paint, professional application recommended, cohesive hardware Bold yet refined industrial-modern aesthetic Urban renovations, lofts, contemporary kitchens Modern, less severe than black, cohesive matte statement

Bring Your Vision to Life with Professional Cabinet Painting

You've explored the spectrum of possibilities, from the timeless appeal of soft whites and creams to the bold drama of navy blue and black. We've journeyed through earthy sage and forest greens, sophisticated warm grays, and the balanced elegance of two-tone designs. Each of these kitchen cabinets paint color ideas offers a unique opportunity to redefine the heart of your home or refresh a commercial space, proving that color is one of the most powerful tools in any design arsenal.

The key takeaway is that the perfect color is deeply personal and context-dependent. A high-gloss navy might shine in a well-lit kitchen with brass hardware, while a matte charcoal gray excels in a modern, minimalist setting. The ideas presented, from pairing sage green with oil-rubbed bronze to combining warm taupe with brushed nickel, are designed to be starting points for your own creative exploration.

From Inspiration to Impeccable Execution

Choosing the right color and finish is an exciting first step, but achieving a flawless, durable result is a different challenge altogether. The true measure of a successful cabinet painting project lies in the quality of the execution. This is where professional expertise becomes invaluable, especially in the demanding environments of both residential kitchens and commercial properties.

A professional finish is about more than just aesthetics; it's about longevity and performance. The process involves several critical stages that cannot be overlooked:

  • Meticulous Preparation: Proper cabinet painting requires thorough cleaning to remove years of grease and grime, careful sanding to create a surface that paint can adhere to, and precise application of the right primer to ensure a smooth, even base and block stains.
  • Choosing the Right Products: Professionals have access to and experience with high-performance coatings that are formulated specifically for cabinetry. These products offer superior hardness, scuff resistance, and washability compared to standard wall paints, ensuring your cabinets can withstand daily use.
  • Flawless Application: Achieving a factory-like finish without brush marks, drips, or uneven sheen requires specialized equipment, such as HVLP (High Volume, Low Pressure) sprayers, and the technical skill to use them correctly.

For homeowners in the Puget Sound area, investing in a professional cabinet refinish protects your investment and elevates your home's value. For facilities managers, business owners, and commercial property owners planning a tenant improvement or office renovation, a professional job ensures minimal disruption and a result that reflects the quality of your brand.

Beyond Color: A Partner in Your Project's Success

The journey from a simple color swatch to a fully transformed space involves careful planning, precise work, and a deep understanding of materials. Whether you are a homeowner envisioning a kitchen remodel, a business owner planning an office space renovation, or a designer seeking a reliable local contractor, the right team makes all the difference.

Think of it this way: the perfect color idea is the blueprint, but expert craftsmanship is what builds the final structure. A seasoned local provider like Wheeler Painting & Restoration bridges that gap, managing every detail from color consultation and surface preparation to the final coat and cleanup. This ensures your project, whether it's a small kitchen update or a large-scale commercial renovation, is completed to the highest standard, on time, and with lasting results. Your vision deserves more than a quick coat of paint; it deserves a professional finish that will look beautiful for years to come.


Ready to turn your favorite kitchen cabinets paint color ideas into a stunning reality? For a durable, professional-grade finish that transforms your home or commercial property, trust the experts at Wheeler Painting & Restoration Services. We provide comprehensive residential and commercial painting and construction services across the Puget Sound region, ensuring your project is handled with precision and care from start to finish. Contact Wheeler Painting & Restoration Services today to schedule your consultation and receive a detailed estimate.

A Guide to Kitchen Cabinet Doors Painting for a Flawless Finish

Thinking about giving your kitchen a facelift without the sticker shock of a full remodel? Painting your cabinet doors is one of the most effective and wallet-friendly ways to completely transform the space. It’s a project that delivers a high-end look for a fraction of the cost, letting you update outdated colors, erase years of wear and tear, and even boost your home's value.

This is a design refresh that really packs a punch.

Two kitchen cabinet doors, one dark brown and one newly painted white.

Why Painting Cabinet Doors Is Such a Smart Home Upgrade

If you're tired of staring at dated, scuffed-up kitchen cabinets but don't love the idea of a massive bill for new ones, painting is the perfect solution. It beautifully blends dramatic visual change with smart financial planning. Here in our local community, we see homeowners and property managers choose this option all the time, and for good reason.

This isn't just about slapping on a new coat of paint. It's a chance to completely redefine the heart of your home or rental property. You can finally ditch those dark, heavy wood tones for a bright, airy white, or maybe go bold with a contemporary color that truly shows off your personality.

The Financial and Aesthetic Payoff

The appeal becomes undeniable when you break down the numbers. Opting to paint your existing cabinets can cost 50-70% less than a full replacement, giving you a fantastic return on your investment. It’s a major reason why cost-effective updates like professional painting are driving growth in the kitchen renovation market.

Beyond the significant savings, the visual impact is instant. A fresh, professional paint job makes the whole kitchen feel cleaner, more spacious, and infinitely more welcoming. This guide will walk you through everything you need to know, whether you're gearing up for a DIY weekend or thinking about hiring a pro to get that flawless, durable finish.

A professional paint job doesn’t just look good—it delivers a durable, factory-like finish that adds real, measurable value to your home. It’s an upgrade that pays for itself, both in your daily enjoyment and its appeal to future buyers.

By getting a handle on the process, you can make a confident decision that fits your budget and vision. For a closer look at how these costs fit into the bigger picture, check out our guide on understanding the kitchen remodel cost breakdown.

Planning Your Project and Gathering the Right Supplies

A flawless finish on your kitchen cabinets starts long before you ever pick up a paintbrush. Thorough planning is what truly separates a frustrating, messy job from a project you can be proud of. If you take the time to map out your timeline, set up a dedicated workspace, and get all your supplies in order first, you’ll save yourself a world of headaches down the road.

Think of it as setting the stage. This isn't a project you can knock out in a single afternoon. Realistically, painting kitchen cabinet doors properly often takes two full weekends—the first for disassembly and prep work, and the second for painting, curing, and putting everything back together. Trying to rush it is a surefire way to end up with smudges and chipped paint.

Setting Up Your Workspace

Your first move is to create a dedicated project zone. You need a space that's well-ventilated, protected from dust and debris, and big enough to lay out all your cabinet doors and drawer fronts. A garage or basement is usually your best bet.

Make sure to lay down drop cloths to protect the floors. We also recommend using plastic sheeting to wall off the area, which helps keep sanding dust from drifting into the rest of your house.

Your workspace should have room for a few key areas:

  • A cleaning station: This is where you'll be doing the critical degreasing and washing of the doors.
  • A prep area: For all your sanding, filling, and priming.
  • A drying rack system: You don't need anything fancy. Painter's pyramids are great, but even some 2x4s with screws driven through them will work to elevate the doors. This lets you paint both sides with less waiting time in between.

Choosing Your Paint and Application Method

Here’s where you’ll make one of the most important decisions for your project: what kind of paint to use and how to apply it. This choice directly affects the final look, the durability of the finish, and the amount of work involved. For most property owners, the big debate is whether to brush or spray the paint.

To help you figure out what’s right for you, we've put together a quick comparison.

Paint and Application Method Comparison

This table breaks down the key differences between common paint types and application methods for cabinet doors, highlighting the pros, cons, and best-use cases to help you choose the right combination for your project.

Feature Brushing/Rolling Spraying (HVLP)
Finish Quality Can show subtle brush marks; takes a skilled hand to get a perfectly smooth finish. Best for textured or rustic styles. Gives you that smooth, factory-like finish with zero brush marks. It's the go-to for modern, sleek kitchens.
Skill & Learning Curve The learning curve is much lower since most people have used a brush before. There's a definite learning curve. You’ll need to practice to avoid drips, runs, and an uneven coat.
Cost & Equipment Very budget-friendly. All you need are high-quality brushes, mini-rollers, and trays. A higher initial cost because you need to buy or rent an HVLP (High Volume, Low Pressure) sprayer.
Prep & Cleanup You don't have to do much masking, but the actual painting process is slower. Cleanup is pretty simple. Requires extensive masking of your kitchen to protect everything from overspray. Cleaning the sprayer itself can also be time-consuming.
Best For Smaller kitchens, DIYers on a tight budget, or anyone who prefers a more hands-on, traditional approach. Large kitchens, anyone determined to get a flawless professional look, and those who are comfortable handling the equipment.

So, what's the verdict? The best method really comes down to your confidence level, your budget, and the final look you're after. If you're tackling a larger renovation, understanding these trade-offs is crucial. You can see how this piece fits into the bigger picture in our guide on how to plan a kitchen remodel.

Ultimately, both brushing and spraying can give you a beautiful result. The key is knowing what you're getting into and preparing for it properly.

Mastering the Critical Surface Preparation Steps

If painting is the exciting part of the transformation, then prep work is the unglamorous foundation that ensures it all lasts. Any pro painter will tell you the same thing: 90% of a quality finish comes from the prep. Skipping these steps is, without a doubt, the biggest mistake you can make. It's the difference between a durable, factory-smooth finish and a paint job that chips and peels within a year.

We know it can feel tedious, but trust us, every minute you spend here pays off tenfold in the final result. Think of it as methodically getting your canvas ready for a masterpiece.

Let's break down the project into three core phases: planning your timeline, prepping your surfaces, and finally, getting that paint on.

Infographic showing a three-step project planning process: Plan, Prep, and Paint, with descriptive text and icons.

As you can see, proper prep is the essential bridge between your plan and the final coat of paint. It’s what makes or breaks the project.

Removing and Labeling Doors and Hardware

First things first, you need to systematically dismantle your kitchen before you can clean or sand anything. Start by emptying all your cabinets. Then, carefully take off each door and drawer front.

This is where a simple labeling system becomes your best friend. A piece of painter's tape on the inside of a door or in the hinge cup with a number (like "U1" for the first upper cabinet, "L3" for the third lower one) will save you a massive headache later. Put all your hinges, screws, and pulls into labeled Ziploc bags. You’ll thank yourself during reassembly.

Pro Tip: Whatever you do, don't try to paint around hinges or hardware. It’s impossible to get a clean line, and the paint will start to chip and peel around those areas almost immediately. Taking the extra 30 minutes to remove everything is non-negotiable for a pro-level job.

The All-Important Cleaning and Degreasing

Kitchens are ground zero for grease, food splatters, and cooking oils. Even if they look clean, they aren’t. Paint simply will not stick to a grimy surface, so you have to thoroughly clean every inch of your cabinet doors and frames.

A dedicated degreasing cleaner is a must for this step.

  • What to Use: A solution of trisodium phosphate (TSP) or a TSP substitute is fantastic for cutting through tough, baked-on kitchen grease. Always follow the manufacturer's directions and wear gloves and eye protection.
  • The Process: Grab a non-abrasive sponge and get to scrubbing. Pay extra attention to the cabinets around the stove, microwave, and sink—and especially around the handles and knobs where grime builds up.
  • Rinse It Off: After degreasing, you absolutely must rinse the surfaces with clean water. Any leftover chemical residue will sabotage your paint job just as much as the grease did. Let everything dry completely before you even think about sanding.

Sanding and Filling for a Silky Smooth Surface

With your cabinets clean and bone-dry, it's time to create a perfectly smooth surface for your primer to grab onto. Sanding does two crucial things: it scuffs up the old finish to give the new primer a "tooth" to bond with, and it smooths out any minor flaws.

For most projects, a medium-grit sandpaper (120- to 150-grit) is the perfect starting point. If you have older cabinets with a thick, glossy varnish, you might want to start with a slightly coarser grit to knock down that shine. The goal here isn't to strip the old finish completely, but to create a uniform, dull surface.

After that initial sanding, wipe away every speck of dust with a tack cloth or a microfiber cloth lightly dampened with mineral spirits. Now, run your hand over every door and inspect it closely for dings, dents, or deep scratches. Use a high-quality wood filler and a small putty knife to fill these spots.

Once the filler is totally dry, sand it smooth with fine-grit sandpaper (220-grit) until you can't feel the patch with your fingertips. This is the kind of meticulous detail that separates a good DIY job from a truly flawless, professional finish.

Applying Primer and Paint for a Flawless Finish

Okay, you've done the hard part. All that cleaning, sanding, and prep work is about to pay off in a big way. Now comes the moment of truth: applying the primer and paint that will completely transform your kitchen. This is where you get to see your vision come to life.

A person spray paints a light-colored kitchen cabinet door on sawhorses in a garage.

Before you even think about color, you need to prime. Don't skip this step! A quality bonding primer is the unsung hero of any cabinet painting project. It’s what grabs onto the cabinet surface and gives your paint something to really stick to.

Primer also acts as a stain blocker, which is absolutely essential for wood like oak or cherry. Without it, you’ll likely see ugly yellow or reddish spots—a phenomenon called tannin bleed-through—seep through your beautiful new paint job weeks or months later.

Brushing and Spraying Techniques for a Pro Look

Whether you're brushing or spraying, your technique is what separates an amateur job from a professional one. The universal rule? Two thin coats are always better than one thick one. This simple guideline helps you avoid drips, pooling, and an uneven, globby finish.

If you're using a brush:

  • Always maintain a "wet edge." This just means you overlap your fresh brush strokes onto the still-wet paint from the previous stroke. It’s the key to making the paint level out smoothly and hiding those pesky brush marks.
  • Invest in a good angled brush for the details. A quality brush holds paint better and gives you more control, especially for cutting in around panels and intricate trim.
  • After brushing the details, switch to a small foam roller for the flat areas. This one-two punch is a fantastic way to get a much smoother finish than brushing alone.

If you're using a sprayer:

  • Consistency is everything. Hold the sprayer about 6-8 inches from the door and move in steady, even passes. If you stop or linger in one spot, you’re guaranteed to get drips.
  • Start spraying just before the edge of the door and stop just after. This prevents paint from building up too heavily at the start and end of each pass.
  • Your first pass should be a very light "tack coat." This fine mist gives the next, heavier coat something to grip onto, which dramatically reduces the chance of runs.

Exploring the Two-Tone Cabinet Trend

Painting cabinets isn't just about refreshing an old look anymore; it's a powerful design choice. One of the most stylish trends we're seeing is two-tone cabinetry, where the upper and lower cabinets are painted in different colors. It's a fantastic way to add depth and make a kitchen feel more spacious and custom. A common combination is dark, grounding lowers with light, airy uppers.

This isn't just a niche trend, either. A surprising 24% of homeowners are now opting for a two-tone look in their kitchen renovations. It really shows how painted finishes have become central to modern kitchen design. The entire U.S. kitchen cabinet market is booming, expected to hit USD 43.03 billion by 2032, and custom paint jobs are a huge part of that growth.

You can explore more kitchen cabinet painting statistics to see just how dominant painted doors have become in today’s most popular styles.

Curing, Reassembly, and Long-Term Care

You’ve laid on that final coat of paint, and your cabinet doors are looking absolutely phenomenal. We know the feeling—you're so close to the finish line, you can almost taste it. But this is where patience becomes your most important tool. There's a huge difference between paint that's "dry to the touch" and paint that's fully "cured," and understanding this is the key to a lasting finish.

Paint might feel dry in just a few hours, but the curing process is a different beast entirely. This is when the paint chemically hardens into that durable, protective shell you want in a high-traffic area like a kitchen. Depending on the product and the humidity in your home, this can take anywhere from 7 to 30 days. If you rush it, you’re practically asking for dings, smudges, and heartbreak.

Putting It All Back Together

Alright, once you're confident the paint has had enough time to cure—we always recommend waiting at least a few days as a bare minimum—it’s time for the fun part. This is where that labeling system you set up in the beginning becomes your best friend.

Grab your labeled baggies of hardware and start by reattaching the hinges to the doors themselves. Then, you can carefully hang each door on its matching cabinet frame. Go slow and be methodical here; the last thing you want is an accidental scratch after all your hard work.

With the doors up, it's time for the final adjustments.

  • Get the Alignment Just Right: Most modern hinges have little adjustment screws. Grab a screwdriver and tweak them until all your doors are perfectly level with nice, even gaps. It's this attention to detail that really separates a DIY job from a professional one.
  • Install Your Knobs and Pulls: Carefully screw your hardware back on. If you opted for new pulls with different spacing, you should have already filled the old holes and drilled new ones during the prep stage.
  • Don't Forget the Bumpers: This is a small step people often forget, but it makes a huge difference. Stick a few small felt or rubber bumpers on the inside corners of your doors. They’ll prevent that harsh thwack of the door hitting the frame and protect your beautiful new finish for years.

Seriously, be patient. Letting that paint fully cure before you start slamming doors and drawers is the best insurance policy you can have for your project. This simple act of waiting is what makes the finish last.

Keeping Your "New" Cabinets Looking New

Your kitchen now has a stunning new focal point, and a little bit of care will keep it that way. The golden rule is to be gentle. Avoid harsh, abrasive cleaners or scrub pads at all costs—they will absolutely dull, or even strip, the paint over time.

For everyday smudges and fingerprints, a soft, damp microfiber cloth is all you need. If you run into something a little more stubborn, a mild mix of dish soap and warm water will do the trick.

Life happens, so be prepared for the occasional accident. Keep a small, well-sealed container of your leftover paint and primer for quick touch-ups. When you see a small chip or scuff, deal with it right away before it gets worse. A little proactive care goes a long way in making sure your newly finished cabinets remain something you’re proud of for years to come.

When to Hire a Professional Painting Contractor

Taking on a kitchen cabinet painting project yourself can be incredibly satisfying, but it's definitely not for everyone or every kitchen. Knowing when to step back and call in an expert is a smart move. It can save you a ton of time, frustration, and even money in the long run. The real key is to take a hard look at the size of the job and your own limits.

For example, do your cabinets have intricate molding, detailed trim, or glass panels? The precision needed for a perfect finish on those goes way up. The same applies to big kitchens. What seems like a fun weekend project in a small galley kitchen can quickly turn into a months-long nightmare when you're faced with 30 or 40 doors and drawer fronts.

The Value of Professional Expertise

Hiring a professional painting contractor brings so much more to the project than just a steady hand. You're really investing in a guaranteed result—a durable, beautiful finish without all the stress of managing it yourself. A professional crew has the dedicated workshop space, specialized gear like HVLP sprayers, and access to commercial-grade coatings that you just can't find at a local hardware store.

That professional-grade finish is a big deal, especially with today's design trends. While we're seeing natural wood grain make a comeback, painted cabinets are still king in the kitchen design world. The global market is projected to hit an incredible USD 253.96 billion by 2035, driven by the demand for durable, custom-painted finishes. In fact, industry reports show a 34% surge in preference for low-VOC finishes, which pros are perfectly set up to apply safely and effectively. You can read the full 2026 Kitchen Trends Report to see how these tastes are shaping modern kitchens.

Hiring a pro turns a potentially stressful, time-consuming DIY job into a predictable, seamless project. You get the peace of mind that comes with knowing the job will be done right, on schedule, and with a finish that will withstand years of daily use.

Signs It’s Time to Call the Pros

Still on the fence? Here are a few clear signs that bringing in a professional painter is your best move:

  • You're Out of Time: Let's be real—a proper cabinet painting job is a major time sink. If your calendar is already bursting at the seams, a pro can get the work done efficiently without turning your home into a construction zone for weeks.
  • You Don't Have a Dedicated Workspace: If you don't have a well-ventilated garage or workshop, the mess and fumes from sanding and spraying can take over your entire home. It gets difficult, fast.
  • Your Cabinets Need Major Repairs: Are you looking at peeling laminate, water damage, or warped doors? A professional can handle complex repairs and restoration that go far beyond just slapping on a coat of paint.
  • You Demand a Flawless, Factory-Like Finish: That perfectly smooth, glass-like finish with zero brush marks takes serious skill and specialized spray equipment. If you won't be happy with anything less than perfection, an experienced crew is the only way to guarantee it.

At the end of the day, whether you're a homeowner or a facilities manager looking for "commercial painting services near me," the goal is the same: a beautiful, long-lasting result. Our teams are experienced in both residential and commercial painting services, and we know what it takes to deliver top-tier quality every time.


For a project as central to your home or business as your kitchen, you deserve a partner you can trust. Wheeler Painting & Restoration Services has been delivering reliable craftsmanship to local homeowners and businesses since 1991. If you're ready for a stunning, durable finish without the headache, contact us for a consultation. You can learn more about our comprehensive painting services at https://wheelerpainting.com/painting/.