Tag Archive for: puget sound remodeling

Puget Sound Bathroom Remodel Planning: Your Essential Guide

Thinking about remodeling your bathroom? It’s one of the best upgrades you can make to your property, and when done right, it's incredibly rewarding. But before you get lost in tile samples and faucet designs, successful projects—whether for your home or a commercial property—always start with one simple question: why?

Figuring out your core motivation is the single most important first step. Are you dreaming of a personal spa, need a more functional space for your growing family, or are you a facility manager needing to upgrade an office or retail space for accessibility and modern appeal? Your answer will guide every decision from here on out. This guide will walk you through the essential steps, from initial vision to final punch list, ensuring your project in the Kent, WA area is a success.

Getting Started on Your Puget Sound Bathroom Remel

A bathroom remodel isn’t just about knocking down walls and putting up new tile. It’s a serious investment in your property's value and, more importantly, in your daily life or business operations. Especially for property owners in hot markets like Seattle, Kent, or Tacoma, a smart remodel can deliver a fantastic return.

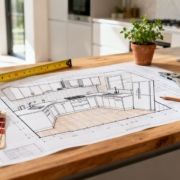
But let's not get ahead of ourselves. Nailing down your vision before a single hammer swings is what separates a smooth project from a stressful one. Getting this right prevents those expensive, last-minute changes and ensures the finished bathroom is one you'll actually love using every day.

First, Define Your "Why"

We always ask clients to start by thinking about the problems their current bathroom creates. What's not working for you? Is it cramped and cluttered? Outdated and impossible to clean? Or are you simply planning for the future?

Your answers point us in the right direction. For example:

  • Craving a Spa-Like Retreat? We'd probably look at a spacious soaking tub, maybe a multi-head shower system, and definitely things like heated floors and dimmable mood lighting.
  • Wrangling a Busy Family? The focus shifts to durability. Think dual sinks to end the morning rush hour, tough materials that can handle some abuse, and clever storage to hide all the clutter.
  • Planning for Accessibility? The layout is key. A curbless, walk-in shower becomes the centerpiece, along with well-placed grab bars, a comfort-height toilet, and maybe a wider doorway. This is a common need in both residential and commercial renovations.

Knowing what you truly need helps a contractor see beyond just a list of wants. It allows us to build a focused, practical plan that aligns your goals with your budget.

The Real Value of a Bathroom Remodel

It's no secret that bathroom projects are a smart investment. The market for remodels is huge—the global industry hit $398.1 billion in 2024 and continues to grow as people look to add personal touches and real value to their homes.

More importantly, a well-planned remodel can boost your home's value by as much as 60%, making it one of the highest-return improvements you can undertake. You can even explore more about these industry trends to see how projects like yours are shaping the market.

A thoughtfully planned remodel isn't just about aesthetics; it's about creating lasting value. By focusing on both timeless design and high-quality craftsmanship, you ensure your new bathroom will be enjoyed for years while also being a strong asset if you ever decide to sell your home in the Puget Sound area.

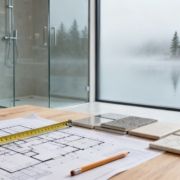
Alright, you've got your "why" figured out. Now comes the part where dreams meet reality: defining what you're actually going to do and how much it’s going to cost. Getting this right from the start is the single most important thing you can do to ensure your bathroom remodel is a success.

Why? Because the difference between swapping a vanity and moving a wall is massive, not just in dollars but in dust, disruption, and duration.

The first real decision you need to make is whether you're looking at a cosmetic facelift or a full-blown, down-to-the-studs renovation. This choice sets the stage for everything else. It’s the best way to keep "scope creep"—those little "while we're at it" additions that kill a budget—firmly in check.

Cosmetic Updates vs. Full Renovations

A cosmetic update is all about achieving a big impact with minimal demolition. Think of it as giving your bathroom a fresh new look without tearing into the walls. It’s faster, less expensive, and perfect for a space that already functions well.

  • A fresh coat of paint on the walls, ceiling, or even the vanity.
  • Replacing tired faucets, showerheads, and light fixtures.
  • Swapping out old cabinet pulls, knobs, and towel bars.
  • Upgrading your mirror or putting in a new vanity top (as long as you don't move the plumbing).

A full renovation, on the other hand, is a completely different animal. This is what you need when you're changing the bathroom's footprint, dealing with ancient plumbing and wiring, or fixing hidden problems like old water damage. It's common in commercial construction for retail build-outs or office space renovations.

  • Taking down walls to open up the space or create a new layout.
  • Moving the toilet, sink, or shower—a job that requires serious plumbing work.
  • Hiring a drywall contractor to hang and finish new walls and ceilings.
  • Tearing out the old floor for new tile or a combination of wood and tile floors.
  • Bringing the electrical system up to current code, a common necessity in older homes and commercial buildings around Kent, WA.

Knowing which path you’re on from the get-go manages expectations for both your timeline and your wallet. If you're trying to keep costs down, our guide to planning an affordable bathroom remodel has some great strategies.

Budgeting for Your Puget Sound Remodel

Let's talk money. In the Seattle-Tacoma area, remodel costs are a moving target, influenced by the scope of your project, the age of your house or building, and the quality of finishes you choose. A good budget is more than just a number; it’s a detailed plan.

We tell every client the same thing: You absolutely must have a contingency fund. Set aside 15-20% of your total budget for the unexpected. This isn't for a splurge on fancier tile. It’s for the surprises we will find when we open up a wall—like leaky pipes, mold, or shoddy framing from a previous job.

To give you a starting point for your planning, here’s a look at what different levels of remodels typically cost in our area for 2026.

Estimated Bathroom Remodel Costs in the Puget Sound Area (2026)

Remodel Tier Typical Scope of Work Estimated Cost Range
Basic / Cosmetic Paint, new fixtures (faucet, lights), new vanity top, hardware updates. No layout changes. $8,000 – $15,000
Mid-Range New tub/shower combo, new vanity & toilet, new tile floor & shower surround, updated lighting & ventilation. Minor plumbing/electrical adjustments. $18,000 – $35,000
High-End / Custom Full gut renovation, layout changes, moving plumbing/walls, custom walk-in shower, high-end fixtures & tile, radiant floor heat, custom cabinetry. $40,000 – $75,000+

Disclaimer: These are general estimates for professional remodels. Costs can vary significantly based on material choices, home condition, and contractor.

This infographic also gives a great snapshot of the bigger picture and why property owners are so focused on this space.

An infographic summarizing the bathroom remodel market, including global value, top trend, and home value increase.

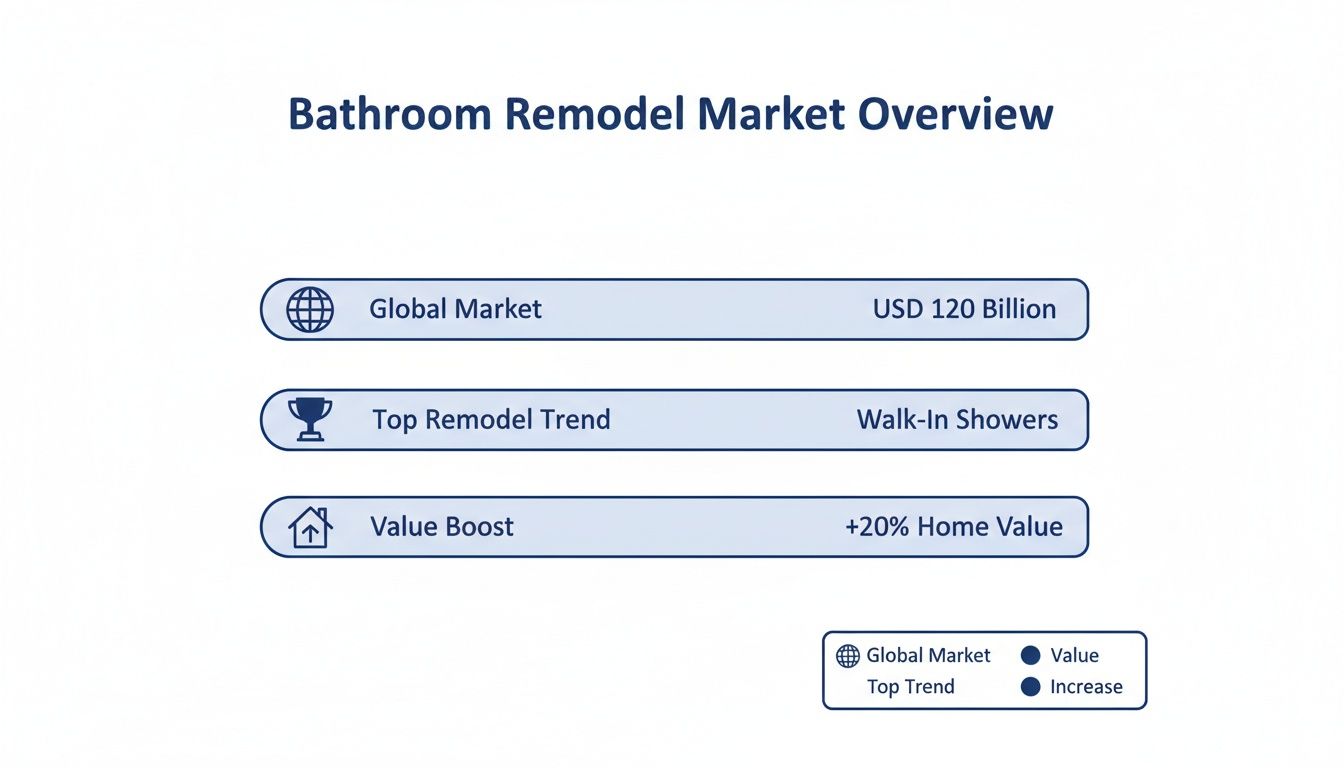
It’s clear that a well-planned bathroom remodel isn't just an expense; it’s one of the smartest investments you can make in your home's value.

When you build your budget, be sure to break it down into these core components:

  • Materials: Tile, fixtures, paint, vanity, toilet, tub… everything you can see and touch. This category has the biggest cost variance.
  • Labor: The pay for the skilled pros who make it happen—plumbers, electricians, tilers, and your general contractor.
  • Permits: Non-negotiable for projects in Seattle, Tacoma, and surrounding cities that touch plumbing, electrical, or structural components.
  • Contingency Fund: That 15-20% buffer we talked about. Don't skip it.

By locking in your scope and building out a detailed, all-in budget, you move your project from a "someday" idea to a well-defined plan. This groundwork is what makes for a smooth project and a great partnership with a local pro.

Making the Right Calls on Layout and Materials

Once you've nailed down your budget and scope, we get to the fun part. This is where your vision starts to feel real—where abstract ideas become concrete choices about your bathroom's layout, fixtures, and finishes. We've seen it time and time again: the most successful remodels are the ones that perfectly marry beautiful design with day-to-day practicality.

A modern bathroom showroom featuring a walk-in shower, vanity, and a display of tile samples.

This stage is about so much more than just picking a tile that catches your eye. It's about crafting a space that genuinely works for you, your family, or your tenants. If you're in an older Seattle or Tacoma building, you know what we're talking about—those cramped, awkward layouts that just don't make sense. We can fix that.

Optimizing Your Bathroom Layout

The layout is the absolute backbone of a great bathroom. Sometimes, even the smallest tweaks can completely change how the room feels and functions. A good residential or commercial contractor should help you see possibilities you might not have even thought of.

Here are some layout strategies we often recommend:

  • Making the Most of Small Spaces: Floating vanities are a game-changer. They create the illusion of a bigger room and make cleaning a breeze. Wall-mounted toilets can also be a clever way to reclaim a few precious inches.
  • Designing a Functional Flow: Think through the daily routine. Is the towel hook exactly where you need it when you step out of the shower? If two people use the bathroom, can they get ready without a constant dance of bumping elbows? In a commercial setting, this means ensuring ADA compliance and smooth traffic flow.
  • Planning for the Future: We're seeing a huge demand for universal design. This doesn't mean your bathroom has to look clinical. It can be as simple as installing a comfort-height toilet or adding blocking in the walls now for grab bars you might want later. This is crucial for both residential remodeling and commercial renovations.

It's often the little details that make the biggest difference. Something as specific as mastering sconce height for perfect vanity lighting can elevate the entire room from just "done" to "designed."

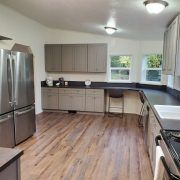
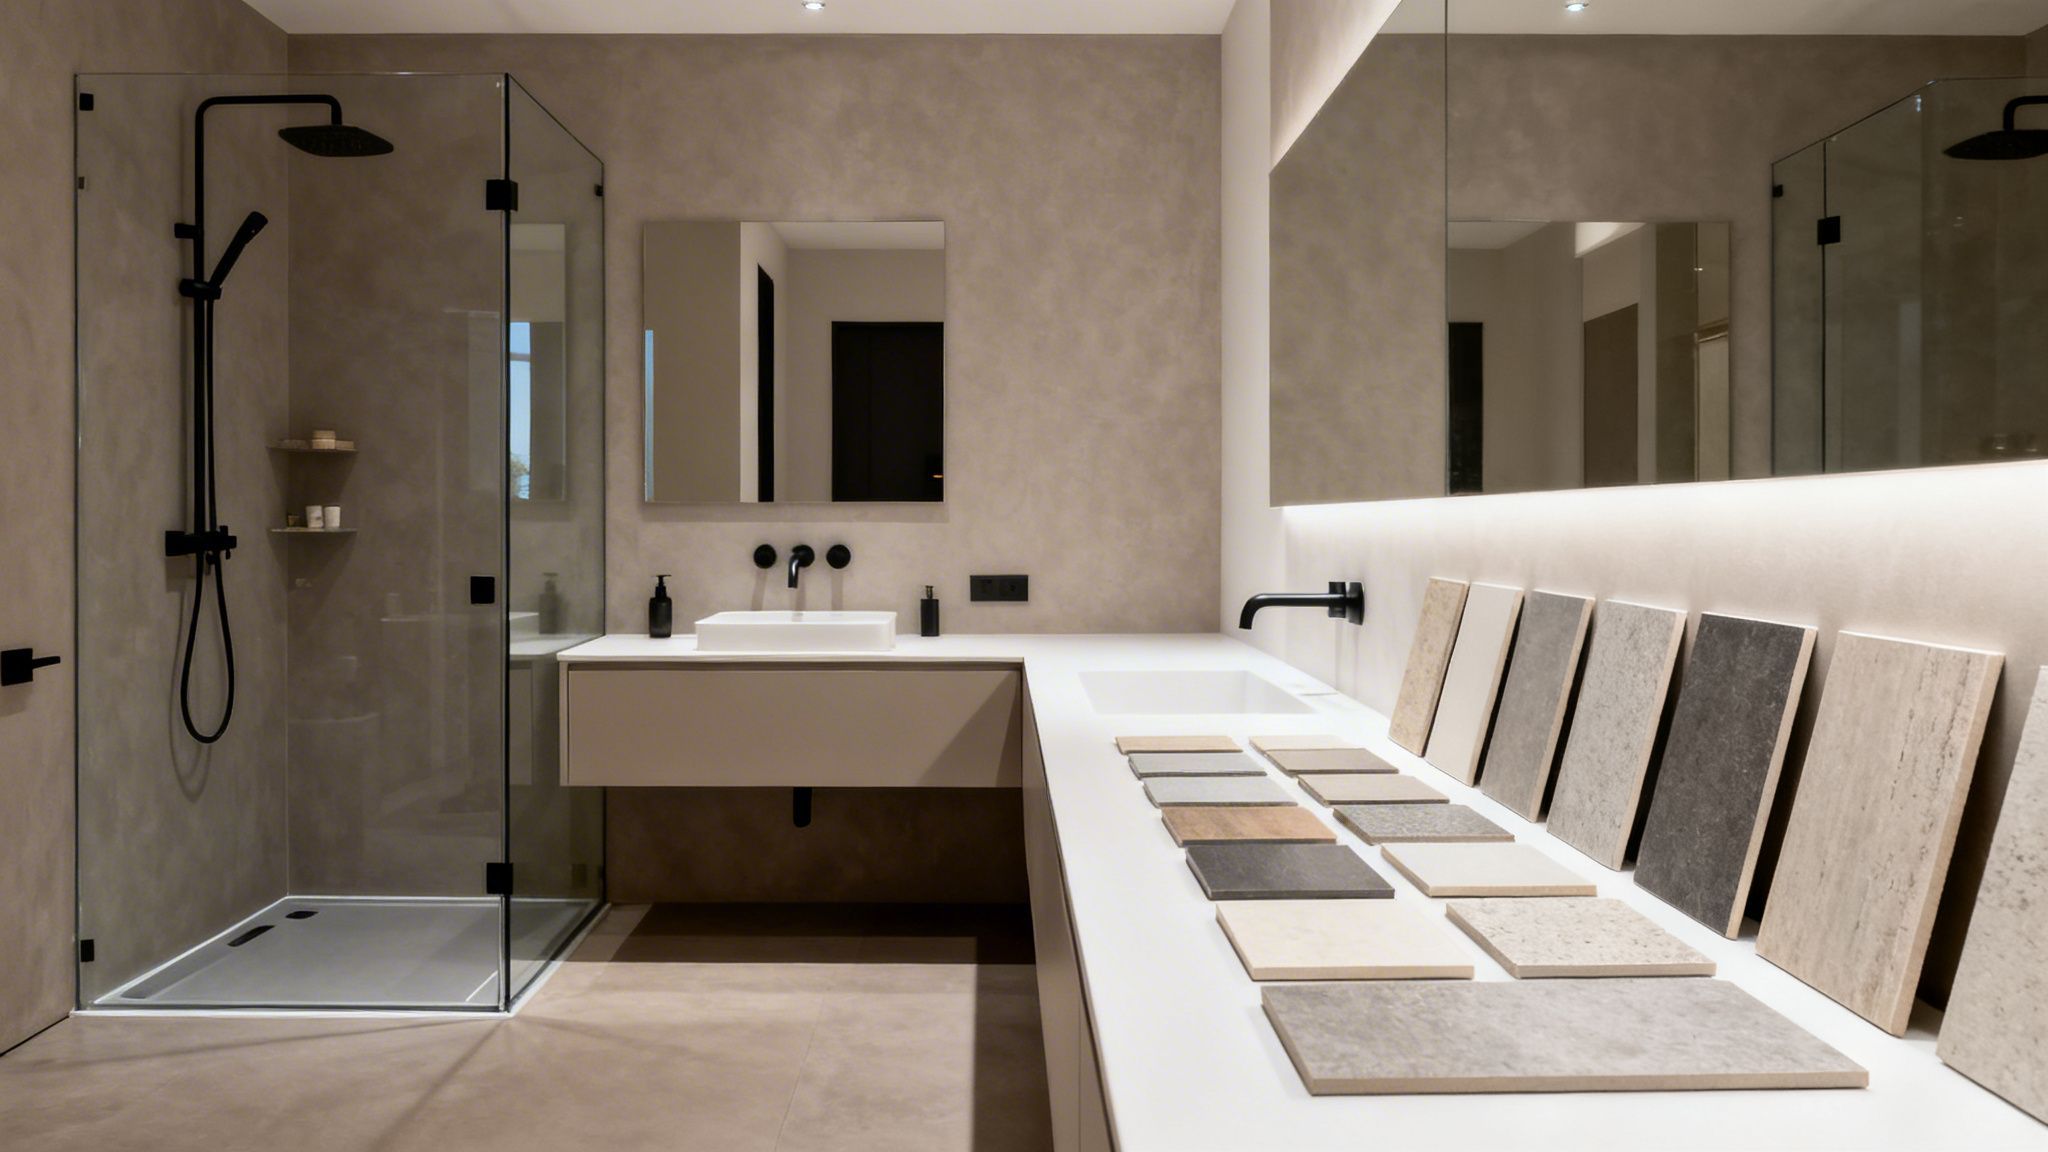
Selecting Durable and Stylish Materials

Your material choices set the tone for the entire space, but in the damp Pacific Northwest, durability is just as crucial as style. You absolutely need materials that can stand up to moisture, resist mold, and handle daily wear and tear.

Flooring, for instance, makes up a huge part of the material decision, accounting for 27.3% of the market share. Property owners are gravitating toward slip-resistant, easy-to-clean options like porcelain and luxury vinyl tile. And with over 50% of U.S. homes now over 40 years old, accessible features like curbless showers are becoming a smart investment, sometimes boosting resale value by 5-10%.

Let's dive into some of the most important material choices for your Puget Sound bathroom.

Flooring, Fixtures, and Finishes

Here's a breakdown of what to prioritize for the core components of your new bathroom:

  • Flooring: You can't go wrong with porcelain or luxury vinyl tile (LVT). They're tough, 100% waterproof, and come in an endless variety of styles. Pro tip: For real comfort on those chilly Washington mornings, have radiant floor heating installed underneath.
  • Countertops: Quartz is our go-to recommendation. It's a non-porous, stain-resistant surface that gives you the elegant look of natural stone without all the high-maintenance headaches.
  • Fixtures: Look for faucets and showerheads with the WaterSense label to save water without sacrificing pressure. The finish—whether it's matte black, brushed nickel, or champagne bronze—is the jewelry of the room and pulls the whole design together.
  • Cabinetry: Don't just settle for off-the-shelf options. Custom cabinets let you use every single inch of space for smart storage, which is worth its weight in gold, especially in a smaller bathroom.

The Critical Role of Waterproofing and Ventilation

Listen, if there's one thing you can't afford to get wrong in our climate, it's waterproofing and ventilation. We can't stress this enough. Cutting corners here is a recipe for disaster. A gorgeous remodel can be completely undermined by hidden moisture that leads to mold, rot, and costly structural damage.

At Wheeler Painting, we are meticulous about moisture management. It starts behind the scenes, using proven systems and materials to create a fully sealed, waterproof envelope in showers and wet areas. Our expertise in creating a fully waterproofed bathroom is how we ensure your investment is protected for the long haul.

Just as important is a powerful, quiet ventilation fan that’s properly sized for the room and vented directly to the outside—not into your attic. This is your number one defense against the damp air that lets mold and mildew take hold, keeping your beautiful new bathroom feeling fresh and healthy for years to come.

Hiring the Right Contractor in Western Washington

You’ve mapped out your dream bathroom, but bringing it to life hinges on one person: your contractor. After all the design choices and budget spreadsheets, the success of your project truly rests in their hands. This is arguably the most critical decision in your remodel, and here in the Puget Sound area—from Seattle to Tacoma and Kent—partnering with a reputable, local general contractor is your best bet for a smooth process.

A couple discussing bathroom renovation plans, looking at blueprints and a digital tablet.

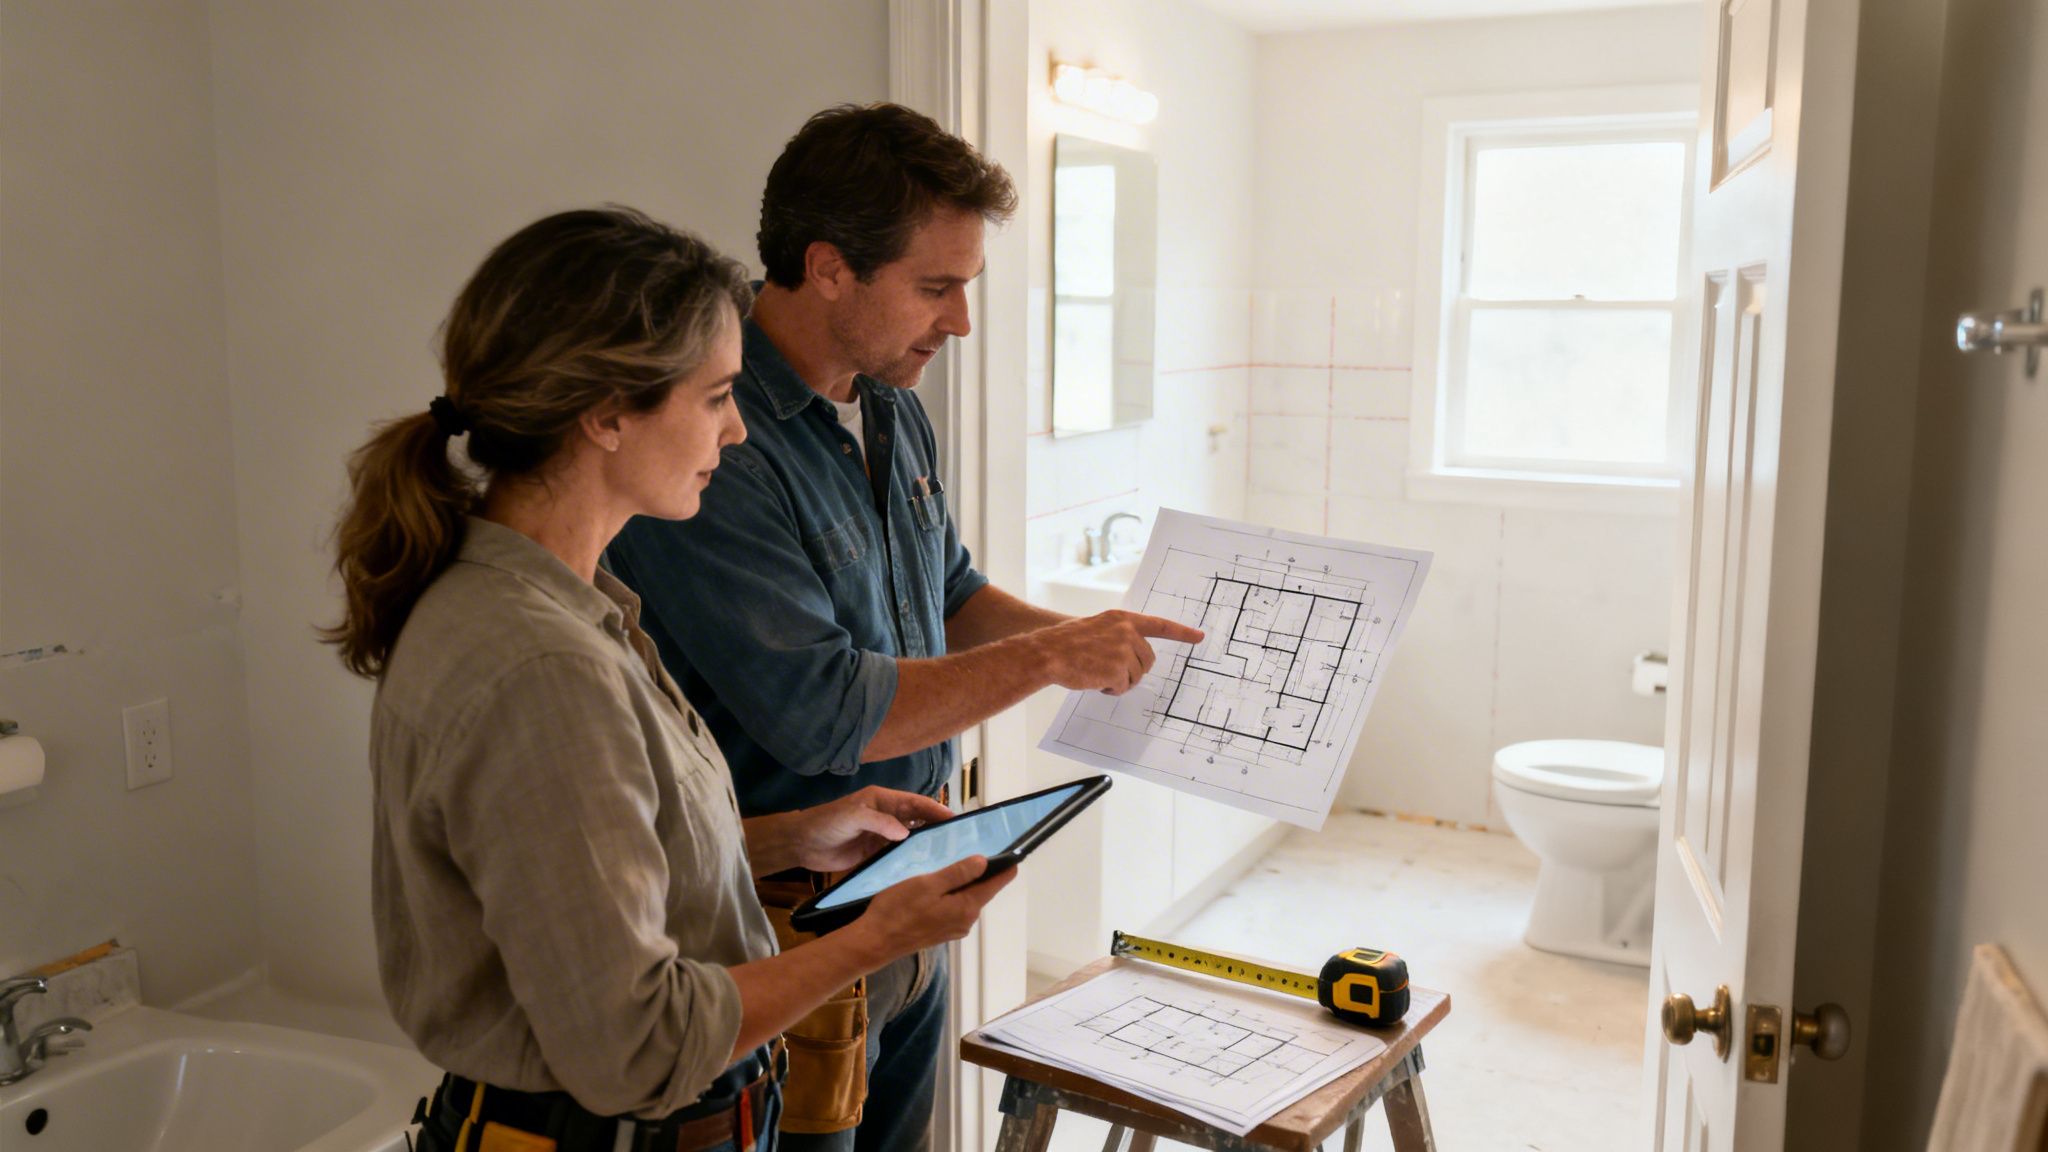
Finding the right pro isn't about chasing the lowest number. It's about finding a team you can communicate with, whose work you’ve seen and trust. A great contractor is more than just a builder; they're your project manager, your advocate, and your go-to problem-solver when the unexpected happens. Wheeler Painting is the ideal partner for building owners, facility managers, and property managers seeking a dedicated firm that specializes in small to mid-size tenant improvement and facility maintenance projects.

Where to Find and How to Vet Your Contractor

So, where do you start? The best leads often come from your own community. Talk to friends, neighbors, or coworkers who've had good remodeling experiences. Local building supply stores are another goldmine—they know which contractors are busy and consistently buying quality materials.

With a few names in hand, it's time to do your homework. In Washington State, a few non-negotiable credentials separate the pros from the risks. Before you even schedule a meeting, verify that they are:

  • Licensed: A contractor must hold a current license with the Washington State Department of Labor & Industries (L&I). You can—and absolutely should—look them up on the L&I website.
  • Bonded: The contractor’s bond is your financial safety net. It protects you if they fail to finish the job or skip out on paying their suppliers and crew.
  • Insured: This is twofold. They need liability insurance to cover any potential damage to your property and workers' compensation to cover their crew in case of injury. Without it, you could be held liable.

Don't be shy about asking for proof. Request to see their current license and insurance certificates. Any legitimate contractor will have these documents ready and will be happy you asked. This one step can save you from a world of financial and legal trouble.

Questions to Ask During the Consultation

Think of the initial consultation as a two-way interview. While they're sizing up the job, you should be sizing them up. Do you get a good feeling from them? Do they listen to your ideas and offer thoughtful feedback? Trust your gut.

As you assemble your team of tradespeople, it's also important to know how to find a good plumber, as their work is fundamental to your bathroom's long-term function. The same rigorous vetting applies to every specialist who sets foot in your home or on your property.

Come prepared with a list of questions for each contractor you meet. For a complete rundown, check out our guide on the questions you should always ask a contractor before making a final decision.

Reading Bids and Understanding the Contract

Once the walkthroughs are done, the bids will start rolling in. It's so easy to just scan for the price at the bottom, but that’s a rookie mistake. A good bid is a detailed blueprint for the project, clearly outlining the entire scope of work.

Lay the bids out and compare them line by line. Is one significantly cheaper? Look closer. It might be missing key items like demolition, debris hauling, or it might have quoted builder-grade fixtures when you discussed premium ones. The cheapest bid is often the one with the most holes, leaving you wide open for costly "change orders" down the road.

Your final line of defense is the contract. A contract that protects you should always include:

  • A Detailed Scope of Work: A complete description of every task and all materials being used.
  • Total Cost and Payment Schedule: Payments should be tied to specific project milestones, not arbitrary dates.
  • Project Timeline: An estimated start and completion date, with major phases outlined.
  • Change Order Process: A clear procedure for how any changes to the plan will be approved and priced.
  • Lien Waivers: These are critical. They are proof that the contractor has paid their suppliers and subcontractors, which prevents them from putting a lien on your property.

When you work with a trusted, local team like Wheeler Painting, you're not just hiring a crew—you're gaining a partner who is committed to quality and transparency, giving you peace of mind from demo day to the final, beautiful reveal.

What to Expect During the Construction Phase

All the planning is done, the decisions are made, and the start date is finally here. This is the moment the sledgehammer swings, and your old bathroom starts its journey to becoming the space you've been dreaming of. It’s also where things get loud, dusty, and a little chaotic before they get beautiful.

Knowing the typical flow of a renovation can seriously reduce your stress levels. It helps you understand what’s happening behind all that plastic sheeting, especially for homeowners and facility managers here in the Kent area who are new to the remodeling game.

A bathroom undergoing renovation with exposed wall studs, plumbing, a bathtub, vanity, and tools.

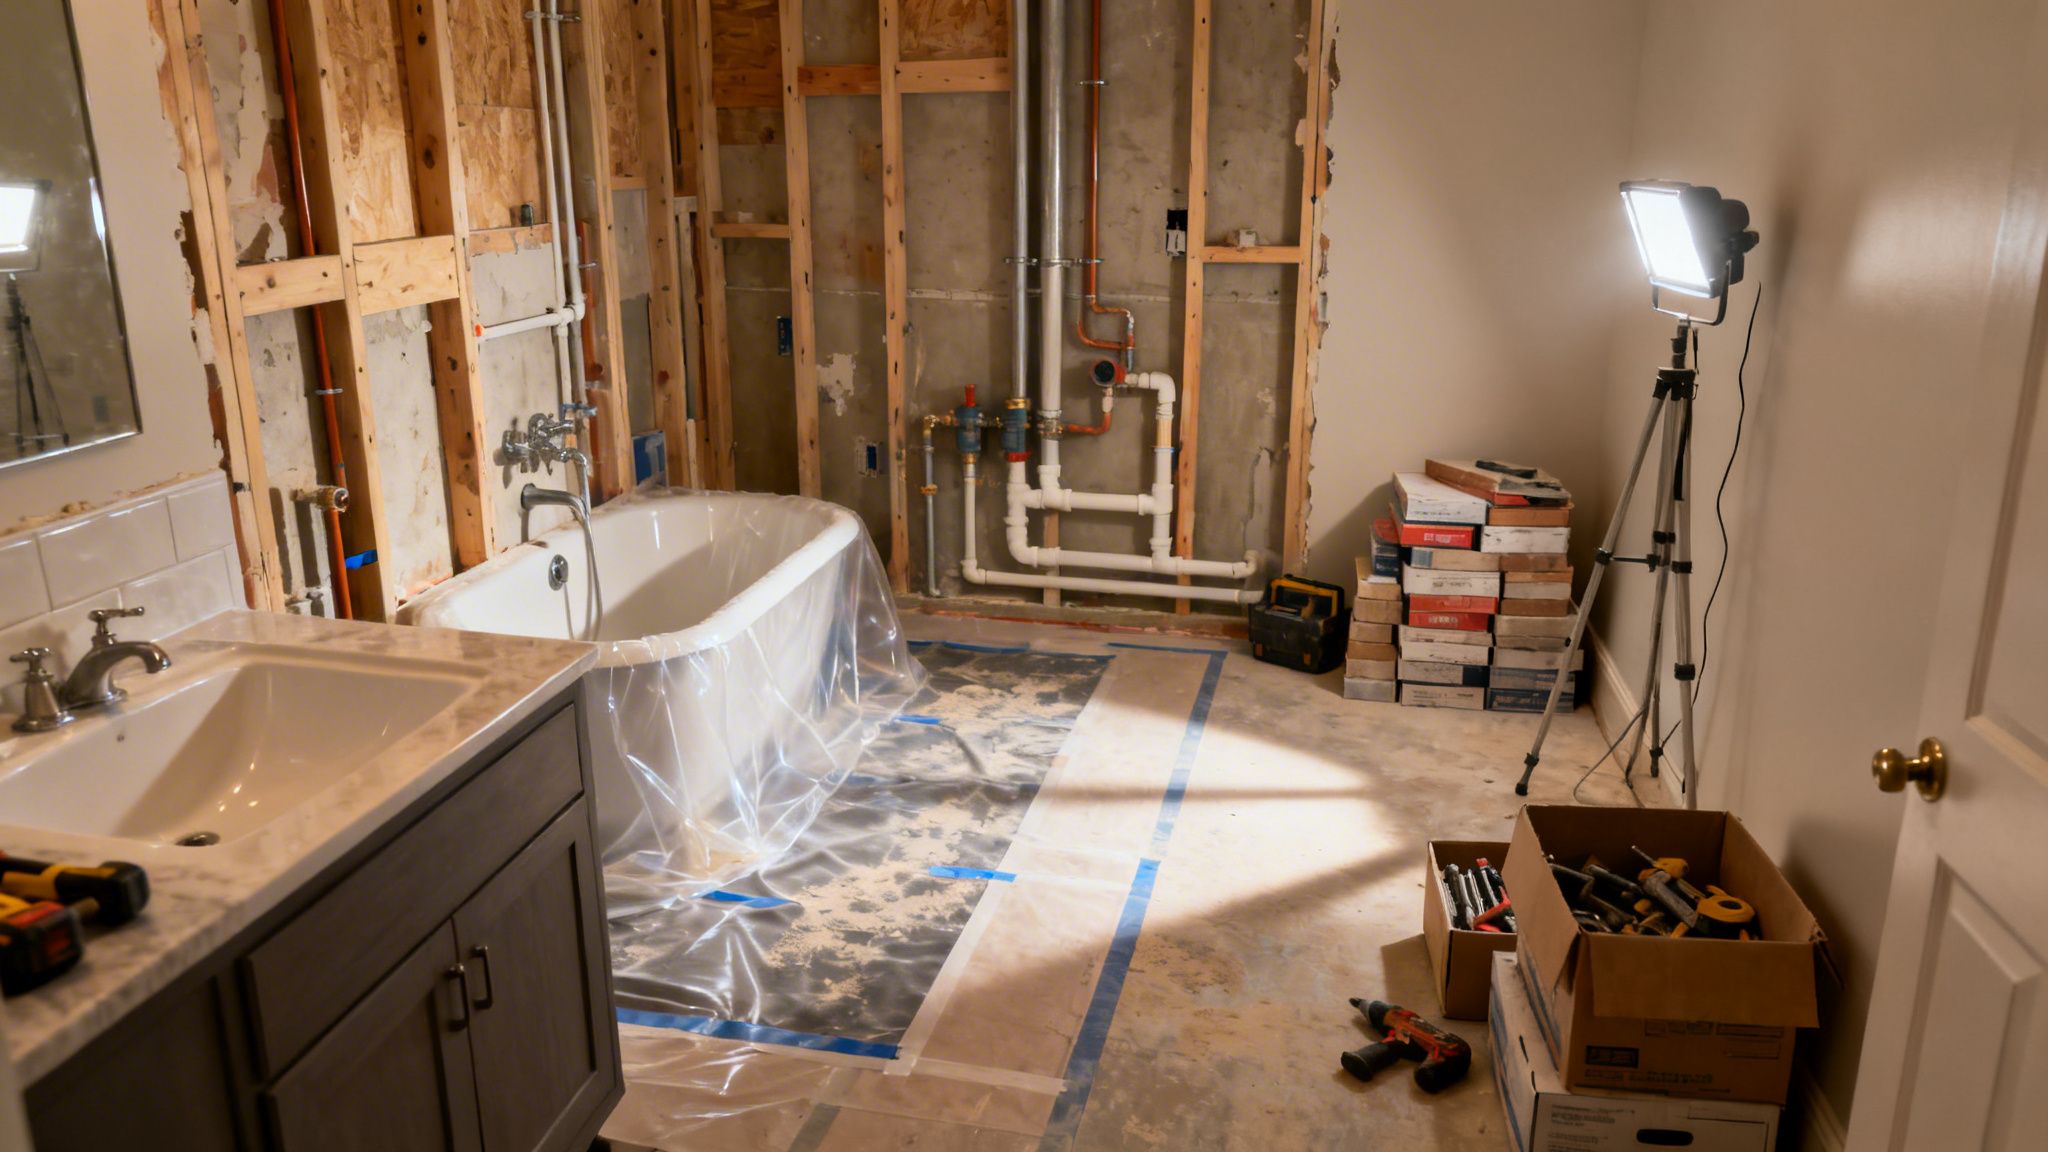
Before any walls come down, a good crew’s first job is protecting your property. They'll seal off the bathroom from the rest of your home or office to contain the inevitable dust storm and lay down protection for your floors and hallways. Then, the real fun begins.

The Order of Operations in a Remodel

While every bathroom has its own quirks, the construction work itself follows a pretty standard and logical path. Your project manager should give you a schedule, but this is the general sequence you can expect to see.

  • Demolition and Haul-Away: This is the deconstruction phase. Our crew will tear out everything that’s being replaced—fixtures, tile, the vanity, maybe even drywall. It's also the point of no return and, frankly, the most likely time for surprises. This is when we often discover things like hidden water damage or funky old wiring that needs to be brought up to code.
  • The "Rough-In" Work: If you’re changing the layout, this is when new walls get framed. Then, the plumbers and electricians take over, running new supply lines, drains, and wiring through the open walls and ceiling. This prepares the space for your new shower, toilet, vanity lights, and fan.
  • Key Inspections: This is a crucial, non-negotiable step. Here in Western Washington, an inspector from your city (be it Seattle, Tacoma, or elsewhere) must come out to approve the rough-in plumbing and electrical work. Nothing can be covered up until they give the green light.
  • Closing Up and Waterproofing: Once the inspections are passed, it’s time to close everything up. Insulation goes in, and fresh drywall is hung and finished. Critically, this is also when your contractor will apply modern waterproofing membranes in the shower and on the floor. Don’t let anyone skip this step!
  • Tile, Paint, and Fixtures: The fun part! This is where you really start to see the new bathroom take shape. The tile goes in, the walls get painted, and the major pieces like the vanity, toilet, and tub are installed.
  • The Finishing Touches (and the Punch List): The final stage is all about the details. Faucets and shower trim are connected, light fixtures and mirrors are hung, and hardware is installed. Afterward, you’ll do a final walk-through with your contractor to create a "punch list"—a short list of any minor adjustments or fixes needed before the job is officially complete.

How to Live Through the Dust

Let’s be honest: living at home during a major renovation isn't for the faint of heart. If this is your only bathroom, you absolutely need to have a temporary solution figured out beforehand. And even with the best containment, expect a fine layer of dust to find its way into nearby rooms. A little extra vacuuming is just part of the process.

It’s worth noting that the remodeling industry is always looking for ways to work more efficiently. Data shows that 80% of remodelers prioritize timeliness, as they know how disruptive a project can be for a family or business. Some newer methods, like using prefabricated shower systems, can even trim project timelines by up to 30% in the right situation. You can learn more about remodeling industry forecasts and financial breakdowns to see where the market is headed.

Our Pro Tip: Set up a standing weekly check-in with your project lead. This is your time to get updates, see the progress firsthand, and ask any questions. In our experience, consistent communication is the single best tool for keeping the project running smoothly and making sure you and your build team stay on the same page.

Your Top Bathroom Remodel Questions, Answered

After years of guiding homeowners and property managers through bathroom remodels in the Puget Sound, we've found the same critical questions come up time and time again. Let's cut through the noise and get you the straight answers you need to start planning with confidence.

How Long Will My Bathroom Remodel Actually Take?

This is the million-dollar question, isn't it? The honest answer is: it truly depends on the scale of your project.

If you're just looking for a quick refresh—maybe a new vanity top, updated fixtures, and a fresh coat of paint—you're in luck. This kind of cosmetic work can often be wrapped up in just one to two weeks. The disruption is minimal because we're not moving walls or messing with the core plumbing.

However, a full gut renovation is a different story. Once you start changing layouts, moving drains, or rewiring, the timeline naturally gets longer. For these bigger jobs, you should realistically plan for four to eight weeks, sometimes more. Why the big range? A few key things can stretch the schedule:

  • Material Lead Times: That gorgeous custom vanity or special-order tile you fell in love with? It could have a long lead time that we need to account for right from the start.
  • The Permit Process: Cities like Seattle and Tacoma have their own timelines for reviewing and approving permits. This administrative step happens before a single hammer is swung.
  • Hidden Surprises: This is the big one. Once we open up walls, we might find hidden mold, old plumbing issues, or wood rot that absolutely must be addressed. It's an unwelcome discovery, but fixing it properly is non-negotiable.

This is exactly why we build a detailed, transparent project schedule before we begin. Our goal at Wheeler Painting is to anticipate as much as possible so you always know what’s happening and what to expect next.

Do I Really Need a Permit for My Bathroom Remodel in Washington?

Yes, you most likely do. It’s tempting to see permits as just red tape, but in Washington State—and especially in cities like Kent, Seattle, and Tacoma—they are your assurance of safety and quality. Think of them as a system of checks and balances that protects your property and your investment.

You can breathe easy for simple cosmetic swaps. Painting, changing a faucet without altering plumbing lines, or swapping a light fixture usually don't require a permit.

But the moment you touch the bones of your building, a permit is required. This includes:

  • Moving the location of a toilet, sink, or shower.
  • Altering plumbing supply or drain lines.
  • Changing or adding new electrical circuits.
  • Removing or building walls (structural changes).

This is where hiring a professional really pays off. A licensed contractor, like our team at Wheeler Painting, manages the entire permitting process for you. We handle the applications, the plans, and the final inspections. You get the peace of mind knowing your beautiful new bathroom is also safe, fully compliant, and a true asset to your property’s value.

What's the Average Return on Investment for a Bathroom Remodel?

A well-planned bathroom remodel is consistently one of the smartest investments you can make in your property. Based on market trends, Puget Sound homeowners can typically expect to recoup 50-70% of their cost when they sell their home. For commercial properties, the return is measured in tenant satisfaction, improved brand image, and ADA compliance, which are invaluable.

While a high-end, super-customized bathroom might have a slightly lower direct financial ROI, its value often comes from an improved lifestyle and major "wow factor" in a competitive real estate market.

To get the best bang for your buck, focus on choices with wide appeal:

  • Go for Timeless Design: Steer clear of flash-in-the-pan trends. Classic choices in tile and fixtures will look great for years to come.
  • Prioritize Functionality: A layout that just works better is a huge selling point. Think better storage, more counter space, or a more accessible shower.
  • Demand Quality Workmanship: Nothing screams "bad investment" like sloppy tile work or a poorly installed vanity. Quality craftsmanship is an investment that always shows.

What Are the Biggest Mistakes I Should Avoid?

A successful remodel is all about the planning. The most expensive mistakes are almost always made before the first wall comes down.

The number one pitfall we see is jumping in without a detailed plan and a firm budget. This is a recipe for scope creep and serious financial stress. Right behind that is failing to set aside a 15-20% contingency fund. Trust us, you'll be glad you have it when an unexpected issue pops up.

Another common misstep is choosing materials based only on looks. That stunning-but-porous marble might not be the best choice for a busy family bathroom floor. In the damp Pacific Northwest, failing to invest in top-notch ventilation and waterproofing is a critical error that can lead to years of mold and rot problems. Lastly, don't buy all your materials before finalizing the design with your contractor—it's a surprisingly common mistake that leads to wasted money on fixtures that just don't fit.


Feeling more confident about your bathroom remodel planning? The right partner makes all the difference. For decades, Wheeler Painting has served homeowners and businesses in Kent, Seattle, and Tacoma, turning complex projects into straightforward, successful renovations. We are the trusted local choice for everything from residential remodeling to commercial construction and painting. If you’re ready to discuss your project, contact us for a consultation at https://wheelerpainting.com.

How to Plan a Kitchen Layout: A Practical Guide for Your Space

A kitchen layout that genuinely works for you isn’t about picking the cabinets or countertops first. It’s about something more fundamental: how you actually live and work in the space. Getting this part right from the start is the secret to a kitchen that’s not just beautiful, but a true joy to use every single day.

Building the Foundation for Your Kitchen Remodel

A truly great kitchen remodel begins with thoughtful preparation. Long before the first hammer swings, the most important work is done with a simple tape measure and a notebook. This is where you dig into what drives you crazy about your current kitchen and start dreaming up a space that actually serves you and your family.

Here in the Puget Sound, many of us are fighting the same battles—not enough counter space, appliances crammed into awkward corners, or a layout that just makes cooking feel like a chore. The first move in planning your new kitchen layout is to simply pay attention.

Define Your Kitchen’s Purpose

First things first: what is your kitchen’s real job? Is it a pure, utilitarian cooking zone, or is it the command center for your home where homework happens, guests mingle, and you sip your morning coffee? Knowing its primary role is crucial for deciding what features to prioritize.

  • The Family Hub: If your kitchen is where everyone gathers, an island with seating or a seamless flow into the living room might be at the top of your list.
  • The Chef’s Workspace: For those who love to cook, the focus shifts to generous counter space, maybe a second prep sink, and a smart, efficient path between the fridge, stove, and sink.
  • The Multi-Purpose Room: Does it need to be an office, dining room, and kitchen all in one? If so, your design needs to create clear, distinct zones for each activity to keep things from feeling chaotic.

Your new layout should be a problem-solver, not just a style update. Seriously, make a list of every little thing that bugs you now. Is it the dishwasher door that blocks the main walkway when it’s open? The pantry you can barely reach into? That list is your new best friend—it’s the roadmap to a design that will make your life easier.

Before diving deep into design, it's helpful to answer a few foundational questions. This checklist can clarify your priorities and set a clear direction for your project.

Essential Kitchen Planning Checklist

Planning Area Key Questions to Consider Why It Matters
Lifestyle & Use How many people cook at once? Do you entertain often? Is it a spot for kids' homework? This defines the need for multiple workstations, seating, and overall traffic flow.
Pain Points What are the top 3 frustrations with your current kitchen layout? Your new design's primary goal should be to eliminate these specific problems.
Appliance Needs Are you dreaming of a larger fridge, a double oven, or a special wine cooler? Appliance dimensions are fixed and dictate cabinet and counter layout from the start.
Storage Goals Are you constantly running out of pantry space? Do you need better organization for pots/pans? Answering this helps you plan for pull-out pantries, deep drawers, or other custom storage solutions.
Budget & Scope What is your realistic budget? Are you moving walls or just replacing fixtures? This sets the boundaries for what's possible and prevents costly surprises down the road.

Thinking through these points gives you a solid brief to work from, whether you’re DIY-ing the design or bringing in a professional residential contractor.

Take Precise Measurements

Once you know what you need, you have to figure out the where. This is where accuracy is everything. Sloppy measurements can derail a project fast, so grab a quality tape measure and document it all.

  • The room’s overall length and width.
  • The exact size and location of every door and window (including the trim).
  • Pinpoint where your current plumbing, outlets, and gas lines are.
  • Don’t forget the ceiling height!

These numbers are the reality check for your wishlist. They’ll tell you if that amazing oversized island you saw on Pinterest will actually fit, or if a more streamlined galley layout is the smarter choice. This is also where a good local contractor can be a huge help, as they can spot things you might miss, like load-bearing walls that could complicate your plans.

For anyone trying to wrap their head around the financial side of things, it’s a good time to look at a detailed kitchen remodel cost breakdown to see how these early decisions can impact the overall investment. A little planning now saves a lot of money—and headaches—later.

Designing for Flow: From Work Triangles to Modern Zones

Ever been in a kitchen that just works? Where everything you need is right where you'd expect it to be? That intuitive feeling doesn't happen by chance; it’s the result of a layout designed for pure, unadulterated flow. The classic concept behind this magic is the kitchen work triangle.

For decades, this simple idea has been the secret sauce of efficient kitchen design. It connects the three pillars of kitchen activity: the sink (cleaning), the refrigerator (storage), and the stove (cooking). When you can move easily between these three points in an unobstructed triangle, your daily routine becomes seamless. No more awkward treks across the room with a dripping head of lettuce or a sizzling-hot pan.

Why the Work Triangle Still Matters

Even with all the modern design innovations, the work triangle remains the bedrock of good kitchen planning. It just plain works. A recent 2026 kitchen layout trends report from Homes & Gardens confirms its staying power, highlighting it as a proven formula for efficiency.

From our experience, the sweet spot for the triangle's dimensions is key. Each leg should measure somewhere between 4 and 9 feet, with the total of all three sides landing between 13 and 26 feet. This keeps the space from feeling either cramped or like a marathon route. In fact, kitchens that get this right often see 20-30% faster task completion times compared to those with a chaotic layout.

This process of analyzing your needs, defining your goals, and taking precise measurements is the foundation for getting it right.

A planning foundation diagram illustrating three key steps: analyze, define, and measure with icons.

Starting with these fundamentals ensures your layout is built on solid ground, not guesswork.

Moving Beyond Triangles to Smart Work Zones

While the work triangle is a brilliant starting point, let’s be honest—today’s kitchens are so much more than just a place to cook. They’re homework central, entertainment hubs, and the command center for the entire family. That's where the concept of work zones comes in.

Think of zones as an evolution of the triangle. Instead of just three points, you create dedicated mini-stations for specific tasks. This is how we, as professional contractors, approach a modern kitchen plan. By grouping all the items and appliances needed for a task—like making coffee or packing lunches—you create an incredibly organized space, especially when multiple people are using the kitchen at once.

Pro Tip: Pay close attention to your daily habits. Where do you instinctively set down the mail? Where do you brew your morning coffee? Creating dedicated zones for these routines is the single best way to conquer clutter and build a kitchen that feels effortlessly organized.

Mapping Out Your Key Kitchen Zones

Let's walk through the most common zones and how to set them up for success. Thinking about your space this way will help you design a layout that truly fits your family’s rhythm.

  • Prep Zone: This is your command center for chopping, mixing, and assembling meals. Ideally, it should sit right between the sink and the fridge, giving you easy access to produce and a place to rinse. Generous counter space is non-negotiable here, along with storage for knives, cutting boards, mixing bowls, and a conveniently located trash bin.

  • Cooking Zone: Centered on your cooktop or range, this zone needs "landing space"—at least 12-15 inches of countertop on either side for hot pots and pans. Keep your spices, oils, and cooking utensils in nearby drawers or cabinets so you can grab them without missing a beat.

  • Cleaning Zone: This area is all about the sink and dishwasher. The number one mistake we see people make is putting their dish and silverware storage across the room. For true efficiency, locate those cabinets or drawers right next to the dishwasher. It turns unloading from a chore into a simple, pivot-and-place motion.

  • Storage Zone: This is your pantry and refrigerator area. We always recommend grouping these together. It makes putting away groceries a one-stop-shop and simplifies grabbing ingredients when you're meal planning.

Beyond these four core areas, you can really tailor the layout to your life. A dedicated coffee bar with mugs and your machine can be a game-changer, freeing up valuable counter space elsewhere. For many of our clients here in Western Washington, a small homework station or charging nook keeps laptops and phones from taking over the island. Thinking in zones is what elevates a good kitchen into a great one.

Choosing the Right Kitchen Layout for Your Space

A bright, modern minimalist kitchen with light cabinets, a kitchen island, and two stools by a large window.

Now that you're thinking in terms of work zones, it's time to choose the physical blueprint for your kitchen. This is a huge decision. It dictates traffic flow, countertop space, and the overall feel of the room. The best layout isn’t just about what’s trendy; it’s about what works for your home’s architecture and your family’s daily rhythm.

Let's break down the most common layouts and get into the real-world pros and cons of each. Think of this as finding the layout that solves your current kitchen's biggest headaches.

The L-Shape: A Versatile Classic

You’ve seen this one everywhere for a reason. The L-shaped kitchen, running along two perpendicular walls, is incredibly popular, especially here in the Puget Sound where open-concept living is so common. It just works.

This layout naturally creates a great work triangle, keeping the path between your fridge, sink, and stove clear and efficient. Its biggest advantage is how it opens up the room, often leaving enough space for a dining table or an island. Suddenly, your kitchen becomes a social hub.

An L-shape is fantastic for families who cook together, as it provides enough elbow room for a few people to work without bumping into each other. The only real catch? That tricky corner cabinet can become a black hole for pots and pans if you don't install smart storage like a Lazy Susan or pull-out shelving.

The Galley Kitchen: A Powerhouse of Efficiency

Don't let a small footprint fool you—the galley kitchen is a workhorse. Made up of two parallel walls of cabinetry and countertops, this layout is common in smaller homes and condos where every inch counts. What it might lack in openness, it more than makes up for in pure, streamlined efficiency.

Serious cooks often love this setup. With the main work areas facing each other, everything is just a quick pivot away.

The main drawback, of course, is that a galley can feel tight, especially if it's a major walkway through the house. It's usually a one-cook kitchen and doesn't have that "hang out" vibe many families want today. If you go this route, making sure you have at least 42 inches between the counters is non-negotiable for comfortable movement and appliance access.

The most beautiful kitchen in the world won’t make you happy if it doesn’t work for how your family actually lives. Take what resonates with your daily routines and leave the rest. The key is planning for your life, not just copying what looks pretty on social media.

The U-Shape and Peninsula Designs

Lining three walls, a U-shaped kitchen creates a self-contained and highly functional workspace. It gives you an incredible amount of counter and storage space and naturally keeps foot traffic out of the cook’s way, which is a big plus for safety and focus.

A great twist on this is the peninsula. By making one of the "U" walls shorter, you create a peninsula that opens into an adjacent dining or living area. It's the perfect compromise: you get the efficiency of a U-shape with the social connection of an open-plan design. The peninsula can easily become a breakfast bar, a serving station, or the go-to spot for homework.

The challenge with a U-shape is making sure the room is wide enough. If it's too narrow, the parallel counters can feel claustrophobic. You can get a better sense of what's involved in a layout transformation by exploring the bare facts about a kitchen remodel.

Comparing Popular Kitchen Layouts

Choosing a layout can feel overwhelming. To make it easier, here’s a quick comparison of the layouts we've discussed, highlighting where each one truly shines.

Layout Type Best For Pros Cons
L-Shape Open-concept homes, social kitchens, medium-sized spaces. Very versatile, great for workflow, opens up the room for an island or table. Corner cabinets can be awkward and inefficient without special hardware.
Galley Small, narrow spaces; condos and apartments. Extremely efficient workflow, maximizes space in a small footprint. Can feel cramped, not ideal for multiple cooks or heavy foot traffic.
U-Shape Larger kitchens, households with serious cooks. Abundant counter and storage space, keeps traffic out of the work zone. Can feel closed-in if the room is too narrow, requires a larger footprint.
Peninsula Bridging kitchen and living areas, creating casual seating. Offers the benefits of a U-shape with an open feel, adds a social element. Can create a bottleneck for traffic flow if not planned carefully.
One-Wall Studios, lofts, and very small homes. The ultimate space-saver, everything is easily accessible. Limited counter and storage space, difficult to create a true work triangle.
Island Larger L-shape or U-shape kitchens, entertaining. Adds storage, seating, and prep space; becomes a social hub. Requires significant clearance on all sides, can disrupt traffic flow.

Ultimately, the best choice marries your personal cooking style with the architectural reality of your home.

The One-Wall and Island Layouts

Finally, we have the most specialized layouts. The one-wall kitchen is the king of space-saving, putting all appliances, cabinets, and counters along a single wall. It's a perfect solution for studios or accessory dwelling units, but creating a functional work triangle can be a real puzzle.

On the other hand, an island is the modern kitchen's MVP. It can be added to almost any layout (especially L- and U-shapes) as long as you have the floor space. An island can house a prep sink or cooktop, but most often it provides much-needed extra counter space and seating. It almost instantly becomes the social heart of the kitchen, but planning for plenty of walkway clearance on all sides is absolutely critical to keep the space from feeling cramped.

Mastering the Details: Spacing, Storage, and Appliance Placement

Bright, organized kitchen featuring open drawers with food, built-in oven, stovetop, and a dishwasher.

A good kitchen layout looks great on paper. A great kitchen layout feels effortless to live and work in. The real difference often comes down to just a few inches—the precise spacing between countertops, the thoughtful placement of appliances, and the smart integration of storage.

This is where a design goes from concept to reality. It's easy to get the big picture right, but if you can't open your refrigerator door without hitting the island, the whole plan falls apart. We lean heavily on proven standards from groups like the National Kitchen & Bath Association (NKBA) to create a blueprint that’s not just beautiful, but safe, comfortable, and highly functional.

Giving Yourself Room to Maneuver: Clearances and Walkways

One of the most common regrets we hear from homeowners after a remodel is that they didn't leave enough open space. A cramped kitchen is just plain frustrating to use, not to mention a potential safety hazard.

As a rule of thumb, the absolute minimum width for any walkway should be 36 inches. But honestly, for any kitchen that sees real use or has more than one person in it, you’ll want to aim for 42 to 48 inches. That extra bit of room is the difference between squeezing past someone and moving comfortably.

When an island is involved, these numbers become even more critical.

  • Work Aisles: For the space between an island and a main work counter (think sink or stove), you need at least 42 inches.
  • Walk-Through Aisles: If an aisle is just for foot traffic, 36 inches can work, but pushing it to 42 inches makes the entire kitchen feel more open and inviting.

Don’t forget about appliance doors! You have to account for the full swing of your refrigerator, oven, and dishwasher doors. A seasoned contractor will always double-check these clearances to ensure you aren’t creating an unexpected roadblock.

The Art of the "Landing Zone"

Ever pulled a sizzling pan out of the oven and had a moment of panic trying to find a spot to put it down? That’s exactly what landing zones are for. These are designated, heat-resistant countertop spaces right next to your key appliances, and they're a non-negotiable part of good design.

  • Next to the Fridge: Plan for at least 15 inches of counter space on the handle side of your refrigerator. It’s the perfect spot to set down grocery bags while you unload.
  • Beside the Cooktop: You'll want a minimum of 12 inches on one side and 15 inches on the other. This gives you a safe place for hot pots, pans, and stirring spoons.
  • Around the Sink: Aim for 18 inches on one side (for stacking dirty dishes) and 24 inches on the other (for a drying rack or clean items).

Thinking through these small, practical details is what elevates a kitchen from a simple room with appliances into a truly efficient workspace.

Smart Storage Is a Game Changer

Nothing ruins the look and feel of a new kitchen faster than clutter. A successful layout finds a home for everything, keeping your countertops clear and your most-used tools right where you need them. The old way of thinking—deep, dark cabinets where things go to get lost—is out.

Today, it's all about accessibility and visibility.

  • Pull-Out Everything: Swapping standard lower cabinet shelves for full-extension pull-out drawers is a revelation. Instead of getting on your hands and knees, you bring the contents to you.
  • Dedicated Drawers: Deep drawers near the cooktop are perfect for pots and pans. Well-designed drawer organizers for cutlery, utensils, and spices can transform your daily cooking routine.
  • Go Vertical: A tall, narrow pull-out pantry next to the fridge is an incredibly efficient use of space for cans and spices. Likewise, adding vertical dividers to a cabinet creates the ideal spot for stashing baking sheets and cutting boards.

This is where having an experienced team like Wheeler Painting & Restoration Services in your corner really pays off. As a full-service general contractor, we help Puget Sound homeowners think through these practical details from day one. We’re here to ensure your vision for a beautiful kitchen is built on a foundation of smart, real-world design, making the whole process feel seamless.

Getting Your Lighting and Electrical Right

You can have the most brilliant kitchen layout on paper, but without the right lighting and power, it's just a pretty room. The wiring and plumbing behind the drywall are what truly bring a kitchen to life, turning it from a static space into the warm, functional heart of your home. That's why thinking about these systems from the get-go is one of the most critical parts of planning your new kitchen layout.

Folding electrical and plumbing into your initial plans isn't just a suggestion—it's essential. Getting it right from day one saves you from the headache and high cost of backtracking later. It’s what makes sure your finished kitchen works as beautifully as it looks, with light and power exactly where you need it, when you need it.

Layering Your Light Like a Pro

Great kitchen lighting isn't about one big, bright fixture in the middle of the ceiling. That's actually a classic mistake that casts annoying shadows right where you're trying to work. A truly well-lit kitchen uses three distinct layers of light working together to create a space that’s both functional and full of atmosphere.

  • Ambient Lighting: Think of this as the base layer—the overall glow that fills the room. This job is usually handled by recessed can lights, flush mounts, or even a statement chandelier. The goal is comfortable, even illumination across the entire kitchen.

  • Task Lighting: This is your precision lighting, the real workhorse of the kitchen. It’s focused light aimed directly at your key work areas like countertops, the sink, and the stove. Under-cabinet LED strips are fantastic for this; they completely wipe out shadows on your prep surfaces.

  • Accent Lighting: Now for the fun stuff. Accent lighting is all about creating visual interest and highlighting the details you love. Maybe it's a few small spotlights inside glass-front cabinets to show off beautiful glassware, or a chic pendant light that turns your island into a stunning centerpiece.

A smart lighting plan does more than just illuminate; it sets the mood. Put each layer on its own dimmer switch, and you can instantly take your kitchen from a bright, bustling workspace to a softly lit spot for a quiet dinner.

Powering Up for Real Life

Next up is power. Our kitchens demand way more than just an outlet for the toaster and coffee maker these days. We've got stand mixers, air fryers, laptops, and phones all competing for juice. Having enough power in all the right places is non-negotiable.

As you map out your layout, mentally walk through your daily routine. Where will you blend a smoothie? Where does the slow cooker go on a busy weekday? A good rule of thumb is to place outlets every four feet along countertops. You'll never regret having an extra outlet, but you'll definitely curse not having one.

It’s also crucial to plan for major appliances, which need their own dedicated circuits to run safely without tripping the breaker. This isn't optional—it's a code requirement for items like your:

  • Refrigerator
  • Dishwasher
  • Electric range or oven
  • Garbage disposal
  • Microwave

Don't Forget the Plumbing

Finally, let's talk about the pipes. It might seem basic, but deciding on the final location for your sink, dishwasher, and refrigerator (especially if it has a water line) is a cornerstone decision. Trust me, moving drain lines and water pipes after the fact is a messy, expensive job you want to avoid at all costs.

This is where working with a team that gets the big picture is so valuable. A general contractor who brings licensed electricians and plumbers to the table early on ensures all these hidden systems are planned and installed correctly from the start. Here at Wheeler Painting & Restoration Services, we manage this whole process for our Puget Sound clients. This integrated approach is the secret to a renovation that runs smoothly and results in a kitchen that works perfectly for years to come.

Bringing Your Vision to Life with a Professional Contractor

You’ve done the hard work of planning your kitchen layout. Now for the exciting part: turning those sketches and ideas into a beautiful, functional space you can actually cook in. This is where your detailed plan meets the real world, and honestly, the single most important decision you'll make from here on out is choosing the right professional to build it.

Think of your layout as the roadmap. A great contractor is the seasoned guide who knows the terrain, anticipates the roadblocks, and gets you to your destination without any wrong turns. They’re the ones who translate your vision into a real, tangible kitchen, handling everything from the first swing of the sledgehammer to the final coat of paint.

From Blueprint to a Beautiful Build

A general contractor’s job goes way beyond just managing the construction crew. They are the project's conductor, orchestrating a complex symphony of tasks and people.

First and foremost, they handle the critical-but-not-so-glamorous stuff, like securing building permits. This isn't just paperwork; it’s what ensures your remodel is safe, legal, and up to code. They also have a roster of trusted, licensed subcontractors—the electricians, plumbers, and cabinet installers they’ve worked with for years.

Trying to juggle all these different tradespeople yourself can quickly turn into a full-time job, riddled with scheduling nightmares and expensive delays. A seasoned contractor ensures the plumber isn’t showing up before the electrician has even run the new wires. It’s a carefully choreographed dance, and they know all the steps.

They also keep a pulse on what's new and what's next. For instance, the whole concept of the kitchen is changing. The National Kitchen & Bath Association’s 2026 Kitchen Trends Report found that 76% of designers see kitchen footprints getting bigger, even as new homes get smaller. We're seeing a huge demand for oversized islands—half of which are now over 7 feet long—that need specific structural and electrical planning. An experienced pro knows how to handle these modern demands. You can dig into this trend from the full NKBA report to see what's on the horizon.

Why a Local Puget Sound Contractor Makes All the Difference

When you're remodeling in Western Washington, hiring a local contractor has some serious perks. A local professional has deep roots here. They know which suppliers have the best materials and can often get better pricing and availability.

More importantly, they have an intimate understanding of the specific building codes and permitting quirks in our area. This inside knowledge can save you from a world of headaches and frustrating delays down the line.

A great contractor is your advocate, your problem-solver, and your project manager, all rolled into one. Their real job is to see challenges before they happen, communicate clearly, and deliver a finished kitchen that doesn't just meet your expectations—it completely wows you.

When you partner with a full-service team like Wheeler Painting & Restoration Services, you get one point of contact for the entire job. We manage every single detail, from the first design chat to the final walkthrough, making sure your project stays on track and within budget. We truly believe a kitchen remodel should be an exciting journey, not a source of stress.

Ready to find the right partner for your project? Our guide on how to choose a general contractor is a great place to start. It’s packed with smart questions to ask and the key qualities to look for.

Your Kitchen Layout Questions, Answered

Even the best-laid plans can leave you with a few lingering questions. It’s completely normal. Over the years, we’ve heard just about everything from homeowners here in the Puget Sound, so let’s tackle some of the most common ones that come up during the design phase.

What’s Really the Most Efficient Kitchen Layout?

This is the million-dollar question, and the honest answer is: it depends entirely on your space.

From a pure, task-oriented perspective, a classic galley kitchen is tough to beat. Everything is in a tight, linear space, meaning you're just a quick spin away from your sink, stove, and fridge. It minimizes steps like nothing else.

But for the way most of us live today, an L-shape or U-shape kitchen often hits the sweet spot. When designed properly with a smart work triangle, they are incredibly efficient and provide the flexibility needed for more than one person to cook at the same time. Plus, they integrate beautifully into open-concept homes, keeping the cook connected to the rest of the family.

What’s the Real Cost of Changing a Kitchen Layout?

The budget for rearranging a kitchen can swing wildly. If you're just shifting some cabinets around and not touching the utilities, you might only add a few thousand dollars to your total remodel cost.

The real budget-busters are moving walls, plumbing, and electrical. As soon as you start rerouting water and gas lines or making structural changes, the cost can easily jump by tens of thousands of dollars. The only way to get a firm number for your specific project is to have a trusted contractor walk the space and provide a detailed estimate.

Your most valuable investment isn't the countertops or the cabinets; it's the plan itself. Diving into demolition without a clear, professionally reviewed design is a recipe for delays, stress, and unexpected costs.

Do I Actually Have Enough Room for an Island?

A kitchen island can be a fantastic addition, but forcing one into a space that’s too small will cause daily frustration. Don't do it unless you have the room.

The golden rule is you need a minimum of 36 to 42 inches of clear walkway on all sides of the island. Anything less and the kitchen will feel cramped and become a bottleneck.

For the island itself to be truly useful, aim for it to be at least four feet long and two feet deep. An island smaller than that tends to be more of a roadblock than a functional workspace. Measure twice, build once!


Planning a new kitchen layout is a big undertaking, but you don’t have to figure it all out on your own. Here at Wheeler Painting & Restoration Services, we've spent decades helping Western Washington homeowners create kitchens that are as functional as they are beautiful. We have the hands-on experience to bring your ideas to life, the right way.

Contact us today for a consultation and let's start building your dream kitchen together.

Kitchen Remodel Cost Breakdown: A Clear Budget Guide for Puget Sound Homeowners

Thinking about remodeling your kitchen is exciting. But before you start choosing paint colors and appliances, the biggest question looms: “What will this actually cost?”

Here in the Puget Sound area, a full kitchen remodel cost breakdown can start around $25,000 for a simple refresh and climb north of $100,000 for a custom, high-end overhaul. Feeling overwhelmed? You’re not alone. The goal of this guide is to explain the process in simple, helpful terms, so you can build a budget with confidence.

Your Puget Sound Kitchen Remodel Cost at a Glance

Let’s be upfront: planning a kitchen remodel in Western Washington means budgeting for our specific market. Costs here are often higher than the national average due to high demand for skilled professionals and local labor rates. Understanding the typical investment levels is the best first step you can take.

For local homeowners and property owners, the project’s scope is the biggest factor. A smaller, basic remodel might focus on cosmetic changes—painting cabinets, swapping out a faucet, and adding a new backsplash. At the other end, a high-end renovation could involve tearing down walls, re-routing plumbing, and installing custom cabinets and professional-grade appliances.

Typical Investment Tiers

To help you see where your project might land, we can break down kitchen remodels into three general tiers common for the Puget Sound area.

  • Basic Remodel ($25,000 – $50,000): This is about making smart, high-impact upgrades without changing the kitchen’s layout. Think professionally refinishing your existing cabinets, installing new countertops, and updating hardware and lighting.
  • Mid-Range Remodel ($50,000 – $100,000): This is the sweet spot for many homeowners. It usually includes new semi-custom cabinets, better-quality appliances, durable new flooring, and perhaps minor adjustments to the layout.
  • High-End Remodel ($100,000+): This is a full-gut renovation. We’re talking top-of-the-line custom cabinetry, pro-grade appliances, premium materials like natural stone, and even structural work like moving walls.

This visual gives a great snapshot of how those costs break down for a typical Puget Sound kitchen project.

Puget Sound kitchen remodel cost tiers: High-End ($100K+), Mid-Range ($50-100K), Basic ($25-50K).

As you can see, the investment climbs as you move from simple cosmetic updates to a full-blown structural renovation.

To make this clearer, here’s a table outlining what you can generally expect within each budget tier here in Western Washington.

Puget Sound Kitchen Remodel Cost Tiers

Remodel Tier Typical Scope of Work Estimated Cost Range (Puget Sound)
Basic Keep existing layout, paint or refinish cabinets, replace countertops (laminate/entry-level quartz), new sink/faucet, update lighting, fresh paint. $25,000 – $50,000
Mid-Range New semi-custom cabinets, higher-quality quartz or granite, mid-grade appliance package, new flooring, tile backsplash, minor layout changes. $50,000 – $100,000
High-End Fully custom cabinetry, premium stone countertops, professional-grade appliances, major layout reconfiguration (moving walls/plumbing), high-end fixtures. $100,000+

These ranges help set a realistic foundation for planning, showing how your choices directly shape the final cost.

Key Cost Drivers to Consider

No matter your budget, a few key items will always command the biggest slice of the pie. The “big three” are almost always cabinets, countertops, and labor. Appliances, of course, are right up there as well. Being strategic about your choices in these areas is the secret to keeping your project on track and on budget.

A well-planned remodel starts with knowing where your money is going. By breaking down the costs, you can put your dollars toward the features that matter most. This ensures you end up with a kitchen you love that also adds lasting value to your home.

As a trusted local provider, Wheeler Painting helps homeowners and business owners navigate these decisions every day. Our approach is built on making the process transparent and reassuring, turning what can feel like an overwhelming project into an experience you can trust.

Breaking Down Your Budget, Part One: Cabinets and Countertops

When you start planning a kitchen remodel, you’ll quickly find that two line items almost always consume the biggest portion of the budget: cabinets and countertops. Understanding what drives their costs is the first step toward building a realistic budget that matches your vision. After all, these aren’t just functional pieces—they set the entire tone for your space.

Modern kitchen featuring white shaker cabinets, light speckled countertops, and cutting boards.

Cabinets are the workhorse of your kitchen’s design and storage, and their price tag reflects that, typically accounting for 30-40% of the total remodel cost. Nationally, for a mid-range project costing between $30,000 and $50,000, that means you’re looking at $9,000-$20,000 for cabinets alone.

Here in the Puget Sound area, you can expect those figures to be 40-60% higher. This jump comes from our region’s higher labor rates ($90-$150 per hour) and the premium on materials. You can get a broader sense of how kitchen remodeling costs vary by region in this 2026 cost overview.

Your Guide to Kitchen Cabinet Options

The wide price range for cabinets boils down to three distinct categories. Each one strikes a different balance between cost, quality, and personalization.

  • Stock Cabinets: These are your most budget-friendly choice. They are mass-produced in standard sizes and a limited range of finishes, making them quick to acquire but light on customization.
  • Semi-Custom Cabinets: This is the sweet spot for many homeowners. You start with standard cabinet sizes but get more choices for finishes, door styles, and clever storage solutions, offering design flexibility without the full cost of custom work.
  • Custom Cabinets: If you can dream it, it can be built. Custom cabinets are made to your exact specifications, perfect for tricky layouts or for anyone wanting a one-of-a-kind kitchen. Naturally, they also represent the biggest investment.

A Smarter Alternative: Professional Cabinet Refinishing

Here’s a tip many Puget Sound homeowners are catching on to: you don’t always need a full tear-out for a dramatic transformation. Professional cabinet refinishing can deliver a high-end, factory-fresh look for a fraction of the cost. This is a core specialty at Wheeler Painting and a game-changer for updating your kitchen’s style without the massive expense and disruption of total replacement.

Choosing to refinish your existing, good-quality cabinets can save you up to 70% compared to the cost of brand-new custom cabinetry. This frees up a huge chunk of your budget that you can reallocate to other high-impact upgrades, like countertops or new appliances.

Choosing the Right Countertop Material

Once your cabinets are sorted, countertops are the next big decision. They are a huge visual element and have to stand up to daily use, so you’re looking for that perfect blend of beauty, durability, and cost.

Here’s a quick rundown of popular materials we see in local residential and commercial remodels:

  • Laminate: This is the most affordable route. Modern laminates offer countless designs, including convincing mimics of stone and wood, though they are less resistant to heat and scratches.
  • Granite: A classic for a reason. This durable and beautiful natural stone is unique to each slab. It’s very heat-resistant and, when sealed properly, holds up well against stains.
  • Quartz: An engineered stone that has become a favorite for both homeowners and businesses. It’s non-porous, meaning it resists stains without needing to be sealed, and comes in a huge range of consistent colors and patterns.

Countertop pricing is almost always calculated per square foot, installed. In our area, laminate is the most accessible option, while high-end quartz and granite are a more significant—but long-lasting—investment. Making the right choice ensures your surfaces not only look fantastic but also serve your needs for years to come.

Breaking Down Your Budget: Appliances and Finishes

Once your cabinets and countertops are sorted, it’s time for the fun part: picking out appliances and finishes. These are the elements that bring your kitchen’s personality to life. From the oven for holiday meals to the faucet you use every day, these choices define how you experience your new space.

Modern kitchen featuring stainless steel appliances, white and wood cabinets, a colorful tiled backsplash, and a black sink.

Appliances are a big-ticket item with seemingly endless options. You could go with a reliable, standard set that gets the job done or invest in professional-grade or smart appliances that add long-term value and convenience. There’s no wrong answer—it’s all about what matters most to you.

Choosing Your Appliance Package

The best appliance package is the one that fits how you actually cook and live. If you’re a passionate home chef, a six-burner gas range might be non-negotiable. For a busy family, a smart fridge that helps track groceries could be a game-changer.

  • Standard Appliance Packages: This budget-friendly route gives you all the essential functions without extra bells and whistles, helping keep costs in check.
  • Mid-Range and Smart Appliances: Here, you’ll find popular features like convection ovens, induction cooktops, and Wi-Fi connectivity, balancing modern tech with a reasonable price.
  • High-End and Professional-Grade: Built for performance and longevity, these appliances are a serious investment. Think stainless steel construction, precision controls, and specialized functions.

Generally, appliances account for 10-20% of your total remodel budget. For a mid-range project, that often lands between $8,000 and $15,000. This gets you a great suite of energy-efficient models that look fantastic and can help lower utility bills. To dig deeper, these essential cost insights for home remodeling can help you understand how trends influence budgets.

Selecting Durable and Stylish Flooring

Your kitchen floor needs to be a workhorse. It has to stand up to constant foot traffic, dropped pans, and inevitable spills, all while looking great. This is a decision where durability, style, and cost must meet in the middle.

Your flooring is the foundation of your kitchen’s design. Investing in a material that is both beautiful and resilient ensures your kitchen will stand up to the demands of daily life for years to come, protecting your overall investment.

Here in the Puget Sound, a few flooring options have become clear favorites for both residential and commercial projects:

  • Luxury Vinyl Plank (LVP): There’s a reason LVP is so popular. It’s waterproof, scratch-resistant, and comfortable to stand on. Plus, it mimics the look of real wood or stone without the high cost or maintenance.
  • Hardwood: A classic choice that adds timeless warmth and value to your home. While solid hardwood can be tricky in a kitchen, engineered hardwood is a fantastic alternative with better moisture resistance.
  • Tile: Ceramic and porcelain tiles are incredibly durable, waterproof, and easy to clean. The design possibilities are endless, but keep in mind they can feel hard and cold underfoot.

The Finishing Touches That Complete the Look

Finally, we have the “kitchen jewelry”—all the little details that pull the whole room together. It’s easy to overlook them in the initial budget, but their impact is huge.

These are the crucial final pieces:

  • Lighting: A great lighting plan is layered. You need ambient light for overall illumination, task lighting (like under-cabinet strips) for workspaces, and accent lighting (like pendants over an island) to create mood.
  • Sink and Faucet: Your sink is arguably the most-used feature. Options range from durable stainless steel to classic fireclay. Faucets now come with features like touchless technology and specialized spray functions.
  • Backsplash: This is where you can show your personality! A backsplash protects your walls from splashes and splatters while acting as a major design focal point.
  • Hardware: Knobs and pulls are the final flourish. The right hardware can completely transform the style of your cabinets. Coordinating the finish with your faucet and lighting creates a polished, cohesive look.

You can see how these details come together to create stunning, functional spaces in the Wheeler Painting & Restoration Services portfolio.

Understanding the True Value of Professional Labor

When adding up costs for a kitchen remodel, it’s easy to focus on the tangible items—shiny new appliances, gorgeous countertops, and custom cabinets. But the single most important part of your budget, the one holding the entire project together, is often the most underestimated: professional labor.

Think of it this way: you can buy the best ingredients, but without a skilled chef, you won’t get a five-star meal. Professional tradespeople are your project’s master chefs. They are the carpenters, electricians, plumbers, and painters who turn materials into a functional, beautiful, and—most importantly—safe kitchen.

Two professional construction workers review blueprints in a kitchen under renovation, discussing project plans.

Why Professional Labor Is a Non-Negotiable Investment

Trying to DIY a major kitchen remodel in the Puget Sound area can lead to serious problems. Our region has specific building codes and permitting requirements that licensed professionals know inside and out. A poorly installed electrical outlet isn’t just an annoyance; it’s a fire hazard. A leaky plumbing connection hidden behind a wall can lead to thousands in water damage repairs.

Investing in a professional team from day one is about protecting your property and your sanity. It’s the guarantee that the work is done right, built to last, and safe for your family or employees.

The General Contractor: Your Project Quarterback

A great general contractor proves their worth by managing the entire process. They are not just an expense; they are the essential manager and single point of contact who orchestrates everything. As a licensed residential and commercial contractor, Wheeler Painting acts as the quarterback calling the plays.

Their role is to:

  • Schedule and Coordinate: They ensure the plumber shows up after the framing is done but before the drywall goes up. It’s a complicated dance, and they know all the steps.
  • Vet Subcontractors: They have a roster of trusted, licensed, and insured tradespeople they’ve worked with for years. You get a proven team, not a gamble.
  • Ensure Code Compliance: They navigate the maze of permits and inspections, ensuring every part of the job meets Western Washington’s strict building codes.
  • Solve Problems: When the crew opens a wall and finds a surprise, a good GC has the experience to solve it quickly and correctly, keeping the project on track.

Hiring a qualified general contractor is the best insurance policy for your kitchen remodel. It buys you peace of mind, protects your budget from expensive do-overs, and ensures a high-quality result that adds real value to your property.

The Cost of Labor in the Puget Sound

Labor is a major slice of any remodel budget, and our region’s high demand for skilled trades reflects that. While national averages suggest labor accounts for 20-30% of the total cost, it’s often higher here.

Specialized work from electricians and plumbers can run $90-$150 per hour. When you add it all up—demolition, installation, and finish work—the total labor bill for a mid-range kitchen can easily land between $10,000 and $20,000. You can see more on how these costs stack up in this helpful kitchen cost guide from USA Cabinet Store.

As a general contractor serving Western Washington for decades, we help manage these costs through efficient project management and long-standing supplier relationships. By guiding you from the initial proposal to the final build, our locked-in vendor rates can often create significant savings. You can learn more about how we handle complex jobs by exploring our approach to residential construction.

In the end, professional labor isn’t just a line item. It’s the foundation of a successful, stress-free remodel.

Planning for the Unexpected Costs of Remodeling

When you dream about your new kitchen, it’s easy to focus on the fun stuff—gorgeous cabinets, sleek countertops, and shiny new appliances. But a smart remodel plan goes deeper. The real secret to a smooth, stress-free project is planning for the costs you can’t see at first.

Think of your main budget as your game plan, but every experienced coach needs a plan for when things don’t go as expected. These aren’t necessarily “hidden” costs, but rather the realities of any major home or commercial renovation. A complete kitchen remodel cost breakdown must account for them from the start.

Building Your Project’s Safety Net

Every house has its own story, especially in the Puget Sound area where many homes are decades old. When we open up walls, we sometimes find unexpected chapters, such as old wiring that needs to be brought up to modern safety codes, minor water damage, or evidence of past pests.

This is exactly why a contingency fund isn’t a luxury; it’s a necessity.

A contingency fund is your project’s financial cushion. We strongly recommend setting aside 15-20% of your total project cost for these kinds of surprises. It’s the single best way to protect your budget and your peace of mind.

For a $75,000 mid-range remodel, that means having an extra $11,250 to $15,000 ready. This isn’t money you will necessarily spend, but it’s there if you need it. It keeps a small hiccup from turning into a major crisis that forces you to compromise on your vision.

Accounting for Essential Overheads

Beyond surprises in your walls, other costs are part of the process. They are critical administrative and planning expenses that are easy to forget when you’re focused on tile and paint colors.

  • Design Fees: A great kitchen starts with a great plan. Working with a professional designer ensures every inch of your space is functional and beautiful. Their fee is an investment in getting the final result just right.
  • Building Permits: Most substantial remodels require permits from your local city or county. This non-negotiable step ensures all work is done safely and meets current building codes.
  • Scope Creep: This happens when one small “while we’re at it” change leads to another. Deciding to add under-cabinet lighting or upgrading your sink midway through the project might seem small, but those costs can add up fast. We manage this with clear “change orders” so you always know how a decision will impact the final cost.

A seasoned team like Wheeler Painting & Restoration Services knows to anticipate these costs. We build them into our initial proposals, giving you a realistic, all-in budget from day one. This transparency is key—it prevents sticker shock and keeps you firmly in control.

To give you a clearer idea, here’s how a typical budget might break down for a mid-range kitchen remodel in our area.

Sample Budget for a $75,000 Mid-Range Puget Sound Kitchen

The table below shows a common allocation for a $75,000 project. Remember, these percentages can shift based on your priorities—for example, if you opt for ultra-premium appliances or custom-built cabinetry.

Cost Category Percentage of Budget Estimated Cost
Cabinetry & Hardware 35% $26,250
Labor & Installation 20% $15,000
Appliances & Ventilation 15% $11,250
Countertops 10% $7,500
Flooring 5% $3,750
Plumbing & Electrical 5% $3,750
Lighting & Finishes 5% $3,750
Design, Permits, & Other 5% $3,750
TOTAL 100% $75,000

It’s important to note that this $75,000 is the budget for the planned work. Your separate 15-20% contingency fund sits on top of this. By planning for both the known and the potential unknown, you create a financial buffer that turns a potentially chaotic process into a predictable and even enjoyable one.

How to Maximize Your Remodeling Budget and Value

Getting the kitchen you’ve always wanted doesn’t have to mean emptying your savings. With smart planning, you can build a beautiful, functional space and make every dollar work for you. The secret is to put your money into high-impact upgrades and clever substitutions that deliver the most bang for your buck without sacrificing quality.

One of the best ways to keep your kitchen remodel cost breakdown in check is to work with the footprint you already have. It can be tempting to knock down walls, but that’s where costs spiral. Moving plumbing for a sink, shifting gas lines for a stove, or running new electrical adds thousands to your labor bill, and fast.

By sticking with your current layout, you can pour that money into the things you’ll see and use every day.

Transform Your Space with Smart Upgrades

Another fantastic strategy is to breathe new life into what’s already there. If your cabinet boxes are structurally sound, there’s often no need to rip them out. For homeowners and business owners in the Puget Sound area, professional cabinet refinishing is a total game-changer.

A professional refinishing can give your existing cabinets a flawless, factory-like finish for a fraction of what new semi-custom or custom cabinets would cost. This one move can save you up to 70% on what is usually the biggest expense in any kitchen budget.

This approach doesn’t just save you a huge chunk of change; it also keeps perfectly good materials out of the landfill. It’s a smart, sustainable choice that frees up your budget for other items on your wish list.

Choose High-Value Materials

Picking the right materials is key to getting the most from your investment. Today’s budget-friendly options deliver amazing performance and aesthetics that can easily go toe-to-toe with their pricier counterparts.

Think about these cost-effective swaps:

  • Durable Flooring: Luxury Vinyl Plank (LVP) gives you the gorgeous look of hardwood but with far better water resistance and durability—all at a lower price. It’s a perfect fit for a busy, spill-prone room like a kitchen.
  • Countertop Alternatives: You don’t need a rare slab of stone to get a high-end look. Modern, high-quality laminate countertops now come in stunningly realistic patterns that mimic granite or quartz, giving you a tough, stylish surface for much less.
  • Splurge and Save on Finishes: Create a premium feel by mixing materials. You could splurge on a beautiful, eye-catching tile for a small backsplash area behind the stove and then use a more standard tile for the rest.

At the end of the day, stretching your budget is about making smart, informed decisions. When you partner with an experienced local contractor like Wheeler Painting & Restoration Services, you get an expert guide to help you navigate these choices. Our deep experience in residential and commercial construction means we can point you toward solutions that deliver a beautiful, long-lasting kitchen that also respects your wallet.

Your Kitchen Remodel Questions, Answered

As you get closer to starting your project, the questions really start to pile up. It’s completely normal. Let’s walk through some of the most common things we hear from property owners, business owners, and homeowners around the Puget Sound so you can move forward with confidence.

How Long Does a Kitchen Remodel Actually Take?

This really comes down to the scale of your vision. A straightforward cosmetic update—think cabinet refinishing or a new backsplash—can often be wrapped up in one to three weeks.

But if you’re planning a full overhaul with a new layout and coordinating multiple trades like electricians and plumbers, you should prepare for a longer timeline. These larger projects typically run anywhere from six to twelve weeks, and sometimes longer once you factor in permit approvals and material lead times in our region.

Can We Live in the House During the Remodel?

For smaller projects, absolutely. For a full-gut renovation? It gets tough. You have to be prepared for your home to become a construction zone—there will be dust, noise, and for a good stretch of time, you won’t have a working kitchen.

Many families make it work by setting up a temporary kitchen in another room. Others decide to stay with family or find a short-term rental during the most intense phases of construction.

A detailed project schedule from your contractor is your best friend here. It gives you a roadmap, showing you exactly what’s happening and when, so you can plan your life around the disruption.

What Are the Best Ways to Save Money on My Remodel?

Smart planning is the key to keeping costs in check without sacrificing quality. Here are three of the most effective strategies we’ve seen over the years:

  • Work with Your Existing Layout. This is the big one. Moving plumbing, gas lines, or major electrical wiring adds a significant amount to your labor costs. Keeping your sink and appliances in the same spot can save you a bundle.
  • Refinish Cabinets Instead of Replacing Them. If the “bones” of your cabinets are solid, a professional refinishing job can make them look brand new for a fraction of the cost of a full replacement.
  • Choose High-Value, High-Impact Materials. You don’t always need the most expensive option to get a high-end look. For example, modern luxury vinyl plank flooring is incredibly durable, and many quartz countertops now mimic the look of marble or quartzite beautifully.

For even more ideas on smart savings and project planning, check out the other articles on our company blog.

How Can I Get a Truly Accurate Estimate for My Project?

Ballpark figures are helpful for initial planning, but the only way to get a firm, reliable number is to have a professional walk through the space with you.

An experienced residential and commercial contractor can see your kitchen, listen to what you want to achieve, and spot potential issues that a simple calculator would miss. This in-person consultation is what turns a rough guess into an actionable proposal you can actually budget around.


Ready to turn your vision into a reality with a local team that’s been trusted in the Puget Sound area since 1991? Wheeler Painting is here to help homeowners and businesses with their residential and commercial construction needs. Reach out today for a detailed, no-obligation estimate, and let’s start planning the kitchen you’ve always wanted. Learn more at https://wheelerpainting.com.