Tag Archive for: commercial contractor

What is a Tenant Improvement Allowance?

You found a commercial space in Seattle, Kent, or Tacoma that looks promising. The location works. The parking works. The lease terms seem close. Then you walk inside and realize it still needs real work before your team can use it.

Maybe it’s an open shell. Maybe the walls are wrong, the flooring is worn out, and the lighting doesn’t fit your business. That’s where many small and mid-size business owners get stuck. They know the space could work, but they don’t know who pays for the build-out.

A tenant improvement allowance is often the answer. It’s the part of the lease that can help fund the changes needed to turn a generic commercial space into something your business can operate in.

If you’ve been searching for what is a tenant improvement allowance, this guide gives you the practical version. Not the abstract real estate version. The version that matters when you’re trying to open on time, stay on budget, and avoid ugly surprises during construction.

Your Guide to Commercial Space Build-Outs

A lot of business owners in the Seattle to Tacoma corridor run into the same situation. They finally find a decent location, sign or nearly sign the lease, and then discover the space still needs drywall repairs, paint, flooring, lighting updates, office partitions, or plumbing and electrical changes before anyone can move in.

A professional woman holding architectural blueprints stands in an unfinished office space overlooking the Seattle city skyline.

That gap between “good address” and “ready for business” is exactly why TIAs exist. In simple terms, the landlord sets aside a renovation budget inside the lease so the tenant can improve the space. Sometimes the landlord pays contractors directly. Sometimes the tenant pays first and gets reimbursed. Sometimes the landlord delivers a finished space.

For a small business, that can be the difference between a workable deal and a bad one.

Why this matters early

The build-out conversation shouldn’t start after the lease is signed. It should start while you’re still pricing the space and deciding whether the landlord’s offer is strong enough.

A rough sketch and a hopeful budget won’t protect you. A defined scope does. Good planning, realistic bids, and clear approvals matter before any walls are framed or paint goes on.

If you're still sorting out layout options, a resource on office space planning and design can help you think through how your team will use the space day to day.

What local owners usually need

In the Puget Sound area, small to mid-size tenant improvement projects often include:

  • Office reconfiguration: Adding private offices, conference rooms, or reception areas
  • Finish upgrades: Interior painting, wall repairs, flooring replacement, and ceiling work
  • System changes: Electrical, plumbing, HVAC adjustments, and code-related updates
  • Operational improvements: Storage areas, wash-up spaces, or practical work zones tied to your business

If your project is moving toward construction, it helps to understand what a commercial build-out usually includes. This overview of https://wheelerpainting.com/commercial-build-out-services/ gives a practical look at the work involved.

A TIA isn’t free money. It’s part of the lease economics, and the details around how it’s used matter just as much as the dollar amount.

Understanding Tenant Improvement Allowance Basics

A tenant improvement allowance, or TIA, is the portion of the lease deal a landlord sets aside for build-out work inside your space. In plain terms, it is money committed toward making the suite usable for your business.
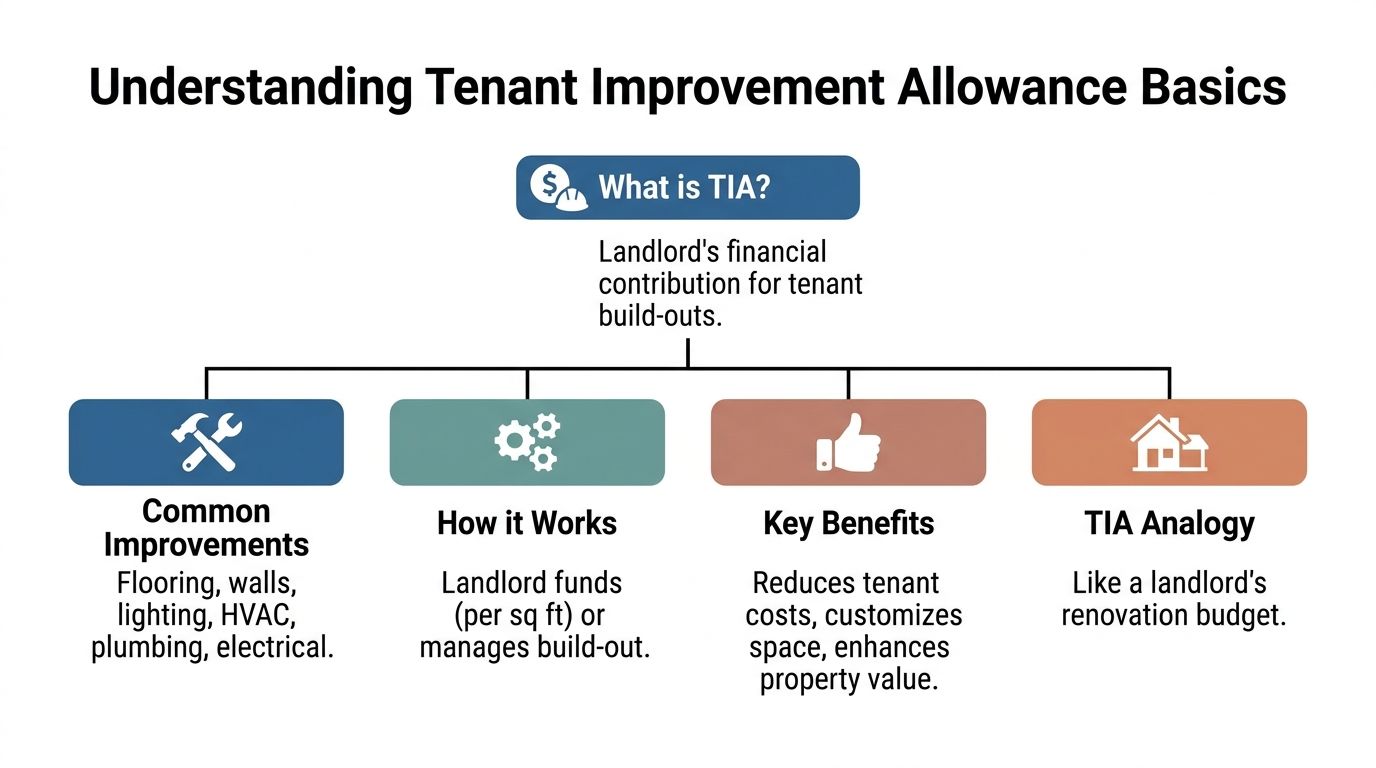
An infographic explaining the basics of a tenant improvement allowance, detailing its function, benefits, and common improvements.

For a small business owner in Seattle, Kent, or Tacoma, that can mean help paying for walls, lighting, flooring, plumbing changes, HVAC adjustments, ADA updates, or a basic reception area. It is usually quoted per rentable square foot, then folded into the lease economics.

Why landlords offer TIAs

Landlords offer TIAs to help get vacant space leased and keep good tenants in place longer. If the improvements stay with the building after the lease ends, the owner may also benefit from a better space for the next tenant.

That is why allowance dollars rarely stand alone. The amount is usually shaped by lease term, tenant credit, vacancy in the building, and how much work the space needs before it can be occupied.

In the Puget Sound corridor, that last point matters a lot. Older office and flex buildings in South Seattle, Kent Valley, and Tacoma often need more than paint and carpet. Electrical capacity, mechanical updates, permit requirements, and accessibility work can push costs up fast.

How the math works

Most TIAs are calculated with a simple formula:

Rentable square footage x negotiated TIA rate = total allowance

Here is what that looks like:

Space size TIA rate Total allowance
2,000 RSF $10 per RSF $20,000
10,000 RSF $30 per RSF $300,000

The important part is not just the formula. It is whether the total allowance lines up with your actual scope.

A 2,000 RSF office with minor cosmetic work may function well with a modest allowance. The same square footage for a medical-adjacent user, light industrial office, or customer-facing showroom may need far more because the build-out is more demanding.

What counts as a good allowance

There is no single "good" TIA number that applies to every deal in this region. A fair allowance depends on the starting condition of the space, the type of use, permit complexity, and who is carrying which costs under the lease.

In practice, I tell tenants to judge the allowance against the work list, not against a headline number. A landlord offering a lower rate on a clean second-generation office can be making a better deal than a landlord offering a higher rate on a tired shell that needs major mechanical and code work.

That is the benchmark.

Why local owners should care

In Seattle-Tacoma-Kent deals, the allowance can look reasonable until contractor pricing, permit review, and lead times are added to the picture. Local labor costs are not cheap, and even straightforward projects can get more expensive once demolition opens up walls or building systems need upgrades to meet current code.

Practical rule: The number that matters is whether the allowance covers the improvements you need to open, operate, and pass inspections.

A lower rent does not automatically mean a better deal. If the TIA leaves you funding a large gap out of pocket, the cheaper lease can become the more expensive decision.

How a Tenant Improvement Allowance Works in Practice

A Kent business owner finds a decent suite, signs the lease, and sees a tenant improvement allowance in the deal. Then the key questions start. Who hires the contractor, who pays first, what gets approved, and what happens if the city requires more work than anyone expected?

That is where the allowance either helps the project or creates friction.

In the Seattle-Tacoma-Kent corridor, I see tenants focus on the dollar amount and miss the funding structure. The structure affects cash flow, decision speed, and how much control you keep once drawings, permits, and contractor bids are in play.

Three common TIA structures

The same allowance can feel very different depending on how it is set up.

Reimbursement

With reimbursement, the tenant pays approved project costs first and the landlord pays back those costs up to the allowance cap.

This setup gives the tenant more say over contractor selection, scheduling, and finish choices. It also puts pressure on working capital. If your build-out includes permit review, demolition, electrical work, paint, flooring, and inspections, that money often goes out long before reimbursement comes in.

The practical risk is simple. If costs rise after walls are opened or code items are added, the tenant usually covers the difference unless the lease says otherwise. In this region, that happens more often than small business owners expect.

Direct landlord payment

Some landlords pay the contractor directly after approving the scope, bid, and invoices.

That can reduce the amount of cash the tenant needs to float. The trade-off is speed. Payment requests, substitutions, and change orders usually move through the landlord’s approval process, so decisions can take longer than they would on a tenant-run job.

This structure works best when the plans are well defined before construction starts.

Turnkey build-out

In a turnkey deal, the landlord runs the project and delivers the space ready for occupancy.

That can be a good fit for a straightforward office, retail, or service business that wants fewer construction decisions on its plate. It is less flexible if your business has specific operational needs, custom finishes, or equipment requirements. I tell tenants to be careful here. If the finish level, layout, and approval rights are vague, the landlord will usually choose the cheaper acceptable option.

If you are deciding who should control the work, this breakdown of design-build versus general contractor options helps clarify how delivery method affects cost, coordination, and decision-making.

What the allowance usually pays for

Most TIAs are meant for permanent improvements inside the leased space that help make it usable for the tenant.

Common covered items include:

  • Interior walls and doors: Framing, drywall, insulation, and basic door installation
  • Flooring and wall finishes: Carpet, LVT, tile, paint, and wall repair
  • Electrical and lighting work: New circuits, relocated outlets, light fixtures, and panel-related changes tied to the build-out
  • Mechanical and plumbing modifications: HVAC distribution, restroom updates, sink additions, and similar scope tied to occupancy
  • Code-driven work inside the suite: Accessibility items and other improvements needed for permit sign-off

What often falls outside the allowance

Here, budgets get squeezed.

Many tenants assume the allowance covers everything needed to open for business. In practice, leases often exclude costs that are real, necessary, and easy to overlook during deal review.

Typical exclusions include:

  • Furniture, fixtures, and loose equipment: Desks, seating, display racks, and movable shelving
  • IT and business equipment: Computers, servers, phones, and specialty wiring beyond the landlord’s standard scope
  • Moving and setup costs: Relocation labor, storage, and reinstallation of existing equipment
  • Brand-specific upgrades: Custom millwork, specialty lighting, feature walls, and upgraded finish selections
  • Soft costs, in some leases: Design fees, permit fees, engineering, project management, and expediting, unless the lease says they are covered

Where deals usually go wrong

Problems usually start before construction, not during it. The lease says there is an allowance, but it does not clearly say how funds are released, which costs qualify, who owns unused funds, or who pays if the city or the building requires extra work.

A clean bid package fixes a lot of that. The best results come from matching the lease language to actual plans, finish selections, and contractor pricing. If those documents line up, disputes are fewer and approvals are faster.

That is the practical side of a TIA. It is not just money in the lease. It is a construction process with rules, timing, and real cost exposure.

Negotiating Your TIA for a Puget Sound Commercial Space

You tour a Kent flex space or a small office in Tacoma, the rent looks workable, and the landlord offers a TIA that sounds decent on paper. Then your contractor prices the actual scope, and the gap shows up fast.

That gap is where a lot of small and mid-size tenants in the Seattle-Tacoma-Kent corridor get into trouble. The allowance number matters, but the deal terms around that number often matter just as much.

A professional man and woman discussing a lease agreement document at a desk in an office.

Bring real project costs to the lease conversation

The strongest argument in a TIA negotiation is a real estimate tied to a real scope. Landlords respond better when you can show what it will cost to make the space usable for your business in this market, with current labor, materials, permitting, and building requirements in mind.

That matters in Puget Sound because build-out costs vary a lot by building type and city. A light office refresh in Seattle is one thing. A medical, retail, or warehouse office build-out in Kent or Tacoma can involve different utility work, code triggers, and schedule risk. If the suite needs paint, flooring, partitions, coatings, repairs, or utility changes before you can open, price those items before you settle the lease.

If you're weighing project delivery options while the deal is still forming, this comparison of https://wheelerpainting.com/design-build-vs-general-contractor/ is useful because the structure you choose affects cost control and decision speed.

What to ask for

A better TIA deal is not always the highest dollar amount. In many leases, the safer deal is the one that spells out how money is approved, released, and applied if the scope changes.

Focus on these points:

  • Allowance amount: Ask whether the landlord will adjust the per-square-foot allowance based on your bid package and lease term
  • Disbursement method: Confirm whether the landlord reimburses you, pays contractors directly, or delivers the work as a turnkey project
  • Timing: Get approval timelines and payment timing in writing so cash flow does not become your problem
  • Overrun treatment: Ask whether costs above the allowance can be rolled into rent, split, or value-engineered before work starts
  • Change order rules: Set clear approval steps for added work, especially if demolition exposes building issues
  • Unused funds: Confirm whether leftover allowance can go toward other approved improvements, permits, or related costs such as signage project management

Use local market conditions to improve your bargaining position

Overrun risk is real. If a $20 PSF TIA on 2,000 sq ft yields $40,000 but the total project reaches $60,000, the tenant usually covers the excess unless that issue was negotiated ahead of time, based on this overview of tenant improvement allowances.

That same source states that post-pandemic hybrid office demands have spiked TIAs by 15% to 25% in major U.S. markets like Seattle, often tied to longer leases of 7+ years. For tenants here, that lines up with what shows up in actual lease discussions across the corridor. Landlords are often more open to a higher allowance, or a cleaner reimbursement structure, when the term is longer and the tenant improves the asset in a lasting way.

The source also notes that tenants can ask for contingency clauses worth 10% to 15% of the TIA, and that those protections can reduce overruns by 18%. In Seattle-area deals, I would treat that less as a universal rule and more as a useful negotiating benchmark. The practical takeaway is local: if you are taking second-generation space with unknown conditions, ask for a contingency bucket or a written process for handling hidden conditions. Older buildings in Seattle and Tacoma can produce surprises after demolition, and those surprises are expensive.

A landlord may not grant every request.

But a tenant who brings pricing, a defined scope, and a reasonable lease term usually has a better bargaining position before the lease is signed than after permits are underway and opening dates are fixed.

Here’s a quick explainer that helps many tenants understand how these trade-offs show up in lease talks:

The best time to deal with overruns is before the lease is final. After that, your negotiating power drops and the project clock starts running.

Managing Your Tenant Improvement Project from Plan to Finish

After the lease is signed, the TIA stops being a negotiation topic and becomes a project management issue. At that point, success depends less on the headline allowance and more on how well the job is documented and administered.

Who handles what

A smooth tenant improvement project usually depends on three groups doing their jobs clearly.

The landlord

The landlord typically reviews plans, approves scope, releases funds under the lease, and may require inspections before payment. In a landlord-managed build-out, the owner also controls contractor procurement and delivery standards.

The tenant

The tenant makes business decisions. That includes layout approval, finish selections, schedule priorities, and budget choices when alternates or overruns come up.

The contractor

The contractor turns drawings and lease language into actual work. That means sequencing trades, managing change orders, tracking invoices, and keeping the project aligned with the reimbursement rules.

Documentation is not optional

If your TIA is reimbursement-based, paperwork becomes part of the job itself.

Keep these items organized from day one:

  • Approved plans: Match the lease scope and any landlord review comments
  • Invoices and receipts: Every reimbursable cost should be easy to trace
  • Change orders: Signed approvals matter before added work starts
  • Lien waivers: These protect the property and are often required before payment
  • Inspection records: Some landlords want third-party verification before reimbursement

A similar principle applies to exterior branding and site coordination. If your project includes signs, wayfinding, or storefront updates, good signage project management keeps permits, fabrication, and installation aligned with the construction schedule.

The accounting side matters too

The accounting treatment of TIAs can be more complicated than many tenants expect. Under ASC 842, TIAs paid at or before lease commencement are treated as lease incentives and directly reduce the opening balance of the right-of-use asset, according to FinQuery’s discussion of tenant improvement allowance accounting.

That same source says 70% of lessees struggle with TIA classification, which can lead to audit issues. It also notes that overages beyond the TIA must be tenant-funded and capitalized separately.

Ask your accountant how the allowance should be recorded before the first reimbursement hits your books. It’s easier to set it up correctly than fix it later.

For most small businesses, the practical takeaway is simple. Keep clean records, align construction paperwork with the lease, and involve your accountant early if the allowance is significant.

Real-World TIA Examples in the Seattle-Tacoma Area

The idea gets easier to understand when you look at normal local scenarios. These are illustrative examples, built around common small to mid-size commercial projects in the corridor between Seattle and Tacoma.

Three common situations

A small office user in Seattle may lease a second-generation suite that needs paint, a few new walls, lighting updates, and flooring replacement. The space isn’t a full shell, but it still needs work before staff can move in.

A retailer in downtown Tacoma may need a cleaner customer-facing layout. That often means finish upgrades, fitting rooms, better lighting, and back-of-house adjustments.

A warehouse user in Kent may only need a modest office build-out inside a larger industrial space. The work can be focused and practical, but it still needs to be budgeted correctly under the lease.

Sample TIA estimations in Puget Sound

Business Type & Location Square Footage Typical TIA Rate Total TIA Amount Potential Project Focus
Office user in Seattle 2,000 sq ft $20 PSF $40,000 Interior paint, flooring, partitions, lighting
Retail boutique in Tacoma 1,500 sq ft $15 PSF $22,500 Finish refresh, display lighting, fitting area improvements
Logistics company in Kent 5,000 sq ft $25 PSF $125,000 Office build-out within warehouse, break area, wall systems, flooring

These examples use TIA rates already discussed earlier in the article. Real numbers depend on lease structure, building condition, and the actual scope of work.

What matters most is fit. A modest allowance can work well if the space already has usable infrastructure. A larger allowance can still fall short if the suite needs extensive rework.

Partnering for a Successful Build-Out

A tenant improvement allowance can be one of the most useful tools in a commercial lease. It can reduce upfront build-out cost, make a better space financially workable, and give your business room to open in a location that otherwise wouldn’t pencil out.

But the allowance only helps if the scope is realistic, the lease language is clear, and the project is managed carefully. That’s where many tenants run into trouble. They focus on the allowance amount and not the process around it.

For small and mid-size businesses in the Seattle, Kent, and Tacoma area, the smartest approach is simple. Price the work early. Negotiate from actual scope. Document everything. Choose a contractor who can manage both the build quality and the paperwork.

If you're evaluating firms before moving ahead, this guide on https://wheelerpainting.com/how-to-choose-a-general-contractor/ is a good place to start.

Frequently Asked Questions about Tenant Improvement Allowances

Can a tenant improvement allowance be used for furniture

Usually, no. TIAs generally apply to permanent or semi-permanent improvements to the leased space, such as walls, flooring, electrical, plumbing, and similar construction items. Furniture, movable shelving, and décor are often excluded unless the lease specifically allows them.

What happens if the build-out costs more than the allowance

The tenant usually pays the difference unless the lease says otherwise. That’s why overrun language matters so much. If you expect potential surprises, try to address them before signing the lease.

What happens if the project costs less than the allowance

That depends on the lease. Some landlords cap reimbursement at actual construction cost and keep the unused portion. Others may allow flexibility, but only if the lease spells it out clearly.

Is a higher TIA always the better deal

Not always. A higher allowance can come with trade-offs, including higher rent or a longer lease term. A lower allowance paired with stronger overall lease economics can sometimes be the better business decision.

Does the tenant or landlord choose the contractor

Either setup can happen. In reimbursement deals, the tenant often has more say. In turnkey projects, the landlord usually controls contractor selection. The lease should define the approval process.

Are paint and finish work usually covered

Often, yes, if they’re part of the approved build-out scope. Interior painting, wall repairs, coatings, and finish upgrades are common parts of tenant improvement work when they’re tied to preparing the space for occupancy.

Does a TIA cover permits and design fees

Sometimes, but not automatically. Some leases allow certain pre-construction costs as part of the allowance, while others restrict reimbursement to physical construction only. Read that section carefully.

Why do small businesses need contractor pricing before lease signing

Because you can’t negotiate effectively without knowing the actual build-out cost. A landlord’s allowance may sound reasonable until a real scope is priced. Early bids help you avoid underfunded projects and reduce the chance of disputes once construction starts.


If you're planning a commercial move, office build-out, retail refresh, or tenant improvement project in Seattle, Kent, Tacoma, or the communities in between, Wheeler Painting & Restoration Services can help you price the work clearly and move from lease negotiation to construction with less guesswork. Reach out to discuss your space, your scope, and what it will take to get the job done right.

12 Types of Cabinet Options for Your Home & Business in 2026

Choosing the right cabinets can feel overwhelming, whether you're renovating your home kitchen in Bellevue or planning a commercial build-out in Seattle. Cabinets are more than just storage; they define the functionality and style of a space, impacting everything from daily workflow to long-term property value. With so many types of cabinet available, from stock and semi-custom to fully custom designs, it is crucial to understand the options before making an investment. This guide breaks down the essential categories, materials, and styles to help homeowners and business owners across the Puget Sound area navigate their choices with confidence.

We'll explore the pros and cons of different cabinet construction methods, such as face-frame versus frameless, and what they mean for durability and aesthetics. Beyond the visual appeal, understanding the various structural components, such as the different types of cabinet door hinges, will help in selecting cabinets that offer both your desired style and lasting functionality. We'll also highlight key considerations for our unique Western Washington climate, where moisture resistance and material stability are paramount for longevity.

This comprehensive guide provides the clarity you need to select cabinets that are functional, beautiful, and built to last. Whether you're a facilities manager sourcing durable solutions for a new office space renovation, an architect planning a retail build-out, or a homeowner ready for a residential remodel, this article will equip you with the knowledge to make an informed decision. Learn how a trusted local partner like Wheeler Painting can guide your project from concept to completion, ensuring your new cabinetry perfectly suits your needs.

1. Kitchen Cabinets

Kitchen cabinets are the foundation of any kitchen’s design and functionality, serving as purpose-built storage for everything from cookware and dishes to pantry staples. These fixtures are a dominant visual element and play a critical role in the room's workflow. As one of the most essential types of cabinet, they are a primary focus in both residential remodels and commercial build-outs, such as in office breakrooms or restaurant kitchens.

The sheer variety available allows for precise customization. For instance, a modern farmhouse kitchen in Bellevue might feature classic white Shaker-style cabinets, while a traditional Mercer Island home could showcase the deep, rich tones of custom stained cherry wood. Two-tone designs, combining different colors for upper and wall cabinets, are also a popular choice for contemporary spaces.

Key Considerations for Kitchen Cabinets

  • Plan Your Layout: Design the cabinet configuration early to ensure an efficient "kitchen triangle" between the sink, stove, and refrigerator.
  • Invest in Hardware: High-quality hinges and soft-close drawer slides are small details that greatly improve daily use and longevity.
  • Professional Finishing: A flawless finish is key to a high-end look. A professional service like Wheeler Painting ensures a durable, even coat without brush marks, whether you're painting new cabinets or refinishing old ones. For a deeper dive into color selection, explore these kitchen cabinet paint color ideas.
  • Proper Installation: Schedule installation for a time when the kitchen can be out of commission for one to two weeks to allow for a smooth, uninterrupted process.

2. Bathroom Vanities & Storage Cabinets

Bathroom vanities and storage cabinets are specialized furniture pieces designed for the unique demands of the bathroom environment. These units combine a sink, countertop, and storage into one functional fixture, serving as a central point for daily routines. As one of the most important types of cabinet for organization, they are essential for stowing toiletries, linens, and cleaning supplies, helping to maintain a clutter-free space in both residential homes and commercial facilities like office restrooms or hotel suites.

The range of available styles allows for a perfect match to any aesthetic. A minimalist bathroom remodel in a Seattle condo might feature a sleek, wall-mounted floating vanity to create a sense of space. In contrast, a master bathroom in a more traditional Sammamish home could benefit from a large, freestanding double-sink vanity with ornate details. For smaller powder rooms or commercial restrooms, pedestal sinks paired with separate wall-mounted storage cabinets offer a practical solution.

Key Considerations for Bathroom Vanities & Storage Cabinets

  • Plan for Moisture: Ensure the bathroom has adequate ventilation to combat humidity. Choose cabinets made from moisture-resistant materials like solid wood, plywood with a high-quality veneer, or thermofoil to prevent warping and damage.
  • Check Plumbing & Electrical: Before ordering your vanity, measure the exact locations of existing plumbing rough-ins. Plan for any new electrical needs, such as outlets for personal care devices or integrated vanity lighting, at the same time.
  • Prioritize a Professional Finish: A durable, waterproof finish is critical for longevity in a high-moisture area. A professional painting service ensures the finish is perfectly applied, sealed, and capable of withstanding daily use and humidity without peeling or bubbling.
  • Select Based on Needs: Before falling in love with a style, assess your storage requirements. Consider if you need deep drawers for towels, shallow organizers for cosmetics, or a combination. For more ideas on how to update your space, you can get inspired by these affordable bathroom remodel strategies.

3. Built-In Wall Cabinets & Shelving

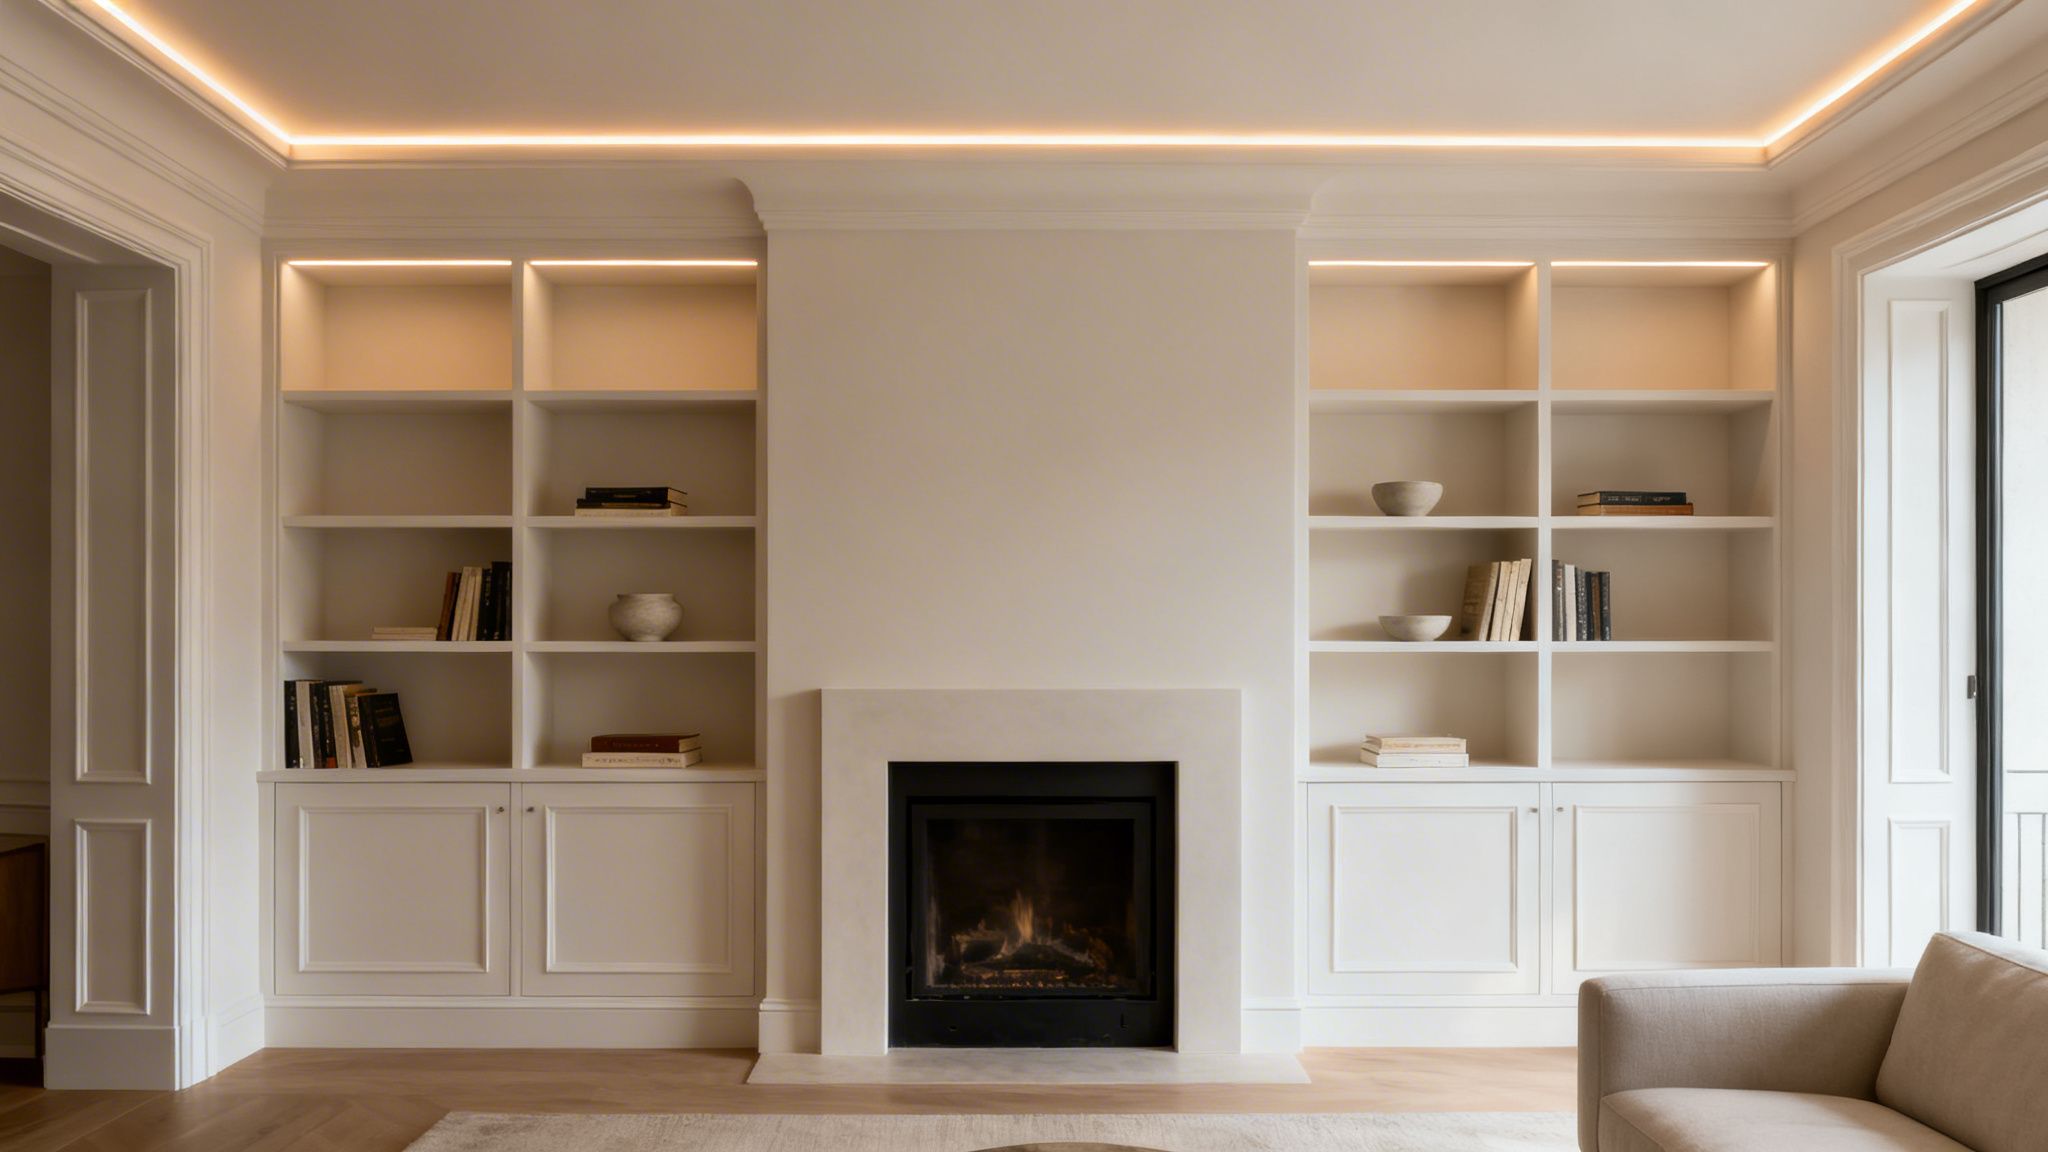
Built-in wall cabinets and shelving are custom-integrated storage solutions built directly into a room's structure, offering a seamless and sophisticated look. These permanent installations are designed to fit specific wall dimensions precisely, maximizing space efficiency in both residential homes and commercial properties. From floor-to-ceiling bookcases flanking a fireplace in a Sammamish living room to a sleek media center in a new office lobby, built-ins add significant functional and aesthetic value.

A chic living room featuring a fireplace flanked by built-in bookshelves with warm lighting.

These types of cabinet systems turn unused nooks and empty walls into valuable assets, whether for display, storage, or a combination of both. In a home office, they create an elegant library wall; in an entryway, they provide organized cubbies for coats and shoes. For maximizing space and creating a seamless look, consider the benefits of custom built-in cabinetry. The result is a high-end, architectural feature that feels like a natural part of the room's design.

Key Considerations for Built-In Wall Cabinets & Shelving

  • Plan for Electrical: If you want integrated lighting, device charging stations, or outlets for media equipment, these electrical needs must be planned during the initial design phase before construction begins.
  • Work with a Designer: Collaborate with a professional designer or a design-build firm to ensure the final product is both beautiful and highly functional for your specific needs.
  • Choose Durable Materials: Since built-ins are a permanent fixture, investing in high-quality materials like solid wood or premium plywood ensures they last for decades.
  • Prioritize a Flawless Finish: The finish is a major focal point. A professional painting service like Wheeler Painting can provide a spray-applied, factory-grade finish that is both stunning and durable, making your built-ins a true centerpiece.
  • Allow Adequate Time: Custom built-in projects are complex. Plan for a timeline of at least 4-8 weeks to accommodate design, fabrication, and professional installation.

4. Garage Cabinets & Storage Systems

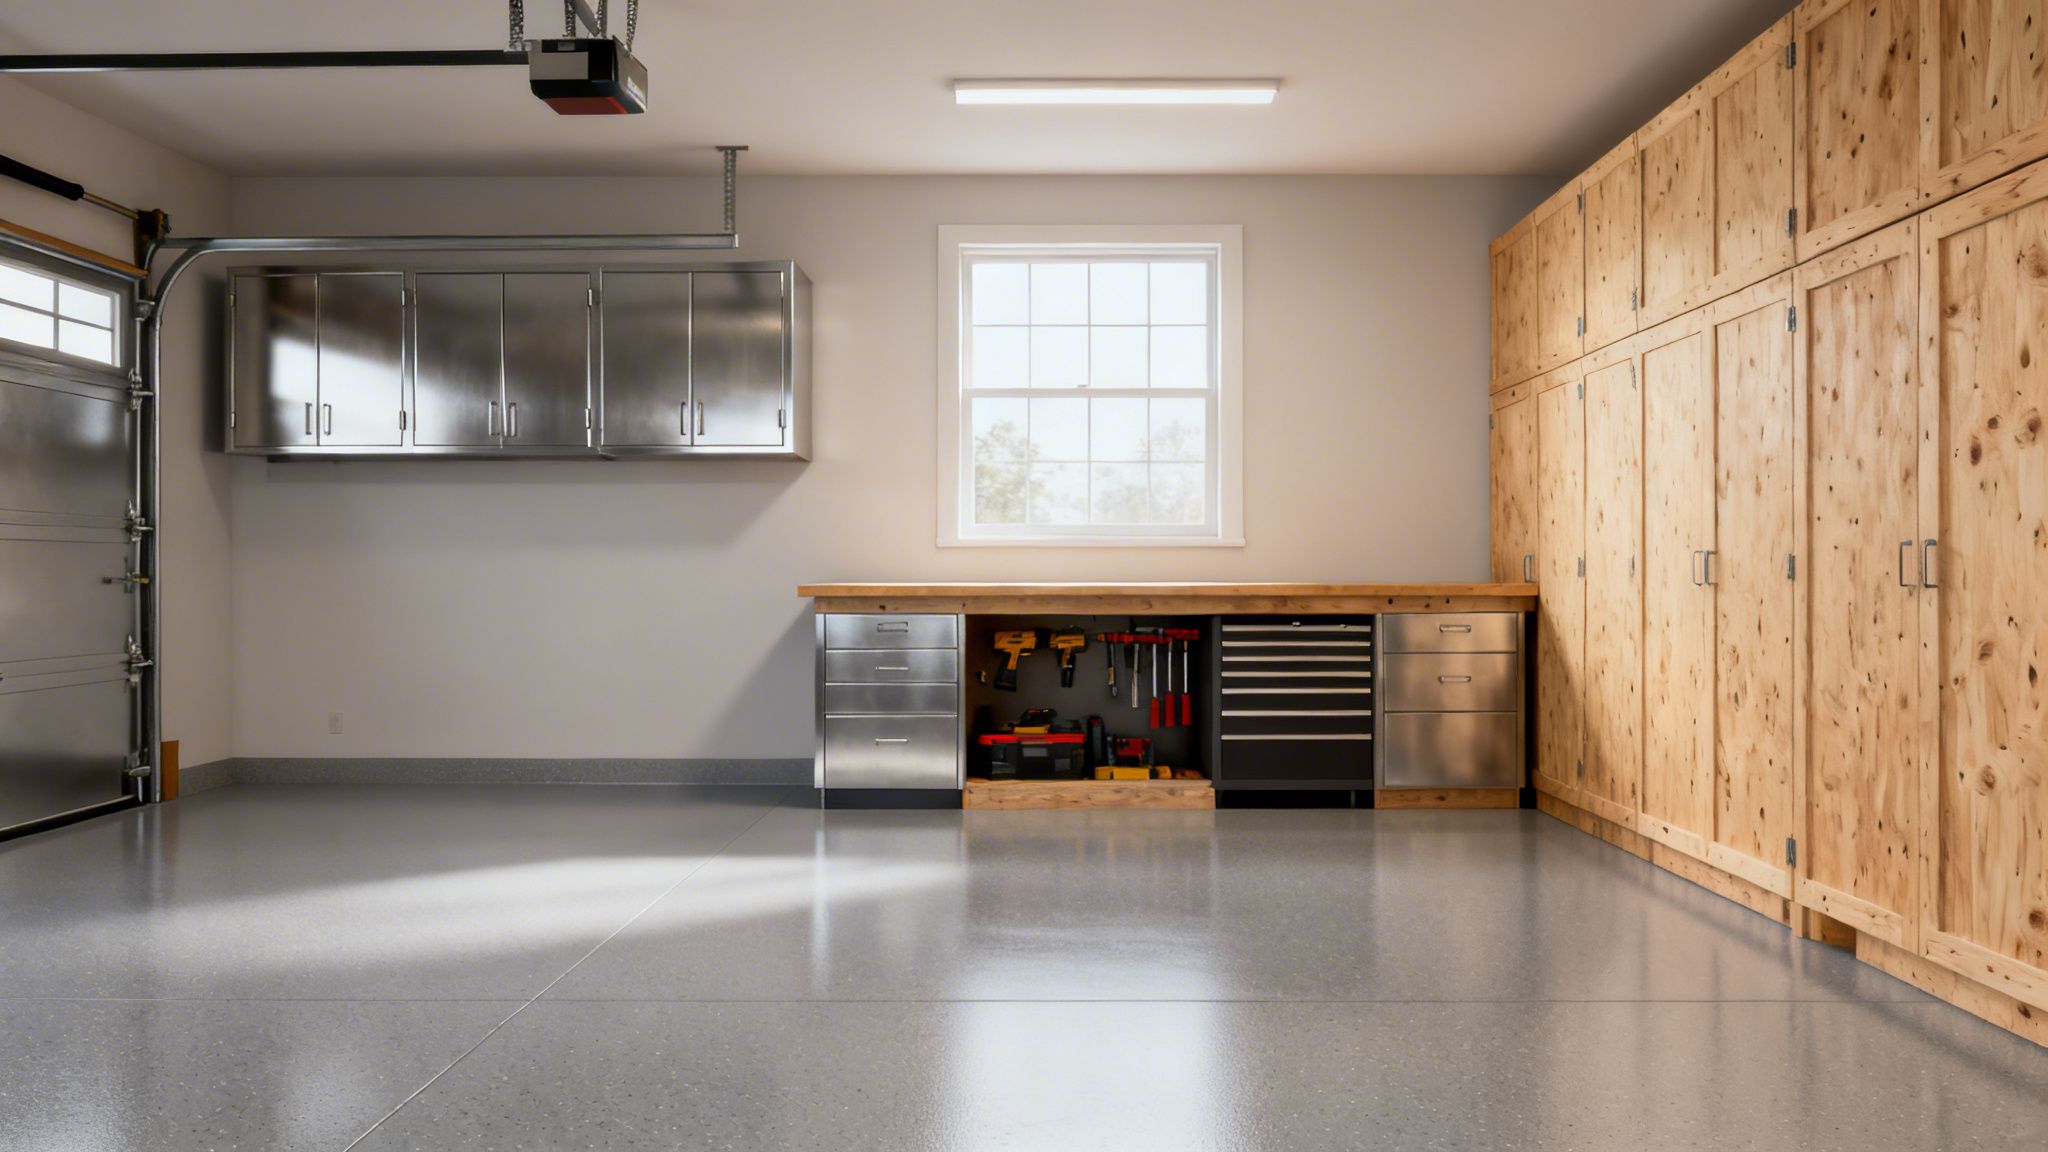
Garage cabinets are heavy-duty storage systems built to withstand the unique conditions of a garage environment, including temperature swings, humidity, and dust. Unlike interior cabinetry, these are designed for storing tools, bulky equipment, seasonal items, and household supplies. As a crucial type of cabinet for any home, they transform a cluttered space into an organized, functional area, improving safety by keeping hazardous materials locked away and trip hazards off the floor.

A clean, organized garage with stainless steel overhead cabinets, a workbench, and tall wooden storage units.

The applications are diverse, from wall-mounted metal cabinets in a Sammamish workshop to durable, epoxy-coated units in commercial auto shops. In Western Washington, where dampness is a concern, selecting the right materials and finishes is critical to prevent warping and rust. Custom systems can be configured to fit any space, offering a combination of shelving, drawers, and lockable cupboards for everything from power tools to gardening supplies.

Key Considerations for Garage Cabinets

  • Assess Wall Structure: Before installing wall-mounted units, confirm your wall studs can handle the intended load. Professional installation is recommended to ensure safety and stability.
  • Choose Durable Finishes: Select cabinets with robust finishes like powder coating, epoxy, or polyurethane. These surfaces resist moisture, chemicals, and scratches, which is essential for longevity in a garage setting.
  • Plan for Climate: In humid Puget Sound garages, proper ventilation or a dehumidifier can prevent moisture damage to both the cabinets and their contents. A well-finished floor also helps control moisture, and you can explore options with our guide to garage floor staining.
  • Prioritize Safety and Accessibility: Install lockable storage for chemicals, sharp tools, and other hazardous materials. Position frequently used items at an accessible height to avoid straining or using a ladder unnecessarily.

5. Mudroom & Entryway Cabinets

Mudroom and entryway cabinets are purpose-built storage solutions designed to create order at a home's primary access points. These fixtures serve the critical function of capturing clutter like coats, shoes, and bags right at the door, preventing it from migrating into main living areas. As a key organizational type of cabinet, they are invaluable in both busy family homes and professional settings like commercial office lobbies.

These cabinets expertly blend different storage forms, often combining closed doors, open cubbies, hooks, and integrated benches to create a highly functional and welcoming space. For instance, a Sammamish family home might feature custom-built lockers, giving each child a designated spot for their belongings. A modern farmhouse in Woodinville could incorporate a long bench with pull-out drawers for shoe storage. In a commercial context, entryway cabinets in a Seattle office building can provide sleek, organized storage for employees and visitors alike.

Key Considerations for Mudroom & Entryway Cabinets

  • Plan for Your Users: Involve all family members in the design process to ensure the layout is practical for everyone, from the youngest child to the tallest adult. For commercial spaces, consider the needs of employees and clients.
  • Maximize Every Inch: Design for maximum storage capacity without overwhelming the space. Vertical storage, like tall cabinets, is excellent for smaller foyers.
  • Prioritize Durability: This is a high-traffic, high-use area. The finish must be exceptionally durable to withstand scuffs, moisture, and daily wear. A professional application from Wheeler Painting ensures the paint or stain is tough enough for the job.
  • Include Seating: If space permits, a built-in bench provides a convenient spot to put on or take off shoes and adds a comfortable, welcoming element to the entryway.

6. Laundry Room Cabinets & Storage

Laundry room cabinets are specialized storage systems that bring order and efficiency to a space often overlooked in design. These purpose-built fixtures organize detergents, cleaning supplies, and linens while concealing plumbing and creating a polished look. Because laundry rooms produce moisture and heat, these types of cabinet must be durable enough to withstand humidity and frequent use, transforming a utilitarian area into an attractive and functional part of the home or commercial facility.

The design possibilities can meet any need, from residential to commercial applications. For example, a compact laundry closet in a Seattle condo might benefit from tall, narrow cabinets to maximize vertical space. A larger laundry room in a Sammamish home could feature a long countertop over base cabinets for folding, complete with a built-in utility sink. In commercial settings like hotels or care facilities, durable, easy-to-clean laminate or metal cabinets provide robust storage for bulk supplies and linens.

Key Considerations for Laundry Room Cabinets & Storage

  • Prioritize Moisture Resistance: Select materials and finishes that can handle high humidity. Finishes like high-quality acrylic-alkyd or polyurethane are essential for protecting cabinetry from moisture damage and chemical spills. Wheeler Painting can apply professional-grade coatings that ensure longevity.
  • Plan for Ventilation: Ensure your cabinet layout does not block dryer vents or impede airflow. Proper ventilation is critical for managing humidity and preventing mold growth in enclosed laundry spaces.
  • Optimize the Layout: Position cabinets to allow easy access to washer and dryer controls, as well as water shut-off valves and electrical outlets. A well-planned configuration prevents future maintenance headaches.
  • Incorporate Smart Features: Consider adding functional elements like pull-out drying racks, built-in ironing boards, or designated hampers. A fold-down work surface is another excellent feature for adding temporary folding space in smaller rooms.

7. Display Cabinets & China Cabinets

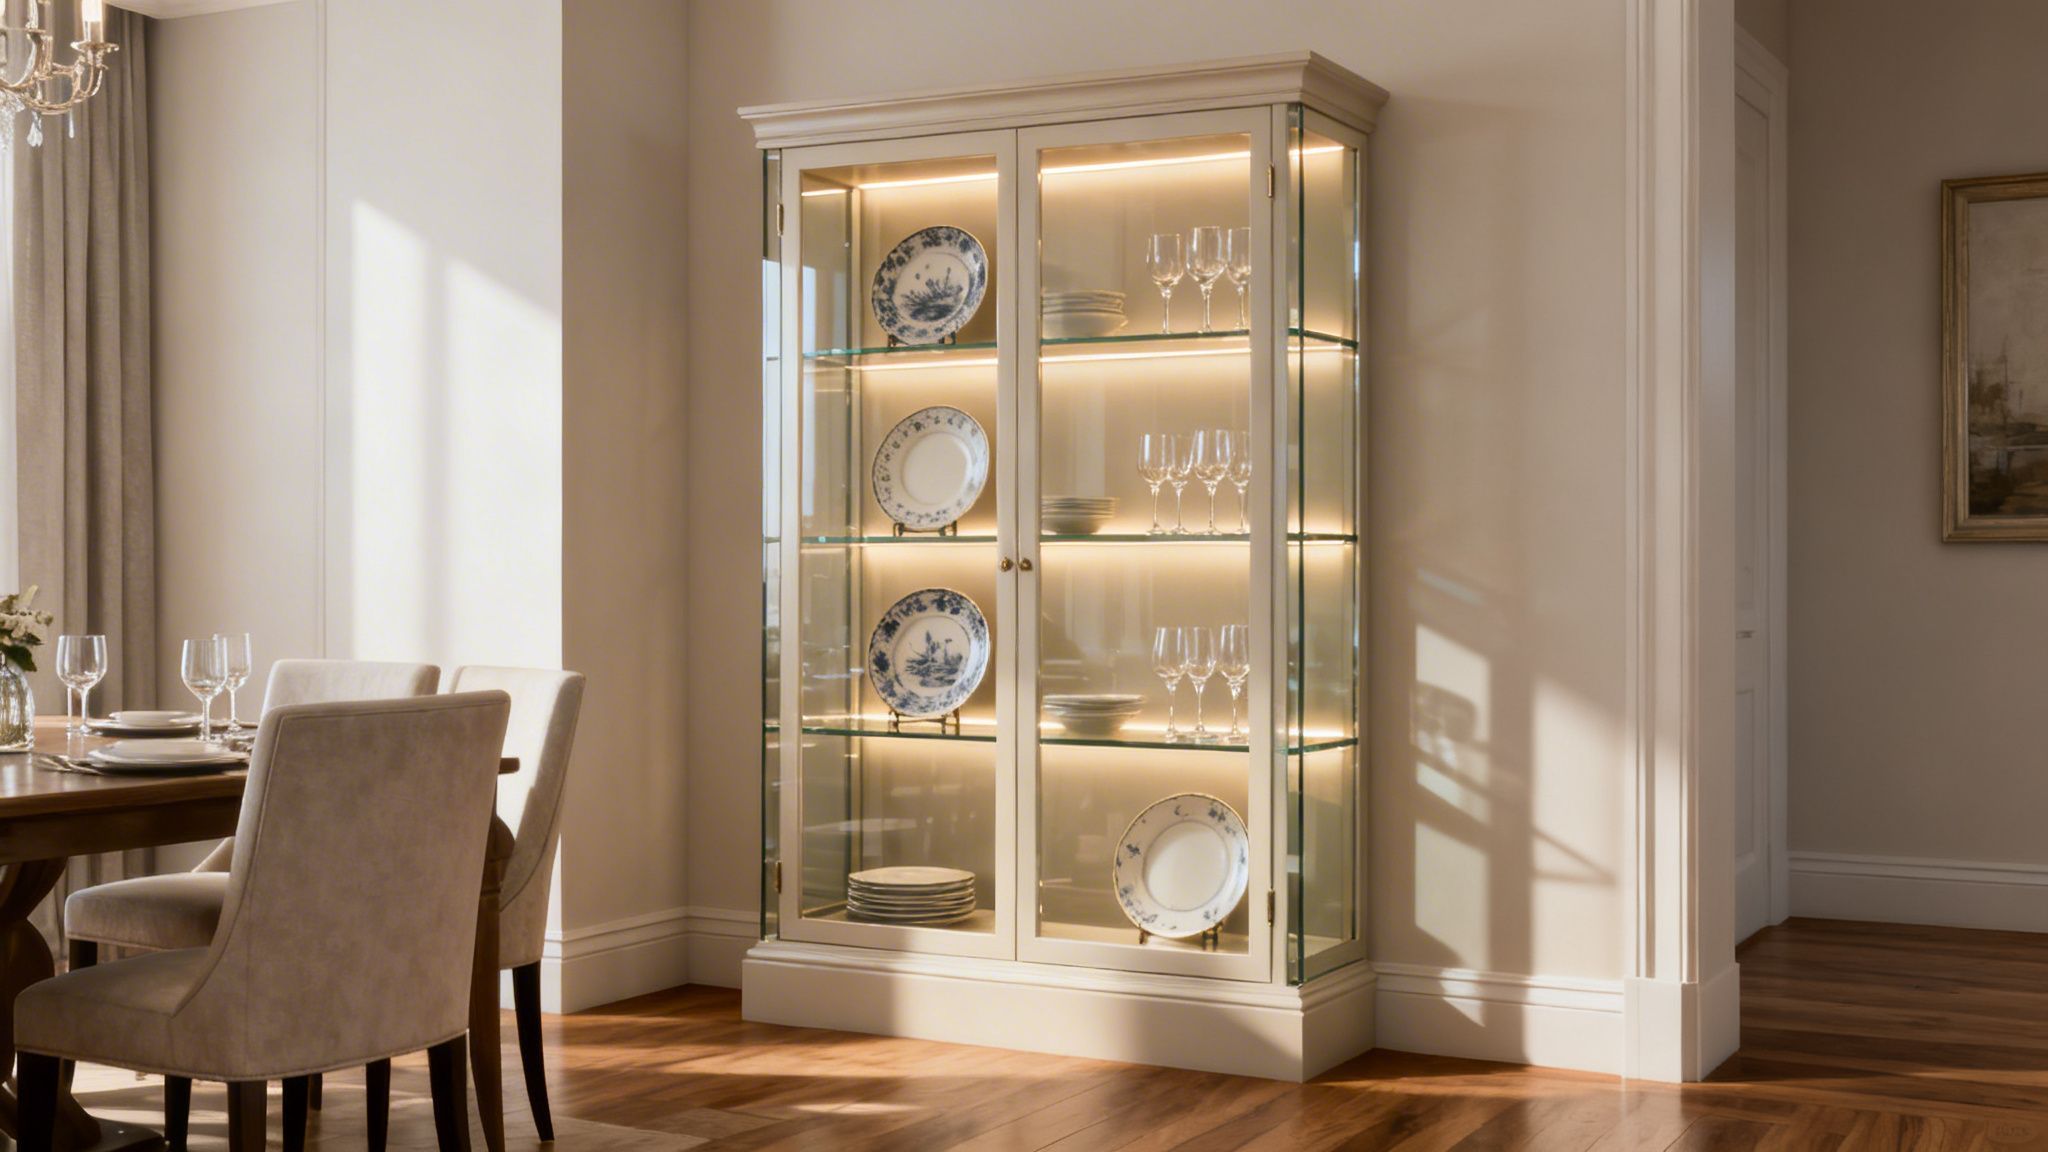
Display and china cabinets are elegant glass-front storage solutions designed to showcase collectibles, fine dishware, or other decorative items. This type of cabinet merges functionality with aesthetic appeal, featuring glass doors and often interior lighting to highlight valuable or sentimental collections. They serve as beautiful focal points in dining rooms, living rooms, and even commercial spaces like galleries or high-end retail stores.

A well-lit cream display cabinet showcasing patterned plates and clear wine glasses in a dining room.

From traditional-style china cabinets in a formal Sammamish dining room to modern, minimalist display units in a downtown Seattle condo, their purpose is to draw the eye. A custom-built display cabinet can be tailored to fit a specific niche or design theme, becoming a true statement piece. For commercial settings, such as a boutique in Kirkland, these cabinets can be designed to present merchandise securely and attractively.

Key Considerations for Display Cabinets & China Cabinets

  • Plan for Lighting: Integrate interior lighting during the design phase. LED strips are an energy-efficient option, and you can choose a color temperature that best complements the items on display.
  • Choose a Quality Finish: The finish is just as important as the items inside. A professional, flawless paint job from a service like Wheeler Painting ensures the cabinet itself is a work of art, free of drips or brush marks that can detract from its contents.
  • Prioritize Functionality: Opt for adjustable shelves to accommodate items of various heights. For valuable collections, consider adding locking mechanisms for security.
  • Strategic Placement: Position the cabinet to minimize glare from windows or overhead lights, ensuring the contents are clearly visible without distracting reflections.

8. Medicine Cabinets & Bathroom Wall Storage

Medicine cabinets and other forms of bathroom wall storage are essential fixtures that merge storage and practicality, often in compact spaces. These units, which can be recessed into a wall or mounted on the surface, are designed to hold medications, toiletries, and personal care items. By frequently incorporating mirrors and even lighting, they serve multiple functions, making them a crucial component in residential bathrooms, commercial restrooms, and healthcare facilities.

These specialized types of cabinet are invaluable for keeping small items organized and accessible. For instance, a recessed medicine cabinet in a compact Seattle powder room can create a seamless, built-in look, while a larger, LED-lit model adds a touch of modern luxury to a primary bathroom. In commercial settings, such as a doctor's office in Bellevue, lockable wall cabinets provide secure and necessary storage for medical supplies.

Key Considerations for Medicine Cabinets & Bathroom Wall Storage

  • Plan for Installation: Before purchasing a recessed model, carefully verify the dimensions of the wall cavity to ensure a proper fit. If a wall cavity isn't available due to plumbing or structural elements, a surface-mounted cabinet is a great alternative.
  • Integrate Modern Features: For humid climates common in Western Washington, consider a model with a defogging heating element. If you choose a cabinet with integrated lighting, plan for the necessary electrical wiring early in your remodel.
  • Prioritize Safety and Ventilation: For households with children or in healthcare settings, selecting a cabinet with a lockable mechanism is a critical safety measure. Always ensure the bathroom has adequate ventilation to prevent moisture from damaging the cabinet and its contents.
  • Expert Finishing: While many medicine cabinets come pre-finished, custom bathroom wall storage or older units can be painted to match your vanity or trim. A professional painter can apply a moisture-resistant finish that withstands the humid bathroom environment, ensuring longevity and a polished appearance.

9. Office & Home Office Cabinets

Office and home office cabinets are purpose-built storage solutions designed to organize files, supplies, and equipment in a professional setting. These fixtures are fundamental for creating a productive and uncluttered workspace, whether in a corporate environment or a dedicated room at home. As a key type of cabinet, they range from simple filing systems to sophisticated built-in wall units that combine open and closed storage, projecting a polished, professional image to clients and colleagues.

The applications are varied, adapting to specific professional needs. For example, a home office addition in Sammamish might feature custom built-ins with integrated desks and overhead storage. In a commercial setting, like a Bellevue law firm or accounting office, durable laminate or wood veneer credenzas and filing systems are essential for managing sensitive documents. Creative agencies might opt for open shelving to display portfolios and materials, encouraging a collaborative atmosphere.

Key Considerations for Office & Home Office Cabinets

  • Plan for All Storage Needs: Design your cabinet layout to accommodate both physical paper files and digital equipment. Consider drawers for files, shelves for books, and deeper cabinets for printers or servers.
  • Integrate Wire Management: A clean workspace requires thoughtful cable management. Ensure your cabinet system includes grommets, channels, or hidden compartments to keep technology cables organized and out of sight.
  • Balance Open and Closed Storage: Use a combination of open shelving for frequently accessed items or display pieces and closed cabinets to conceal clutter and sensitive materials. This creates visual interest and improves functionality.
  • Professional Installation and Finishing: For custom office built-ins that create a lasting impression, a flawless finish is essential. A professional service like Wheeler Painting can provide a durable, high-quality paint or stain finish for new installations, ensuring your workspace looks impeccable. As a leading "commercial construction near me" provider, we are the ideal partner for office build-outs in the Puget Sound area.

10. Linen & Closet Cabinets

Linen and closet cabinets are specialized storage solutions designed to bring order to hallways, bedrooms, and dedicated closets. These essential types of cabinet transform cluttered spaces into highly efficient zones for storing towels, bedding, seasonal clothing, and other household items. They are a common feature in residential homes and are also vital in commercial settings, such as for employee lockers or organized storage in hospitality businesses.

The versatility of closet systems allows them to be adapted to any space or need. A hallway closet in a North Seattle home might use simple, sturdy wooden shelving to organize linens, while a master suite in Sammamish could feature a custom closet organization system with integrated drawers, shoe racks, and hanging rods. In commercial applications, durable and easy-to-clean materials are often preferred for their longevity and low maintenance requirements.

Key Considerations for Linen & Closet Cabinets

  • Measure with Precision: Before purchasing or building, take exact measurements of the closet's height, width, and depth to ensure a perfect fit and avoid wasted space.
  • Prioritize Accessibility: Plan the layout based on what you need to store. Place frequently used items at an accessible height and consider pull-out drawers or trays for items stored in the back.
  • Incorporate Adjustable Shelving: Using adjustable shelves provides the flexibility to reconfigure the space as your storage needs change, accommodating everything from bulky comforters to small toiletries.
  • Maximize Every Inch: Don't forget the back of the door. Installing door-mounted racks or organizers is a simple way to add valuable storage for smaller items without taking up shelf space.

11. Commercial & Retail Display Cabinets

Commercial and retail display cabinets are specialized systems designed to showcase products and merchandise in business environments while providing secure, organized storage. Unlike residential cabinetry, these units must withstand high-traffic use and project a professional brand image. They are essential fixtures in retail stores, hospitality venues, medical offices, and other commercial spaces where functionality and aesthetics directly impact business success.

These types of cabinet are purpose-built to balance durability, visibility, and security. For example, a luxury jewelry store in downtown Seattle requires elegant, well-lit display cases with robust locking mechanisms. In contrast, a busy restaurant kitchen needs heavy-duty stainless-steel cabinets for supply storage that are easy to clean and access. The design must support operational needs while reinforcing the company’s brand identity, making them a critical component of any commercial build-out or renovation.

Key Considerations for Commercial & Retail Display Cabinets

  • Strategic Product Placement: Design cabinets to position high-value or featured products at eye level, capturing immediate customer attention.
  • Integrated Lighting: Plan for built-in lighting to create ambiance, highlight merchandise, and guide the customer’s focus. LED strips are a popular, energy-efficient choice.
  • Brand-Consistent Finishes: The materials and finishes should align with your corporate branding. A professional service can apply custom paints or durable coatings that match your company’s color palette and can withstand commercial wear and tear.
  • Security and Durability: Ensure cabinets include necessary security features like locks and shatter-resistant glass for valuable items. Materials must be chosen for longevity and ease of maintenance in a commercial setting.
  • Plan for Flexibility: Design modular or adjustable shelving to accommodate future changes in product size, displays, or inventory needs.

12. Specialty & Niche Cabinets (Wine, Bar, Media, Pet Storage)

Specialty and niche cabinets are custom-designed storage solutions created for a single, specific purpose, moving beyond general storage to address unique lifestyle needs. These types of cabinet include everything from temperature-controlled wine cellars and dedicated home bars to integrated media centers and pet supply stations. They are the ultimate expression of personalized design, solving distinct organizational challenges while adding significant value and character to a space.

These custom fixtures are where creative design meets practical problem-solving. A sleek, modern media cabinet in a downtown Seattle condo can discreetly hide AV equipment, while a rustic-style home bar becomes the centerpiece of a Snohomish entertainment room. In commercial settings, a well-designed coffee bar in an office or a display cabinet in a retail build-out can greatly improve the experience for employees and customers alike.

Key Considerations for Specialty & Niche Cabinets

  • Define the Purpose First: Before starting the design, thoroughly research the specific storage requirements. For a wine collection, this means understanding bottle sizes and cooling needs; for media, it involves planning for ventilation and cable management.
  • Plan for Future Growth: Consider how your needs might change. If you plan to expand your wine collection or upgrade your entertainment system, design the cabinetry with extra space to accommodate future growth.
  • Integrate Proper Lighting: Good lighting is essential for showcasing items like glassware or collectibles and improving usability. Low-voltage LED strips are an excellent choice for creating ambiance without generating excess heat.
  • Ensure a Flawless Finish: Since these cabinets are often focal points, the finish is critical. A professional painter like Wheeler Painting can apply a durable, custom finish that complements your home’s aesthetic and ensures the piece looks stunning for years.

12 Cabinet Types Comparison

Category Implementation complexity Resource requirements Expected outcomes Ideal use cases Key advantages
Kitchen Cabinets Moderate–High (custom layouts & installation) Carpenter/cabinetmaker, hardware, finishes, installation time Optimized kitchen workflow; strong visual focal point; higher resale value Full kitchen remodels; chef-friendly layouts; residential/commercial kitchens Maximizes storage; highly customizable; improves functionality
Bathroom Vanities & Storage Cabinets Moderate (plumbing integration increases complexity) Moisture-resistant materials, plumber, countertop & hardware Consolidated sink/storage; improved organization; enhanced bathroom aesthetics Bathroom renovations; master baths; guest bathrooms Combines sink & storage; moisture-resistant options; space efficient
Built-In Wall Cabinets & Shelving High (custom measurement and finishing) Skilled millwork, custom materials, longer lead times Seamless, permanent storage; high-end aesthetic; significant value add Living rooms, home offices, media walls, entryways Space-maximizing; tailored fit; architectural impact
Garage Cabinets & Storage Systems Moderate–High (structural assessment for loads) Heavy-duty materials (steel/plywood), fasteners, protective finishes Durable, secure tool storage; improved safety and organization Workshops, garages, commercial auto shops Heavy-load capacity; lockable storage; robust finishes
Mudroom & Entryway Cabinets Moderate (layout and user planning required) Custom cabinetry, hooks/benches, durable finishes Clutter-free entry; organized outerwear and footwear; welcoming first impression Family homes, multi-occupant households, apartment entries Captures clutter at entry; customizable to family needs
Laundry Room Cabinets & Storage Moderate (humidity & utility coordination) Moisture-resistant materials, ventilation, integration with appliances Organized cleaning supplies; functional folding/ironing workspace Residential laundry rooms, commercial laundry facilities Moisture-tolerant storage; dedicated work surfaces; safety for chemicals
Display Cabinets & China Cabinets Low–Moderate (focus on finishing and lighting) Glass, interior lighting, tempered shelves, locks Visible, protected displays; decorative focal point Dining rooms, living rooms, retail showcases Showcases collectibles; dust protection; interior lighting
Medicine Cabinets & Bathroom Wall Storage Low–Moderate (recessed work adds complexity) Recessed boxes or surface units, mirror, optional lighting/locks Compact organized storage with mirror/lighting; secure medication storage Small bathrooms, powder rooms, healthcare facilities Space-efficient; combines mirror and storage; secure options
Office & Home Office Cabinets Moderate (wire management & file systems) Filing hardware, cable management, durable finishes Organized documents and equipment; professional appearance Home offices, professional suites, accounting/legal offices Secure filing; improved productivity; professional aesthetic
Linen & Closet Cabinets Low–Moderate (measurement and adjustable systems) Adjustable shelving, pull-outs, rods/drawers Maximized vertical storage; easier item retrieval; decluttered spaces Hallway closets, master closets, linen/storage rooms Efficient vertical use; adaptable organization; accessible storage
Commercial & Retail Display Cabinets High (custom design, branding, security) Commercial-grade materials, lighting, locks, professional install Product-focused displays; protected merchandise; brand presentation Retail stores, hospitality, showrooms, commercial lobbies Enhances sales presentation; durable; secure and branded
Specialty & Niche Cabinets (Wine, Bar, Media, Pet) High (special systems & environmental controls) Specialized components (chillers, racks, AV ventilation), custom finishes Dedicated functional zones for hobbies/collections; tailored performance Wine cellars, home bars, media rooms, pet stations Solves niche storage needs; highly personalized; can include environmental control

From Planning to Perfection: Partner with Wheeler Painting for Your Cabinet Project

Navigating the world of cabinetry can feel like a complex puzzle. From understanding the structural differences between face-frame and frameless construction to choosing between stock, semi-custom, and fully custom options, the decisions are numerous. This guide has armed you with the essential knowledge to distinguish between the various types of cabinet, assess their pros and cons, and align them with your specific needs, whether for a kitchen, bathroom, office, or commercial space.

The real takeaway is that your cabinets are more than just storage; they are a fundamental component of your space’s design, functionality, and overall value. A Shaker door can set a timeless, traditional tone, while a sleek, flat-panel door in a high-gloss finish can define a modern aesthetic. Understanding these distinctions allows you to make informed choices that reflect your personal style or brand identity, ensuring your final selection serves its purpose beautifully for years to come.

Beyond the Basics: Making Your Vision a Reality

Simply selecting the right cabinet type is only the beginning. The success of any project, from a simple cabinet refresh to a full-scale commercial renovation, hinges on expert execution. This is where a professional partner becomes invaluable, translating your plans into a polished, durable reality.

For homeowners in the Puget Sound region, this means considering our unique climate. The persistent dampness of Western Washington can affect wood and finishes, making professional-grade materials and application techniques critical for long-term durability. For businesses, the right cabinetry in a retail build-out or office space renovation directly impacts workflow, customer experience, and brand perception.

Key Insight: The longevity and beauty of your cabinets depend just as much on the quality of the installation, finishing, and painting as on the initial cabinet selection itself. Professional execution protects your investment and prevents costly issues down the road.

Why Professional Partnership Matters

Choosing a professional partner like Wheeler Painting means you're not just hiring a painter or a contractor; you're securing a team dedicated to a seamless and successful outcome. We bridge the gap between planning and perfection.

  • For Residential Projects: Imagine you’ve chosen new custom cabinets but want a specific, durable paint finish. Instead of hiring separate contractors, our integrated team handles it all. We are the "residential contractor near me" that can manage the installation, perform any necessary siding replacement or repairs, and apply a flawless, long-lasting finish.
  • For Commercial Projects: A business planning an office space renovation needs more than just new cabinets. They need a partner who understands commercial timelines, building codes, and the importance of minimal disruption. As a leading "commercial construction near me" provider, we manage every facet, from structural changes to applying specialty coatings and ensuring the final space is functional and professional.

Our deep local experience means we understand the challenges and opportunities of building and renovating in Western Washington. We provide a single point of accountability, ensuring every detail aligns with your vision. Whether you need an expert "commercial painting service near me" for a large facility or a skilled team for a home remodel, we bring over 30 years of trusted craftsmanship to your project.


Ready to move from planning to perfection? Whether you're updating existing cabinets or embarking on a full renovation, the expert team at Wheeler Painting provides both the residential and commercial construction services needed to bring your project to life. Visit Wheeler Painting & Restoration Services to schedule your consultation and discover how our integrated approach makes achieving a flawless result straightforward and stress-free.

Your Guide to Concrete Stain and Sealer for Stunning Results

That plain gray concrete patio or driveway isn’t doing your property any favors. For homeowners and business owners across the Puget Sound, there's a fantastic way to not only fix that eyesore but also add serious value and protection: concrete stain and sealer. It's a combination that can completely revitalize a surface, whether it’s a residential patio or a high-traffic commercial floor.

From Drab Slab to a Stunning Feature

Side-by-side comparison of old, cracked concrete next to newly stained and sealed concrete.

If you're tired of that boring slab or need a durable, appealing floor for a retail space, staining and sealing your concrete is one of the best upgrades you can make. This isn't just a coat of paint. The process involves thoroughly cleaning the concrete, applying a stain that penetrates deep into the surface for rich, lasting color, and then locking it all in with a high-quality protective sealer.

The result is a huge visual upgrade that also defends the concrete against moisture, oil stains, and daily wear and tear. In this guide, we'll walk you through the whole project, step-by-step. We'll cover what you can reasonably DIY and give you the straight scoop on when it's time to call in a trusted local provider. We understand the unique challenges our climate presents and will provide advice tailored to get you results that last.

Why Sealing Is Non-Negotiable in the Pacific Northwest

Here in the Puget Sound, with our relentless rain and freeze-thaw cycles, leaving concrete unprotected is asking for trouble. Water is the enemy. It seeps into the concrete's pores, and when it freezes, it expands, causing cracking, chipping, and spalling. A good sealer is your best line of defense.

It's no surprise that demand for these products is exploding.

The global market for concrete sealers hit USD 1,759.6 million in 2024 and is on track to reach over USD 3,015.6 million. For those of us in areas like Puget Sound, where weather is tough on concrete, sealers are essential. Penetrating sealers are especially popular because they soak in to repel water and stains from within, all while letting the concrete breathe.

North America accounts for a huge chunk of those sales, driven by new construction and renovation projects, including residential remodeling and commercial renovations. This just goes to show how critical sealing is for protecting the investment you have in your property. If you're interested in the market trends, you can dig deeper into the complete concrete sealer market report.

How to Assess Your Concrete Before You Begin

Tools and materials on cracked concrete: white powder, plastic sheet, trowel, and measuring tape.

Before you get excited about colors and finishes, you need to play detective with your concrete slab. The final look of your concrete stain and sealer is only ever as good as the surface underneath it. Taking the time to do an honest assessment now will save you from some serious, project-killing mistakes down the road.

Take a walk around the entire area—whether it's a small backyard patio or a sprawling commercial floor—and get a good look at what you're dealing with. This initial inspection is your game plan; it tells you exactly what prep work is needed.

Identifying and Addressing Cracks

It's concrete, so you're going to find cracks. The key is knowing which ones are a simple fix and which ones are red flags.

Most of what you'll see are tiny, web-like hairline cracks. These are usually just cosmetic. You can fill them easily with a flexible elastomeric caulk or a polymer-modified cement filler before you start staining.

Bigger issues are spalls, which are more like pits where chunks of concrete have popped out. These require a sturdier concrete patching compound to get them level again. If you find any deep, structural cracks—anything wider than a credit card—it's smart to have a professional contractor like Wheeler Painting take a look. That could signal a problem with the foundation itself, and our team has experience with both residential and commercial construction issues.

Pro Tip: When you're filling cracks, overfill them just a little. Most patching materials shrink as they dry. This lets you sand the patch perfectly flush with the surface for a repair that completely disappears under the stain.

The Crucial Moisture Test

Nothing will ruin a concrete coating faster than moisture. If water vapor is constantly pushing up through the concrete, it's guaranteed to make your new sealer bubble, peel, and fail. We see this all the time on garage floors and basement patios, especially here in the damp Puget Sound climate.

You might even see evidence of it already. If you notice a chalky white powder on the surface, that’s efflorescence. It's the mineral salts left behind as moisture evaporates. Seeing this means a moisture test isn't optional—it's mandatory.

Thankfully, the test is incredibly simple:

  1. Grab a 2’x2’ square of clear plastic sheeting.
  2. Tape it down on all four sides, making sure it’s completely sealed to the concrete.
  3. Just leave it alone for at least 24 hours.

When the time's up, pull back the plastic. If the concrete looks dark or you see condensation on the plastic, you've got a moisture issue. We can't tell you how many projects we've seen fail because someone skipped this five-minute test. Dealing with moisture often involves a deep cleaning to open up the concrete's pores, which is something you can learn more about by checking out the benefits of professional power washing.

Choosing the Right Concrete Stain and Sealer

Walking into a store and seeing a wall of different concrete stains and sealers can feel overwhelming. But once you know what you’re looking at, the choice becomes much clearer. Picking the right products is about more than just color; it’s about getting the look you want and making sure it lasts for years.

Let's start with the stain, which is what gives your concrete its character. You’re essentially choosing between two different approaches here, each with its own unique result.

Acid-Based vs. Water-Based Stains

Acid-based stains are old-school cool. They work by creating a chemical reaction with the lime and minerals in your concrete, producing rich, translucent tones that look like they're part of the stone itself. The final look is always a bit of a surprise—think marbled, variegated patterns in earthy browns, tans, and soft blue-greens. No two floors will ever be identical. If you want a one-of-a-kind, artisanal finish for a patio or an eye-catching retail build-out, this is your ticket.

On the other hand, we have water-based stains. These behave more like a traditional dye, soaking into the concrete’s surface pores without a chemical reaction. This gives you far more control and consistency. If you need to match a specific color for your interior or exterior painting project, or want a more uniform look, water-based is the way to go. The color palette is massive, offering everything from bold reds to deep, solid blacks. They're also a great solution for concrete that has a low lime content, where an acid stain wouldn't react properly.

This flowchart breaks down the visual difference you can expect. It really helps to see how an acid stain creates that organic, marbled effect versus the predictable, even color you get from a water-based product.

Flowchart illustrating the concrete finish selection process for marbled versus consistent looks, detailing application methods and results.

Film-Forming vs. Penetrating Sealers

Once your stain is down, you need to protect it with a sealer. Just like with stains, you have two main families of products to consider.

Film-forming sealers do exactly what their name suggests: they create a durable protective layer on top of the concrete. Products like acrylics, urethanes, and epoxies fall into this category. They offer fantastic protection against spills, scuffs, and heavy foot traffic, and you can choose a finish from matte all the way to a high gloss. For commercial spaces or a garage floor that sees a lot of action, a film-former is usually the best bet. For the ultimate in durability, you might even consider a full system. You can learn more about what an epoxy floor coating is and how it provides a thicker, more robust surface.

Penetrating sealers work completely differently. Instead of forming a surface film, these silane- or siloxane-based products dive deep into the concrete's pores. There, they create a hydrophobic (water-repelling) barrier from the inside out. The best part? They’re completely invisible once cured and won't change the texture or color of your stained concrete. This makes them perfect for preserving that natural look while locking out moisture—an absolute must-have for any outdoor concrete here in the wet Puget Sound climate.


To help you visualize your options, here’s a quick comparison of the most common products we use on projects in the Seattle area.

Stain and Sealer Comparison for Your Puget Sound Project

This table breaks down the key differences between common concrete stains and sealers, helping you weigh the appearance, durability, and ideal use case for your project.

Product Type Best For Appearance Durability & Protection
Acid Stain Achieving a unique, artisanal look on patios, walkways, or interior floors. Variegated, marbled, translucent tones. Earthy color palette. Stain is permanent. Requires a top-coat sealer for protection.
Water-Based Stain Consistent color, specific color matching, and creating graphics or patterns. Opaque or semi-transparent, uniform color. Wide range of colors available. Stain is permanent. Requires a top-coat sealer for protection.
Acrylic Sealer General-purpose sealing for both interior and exterior surfaces. Good UV resistance. Clear, non-yellowing film. Available in matte to gloss finishes. Enhances color. Good. Protects against water and stains but requires reapplication every 1-3 years.
Epoxy/Urethane Sealer High-traffic interior areas like garages, basements, and commercial floors. Thick, high-gloss film. Can be colored. Extremely durable finish. Excellent. Resists chemicals, abrasion, and hot-tire pickup. A long-term solution.
Penetrating Sealer Exterior surfaces like driveways and patios where a natural look is desired. Invisible finish. Does not change the appearance or texture of the concrete. Good to Excellent. Superb water repellency, preventing freeze-thaw damage. Long-lasting.

Ultimately, choosing the right stain and sealer combination comes down to balancing aesthetics with performance. Think about where the concrete is, how much traffic it will get, and the look you’re trying to achieve.

Decorative concrete is a big deal, with the market valued at USD 850 million globally. Here in the Puget Sound, we see property managers combining stains with penetrating sealers for a one-two punch of curb appeal and critical moisture defense. For homeowners, the right combo can extend the life of their concrete by up to 50%.

Making the right choice upfront ensures your surface isn't just beautiful on day one, but that it's also protected and built to handle our local weather for the long haul.

Putting It All Together: Your Guide to Applying Concrete Stain & Sealer

A sprayer applies liquid to a concrete driveway, with a bucket and paint roller ready for sealing.

Alright, you've done your homework, assessed the concrete, and picked out the perfect products. Now comes the rewarding part—bringing that vision to life. Applying concrete stain and sealer isn't complicated, but it does demand patience and a methodical approach.

Think of it as three distinct stages: a deep clean, the application itself, and the final cure. The biggest mistake we see homeowners make is rushing through one of these steps. Each one lays the foundation for the next, so giving each stage the attention it deserves is your ticket to a durable, professional-grade finish.

First, Get Your Surface Spotless and Ready

You simply can't stain over years of built-up grime, oil spots, or old, flaky sealers and expect good results. The first order of business is getting that concrete impeccably clean. For most outdoor surfaces like patios and driveways, a good pressure washing is all it takes to blast away the dirt.

But what if your surface is smooth, like a brand-new garage floor or a hard-troweled basement? Stain needs something to grab onto, and on a dense surface, it will just sit on top. This is where you’ll need to etch the concrete. An etching product is a specialized cleaner that chemically opens up the pores of the concrete, giving it a texture a bit like medium-grit sandpaper. This profile is perfect for the stain to penetrate deeply and evenly.

Here’s your game plan for prep:

  • Clear the Deck: Start by sweeping or blowing off all leaves, dirt, and loose debris.
  • Attack Grease: Hit any stubborn oil or grease stains with a dedicated concrete degreaser. Follow the product instructions.
  • Wash It Down: Thoroughly pressure wash the entire area.
  • Etch If Necessary: If the surface is smooth or sealed, apply an etching solution. Be sure to rinse it away completely afterward.

Once clean, the concrete needs to dry out completely. Here in the Puget Sound, that can easily take 24 to 48 hours, so be patient and check the weather forecast.

Expert Tip: The way you spray has a huge impact on the final look. For acid stains, use a figure-eight motion with overlapping passes to get that beautiful, mottled effect. With water-based stains, always maintain a "wet edge" by working in smaller, manageable sections to avoid lap marks.

Next, Apply the Stain and Sealer

Once your concrete is bone dry and ready, it's time for the main event. A basic pump-up garden sprayer is your best friend here—it’s the perfect tool for applying a light, consistent coat of stain without over-saturating the surface.

After the stain is down and has dried according to the manufacturer’s directions, it's time to lock in that color and add protection. This is where the sealer comes in. Penetrating sealers are a massive part of the industry—valued at USD 381 million globally in 2025—for a good reason. They soak into the concrete to protect it from within, rather than forming a slippery film on top. For our damp Puget Sound climate, these are an excellent choice, especially with so many great low-VOC, water-based options available that comply with local environmental regulations. You can get more details on the growth of penetrating concrete sealers and how they work.

Finally, Let It Cure

The final phase is all about patience. Curing isn't just about drying; it's a chemical process where the stain and sealer harden and bond with the concrete.

  • Foot Traffic: You can typically walk on the surface in about 4 to 6 hours.
  • Heavy Items & Vehicles: Hold off on moving heavy furniture back or parking cars on the surface for at least 48 to 72 hours.
  • Full Cure: A complete chemical cure can take up to a week. During this time, try to keep the surface dry and protect it from chemicals or spills.

Knowing When to Call a Professional Contractor

There's a real satisfaction in a DIY job well done. But when it comes to concrete stain and sealer, it’s crucial to know when to step back and call in an expert. Recognizing that line can be the difference between a beautiful, long-lasting surface and a costly, frustrating mess.

Before you even think about picking colors, take a hard look at the concrete itself. If you're seeing deep cracks, widespread flaking (spalling), or persistent damp spots, that’s your first red flag. These aren’t just cosmetic flaws; they often point to deeper issues like foundation movement or moisture problems from below.

A professional can diagnose what's really going on. Slapping a coat of sealer over a serious structural issue is just a temporary fix that will fail, and an experienced contractor will make sure the slab is sound before any staining begins. If you’re looking for a “residential contractor near me,” choosing one with this expertise is vital.

Large-Scale and Commercial Projects

The sheer size of a project is often the clearest sign you need a pro. Staining a small concrete patio is a manageable weekend project. Staining a huge driveway, a commercial showroom, or an entire parking garage? That's a different league entirely.

These bigger jobs require a professional team and specialized equipment to get a uniform finish. Without them, you’re almost guaranteed to see lap marks and color inconsistencies, especially on a large, open surface.

For any business, bringing in a "commercial construction near me" expert like Wheeler Painting is less about convenience and more about protecting your investment and ensuring safety.

A commercial floor, whether in a retail space or an industrial facility, has to perform. It needs to stand up to heavy foot traffic, forklifts, and chemical spills. A pro will select and apply a high-performance system—from office space renovation to institutional painting—that not only looks good but also meets all durability requirements and local building codes.

Ultimately, it's about minimizing risk and preventing operational downtime.

When Specialized Coatings and Finishes Are Required

Some high-performance coatings are simply not DIY-friendly. We're talking about products like high-solid epoxies or chemical-resistant urethane systems. These materials are incredibly tough, but they demand precise application conditions—everything from surface temperature to air humidity has to be just right. One mistake can cause the entire coating to fail.

Hiring a pro gives you access to their industrial-grade grinders and vacuums, their deep knowledge of different products, and their ability to solve problems on the fly. It’s what ensures a finish lasts for a decade or more, not just a couple of seasons. For tricky situations that require a fast response, our team is equipped to handle just about anything. You can see how we manage time-sensitive projects in our guide to emergency parking lot services.

Answering Your Top Questions About Concrete Staining and Sealing

Even the most detailed guide can leave you with a few lingering questions. When you’re staring at your own concrete, specific concerns always pop up. We get it. Over the years, we've heard just about every question in the book from homeowners and facility managers here in the Puget Sound.

Here are the honest, straightforward answers to the questions we're asked most often.

How Long Does Concrete Sealer Really Last in the Pacific Northwest?

This is probably the most practical question of all, especially with our notoriously wet weather. There's no single answer, but as a solid rule of thumb, you should plan on reapplying a quality sealer every 2 to 5 years.

The exact lifespan really boils down to two things: the product you choose and the wear and tear it endures. For instance, a premium penetrating sealer on a quiet residential patio can easily last closer to that 5-year mark. On the other hand, a film-forming acrylic sealer on a high-traffic commercial entryway will likely need a fresh coat every 2 years to keep looking its best. Our damp winters are the ultimate test for any coating, making regular check-ups a must.

Can I Stain and Seal Old Concrete That's Already Been Treated?

You absolutely can, but there's a huge catch: preparation is everything. You can't just slap a new coat of stain over an old, peeling sealer and hope for the best.

First, that old coating has to go—all of it. This usually involves a chemical stripper and a good amount of elbow grease with a scraper, or mechanical grinding for tougher coatings like epoxy. Once the concrete is bare, it needs a thorough cleaning and acid etching to open up the pores. This is what allows the new stain to soak in deeply rather than just sitting on top.

If your concrete is particularly old or looks damaged and overly porous, it's wise to get a professional opinion. An expert can tell you if the slab is still in good shape for staining or if you're at risk of a splotchy, uneven finish.

What's the Biggest Mistake People Make with This Project?

Without a doubt, the #1 mistake we see is rushed or improper surface preparation. It's the least exciting part of the job, and that's precisely why it gets skipped. People get excited about the color and just want to get to the fun part.

But failing to deep clean, not treating oil spots, skipping the acid etch on a smooth slab, or forgetting to check for moisture is a recipe for disaster.

We’ve been called out to fix it countless times: a beautiful stain job that starts peeling, flaking, or turning cloudy within months. Taking the time to get the concrete perfectly clean, profiled, and dry isn't just a suggestion—it’s the only way to guarantee a finish that lasts.

Is Stained and Sealed Concrete a Good Option for a Commercial Floor?

It’s a fantastic option. For places like retail shops, showrooms, restaurants, and office lobbies, stained concrete offers a killer combination of sophisticated style, serious durability, and low-key maintenance. The seamless, non-porous surface is a breeze to keep clean and holds its own against constant foot traffic.

For new commercial construction or major renovations, you can really dial in the performance. In a high-wear environment, we often recommend layering a beautiful concrete stain with a heavy-duty topcoat system, like a high-performance epoxy or urethane. This one-two punch delivers maximum protection against scuffs, spills, and the daily grind, keeping the floor looking sharp for years to come.


If your project feels like it's getting too big, or if you simply want to ensure a perfect, professional finish from the start, our team at Wheeler Painting is ready to step in. We have decades of experience making complex concrete projects straightforward for our residential and commercial clients all over the Puget Sound.

Schedule your free, on-site consultation with Wheeler Painting today!