Tag Archive for: diy home improvement

Painting Small Rooms: A Pro’s Guide to Big Results

A lot of small room projects start the same way. You stand in the doorway of a spare bedroom, a narrow office, or a powder room and think, “This space feels tighter than it should.” In Seattle and across the Puget Sound, that feeling often gets worse during long gray stretches when natural light is limited and every wall color seems to work a little harder.

Paint can change that faster than almost any other finish in the room. It won't move a wall or raise a ceiling, but it can shift how the space feels the moment you walk in. The key is knowing when to chase brightness, when to add softness, and when a small room looks better with more depth instead of more white.

That's where a careful approach matters. Painting small rooms is less forgiving than painting a large open area. Every roller line, every rough patch, and every color decision shows up quickly because you're always close to the walls. The good news is that a small room is also manageable. With the right prep, tools, and sequence, a first project can come out looking clean and intentional.

Transform Your Space With More Than Just Paint

Small rooms tend to collect frustration. A guest room becomes storage. A home office feels boxed in by the middle of the afternoon. A bathroom with no real daylight starts to feel dull no matter how often it's cleaned. Most homeowners don't need a full remodel to improve those spaces. They need better light handling, better color choices, and a finish that makes the room feel deliberate instead of accidental.

In homes around Seattle, West Seattle, Bellevue, and North Bend, I see the same pattern often. The room isn't always too small. It just feels small because the color, ceiling, trim, and available light are all working against each other. A thoughtful paint plan can correct that.

There are also small details beyond paint that help the whole room read larger. If your room has limited window area, Joey'z Shopping's window enlargement tips offer useful ideas for making the opening feel more generous, which pairs well with a smart paint scheme.

Practical rule: In a small room, paint doesn't work alone. Wall color, ceiling brightness, trim contrast, window treatment, and furniture scale all affect whether the room feels open or cramped.

A good result usually comes from a few coordinated choices:

  • Wall color that matches the room's light. A bright white in one room can look fresh. In another, it can look flat.
  • A ceiling that helps lift the space. This matters more than many homeowners expect.
  • Clean lines at trim and corners. Small rooms put workmanship at eye level.
  • A finish that fits the room's use. An office, bathroom, and child's room don't all need the same sheen.

That's why painting small rooms is worth treating like a real project, even if it's only one room. Done well, it changes how the space lives day to day.

Choosing the Right Color for Your Small Room

The old advice still has value. Lighter colors usually make a room feel larger because they reflect more light, while darker colors absorb light and can make walls feel closer. Guidance on small spaces also points to lighter ceilings and even vertical stripes as ways to change perceived proportions without changing the floor plan, as noted in this small-room paint guide from CertaPro.

A visual guide showing the pros and cons of color choices for painting small rooms effectively.

That's the starting point. It isn't the whole story.

When light colors help most

If the room gets decent daylight, light paint is usually the safer play. Soft whites, pale grays, and muted warm neutrals help the eye travel across the room instead of stopping at each wall. In a small bedroom or office, that can make the space feel calmer and less crowded.

Cooler, lighter tones can also visually recede. That's useful in tight rooms with short sightlines. If you're choosing between several similar colors, test them in morning light and late afternoon light. In Puget Sound homes, the same paint can look airy at noon and muddy by evening.

A few combinations tend to work well in small spaces:

Room condition Color direction Why it works
Good daylight Light neutral or soft white Helps bounce light and reduces visual heaviness
Low ceiling Lighter ceiling than walls Draws the eye upward
Narrow room Low-contrast wall and trim palette Keeps the room from feeling chopped up

For homeowners comparing options, Wheeler has a useful page on interior paint color ideas for the home that can help narrow the field before you buy paint.

When white is the wrong choice

This is the part most short guides skip. In a small, dark room, white isn't always the answer. Design writers have pointed out that in low-light spaces, white can look flat or harsh, while a medium neutral may create a better balance by reflecting some light and still adding depth, as discussed in Emily Henderson's take on painting small dark rooms.

That lines up with what many homeowners in Seattle and Tacoma notice in real life. On overcast days, a stark white can read cold. In a north-facing office or a powder room with little natural light, a soft greige, muted taupe, or medium earthy neutral can feel richer and more finished.

A small room doesn't always need to feel bigger. Sometimes it needs to feel better.

A simple way to judge the room is this. Walk in during the day and ask whether you still need lamps on to make the room feel usable. If the answer is yes, a bright white may not give you the effect you expect. A medium tone may look more grounded and less washed out.

Don't ignore sheen

Color gets the attention, but finish matters. In a small room, sheen affects both durability and how the walls read under artificial light.

  • Flatter finishes hide minor wall flaws better. That helps in older homes with patches or uneven surfaces.
  • Higher sheen finishes reflect more light, but they also show surface defects and roller marks more clearly.
  • Trim paint should feel distinct from wall paint, but too much contrast can break the room into smaller visual pieces.

If the room has perfect drywall and gets regular wipe-downs, a little more sheen can work. If the walls have repairs, a quieter finish usually looks more professional.

Gathering Your Tools and Preparing for Success

Most disappointing paint jobs don't fail because of the final coat. They fail because the prep was rushed. In small rooms, that shows up fast. You're close to every wall, every corner, and every patch, so even minor shortcuts are easy to see.

An assortment of painting supplies including paint brushes, rollers, trays, tape, and a step ladder on a drop cloth.

What to have on hand

Start with a simple kit that supports control, not speed.

  • Angled sash brush for cutting in at ceilings, corners, and trim
  • Roller frame and trays sized for interior wall work
  • Roller covers matched to the wall texture
  • Painter's tape, drop cloths, and plastic for furniture
  • Spackle or patching compound for small dents and nail holes
  • Sandpaper in the recommended range
  • Primer for repairs, raw areas, or major color changes
  • A step ladder that fits comfortably in tight quarters

Brush-and-roller choice matters more than people think. One expert guide recommends 1/4" to 3/8" nap rollers for smooth walls and higher-sheen paints, while 1/2" to 1" nap rollers are better for rougher surfaces like textured drywall or masonry, according to The Navage Patch roller guide. In many Bellevue or Issaquah homes with smooth interior drywall, the shorter nap is usually the cleaner fit.

Prep is where the finish starts

Before any paint comes out, clear the room as much as possible. In a small space, trying to work around furniture slows you down and increases the chance of brushing against wet walls.

Then handle the surface in order:

  1. Move or cover furniture so you can reach every wall safely.
  2. Clean the walls to remove dust, handprints, and bathroom residue.
  3. Patch small damage like pinholes, dents, and minor cracks.
  4. Sand repairs smooth so they disappear under paint.
  5. Spot-prime or fully prime where needed.

If you're deciding whether primer is necessary on repaired drywall or fresh sheetrock, this guide on whether you have to prime sheetrock before painting explains the situations where skipping primer creates problems later.

Shop-floor insight: Small rooms punish uneven prep. A patch that looks “good enough” before paint often becomes the first thing you notice after the walls dry.

For homeowners who'd rather hand off prep and finish work, Wheeler Painting & Restoration Services handles interior painting as part of its residential and general contracting work. That's often useful when a small room project includes drywall repair, trim issues, or related updates nearby.

The Professional Painting Process Step by Step

A clean paint job follows a disciplined order. Pros stick to a top-to-bottom workflow because it controls dust, helps avoid lap lines, and keeps drips off finished work. The standard sequence is to move or cover furniture, clean and repair the walls, sand repaired areas with roughly 120-220 grit, prime, then paint the ceiling first, walls second, and trim or baseboards last, as described in House Beautiful's room-painting guide.

This visual lays out the process clearly.

An infographic showing the six steps of the professional house painting process for home improvement projects.

Start with the ceiling

Ceilings come first for a simple reason. Gravity wins. Any splatter or light roller mist is easier to correct on unfinished walls than on completed ones.

Use your brush to cut along the ceiling edges first, then roll the main field. In a small room, work in manageable sections and don't overwork the paint once it starts setting. Re-rolling partially dry paint is one of the quickest ways to create flashing and uneven texture.

Cut in walls before you roll

After the ceiling dries enough, move to the walls. Cutting in means brushing a narrow band along corners, trim, and the ceiling line before the roller fills the larger area. It sounds fussy, but it gives you control where the roller can't reach.

A few habits make a big difference:

  • Load the brush, don't flood it. Too much paint causes drips at corners and trim.
  • Work one wall at a time so the brushed edge stays wet when you roll into it.
  • Watch your body position in tight rooms. It's easy to lean into a freshly painted wall behind you.

For trim details and edge work, Wheeler also has practical guidance on tips for painting trim, especially if you want the room to look finished rather than merely repainted.

This short video is useful if you want to watch the rhythm of the process before starting.

Roll for even coverage

Once the edges are cut, roll the wall before that brushed band dries too far ahead. A common method is to lay paint on in a loose W or similar spread pattern, then fill in and lightly even it out. The exact letter shape matters less than keeping the paint distributed and maintaining a wet edge.

Keep the roller moving, but don't press hard. Pressure leaves marks faster than most beginners realize.

In compact rooms, rolling technique matters because every angle catches light. If one side of the room gets a lamp, another gets window light, and another sits in shadow, texture inconsistencies become visible fast.

Finish with trim and baseboards

Trim is last because it needs the cleanest lines. By then, the wall color is established and easier to cut against. Use a quality brush, work slowly, and remove tape carefully while the paint is still slightly damp if the product directions support that timing.

A patient final pass is what separates “freshly painted” from “professionally finished.”

Avoiding Common Pitfalls and Finishing Strong

Most DIY problems come from rushing the part people think they can rush. Small rooms are where that assumption gets expensive in time and aggravation. If you skip a step, the room usually tells on you right away.

A professional painter wearing white clothes applies blue painter's tape along the baseboard in a room.

Shortcuts that usually backfire

A few mistakes show up again and again:

  • Skipping primer on repairs. The patched areas may flash through or absorb paint differently.
  • Applying the next coat too soon. The surface may feel dry before it's ready for another pass.
  • Using the wrong roller nap. That can create texture mismatch on smooth walls.
  • Leaving poor ventilation out of the plan. In the Puget Sound, damp air can slow drying and make a room feel stuffy for longer.
  • Trusting leftover sample paint for touch-ups. Sheen mismatch can make the repair stand out.

That last point catches homeowners off guard. A better practice is to save a little of the properly mixed final coat in a sealed container for future touch-ups, rather than depending on a sample or an old partial can that may not match exactly.

The finish work matters

Tape removal is a good example. People often wait too long, then yank tape off after everything has hardened. That can lift paint edges or leave ragged lines. Pull tape back on itself slowly and keep an eye on the edge as you go.

Ventilation deserves the same care. You want airflow, but not so much dust or debris that it lands in wet paint. A cracked window, an exhaust fan where appropriate, and a controlled work area usually beat throwing the room wide open.

Final check: Before you call the room done, walk it in both daylight and lamp light. Small flaws often show up under one type of light and disappear under another.

If you do get paint on glass during the job, these techniques for removing paint splatters are helpful, especially for interior window trim and nearby panes.

Cleanup also affects your next project. Wash reusable tools carefully, shape the bristles back into place, and store leftover labeled paint where you can find it later. A small room may only take a day or two to paint, but the best-looking jobs stay easy to maintain afterward.

Your Project's Value and When to Call a Pro

A well-painted small room does more than freshen the space. It improves how the room feels every day, and it can be a smart investment. According to industry data cited by Opendoor, interior painting commonly returns 100% to 107% of cost at resale, and professionally painting a single room often runs about $300 to $1,500, which is part of why paint remains such a practical upgrade for homeowners in active housing markets like Seattle and Bellevue, as noted in Opendoor's overview of paint and resale value.

That doesn't mean every room should be a DIY project. Some are better left to a professional crew.

When it makes sense to bring in help

Call a pro when the project includes more than color on walls:

  • The room needs drywall repair beyond a few nail holes
  • The trim is detailed or damaged and needs careful restoration
  • The space is part of a larger remodel such as a bath remodel, kitchen remodel, or custom cabinet update
  • You want multiple rooms completed quickly with minimal disruption
  • The project extends into commercial work like office space renovation, tenant improvement, or facility maintenance

If you're in Seattle, Tacoma, Kirkland, Issaquah, Bellevue, Snoqualmie, North Bend, New Castle, or West Seattle, there's real value in having a local contractor who already understands how Pacific Northwest light, moisture, and scheduling affect interior work.


If you'd like help with painting small rooms, interior repainting, drywall repair, or a larger residential or commercial project, contact Wheeler Painting & Restoration Services. The team works across the Puget Sound on residential updates, commercial renovations, tenant improvements, and facility maintenance, and can provide an on-site consultation and detailed proposal for the scope you have in mind.

Repainting Your Bathroom Ceiling: A Guide for Kent & Seattle Area Property Owners

Painting a bathroom ceiling isn't just another item on your weekend to-do list. For homeowners and property managers, it’s one of the most demanding paint jobs in any building, thanks to a constant barrage of heat and humidity. A quick slap of paint won't cut it here; you need the right prep, the right materials, and a bit of know-how to prevent peeling, bubbling, and mildew growth for a finish that actually lasts. At Wheeler Painting, we've helped countless clients in the Kent and Seattle areas tackle this common facility maintenance headache.

Why Bathroom Ceilings Demand Special Attention

Think about it: the ceiling directly above a shower is probably the most abused painted surface in an entire home or commercial facility. For property owners here in Western Washington, from Seattle down to Tacoma, that constant dampness makes the battle against bathroom moisture a year-round affair. This is exactly where we see standard paint jobs fail time and time again.

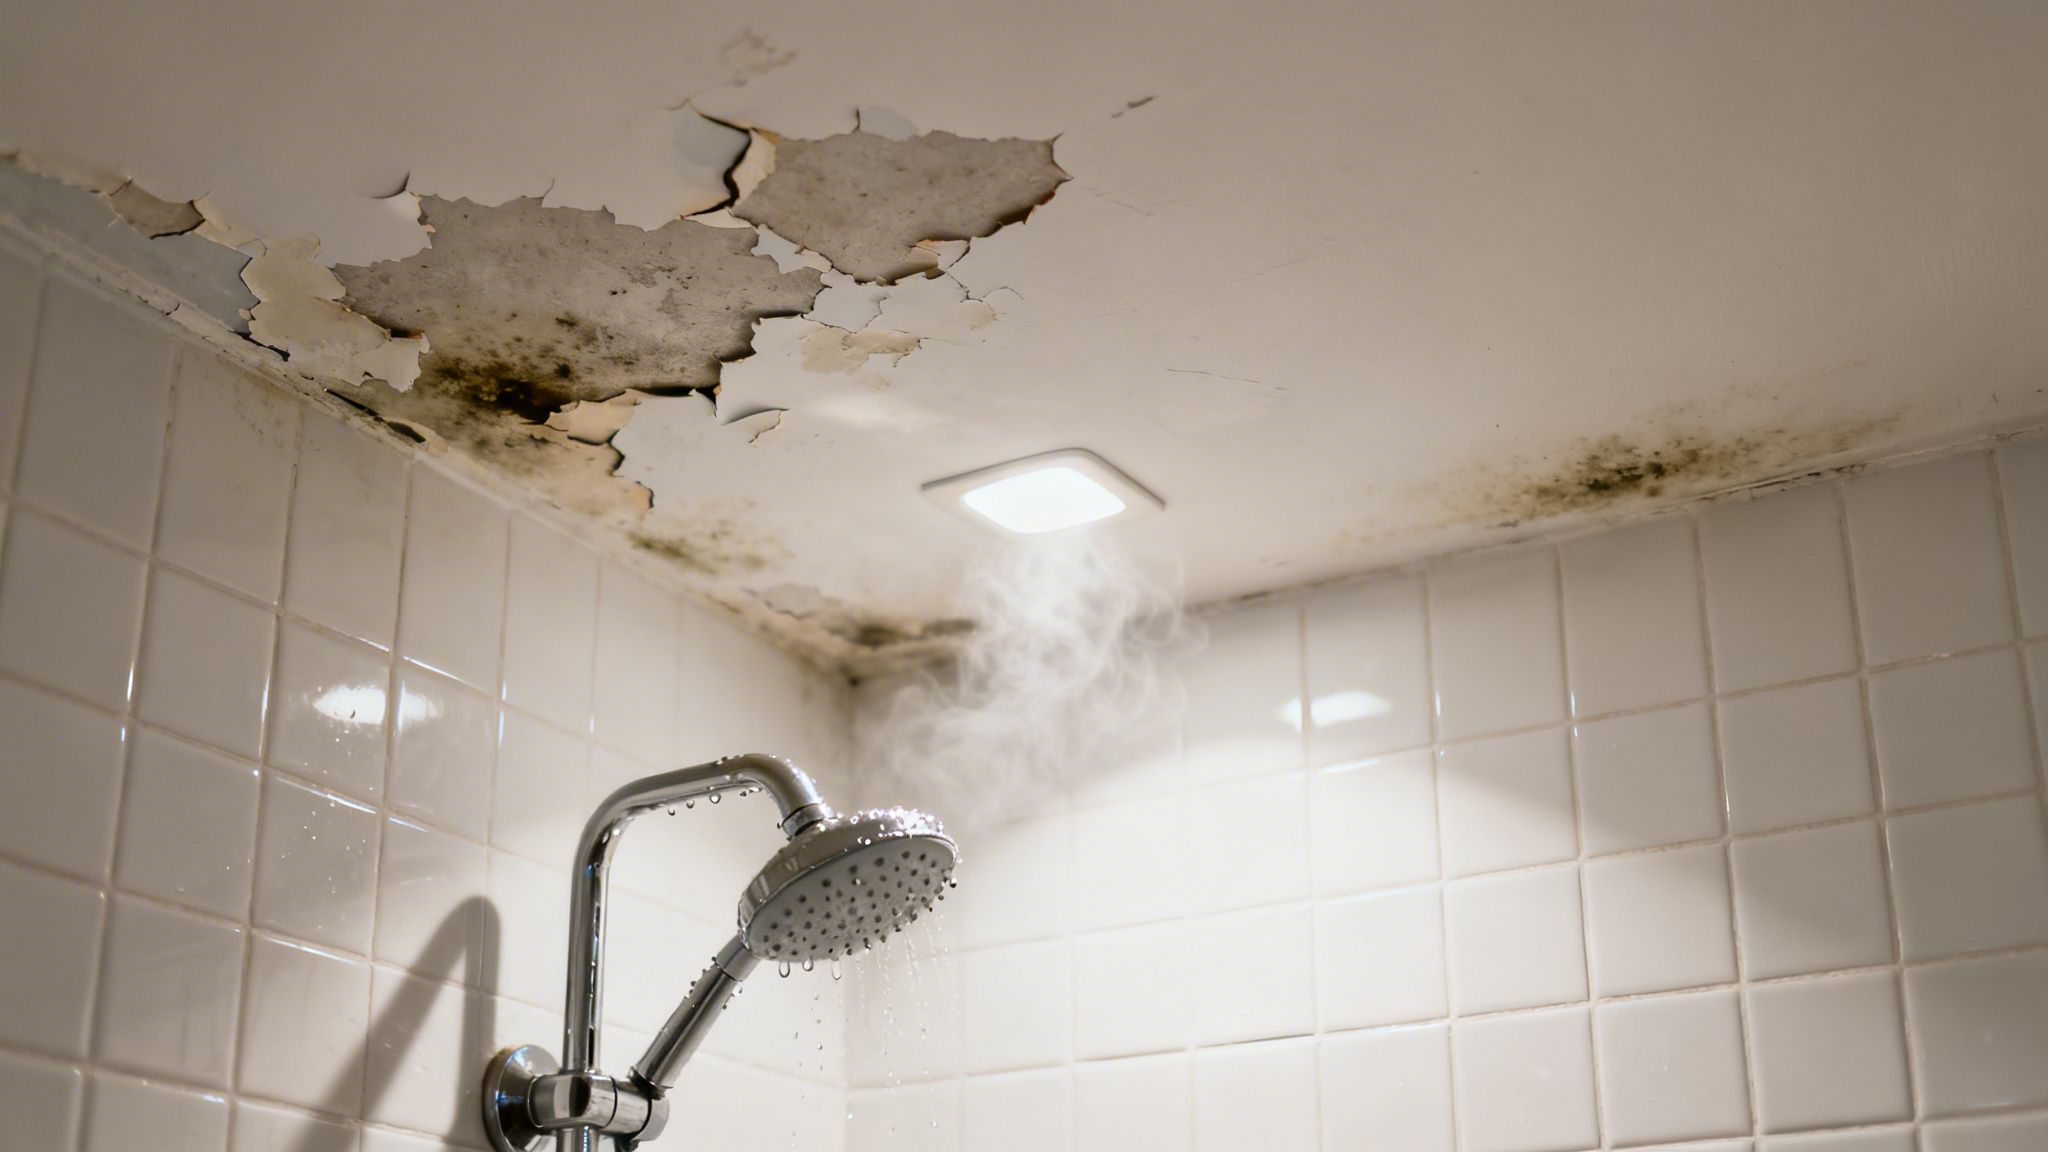
A damaged bathroom ceiling with peeling paint and black mold above a steaming shower head.

Unlike a bedroom or office, a bathroom ceiling endures a brutal cycle of steam and condensation every single day. That hot shower creates a perfect storm for paint failure as steam rises and settles directly overhead. It’s why so many homeowners and business owners in Kent and the surrounding communities call us about the same frustrating problems, often just a year or two after their last paint job.

The Science Behind Peeling Paint

Every time someone showers, the paint on the ceiling gets damp and swells slightly. As it dries, it contracts. This constant expansion and contraction eventually breaks the paint's bond, causing it to lose its grip and start peeling away from the drywall. This is a common issue for any residential or commercial painting project in a high-moisture area.

The stress is so intense that it destroys paint faster than anywhere else. In fact, the conditions are so harsh that some painting contractors won't even warranty their work in a bathroom. It’s the same reason paint bubbling is so common. If you’re seeing that, you might be curious about what causes paint to bubble on walls elsewhere, too.

Before you even think about painting, you have to play detective. Look closely for any signs of ceiling water damage, like persistent brown stains or sagging drywall. Those could point to a much bigger issue, like a leaky pipe or roof, that no amount of paint will fix.

At Wheeler Painting, we’ve seen it all. The key to a successful bathroom paint job is correctly diagnosing why the old paint failed. Was it poor ventilation? The wrong type of paint? Rushed prep work? As your local residential and commercial contractor, we address the root cause to ensure the problem doesn’t come right back.

Common Bathroom Ceiling Problems

The unique environment in a bathroom leads to a few signature issues. If you can spot them, you’re one step closer to fixing them for good.

Here’s what we typically see:

  • Mildew Growth: Those tell-tale black or gray spots are a classic sign of trapped moisture and poor airflow.
  • Surfactant Leaching: Ever notice sticky, brownish streaks running down the walls after a shower? That’s moisture pulling water-soluble ingredients (surfactants) out of the paint.
  • Peeling and Flaking: This is the most obvious sign of failure, where moisture has worked its way behind the paint film and completely broken its adhesion.

Tackling these problems means going beyond just scraping and painting. It requires a meticulous process that we've fine-tuned over thousands of residential and commercial projects to get it right the first time, from small home improvements to larger tenant improvement projects.

Your Blueprint For A Long-Lasting Finish

The secret to a bathroom ceiling that looks great for years isn't found in the paint can. It’s earned long before a brush ever touches the surface. All the real, lasting quality comes from the prep work. This is the foundation that separates a quick fix from a durable, professional finish, and it's a non-negotiable step on every project we do at Wheeler Painting.

First things first, you have to protect everything you don't want painted. Cover your vanity, toilet, tub, and floors with plastic sheeting or canvas drop cloths. Use painter's tape to secure the edges. A few extra minutes here will save you an hour of scraping dried paint drips later.

Clearing the Way for a Fresh Start

Once your bathroom is masked off, it's time to deal with the ceiling itself. Over time, bathroom ceilings get coated in a nearly invisible film of soap scum, hairspray, and other residues. Trying to paint over that grime is a surefire way to have your new paint fail, because it simply can't stick properly.

Grab a mild degreasing cleaner and mix it with some warm water. Using a sponge mop or a microfiber cloth on a pole, give the whole surface a good cleaning. Pay extra attention to the area right above the shower—that’s where the buildup is almost always the worst. After scrubbing, wipe the ceiling with a clean, water-dampened sponge to get rid of any soap residue.

Addressing Mildew and Minor Damage

Let the ceiling dry completely, then give it a close inspection. Look for any tell-tale black or gray spots, which signal mildew. You can't just paint over it; the fungus will work its way right through the fresh coat.

To kill it for good, you'll need a solution of one part bleach to three parts water, or a dedicated mildew killer.

  • Apply your solution directly to the mildew spots and let it sit for 10–15 minutes.
  • Gently scrub the areas, then rinse thoroughly with clean water.
  • Crucially, let the ceiling dry completely. This isn't a 30-minute job. It can take a full 24 hours, so be patient.

Next, hunt for any hairline cracks, peeling paint, or small dings. A good drywall contractor knows this step is vital. Take a putty knife and carefully scrape away any loose bits until you hit a solid, stable edge. Fill small cracks or holes with a lightweight spackling compound, smoothing it flush. Once dry, a light sanding is all it takes to make the patch disappear. If you're looking at more significant water stains or sagging, you may need to learn how to repair water-damaged drywall before you can move forward.

I can't tell you how many homes we've visited around Kent and Seattle where a property owner has to call us because a paint job started failing after just a few months. The number one culprit is always rushed prep work. Skipping a thorough cleaning or painting over live mildew guarantees the old problems will come right back. Taking your time on these foundational steps is the only way to ensure your repainting bathroom ceiling project actually lasts.

This careful, step-by-step preparation ensures you have a clean, solid surface that the primer and paint can bond to, giving you a finish that can handle the humidity for years.

Choosing The Right Paint And Primer

After all that careful prep work, picking the right products is what will make or break your bathroom ceiling paint job. We know the paint aisle can be a maze, but getting the primer and topcoat combination right is the secret to a finish that can actually handle the damp Puget Sound climate.

Why Primer Is Non-Negotiable

Seriously, don't even think about skipping the primer on a bathroom ceiling, especially after all the cleaning and patching you just did. A quality, stain-blocking, moisture-resistant primer is your most important tool here. As a full-service residential and commercial contractor, we consider this a critical step in any interior painting job.

It does a few critical jobs:

  • Creates a uniform base: This ensures your topcoat looks even and consistent.
  • Blocks stubborn stains: It locks in old water marks or anything else that might bleed through.
  • Seals new repairs: Primer ensures the paint sticks just as well to new spackle as it does to the old surface.
  • Provides a solid grip: It acts like double-sided tape, holding onto the drywall and giving the topcoat something to grab, which is key to preventing peeling.

For a bathroom, you absolutely need a primer designed to handle moisture. These products contain additives that stop mildew in its tracks. Even on brand new drywall, understanding why you should prime sheetrock before painting is a must for a long-lasting job.

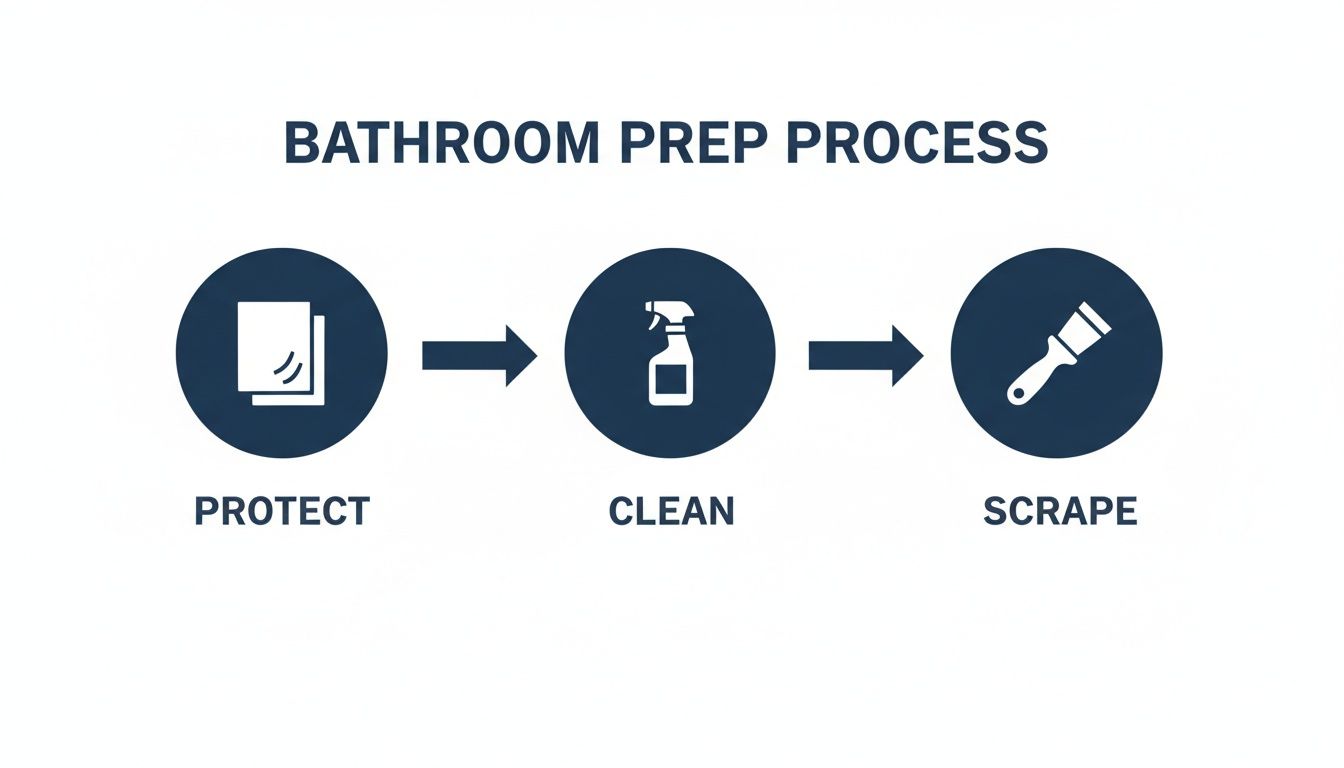
Infographic showing a three-step bathroom preparation process: protect, clean, and scrape.

These are the non-negotiables before you even crack open a can of primer. Protecting your fixtures, cleaning the surface, and scraping away any failures gives you the clean slate you need for a professional result.

Selecting Your Topcoat Sheen And Formula

Now for the paint itself. You’ll want a product specifically made for bathrooms or other high-humidity areas. Look for a label that says "kitchen & bath" or mentions mildew resistance. These paints contain mildewcide, an agent that actively prevents mold from taking hold. For anyone managing a property in places like Kent, Seattle, or Tacoma, this is a lifesaver.

The paint's sheen (its level of gloss) is just as important as the formula. For a bathroom ceiling, your best bets are satin or semi-gloss.

Bathroom Paint Sheen Comparison

Choosing a sheen isn't just about looks; it's about performance. A higher gloss level creates a tighter, less porous surface that's much better at repelling moisture. Here’s a quick breakdown of why this matters for a bathroom ceiling.

Sheen Durability Moisture Resistance Best For
Flat/Matte Low Very Low Not recommended. It absorbs moisture and is difficult to clean.
Eggshell Medium Low to Medium A slight step up, but still not ideal for direct steam exposure.
Satin High High A great choice. Offers a slight sheen, is very durable, and easy to wipe down.
Semi-Gloss Very High Excellent The gold standard for bathrooms. It's tough, highly moisture-resistant, and reflects light.

While a flat finish is great for hiding imperfections, in a bathroom it acts like a sponge for steam. This will almost guarantee stains and peeling. Sticking with a satin or semi-gloss finish is the professional choice for a reason.

A Pro Tip From The Field: At Wheeler Painting, we use satin or semi-gloss finishes on bathroom ceilings almost exclusively. That slight gloss provides a tough, washable surface that stands up to daily steam. It’s a small detail that makes a huge difference in how long the paint job lasts, whether it's for a home or a commercial renovation.

Of course, durability is only part of the equation. For aesthetic guidance, this guide on how to choose paint colors for your bathroom can help you tie the whole room together. By pairing a high-quality primer with a durable, mildew-resistant topcoat, you're setting your ceiling up for a beautiful finish that will last for years.

Getting That Pro Finish: Painting Techniques

Alright, the prep work is done. The patching is smooth, the mildew is gone, and your masking tape is straight. Now for the satisfying part—actually getting some paint on that ceiling. This is where your patience pays off and the real transformation happens. A few key techniques separate a decent DIY job from a truly professional one.

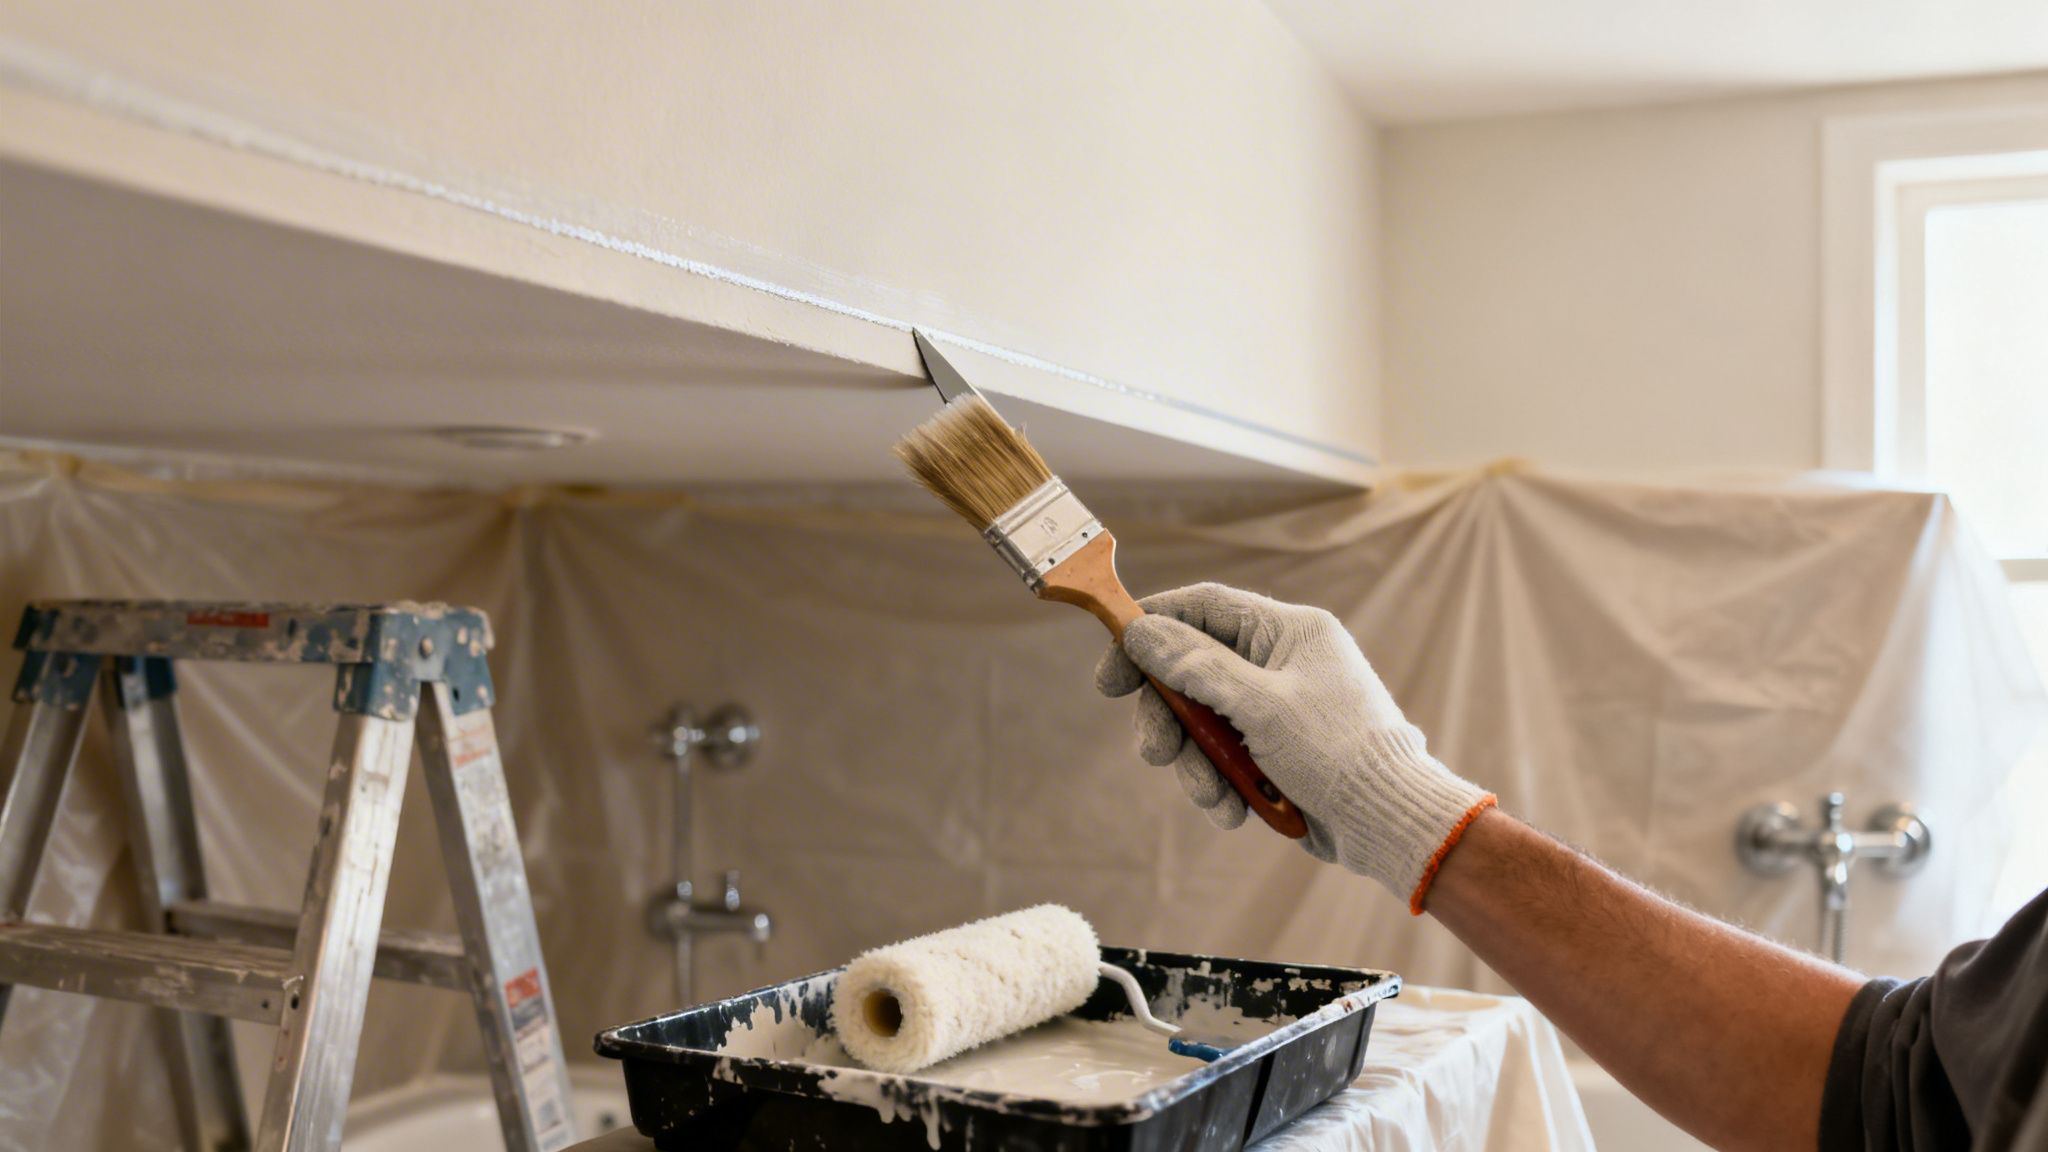
A person in a white glove uses a paintbrush to cut in white paint on a ceiling.

First, The "Cut-In"

Before a roller ever touches the ceiling, you have to "cut in." This just means using a brush to paint all the edges and corners where a roller can't reach cleanly—think along the walls, around your light fixture, and next to the exhaust fan. A crisp cut-in line is the hallmark of quality interior painting.

Grab a good-quality 2 to 2.5-inch angled sash brush. The angle gives you better control. Dip about the first third of the bristles into your paint and gently tap—don't scrape—the excess off on the inside of the can. Tapping keeps the paint loaded in the brush for a longer, smoother stroke.

Start your brushstroke about a half-inch from the wall line, then smoothly guide it into the corner. You're aiming to create a solid band of paint about 2-3 inches wide all the way around the ceiling's perimeter. This painted border gives your roller a target to roll up to without hitting the walls.

Professional Tip: If you're new to this, it’s completely fine to steady your painting hand with your other hand. Our crews providing commercial painting services in Kent and Tacoma do this by instinct, but for a first-timer, that extra stability is the secret to avoiding wobbly lines.

Rolling Without Streaks

With your edges done, it’s time to roll the main field of the ceiling. The number one mistake homeowners make is trying to stretch their paint too thin. This causes "lap marks," those ugly, streaky lines where the paint has started to dry before you overlap it. The key to avoiding this is to always maintain a wet edge.

For a smooth ceiling, a 3/8-inch nap roller is perfect. If you have any texture, jump up to a 1/2-inch nap. Get a roller screen for your bucket—it loads the roller much more evenly than a tray.

Here's the method that guarantees a beautiful, uniform finish:

  • Find a corner and start by rolling a large "W" or "N" pattern on the ceiling, roughly 3 feet by 3 feet.
  • Now, without lifting the roller, fill in that "W" with straight, parallel strokes that slightly overlap.
  • Once that section is fully covered, do a final "lay off." This means making a few very light passes with the roller in one single direction across the whole section to erase roller marks.
  • Move on to the next 3×3 section, repeating the process but always rolling back into the wet edge of the section you just finished.

Working this way, section by section, keeps the paint workable and prevents frustrating streaks. It’s a methodical approach, but the flawless result is well worth the effort.

Knowing When To Call a Professional

There's a real satisfaction that comes from tackling a project yourself. But after years in this business, we can tell you that the smartest property owners are the ones who know their limits. What looks like a simple paint job can quickly turn into a frustrating, costly ordeal.

So, how do you know when to put down the roller and pick up the phone? Certain problems are dead giveaways that you need professional help.

Signs You Should Hire a Pro

Persistent mildew is a classic. If you've scrubbed those black spots away multiple times only to see them creep back, you're not fixing the root cause. A professional painter can diagnose if this is a simple ventilation issue or part of a larger facility maintenance problem requiring waterproofing.

Another huge red flag is significant water damage. If you’re seeing sagging drywall, paint peeling in sheets, or growing water stains, you’re looking at symptoms of a bigger problem. A leak from the roof or a pipe needs a proper diagnosis and repair from a qualified residential or commercial contractor before any painting can begin.

And let’s not forget safety. Trying to paint a high ceiling in a cramped bathroom is a recipe for disaster without the right gear. Professionals come equipped with the proper equipment—and, just as importantly, the insurance—to handle these situations safely.

A professional painter doesn’t just cover up problems; we solve them. At Wheeler Painting, our experience with homes and commercial facilities across the Puget Sound has taught us how to diagnose the why behind paint failure. We bring a guarantee that the job is done right.

The Value of Professional Service

For homeowners, building owners, and facility managers in Tacoma, Kent, and the greater Seattle area, bringing in a team like Wheeler Painting & Restoration Services isn't just about getting a paint job. It's an investment in quality and peace of mind. We have access to commercial-grade primers and coatings you can't find at a big-box store, and we know exactly how to apply them for a flawless, durable finish perfect for any tenant improvement or residential remodeling project.

Ultimately, hiring a pro for your bathroom ceiling isn't admitting defeat—it's making a smart decision to protect your property. It ensures the work is done correctly, safely, and efficiently the first time. That means you get a beautiful result that will hold up for years, letting you focus on other things without worrying about what’s happening overhead.

Your Top Bathroom Ceiling Questions, Answered

When it comes to repainting a bathroom ceiling, a few questions pop up time and time again. As painters serving the Seattle area, we've heard them all. Here are our straightforward answers to the most common queries we get from homeowners and property managers.

How Long Should I Wait to Shower After Painting?

This is the big one. While new paint might feel dry in a few hours, it hasn't fully cured yet. Curing is the chemical process where the paint hardens and develops its final moisture-resistant shell.

We always tell our clients to hold off on hot showers for at least 24-48 hours. Firing up the steam too early is the quickest way to ruin a fresh paint job. Check the paint can for the manufacturer's specific recommendation, as some high-performance bathroom paints need even more time to get tough enough to handle the humidity. A little patience now prevents a lot of headaches later.

Can I Just Paint Over a Few Mildew Spots?

Absolutely not. This is probably the biggest mistake we see people make. Painting over mildew is like putting a rug over a stain—it doesn't solve the problem, it just hides it for a little while.

Mildew is a living fungus, and it will happily grow right through that new layer of paint, often coming back worse. You have to kill it first. Mix a solution of one part bleach to three parts water (or use a store-bought mildew killer), apply it, and let it sit. After a good rinse and letting it dry completely, you'll need to use a quality stain-blocking primer before you even think about your topcoat. It's the only way to be sure it's gone for good.

For many homeowners and property managers in the Kent and Tacoma areas, hiring a professional for a bathroom ceiling is a smart call. An expert ensures underlying moisture or mildew issues are properly resolved, not just covered up. We have the right tools and experience for a flawless finish, saving you time and ensuring it lasts—a wise investment in protecting your property.

What's the Right Way to Fix Peeling Paint?

Peeling paint is your ceiling's way of telling you there's an adhesion problem, almost always caused by moisture. Just painting over the peeling spot won't work; the new paint will just peel off with the old layer.

You have to get back to a solid foundation. Here's how:

  • Scrape: Use a putty knife or scraper to remove every bit of loose, flaking paint. Keep going until you only have paint with a solid, firm edge.
  • Sand: Feather the edges of the remaining paint to create a smooth transition from the painted to the bare areas. A thin skim coat of spackle might be needed.
  • Prime: This is the non-negotiable step. You must prime the repaired patches with a high-quality bonding or moisture-resistant primer. This gives your new paint something to grab onto.

Only after you've properly prepped the surface can you repaint the entire ceiling for a uniform, lasting finish.


Ready to skip the hassle and get a guaranteed professional result? The team at Wheeler Painting has been serving homeowners and businesses in the Puget Sound for decades, delivering durable, beautiful finishes for homes and commercial facilities. We are the local "house painting near me" and "commercial painting services near me" provider you can trust. Contact us today for a free, no-obligation estimate