Tag Archive for: hiring a contractor

Hiring a Remodel Kitchen Contractor in Seattle & Tacoma

A lot of homeowners around Seattle, Tacoma, Bellevue, and Issaquah start in the same place. They know their kitchen isn't working anymore, but they also know a major renovation can get expensive, disruptive, and hard to compare once bids start landing in the inbox.

That tension is real. A kitchen remodel is one of the biggest projects taken on inside the home. It's also one of the few upgrades that affects your routine every single day, from coffee in the morning to cleanup at night.

The good news is that a kitchen project gets much easier when you treat it like a process instead of a shopping trip. The right remodel kitchen contractor helps you sort out scope, pricing, scheduling, and trade coordination before the work begins. That matters in the Puget Sound area, where permit paths, inspection timing, older housing stock, and product lead times can all shape the job in ways homeowners don't always see at first.

Your Puget Sound Kitchen Remodel Starts with a Plan

Most kitchen remodels don't begin with cabinets. They begin with frustration.

Maybe the layout pinches traffic around the island. Maybe the storage never made sense. Maybe the finishes are tired, or the room just doesn't fit how your household cooks and gathers anymore. That's why kitchen remodeling is driven by more than style alone. A 2022 report cited in kitchen remodeling statistics and resale data found homeowners can recoup about 75% of the cost of a complete kitchen renovation at resale, and another survey cited there showed 40% of remodels are motivated by dissatisfaction with the kitchen's appearance.

In practice, the strongest kitchen plans solve three things at once. They improve function, respect budget, and avoid unnecessary disruption.

Decide whether you need a refresh or a full remodel

Not every kitchen needs to be gutted. Sometimes the smartest move is to keep the existing layout and focus on cabinets, flooring, lighting, drywall repair, paint, and finishes. In other homes, especially older ones around Seattle, West Seattle, or Tacoma, the bigger issue is hidden behind the walls. Electrical updates, plumbing changes, damaged substrate, or awkward framing may push the project into full-remodel territory.

Cabinets are usually where homeowners start wrestling with that choice. If your cabinet boxes are solid and the layout still works, refinishing may be worth serious consideration before replacement. For a practical look at that decision, Resurrect Wood Refinishing's insights are useful because they help you think through condition, cost logic, and what refinishing can and can't fix.

Build the plan before you request pricing

A remodel kitchen contractor can only price what's been defined. If two contractors are pricing two different versions of your project, the bids won't mean much.

Start with a simple planning list:

  • Must-keep items like appliance locations, window placement, or existing flooring in adjacent rooms.
  • Must-change problems such as poor storage, worn finishes, low light, or damaged surfaces.
  • Finish expectations for cabinets, counters, backsplash, flooring, and paint.
  • Jobsite realities including pets, kids, parking, access, and whether you need part of the kitchen usable during construction.

Practical rule: The clearer your scope is before bidding, the fewer “surprises” show up later as change orders.

If you want a local planning reference before meeting contractors, this kitchen remodel planning guide from Wheeler Painting is a good first pass for organizing priorities and decisions.

Vetting Local Contractors Finding a Partner You Can Trust

A beautiful proposal doesn't mean much if the contractor can't manage people, paperwork, and sequencing.

In the Puget Sound market, kitchen work often involves multiple trades in a tight footprint. That means you're not only hiring someone to install materials. You're hiring someone to coordinate demolition, rough plumbing, electrical, drywall, flooring, cabinetry, counters, finishes, and closeout without letting small misses turn into expensive rework.

Vetting Local Contractors Finding a Partner You Can Trust

Start with the non-negotiables

Before you discuss style, ask for the basics and verify them.

  • License, bond, and insurance should be active and appropriate for the work.
  • Business identity should match the name on the proposal and contract.
  • Project type fit matters. A contractor who mainly does quick surface updates may not be the right fit for a kitchen involving layout changes and trade coordination.
  • Written proposal quality tells you a lot early. Sloppy paperwork often points to sloppy administration later.

If electrical work is part of the project, it helps to understand what that portion can involve before you sign with anyone. Homeowners comparing scopes often benefit from reviewing examples of home remodeling electrical services, because it shows how much can hide inside a short line like “electrical as needed.”

Read reviews like a project manager

Online reviews are useful, but only if you read them with a filter.

Look for comments about scheduling, communication, punch-list follow-through, cleanliness, and billing clarity. A contractor can have good finish photos and still struggle with coordination. For kitchens, that difference matters more than it does on simpler paint or flooring jobs.

Ask for recent references from projects that sound like yours. A homeowner in Bellevue with a straightforward footprint may need a different contractor than someone in North Bend with an older house and more unknowns behind the walls.

Meet the person who will actually run your job

Many homeowners often skip an important step. They meet the salesperson, like the price, and never clarify who's managing the remodel.

Ask these questions directly:

Question Why it matters
Who is my day-to-day contact? You need one clear decision path.
Who handles permits and inspections? Responsibility needs to be assigned in writing.
How often will I get updates? Kitchen jobs move better with a set communication rhythm.
How are subcontractors scheduled? Trade coordination is where many delays begin.

Good contractor-client chemistry isn't a soft issue. It affects decisions, timing, and how problems get solved when the unexpected shows up.

A helpful local resource before interviews is this guide on choosing a general contractor. It's especially relevant for homeowners who are hiring a remodel kitchen contractor for the first time and need a clean checklist.

How to Compare Kitchen Remodel Proposals and Bids

Many homeowners often find themselves stuck. The bids look different, the totals don't line up, and no one seems to be pricing the same job.

That's normal. Industry guidance stresses that homeowners need to understand the fine print because kitchen projects involve multiple specialists, and vague bids on demolition, electrical work, and finish levels can hide major cost differences. Without a detailed, line-item proposal, a true apples-to-apples comparison is almost impossible, as discussed in this guidance on comparing contractor bids.

How to Compare Kitchen Remodel Proposals and Bids

Compare the scope before you compare the price

The number at the bottom only matters after you confirm what the contractor is including.

A solid proposal should spell out demolition, disposal, framing, drywall, plumbing, electrical, flooring prep, cabinet installation, countertop coordination, trim, paint, and final touch-up. If a proposal says “complete kitchen remodel” without detail, that's not a scope. That's a placeholder.

Here's a simple way to normalize bids:

  • Demolition
    Does it include haul-off, protection of adjacent spaces, and removal of old cabinets, counters, backsplash, and flooring?

  • Mechanical work
    Are plumbing and electrical relocations included, or only reconnects in the same locations?

  • Wall and ceiling repair
    Is drywall patching included after rough-in work, and how much patching is assumed?

  • Cabinet installation
    Does the bid cover installation only, or also fillers, panels, trim, hardware, and adjustments?

  • Paint and finish work
    Is finish painting part of the scope, and what surfaces are included?

Understand allowances before they become overruns

An allowance is a placeholder amount for something not fully selected yet. Common examples are cabinets, tile, hardware, lighting, plumbing fixtures, or countertops.

Allowances aren't bad on their own. They become a problem when one contractor uses realistic allowances and another uses low placeholders to make the proposal look cheaper.

Watch closely: A low bid with thin allowances often turns into a higher final price once real products are chosen.

If one proposal includes a cabinet allowance and another includes a specific cabinet line and finish package, those are not equal. The second proposal is usually easier to trust because it clearly defines what is being purchased.

This comparison video is useful context if you're sorting through uneven proposals:

Exclusions are where budget shocks often hide

Every proposal should state what is not included. If exclusions are missing, ask for them in writing.

Common exclusions that deserve scrutiny include:

  • Permit fees
  • Utility upgrades
  • Structural repair discovered after demolition
  • Dry rot or moisture damage
  • Appliance purchase and delivery
  • Countertop template timing and re-templating
  • Painting of adjacent rooms or trim outside the kitchen
  • Floor leveling or substrate correction

A quick homeowner worksheet can help. Put each contractor in a column and list scope items down the side. Mark each item as included, allowed, excluded, or unclear. That one page often reveals why a lower price isn't really lower.

For anyone trying to make sense of category-level pricing before reviewing bids, this kitchen remodel cost breakdown can help frame the conversation.

Your Kitchen Remodel Timeline from Demolition to Dinner

Most kitchen remodels feel slow before they feel fast.

That's because the project starts long before demolition day. A typical kitchen remodel often runs 6 to 9 months from first consultation to final walkthrough, with an 8 to 12 week active construction window. Planning and design often take 1 to 3 months, ordering and logistics may take 1 to 2 months, and qualified contractors are often booked 4 to 8 months in advance, according to this kitchen remodel timeline guide.

Your Kitchen Remodel Timeline from Demolition to Dinner

What the schedule usually feels like

In the early stage, the job can seem paperwork-heavy. That's normal. Selections get finalized, materials are ordered, permit responsibilities are sorted out, and the contractor builds the sequence around what has to arrive first.

Then the visible work starts. Demo is quick. The middle is slower because that's where hidden systems get changed and inspected. The final stretch feels fast again when cabinets, counters, fixtures, paint, and touch-ups begin stacking together.

The order matters more than speed

Kitchen work follows a dependency chain. The basic flow is planning and design, permits or engineering, demolition, rough plumbing and electrical, drywall, flooring, cabinet installation, countertops, appliances and fixtures, then final inspection, based on this order-of-operations overview.

That sequence isn't just tradition. It prevents rework.

  • Rough-ins happen early because plumbing and electrical need to be in place before walls are closed.
  • Drywall and surface repair follow once those hidden systems are complete.
  • Cabinets go in before countertop template and install because the counter fabricator needs final cabinet positions.
  • Finish details come late because punch-list items are easier to address after the heavier work is done.

If a contractor promises a very fast kitchen without a clear sequencing plan, slow down and ask harder questions.

Local timing issues homeowners should expect

In Seattle, Tacoma, Bellevue, and Kirkland, permit review, inspection timing, and product lead times can affect the calendar more than homeowners expect. Custom cabinetry is a common bottleneck. So are specialty appliances, tile decisions made late, and design changes after materials have been ordered.

A well-run contractor will lock the scope early, confirm who is responsible for each decision, and avoid bringing trades in before the site is ready. That's where a lot of schedule drift comes from. One trade arrives, finds the previous task incomplete, and the whole chain slips.

For households trying to stay in the home during the project, the smartest planning move is to set up a temporary kitchen before demo starts. A microwave, coffee setup, dish tubs, and a temporary food prep area can make the active construction weeks far more manageable.

Communication Change Orders and Finishing Strong

A kitchen remodel rarely fails because someone forgot how to install a cabinet. It usually goes sideways because expectations weren't documented, questions sat too long, or a mid-project change was discussed casually and billed formally later.

That's why communication needs structure. Not more messages. Better ones.

Communication Change Orders and Finishing Strong

Set the rules early

Pick one homeowner contact and one contractor contact. That sounds simple, but it prevents crossed wires when a spouse, designer, electrician, cabinet supplier, and installer all have opinions at the same time.

Weekly updates work well on most kitchen jobs. They don't need to be long. They should answer three things:

  • What was completed this week
  • What is scheduled next
  • What decisions or approvals are needed from the homeowner

If you want a practical outside perspective on keeping communication clean during residential work, this homeowner guide to clear contractor communication is worth a read.

Treat change orders as protection, not conflict

A change order is a written change to the original agreement. It should describe the revised work, the cost impact, and the schedule impact before the work proceeds.

That applies to homeowner-driven changes and field-discovered conditions. If the wall opens up and damaged framing, moisture issues, or outdated wiring appear, the contractor should stop, document the issue, and present a written path forward.

What doesn't work is hallway approval. A quick “sure, go ahead” during a busy afternoon often turns into confusion later.

Changes are normal. Unwritten changes are the problem.

Close the project the right way

The kitchen remodel workflow is a chain of dependent tasks. Rough plumbing and electrical should be completed and inspected before drywall goes in, and the final walkthrough should verify code compliance before closeout, as explained in that earlier order-of-operations guidance.

For the final walkthrough, bring a notepad and move slowly. Open doors and drawers. Test lights. Run plumbing fixtures. Check paint touch-ups in daylight. Confirm appliance trim, backsplash edges, hardware alignment, and transitions at flooring and trim.

A punch list doesn't mean the project went badly. It means you're closing it out professionally.

For homeowners looking at local options, Wheeler Painting & Restoration Services is one Puget Sound general contractor that handles residential remodeling, kitchen work, drywall, flooring, painting, and related finish coordination under one scope. That can be useful when you want fewer handoffs on a project with multiple moving parts.

Frequently Asked Questions About Kitchen Remodeling

Do I need to move out during a kitchen remodel

Usually, no. Many homeowners stay in the house during the project.

The better question is whether staying will be comfortable. If the remodel is a full-gut kitchen with heavy dust control, limited sink access, and trade traffic every day, some families choose to stay elsewhere for the messiest stretch. If you remain in place, set up a temporary kitchen somewhere outside the work zone and plan meals around limited cleanup.

What should I expect to spend on a kitchen remodel

Kitchen remodeling is a high-cost, high-variance project. In 2026, typical U.S. kitchen remodel spending was reported at $14,585 to $41,534, with an average of $26,962. Major renovations can run $65,000 to $130,000+, and cost per square foot commonly ranges from $75 to $250, according to Angi's kitchen remodel cost guide. That same source notes that general contractor fees are often estimated at 10% to 20% of total project cost.

What matters most is scope. Keeping the layout intact is often very different from moving plumbing, changing electrical, reworking structure, or ordering custom cabinetry.

How do I keep the rest of my home protected from dust and damage

Ask about protection before the contract is signed, not on demo day.

A careful contractor should define how the crew will protect adjacent floors, isolate the work area, manage debris removal, and handle daily cleanup. In occupied homes around Seattle and Tacoma, that planning matters even more when weather pushes people indoors and the kitchen is central to daily traffic.

Is the cheapest bid ever the right choice

Sometimes a lower bid is legitimate. More often, it's lower because the scope is thinner, the allowances are unrealistic, or exclusions are doing too much work.

The safest comparison is not “Who is cheapest?” It's “Who has clearly priced the same job?” If the proposal doesn't define line items, allowance schedules, permit responsibility, and the change-order process, you still don't know the true cost.


If you're planning a kitchen remodel in Tacoma, Seattle, Bellevue, Issaquah, Kirkland, North Bend, Snoqualmie, New Castle, or West Seattle, Wheeler Painting & Restoration Services can help you evaluate scope, understand proposals, and move from concept to a clear, written plan.


10 Crucial Questions to Ask a Contractor Before Hiring in Kent, WA

Embarking on a residential remodel, commercial build-out, or even a large-scale painting project is a significant investment. For homeowners, property managers, and facility managers in the Puget Sound area, from Tacoma to Seattle, the success of your project hinges on choosing the right partner. A great residential or commercial contractor brings not just skill but also transparency, reliability, and local expertise. The difference between a smooth, successful outcome and a stressful ordeal often comes down to asking the right questions upfront.

Before you sign any contract, it’s critical to ask the right questions. This guide provides the essential list of questions to ask a contractor to ensure you're hiring a professional, trustworthy partner like Wheeler Painting, who can navigate your project with confidence. By using this checklist, you’ll be empowered to make an informed decision, protecting your property and ensuring your vision for a residential remodel or commercial renovation is realized on time and on budget.

The vetting process is a crucial first step. It's about more than just finding the lowest bid; it’s about finding a local provider who understands the needs of businesses and homeowners in Kent, Seattle, and Tacoma. A well-prepared list of questions helps you compare potential partners systematically, ensuring you cover critical areas like licensing, payment schedules, and how unexpected issues are handled. To delve deeper into the overall process, a comprehensive guide on how to hire contractors can be invaluable. This list will equip you with the specific queries needed to verify credentials, understand project workflow, and set clear expectations, whether you're planning a tenant improvement in Kent or siding replacement in Tacoma.

1. Are You Licensed, Bonded, and Insured?

This is the most critical of all the questions to ask a contractor, acting as your first line of defense against financial risk and subpar work. Before you discuss project details, verify that any potential partner has these three credentials. In Washington State, these protections are foundational requirements that separate legitimate professionals from those who could leave you with a costly mess.

A hand points to a licensed contractor ID card, insurance certificates, and a phone on a white desk.

Understanding these three components is key to protecting your home or business in the Seattle, Tacoma, and Kent areas.

  • Licensing: General contractors must be registered with the Washington State Department of Labor & Industries (L&I). This confirms they have met state requirements, including obtaining a bond and insurance.
  • Bonding: A surety bond protects you. If a contractor fails to complete the job, doesn't pay for permits, or neglects to pay subcontractors, you can file a claim against the bond to recover financial losses.
  • Insurance: This covers accidents. General liability insurance protects your property from damage, while workers' compensation covers injuries to the contractor's employees on your job site, preventing you from being held liable.

How to Verify Contractor Credentials

Never take a contractor's word for it. Always perform your own due diligence.

  • Request Physical Copies: Ask for current certificates of insurance, a copy of their bond, and their L&I contractor number.
  • Verify with L&I: Use the "Verify a Contractor, Tradesperson or Business" tool on the L&I website. This will show if their license is active and if they have any outstanding infractions.
  • Confirm Insurance Directly: Call the insurance agent listed on the certificate to confirm the policy is active and the coverage limits are adequate for your project's scope.
  • Check Subcontractor Coverage: Ask how they ensure their subcontractors are also fully licensed and insured. Reputable general contractors like Wheeler Painting have a strict vetting process for every partner they bring onto a job site.

2. What is Your Experience With Projects Similar to Mine?

Past performance is the best predictor of future success. This essential question helps determine if a contractor has proven, hands-on expertise with your specific project type, whether it’s a commercial renovation, residential remodeling project, or an exterior painting job. A mismatch in experience is a significant red flag, as a contractor specializing in new home construction may not have the nuanced skills required for a complex commercial tenant improvement project in downtown Seattle.

Digging into a contractor’s portfolio is crucial. For instance, a "remodeling contractor" might excel at custom decks and patios but lack the specific knowledge for a large-scale retail build-out or the precision needed for institutional painting. You need a partner whose background aligns directly with the scope, complexity, and unique challenges of your job.

  • Residential vs. Commercial: The logistics, materials, and codes for residential home improvement services in Kent are vastly different from those for a commercial facility in Tacoma. A contractor must have experience navigating the right set of challenges.
  • Project-Specific Skills: A general painter may not have the training to apply durable waterproofing coatings, just as a general builder might not understand the specific demands of a facility maintenance contract.
  • Relevant Scale: A firm accustomed to small repairs may be overwhelmed by a multi-floor office space renovation. Ensure their team and resources can handle the size of your project. Wheeler Painting is perfect for building owners or facility managers looking for a smaller firm that specializes in small to mid-size tenant improvement and facility maintenance projects.

How to Verify Relevant Experience

Go beyond a simple "yes" and ask for tangible proof of their expertise. A professional contractor will be proud to showcase their work.

  • Request a Detailed Portfolio: Ask for photos and descriptions of 3-5 recently completed projects that are similar to yours in scope and style.
  • Ask for Relevant References: Inquire about clients from these specific projects. Speaking with a past customer who had a similar job is one of the most valuable forms of due diligence.
  • Inquire About Specific Challenges: A great follow-up question is, "What was the biggest unexpected challenge on that project, and how did you resolve it?" Their answer reveals problem-solving skills.
  • Discuss Your Project's Nuances: Explain any unique aspects of your project, like the need for custom cabinets or wood and tile floors, and ask how they would approach them. This tests their critical thinking and confirms their understanding. Wheeler Painting, with decades of experience in the Puget Sound region, can provide detailed case studies for everything from commercial renovations to residential siding replacement.

3. Can You Provide References From Recent Clients?

While a portfolio showcases their best work, references reveal the reality of working with them day-to-day. This is one of the most insightful questions to ask a contractor because it provides direct feedback on their communication, timeliness, and professionalism from clients who have already been through the process. Verifying recent references is your best tool for predicting your own experience with a "residential contractor near me" or a local commercial construction firm.

Hearing directly from past customers in the Seattle, Kent, or Tacoma areas offers a layer of assurance that a glossy brochure cannot.

  • Recent Projects: References from jobs completed within the last 12-24 months are most relevant. They reflect the contractor's current team, processes, and quality standards.
  • Similar Scope: Ask for references from clients who had projects similar to yours. If you need commercial painting services, a reference from a small residential deck and porch staining job is less helpful.
  • Willingness to Share: A contractor’s confidence and transparency in providing a list of contacts is a positive sign. Hesitation could be a red flag.

How to Effectively Check References

Don't just collect names and numbers; conduct a thorough inquiry to get the full picture.

  • Request 3-5 References: A quality contractor should have a healthy list of satisfied clients. Wheeler Painting can readily connect you with facility managers or homeowners who have recently completed projects.
  • Prepare Specific Questions: Go beyond "Were you happy?" Ask about their communication style, how they handled unexpected issues, if the project stayed on budget, and if the cleanup was thorough.
  • Inquire About the Team: Ask the reference about their experience with the on-site crew and project manager. Were they professional, respectful of the property, and communicative?
  • Ask the Ultimate Question: A powerful final question is, "Would you hire them again?" The answer, and any hesitation behind it, often tells you everything you need to know.

4. How Will You Handle Change Orders and Unexpected Issues?

No project is immune to surprises, making this one of the most important questions to ask a contractor. A clear, documented process for handling change orders and unforeseen problems is the hallmark of a disciplined professional. This process protects both you and the contractor from scope creep and budget overruns when unexpected issues arise, such as discovering hidden damage or needing a drywall contractor for unforeseen repairs.

A Change Order document on a clipboard with a pen, sticky notes, a yellow hard hat, and a measuring tape.

Understanding how a contractor manages these changes reveals their project management maturity. Whether it's a residential remodel in Seattle or a commercial tenant improvement in Kent, a formal change order process is essential.

  • What is a Change Order? A change order is a written amendment to the original contract that documents a change in scope, price, or schedule. It should be signed by both you and the contractor before any new work begins.
  • Why is it Necessary? It prevents misunderstandings by formally documenting new agreements. Issues like discovering rotted wood during an exterior painting job or finding outdated plumbing during a remodel require a formal change order to adjust the budget and timeline fairly.
  • What it Protects Against: A solid process prevents a contractor from billing you for unauthorized work and protects the contractor from performing extra work without compensation. Understanding specific scenarios, like those in a guide to emergency storm damage repair, can help you formulate questions about a contractor's readiness for unforeseen challenges.

How to Clarify the Change Order Process

Your contract should explicitly detail the procedure for managing changes. Discuss these points before signing anything.

  • Require a Formal Process: Insist that all changes be documented in writing on a formal change order form before work proceeds.
  • Define Approval Authority: Clearly state who has the authority to approve changes and associated costs, whether it's you, a property manager, or an architect.
  • Set Approval Timelines: Agree on how quickly you must review and approve a change order to prevent work stoppages and project delays.
  • Demand Justification: The contractor should explain the reason for the change, provide a detailed cost breakdown, and outline any impact on the project schedule. Reputable contractors like Wheeler Painting will transparently provide this documentation for any necessary changes.

5. What is Your Payment Schedule and Invoice Process?

One of the most important questions to ask a contractor revolves around money. A clear payment schedule and invoicing process are vital for managing your project's cash flow. This conversation establishes firm expectations for when and how you pay, which helps prevent billing disputes and protects you from paying too much for incomplete work. In Washington State, payment terms must be explicitly documented in your contract.

Agreeing on a payment structure before work begins is non-negotiable for any project, whether it's a "house painting near me" job in Seattle or a commercial build-out in Kent.

  • Progress Payments: Payments should be tied to specific, verifiable project milestones, not arbitrary dates. For example, a payment might be due after framing is complete and has passed inspection.
  • Deposit: A reasonable deposit secures your spot on the contractor's schedule and allows them to order initial materials. However, this initial payment should be a modest percentage of the total cost.
  • Final Payment & Retention: The final payment should only be made after all work is 100% complete, the site is clean, and you are fully satisfied. Holding back a small percentage (retention) is a standard practice that ensures the contractor finishes every last detail.

How to Structure Contractor Payments

A professional contractor will have a standard process but should be willing to negotiate terms that work for you.

  • Negotiate the Schedule: Propose a payment schedule that aligns with key construction phases. For a home addition, you can explore cost estimators to better understand the phases and their associated costs.
  • Limit the Deposit: Avoid paying more than 10-25% upfront. A contractor demanding a large deposit may be a red flag for financial instability.
  • Require Detailed Invoices: Each payment request should come with an invoice that itemizes labor, materials, and any subcontractor costs for that phase.
  • Ask for Lien Waivers: With each progress payment, request a signed lien waiver. This document confirms that the contractor and their suppliers have been paid, protecting your property from a mechanic's lien.
  • Define ‘Completion’: Clearly state in the contract what constitutes "completion" for the final payment. This should include passing final inspections, completing a final punch list, and removing all tools and debris.

6. What is Your Timeline and What Happens if You Miss Deadlines?

A clearly defined timeline is the backbone of a successful construction or painting project. This question establishes expectations for start and completion dates and, crucially, what happens if deadlines are missed. For homeowners and business operators in the Puget Sound area, understanding the project schedule is essential for managing disruptions. A professional contractor should provide a realistic timeline that accounts for project complexity and their current capacity.

This discussion also reveals a contractor's organizational skills. A vague timeline can be a major red flag, while a detailed, phase-by-phase schedule demonstrates foresight. In Western Washington, where weather can impact exterior work like siding replacement or exterior painting, this conversation is even more critical.

How to Discuss and Document Project Timelines

A verbal agreement on timing is not enough; the schedule must be part of your written contract.

  • Request a Detailed Schedule: Ask for a schedule that includes start and end dates for each major phase. For a kitchen remodel, this would mean dates for demolition, framing, electrical/plumbing rough-ins, drywall, and finishing.
  • Define Work Hours: Clarify the contractor’s standard work hours (e.g., 7:00 a.m. to 3:30 p.m., Monday-Friday). This helps you manage expectations for noise and activity on your property in Seattle or Tacoma.
  • Establish Delay Protocols: Specify which events qualify for a timeline extension, such as client-requested changes, unforeseen site conditions, or significant weather delays.
  • Include Accountability Clauses: For larger commercial or residential projects, consider a "liquidated damages" clause. This stipulates a set amount the contractor pays for each day the project runs past the agreed-upon completion date, excluding approved extensions.
  • Plan for Weather: For any exterior work in the Kent area, such as exterior painting or custom decks and patios, ensure your contract includes specific language about weather contingencies.
  • Require Progress Updates: Reputable firms like Wheeler Painting provide regular progress reports to keep you informed and ensure the project is tracking against the established schedule.

7. How Do You Manage Subcontractors, Permits, and Code Compliance?

A successful renovation or construction project involves more than just the general contractor; it’s an ecosystem of specialized trades and municipal regulations. This is one of the most important questions to ask a contractor, as their answer reveals their ability to manage the entire project. A professional "commercial construction near me" contractor takes full ownership of coordinating subcontractors, securing permits, and ensuring every aspect of the work is up to code.

In Washington State, a licensed general contractor is legally responsible for the project's compliance. A contractor with clear processes demonstrates the experience needed to protect you from liability and delays. They act as the single point of accountability, ensuring the project runs smoothly without you having to juggle multiple vendors or navigate complex city requirements in Seattle or Tacoma.

How to Verify Project Management Capabilities

A well-managed project is a stress-free project. Dig into the details to understand how a contractor will handle these critical tasks.

  • Permits and Fees: Confirm the contractor will obtain all required permits. Ask who pays the permit fees and how those costs are presented in the bid.
  • Subcontractor Vetting: Request a list of the primary subcontractors they work with for trades like electrical and plumbing. Reputable contractors like Wheeler Painting have a roster of trusted partners they rely on for projects like a full kitchen remodel or floor repairs and replacements. You can learn more about how these elements fit together by exploring a guide on how to plan a kitchen remodel.
  • Code Compliance Responsibility: The contract should state that the contractor is responsible for ensuring all work meets local and state building codes and for correcting any work that fails an inspection at their own cost.
  • Inspection Coordination: Ask about their process for scheduling and managing building inspections with the relevant city department, whether in Kent or a surrounding municipality.
  • Documentation: Request that you receive copies of all passed inspection reports and the final signed-off permit before you make your final payment.

8. What is Your Warranty and What Does It Cover?

A project isn’t truly complete until you have a clear understanding of the contractor’s responsibility after the final payment. Asking about the warranty is a critical question for any contractor, as it defines their commitment to quality. In Washington, the law implies certain warranties, but a detailed written warranty provides superior protection and clarity.

The scope and duration of a warranty can vary depending on the work. It's essential to understand these differences to set realistic expectations for your project in the Seattle, Tacoma, or Kent areas.

  • Painting & Coatings: A professional interior or exterior painting warranty might offer two years on labor and a longer term on materials. Exclusions often include issues not caused by the contractor, such as pre-existing moisture problems.
  • Remodeling & Construction: For a kitchen remodel or tenant improvement, a contractor typically offers a one-year workmanship warranty. This is separate from manufacturer warranties on appliances and fixtures.
  • Facility Construction Services: For services like waterproofing or floor repairs and replacements, the warranty should be specific to the materials used and the application process.

How to Verify Warranty Details

A verbal promise is not enough. You need the warranty terms documented to protect your investment.

  • Request Written Terms: Ask for the full warranty language to be included directly in your contract.
  • Clarify Inclusions and Exclusions: Ask for a specific list of what is covered and, just as importantly, what is not.
  • Understand Labor vs. Materials: Confirm if the warranty covers both the cost of replacement materials and the labor to install them.
  • Review the Claims Process: Ask how you should report a defect. What is the expected timeframe for a response and repair? This process is a key part of an effective construction quality control checklist.
  • Confirm No-Cost Repairs: A reputable contractor like Wheeler Painting stands behind their work and will confirm that valid warranty repairs will be performed at no additional cost to you.

9. How Will You Handle Safety, Cleanliness, and Site Management?

A project's success isn't just about the final product; it's also about how the work gets done. This question to ask a contractor reveals their professionalism and respect for your property. A well-defined plan for these elements minimizes disruption and protects your family or employees, whether it's a home in Tacoma or a commercial facility in Kent.

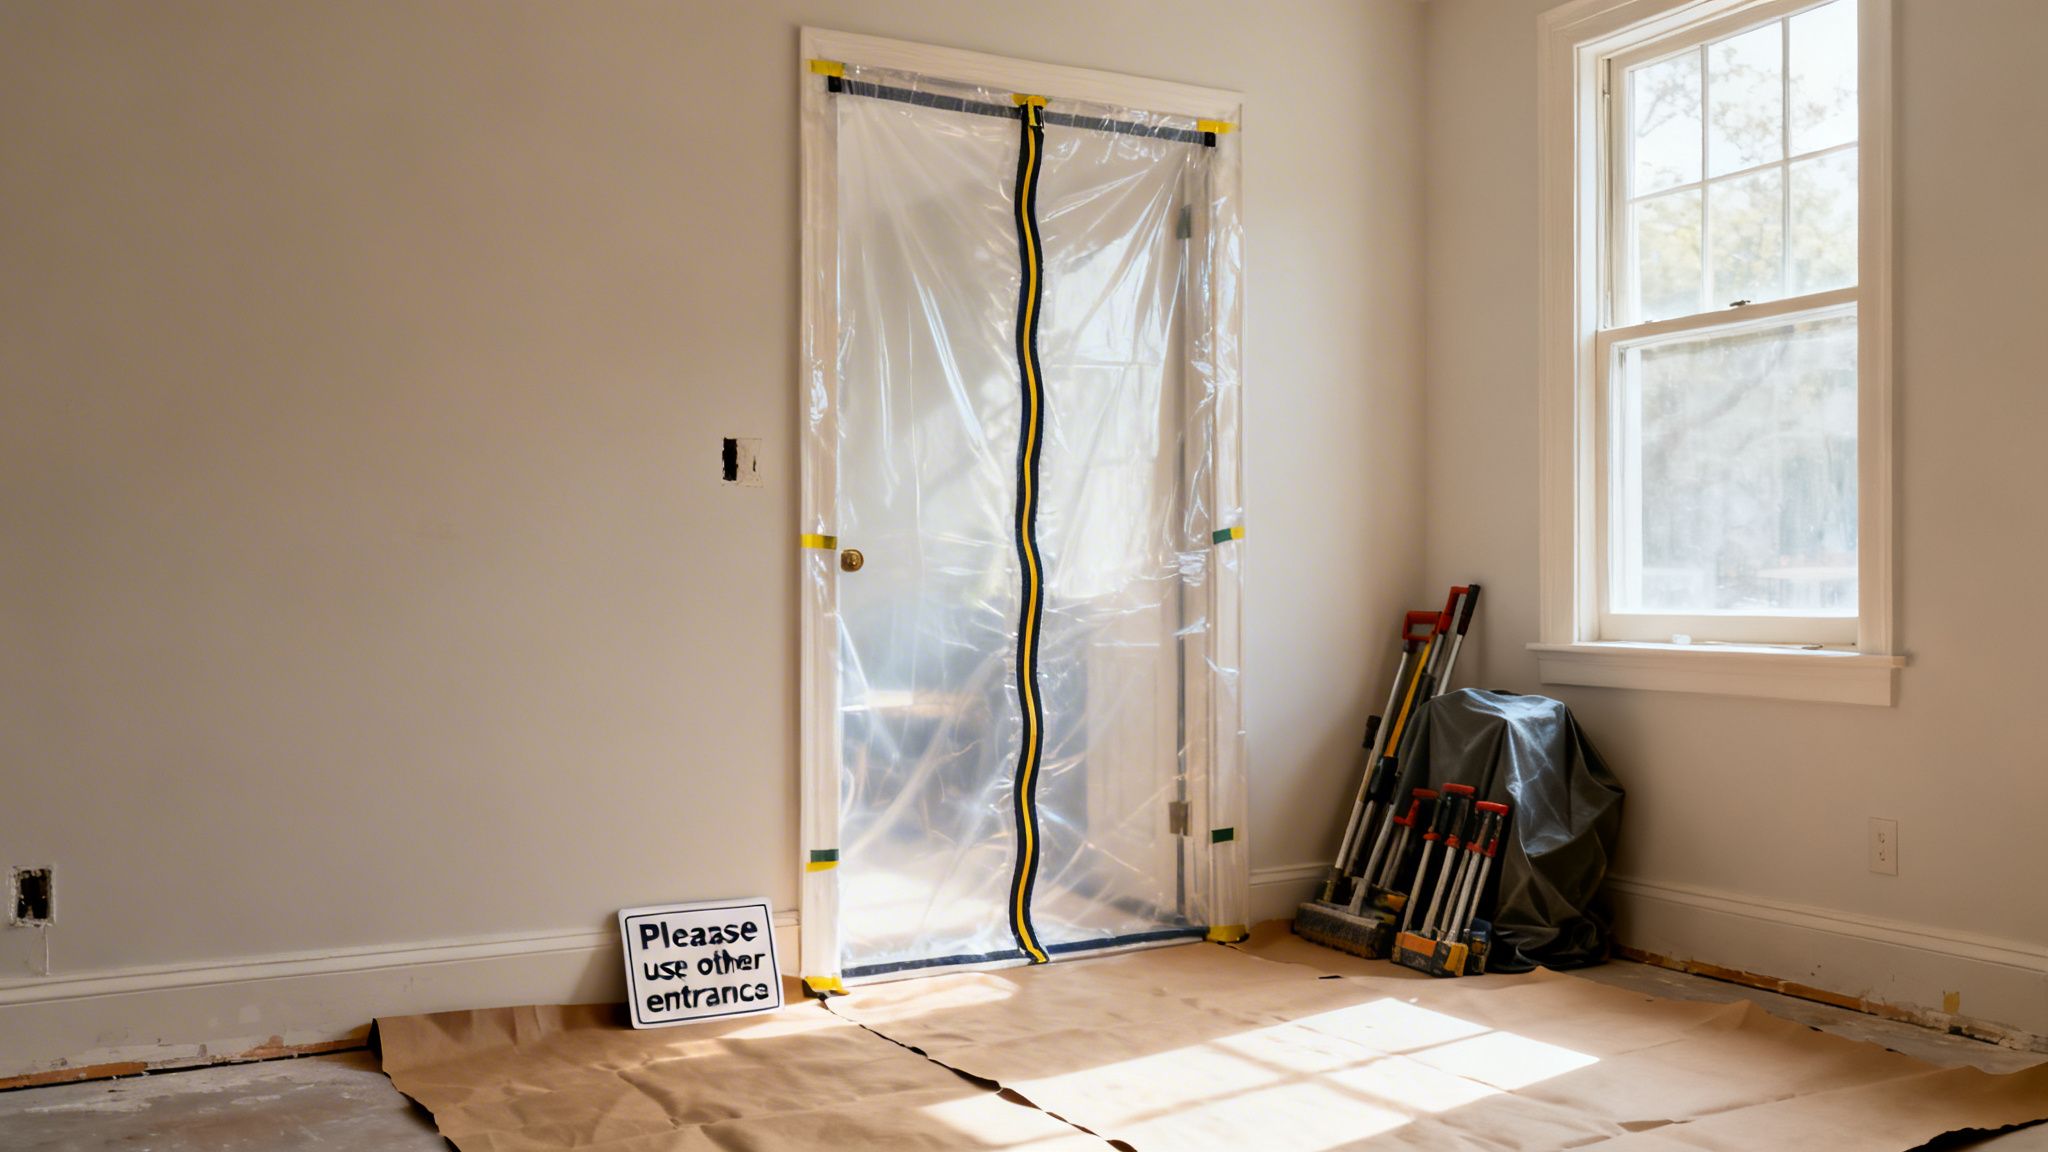
A room undergoing renovation with a plastic dust barrier over a doorway and construction tools.

Understanding a contractor’s approach to site management is crucial for both residential and commercial projects where daily life or business operations must continue.

  • Safety: A professional contractor will have clear protocols for securing the work area, managing tools, and addressing potential hazards.
  • Cleanliness: This goes beyond a final sweep. It involves daily cleanup, dust containment methods like plastic barriers, and organized material storage to keep your space orderly.
  • Site Management: This covers the logistics of the project, including work hours, noise levels, parking for crew vehicles, and protection for landscaping and adjacent structures.

How to Confirm a Contractor's Site Management Plan

A verbal promise isn't enough; you need specific commitments written into your agreement.

  • Describe a Typical Day: Ask the contractor to walk you through their standard daily routine from arrival to departure. What does their cleanup process look like?
  • Discuss Protection Measures: For interior painting, ask how they will contain dust and protect your furniture and flooring. For exterior projects, clarify how they will shield landscaping and windows.
  • Review Work Hours and Noise: Confirm their proposed work schedule. Discuss flexibility for commercial properties in Seattle trying to minimize business disruption.
  • Request a Safety Plan: Ask for their safety procedures, emergency contacts, and how they secure the site at the end of each day. Reputable firms like Wheeler Painting have established safety and cleanliness standards for every project.

10. How Are Disputes Handled, and Will I Receive a Written Contract?

Even the best-laid plans can encounter bumps. Discussing dispute resolution before a project begins is a sign of a mature, professional contractor. It establishes a clear, fair process for addressing disagreements over quality or costs, preventing small issues from escalating. This discussion should always conclude with a comprehensive, written contract that documents every detail.

In Washington State, a detailed contract is your best tool for ensuring clarity and accountability. A vague, lump-sum quote is a major red flag.

  • Written Estimate/Contract: This document is the blueprint for your project. It must itemize all costs, including labor and materials, and specify brands and quantities. It should also outline the project timeline, payment schedule, change order process, and warranty details.
  • Dispute Resolution Clause: A good contract specifies the steps to resolve conflicts. This often starts with direct negotiation, followed by mediation (using a neutral third party).
  • Protecting Your Investment: Having these processes defined protects both parties. It ensures there is a pre-agreed method for solving problems and keeping the project on track.

How to Ensure Your Contract is Complete

A thorough contract is your project’s most important document. Don’t rush this step.

  • Request an Itemized Estimate: Never accept a single lump-sum price. Ask for a breakdown of costs for materials, labor, permits, and other expenses.
  • Verify All Agreements: Read the contract carefully to ensure all verbal promises—such as details about color consultation or specific materials—are included in writing. If it’s not in the contract, it’s not guaranteed.
  • Clarify the Dispute Process: Ask the contractor to walk you through their standard dispute resolution clause. Is good-faith negotiation the first step?
  • Review with a Professional: For large-scale projects in the Seattle or Tacoma area, consider having an attorney review the contract. Reputable contractors like Wheeler Painting will provide their standard agreement for review and are transparent about every clause.

10 Key Contractor Questions Comparison

Item Implementation complexity Resource requirements Expected outcomes Ideal use cases Key advantages
Is the Contractor Licensed, Bonded, and Insured? Low — document verification and database checks Minimal — time, access to L&I and insurer contacts Legal protection, verified legitimacy, reduced liability Any hire; projects with regulatory or liability exposure Liability protection, recourse, professionalism
What is Your Experience With Projects Similar to Mine? Medium — portfolio review and follow-up questions Time for portfolio review, reference checks, possible site visits Better fit, fewer mistakes, realistic approach to scope Specialized or complex projects, niche trades, restorations Proven competence, local code knowledge, efficient execution
Can You Provide Multiple References From Recent Clients? Medium — conducting and documenting reference interviews Time, prepared questions, phone/email contact effort Direct insight into performance, communication, timeliness High-value contracts or unfamiliar contractors Real-world verification of claims; reveals reliability
How Will You Handle Change Orders and Unexpected Issues? Medium–High — contract clauses and approval workflows Clear change-order forms, documentation processes, approval timelines Controlled scope changes, documented decisions, fewer disputes Projects with unknowns (remodels, restorations) Transparency, cost control, dispute prevention
What is Your Payment Schedule and Invoice Process? Medium — define milestones and invoicing requirements Financial planning, lien waivers, invoice tracking Aligned cash flow, protection against overpayment Large or phased projects, projects requiring retention Financial clarity, retention leverage, reduced billing disputes
What is Your Timeline and What Happens if You Miss Deadlines? Medium — detailed scheduling and penalty clauses Project schedule, monitoring tools, contingency planning Predictable schedule, contractor accountability Time-sensitive commercial work or occupied homes Timely completion incentives; better coordination
How Do You Manage Subcontractors, Permits, and Code Compliance? High — coordination with multiple parties and jurisdictions Permit fees, subcontractor vetting, liaison time, inspections Regulatory compliance, single-point responsibility, fewer reworks Permitted projects, multi-trade build-outs, commercial jobs Reduced owner burden, inspection coordination, code compliance
What is Your Warranty and What Does It Cover? Low–Medium — specify duration and exclusions in writing Written warranty documents, clarity on labor vs. materials Post-completion protection and defined remedies Work with long-term performance concerns (coatings, finishes) Assurance of quality, recourse for defects, confidence in workmanship
How Will You Handle Safety, Cleanliness, and Site Management? Medium — establish daily protocols and containment methods PPE, dust containment, cleanup supplies, supervision Minimized disruption, lower injury and property-damage risk Occupied residences, ongoing business operations Safer site, protected property, professional site appearance
Disputes, Resolution, and Written Estimates/Contracts High — legal clauses, itemized estimates, resolution paths Legal review, detailed documentation, third-party experts Clear dispute process, enforceable expectations, fewer surprises High-value projects, multi-stakeholder contracts Reduces litigation risk, clarifies scope/costs, structured resolution

Build with Confidence: Partner with a Trusted Local Contractor

You have now worked through a detailed checklist of critical inquiries for any potential construction or painting partner. Moving beyond a simple price comparison to a thorough vetting process is the single most important step you can take to protect your investment. Asking the right questions to ask a contractor isn't about being confrontational; it's about establishing a foundation of clarity, accountability, and mutual respect.

A truly professional contractor, whether for "commercial painting services near me" in Seattle or a residential siding replacement in Tacoma, will appreciate your diligence. They understand that informed clients make the best partners. Their willingness to openly discuss licensing, insurance, and payment schedules is a direct reflection of their business ethics. Conversely, any hesitation or refusal to provide this information is the brightest red flag you can encounter.

Key Takeaways for Your Contractor Search

This comprehensive list of questions is your framework for a successful hiring decision. Let’s distill the most crucial takeaways to guide your next steps:

  • Documentation is Non-Negotiable: Always verify a contractor's license (via the L&I website), proof of insurance, and bond details. This is your primary shield against liability and financial risk.
  • Experience Must Be Relevant: A contractor’s experience is only valuable if it aligns with your specific project. Ask for a portfolio and references for projects that are similar in scope, size, and complexity to yours.
  • The Contract Governs Everything: Your written contract is the ultimate source of truth. It should explicitly detail the scope of work, a clear payment schedule, material specifications, the change order process, and warranty terms.
  • Communication is Key: Pay close attention to how a contractor communicates during the bidding process. Are they responsive, clear, and professional? This initial interaction is a strong indicator of how they will communicate once the project is underway.

Turning Questions into a Confident Decision

Armed with these questions, you can move forward with a clear plan. Start by shortlisting three to four potential contractors in your area, whether in Kent, Seattle, or surrounding Puget Sound communities. Conduct initial phone screenings, then invite your top candidates to provide a detailed, written bid. Use these bids not just to compare costs but to evaluate the thoroughness and professionalism of each company.

You are not just hiring a service; you are entering into a significant business relationship. The goal is to find a partner who will respect your property, communicate transparently, and deliver high-quality craftsmanship. For facility managers, this means finding a reliable team like Wheeler Painting for ongoing facility maintenance and tenant improvements. For homeowners, it's about entrusting your most valuable asset to a team that values quality and integrity. By using this guide, you empower yourself to make a choice that leads to a smooth, successful project and a final result you can be proud of for years to come.


The team at Wheeler Painting has built a three-decade reputation by providing clear, honest answers to every one of these questions. We believe an informed client is our best partner, and we welcome your detailed inquiries for any residential or commercial project in the Puget Sound area. Find out how our commitment to transparency and quality sets us apart by visiting Wheeler Painting & Restoration Services to schedule your detailed estimate.

How to Plan Your Kitchen Remodel: A Step-by-Step Guide

Planning a kitchen remodel you’ll love for years doesn’t start in a showroom. It begins right where you are, with a clear look at what works—and what doesn’t—in your current space. Getting this first step right is the single best way to prevent budget-busting changes and “I wish we had…” regrets down the road. This guide is designed to help homeowners and property managers navigate the process with confidence.

Defining Your Remodel Goals and Vision

Before you fall in love with a specific countertop or a fancy faucet, let’s get to the heart of the matter: what are you trying to achieve? A stunning kitchen that doesn’t fix your daily frustrations is just a pretty, expensive problem. A successful remodel creates a space that genuinely makes your life easier and more enjoyable.

Think of this initial phase as drawing the map for your entire project. Every decision from here on out, from the layout to the light fixtures, will be guided by the goals you set right now.

What Drives You Crazy About Your Kitchen?

For the next week, become an observer in your own home. Pay close attention to the little annoyances and daily bottlenecks in the kitchen.

Where are the friction points? Maybe you and your partner are always doing a clumsy dance to get around each other. Perhaps you find yourself prepping vegetables on a tiny sliver of counter space next to the sink because there’s nowhere else to go.

Here are a few common headaches to look out for:

  • A Tangled Workflow: Is the path between your fridge, stove, and sink a logistical nightmare? A bad “work triangle” can make cooking feel like an obstacle course.
  • The Storage Black Hole: Are your counters covered in clutter because you have nowhere to stash the toaster and blender? Are things constantly getting lost in the back of deep, dark cabinets?
  • Bad Lighting: A dark, poorly lit kitchen isn’t just depressing; it can make simple tasks like chopping an onion feel downright dangerous.
  • An Isolated Space: Does the cook always feel cut off from the rest of the family or guests? Many older kitchens were designed for one person, not as the social hub they’ve become today.

The All-Important “Needs vs. Wants” List

Once you’ve identified the problems, you can start dreaming up solutions. This is the fun part, but it requires discipline. Now is the time to separate your absolute, non-negotiable must-haves from your “it-would-be-nice-to-have” wishes.

A well-defined scope is the bedrock of a successful remodel. It transforms a vague wish list into an actionable plan, ensuring that your investment directly addresses the functional needs of your household.

Your “Must-Have” list is for the game-changers. If your biggest complaint is a total lack of prep space, an island or a new section of countertop isn’t a luxury—it’s a core requirement. If you’re tired of canned goods taking over a cabinet, then a dedicated pantry is a must-have.

Your “Nice-to-Have” list is for the extras. This is where you can put things like that built-in wine fridge, a pot-filler faucet over the stove, or those top-of-the-line smart appliances. Knowing the difference between these two categories from the get-go gives you a clear path forward and makes it much easier to make smart decisions if you need to trim the budget later.

This early planning ensures you end up with a kitchen that not only looks incredible but functions beautifully for your real life. To see how a clear vision comes to life, take a look at our portfolio of completed residential construction projects. When you set clear priorities from the start, you’re paving the way for a smooth, rewarding renovation.

Building a Realistic Remodel Budget

Alright, let’s talk about the money. This part of planning a kitchen remodel can feel the most daunting, but getting it right from the start is the secret to a project that doesn’t keep you up at night. A well-thought-out budget isn’t just a number; it’s the financial blueprint that empowers you to make smart, confident decisions without the sticker shock later.

For those of us here in Western Washington, it’s critical to understand the local market. Costs in the Puget Sound region often run 10-20% higher than the national average due to labor rates and material transport. Online calculators can sometimes set you up for disappointment if they don’t account for our local reality.

Where Does the Money Actually Go?

A kitchen remodel budget is a bit of a balancing act. Knowing where the big chunks of your investment will likely go helps you figure out where you can save and where you want to splurge. While every project has its own quirks, most budgets follow a pretty predictable pattern.

The single biggest line item is almost always cabinetry. It’s the visual and functional backbone of your new kitchen, so it’s no surprise it can take up a big slice of the pie. Right behind that are countertops and appliances, which are also major investments in both the look and day-to-day usability of your space.

Here’s a rough idea of how a typical mid-range budget breaks down:

  • Cabinets & Hardware: 30% – 40%
  • Labor & Installation: 20% – 35%
  • Appliances: 15% – 20%
  • Countertops: 10% – 15%
  • Plumbing & Electrical: 5% – 10%
  • Flooring, Lighting & Finishes: 5% – 10%

Seeing these percentages helps you prioritize. For example, if you have your heart set on beautiful custom cabinets, you might decide to go with more moderately priced appliances to stay on track. A good contractor will always give you a transparent proposal that breaks these costs down clearly.

Setting a Budget Range That Makes Sense

Nailing down your budget is ground zero for planning a remodel. Costs have crept up in recent years due to supply chain issues and labor shortages, making it more important than ever to be realistic. Nationally, you can see a huge range: a minor refresh might start around $28,500, while mid-range projects average $82,793, and high-end remodels can soar past $164,104.

Here in our local service area, we find a well-planned, mid-range remodel often lands between $30,000 and $50,000. For a deeper dive into current trends, you can explore more detailed cost breakdowns and find out what to expect from a kitchen remodel in 2026 on KitchenSolvers.com.

This chart is a great way to visualize how to think about your own project. It’s all about separating your absolute must-haves from the nice-to-haves and the dream features.

Successful budgeting means you lock in your core needs first. Once those are covered, you can start allocating the remaining funds to the wants and dreams that will make the space truly yours.

The following table provides a more concrete example of how a $65,000 mid-range kitchen remodel budget might look in the Puget Sound area.

Sample Kitchen Remodel Budget Breakdown for a Puget Sound Home

This table shows an estimated cost breakdown for a typical mid-range kitchen remodel in our service area, based on an average project cost of $65,000.

Expense Category Percentage of Budget Estimated Cost
Design & Planning Fees 4% $2,600
Cabinets & Hardware 35% $22,750
Countertops 12% $7,800
Appliances 14% $9,100
Labor & Installation 20% $13,000
Plumbing & Electrical 7% $4,550
Flooring 4% $2,600
Lighting & Fixtures 4% $2,600
Total Estimated Cost 100% $65,000

Keep in mind, these are just estimates. The final numbers will depend entirely on your specific material choices, layout changes, and the contractor you hire.

The One Thing You Can’t Skip: The Contingency Fund

If you only take one piece of budgeting advice, make it this: build in a contingency fund of 15-20%. This isn’t “extra” money you might spend. It’s a non-negotiable part of your total budget set aside for the inevitable surprises that pop up when you start opening up walls.

Your contingency fund is your project’s safety net. It’s what turns a potential crisis, like discovering outdated wiring or a hidden plumbing leak, into a manageable bump in the road.

Remodeling an older home is a bit like an archeological dig—you never know what you’ll find. Without that buffer, a single unforeseen issue could force you to compromise on a finish you love or, worse, bring the whole project to a grinding halt. Any experienced local contractor will insist on a contingency fund; it’s the hallmark of a realistic, well-managed project and the key to your peace of mind.

Designing a Kitchen That Works for You

A stunning kitchen that’s a nightmare to cook in is a beautifully wasted opportunity. Now that you’ve handled your big-picture goals and budget, it’s time to dive into the nitty-gritty of how the space will actually function. The goal is to create a layout that works with you, not against you, whether you’re navigating the morning coffee rush or a full-blown holiday dinner.

This part of the process is all about workflow, smart storage, and the real-world durability of the materials you choose. Getting these details right will pay you back every single day.

A modern white kitchen with dark countertops, stainless steel appliances, and pull-out drawers for organized storage, highlighting functional design.

Beyond the Basic Work Triangle

You’ve probably heard about the classic kitchen “work triangle”—the logical path between the sink, stove, and refrigerator. It’s still a great starting point for efficiency, but today’s kitchens have moved on. With open-concept layouts and large islands becoming the norm, we need to think more about “work zones.”

Instead of just one triangle, try mapping out dedicated zones for specific tasks. This prevents household traffic jams when more than one person is in the kitchen.

  • Prep Zone: This is your main chopping and mixing area. It needs plenty of counter space, ideally near the sink and a trash pull-out, with knives and cutting boards within arm’s reach.
  • Cooking Zone: Centered around the cooktop or range, this zone should have nearby storage for pots, pans, oils, and spices.
  • Cleaning Zone: This is your command center for dirty dishes, built around the sink and dishwasher. Keep some clear counter space here for stacking.
  • Storage Zone: Think pantry and refrigerator. Placing this zone near the entrance to the kitchen makes unloading groceries a breeze.

This approach creates an intuitive flow that makes the kitchen feel more organized and less chaotic, even when things get busy.

Making Every Inch Count with Smart Storage

Nothing kills the joy of a new kitchen faster than clutter. When you’re planning, think beyond standard box cabinets and look for solutions that squeeze utility out of every possible inch. It’s no surprise that 68% of homeowners now say smart storage is a top priority—it’s a total game-changer.

Here are a few high-impact storage upgrades our team often recommends:

  • Full-Extension Drawers: Stop getting on your hands and knees to find something in a deep lower cabinet. Deep drawers let you see everything at once.
  • Corner Pull-Outs: Those awkward “blind corners” are notorious for becoming black holes. A Lemans-style swing-out or a classic lazy Susan makes that space usable again.
  • Vertical Dividers: Perfect for storing cookie sheets, platters, and cutting boards upright so they’re easy to grab.

Smart layouts and storage don’t just improve your daily life; they directly impact your home’s worth. Even minor upgrades focusing on function can significantly boost resale value, making it a wise investment.

Choosing Materials for Your Real Life

The materials you select will define your kitchen’s style, but they also dictate how much time you’ll spend cleaning and maintaining it. You have to strike a balance between what looks amazing and what can stand up to your family’s daily life.

This is where you design for both function and resale value. The data shows that mid-range remodels can deliver a 50-60% ROI, and simply having an ergonomic, well-planned layout can add another 5-10% to your home’s resale value. You can find more detail on the ROI of kitchen remodels and trends on LancasterKitchenandBaths.com.

Even if you’re not doing a full gut-job, thoughtful upgrades to flooring, backsplashes, and lighting can provide a major refresh for under $10,000. High-end custom work often makes the most sense if you know you’re staying in your home for the long haul.

Ultimately, the final finish ties everything together. A professional paint job can make all your material choices sing in harmony. From cabinets to trim, expert interior painting services provide that polished, high-quality result that looks great for years.

Finding and Vetting the Right Local Contractor

Your choice of contractor will absolutely make or break your kitchen remodel. This isn’t just about hiring someone to swing a hammer; it’s about finding a true partner. You need someone you can trust to manage a significant investment and bring your vision to life. A great contractor acts as your project’s advocate, navigator, and quality control expert all in one.

For homeowners in our community, this means finding a local pro who gets it. They need a deep understanding of regional building codes, know the best local suppliers, and even understand the quirks of different neighborhoods. A trusted local partner makes a complex, stressful process feel straightforward and manageable.

A couple reviews kitchen design samples and documents on a counter with a laptop.

Where to Find Reputable Local Contractors

Kicking off your search can feel overwhelming. Our advice? Start local and lean on trusted sources. Nothing beats a word-of-mouth referral from a friend or neighbor who just went through a remodel—they’ll give you the real, unfiltered story.

Beyond personal recommendations, look for contractors who have a strong, professional online presence. Their website should be more than a digital business card; it should clearly showcase their work, feature a portfolio of finished projects, and make it easy to get in touch.

Here are a few places we always recommend clients look:

  • Local Reviews: Dig into Google, Yelp, and especially Houzz for detailed reviews from homeowners right here in your community.
  • Professional Groups: Membership in organizations like the National Association of the Remodeling Industry (NARI) or local builders’ associations is a good sign of commitment to their craft.
  • Supplier Intel: The folks at your local lumber yard or high-end kitchen showroom see contractors every day. Ask them who they trust and recommend.

Your Vetting Checklist: The Non-Negotiables

Once you have a shortlist, it’s time to do your homework. A professional, trustworthy contractor will be an open book and should be happy to provide all the documentation you need. Don’t be shy about asking for these essentials—it’s your home and your money on the line.

Make sure you get confirmation on these items:

  1. License and Insurance: In Washington, this is critical. Verify their contractor license is active and that they carry both general liability insurance and workers’ compensation.
  2. Portfolio and Real References: Ask to see photos of recent kitchen remodels similar to what you have in mind. Even better, ask for at least three recent references you can actually call to talk about their experience.
  3. A Truly Detailed Proposal: A legitimate bid is never just a single number on a piece of paper. It should be a detailed document breaking down the costs for labor, materials, permits, and other specific line items.

A contractor’s willingness to provide clear, detailed information upfront is a direct reflection of their professionalism and communication style. If they are vague or evasive now, expect that pattern to continue throughout the project.

Understanding Proposals and Getting the Timeline Right

When you get multiple bids, resist the temptation to just jump on the lowest number. You need to compare them line-by-line. Make sure each contractor is quoting for the exact same scope of work and quality of materials. A suspiciously low bid often means something critical has been left out, which will inevitably lead to expensive change orders down the road.

Timeline management is another area where the real pros shine. The average kitchen remodel takes 6-12 weeks, but we’ve seen delays quickly inflate costs by 10-20% due to material price hikes and extended labor. Proper planning has to account for permitting, which can easily add 2-4 weeks in Washington, and material lead times—those beautiful custom cabinets can take 8-12 weeks to arrive.

A staggering 75% of budget overruns can be traced back to poor timeline planning. If you want a deeper dive, you can explore detailed 2026 remodeling project data that breaks down how schedules impact the final cost.

With extensive experience in our service area, the Wheeler Painting team knows how to plan meticulously to keep projects on track. Partnering with a seasoned local residential contractor is your best defense against those dreaded delays and budget surprises.

If you want to see how we make complex projects simple for homeowners, learn more about our expert residential construction services.

Getting Through the Remodel and Finishing Strong

Living through a kitchen remodel is a test of patience. The heart of your home turns into a dusty, noisy construction zone, and your daily life gets completely upended. But with some smart prep work, you can get through it without losing your mind.

This phase isn’t just about survival. It’s about setting yourself up for a successful finish. Planning for the final stages—from your makeshift kitchen to the all-important final walkthrough—is just as crucial as picking out the perfect countertop.

A temporary outdoor kitchen setup with a microwave, coffee maker, and toaster on a folding table.

Setting Up Your Temporary Kitchen

For the next few weeks, you’ll need a new command center for meals. The goal is to create a simple, functional space that covers the bare necessities so you aren’t eating out every single night.

Find a spot that’s out of the way of the construction chaos. A corner of the dining room, the laundry room, or even a cleared space in the garage can work perfectly. You’re just trying to keep the coffee flowing and have a place to make a simple meal.

Your temporary kitchen survival kit should include:

  • Essential Appliances: A microwave, a slow cooker or multi-cooker, an electric kettle, and—we can’t stress this enough—your coffee maker. These are your best friends.
  • A Makeshift “Sink”: A large plastic bin or a nearby utility sink is a lifesaver for washing dishes. Keep a dish rack, soap, and a towel nearby.
  • Counter Space: A folding table or a sturdy bookshelf works great as a temporary pantry and prep area.
  • The Basics: Pack a single box with a plate, bowl, cup, and utensils for each person in your family. Don’t forget a can opener, a good knife, and a cutting board.

Dealing with Dust, Noise, and Everyday Chaos

Even the best contractors can’t eliminate all the mess. Dust has a magical ability to get everywhere. Help contain it by sealing off doorways to the work zone with plastic sheeting and stuffing old towels at the bottom. It’s also a good idea to change your HVAC filter a bit more often during the remodel.

If you have kids or pets, the constant noise and disruption can be a real challenge. Whenever possible, try to schedule the loudest work for when the kids are at school or you can take the dog out for an extra-long walk. Sticking to your normal routines as much as you can really helps everyone feel a little more grounded.

The best tool you have for managing the chaos is open communication with your contractor. A quick daily or weekly check-in asking, “What’s the plan for tomorrow?” can make a world of difference, letting you plan your family’s schedule around the biggest disruptions.

The Final Walkthrough and Your Punch List

Once the tools are packed up and the dust is settling, it’s time for one of the most critical steps: the final walkthrough. This is your chance to go over every inch of the project with your contractor and create a “punch list”—a straightforward list of any little things that need a final tweak.

This isn’t about being picky; it’s a standard part of the process to ensure quality. Look closely at things like cabinet doors that don’t close quite right, tiny paint splatters, uneven grout lines, or a sticky drawer. A true professional expects this and wants to make sure you are 100% happy with the finished product. Be thorough, be fair, and get it all down in writing.

Once every item on the punch list is checked off, the project is officially complete. This is usually when you’ll make the final payment. Your contractor should also hand over all the warranty paperwork for your new appliances, cabinets, and countertops. Put these in a safe place.

Before you say goodbye, ask for care instructions. Find out the best way to clean your specific countertops, care for the cabinet finishes, and maintain your new floors. A little bit of knowledge here will keep your beautiful new kitchen looking amazing for years, protecting your investment and letting you enjoy it to the fullest.

Common Questions About Kitchen Remodel Planning

Taking the plunge on a kitchen remodel is a huge deal, so it’s only natural to have a list of questions before you even get started. Local homeowners are always asking us about timelines, costs, and whether the investment will really pay off. Getting clear answers to these questions from the get-go is the best way to feel confident and ready for the process.

We’ve been serving the community for decades, so we’ve heard just about every question in the book. Here are some of the most common ones we get, along with some straightforward advice.

How Long Does a Typical Kitchen Remodel Take?

The timeline really comes down to the scope of your project.

If you’re just looking for a cosmetic facelift—think painting cabinets, swapping out countertops, and putting in a new backsplash—you could be looking at a relatively quick 4 to 6 weeks.

But for a more typical mid-range remodel where you’re changing the layout, bringing in all-new custom cabinets, and maybe moving some plumbing or electrical, you should plan for 8 to 12 weeks of actual construction. And that clock starts on demolition day. Don’t forget to budget an extra 2 to 4 weeks for the permitting process here in Washington. Custom items, especially cabinetry, can also have lead times of 8 weeks or more, so that needs to be factored in early.

What Time of Year Is Best to Start a Remodel?

Lots of people think they should start in the fall or winter to have a beautiful new kitchen ready for summer. Honestly, any experienced contractor can handle a remodel any time of year. The “best” time is simply when you are ready—when you have a solid plan, a firm budget, and your financing is all lined up.

The real secret to timing isn’t the season; it’s giving yourself enough of a planning runway. You should really start the detailed planning process at least 3 to 6 months before you want a hammer to swing. That gives everyone enough breathing room for design, selecting materials, and getting everything ordered without rushing.

Do I Need an Architect for My Kitchen Remodel?

This really depends on how big you’re dreaming. For the vast majority of kitchen projects that stay within the existing walls, a good design-build contractor like us has all the expertise you need. We can help you nail down the best layout, pick the right materials, and design a functional space, no architect required.

Now, if your vision involves major structural work—like taking out a load-bearing wall to create that big open-concept kitchen you’ve always wanted—then yes, hiring an architect is a crucial step. You absolutely need their engineering know-how to make sure your home remains safe, stable, and up to code.

How Much Value Does a Kitchen Remodel Really Add?

A well-designed kitchen remodel is almost always one of the best investments you can make in your home. It consistently delivers a strong return. Industry data shows that even a smart, mid-range remodel can help homeowners recoup 50-60% of what they spent when it’s time to sell.

And in a hot real estate market like ours, a modern and functional kitchen isn’t just a nice-to-have; it’s a major selling point. It can make the difference in how fast your home sells and for how much. The trick is to stick with classic, high-quality finishes and a timeless design that will appeal to buyers for years to come.


Ready to stop planning and start building? The team at Wheeler Painting has been helping local homeowners navigate every step of the kitchen remodel process for decades. From initial design to final walkthrough, we provide the clear communication and expert craftsmanship needed to make your project a stress-free success. Contact us today for a consultation and a transparent, detailed proposal for your dream kitchen.

Get Your Free Kitchen Remodel Estimate

How to Choose a General Contractor in Puget Sound

Your project’s success hinges on one key decision: choosing the right general contractor. This isn’t just about finding someone to swing a hammer; it’s about partnering with a professional who can bring your vision to life, on time and on budget. For homeowners, business owners, and facilities managers feeling overwhelmed by a construction or renovation project, this choice is paramount.

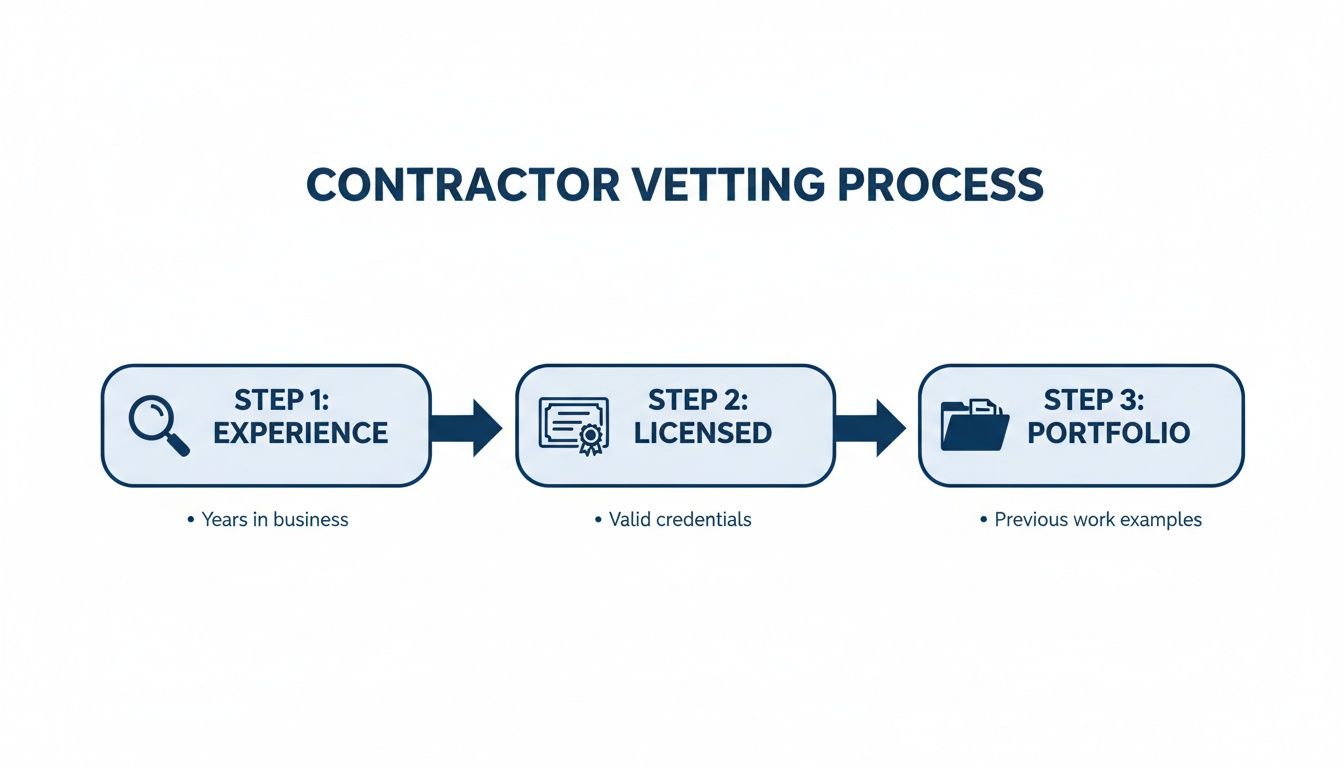
The selection process can be broken down into three crucial steps: verify their local experience, confirm they are fully licensed and insured, and review a portfolio of projects similar to yours. Getting these three things right is the foundation of a smooth, successful project.

Starting Your Project with the Right Partner

Choosing a general contractor in the Puget Sound region is arguably the single most important decision you’ll make for your project. Whether you’re a homeowner gearing up for a major kitchen remodel or a business owner managing a new retail build-out, this choice sets the tone for everything—from staying on budget to the final quality of the work.

A great contractor makes a complex process feel manageable and reassuring. The wrong one can lead to stress, unexpected costs, and frustrating delays. You’re not just hiring a builder; you’re looking for a professional with deep roots here in Western Washington who understands the unique challenges of our area and can guide you with clarity and expertise.

A contractor with years of experience right here in our community knows the ins and outs of local building codes, which materials hold up to our damp climate, and who the most reliable local subcontractors are. That kind of local, community-focused knowledge is invaluable.

Key Pillars of a Trustworthy Contractor

Before interviewing contractors or comparing bids, it helps to have a clear picture of what a qualified professional looks like. Focusing on these non-negotiables from the start will help you filter out the wrong fits and concentrate on the best candidates for your residential or commercial project.

  • Proven Local Experience: A contractor who has been serving the Puget Sound area for decades has seen it all. They know how to navigate permitting with the City of Seattle versus Tacoma and have built solid relationships with the best local suppliers.
  • Proper Credentials: This is a firm rule. A legitimate contractor will readily provide their Washington state license, liability insurance, and bonding. This is your safety net, protecting you from liability and financial issues if something goes wrong.
  • Relevant Project Portfolio: Their past work is the best preview of what they’ll do for you. Look for a portfolio with projects that mirror yours in scope and style, whether it’s a detailed home restoration or a large-scale commercial construction project.

Following this simple vetting framework ensures you’re only spending time on truly qualified, trusted local providers.

Infographic illustrating the 3-step contractor vetting process: experience, licensing, and portfolio examples.

To make this initial screening process even easier, here is a quick checklist. Think of it as your first step to quickly qualify or disqualify potential contractors.

Quick Vetting Checklist for Your General Contractor Search

Vetting Category What to Look For Why It Matters
Experience & Reputation 10+ years in Puget Sound, positive online reviews, local references. Deep local experience means they understand regional codes, climate challenges, and the best local subcontractors.
Licensing & Insurance A valid WA State contractor license, general liability insurance, and proof of bonding. This is non-negotiable. It protects you from financial risk, worksite accidents, and unfinished work.
Portfolio & Specialization A gallery of completed projects similar to yours in size, style, and complexity. You need a contractor who has successfully done this kind of work before, not one learning on your dime.

Using this table as a guide helps you stay organized and objective as you begin your search. By systematically checking these boxes for every potential candidate, you build a strong foundation for a successful partnership and a project you can be proud of.

Verifying Licenses, Insurance, and Bonding

A man in a hard hat and a woman look at blueprints in front of newly built houses.

Before you begin discussing project details, there’s a crucial first step you cannot skip: verifying a contractor’s credentials. This isn’t just paperwork; it’s the single most important thing you can do to protect your property and investment.

You’ve likely heard the phrase “licensed, insured, and bonded.” It’s more than a slogan—it’s a three-part shield for your home, business, and peace of mind.

Here in Washington state, these are not optional; they are the absolute minimum standard for a professional. A contractor who has gone through the process of getting properly licensed, insured, and bonded demonstrates that they are a legitimate business committed to doing things correctly. It signals professionalism and protects you.

What Does “Licensed, Insured, and Bonded” Actually Mean?

It’s easy for these terms to blur together, but each one protects you in a specific way. Understanding the difference empowers you to ask the right questions and spot any red flags.

Let’s break it down in simple terms:

  • Licensed: This is the state’s official approval. A contractor license from Washington’s Department of Labor & Industries (L&I) proves they’ve registered their business and are legally allowed to perform construction work. It’s the baseline for legitimacy.
  • Insured: This refers to general liability insurance. If a worker accidentally damages your property, a neighbor’s fence, or causes an injury to a visitor on the job site, this insurance provides coverage. Without it, that liability could fall on you.
  • Bonded: Think of a contractor’s bond as a financial safety net. It’s a type of surety bond that protects you if the contractor fails to complete the job, doesn’t pay their suppliers (who could then place a lien on your property), or otherwise defaults on their financial duties.

These protections are not just theoretical. In fact, research covering the U.S. construction industry landscape shows a clear trend: bonded and insured contractors successfully complete 35% more commercial expansions without claims. It’s a real-world risk reducer.

How to Verify a Contractor in Washington State

Don’t just take their word for it. Any reputable contractor will expect you to do your homework and will gladly provide their license number. Thankfully, Washington makes this incredibly easy.

The L&I has an excellent online Verify a Contractor tool. Just enter the company’s name or license number, and in seconds, you can see if their license is active, their insurance is up to date, and their bond is in good standing.

Consider this scenario: A painter working on your office building falls from a ladder and is injured. If the contractor isn’t properly insured, you, as the property owner, could be sued for their medical bills and lost wages. It’s a messy, expensive, and completely avoidable situation.

What to Look for on an Insurance Certificate

When a contractor provides their certificate of insurance, don’t just glance at it. You need to look for two specific things:

  1. Coverage Amount: For most residential or light commercial work, you should see at least $1 million in general liability coverage. For larger or more complex projects, that number should be higher.
  2. “Certificate Holder” Section: Ask your contractor to have you listed as a “certificate holder” on their policy for the duration of your project. It’s a simple request, and it means you’ll be automatically notified if their policy is canceled for any reason.

Taking a few minutes to verify everything might feel like a hassle, but it’s an investment that pays huge dividends in security and peace of mind. It’s how you separate the pros from the pretenders right from the start.

Matching a Contractor’s Experience to Your Project

A desk with a document titled 'Licensed & Insured', a house model, and a hard hat, suggesting construction or real estate services.

It’s a common mistake to assume that any good general contractor can handle any project. The reality is that construction is a world of specialists. The skills needed for a custom home build are very different from what’s required for a fast-paced commercial office renovation.

Ensuring a contractor’s specific expertise aligns with your project’s demands is one of the most critical steps. It’s about more than looking at a photo gallery; you need to confirm that their hands-on experience matches what you need.

Looking Beyond a Polished Portfolio

When you’re reviewing a contractor’s past work, look for relevance in three specific areas: scope, style, and complexity. A beautiful picture of a finished kitchen doesn’t tell you if they had to move load-bearing walls, re-route plumbing, or navigate a tough permitting process.

Think like an investigator. If you’re a facility manager planning a retail build-out, seeing a portfolio full of residential bathroom remodels should be a red flag. Commercial projects run on different timelines, use different materials, and require a different communication style with stakeholders.

A proven track record in your specific project type is more than a confidence booster. It’s a direct indicator that they have refined processes, strong subcontractor relationships, and a deep understanding of potential roadblocks before they happen.

This is especially true for specialized work. For instance, if your property has suffered fire or water damage, a standard remodeler may not be the right fit. You need a restoration specialist who understands insurance claims, mold remediation, and structural drying.

Getting Real Answers From Relevant References

Asking for references is a standard step, but asking for the right kind of references is what separates a good choice from a great one. Don’t just accept a pre-approved list. Be specific.

If you’re a business owner planning an office space renovation, ask to speak with other business owners or property managers they’ve worked for. Then, ask targeted questions:

  • Communication: How did they handle updates or unexpected issues? Was there a single point of contact?
  • Budgeting: How close was the final invoice to the initial bid? Were change orders explained clearly and priced fairly?
  • Scheduling: Did they finish on time? How did they manage delays from subcontractors or supplies?

Hearing from someone who has been in your exact shoes provides invaluable insight that a curated portfolio cannot offer. You can learn more about how a professional team manages these details by exploring our approach to residential construction services.

Why Decades of Local Experience Matter

Here in the Puget Sound, experience isn’t just a number—it’s a powerful tool for managing risk. A residential or commercial contractor who has been in business for decades has weathered economic downturns, material shortages, and countless updates to local building codes. That kind of adaptability is earned one project at a time.

This experience has a tangible impact. In regions like ours, seasoned contractors deliver 20-30% fewer delays on average. A recent 2025 construction market trends report highlighted a concerning trend: the Project Surety Index (PSI) jumped 19% year-over-year, driven by a shocking 88.2% surge in project abandonments, often tied to newer, less experienced firms. Choosing a contractor with a long history in Western Washington drastically lowers that risk.

A firm with thousands of completed projects, from small home improvements to large commercial build-outs, brings institutional knowledge that can’t be faked. They don’t just build things; they anticipate problems, find creative solutions, and ensure your project is built to last in our unique Pacific Northwest climate.

Asking the Right Questions: The Contractor Interview

You’ve done your research, checked credentials, and narrowed your list. Now comes the most important part: the interview. This is your chance to get a real feel for the person and company you’ll be trusting with your home or business.

Think of this as a conversation to see if you genuinely connect. You’re not just hiring a builder; you’re starting a partnership that could last for months. Their portfolio shows what they can do, but this conversation will tell you how they do it. Pay close attention to how they listen and explain things. Your gut feeling is often a good indicator of the future working relationship.

Questions About Their Day-to-Day Operations

These questions help you understand their process, their team, and how they manage the logistics of a construction site.

  • Who is my main point of contact? This is essential. Will you speak directly with the owner, or will they assign a dedicated project manager? A single, consistent contact is key to clear communication.
  • Tell me about your subcontractors. A contractor is only as good as their team. You want to hear that they work with a trusted, regular crew of plumbers, electricians, and other trades. Long-term relationships usually mean better craftsmanship and more reliable scheduling.
  • How often will a supervisor be on-site? An absent contractor can lead to problems. Someone in a leadership role should be checking in frequently to ensure quality work and steady progress.

Gauging Their Communication Style

Every project can encounter a snag—a surprise pipe, a delayed material shipment. What separates pros from amateurs is how they communicate and handle those challenges.

You’re looking for a partner, not just a service provider. A great contractor is transparent and solution-oriented. They’ll bring you a problem, but they’ll also bring you well-thought-out solutions.

  • How will we stay updated on progress? Be specific. Do they send weekly emails, use a project management app, or schedule regular calls? Having an agreed-upon system is what matters.
  • What is your process for change orders? Changes can happen. A professional will have a formal, written process. Any deviation from the original plan should be documented in a change order detailing the new work, cost, and schedule impact. Crucially, you should approve this before the new work begins.
  • Tell me about a time a project had a problem. What happened and how did you fix it? This question reveals a lot. If a contractor claims they’ve never had a problem, they are either inexperienced or not being honest. A seasoned pro will have a story and will focus on how they communicated with the client and solved the issue. You can see how an experienced team tackles a wide range of challenges by looking at our project portfolio.

Red Flags to Watch For

Sometimes, the most important information comes from what isn’t said. During your conversation, keep an eye out for these warning signs.

Be wary of any contractor who:

  • Gives vague answers. A professional knows their process and should be able to explain it clearly and simply.
  • Uses high-pressure sales tactics. A good contractor’s reputation speaks for itself. If they push you to sign immediately, it’s a red flag.
  • Speaks poorly of former clients or their own crew. This points to a lack of professionalism and a tendency to shift blame.
  • Seems disorganized. If they show up late or unprepared, imagine how they’ll manage a complex project with many moving parts.

How to Compare Bids and Understand Contracts

You’ve done your research and now have a few solid bids in hand. This is the moment where you move from interviews to hard numbers. It’s tempting to just look at the total and pick the lowest price, but that can be a costly mistake.

Learning how to compare bids is a skill. It’s about looking past the final number to understand what you’re actually getting for your money. A professional, detailed bid is a roadmap for your project. A vague one is a major red flag.

Beyond the Bottom Line: An Apples-to-Apples Comparison

The golden rule is to make sure you’re comparing identical scopes of work. If one contractor’s bid is significantly lower than the others, your first question shouldn’t be, “Why are they so cheap?” but rather, “What are they leaving out?”

An unusually low bid often signals trouble. It could mean they plan to use cheap materials, uninsured labor, or will hit you with expensive “change orders” later to make up for their lowball offer.

To do this right, break down each proposal line by line. Any professional contractor will provide this level of detail.

  • Material Specs: Are they specific? Look for brand names, model numbers, and quality grades. A bid that says “siding replacement” is not the same as one that specifies “James Hardie Cedarmill Lap Siding.”
  • Labor Costs: The bid should provide a clear picture of the labor involved. Vague descriptions can hide corner-cutting.
  • Allowances: An “allowance” is a placeholder budget for items you haven’t selected yet, like countertops or light fixtures. Be wary of unrealistically low allowances meant to make the initial bid look more attractive.
  • The “Extras”: Does the bid account for permits, daily site cleanup, and final debris removal? These details can add thousands to your final bill if not included upfront.

Why a Contractor’s Team Matters More Than You Think

When looking at labor costs, consider the crew. The skilled labor shortage is a real challenge in the construction industry. While the sector is expected to see modest growth into 2025, some areas like commercial and multifamily projects might plateau.

For homeowners and businesses in Puget Sound, a contractor’s ability to retain a skilled team is more critical than ever. Research shows that contractors with low employee turnover deliver projects 15-25% under budget more often. That’s a huge saving on a residential remodeling project or commercial renovation. You can learn more about how construction employment trends affect projects and see why a stable team is a sign of a well-run company.

Decoding the Construction Contract

Once you’ve selected the winning bid, it’s time to review the contract. This legal document protects everyone by laying out all expectations in black and white. A good contract should be written in plain language and feel fair and transparent.

Never sign a contract you don’t fully understand.

Your construction contract is the single source of truth for your project. It should eliminate ambiguity and provide a clear, agreed-upon plan for handling every aspect of the project, from payments to problem-solving.

Before you sign, make sure your contract includes these essential components:

  1. A Detailed Scope of Work: This is the heart of the document. It should list every task and material, referencing the bid and any plans. The more detail, the better.
  2. A Clear Payment Schedule: The contract must spell out how much is due and when. Payments should be tied to project milestones (e.g., foundation poured, framing complete), not just arbitrary dates.
  3. Project Milestones and Timeline: Look for a projected start date, key milestones, and an estimated completion date. It should also explain how potential delays will be handled.
  4. The Change Order Process: A formal process for any changes is non-negotiable. The contract must explain how changes will be priced and approved in writing by both you and the contractor.
  5. Warranty Information: The contract must clearly state what is covered by the contractor’s workmanship warranty, for how long, and how to file a claim if needed.

Signing a solid contract provides the peace of mind to move forward, knowing you have a fair agreement that sets your project up for success.

Answering Your Lingering Questions About Hiring a Contractor

Close-up of a calculator, documents, and pen on a desk, with text 'Compare Bids'.

Even after doing your homework, a few questions often remain. Choosing a general contractor is a big commitment, and it’s normal to want every detail clarified before you sign a contract.

Let’s walk through some of the most common questions we hear from clients in the Puget Sound. Our goal is to provide clear, straightforward answers so you can move forward with total confidence.

How Many Bids Should I Get for My Project?

You’ll hear different opinions, but the ideal number is usually three. Getting three detailed bids from contractors you’ve already vetted gives you a solid benchmark for what your project should cost. It’s enough to establish a clear market rate without becoming overwhelming.

The quality of the contractors you invite to bid matters far more than the quantity of bids. Three proposals from reputable, well-matched companies are infinitely more valuable than ten from a random list. To get a true apples-to-apples comparison, make sure every contractor is bidding on the exact same scope of work, materials, and plans.

What Is the Difference Between an Estimate and a Bid?

These terms are often used interchangeably, but in construction, they are very different. Understanding this distinction is critical for protecting your budget.

An estimate is a ballpark figure. It’s a rough approximation of cost, usually given early in the process before all project details are finalized. Think of it as an educated guess—it can, and often does, change.

A fixed-price bid, on the other hand, is a formal, binding offer. It is a document where the contractor promises to complete a very specific scope of work for a set total price. This provides you with budget certainty. Unless you approve a formal change order, that price is locked in.

For any project with a clear scope—from a siding replacement to a commercial tenant improvement—you should always insist on a detailed, fixed-price bid. It protects you and ensures everyone is on the same page about the total cost from day one.

What Are Some Red Flags to Watch Out For?

Knowing what to avoid is just as important as knowing what to look for. Your gut feeling is a great guide, but there are also concrete warning signs that should give you pause.

Be on high alert for any contractor who:

  • Asks for a large down payment. A reasonable deposit is standard, but demanding 30%, 40%, or 50% upfront is a massive red flag. It often signals cash flow problems.
  • Provides a vague proposal. A professional bid is detailed and transparent. A single page with a bottom-line number is a sign of unprofessionalism or a plan to add surprise costs later.
  • Pressures you to sign immediately. A good contractor respects your process and gives you the time you need to review everything and make a smart decision.
  • Cannot produce proof of licensing and insurance. This is non-negotiable. If they hesitate or make excuses when you ask, walk away immediately.

Perhaps the biggest red flag is a bid that seems too good to be true. An unusually low price often means they’ve missed something, plan to use cheap materials, or intend to recover their profit through a barrage of expensive change orders.

How Important Is Local Experience in Western Washington?

It is absolutely essential. A contractor who has spent decades working right here in Western Washington brings specialized knowledge you just can’t get from an out-of-towner. Our climate is beautiful, but it’s also tough on buildings.

A seasoned local pro knows this area inside and out.

  • Climate-Specific Materials: They know which siding holds up to our rain, which paint formulas resist moss, and the right way to waterproof a foundation for our soggy winters.
  • Permitting Nuances: They have experience with the permitting processes in King County, Pierce County, and other local municipalities, which can save you months of headaches.
  • Subcontractor Relationships: They have a trusted network of local electricians, plumbers, and roofers they’ve worked with for years, leading to better quality work and a more reliable schedule.

Hiring a residential or commercial contractor with deep roots in the Puget Sound means you’re getting a partner who is invested in our community and knows how to build things that last here.


Ready to partner with a general contractor who brings decades of local experience and a commitment to quality? Wheeler Painting & Restoration Services has been serving homeowners and businesses across Western Washington since 1991. We’re ready to make your project straightforward and successful.

Get Your Free Estimate Today