Tag Archive for: mildew resistant paint

Mold and Mildew Resistant Paint Guide for WA Homes

If you live or manage property in Tacoma, Seattle, Bellevue, or anywhere around Puget Sound, you already know how this usually starts. A bathroom ceiling gets a few dark specks. A basement corner smells stale after a wet stretch. Paint near a window or exterior wall starts looking tired even though the room was painted not that long ago.

That's when people start searching for mold and mildew resistant paint and hoping a better coating will solve it.

Sometimes it helps a lot. Sometimes it doesn't fix the underlying issue at all.

In Western Washington, damp air, condensation, slow-drying surfaces, and hidden leaks all work against paint. A resistant coating can absolutely be part of a smart plan, especially in bathrooms, kitchens, laundry rooms, breakrooms, and commercial restrooms. But paint is only one layer of defense. If moisture keeps feeding the problem, even a premium product will struggle.

Your Guide to Mold Resistant Paint in Western Washington

A common call in this area goes something like this: “We cleaned the mildew, repainted, and now it's coming back.” In many homes and commercial spaces, the visible staining is only the symptom. The underlying issue is trapped humidity, poor airflow, condensation, or a leak that never got addressed.

A cozy living room featuring a light gray sectional sofa, a fireplace, and large windows with natural scenery.

That's why a straight answer matters. Mold-resistant paint is useful, but it isn't a magic cure. Independent guidance from Dunn-Edwards makes the point clearly: the right sequence is clean, dry, repair, then coat, because mildewcide-treated paints are meant to inhibit new growth on the paint film, not remove an existing moisture problem or contamination inside the surface (Dunn-Edwards mildew guidance).

What Tacoma area property owners usually need

In this climate, the right approach often includes more than paint:

  • Moisture diagnosis first. Bathrooms may need better exhaust use, basements may need waterproofing review, and exterior-facing walls may need leak investigation.
  • Proper cleanup. Painting over staining without full cleaning usually leads to disappointment.
  • A coating matched to the room. A guest bedroom and a commercial restroom don't need the same finish or product chemistry.
  • A realistic maintenance plan. High-moisture rooms need periodic inspection even after a quality repaint.

Local rule of thumb: If the room still feels damp, smells musty, or shows repeat staining, the paint choice is not the first problem to solve.

That honesty matters more than a sales pitch. In Seattle, Issaquah, Kirkland, and Tacoma, a lasting result usually comes from treating mold and mildew resistant paint as one part of a broader moisture-control strategy.

How Mold and Mildew Resistant Paint Actually Works

Mold and mildew resistant paint works like a protective shield on the surface, not a medicine that cures the wall behind it. That distinction clears up most of the confusion.

An infographic explaining how mold and mildew resistant paint protects home surfaces using specialized chemical components.

Manufacturers formulate these coatings with a moisture-tolerant acrylic binder plus additives such as mildewcides or fungicides. Those additives help suppress growth on the paint film itself, not on the drywall, wood, or masonry underneath. Rust-Oleum and Dunn-Edwards both stress the same practical point: if the moisture source isn't fixed and the surface isn't properly cleaned and dried, mildew-related paint failure can still happen (Rust-Oleum technical explanation).

What the paint is doing

Think of the coating as creating a less hospitable outer skin.

  • The acrylic binder helps the film hold together in damp-prone conditions.
  • The antimicrobial additives help discourage fungal growth on the finished surface.
  • The final film can be easier to wipe down and maintain than a standard wall paint in problem areas.

That's why these products are commonly used in bathrooms, kitchens, laundry rooms, basements, and utility spaces.

What the paint is not doing

It's important that expectations stay grounded.

  • It's not killing mold buried inside drywall.
  • It's not stopping a roof leak or plumbing leak.
  • It's not drying out a chronically wet substrate.
  • It's not a substitute for proper cleaning and prep.

If spores are feeding on dust, soap residue, or ongoing condensation, the coating alone won't win that fight for long.

In practice, mold and mildew resistant paint performs best after the messy part of the job is done right. The room has to be dry. The old contamination has to be removed. Damaged material has to be evaluated. Then the coating can do what it's designed to do, which is protect the finished surface from new growth more effectively than ordinary paint.

That's why experienced painters in Western Washington spend so much time on diagnosis and prep. The product matters, but the condition of the room matters more.

The Real Benefits and Critical Limitations

There's a reason these coatings remain popular in damp climates. Used in the right place and over the right substrate, they can make a room easier to maintain and help the finish stay cleaner longer. Used as a shortcut, they often disappoint.

Where mold and mildew resistant paint earns its keep

For homeowners, facility managers, and small commercial properties, the practical benefits are straightforward:

  • Cleaner-looking surfaces. These coatings can help reduce visible mildew growth on the paint film in bathrooms, kitchens, laundry rooms, and similar spaces.
  • Easier upkeep. In many cases, the finish is more washable than a basic flat wall paint, which matters in active rooms.
  • Better fit for moisture-prone areas. They're designed for spaces where steam, splashing, and uneven airflow are part of normal use.
  • A useful preventive layer after repairs. Once leaks, condensation, or ventilation issues are addressed, the coating can help protect the final surface.

Where people get misled

The biggest problem is warranty language and retail marketing. A paint can sound like a complete fix when the guarantee only applies to the paint film.

One retail listing for a Zinsser interior product promotes a 5-year mold and mildew-proof paint film guarantee, but that kind of protection is conditional. It depends on formulation, substrate preparation, and continued moisture control, and it does not cover the underlying moisture problem itself (Zinsser product listing with paint film guarantee).

What that means in plain language: If the bathroom fan is weak, the wall was still damp, or mildew was never fully cleaned, the warranty wording won't rescue the result.

A few limitations are worth keeping in mind:

  • It won't replace ventilation. A steamy room still needs air exchange.
  • It won't repair damaged materials. Soft drywall, swollen trim, and stained sheathing need evaluation.
  • It won't hide chronic moisture for long. Repeated condensation usually shows up again through staining, peeling, or odor.
  • It may cost more than standard paint. That premium only makes sense when the conditions support it.

For many Tacoma and Bellevue property owners, the right question isn't “Does this paint work?” It's “Is this room ready for this paint to work?”

How to Choose the Right Paint for Your Space

Choosing mold and mildew resistant paint isn't just about grabbing the can with the boldest label. The room, the surface condition, the finish, and how the space is used all matter.

In general, higher-moisture rooms benefit from coatings that clean easily and don't hold onto moisture the way a flatter, more porous-looking finish can. For many interiors, that points people toward satin or semi-gloss rather than flat in bathrooms, kitchens, and utility areas. In commercial settings, washability often becomes just as important as resistance.

Match the paint to the room

A powder room that gets light use has different demands than a family bathroom with daily showers. The same goes for an office breakroom versus a commercial restroom in a high-traffic building.

If you're sorting through bathroom-specific options, this guide to the best paint for bathrooms is a useful starting point for comparing finish and performance.

Room / Area Recommended Paint Type Ideal Finish Reasoning
Bathroom Mold and mildew resistant interior paint Satin or semi-gloss Handles repeated humidity better and is easier to wipe down
Kitchen Moisture-resistant interior paint with mildew-resistant properties Satin Stands up better to cooking moisture and routine cleaning
Basement Mold and mildew resistant coating after moisture issues are addressed Satin Helps protect the finish in cooler, damper spaces
Commercial Restroom Durable moisture-resistant coating designed for repeated cleaning Semi-gloss Better cleanability for frequent maintenance
Office Breakroom Washable interior paint with moisture resistance Satin Good balance of appearance and cleanability
Laundry Room Mold and mildew resistant interior paint Satin Useful where warm, damp air and condensation are common

What to look at before you buy

A few decision points make selection easier:

  • Room use. Daily shower steam, limited airflow, and frequent cleaning all push you toward a more durable finish.
  • Existing surface condition. If there's staining, old paint failure, or prior mildew, prep and primer matter as much as the finish coat.
  • Substrate type. Drywall, wood trim, masonry, and previously painted surfaces all behave differently.
  • Maintenance expectations. In rentals, shared facilities, and commercial spaces, scrub resistance often matters more than a perfectly low-sheen look.

A good product choice can improve performance. A bad room condition can still defeat it.

For residential remodeling and commercial renovations in Seattle, West Seattle, and Newcastle, paint selection should follow the moisture assessment, not replace it.

Surface Preparation and Application Best Practices

The product can only perform as well as the surface underneath it. That's true with every coating, but it matters even more with mold and mildew resistant paint.

Start with the wall, ceiling, or trim itself. If there's active moisture, staining, peeling, soft drywall, or previous mildew growth, the prep process determines whether the finish holds up or fails early.

A six-step infographic detailing best practices for surface preparation and application of mold resistant paint.

The prep sequence that actually works

A professional process usually follows this order:

  1. Find the moisture source. That may be condensation, a plumbing issue, failed caulking, exterior intrusion, or poor ventilation.
  2. Clean the contamination. The surface has to be free of mildew, dirt, residue, and loose paint before coating.
  3. Let the substrate dry fully. Painting too soon traps the problem.
  4. Repair the damaged areas. Patch, sand, replace soft materials where needed, and stabilize the surface.
  5. Prime when appropriate. On repaired areas, porous surfaces, or stain-prone spots, primer often makes the finish system more reliable.

If you want a homeowner-friendly walkthrough on cleaning contaminated walls before repainting, this mould remediation guide is a useful reference for the cleanup side of the job.

Primer is another place people try to save time and regret it later. On fresh repairs or bare drywall, the coating system usually performs better when the surface is sealed correctly first. This overview of whether you have to prime sheetrock before painting covers why that step matters.

A short visual can help if you want to see the process in action:

Application details that affect performance

Application instructions aren't filler text on a label. They are part of the product system.

Rust-Oleum's technical data for one mold- and mildew-resistant coating calls for two coats, applied only between 50-90°F and with relative humidity below 80%. The same sheet specifies an airless spray tip of 0.017 inch and a dry film thickness of 0.875-1.25 mils. If the film goes on too thin or the conditions are off, the protective layer can be compromised (Rust-Oleum interior technical data sheet).

That's why a rushed one-coat repaint in a damp bathroom often fails earlier than expected.

For owners who want one contractor to handle the broader repair scope, Wheeler Painting & Restoration Services works on the paint side as well as related needs such as drywall repair, waterproofing, and facility maintenance. That matters when the issue is bigger than a simple repaint.

Maintaining Your Paint in Our Humid Climate

Once the room is repaired and painted, maintenance decides how long that coating stays effective. In Western Washington, the biggest mistake is assuming the new paint means the problem is gone for good.

The durability range can vary quite a bit depending on room conditions. A published maintenance guide notes that anti-mold paint typically lasts 5 to 6 years under normal conditions, often 3 to 5 years in high-humidity rooms such as bathrooms and kitchens, and up to 10 years in low-humidity, well-ventilated spaces. The same guidance ties performance to moisture control, and it cites EPA guidance that wet materials should be dried within 24 to 48 hours and indoor relative humidity should ideally stay between 30% and 50% (anti-mold paint longevity guide with EPA-linked moisture targets).

Habits that help the coating last

Most of the useful maintenance steps are simple:

  • Run the exhaust fan during showers and after heavy steam.
  • Wipe down condensation on windows, sills, and cold wall areas.
  • Check caulking and grout around tubs, showers, and sinks.
  • Watch for small warning signs like recurring spotting, bubbling paint, or a musty smell.
  • Keep air moving in basements, laundry rooms, and storage areas.

Humidity control matters more than people think

A coating holds up better when the room dries out quickly after normal use. If indoor humidity stays high for long periods, paint becomes the last line of defense instead of part of a balanced system.

For homeowners looking at broader moisture-control habits, these Airtight Spray Foam Insulation strategies offer practical ideas for reducing indoor humidity between painting cycles.

In this climate, paint maintenance isn't just about scrubbing walls. It's about helping the room dry out faster every day.

That's especially true in Tacoma, Snoqualmie, and North Bend, where seasonal dampness can linger and small ventilation problems become big finish problems over time.

Signs You Need More Than Paint Professional Help

Some situations have already moved past the point where a better coating will solve them. If the mold or mildew keeps returning, if the wall feels soft, or if the smell never leaves, the project has shifted from painting to diagnosis and repair.

Warning signs that point to a deeper problem

Look more closely when you notice any of the following:

  • Growth that comes back quickly after cleaning or repainting
  • Persistent musty odor even when the visible staining looks minor
  • Peeling, bubbling, or warped surfaces around the affected area
  • Water staining on ceilings, trim, drywall, or around windows
  • Repeated issues in the same location every wet season or after normal room use

Those are all signs that the substrate, the ventilation, or the building envelope may need attention.

If you're trying to sort out whether discoloration is tied to hidden leaks, this guide to signs of water damage in walls can help you spot what paint alone won't fix.

When the issue may be outside the room itself

Sometimes the wall isn't the original source. Moisture problems can involve ducting, bathroom fan exhaust, roof leaks, failed sealants, window assemblies, or hidden HVAC contamination. If odors seem to spread through the building or return even after surface cleanup, it's worth reviewing HVAC mold detection tips so you're not repainting the symptom while the source stays active.

Paint is the finish layer. If the building is still introducing moisture, the finish layer can only do so much.

For owners managing tenant improvements, facility maintenance, bath remodel work, drywall repairs, or waterproofing concerns, that distinction saves time and money. A room may need leak repair, damaged drywall replacement, ventilation correction, or substrate restoration before any finish coat goes on.

If you're in Tacoma, Seattle, Bellevue, Kirkland, Issaquah, West Seattle, Newcastle, North Bend, or Snoqualmie and you're seeing repeat moisture problems, the next step shouldn't be another quick repaint. It should be a site evaluation that identifies why the area stays wet and what level of repair is needed.


If you're dealing with recurring mildew, suspicious wall staining, peeling paint, or moisture issues in a home or commercial space, Wheeler Painting & Restoration Services can help you determine whether the fix is a straightforward repaint, substrate repair, waterproofing work, or a broader restoration scope. A clear inspection and practical plan usually prevent repeated paint failures and help you solve the root cause instead of covering it up.

Best Paint for Bathrooms in Puget Sound Homes

If you're staring at peeling paint above the shower, brownish drip lines on the ceiling, or those little black specks that keep coming back no matter how often you wipe them down, you're not dealing with a simple paint problem. You're dealing with a bathroom system problem.

That matters in Puget Sound homes. A bathroom in Kent, Seattle, or Tacoma doesn't live in the same conditions as one in a dry climate. We get long damp seasons, older housing stock, and a lot of bathrooms that were built before ventilation was treated like a real priority. So when people ask about the best paint for bathrooms, the honest answer isn't just a brand name. It's the right mix of prep, primer, paint, sheen, and moisture control.

Why Your Bathroom Paint Fails in the Puget Sound Climate

A common local scenario goes like this. The bathroom got painted a few years ago. It looked fine at first. Then the ceiling started spotting near the shower, the corners turned gray, and the wall by the tub began to bubble.

That doesn't always mean the painter used the wrong product. In many Puget Sound bathrooms, the bigger issue is trapped moisture. During showers, bathroom humidity can spike fast, and in our region that moisture often hangs around longer because the house already starts from a damp baseline.

A person touching peeling paint and mold on a bathroom wall near a bathtub.

Older homes between Tacoma and Seattle make this worse. A lot of them have undersized fans, no fan at all, or bathrooms that rely on a small window that barely helps in winter. That's why paint selection is critical in this market. One useful regional point from this bathroom moisture guidance for high-moisture areas is that bathroom exhaust fans can reduce humidity by 30-50%, which changes how hard the paint has to work.

Moisture beats weak systems

If the wall wasn't cleaned well, if mildew was painted over, or if the room stays damp for hours after every shower, even decent paint can fail early. The finish softens. Moisture gets behind it. Then you see peeling, blistering, or recurring mildew.

Practical rule: In a Puget Sound bathroom, paint isn't the first line of defense. It's one layer in the defense system.

That's also why it's smart to rule out hidden damage before repainting. If stains keep returning or the drywall feels soft, check for bigger moisture issues such as the warning signs covered in these wall water damage indicators.

What actually changes the outcome

The bathrooms that hold up usually have three things working together:

  • Better airflow: A fan that gets used after showers.
  • Correct surface prep: Clean, dry, solid walls with any mildew properly addressed.
  • A moisture-resistant coating system: Primer and finish paint matched to the room's conditions.

People often want one magic can of paint. In real bathrooms around Kent and the South Sound, that's not how long-term results happen.

Choosing the Right Paint Formula for Moisture and Mold

The label matters more than the color chip. For bathrooms, the key phrase to look for is 100% acrylic. That's the formula type that tends to hold up better when steam hits the walls day after day.

A strong bathroom coating also needs mildew resistance built into the formula. That doesn't mean you can paint over active mold and call it done. It means the dried paint film is better equipped to resist the conditions that help mildew take hold on the surface.

What a good bathroom formula is doing

In plain English, a quality bathroom paint should do four jobs:

  1. Resist moisture absorption
  2. Stand up to repeated cleaning
  3. Slow mildew growth on the paint film
  4. Keep its bond when the room cycles between damp and dry

Benjamin Moore Aura Bath & Spa is a clear example of that type of specialty formula. According to this product overview of bathroom paint performance, it uses a 100% acrylic formula and anti-microbial additives that achieved a 99.9% reduction in mold colony formation under ASTM D5590 testing. In a bathroom, that matters because condensation often settles on cooler walls and ceilings first.

Premium paint earns its keep in bathrooms

This is one room where bargain paint usually turns into expensive paint. Cheap interior wall paint may look fine on day one, but bathrooms punish weak coatings fast. They see steam, splashing, soap residue, and frequent wiping.

Here’s the practical difference between a standard interior paint and a bathroom-specific formula:

  • Standard wall paint: More likely to absorb moisture, mark up during cleaning, and fail sooner in a steamy room.
  • Bathroom-specific acrylic paint: Built for repeated humidity exposure and cleanup.
  • Premium specialty bathroom paint: Better fit when the room has poor ventilation, frequent use, or a history of mildew.

If you're also comparing options for ceilings, this guide to waterproof ceiling paint for bathroom areas is useful because the ceiling usually takes the first hit from rising steam.

Formula matters, but sanitation still matters

Even the right paint won't fix dirt, soap film, or hidden growth behind trim and caulk lines. Before repainting a commercial restroom, rental unit, or heavily used family bath, it helps to think beyond the visible wall surface. For cleanup habits and overlooked trouble spots, the WipesBlog tips for commercial cleanliness are a helpful outside reference.

A bathroom paint can resist a harsh environment. It can't compensate for a wall that was never properly cleaned, dried, or stabilized before coating.

One other practical note. A premium coating is often worth the upcharge in a bathroom because repainting this room is disruptive. You usually have tight spaces, lots of cut-in work, fixtures in the way, and family schedules to work around. If a better formula buys you a longer-lasting result, that's often the cheaper path overall.

Decoding Paint Sheens from Matte to High-Gloss

One simple rule was traditionally taught. Bathroom equals semi-gloss. That advice isn't wrong, but it's incomplete.

Sheen affects how the paint looks, how easily it cleans, and how much wall texture it reveals. In bathrooms, it also changes how the surface handles repeated moisture exposure. The right answer depends on whether you're painting walls, trim, ceiling areas, or cabinetry, and whether the room is a bright primary bath or a small dim space in an older house.

An infographic chart displaying five different paint sheens suitable for bathrooms, ranging from matte to high-gloss finishes.

Traditional choice versus newer options

Semi-gloss has stayed popular for a reason. Sherwin-Williams Duration Home® is often recommended in semi-gloss for bathrooms, and this bathroom paint reference notes its 100% acrylic latex base and scrub resistance of more than 1,000 cycles per ASTM D2486. That kind of durability is useful when a family bathroom gets wiped down often.

But modern bathroom paint technology has changed the conversation. Some premium matte and low-sheen products now perform far better than old flat paints ever did. So the question isn't just "how shiny should it be?" It's "how much protection do you need, and how much texture are you willing to see?"

Paint sheen comparison for bathrooms

Sheen Durability & Moisture Resistance Hides Imperfections Best For
Matte Lower with standard paint, better only in specialty bathroom formulas Excellent Ceiling or walls when using a premium bathroom-specific product
Eggshell Moderate in lower-moisture baths Very good Powder rooms or bathrooms with lighter moisture load
Satin Strong balance of cleanability and softer appearance Good Most bathroom walls
Semi-gloss Very good for moisture and repeated cleaning Fair Family bathrooms, kids' baths, trim, doors
High-gloss Excellent surface toughness Poor Cabinets, vanities, selected trim

What works well in real bathrooms

A practical breakdown looks like this:

  • Use satin on walls when you want durability without a noticeably shiny look.
  • Use semi-gloss in harder-working bathrooms, especially where ventilation isn't ideal.
  • Use high-gloss selectively on cabinets or trim, not typically on every wall.
  • Use matte carefully and only when the product is specifically made for bathrooms.

The shinier the finish, the more it tends to show patches, sanding marks, and old wall repairs.

That's the trade-off many homeowners discover too late. They choose the most moisture-resistant sheen they can find, then hate how every seam and roller mark shows in daylight. In older Kent and Tacoma homes, where bathroom walls are rarely perfectly flat, satin or a specialty low-sheen bathroom paint often gives the better balance.

Proper Prep Work for a Lasting Bathroom Paint Job

Most failed bathroom paint jobs don't fail because the topcoat was terrible. They fail because the surface under it was dirty, damp, chalky, glossy, or unstable.

Prep is the part people rush because it isn't fun and it doesn't feel visible. But a long-lasting result is won or lost at this stage.

A professional painter applies masking tape to a wall above bathroom tiles to prepare for painting.

Start with cleaning, not painting

Bathrooms collect more than steam. They also collect hairspray, soap film, body oils, dust, and invisible residue that keeps new paint from bonding well.

A solid prep sequence usually includes:

  • Wash the surfaces: Remove soap scum and residue, especially near the vanity and shower.
  • Treat mildew correctly: Clean and address affected areas before any primer goes on.
  • Let the room dry fully: Paint over trapped moisture and you'll regret it.
  • Dull glossy surfaces: Light sanding gives the new coating something to grip.
  • Repair defects: Patch nail holes, soft drywall spots, and old failed areas.

Primer is not optional on problem walls

A good primer bridges the gap between the old surface and the new finish coat. In bathrooms with prior mildew staining, repairs, or patched drywall, skipping primer is one of the fastest ways to waste good paint.

The prep system matters even more in wet zones and heavy-moisture spaces. If your bathroom design includes areas that need stronger moisture protection, wet room waterproofing guidance is worth reviewing before the finish stage.

Here’s a useful visual on detailed prep and coating technique:

Where DIY jobs usually go sideways

The most common mistakes aren't dramatic. They're small shortcuts.

  • Painting over mildew stains: The spot comes back and the homeowner blames the paint.
  • Using a deglosser-free shortcut on glossy walls: The new coat doesn't bond as well.
  • Skipping repairs around failed caulk lines or soft drywall: The finish looks bad even if the color is nice.
  • Rushing recoat timing in a damp room: The film doesn't build the way it should.

Field note: If the wall feels cool and damp after cleaning, it's not ready. Wait. Bathroom painting rewards patience more than speed.

For homeowners, that's the point where hiring a drywall contractor or painter starts making sense. For facility managers, it's also why a repaint should be treated as maintenance work, not just decoration.

Smart Color Strategies for Small or Low-Light Bathrooms

A lot of bathrooms in older Puget Sound homes are short on natural light. Some have no window at all. Others have one frosted window that does almost nothing for half the year. In those rooms, color choice matters almost as much as product choice.

Lighter colors usually make the room feel cleaner and more open. Soft whites, warm off-whites, pale gray-greens, and muted blue tones tend to work well because they reflect available light without feeling harsh. In a small bathroom, that can make the room feel less boxed in.

Keep contrast under control

Heavy contrast can chop up a small bathroom. Dark walls with a bright white ceiling often make the ceiling feel lower. Painting the walls and ceiling in the same color family can make the room feel taller and calmer.

That doesn't mean every bathroom should be white. It means the visual transitions should be gentle. In a Seattle or Kent hallway bath with limited light, softer contrast usually reads better than bold color blocking.

Use sheen to help the room, not fight it

A little reflectivity can brighten a bathroom. Too much can make it feel cold and show every flaw in the drywall.

Good design choices often look like this:

  • Satin on walls when you want a clean, soft lift in low light
  • Semi-gloss on trim and vanity areas where durability matters
  • A coordinated ceiling color to reduce the chopped-up look
  • Simpler palettes in small footprints so the room feels quieter

In a small bathroom, color doesn't just set the mood. It changes the perceived size of the room.

If you're torn between warm and cool tones, look at the fixed finishes first. Tile, countertop, floor color, and lighting temperature should drive the paint decision. The best bathroom color is the one that makes those permanent materials look intentional.

Long-Term Maintenance and Cleaning Tips

A fresh bathroom paint job lasts longer when people treat it like a finish, not like tile. Painted walls need gentler care.

Start with ventilation habits. Run the fan during showers and keep it going after the room is empty. In homes where the fan is weak, leaving the door open after bathing also helps the room dry out faster.

Simple habits that protect the finish

  • Wipe splashes early: Water spots, soap, and toothpaste are easier to remove before they harden.
  • Use mild cleaners: Soft cloths and gentle soap are safer than abrasive pads.
  • Watch corners and ceilings: Those are usually the first places where moisture problems show up.
  • Check caulk lines: Failed caulk lets water get where paint can't protect it.

For commercial bathrooms and shared residential spaces, routine cleaning matters even more because the room doesn't get much downtime between uses. A maintenance mindset protects the paint and helps catch bigger issues before they spread.

Know the warning signs

If you see recurring spotting, persistent staining, bubbling, or a musty smell that doesn't go away, don't assume it just needs touch-up paint. Those clues often point to a moisture source, failed ventilation, or hidden deterioration behind the surface.

A good bathroom finish should be durable. It still needs dry conditions and reasonable care to stay that way.

Ensuring a Perfect Finish When to Hire a Pro

Some bathroom painting jobs are straightforward. Others are really repair projects wearing a paint-project label.

If the room has recurring mildew, peeling around the ceiling line, soft drywall, old water staining, or layers of previous paint failure, the smartest move is often to bring in a pro. The same goes for tall ceilings, occupied commercial restrooms, or bathrooms where downtime needs to be tightly managed.

A professional contractor in white overalls discussing renovation plans with a homeowner in a bright bathroom.

Why pro work holds up better

A professional approach usually catches the things that homeowners and maintenance staff are most likely to miss:

  • Moisture diagnosis: Is this steam, a leak, failed caulk, or damaged substrate?
  • Surface correction: Can the wall be painted, or does it need repair first?
  • Product matching: Which coating fits this exact room condition?
  • Application control: Proper film build, clean cut lines, and realistic dry times

That matters in Puget Sound because bathrooms here often sit in older structures with uneven walls, limited airflow, and a long history of patchwork fixes. What looks like "bad paint" is often a sign that the full assembly needs attention.

A realistic call on mold and mildew

If mildew is light and limited to the surface, cleanup may be manageable. If it keeps returning, covers larger areas, or seems tied to damaged drywall, it needs a more careful response. For general household guidance on cleanup methods, best way to clean mould is a useful outside resource.

Wheeler Painting & Restoration Services handles residential and commercial painting, repairs, waterproofing, and related construction work in Kent, Seattle, Tacoma, and nearby communities, which makes it a practical option when the bathroom needs more than a simple repaint.

A clean-looking finish isn't the same as a stable finish. The goal is a bathroom that still looks good after months of steam, not just the day the paint dries.

If you're comparing house painting near me, commercial painting services near me, or a residential contractor near me for a bathroom update, the right choice is the one that can evaluate the whole problem. Not just sell you a gallon of paint.


If your bathroom paint keeps failing, Wheeler Painting & Restoration Services can help you sort out whether the issue is paint choice, prep, ventilation, water damage, or a combination of all four. Reach out for an estimate or consultation if you want a clear plan for a bathroom that looks better and holds up in Puget Sound conditions.

Repainting Your Bathroom Ceiling: A Guide for Kent & Seattle Area Property Owners

Painting a bathroom ceiling isn't just another item on your weekend to-do list. For homeowners and property managers, it’s one of the most demanding paint jobs in any building, thanks to a constant barrage of heat and humidity. A quick slap of paint won't cut it here; you need the right prep, the right materials, and a bit of know-how to prevent peeling, bubbling, and mildew growth for a finish that actually lasts. At Wheeler Painting, we've helped countless clients in the Kent and Seattle areas tackle this common facility maintenance headache.

Why Bathroom Ceilings Demand Special Attention

Think about it: the ceiling directly above a shower is probably the most abused painted surface in an entire home or commercial facility. For property owners here in Western Washington, from Seattle down to Tacoma, that constant dampness makes the battle against bathroom moisture a year-round affair. This is exactly where we see standard paint jobs fail time and time again.

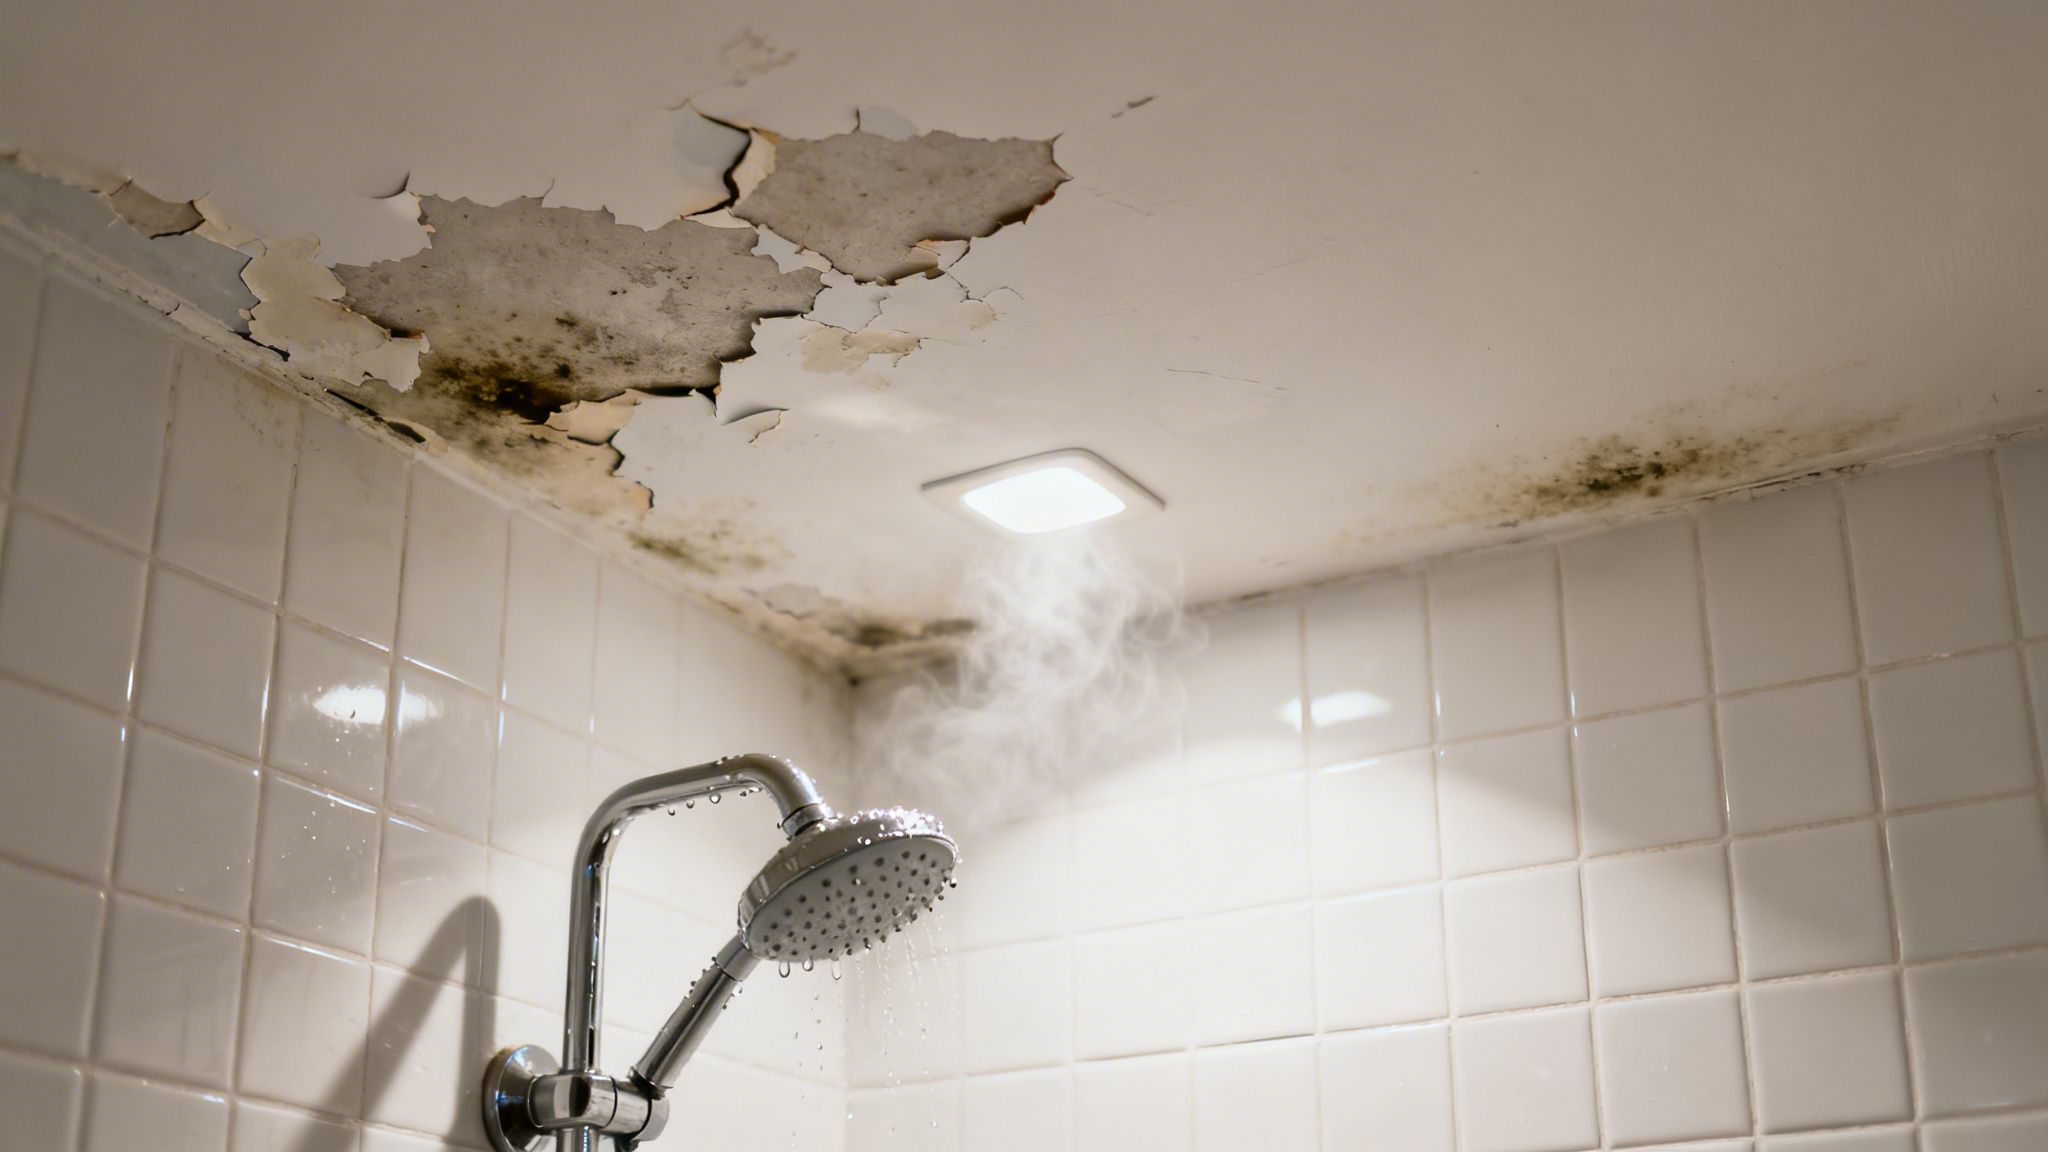
A damaged bathroom ceiling with peeling paint and black mold above a steaming shower head.

Unlike a bedroom or office, a bathroom ceiling endures a brutal cycle of steam and condensation every single day. That hot shower creates a perfect storm for paint failure as steam rises and settles directly overhead. It’s why so many homeowners and business owners in Kent and the surrounding communities call us about the same frustrating problems, often just a year or two after their last paint job.

The Science Behind Peeling Paint

Every time someone showers, the paint on the ceiling gets damp and swells slightly. As it dries, it contracts. This constant expansion and contraction eventually breaks the paint's bond, causing it to lose its grip and start peeling away from the drywall. This is a common issue for any residential or commercial painting project in a high-moisture area.

The stress is so intense that it destroys paint faster than anywhere else. In fact, the conditions are so harsh that some painting contractors won't even warranty their work in a bathroom. It’s the same reason paint bubbling is so common. If you’re seeing that, you might be curious about what causes paint to bubble on walls elsewhere, too.

Before you even think about painting, you have to play detective. Look closely for any signs of ceiling water damage, like persistent brown stains or sagging drywall. Those could point to a much bigger issue, like a leaky pipe or roof, that no amount of paint will fix.

At Wheeler Painting, we’ve seen it all. The key to a successful bathroom paint job is correctly diagnosing why the old paint failed. Was it poor ventilation? The wrong type of paint? Rushed prep work? As your local residential and commercial contractor, we address the root cause to ensure the problem doesn’t come right back.

Common Bathroom Ceiling Problems

The unique environment in a bathroom leads to a few signature issues. If you can spot them, you’re one step closer to fixing them for good.

Here’s what we typically see:

  • Mildew Growth: Those tell-tale black or gray spots are a classic sign of trapped moisture and poor airflow.
  • Surfactant Leaching: Ever notice sticky, brownish streaks running down the walls after a shower? That’s moisture pulling water-soluble ingredients (surfactants) out of the paint.
  • Peeling and Flaking: This is the most obvious sign of failure, where moisture has worked its way behind the paint film and completely broken its adhesion.

Tackling these problems means going beyond just scraping and painting. It requires a meticulous process that we've fine-tuned over thousands of residential and commercial projects to get it right the first time, from small home improvements to larger tenant improvement projects.

Your Blueprint For A Long-Lasting Finish

The secret to a bathroom ceiling that looks great for years isn't found in the paint can. It’s earned long before a brush ever touches the surface. All the real, lasting quality comes from the prep work. This is the foundation that separates a quick fix from a durable, professional finish, and it's a non-negotiable step on every project we do at Wheeler Painting.

First things first, you have to protect everything you don't want painted. Cover your vanity, toilet, tub, and floors with plastic sheeting or canvas drop cloths. Use painter's tape to secure the edges. A few extra minutes here will save you an hour of scraping dried paint drips later.

Clearing the Way for a Fresh Start

Once your bathroom is masked off, it's time to deal with the ceiling itself. Over time, bathroom ceilings get coated in a nearly invisible film of soap scum, hairspray, and other residues. Trying to paint over that grime is a surefire way to have your new paint fail, because it simply can't stick properly.

Grab a mild degreasing cleaner and mix it with some warm water. Using a sponge mop or a microfiber cloth on a pole, give the whole surface a good cleaning. Pay extra attention to the area right above the shower—that’s where the buildup is almost always the worst. After scrubbing, wipe the ceiling with a clean, water-dampened sponge to get rid of any soap residue.

Addressing Mildew and Minor Damage

Let the ceiling dry completely, then give it a close inspection. Look for any tell-tale black or gray spots, which signal mildew. You can't just paint over it; the fungus will work its way right through the fresh coat.

To kill it for good, you'll need a solution of one part bleach to three parts water, or a dedicated mildew killer.

  • Apply your solution directly to the mildew spots and let it sit for 10–15 minutes.
  • Gently scrub the areas, then rinse thoroughly with clean water.
  • Crucially, let the ceiling dry completely. This isn't a 30-minute job. It can take a full 24 hours, so be patient.

Next, hunt for any hairline cracks, peeling paint, or small dings. A good drywall contractor knows this step is vital. Take a putty knife and carefully scrape away any loose bits until you hit a solid, stable edge. Fill small cracks or holes with a lightweight spackling compound, smoothing it flush. Once dry, a light sanding is all it takes to make the patch disappear. If you're looking at more significant water stains or sagging, you may need to learn how to repair water-damaged drywall before you can move forward.

I can't tell you how many homes we've visited around Kent and Seattle where a property owner has to call us because a paint job started failing after just a few months. The number one culprit is always rushed prep work. Skipping a thorough cleaning or painting over live mildew guarantees the old problems will come right back. Taking your time on these foundational steps is the only way to ensure your repainting bathroom ceiling project actually lasts.

This careful, step-by-step preparation ensures you have a clean, solid surface that the primer and paint can bond to, giving you a finish that can handle the humidity for years.

Choosing The Right Paint And Primer

After all that careful prep work, picking the right products is what will make or break your bathroom ceiling paint job. We know the paint aisle can be a maze, but getting the primer and topcoat combination right is the secret to a finish that can actually handle the damp Puget Sound climate.

Why Primer Is Non-Negotiable

Seriously, don't even think about skipping the primer on a bathroom ceiling, especially after all the cleaning and patching you just did. A quality, stain-blocking, moisture-resistant primer is your most important tool here. As a full-service residential and commercial contractor, we consider this a critical step in any interior painting job.

It does a few critical jobs:

  • Creates a uniform base: This ensures your topcoat looks even and consistent.
  • Blocks stubborn stains: It locks in old water marks or anything else that might bleed through.
  • Seals new repairs: Primer ensures the paint sticks just as well to new spackle as it does to the old surface.
  • Provides a solid grip: It acts like double-sided tape, holding onto the drywall and giving the topcoat something to grab, which is key to preventing peeling.

For a bathroom, you absolutely need a primer designed to handle moisture. These products contain additives that stop mildew in its tracks. Even on brand new drywall, understanding why you should prime sheetrock before painting is a must for a long-lasting job.

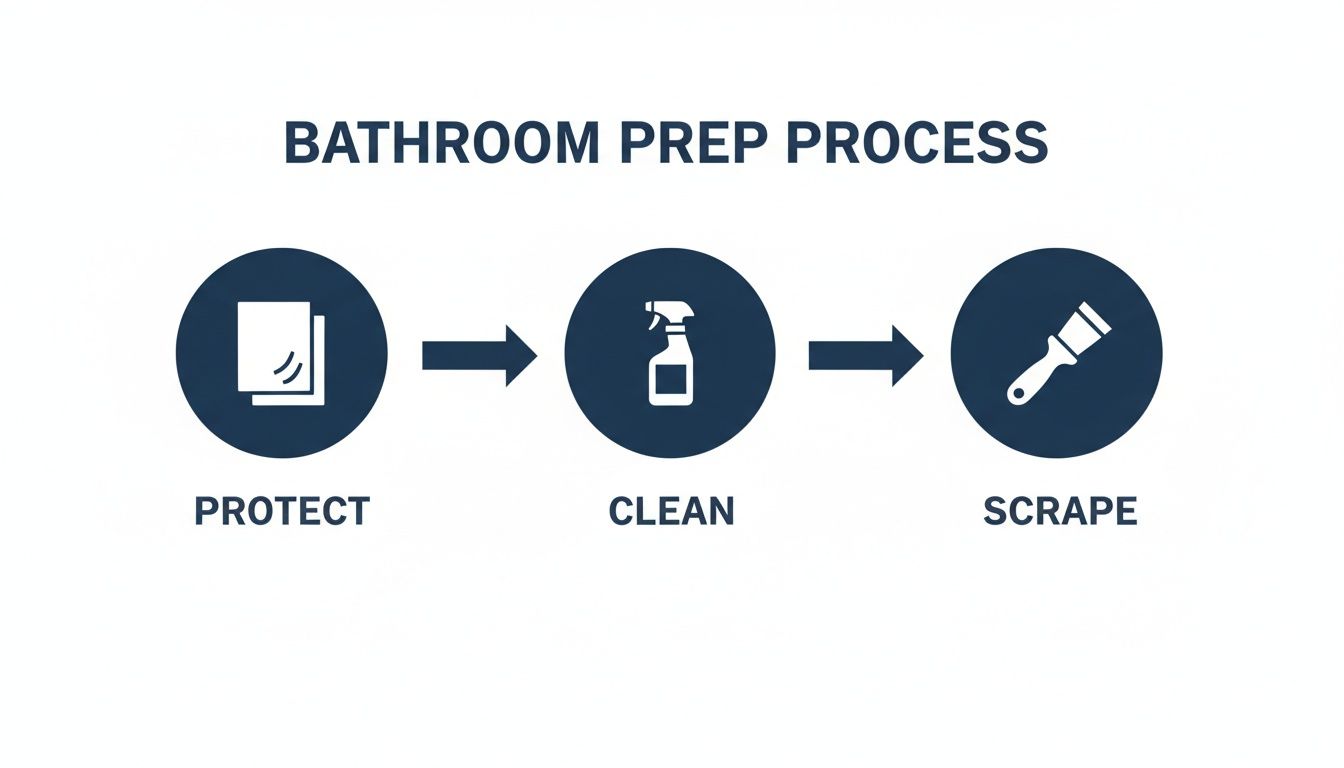
Infographic showing a three-step bathroom preparation process: protect, clean, and scrape.

These are the non-negotiables before you even crack open a can of primer. Protecting your fixtures, cleaning the surface, and scraping away any failures gives you the clean slate you need for a professional result.

Selecting Your Topcoat Sheen And Formula

Now for the paint itself. You’ll want a product specifically made for bathrooms or other high-humidity areas. Look for a label that says "kitchen & bath" or mentions mildew resistance. These paints contain mildewcide, an agent that actively prevents mold from taking hold. For anyone managing a property in places like Kent, Seattle, or Tacoma, this is a lifesaver.

The paint's sheen (its level of gloss) is just as important as the formula. For a bathroom ceiling, your best bets are satin or semi-gloss.

Bathroom Paint Sheen Comparison

Choosing a sheen isn't just about looks; it's about performance. A higher gloss level creates a tighter, less porous surface that's much better at repelling moisture. Here’s a quick breakdown of why this matters for a bathroom ceiling.

Sheen Durability Moisture Resistance Best For
Flat/Matte Low Very Low Not recommended. It absorbs moisture and is difficult to clean.
Eggshell Medium Low to Medium A slight step up, but still not ideal for direct steam exposure.
Satin High High A great choice. Offers a slight sheen, is very durable, and easy to wipe down.
Semi-Gloss Very High Excellent The gold standard for bathrooms. It's tough, highly moisture-resistant, and reflects light.

While a flat finish is great for hiding imperfections, in a bathroom it acts like a sponge for steam. This will almost guarantee stains and peeling. Sticking with a satin or semi-gloss finish is the professional choice for a reason.

A Pro Tip From The Field: At Wheeler Painting, we use satin or semi-gloss finishes on bathroom ceilings almost exclusively. That slight gloss provides a tough, washable surface that stands up to daily steam. It’s a small detail that makes a huge difference in how long the paint job lasts, whether it's for a home or a commercial renovation.

Of course, durability is only part of the equation. For aesthetic guidance, this guide on how to choose paint colors for your bathroom can help you tie the whole room together. By pairing a high-quality primer with a durable, mildew-resistant topcoat, you're setting your ceiling up for a beautiful finish that will last for years.

Getting That Pro Finish: Painting Techniques

Alright, the prep work is done. The patching is smooth, the mildew is gone, and your masking tape is straight. Now for the satisfying part—actually getting some paint on that ceiling. This is where your patience pays off and the real transformation happens. A few key techniques separate a decent DIY job from a truly professional one.

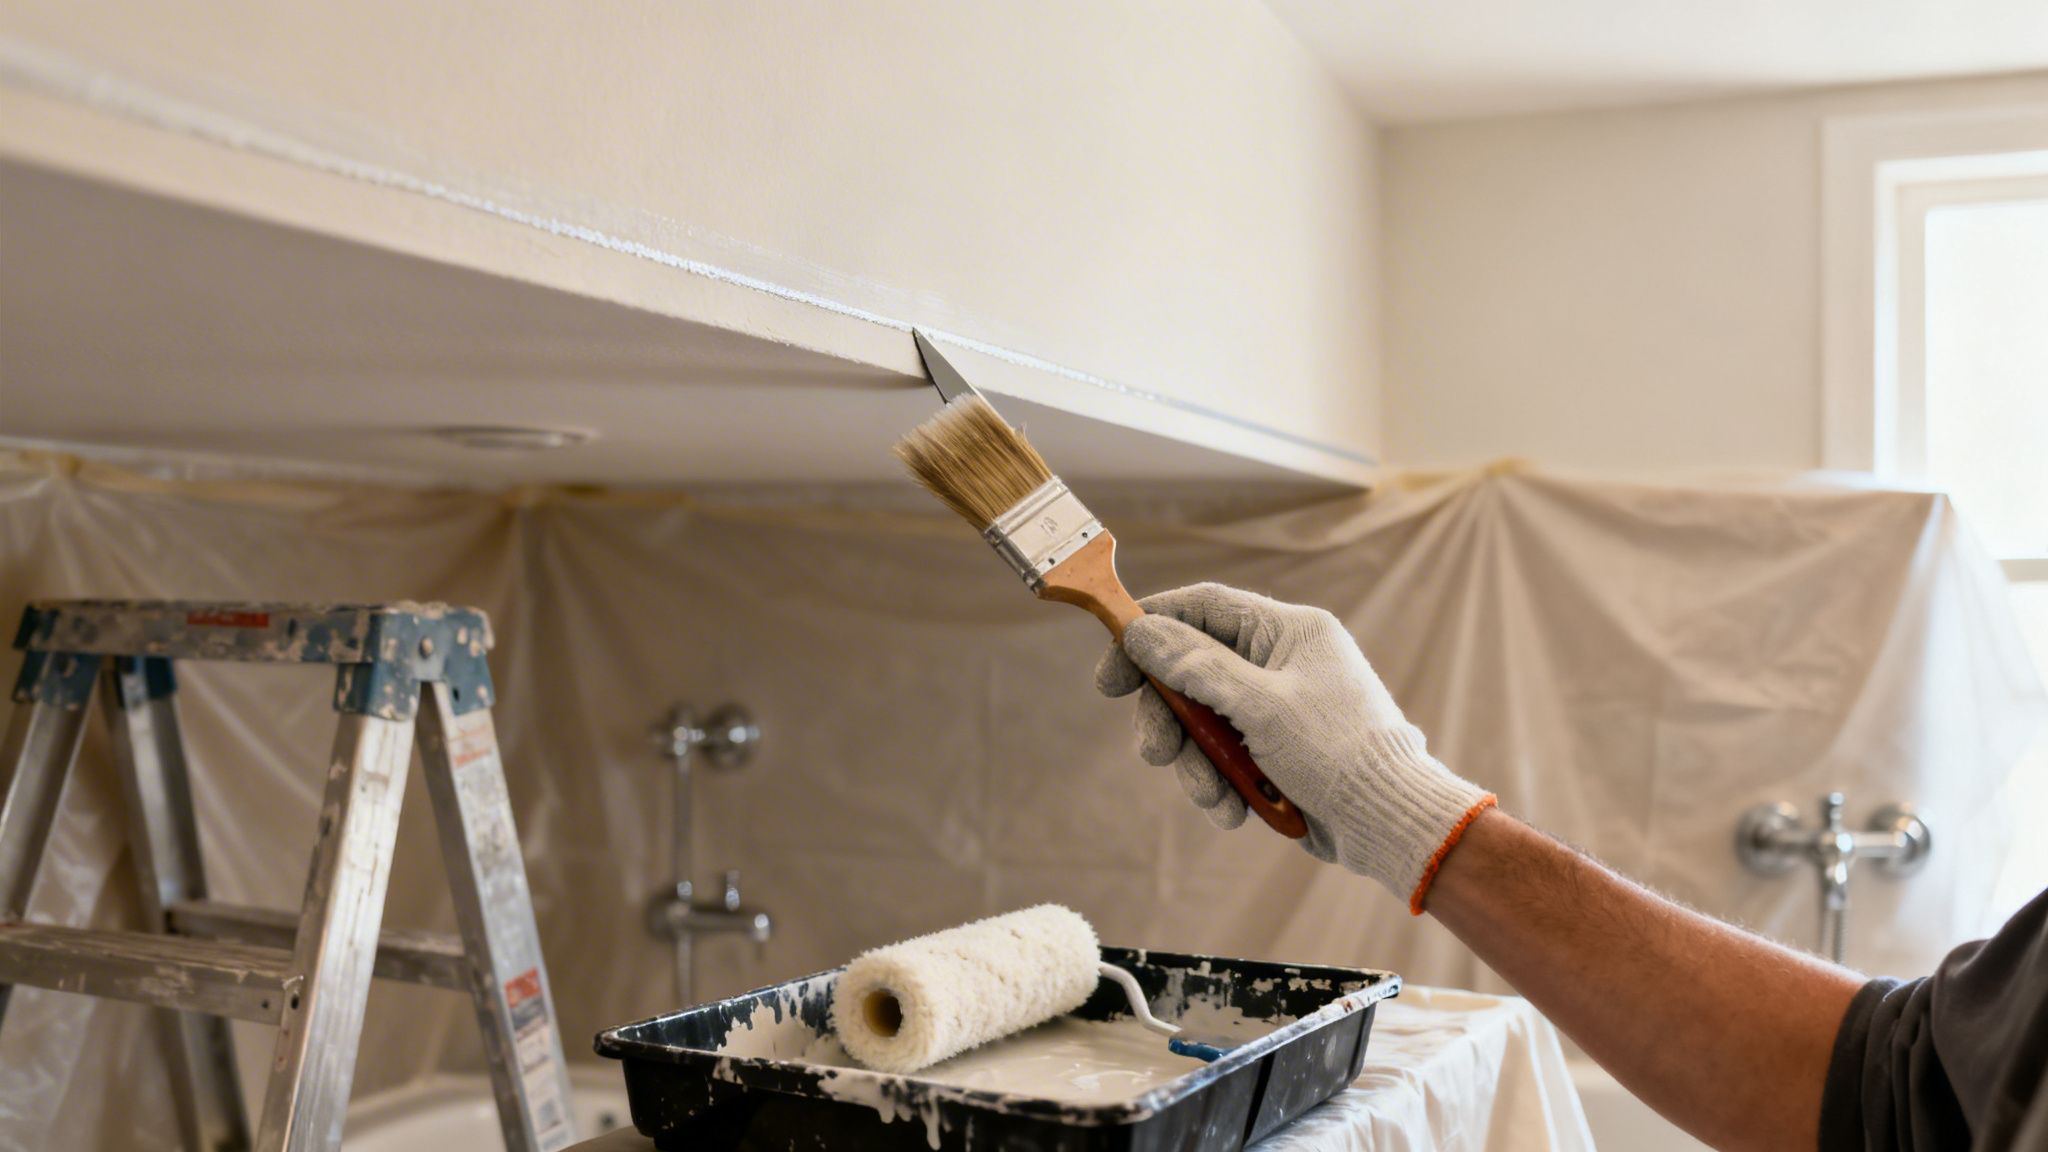
A person in a white glove uses a paintbrush to cut in white paint on a ceiling.

First, The "Cut-In"

Before a roller ever touches the ceiling, you have to "cut in." This just means using a brush to paint all the edges and corners where a roller can't reach cleanly—think along the walls, around your light fixture, and next to the exhaust fan. A crisp cut-in line is the hallmark of quality interior painting.

Grab a good-quality 2 to 2.5-inch angled sash brush. The angle gives you better control. Dip about the first third of the bristles into your paint and gently tap—don't scrape—the excess off on the inside of the can. Tapping keeps the paint loaded in the brush for a longer, smoother stroke.

Start your brushstroke about a half-inch from the wall line, then smoothly guide it into the corner. You're aiming to create a solid band of paint about 2-3 inches wide all the way around the ceiling's perimeter. This painted border gives your roller a target to roll up to without hitting the walls.

Professional Tip: If you're new to this, it’s completely fine to steady your painting hand with your other hand. Our crews providing commercial painting services in Kent and Tacoma do this by instinct, but for a first-timer, that extra stability is the secret to avoiding wobbly lines.

Rolling Without Streaks

With your edges done, it’s time to roll the main field of the ceiling. The number one mistake homeowners make is trying to stretch their paint too thin. This causes "lap marks," those ugly, streaky lines where the paint has started to dry before you overlap it. The key to avoiding this is to always maintain a wet edge.

For a smooth ceiling, a 3/8-inch nap roller is perfect. If you have any texture, jump up to a 1/2-inch nap. Get a roller screen for your bucket—it loads the roller much more evenly than a tray.

Here's the method that guarantees a beautiful, uniform finish:

  • Find a corner and start by rolling a large "W" or "N" pattern on the ceiling, roughly 3 feet by 3 feet.
  • Now, without lifting the roller, fill in that "W" with straight, parallel strokes that slightly overlap.
  • Once that section is fully covered, do a final "lay off." This means making a few very light passes with the roller in one single direction across the whole section to erase roller marks.
  • Move on to the next 3×3 section, repeating the process but always rolling back into the wet edge of the section you just finished.

Working this way, section by section, keeps the paint workable and prevents frustrating streaks. It’s a methodical approach, but the flawless result is well worth the effort.

Knowing When To Call a Professional

There's a real satisfaction that comes from tackling a project yourself. But after years in this business, we can tell you that the smartest property owners are the ones who know their limits. What looks like a simple paint job can quickly turn into a frustrating, costly ordeal.

So, how do you know when to put down the roller and pick up the phone? Certain problems are dead giveaways that you need professional help.

Signs You Should Hire a Pro

Persistent mildew is a classic. If you've scrubbed those black spots away multiple times only to see them creep back, you're not fixing the root cause. A professional painter can diagnose if this is a simple ventilation issue or part of a larger facility maintenance problem requiring waterproofing.

Another huge red flag is significant water damage. If you’re seeing sagging drywall, paint peeling in sheets, or growing water stains, you’re looking at symptoms of a bigger problem. A leak from the roof or a pipe needs a proper diagnosis and repair from a qualified residential or commercial contractor before any painting can begin.

And let’s not forget safety. Trying to paint a high ceiling in a cramped bathroom is a recipe for disaster without the right gear. Professionals come equipped with the proper equipment—and, just as importantly, the insurance—to handle these situations safely.

A professional painter doesn’t just cover up problems; we solve them. At Wheeler Painting, our experience with homes and commercial facilities across the Puget Sound has taught us how to diagnose the why behind paint failure. We bring a guarantee that the job is done right.

The Value of Professional Service

For homeowners, building owners, and facility managers in Tacoma, Kent, and the greater Seattle area, bringing in a team like Wheeler Painting & Restoration Services isn't just about getting a paint job. It's an investment in quality and peace of mind. We have access to commercial-grade primers and coatings you can't find at a big-box store, and we know exactly how to apply them for a flawless, durable finish perfect for any tenant improvement or residential remodeling project.

Ultimately, hiring a pro for your bathroom ceiling isn't admitting defeat—it's making a smart decision to protect your property. It ensures the work is done correctly, safely, and efficiently the first time. That means you get a beautiful result that will hold up for years, letting you focus on other things without worrying about what’s happening overhead.

Your Top Bathroom Ceiling Questions, Answered

When it comes to repainting a bathroom ceiling, a few questions pop up time and time again. As painters serving the Seattle area, we've heard them all. Here are our straightforward answers to the most common queries we get from homeowners and property managers.

How Long Should I Wait to Shower After Painting?

This is the big one. While new paint might feel dry in a few hours, it hasn't fully cured yet. Curing is the chemical process where the paint hardens and develops its final moisture-resistant shell.

We always tell our clients to hold off on hot showers for at least 24-48 hours. Firing up the steam too early is the quickest way to ruin a fresh paint job. Check the paint can for the manufacturer's specific recommendation, as some high-performance bathroom paints need even more time to get tough enough to handle the humidity. A little patience now prevents a lot of headaches later.

Can I Just Paint Over a Few Mildew Spots?

Absolutely not. This is probably the biggest mistake we see people make. Painting over mildew is like putting a rug over a stain—it doesn't solve the problem, it just hides it for a little while.

Mildew is a living fungus, and it will happily grow right through that new layer of paint, often coming back worse. You have to kill it first. Mix a solution of one part bleach to three parts water (or use a store-bought mildew killer), apply it, and let it sit. After a good rinse and letting it dry completely, you'll need to use a quality stain-blocking primer before you even think about your topcoat. It's the only way to be sure it's gone for good.

For many homeowners and property managers in the Kent and Tacoma areas, hiring a professional for a bathroom ceiling is a smart call. An expert ensures underlying moisture or mildew issues are properly resolved, not just covered up. We have the right tools and experience for a flawless finish, saving you time and ensuring it lasts—a wise investment in protecting your property.

What's the Right Way to Fix Peeling Paint?

Peeling paint is your ceiling's way of telling you there's an adhesion problem, almost always caused by moisture. Just painting over the peeling spot won't work; the new paint will just peel off with the old layer.

You have to get back to a solid foundation. Here's how:

  • Scrape: Use a putty knife or scraper to remove every bit of loose, flaking paint. Keep going until you only have paint with a solid, firm edge.
  • Sand: Feather the edges of the remaining paint to create a smooth transition from the painted to the bare areas. A thin skim coat of spackle might be needed.
  • Prime: This is the non-negotiable step. You must prime the repaired patches with a high-quality bonding or moisture-resistant primer. This gives your new paint something to grab onto.

Only after you've properly prepped the surface can you repaint the entire ceiling for a uniform, lasting finish.


Ready to skip the hassle and get a guaranteed professional result? The team at Wheeler Painting has been serving homeowners and businesses in the Puget Sound for decades, delivering durable, beautiful finishes for homes and commercial facilities. We are the local "house painting near me" and "commercial painting services near me" provider you can trust. Contact us today for a free, no-obligation estimate