Tag Archive for: puget sound construction

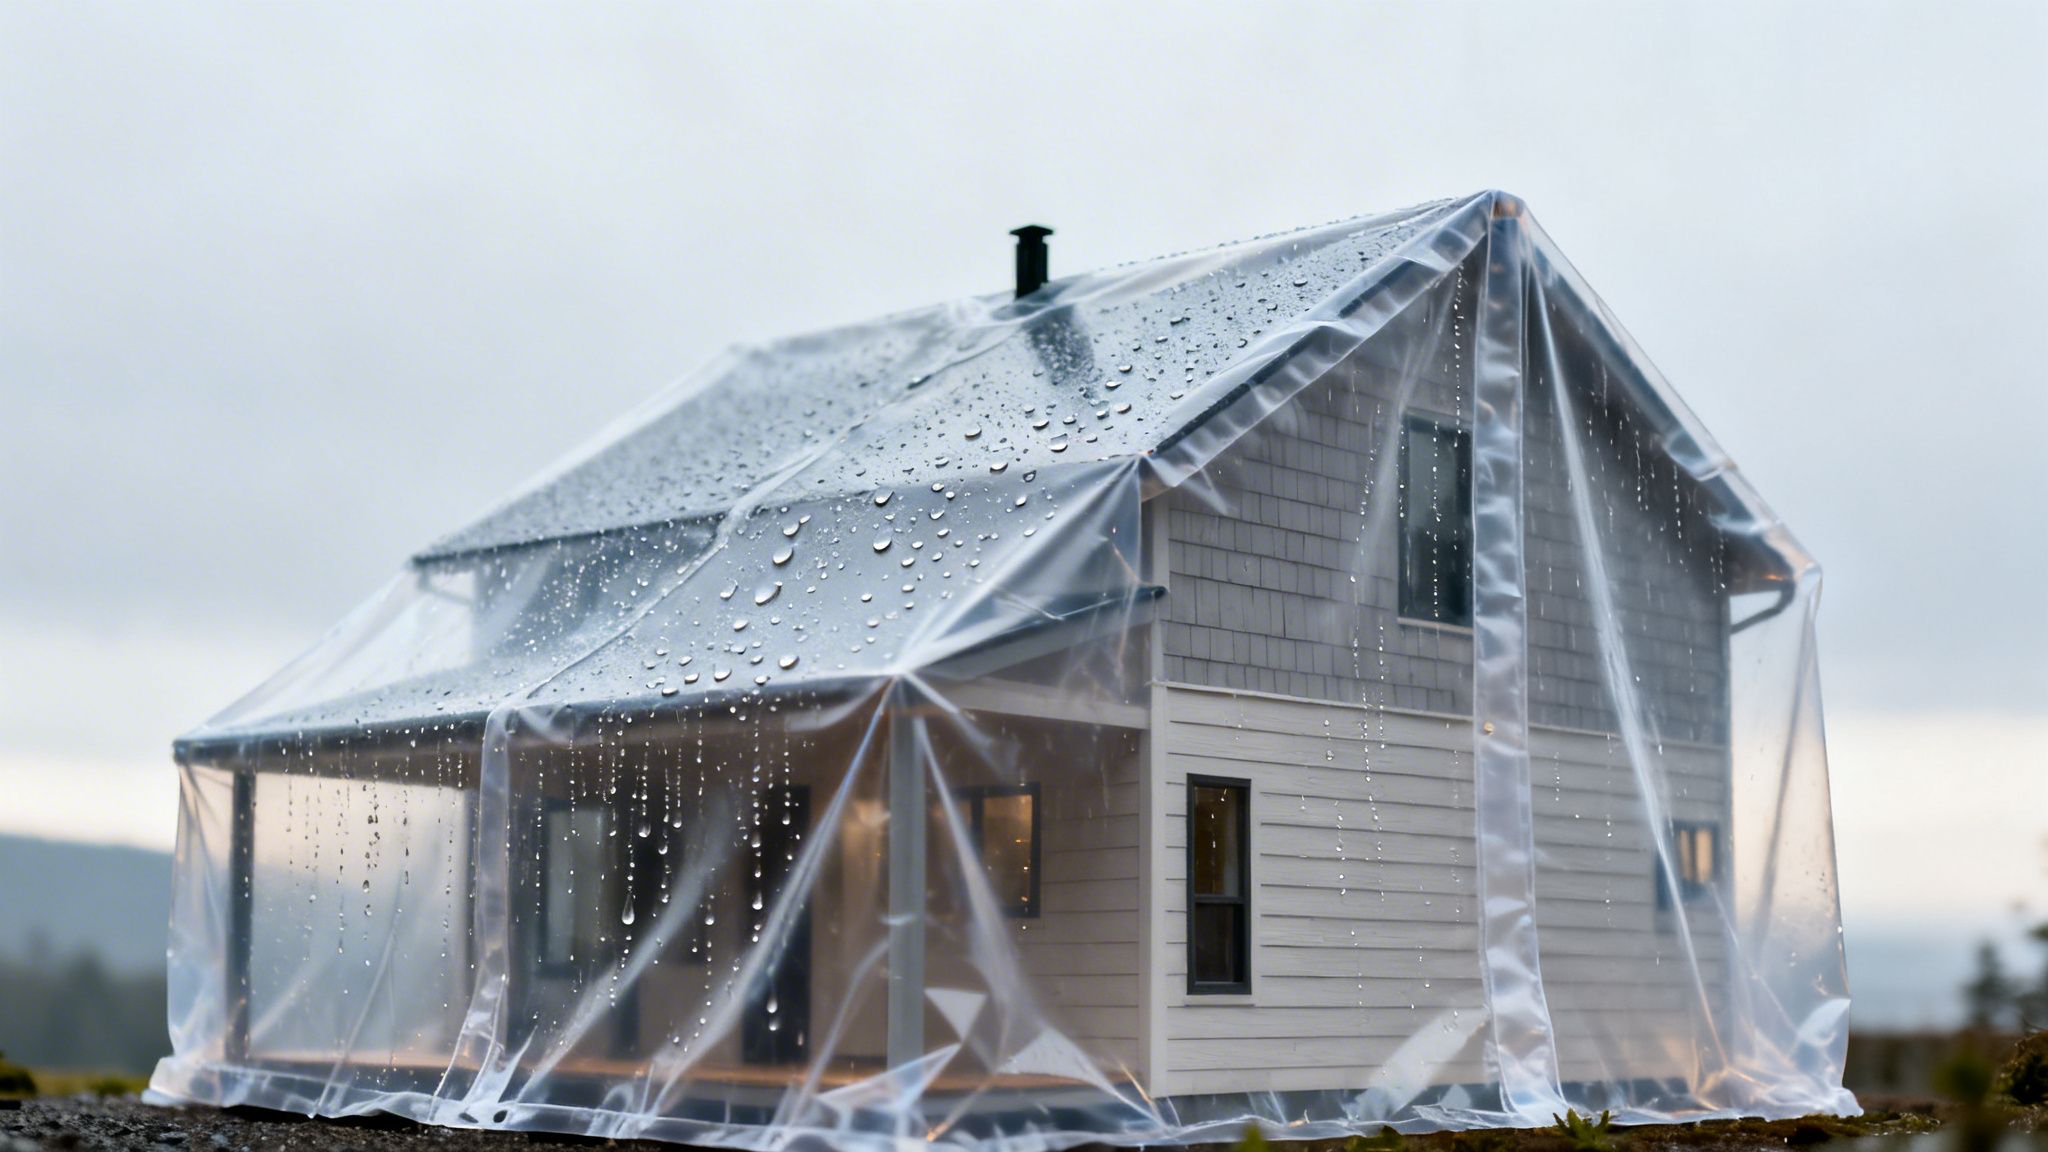
What Is Waterproofing in Construction and Why It Matters in Washington

Think of waterproofing as a seamless, high-performance raincoat for your building. That’s the simplest way to describe what waterproofing is in construction. It isn't just a single product but a complete system designed to stop water from getting inside your property—from the deepest corner of your foundation all the way up to the roof.

Especially here in the perpetually damp Puget Sound, from Seattle to Tacoma, this isn't a luxury upgrade. It’s an essential service for protecting your home or commercial building.

Understanding Construction Waterproofing and Why It Matters

A miniature house covered in clear plastic with raindrops, symbolizing waterproofing and protection.

At its heart, construction waterproofing is the process of making a building or structure completely impervious to water. This goes far beyond a simple coat of "water-resistant" paint. It requires specialized materials that are professionally applied to form a continuous, unbroken barrier that seals your property against moisture intrusion.

Just picture the constant drizzle in Seattle or the heavy seasonal downpours across Tacoma and Kent. All that water creates pressure against your building’s exterior. Without a solid defense, it's only a matter of time before moisture exploits tiny cracks and pores, seeping into your foundation, walls, and roof.

A Proactive Shield for Your Property

The most important thing to understand is that true waterproofing is proactive, not reactive. It’s about preventing water from ever causing damage in the first place, rather than cleaning up a mess after it happens. As a trusted local provider, Wheeler Painting installs systems that shield the very bones of your building, safeguarding its structural integrity for the long haul.

These systems are specifically engineered to combat a powerful force known as hydrostatic pressure. This is the pressure that groundwater exerts on a surface, like against your basement walls after a heavy rain. An effective waterproofing membrane is built to withstand this constant force, keeping your below-grade spaces dry and usable.

Key Takeaway: Waterproofing isn't the same as "water resistance." It's a comprehensive system engineered to block water, even under pressure, preventing the slow, expensive decay that moisture inevitably causes.

What Does Waterproofing Actually Protect?

For homeowners, business owners, and facility managers alike, a robust waterproofing system is one of the most critical investments you can make in your property. Let's get specific about what it's guarding.

Here's a quick look at the fundamentals and what they mean for your property's health and value.

Waterproofing at a Glance

Concept What It Means for Your Property
Impermeable Barrier Forms a continuous shield that completely blocks water, preventing it from seeping into porous materials like concrete and wood.
Hydrostatic Pressure Resistance Actively pushes back against the force of groundwater, keeping basements, foundations, and retaining walls dry.
Structural Protection Safeguards the building's core components from water-induced damage, ensuring long-term stability and safety.
Proactive Defense Stops moisture-related problems before they start, preventing costly repairs and preserving property value.

Ultimately, a professional system is your first line of defense against some very real and costly threats.

It directly protects your property from:

  • Structural Decay: Water is the enemy of building materials. It corrodes the steel rebar inside concrete and can cause foundations to crack and weaken over time.
  • Mold and Mildew Growth: By keeping the interior dry, you eliminate the dampness mold needs to thrive. This is a huge factor for maintaining healthy indoor air quality for your family or employees.
  • Interior Damage: Waterproofing prevents those telltale water stains on ceilings, peeling paint, and warped floors that signal a hidden leak.
  • Reduced Property Value: A building with a history of water problems is a major red flag for buyers. Protecting it from moisture damage is one of the surest ways to maintain its market value.

Understanding this core concept is the first step in protecting your home or commercial building. At Wheeler Painting, we've spent decades serving the local Kent community and surrounding areas, and we see proper waterproofing as a fundamental part of any quality residential remodel or commercial renovation. It's simply the smartest way to protect your most valuable asset.

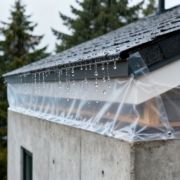
Why Every Puget Sound Property Needs Effective Waterproofing

If you live anywhere from Kent to Seattle, you know the rain is a constant companion. For those of us who own or manage property, that steady drizzle is more than a minor annoyance—it’s a relentless force working against your building’s health and value. Proper waterproofing isn't just another box to check on a construction list; it's your primary line of defense against our unique, water-logged environment.

Our Pacific Northwest climate puts building materials to the test day in and day out. The combination of persistent moisture, high humidity, and punishing freeze-thaw cycles creates the perfect recipe for water intrusion. And water is patient. It will eventually find its way through the tiniest cracks in a foundation, the seams on a roof, or the very pores of your concrete.

The Real Cost of Unchecked Moisture

For a business owner, this might look like water creeping into a commercial foundation, quietly damaging your inventory or build-out. For a homeowner, it's that tell-tale damp, musty smell in the basement—a dead giveaway that water has already broken through. These aren't just small headaches; they're the opening act for far more expensive and destructive problems that require a professional residential contractor.

When you ignore those early warnings, you’re giving moisture a free pass to cause serious, and often hidden, damage:

  • Structural Rot: Wood framing, joists, and support beams start to decay, slowly but surely weakening the entire building.
  • Concrete Degradation: Water seeps in and corrodes the steel rebar inside concrete, causing it to expand, crack, and crumble from within. This is often called "spalling."
  • Poor Indoor Air Quality: Damp, dark spaces are a breeding ground for mold and mildew. Their spores get into the air, creating an unhealthy environment for everyone inside.
  • A Major Hit to Property Value: Nothing sends potential buyers or tenants running faster than signs of water damage. It’s a red flag that directly lowers what your property is worth.

A Smart Investment, Not Just a Repair

This is why professional waterproofing is one of the smartest investments you can make. It’s about being proactive and protecting your building for the long haul, especially here in Washington. By creating a seamless, impermeable barrier, you’re not just plugging a leak; you're stopping the chain reaction of damage before it can even start.

For anyone managing property from Tacoma to Seattle, the key is to stop thinking of waterproofing as a repair and start seeing it as preventative maintenance. It’s how you protect your asset’s value and ensure the building is a safe, healthy place for people to live and work.

This forward-thinking approach is becoming the standard in modern construction worldwide. The global market for waterproofing chemicals is expected to skyrocket past $44 billion by 2030—a massive jump from an estimated $11 billion in 2025. That kind of growth tells you just how critical this work is, particularly in wet climates like ours. At Wheeler Painting, our experienced team provides expert facility maintenance and construction services, applying these advanced solutions to protect everything from family homes to major commercial buildings. You can learn more about the market trends driving this shift to ensure structural durability.

When it comes down to it, investing in professional waterproofing is about protecting your property from the one thing we can always count on in the Puget Sound: water. It turns your building from a vulnerable target into a resilient fortress, ready to stand strong against our local weather for decades to come.

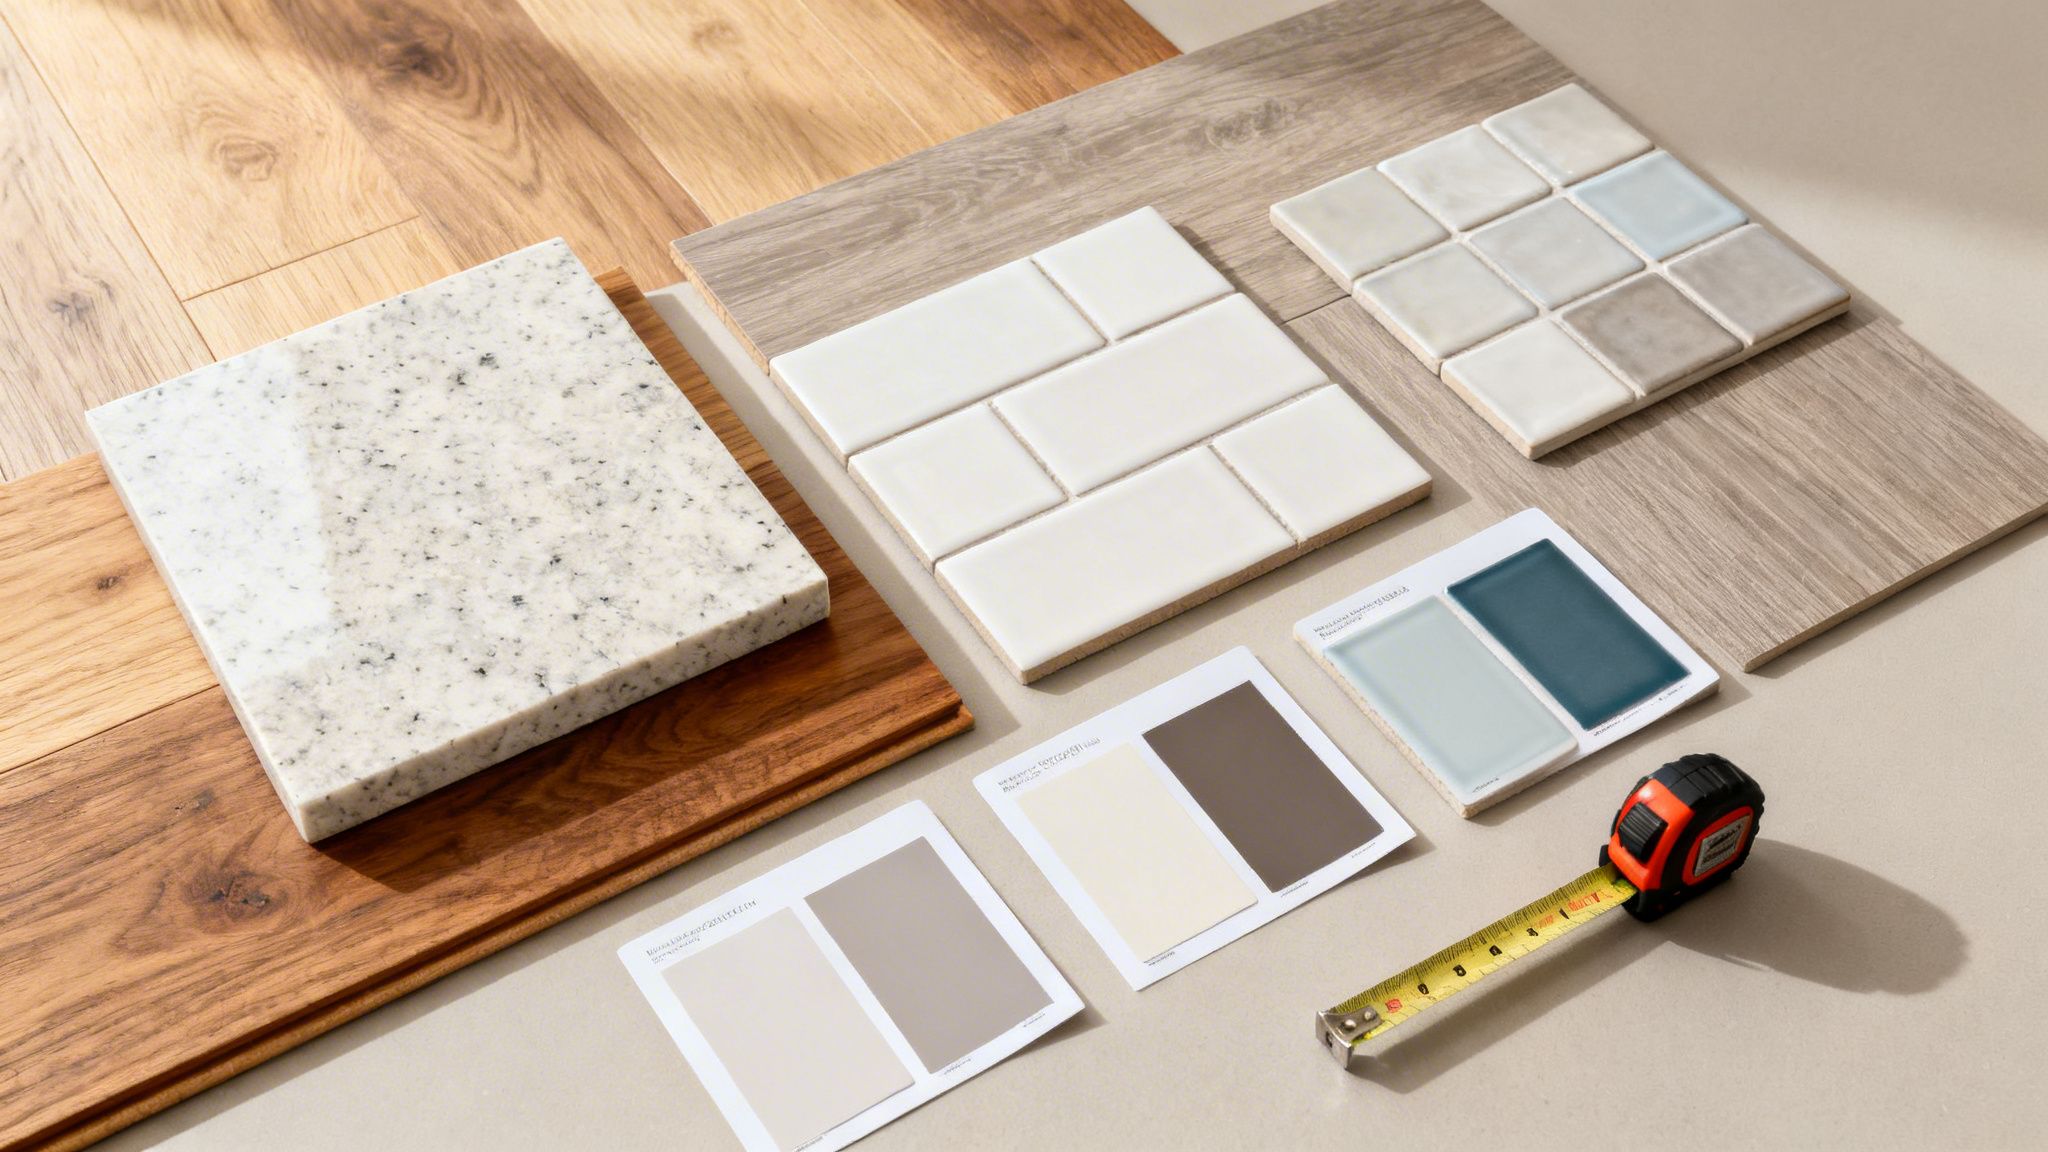
Exploring Common Waterproofing Materials and Methods

Alright, so we've established why waterproofing is so essential here in the damp Puget Sound region. The next logical question for a property owner is, how do the pros actually do it? Waterproofing isn't a one-size-fits-all product you grab off a shelf; it's a toolbox of specialized materials and application methods.

A seasoned residential or commercial contractor knows exactly which tool to pull out for the job at hand. Some situations call for a flexible, liquid-applied membrane, while others demand a tough, pre-formed sheet. The goal is always the same—create a seamless, watertight barrier—but the approach has to match the building, its materials, and the kind of water exposure it faces.

Liquid-Applied Membranes

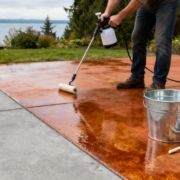
Liquid-applied membranes are one of the most versatile tools in the waterproofing arsenal. Just like the name implies, these products are applied as a thick liquid that cures into a seamless, rubbery, waterproof layer that bonds directly to the surface. This makes them perfect for tricky areas with lots of penetrations, like a roof dotted with vents and pipes or a balcony with complex railing posts.

  • How They Work: Applied by roller, spray, or trowel, these liquids flow into every nook and cranny, creating a monolithic layer with no seams.
  • Best Uses: Roofs, balconies, mechanical rooms, planters, and podium decks.
  • Key Advantage: Their biggest strength is the lack of seams. Seams are the classic weak point in most waterproofing systems, and liquid-applied solutions eliminate them entirely.

This adaptability is why you see them used so often. For any facility manager or building owner, choosing the right material is a long-term investment. In fact, liquid-applied membranes were the top product segment in 2024, and for good reason—water intrusion is behind up to 40% of building damage worldwide. Using robust coatings is a direct defense against that decay.

Sheet Membranes

Another heavyweight in the waterproofing world is the sheet membrane. These are factory-made rolls of waterproof material—think thick sheets of rubber, plastic, or modified bitumen—that are rolled out and bonded to a surface. The seams are then sealed tight using powerful adhesives or, in some cases, heat-welded together to create a continuous barrier.

Sheet membranes are the workhorses for big, flat areas where you need maximum durability, like foundations and plaza decks. They offer a guaranteed, uniform thickness and incredible toughness. This makes them the go-to choice for below-grade applications where they have to withstand constant hydrostatic pressure—that’s the force of groundwater literally trying to push its way through the foundation.

As this chart shows, the stakes are high. A small moisture problem can quickly escalate into a major headache for any property owner.

A flowchart guiding waterproofing needs decision, showing issues like mold, structural decay, and property value drop.

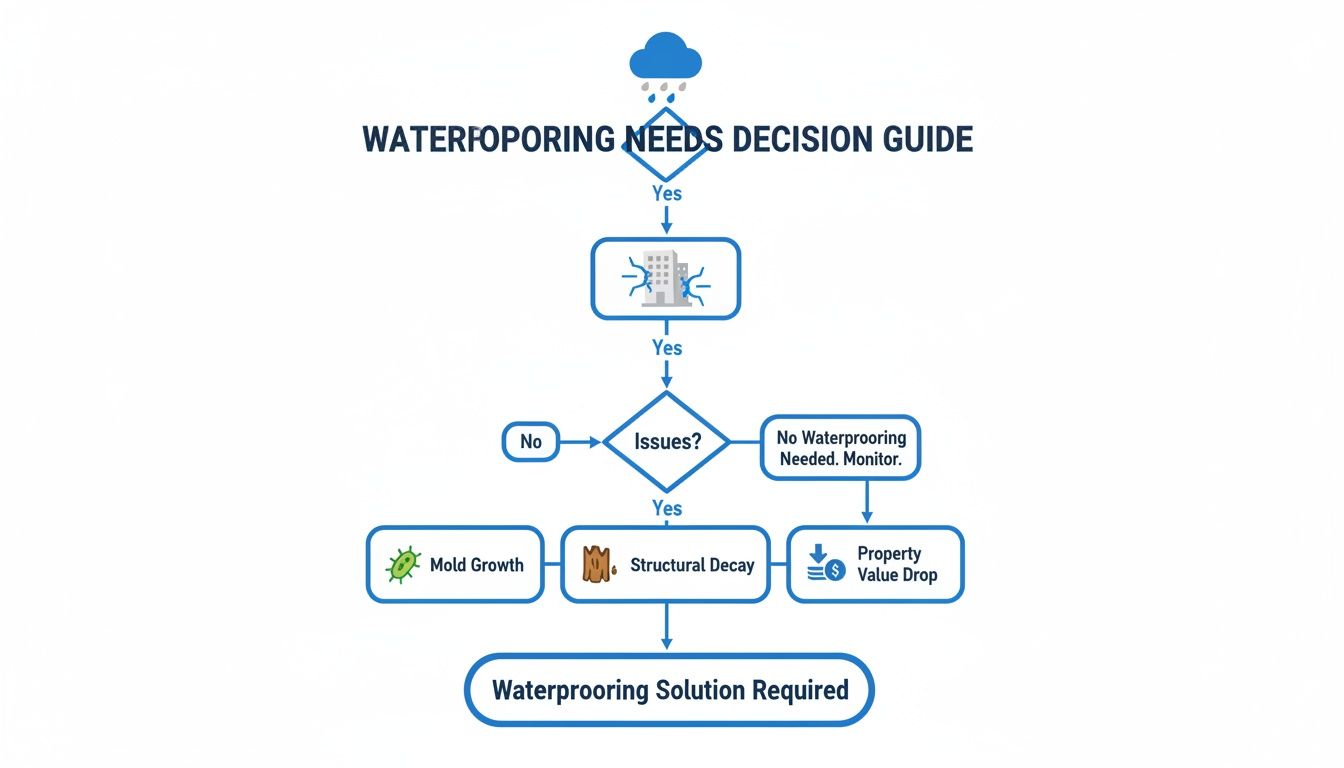
When you see the direct line from moisture intrusion to structural decay and a nosedive in property value, you realize just how critical selecting the right waterproofing method really is.

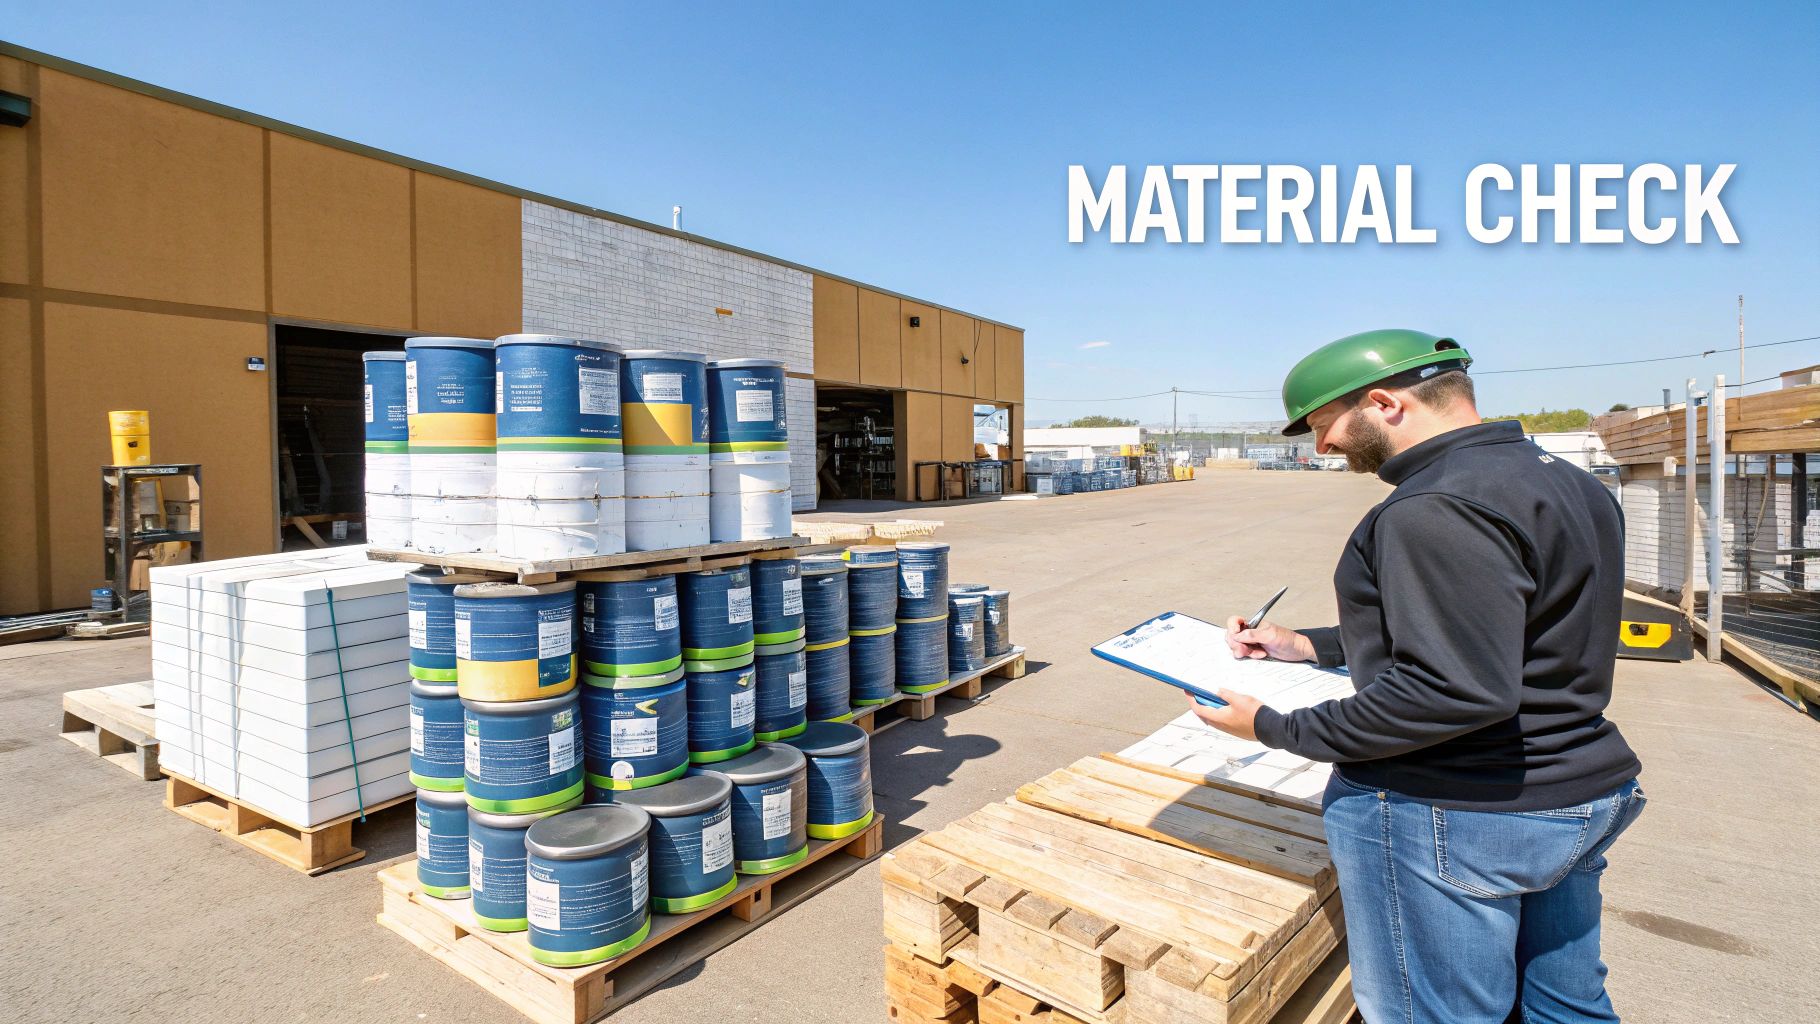
Choosing the Right Waterproofing Method

With several options available, it can be tough to know which is right for your project. This table breaks down the common methods and where they shine, helping you match the solution to the specific area of your building.

Method Best For Key Advantage
Liquid-Applied Membrane Roofs, balconies, planters, complex shapes Creates a seamless, flexible layer with no weak points at joints.
Sheet Membrane Foundations, plaza decks, large, flat surfaces Extremely durable and provides consistent thickness to resist high pressure.
Cementitious Coating Basements, foundations, concrete water tanks Bonds directly with concrete and can be applied to interior (negative) surfaces.
Integral System New concrete construction (foundations, slabs) Makes the concrete itself waterproof from the inside out; a permanent solution.

Ultimately, the best choice depends on factors like the type of structure, exposure to water, and whether it's new construction or a retrofit. Often, a combination of methods provides the most complete protection.

Cementitious Coatings and Integral Systems

For concrete and masonry structures—think basements and foundation walls common in homes from Kent to Tacoma—cementitious waterproofing is a fantastic option. This is essentially a specialized mortar mix that gets applied to the surface. It bonds both chemically and physically with the concrete, creating a hard, dense, and completely waterproof finish.

Expert Insight: Cementitious coatings are brilliant for "negative-side" waterproofing. That means you can apply them to the inside of a basement wall to stop water from seeping through. It's an incredibly effective fix for existing buildings where excavating the outside isn't practical.

Finally, there are integral systems, which take a different approach entirely. Instead of creating a barrier on top of the concrete, they make the concrete itself waterproof. These are special chemical admixtures added to the concrete mix before it’s even poured. As the concrete cures, the admixtures form insoluble crystals that grow and fill the tiny pores and capillaries, permanently blocking any pathways for water.

Each method has its place, and a professional contractor knows how to evaluate a property and prescribe the right solution. This can range from waterproofing the entire building envelope to applying specialized masonry waterproofing and sealing solutions for materials like split-face block. For high-moisture interior spaces, a multi-layered approach is key. You can see how we tackle wet room waterproofing to get a better idea of how these techniques are combined in the real world.

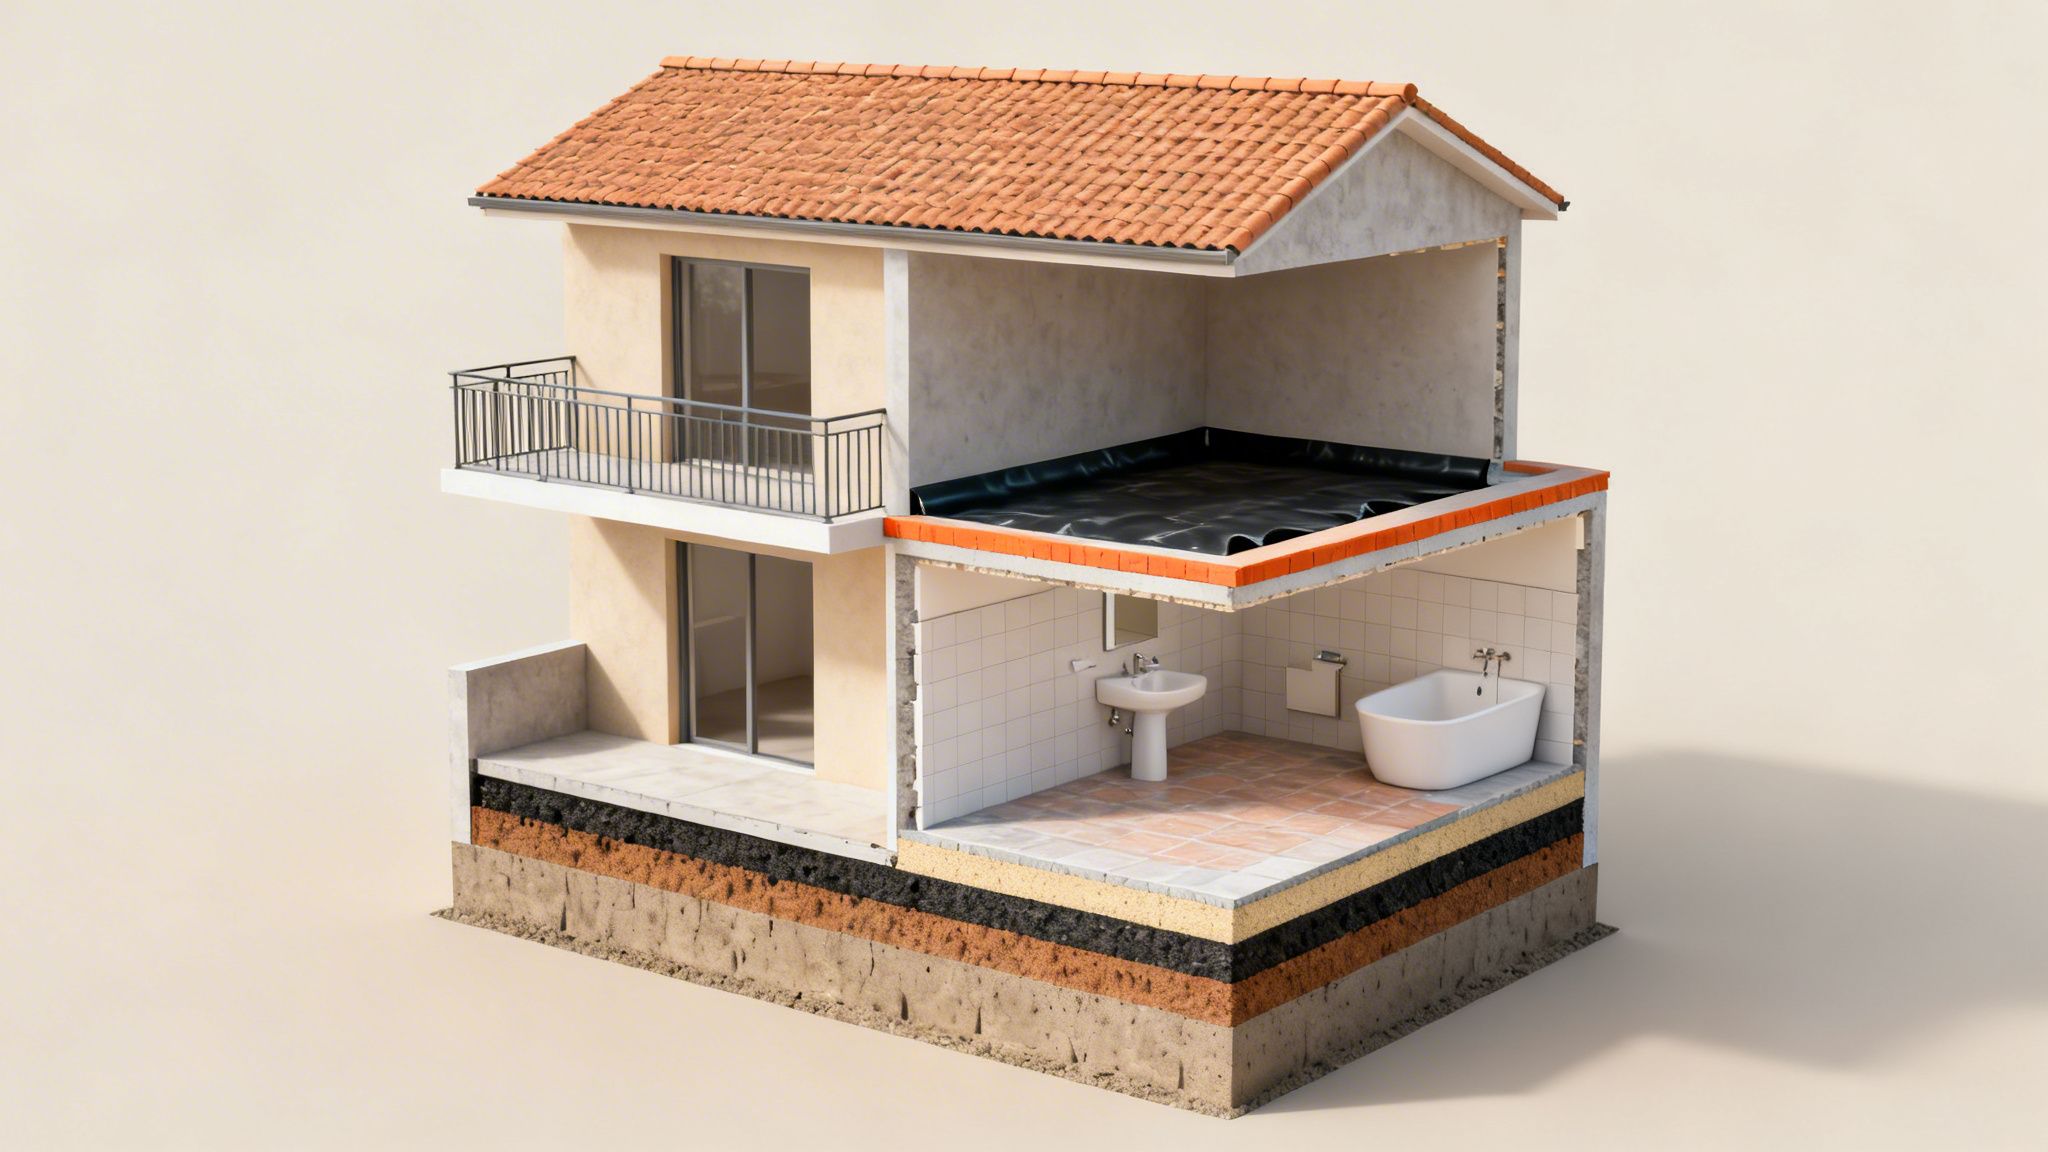
Where Your Building Needs Waterproofing Most

Waterproofing isn't a one-size-fits-all solution you just slap on a building. It's a targeted defense system, and knowing where to apply it is half the battle. For property owners and facility managers here in the Puget Sound, from Kent to Tacoma, understanding your building's weak points is the key to preventing costly water damage.

Let's take a quick tour of a typical property, starting from the ground up, to see exactly where moisture is most likely to attack.

Detailed cross-section of a house showing various construction layers, including a bathroom, balcony, and roof structure with visible waterproofing.

Foundations and Basements

Think about your foundation and basement. They’re buried underground, constantly in contact with damp soil. After a good, long Seattle rain, that soil gets saturated, creating immense hydrostatic pressure—basically, the weight of all that water pushing relentlessly against your concrete walls. This is the single biggest threat to any structure sitting below ground level.

Without a solid waterproofing membrane on the outside, water will inevitably exploit tiny cracks and pores in the concrete. At first, you might just notice a damp, musty smell. Before you know it, you could be dealing with a full-blown flood and serious structural problems. Protecting your foundation isn't just a good idea; it's essential for your building's long-term health.

To get a closer look at how these systems work, you can check out our guide on how to waterproof basement walls.

Roofs, Balconies, and Decks

Now let’s head upstairs. Your roof, balconies, and decks bear the full brunt of the weather—rain, snow, and the sun’s harsh UV rays. While a roof is built to shed water, its real defense is the waterproofing layer hidden beneath the shingles or tiles. Any spot where something pokes through the roof, like a vent, skylight, or chimney, is a potential leak waiting to happen.

Balconies and decks are their own special headache. Not only do they need to be sloped perfectly to drain water away, but they also require a tough, seamless membrane to keep moisture out. If that membrane fails, it doesn't just rot the deck itself; it lets water seep directly into the living space or building frame below. This is why any project involving custom decks and patios has to start with a rock-solid waterproofing plan.

Expert Insight: In a commercial building, a small leak from a plaza deck seeping into the retail space below or a roof dripping into a server room can cause catastrophic business interruptions and financial losses. It’s a stark reminder of why proactive waterproofing is so critical for facility maintenance.

Interior Wet Areas

Waterproofing isn’t just for the outside. Some of the highest-risk areas are inside your building, where plumbing and daily use create a constant threat of moisture. These "wet areas" need their own dedicated waterproofing strategy to contain water and stop it from spreading to other parts of the structure.

A few key interior zones to watch:

  • Bathrooms and Showers: Don't be fooled—tile and grout are not waterproof. A membrane behind the shower walls and under the floor is the only thing preventing water from soaking into your wall cavities and subfloor. This is a key part of any residential remodeling project.
  • Mechanical Rooms: Boilers, HVAC units, and water heaters are all housed here. Leaks aren't a matter of if, but when. A properly waterproofed floor with good drainage is non-negotiable for commercial renovations.
  • Commercial Kitchens and Laundry Rooms: With constant spills and heavy water use, these spaces demand heavy-duty floor and wall waterproofing to prevent damage and keep things sanitary.

Here in the Pacific Northwest, our climate makes these measures even more critical. North America accounts for over 35% of the global waterproofing market, largely driven by repairs to existing buildings. That’s no surprise in the Puget Sound, where we often see more than 40 inches of rain a year, costing property owners millions in water damage repairs. For a building owner in Seattle or Tacoma, professional waterproofing isn't just an expense—it's a crucial investment in your property's resilience.

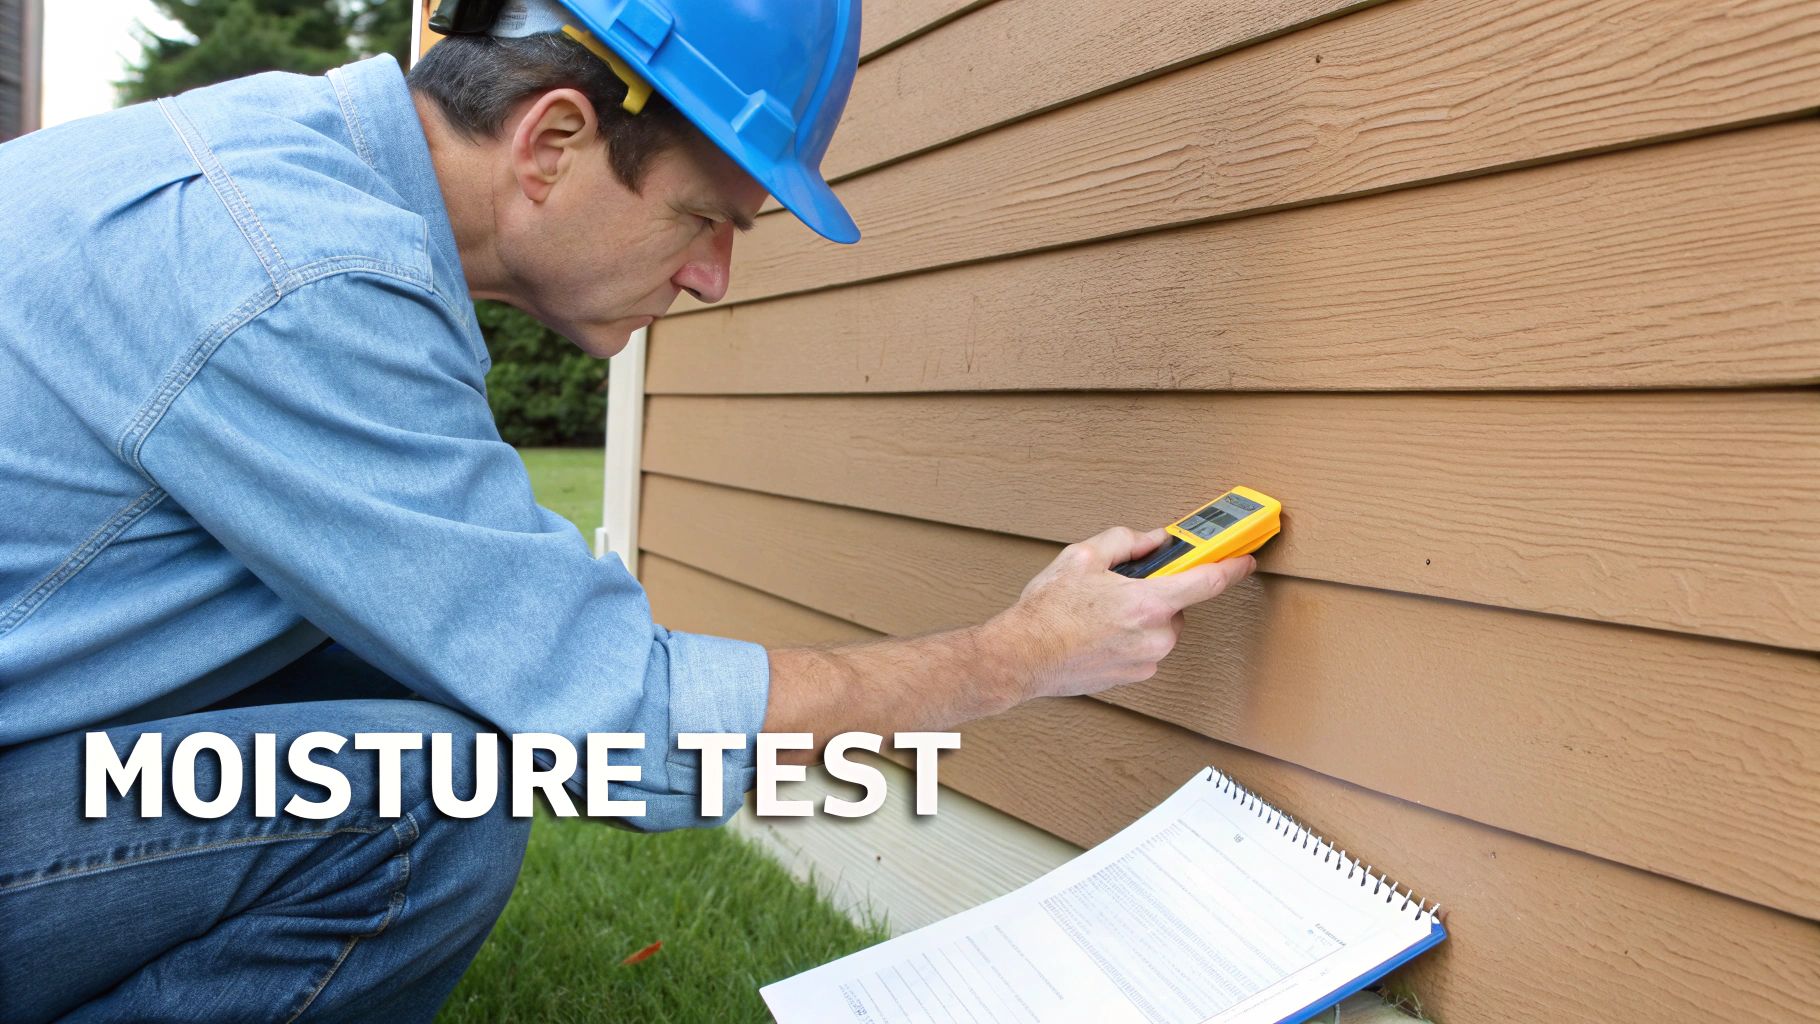
Warning Signs of a Waterproofing Failure

Your building talks. When it comes to water intrusion, it sends signals that range from screaming red flags to quiet, subtle whispers. The trick is learning to listen. Catching these signs early is the single most important thing you can do to stop a small, fixable issue from spiraling into a full-blown structural crisis.

This isn't about being paranoid; it's about being prepared. As a property owner or facility manager, knowing what to look for helps you protect your investment. Think of it as a routine health checkup for your building—one that can prevent a catastrophic diagnosis later.

Obvious Signs of Water Intrusion

Some signs of water damage are impossible to miss. They’re the big, flashing warning lights telling you that water has breached your defenses. If you spot any of these, it's time for immediate action.

These are the most urgent red flags:

  • Peeling, Blistering, or Bubbling Paint: When water gets behind paint, it pushes it away from the wall or ceiling. This is often the first and most visible sign of a hidden leak. This is a common call for exterior painting services.
  • Visible Mold or Mildew: See those dark, splotchy patches of black or green in corners or on walls? That's a direct result of ongoing moisture and a serious health concern that needs to be addressed right away.
  • Musty Odors: That damp, earthy smell in a basement, crawlspace, or even a closet is the unmistakable scent of mold and mildew. Your nose often detects a problem long before your eyes do.
  • Dark Stains or Discoloration: Those ugly yellowish or brown rings on a ceiling are the classic calling cards of a water leak. That's a clear sign that water has soaked through the drywall or plaster from above.

If you see these problems in your Kent, WA property, don't wait. Ignoring them guarantees that the damage—and the repair bill—will only get bigger.

Subtle Clues You Shouldn't Ignore

Not all warning signs are as dramatic as a stained ceiling. Sometimes, the evidence is much more subtle, requiring a sharp eye to catch. For detail-oriented homeowners and facility managers, spotting these early can literally save you thousands.

Keep an eye out for these less obvious indicators:

  • Efflorescence: Ever notice a white, chalky powder on your concrete or brick walls? That’s efflorescence. It happens when water seeps through the masonry, dissolves the natural salts inside, and leaves them behind on the surface as it evaporates. It’s a sure-fire sign water is moving through your foundation.
  • Warped or Cupped Floors: If your hardwood or wood and tile floors are buckling, separating, or feel uneven, they’re likely absorbing moisture from below—a common symptom of a leaky foundation or crawlspace issue.
  • Cracks in Foundations or Walls: While tiny hairline cracks can be normal, pay close attention to cracks that are growing, especially horizontal ones. These often point to serious hydrostatic pressure pushing against your foundation.
  • A "Spongy" Feeling Floor: Does a section of your floor feel soft or bouncy? This could mean the subfloor is rotting from a hidden, long-term leak and may require floor repairs.

Expert Insight: Foundations are particularly vulnerable, and understanding how to identify foundation water damage is crucial for property owners. Efflorescence is often the first visible symptom that your below-grade waterproofing system is under stress.

Catching these subtle signs is what diligent property maintenance is all about. It allows you to fix the root cause—the failing waterproof barrier—before it threatens the structural integrity of your entire building. Whether you manage a retail space in Seattle or own a home in Tacoma, acting on these clues is the smartest move you can make. If you suspect a problem, the first step is always to get a professional diagnosis from a local expert like Wheeler Painting.

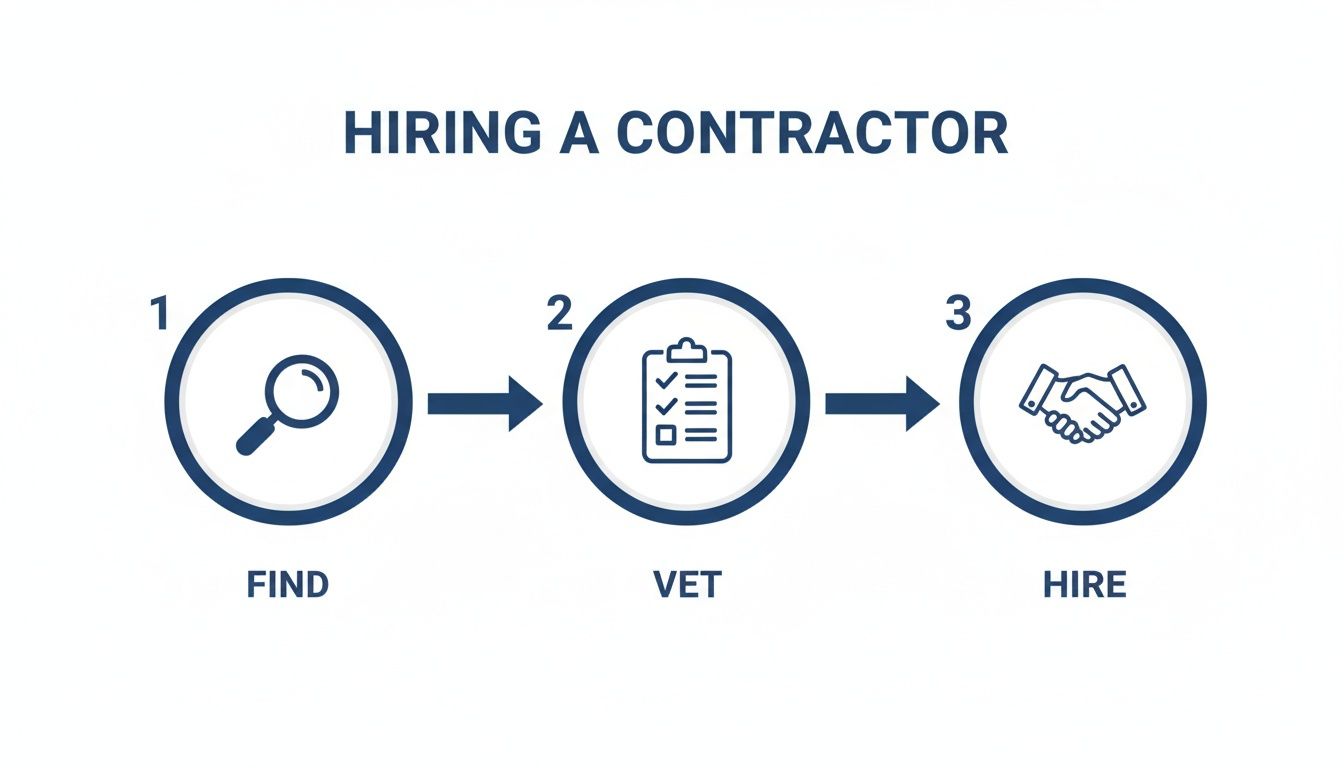
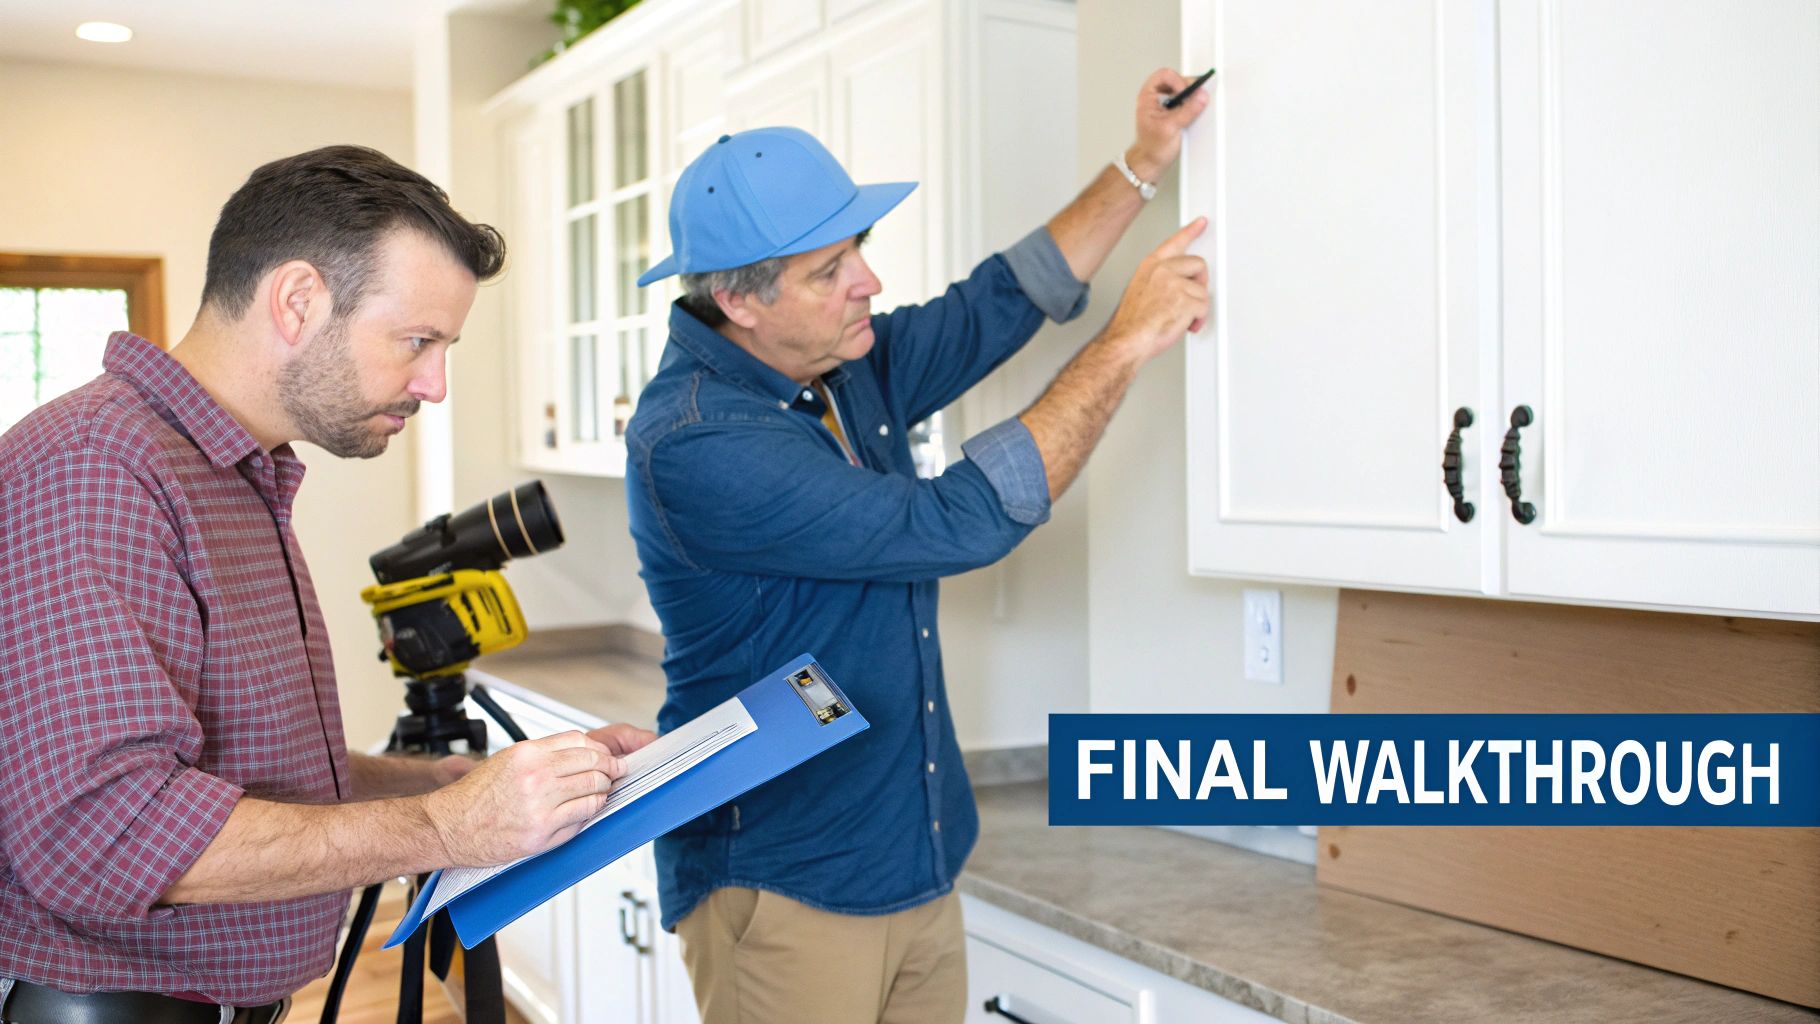
Hiring the Right Waterproofing Contractor in Washington

Now that we’ve covered what waterproofing is and why it's so vital, let's talk about the single most important decision you'll make: choosing who to hire. When it comes to protecting your property from the relentless Washington rain, this isn’t a weekend DIY project. The risks of getting it wrong are simply too high.

An improper application can cause more harm than good. A seal that fails can trap moisture inside your walls, creating a perfect environment for rot and mold to thrive. Choosing the wrong material for the specific hydrostatic pressure pushing against your foundation could lead to a catastrophic failure down the road. This isn't just about slapping on a coating; it’s a science that requires a deep understanding of buildings, our local climate, and the right materials for the job.

Your Checklist for Finding a Puget Sound Pro

When you start looking for a “residential contractor near me” or “commercial construction near me,” you need a partner with a proven local track record. The unique challenges of our climate demand real-world experience. Don't trust your biggest asset to just anyone—use this simple checklist to find the right team.

Look for a contractor who has:

  • Deep Local Experience: A company that’s been working in Seattle, Kent, and Tacoma for decades knows our specific weather patterns and soil conditions inside and out.
  • Proper Licensing and Insurance: This is non-negotiable. It protects you from liability and proves the contractor meets Washington's standards for safety and quality.
  • A General Contractor's Capability: Water damage is rarely a simple fix. A true general contractor can manage the entire project, from finding the leak to full-scale restoration, including drywall contractor services and siding replacement.
  • A Proven Track Record: Always ask to see a portfolio of their work and read testimonials from other property owners or facility managers in your area.

Your Trusted Partner for Waterproofing Projects

At Wheeler Painting, we're more than just painters. We are a full-service general contractor with over 30 years of experience serving the Puget Sound community. We’ve built our reputation by making complex projects like tenant improvements and home renovations feel straightforward and stress-free for our clients. As a firm that specializes in smaller to mid-size facility maintenance, we give your project the focused, hands-on attention it deserves.

Wheeler Painting handles everything in-house, from the initial consultation and precise diagnosis to the final restoration and paint. This single point of accountability means you have one trusted partner managing your project from start to finish, ensuring a seamless and high-quality outcome.

Protecting your investment is our top priority. We bring together decades of hands-on knowledge, top-tier materials, and an unwavering commitment to quality craftsmanship. If you're ready to safeguard your property for the long haul, our team is here to help.

Feeling overwhelmed? Don’t be. Let our team of experienced professionals provide the guidance you need. Learn more about how to find the best waterproofing contractors near me and schedule a consultation today.

Frequently Asked Questions About Construction Waterproofing

When it comes to protecting your property, it's natural to have a few questions. We get calls all the time from homeowners and facility managers in Kent, Seattle, and Tacoma who are trying to get a handle on waterproofing. Here are some of the most common questions we hear, along with some straightforward answers.

How Long Does Professional Waterproofing Last?

That’s a great question, and the honest answer is: it depends. A high-quality waterproofing system can last anywhere from 10 years to the entire life of the building.

The real variables are the materials used, the quality of the workmanship, and how much abuse it takes from the elements. For example, a below-grade foundation system is shielded from sun and weather, so it’s engineered to last for decades. An exterior coating on a balcony, however, is constantly exposed and might need to be reapplied every 10 to 15 years to stay effective. Regular inspections are the key to getting the most out of any system.

Can Waterproofing Be Applied to an Existing Building?

Yes, absolutely. In fact, it’s one of the most common projects we do. This is often called remedial or retrofit waterproofing, and it’s a critical service for many older properties here in the Puget Sound.

Whether you're a homeowner finally tackling a damp basement or a facility manager needing to upgrade an older commercial building, it's entirely possible. At Wheeler Painting, we specialize in these kinds of facility maintenance and residential projects, applying modern solutions to existing structures to restore their defense against moisture.

What Is the Difference Between Waterproofing and Dampproofing?

This is probably the most important distinction to understand. The two are often confused, but they perform very different jobs.

The easiest way to think about it is this: dampproofing is like a light raincoat. It's a coating designed to resist moisture from damp soil, but it will fail the moment it faces actual water pressure. Waterproofing, on the other hand, is like a deep-sea diving suit. It’s a complete, robust system built to block both soil moisture and liquid water, even when it’s under significant hydrostatic pressure.

For our rainy climate in Washington, true waterproofing is absolutely essential for protecting basements, foundations, and any structure below ground level.

How Much Does Waterproofing Typically Cost?

The cost can swing pretty widely depending on a few key things: the total square footage, the type of area being treated (a roof has different needs than a basement), the specific materials chosen, and how much prep work is involved. Sometimes, complex excavation is needed, which adds to the cost.

For a typical home, you might see costs range from a few thousand dollars for interior basement work to much more for a full exterior excavation and sealing. Commercial jobs are usually priced by the square foot. The only way to get a firm number is to have a professional contractor come out, assess the situation on-site, and give you a detailed estimate.


Ready to protect your property from the persistent Washington rain? The team at Wheeler Painting has the local expertise to diagnose water intrusion issues and provide durable, effective solutions for your home or commercial building. Schedule your consultation with us today.

A Homeowner’s Guide to the Best Kitchen Remodeling in Puget Sound

A truly great kitchen remodel is about more than just a fresh look—it’s about creating a space that genuinely improves your daily life while adding real value to your home. It’s a careful balance of your personal style, smart, functional design, and durable materials that can stand up to our Pacific Northwest climate. Finding a residential contractor you trust is the key to bringing it all together, from the first sketch to the final reveal. At Wheeler Painting, our goal is to be that trusted local partner for homeowners in Kent, Seattle, and Tacoma, guiding you through the process with clarity and reassurance.

Starting Your Puget Sound Kitchen Remodel Journey

A couple reviews kitchen design blueprints and color swatches on a table by a window.

Does your kitchen feel like it’s fighting you every step of the way? A cramped layout, outdated appliances, or just a tired look can make the heart of your home feel less than welcoming. Taking on a remodel, especially in Western Washington, might seem overwhelming, but it’s a process that becomes exciting once you break it down into clear, manageable steps. This is your chance to reshape your home’s most important room into a space that works for you.

If you’re frustrated with your kitchen, you’re not alone. Many homeowners remodel simply because they can’t stand the old look anymore or because the kitchen is literally falling apart or just doesn’t function well. Here in the Puget Sound, where many of us live in older homes, an upgrade is one of the smartest investments you can make for your happiness and your property value.

First Things First: What’s Your “Why”?

Before you even think about tile or countertops, it’s important to get clear on your goals. What’s the main driver behind your project?

  • Do you need a more durable, family-friendly hub for your busy Tacoma household?
  • Are you dreaming of a sleek, modern kitchen for entertaining in your Seattle condo?
  • Is your priority creating an accessible, age-in-place design for the future?

Figuring out your "why" sets the entire tone for the project. When you’re clear on your motivation, every decision that follows becomes easier. Nailing down the fundamentals of how to plan a kitchen remodel from the outset is the single best way to avoid expensive changes and regrets later on.

A great remodel starts with a clear vision, a realistic budget, and the right contractor. Our goal at Wheeler Painting is to provide a reassuring roadmap, showing how a trusted local partner can turn your vision into reality without the typical stress.

What It Takes to Succeed in the Puget Sound

A successful remodel in our region means designing with local context in mind. We understand how to maximize natural light during our gray winters and choose materials that can handle our damp climate without warping or molding. It also means navigating the unique quirks of renovating older homes found throughout Kent, Seattle, and the surrounding areas.

As a dedicated residential contractor near you, Wheeler Painting has spent years helping homeowners through this exact process. We’re here to help you build a kitchen that’s not just beautiful, but perfectly suited to your life here in the Puget Sound.

Matching Your Vision With a Realistic Budget

It's the age-old dilemma of any remodel: how do you get the kitchen you’re dreaming of without a budget that gives you nightmares? Finding that balance is a critical part of planning a successful kitchen project. It’s easy to get swept away by glossy magazines, but a solid financial plan is what will actually get your project off the ground and over the finish line.

Before you think about materials, let's talk about how you really use your kitchen. The old "work triangle" concept is a bit dated. Today, we think in terms of work zones. Is your morning routine built around a dedicated coffee station? Do you need a baking zone with marble countertops for rolling out dough? Maybe a small desk area for homework or managing the household? Designing around your family's actual activities is what makes a new kitchen truly life-changing.

Defining Your Wants Versus Your Needs

Now for a dose of reality. It's time to get honest and make two lists: your absolute must-haves (needs) and the things that would be great to have (wants). This simple exercise is the key to keeping your budget from spiraling.

  • Needs: These are the non-negotiables. Think functional appliances that will last, enough cabinet space to end clutter, and a layout that finally solves the traffic jam in front of the fridge. In many older Puget Sound homes, this list often includes critical updates like replacing old plumbing or leveling a sloping floor.
  • Wants: This is the fun stuff! A high-end induction range, that stunning waterfall-edge countertop, or custom pantry inserts that feel like magic. These are the upgrades that bring in the "wow" factor.

Once your lists are made, you can build your budget around them. Fund all your needs first. This way, you won't fall in love with a pricey faucet only to discover you don't have enough set aside for essential floor repairs and replacements.

Building a Budget for Your Puget Sound Remodel

Budgeting for a kitchen remodel in the Seattle area means knowing where your money will likely go. Having a realistic breakdown from the start helps you make smarter decisions and avoid sticker shock.

The most important line item in your budget isn't for cabinets or countertops—it's your contingency fund. We tell every client to set aside 10-20% of the total project cost for the unexpected. When you open up walls in an older Puget Sound home, you never know what you'll find.

We've created a sample budget to give you a clearer picture of how costs are typically allocated for a mid-range kitchen remodel in our area.

Sample Kitchen Remodel Budget Breakdown for Puget Sound

Use this estimated cost allocation for a mid-range kitchen remodel in the Seattle area to help plan your finances effectively.

Expense Category Typical Cost Percentage Notes for Washington Homeowners
Cabinetry & Hardware 25-35% This is often the largest expense. Custom cabinets from local makers can increase this percentage.
Labor & Installation 20-30% Skilled labor is a sound investment in our market, and it's not the place to cut corners. This covers demo, install, and finishing.
Appliances 10-15% Prices vary wildly. Look for sales at local retailers to maximize your budget.
Countertops 10-15% Quartz and granite are popular and durable. The cost depends heavily on the material and complexity of the fabrication.
Contingency Fund 10-20% Crucial for older homes in Tacoma, Seattle, and surrounding areas. Covers surprises like mold, pests, or wiring issues.
Flooring 5-7% LVP (Luxury Vinyl Plank) is a popular, waterproof option for our damp climate.
Plumbing & Electrical 5-10% Bringing an older home up to current code can be a significant part of this.
Backsplash & Finishes 2-5% Includes tile, paint, and lighting fixtures. This is a place where you can often find savings without sacrificing style.

This table is a great starting point, but remember that every project is different. For an even more detailed analysis, check out our complete kitchen remodel cost breakdown. Knowing the real numbers behind material choices, like how much porcelain slabs cost for kitchen remodels, helps you make trade-offs that align with your budget.

Knowing Where to Save and Where to Splurge

A beautiful, functional kitchen isn't about buying the cheapest of everything. It's about being smart with your money.

  • Splurge: Spend your money on the things you touch and interact with every single day. A high-quality faucet, durable countertops, and solid cabinet hardware will make your kitchen a joy to use. The other big one? Don't skimp on your residential contractor. Good craftsmanship from a trusted local provider prevents expensive, frustrating problems down the road.
  • Save: Look for savings on items that are easier to change later. A simple, classic subway tile backsplash is inexpensive and timeless, but can be swapped out for something trendier in five years. You can also opt for reliable, well-reviewed appliances instead of the absolute top-of-the-line professional models.

Choosing Designs and Materials for the Pacific Northwest

A collection of home renovation samples including granite, wood flooring, various tiles, paint swatches, and a measuring tape on a table.

Now for the fun part—choosing the finishes that bring your new kitchen’s personality to life. In the Pacific Northwest, this is all about striking a balance between style, durability, and a sense of warmth that can stand up to our famously gray winter days.

It's no secret that kitchens aren't just for cooking anymore. They're the command center for homework, the hub for entertaining, and the heart of family life. A recent industry report confirms this, noting that 76% of homeowners now want larger, more open kitchens. This shift is a huge reason why the best kitchen remodeling projects focus on creating multifunctional spaces. If you're curious about where design is headed, you can discover more insights in the full 2026 Kitchen Trends Report.

Selecting Materials That Last

For homeowners from Kent to Tacoma, materials have to do more than just look good. They need to be resilient enough to handle moisture, heavy use, and the occasional dropped pot. It's a practical decision.

Here are a few of the most popular and reliable choices we consistently see in Puget Sound homes:

  • Countertops: Engineered quartz is still king. Its non-porous surface is a workhorse, fighting off stains and bacteria. Granite delivers natural, one-of-a-kind beauty with great heat resistance. Butcher block can introduce a wonderful warmth, but it requires a bit more upkeep.

  • Flooring: Luxury Vinyl Plank (LVP) is a true superstar in our climate. It’s totally waterproof, incredibly durable, and does a fantastic job mimicking the look of real wood and tile floors without the high price tag. Of course, hardwood is always a classic, but you'll want a top-tier finish to protect it from our damp environment.

  • Cabinetry: Cabinets form the architectural backbone of your kitchen. Shaker-style doors are a go-to for their timeless look that fits both modern and traditional homes. Investing in quality construction—think solid wood frames and soft-close hardware—is something you’ll appreciate every single day. We cover this in detail, so you might want to learn about the different types of cabinets available for your remodel.

Designing for Light and Flow

Any good Pacific Northwest kitchen design should obsess over one thing: natural light. Big windows, glass doors, or a well-placed skylight can absolutely transform a space.

You can then amplify that light with smart design choices. Lighter paint colors from a professional color consultation, a reflective backsplash, and even some open shelving can make a kitchen feel significantly brighter and more spacious.

When you're thinking about layout, picture your daily routine. An open-concept design that flows into the living or dining room is a game-changer for families and anyone who loves to entertain. It just makes life easier.

The Power of a Strategic Lighting Plan

A great lighting plan is every bit as critical as your countertop choice. You can't rely on one overhead light to do all the work. The best designs layer different types of lighting to create a space that’s both perfectly functional and full of atmosphere.

  • Ambient Lighting: This is your general, room-filling light, usually from recessed cans or a central fixture.

  • Task Lighting: This is the focused light you need for your work zones. Think under-cabinet strips that light up your counters for chopping and prep.

  • Accent Lighting: This is where you add a little personality and drama. Pendants over an island or in-cabinet lights to show off your favorite glassware are great examples.

Working with an experienced residential contractor like Wheeler Painting helps ensure all these pieces come together. We can guide you toward materials and designs that not only match your style but are also a perfect fit for life here in our beautiful corner of Washington.

Finding the Right Contractor in Puget Sound

If there's one piece of advice we can give homeowners, it's this: your contractor can make or break your entire kitchen remodel. They're the partner who determines the quality of the work, how smoothly the project runs, and ultimately, whether you're smiling or stressed at the end of it all.

This is especially true here in the Puget Sound. Our region is full of beautiful older homes that can hide surprises behind the drywall—outdated plumbing, quirky wiring, or unexpected structural issues. An experienced local contractor has seen it all before and knows how to handle it without derailing your project. Finding that right-hand pro in Kent, Seattle, or Tacoma is your ticket to a remodel you'll love for years.

Where to Find Reputable Local Pros

Finding a great contractor isn't about a single Google search. It’s about tapping into trusted networks to build a shortlist of real professionals. We always recommend starting with people, not just pixels.

  • Ask Around: Talk to friends, family, and neighbors who’ve had work done recently. Ask them the nitty-gritty: What was the communication like? How did they handle problems? Would you hire them again? A personal referral is worth its weight in gold.
  • Tap the Trade Network: The folks at your local lumberyard or specialty tile shop see contractors every day. They know who does quality work, who communicates well, and—just as importantly—who pays their bills on time.
  • Review Their Work (Critically): Once you have a few names, dive into their websites and social media. Look past the perfectly staged photos. Do their finished kitchens match the style and quality you envision? Scour reviews on multiple sites, not just the cherry-picked ones on their homepage.

After this initial legwork, you should have a solid shortlist of 3-4 potential candidates. Now it’s time to really put them to the test.

Don't Skip the Vetting Process

We can't stress this enough: never skip the vetting process, no matter how charming a contractor seems. A true professional will expect you to do your homework and will have all their information ready for you.

A contractor’s hesitation to provide their license, insurance, or references is the biggest red flag you can encounter. If they can't or won't provide this basic information, walk away immediately—no matter how low their bid is.

Before you even schedule a consultation, you can do some critical background checks. First, head over to the Washington State Department of Labor & Industries website to check their contractor status. This simple search confirms they are legally registered, bonded, and insured.

Next, ask for a copy of their insurance certificate. You're looking for two things: liability coverage (to protect your home from accidental damage) and workers' compensation (to protect you if a crew member gets injured on your property).

Finally, when they provide references, actually call them. Ask about the experience from start to finish. Was the crew respectful of their home? Did the project stay on schedule and on budget? And most importantly, how were problems resolved when they popped up?

The Value of a Full-Service General Contractor

For a project as complex as a kitchen remodel, hiring a full-service general contractor like Wheeler Painting is the smartest path forward. Think of it this way: instead of you trying to line up a plumber, an electrician, a drywall contractor, and a cabinet installer, a general contractor coordinates everything. We become your single point of contact and accountability for the entire job.

This integrated approach means we manage everything under one roof. We’re the ones pulling permits in Seattle, scheduling our trusted subcontractors in Tacoma, and overseeing the final hardware installation in your Kent home. It closes communication gaps and ensures every detail—from floor repairs and replacements to those perfect finishing touches—is executed as part of a cohesive plan. We handle the logistics so you can focus on the exciting parts of bringing your dream kitchen to life.

Navigating the Remodel From Demolition to Final Walkthrough

You’ve vetted the bids, checked the references, and hired your contractor. Now, the real fun begins. This is where the dust flies and your vision starts taking shape, turning all that planning into a tangible reality.

Knowing the sequence of events is the key to a low-stress remodel. It helps you understand what’s happening, why it’s happening, and what’s coming next. Let's walk through the typical construction flow for a Puget Sound kitchen.

The Construction Sequence: What to Expect

Every remodel has its own quirks—especially in our region's charming older homes—but the fundamental order of operations is pretty universal. A good contractor follows a logical path to keep the project efficient and on track.

Here’s a general roadmap of the process:

  • Prep and Containment: Before a single hammer swings, our crew will prep the site. This means sealing off the kitchen with plastic sheeting to control dust and laying down protection for your floors. It's a simple step, but it shows a contractor's respect for your home.
  • Demolition Day: This is the fastest and most dramatic part of the job. Old cabinets, countertops, appliances, and flooring are torn out and hauled away. If walls are coming down, this is when your space will suddenly feel huge (and very, very empty).
  • The "Rough-In" Phase: Once the space is stripped to the studs, the plumbers and electricians get to work. They’ll run new water lines, drains, and electrical wiring for your future layout. This is a critical stage that requires inspections from your local municipality—whether that’s Seattle, Bellevue, or Tacoma—to ensure everything is safe and up to code before any walls get closed up.

From Bare Walls to a Beautiful Kitchen

After the rough-in work passes inspection, the project really picks up steam. This is the exciting part where the visual elements you chose start coming together, and the empty shell begins to look like a kitchen again.

The infographic below illustrates the simple, three-step process that gets you to this exciting construction phase.

Three-step process diagram illustrating how to hire a contractor: find, vet, and hire.

As you can see, finding and vetting the right professional is the groundwork for a smooth and successful project.

Your Final Walkthrough: The Punch List
As work wraps up, you'll conduct a final walkthrough with your contractor. This isn't just a quick glance; it's your chance to create a "punch list." This is a detailed list of every minor correction needed, from a paint scuff to a sticky cabinet drawer. A true professional won't consider the job done until every single item is checked off to your 100% satisfaction.

Once the rough-in is complete, the finishing work begins in a very specific order:

  1. Drywall, Texture, and Paint: The walls are closed up with new drywall, which is then taped, mudded, and sanded for a smooth finish. After that, our professional painters apply a coat of primer, followed by the first layers of your chosen wall color.
  2. Flooring and Cabinetry: Next, your new flooring is laid down. With the floors in place, the crew will begin carefully installing your custom cabinets, which truly start to define the space.
  3. Countertop Templating and Installation: Your countertop fabricator will visit to make a precise digital or wood template of your cabinets. About a week or two later, they’ll return with the finished stone or quartz slabs for installation.
  4. Finishing Touches: This is the home stretch. Plumbers and electricians come back to install the sink, faucet, garbage disposal, and appliances. They'll also install light fixtures, outlets, and switches. The tile backsplash is one of the last items to go in, followed by cabinet hardware and any final interior painting touch-ups.

This process reflects a major shift in kitchen design. We're seeing more homeowners prioritize smart, functional layouts. In fact, studies show 76% of renovators are incorporating features like built-in pantries and dedicated storage to improve organization.

A well-executed remodel isn't just an upgrade for your lifestyle; it's a solid investment. With a national ROI often landing between 50-70%—and frequently higher here in the competitive Puget Sound market—it makes financial sense. You can read more about how future-proof kitchen designs are trending to see why this is one of the smartest places to put your money.

Answering Your Top Kitchen Remodel Questions

No matter how much planning you do, a few big questions always seem to pop up right before you’re ready to pull the trigger on a remodel. We get it. You want to feel confident before the work begins.

Here are the straightforward answers to the questions we hear most often from homeowners around Puget Sound.

How Long Will My Kitchen Remodel Actually Take?

This is the million-dollar question. The honest answer depends entirely on the scope of your project.

A quick cosmetic refresh—maybe some new paint, updated cabinet hardware, and a faucet swap—can often be completed in just 2 to 4 weeks.

But if we're talking about a full tear-out that involves moving walls, installing custom cabinets, and running new plumbing or electrical lines, you should realistically plan for 6 to 12 weeks. Sometimes, especially in older homes, it can take a bit longer.

A few things can stretch out a timeline:

  • Permitting: Getting the green light from local offices in Seattle, Tacoma, or Kent can sometimes be a waiting game.
  • Material Lead Times: If you've fallen in love with special-order cabinets or one-of-a-kind tile, their creation and shipping time is a major factor.
  • The "Surprise" Factor: You never truly know what’s behind a wall until you open it up. Discovering old rot or faulty wiring from a previous DIY job means we have to stop and fix it right, which takes time.

A good contractor, like Wheeler Painting, will provide a detailed project schedule before starting. This is your roadmap. It sets clear expectations and helps you plan your life around the construction.

What Kind of ROI Can I Expect on a Kitchen Remodel in Washington?

A kitchen remodel is almost always a smart investment, consistently ranking as one of the best projects for boosting your home's value. Nationally, you can expect to recoup 50-70% of the cost, but here in the competitive Puget Sound real estate market, a well-done kitchen can deliver an even higher return.

Here’s a little secret: a thoughtful, minor remodel often gets you a better percentage return than a massive, luxury overhaul. The goal is to make smart, timeless choices that you'll love living with and that will also appeal to a wide range of future buyers. An experienced residential contractor near you is your best asset here, helping you put your money where it will add the most real-world value.

Can I Actually Live in My House During the Remodel?

Yes, you can, but it takes some planning and a healthy dose of patience. The biggest hurdle, obviously, is having no kitchen.

Pro Tip: Set up a "survival kitchen" in your dining room, laundry room, or even the garage. A microwave, mini-fridge, coffee maker, and a stack of paper plates will be your best friends.

You also have to be prepared for the dust and noise. Even with the most careful crews, it's a construction zone. At Wheeler Painting, we go to great lengths to contain the mess by sealing off the work area, running dust extraction systems, and cleaning up thoroughly at the end of every single day. Good communication with your project manager is key to making it all bearable.

Do I Really Need a Permit for My Kitchen Remodel in Kent, WA?

Most of the time, yes. Here in Kent and across the Puget Sound region, you'll need a building permit for any project that alters your home’s structure, electrical, or plumbing systems.

That includes common jobs like:

  • Moving or knocking down walls
  • Relocating a sink or major appliance
  • Adding new outlets or changing the lighting layout

If you’re just doing simple cosmetic work, like painting the cabinets you already have or replacing a faucet in the exact same spot, you typically won't need a permit.

Any reputable, licensed contractor will manage the entire permitting process for you. It’s our job to ensure every bit of work is done safely, meets current building codes, and passes every inspection. This protects your family, your investment, and your home’s long-term value.


Starting a residential remodel is a huge undertaking, but you don’t have to go it alone. If you’re ready to create your dream kitchen with a team that believes in clear communication and expert craftsmanship, Wheeler Painting is here to help. As a local provider specializing in residential remodeling, we serve homeowners throughout Kent, Seattle, and Tacoma. Contact us today to schedule your on-site consultation and get started. Learn more and get your free estimate here.

Your Guide to Concrete Stain and Sealer for Stunning Results

That plain gray concrete patio or driveway isn’t doing your property any favors. For homeowners and business owners across the Puget Sound, there's a fantastic way to not only fix that eyesore but also add serious value and protection: concrete stain and sealer. It's a combination that can completely revitalize a surface, whether it’s a residential patio or a high-traffic commercial floor.

From Drab Slab to a Stunning Feature

Side-by-side comparison of old, cracked concrete next to newly stained and sealed concrete.

If you're tired of that boring slab or need a durable, appealing floor for a retail space, staining and sealing your concrete is one of the best upgrades you can make. This isn't just a coat of paint. The process involves thoroughly cleaning the concrete, applying a stain that penetrates deep into the surface for rich, lasting color, and then locking it all in with a high-quality protective sealer.

The result is a huge visual upgrade that also defends the concrete against moisture, oil stains, and daily wear and tear. In this guide, we'll walk you through the whole project, step-by-step. We'll cover what you can reasonably DIY and give you the straight scoop on when it's time to call in a trusted local provider. We understand the unique challenges our climate presents and will provide advice tailored to get you results that last.

Why Sealing Is Non-Negotiable in the Pacific Northwest

Here in the Puget Sound, with our relentless rain and freeze-thaw cycles, leaving concrete unprotected is asking for trouble. Water is the enemy. It seeps into the concrete's pores, and when it freezes, it expands, causing cracking, chipping, and spalling. A good sealer is your best line of defense.

It's no surprise that demand for these products is exploding.

The global market for concrete sealers hit USD 1,759.6 million in 2024 and is on track to reach over USD 3,015.6 million. For those of us in areas like Puget Sound, where weather is tough on concrete, sealers are essential. Penetrating sealers are especially popular because they soak in to repel water and stains from within, all while letting the concrete breathe.

North America accounts for a huge chunk of those sales, driven by new construction and renovation projects, including residential remodeling and commercial renovations. This just goes to show how critical sealing is for protecting the investment you have in your property. If you're interested in the market trends, you can dig deeper into the complete concrete sealer market report.

How to Assess Your Concrete Before You Begin

Tools and materials on cracked concrete: white powder, plastic sheet, trowel, and measuring tape.

Before you get excited about colors and finishes, you need to play detective with your concrete slab. The final look of your concrete stain and sealer is only ever as good as the surface underneath it. Taking the time to do an honest assessment now will save you from some serious, project-killing mistakes down the road.

Take a walk around the entire area—whether it's a small backyard patio or a sprawling commercial floor—and get a good look at what you're dealing with. This initial inspection is your game plan; it tells you exactly what prep work is needed.

Identifying and Addressing Cracks

It's concrete, so you're going to find cracks. The key is knowing which ones are a simple fix and which ones are red flags.

Most of what you'll see are tiny, web-like hairline cracks. These are usually just cosmetic. You can fill them easily with a flexible elastomeric caulk or a polymer-modified cement filler before you start staining.

Bigger issues are spalls, which are more like pits where chunks of concrete have popped out. These require a sturdier concrete patching compound to get them level again. If you find any deep, structural cracks—anything wider than a credit card—it's smart to have a professional contractor like Wheeler Painting take a look. That could signal a problem with the foundation itself, and our team has experience with both residential and commercial construction issues.

Pro Tip: When you're filling cracks, overfill them just a little. Most patching materials shrink as they dry. This lets you sand the patch perfectly flush with the surface for a repair that completely disappears under the stain.

The Crucial Moisture Test

Nothing will ruin a concrete coating faster than moisture. If water vapor is constantly pushing up through the concrete, it's guaranteed to make your new sealer bubble, peel, and fail. We see this all the time on garage floors and basement patios, especially here in the damp Puget Sound climate.

You might even see evidence of it already. If you notice a chalky white powder on the surface, that’s efflorescence. It's the mineral salts left behind as moisture evaporates. Seeing this means a moisture test isn't optional—it's mandatory.

Thankfully, the test is incredibly simple:

  1. Grab a 2’x2’ square of clear plastic sheeting.
  2. Tape it down on all four sides, making sure it’s completely sealed to the concrete.
  3. Just leave it alone for at least 24 hours.

When the time's up, pull back the plastic. If the concrete looks dark or you see condensation on the plastic, you've got a moisture issue. We can't tell you how many projects we've seen fail because someone skipped this five-minute test. Dealing with moisture often involves a deep cleaning to open up the concrete's pores, which is something you can learn more about by checking out the benefits of professional power washing.

Choosing the Right Concrete Stain and Sealer

Walking into a store and seeing a wall of different concrete stains and sealers can feel overwhelming. But once you know what you’re looking at, the choice becomes much clearer. Picking the right products is about more than just color; it’s about getting the look you want and making sure it lasts for years.

Let's start with the stain, which is what gives your concrete its character. You’re essentially choosing between two different approaches here, each with its own unique result.

Acid-Based vs. Water-Based Stains

Acid-based stains are old-school cool. They work by creating a chemical reaction with the lime and minerals in your concrete, producing rich, translucent tones that look like they're part of the stone itself. The final look is always a bit of a surprise—think marbled, variegated patterns in earthy browns, tans, and soft blue-greens. No two floors will ever be identical. If you want a one-of-a-kind, artisanal finish for a patio or an eye-catching retail build-out, this is your ticket.

On the other hand, we have water-based stains. These behave more like a traditional dye, soaking into the concrete’s surface pores without a chemical reaction. This gives you far more control and consistency. If you need to match a specific color for your interior or exterior painting project, or want a more uniform look, water-based is the way to go. The color palette is massive, offering everything from bold reds to deep, solid blacks. They're also a great solution for concrete that has a low lime content, where an acid stain wouldn't react properly.

This flowchart breaks down the visual difference you can expect. It really helps to see how an acid stain creates that organic, marbled effect versus the predictable, even color you get from a water-based product.

Flowchart illustrating the concrete finish selection process for marbled versus consistent looks, detailing application methods and results.

Film-Forming vs. Penetrating Sealers

Once your stain is down, you need to protect it with a sealer. Just like with stains, you have two main families of products to consider.

Film-forming sealers do exactly what their name suggests: they create a durable protective layer on top of the concrete. Products like acrylics, urethanes, and epoxies fall into this category. They offer fantastic protection against spills, scuffs, and heavy foot traffic, and you can choose a finish from matte all the way to a high gloss. For commercial spaces or a garage floor that sees a lot of action, a film-former is usually the best bet. For the ultimate in durability, you might even consider a full system. You can learn more about what an epoxy floor coating is and how it provides a thicker, more robust surface.

Penetrating sealers work completely differently. Instead of forming a surface film, these silane- or siloxane-based products dive deep into the concrete's pores. There, they create a hydrophobic (water-repelling) barrier from the inside out. The best part? They’re completely invisible once cured and won't change the texture or color of your stained concrete. This makes them perfect for preserving that natural look while locking out moisture—an absolute must-have for any outdoor concrete here in the wet Puget Sound climate.


To help you visualize your options, here’s a quick comparison of the most common products we use on projects in the Seattle area.

Stain and Sealer Comparison for Your Puget Sound Project

This table breaks down the key differences between common concrete stains and sealers, helping you weigh the appearance, durability, and ideal use case for your project.

Product Type Best For Appearance Durability & Protection
Acid Stain Achieving a unique, artisanal look on patios, walkways, or interior floors. Variegated, marbled, translucent tones. Earthy color palette. Stain is permanent. Requires a top-coat sealer for protection.
Water-Based Stain Consistent color, specific color matching, and creating graphics or patterns. Opaque or semi-transparent, uniform color. Wide range of colors available. Stain is permanent. Requires a top-coat sealer for protection.
Acrylic Sealer General-purpose sealing for both interior and exterior surfaces. Good UV resistance. Clear, non-yellowing film. Available in matte to gloss finishes. Enhances color. Good. Protects against water and stains but requires reapplication every 1-3 years.
Epoxy/Urethane Sealer High-traffic interior areas like garages, basements, and commercial floors. Thick, high-gloss film. Can be colored. Extremely durable finish. Excellent. Resists chemicals, abrasion, and hot-tire pickup. A long-term solution.
Penetrating Sealer Exterior surfaces like driveways and patios where a natural look is desired. Invisible finish. Does not change the appearance or texture of the concrete. Good to Excellent. Superb water repellency, preventing freeze-thaw damage. Long-lasting.

Ultimately, choosing the right stain and sealer combination comes down to balancing aesthetics with performance. Think about where the concrete is, how much traffic it will get, and the look you’re trying to achieve.

Decorative concrete is a big deal, with the market valued at USD 850 million globally. Here in the Puget Sound, we see property managers combining stains with penetrating sealers for a one-two punch of curb appeal and critical moisture defense. For homeowners, the right combo can extend the life of their concrete by up to 50%.

Making the right choice upfront ensures your surface isn't just beautiful on day one, but that it's also protected and built to handle our local weather for the long haul.

Putting It All Together: Your Guide to Applying Concrete Stain & Sealer

A sprayer applies liquid to a concrete driveway, with a bucket and paint roller ready for sealing.

Alright, you've done your homework, assessed the concrete, and picked out the perfect products. Now comes the rewarding part—bringing that vision to life. Applying concrete stain and sealer isn't complicated, but it does demand patience and a methodical approach.

Think of it as three distinct stages: a deep clean, the application itself, and the final cure. The biggest mistake we see homeowners make is rushing through one of these steps. Each one lays the foundation for the next, so giving each stage the attention it deserves is your ticket to a durable, professional-grade finish.

First, Get Your Surface Spotless and Ready

You simply can't stain over years of built-up grime, oil spots, or old, flaky sealers and expect good results. The first order of business is getting that concrete impeccably clean. For most outdoor surfaces like patios and driveways, a good pressure washing is all it takes to blast away the dirt.

But what if your surface is smooth, like a brand-new garage floor or a hard-troweled basement? Stain needs something to grab onto, and on a dense surface, it will just sit on top. This is where you’ll need to etch the concrete. An etching product is a specialized cleaner that chemically opens up the pores of the concrete, giving it a texture a bit like medium-grit sandpaper. This profile is perfect for the stain to penetrate deeply and evenly.

Here’s your game plan for prep:

  • Clear the Deck: Start by sweeping or blowing off all leaves, dirt, and loose debris.
  • Attack Grease: Hit any stubborn oil or grease stains with a dedicated concrete degreaser. Follow the product instructions.
  • Wash It Down: Thoroughly pressure wash the entire area.
  • Etch If Necessary: If the surface is smooth or sealed, apply an etching solution. Be sure to rinse it away completely afterward.

Once clean, the concrete needs to dry out completely. Here in the Puget Sound, that can easily take 24 to 48 hours, so be patient and check the weather forecast.

Expert Tip: The way you spray has a huge impact on the final look. For acid stains, use a figure-eight motion with overlapping passes to get that beautiful, mottled effect. With water-based stains, always maintain a "wet edge" by working in smaller, manageable sections to avoid lap marks.

Next, Apply the Stain and Sealer

Once your concrete is bone dry and ready, it's time for the main event. A basic pump-up garden sprayer is your best friend here—it’s the perfect tool for applying a light, consistent coat of stain without over-saturating the surface.

After the stain is down and has dried according to the manufacturer’s directions, it's time to lock in that color and add protection. This is where the sealer comes in. Penetrating sealers are a massive part of the industry—valued at USD 381 million globally in 2025—for a good reason. They soak into the concrete to protect it from within, rather than forming a slippery film on top. For our damp Puget Sound climate, these are an excellent choice, especially with so many great low-VOC, water-based options available that comply with local environmental regulations. You can get more details on the growth of penetrating concrete sealers and how they work.

Finally, Let It Cure

The final phase is all about patience. Curing isn't just about drying; it's a chemical process where the stain and sealer harden and bond with the concrete.

  • Foot Traffic: You can typically walk on the surface in about 4 to 6 hours.
  • Heavy Items & Vehicles: Hold off on moving heavy furniture back or parking cars on the surface for at least 48 to 72 hours.
  • Full Cure: A complete chemical cure can take up to a week. During this time, try to keep the surface dry and protect it from chemicals or spills.

Knowing When to Call a Professional Contractor

There's a real satisfaction in a DIY job well done. But when it comes to concrete stain and sealer, it’s crucial to know when to step back and call in an expert. Recognizing that line can be the difference between a beautiful, long-lasting surface and a costly, frustrating mess.

Before you even think about picking colors, take a hard look at the concrete itself. If you're seeing deep cracks, widespread flaking (spalling), or persistent damp spots, that’s your first red flag. These aren’t just cosmetic flaws; they often point to deeper issues like foundation movement or moisture problems from below.

A professional can diagnose what's really going on. Slapping a coat of sealer over a serious structural issue is just a temporary fix that will fail, and an experienced contractor will make sure the slab is sound before any staining begins. If you’re looking for a “residential contractor near me,” choosing one with this expertise is vital.

Large-Scale and Commercial Projects

The sheer size of a project is often the clearest sign you need a pro. Staining a small concrete patio is a manageable weekend project. Staining a huge driveway, a commercial showroom, or an entire parking garage? That's a different league entirely.

These bigger jobs require a professional team and specialized equipment to get a uniform finish. Without them, you’re almost guaranteed to see lap marks and color inconsistencies, especially on a large, open surface.

For any business, bringing in a "commercial construction near me" expert like Wheeler Painting is less about convenience and more about protecting your investment and ensuring safety.

A commercial floor, whether in a retail space or an industrial facility, has to perform. It needs to stand up to heavy foot traffic, forklifts, and chemical spills. A pro will select and apply a high-performance system—from office space renovation to institutional painting—that not only looks good but also meets all durability requirements and local building codes.

Ultimately, it's about minimizing risk and preventing operational downtime.

When Specialized Coatings and Finishes Are Required

Some high-performance coatings are simply not DIY-friendly. We're talking about products like high-solid epoxies or chemical-resistant urethane systems. These materials are incredibly tough, but they demand precise application conditions—everything from surface temperature to air humidity has to be just right. One mistake can cause the entire coating to fail.

Hiring a pro gives you access to their industrial-grade grinders and vacuums, their deep knowledge of different products, and their ability to solve problems on the fly. It’s what ensures a finish lasts for a decade or more, not just a couple of seasons. For tricky situations that require a fast response, our team is equipped to handle just about anything. You can see how we manage time-sensitive projects in our guide to emergency parking lot services.

Answering Your Top Questions About Concrete Staining and Sealing

Even the most detailed guide can leave you with a few lingering questions. When you’re staring at your own concrete, specific concerns always pop up. We get it. Over the years, we've heard just about every question in the book from homeowners and facility managers here in the Puget Sound.

Here are the honest, straightforward answers to the questions we're asked most often.

How Long Does Concrete Sealer Really Last in the Pacific Northwest?

This is probably the most practical question of all, especially with our notoriously wet weather. There's no single answer, but as a solid rule of thumb, you should plan on reapplying a quality sealer every 2 to 5 years.

The exact lifespan really boils down to two things: the product you choose and the wear and tear it endures. For instance, a premium penetrating sealer on a quiet residential patio can easily last closer to that 5-year mark. On the other hand, a film-forming acrylic sealer on a high-traffic commercial entryway will likely need a fresh coat every 2 years to keep looking its best. Our damp winters are the ultimate test for any coating, making regular check-ups a must.

Can I Stain and Seal Old Concrete That's Already Been Treated?

You absolutely can, but there's a huge catch: preparation is everything. You can't just slap a new coat of stain over an old, peeling sealer and hope for the best.

First, that old coating has to go—all of it. This usually involves a chemical stripper and a good amount of elbow grease with a scraper, or mechanical grinding for tougher coatings like epoxy. Once the concrete is bare, it needs a thorough cleaning and acid etching to open up the pores. This is what allows the new stain to soak in deeply rather than just sitting on top.

If your concrete is particularly old or looks damaged and overly porous, it's wise to get a professional opinion. An expert can tell you if the slab is still in good shape for staining or if you're at risk of a splotchy, uneven finish.

What's the Biggest Mistake People Make with This Project?

Without a doubt, the #1 mistake we see is rushed or improper surface preparation. It's the least exciting part of the job, and that's precisely why it gets skipped. People get excited about the color and just want to get to the fun part.

But failing to deep clean, not treating oil spots, skipping the acid etch on a smooth slab, or forgetting to check for moisture is a recipe for disaster.

We’ve been called out to fix it countless times: a beautiful stain job that starts peeling, flaking, or turning cloudy within months. Taking the time to get the concrete perfectly clean, profiled, and dry isn't just a suggestion—it’s the only way to guarantee a finish that lasts.

Is Stained and Sealed Concrete a Good Option for a Commercial Floor?

It’s a fantastic option. For places like retail shops, showrooms, restaurants, and office lobbies, stained concrete offers a killer combination of sophisticated style, serious durability, and low-key maintenance. The seamless, non-porous surface is a breeze to keep clean and holds its own against constant foot traffic.

For new commercial construction or major renovations, you can really dial in the performance. In a high-wear environment, we often recommend layering a beautiful concrete stain with a heavy-duty topcoat system, like a high-performance epoxy or urethane. This one-two punch delivers maximum protection against scuffs, spills, and the daily grind, keeping the floor looking sharp for years to come.


If your project feels like it's getting too big, or if you simply want to ensure a perfect, professional finish from the start, our team at Wheeler Painting is ready to step in. We have decades of experience making complex concrete projects straightforward for our residential and commercial clients all over the Puget Sound.

Schedule your free, on-site consultation with Wheeler Painting today!

A Realistic Home Addition Cost Estimator for Puget Sound

Planning a home addition in the Puget Sound area is an exciting step, but the first question property owners ask is always, "What's this actually going to cost?"

The honest answer? It varies significantly. For local projects, you can expect to invest anywhere from $250 to over $600 per square foot. A simple bedroom build will land on the lower end, while a new kitchen or a second-story master suite with a luxury bathroom will push you toward that higher figure. The project's complexity and the level of finishes you choose are the biggest factors.

How to Estimate Home Addition Costs in Puget Sound

Figuring out the budget for your home addition is a critical first step. While it's tempting to multiply your desired square footage by an online average, that's just a ballpark guess and doesn't tell the whole story.

To get a real handle on the numbers, you need to think like a professional contractor. That means breaking the project down into its core components—from site preparation to the final light switch. This approach helps you see exactly where your money is going and prepares you for productive conversations with your residential contractor.

Breaking Down the Major Cost Categories

A huge chunk of the work on any addition happens long before the first wall goes up. These are the "soft costs"—things like architectural design, structural engineering, and the crucial process of getting permits from the city or county. They're the blueprint for a successful project.

Then come the "hard costs," which is everything tangible you see during construction: the lumber, the concrete, the windows, and the labor to put it all together.

Let’s look at the major cost centers for a typical addition in our region:

  • Foundation & Site Work: This is where it all begins. This includes excavation, grading the land, and pouring the concrete foundation that will support your new space.
  • Framing & Structure: Think of this as the skeleton of your addition. It includes all the lumber and labor needed to build the walls, floor systems, and roof structure.
  • Exterior Finishes: This is the shell that protects your home from our classic Pacific Northwest weather—siding replacement, roofing, windows, and exterior doors.
  • Interior Systems (The "Guts"): All the essential, behind-the-walls stuff. This includes running new electrical wiring, plumbing for kitchens or baths, and extending your HVAC system for heating and cooling.
  • Interior Finishes: This is the rewarding part where you see the space come to life! It covers everything from drywall and painting to flooring, trim work, cabinetry, and light fixtures.

One of the most common budgeting mistakes homeowners make is fixating on the finishes—the tile, the countertops, the paint colors. Keep in mind that the "unseen" work—the structure and systems—typically accounts for 60-70% of the total budget. These are the critical elements that make the space functional and durable for decades.

For a clearer picture, here’s a quick overview of how a typical budget breaks down.

Puget Sound Home Addition Costs At a Glance

This table shows the typical budget allocation for each major phase of a home addition project in our region.

Project Component Typical Percentage of Total Budget
Design & Permits 10-15%
Site Work & Foundation 10-15%
Framing & Structure 15-20%
Exterior Finishes (Roofing, Siding, Windows) 15-20%
Interior Systems (Plumbing, Electrical, HVAC) 10-15%
Interior Finishes (Drywall, Flooring, Paint) 15-25%
Contractor Fee & Contingency 10-20%

Seeing the numbers laid out like this helps you understand the whole financial picture. It allows for a more informed conversation with your contractor, weighing how a splurge in one area (like a premium accordion door) might require a more conservative choice for your flooring to stay on track.

Breaking Down Your Home Addition Budget

A solid budget for a home addition isn't just one big number. It's a collection of many different costs, and understanding where every dollar goes is the key to a successful project. When you can see the individual components, you're in a much better position to talk with your contractor and make smart decisions.

Think of it as a three-part journey: you start with a rough estimate, refine it into a detailed budget, and then build a comprehensive plan.

Flowchart illustrating the three-step home addition estimate process: estimate, budget, and plan.

Each phase logically follows the last, ensuring your financial plan is as sturdy as the new foundation you're about to pour.

The "Hard Costs": What You Can See and Touch

We call these hard costs because they cover the tangible, physical materials that go into your project. From the concrete in the ground to the shingles on the roof, these are the direct construction expenses that make up the bulk of your budget.

Here’s what that looks like on the ground:

  • Site Work & Foundation: Long before a single wall is framed, the site needs preparation. This involves excavation, grading the land, and pouring the concrete foundation. The cost here can swing quite a bit depending on your soil conditions and the complexity of the addition's footprint.
  • Framing & Structure: This is the skeleton of your new space. It includes all the lumber, sheathing, and the skilled labor needed to put up the walls, floor joists, and roof trusses.
  • The Exterior Shell: This is everything that shields your addition from our classic Pacific Northwest weather. We're talking roofing, siding (like HardiePlank or cedar), windows, and exterior doors. Your choices here have a huge impact not just on the initial cost but also on your home's curb appeal and long-term maintenance.
  • Essential Systems: Think of these as the "guts" of the addition. This means extending electrical wiring, running new plumbing for that dream bathroom or kitchen, and connecting the new space to your existing HVAC system so it's comfortable year-round.
  • Interior Finishes: Here's where your style really starts to show. This large category covers everything from drywall and insulation to interior painting, flooring, trim, cabinetry, countertops, and light fixtures. The options—and the price points—are practically endless.

It's worth noting that the home remodeling market is booming, expected to hit $1.29 trillion by 2030. This shows that more property owners are choosing to invest in their current homes rather than move, especially in a competitive market like Western Washington. For anyone planning an addition in the Puget Sound, this is good news—it means a wider selection of materials and skilled professionals are available.

Don't Forget the "Soft Costs"

Soft costs are all the essential, non-physical expenses that are easy to forget but absolutely critical to getting your project done right. Ignoring them is a surefire way to blow your budget.

One of the most common mistakes we see property owners make is focusing only on the visible construction. Soft costs—like design fees and permits—are just as important and typically add up to 10-15% of the total project cost. Factoring these in from the very beginning is crucial.

These behind-the-scenes costs include:

  • Architectural Design Fees: You'll need a professional architect or designer to draw up the blueprints. They ensure your addition is functional, beautiful, and structurally sound.
  • Structural Engineering: An engineer’s job is to review the plans and confirm that the new structure can be safely supported. This is a non-negotiable step for safety and for getting your plans approved by the city.
  • Permit Fees: Your local city or county requires permits for any significant addition. These fees cover the cost of their team reviewing your plans and performing inspections to make sure all the work is up to code. Costs vary widely depending on your location and the scope of the project.

Labor: The Engine of Your Project

Labor is what brings the plans and materials to life, and it's easily one of the biggest line items in your budget. Here in the Puget Sound region, you can expect skilled labor to account for 40% to 60% of your total project cost.

This covers the wages for all the talented tradespeople on site, including:

  • Carpenters
  • Electricians
  • Plumbers
  • HVAC Technicians
  • Roofers
  • Painters

When you hire a general contractor near you like Wheeler Painting, the management and coordination of all these pros are built into the project fee. This is a huge advantage, as it ensures everyone is working together seamlessly, which is the best way to keep a project on schedule and on budget.

Seeing how these costs break down in other projects can also be incredibly helpful. For a real-world example, take a look at our guide on kitchen remodel cost breakdowns. Getting a firm grip on these individual costs is the first real step toward creating an addition estimate you can count on.

Key Factors That Drive Up Project Costs

Ever wonder why a 500-square-foot addition can cost $150,000 for one person and over $300,000 for their neighbor just down the street? It all comes down to the details. The real cost of an addition isn't just about the square footage; it's a complex mix of your specific choices, unseen site conditions, and the economic climate we're all operating in.

Understanding these variables is the first step toward building a realistic budget and avoiding sticker shock later. Every single decision, from the brand of windows you pick to the pitch of your new roofline, has a direct impact on the final number.

Material Quality: The Great Budget Multiplier

Nowhere does personal taste affect the bottom line more than in your choice of materials and finishes. This is where the gap between "standard" and "custom" can widen into a canyon.

Think about a new primary bathroom. You could grab a standard vanity from a big-box store for around $800. A nice semi-custom option might run you $2,500. But if you want a truly custom, handcrafted piece? That could easily top $7,000.

That same logic applies to everything in your addition:

  • Flooring: Budget-friendly vinyl plank is a great starting point, but mid-range engineered hardwood is a common upgrade. If you’re looking for a premium feel, custom-milled wide-plank flooring can be a significant investment.
  • Windows: Standard vinyl windows get the job done. High-performance fiberglass or classic wood-clad windows, however, cost substantially more while offering better looks and energy savings.
  • Fixtures: A basic faucet set might be $150, but a designer fixture in a specialty finish can easily cross the $1,000 mark.

When you multiply these choices across an entire project, it's easy to see how the final cost can swing dramatically.

To give you a clearer picture, here’s a look at how different material choices can influence your budget across key components of an addition.

How Your Material Choices Impact the Budget

Component Budget-Friendly Option (Example) Mid-Range Option (Example) High-End Option (Example)
Siding Vinyl Siding HardiePlank (Fiber Cement) Cedar Shingles or Custom Metal
Flooring Luxury Vinyl Plank (LVP) Engineered Hardwood Custom-Milled Wide-Plank Hardwood
Windows Standard Vinyl Windows Wood-Clad or Fiberglass Windows Custom Aluminum-Clad Windows
Countertops Laminate Quartz or Granite Marble or Soapstone Slabs
Plumbing Fixtures Builder-Grade Chrome (e.g., Delta) Brushed Nickel/Bronze (e.g., Moen) Designer Brands (e.g., Brizo, Kohler)
Lighting Standard Fixtures from Big-Box Store Dimmable LED Recessed Lighting Designer Pendants and Sconces

This table just scratches the surface, but it illustrates how quickly your personal style and preferences become a major factor in the overall project cost.

Market Volatility and Supply Chain Pressures

Even if you’ve picked out every last finish, broader economic forces are at play. We’re in a volatile market right now, and global supply chain hiccups are felt directly here in the Puget Sound.

Construction materials are under serious upward pressure. Recent industry reports for 2026 show that steel mill products have climbed 16%, and aluminum prices are at a three-year high, partly because of demand for clean energy infrastructure. Lumber, plywood, and even architectural copper continue to see price increases due to shortages and trade issues. This directly affects everything from the framing of your addition to its electrical and plumbing systems. If you want to dive deeper, this in-depth 2026 cost analysis explains these trends well.

This is where having a proactive partnership with your contractor is non-negotiable. An experienced local builder has the supplier relationships to anticipate price spikes and secure materials more effectively, giving your project a much-needed buffer against market swings.

The Skilled Labor Shortage

Another huge factor pushing costs up is the ongoing shortage of skilled labor in our region. To put it simply, there aren't enough talented carpenters, electricians, plumbers, and other tradespeople to keep up with the demand.

When demand outpaces supply, prices go up. Securing a team of reliable, top-tier subcontractors has become a competitive process, and their labor rates reflect that. This is especially true for highly specialized work that requires years of experience to master.

When you work with an established general contractor like Wheeler Painting, you aren't just getting a project manager—you're getting access to our trusted network of vetted professionals. We’ve spent decades building relationships with the best tradespeople in Western Washington. That means your project is staffed with a dependable team that delivers high-quality work, which is invaluable in keeping your project on track and on budget in today's tight labor market.

Planning for the Unexpected: Hidden Costs and Your Contingency Fund

Two men, likely construction workers or engineers, review plans at a building site.

Even with the most detailed blueprint in hand, home additions can present unexpected challenges. That's why any experienced builder will tell you that a solid budget isn't just about what you plan to spend—it's also about preparing for what you don't. This is where a contingency fund comes in.

Think of it less as "extra" money and more as an essential part of the project's real cost. It's the buffer that keeps a small problem from becoming a financial crisis, ensuring you don't have to sacrifice your vision when the unexpected happens.

What Exactly Is a Contingency Fund?

A contingency fund is a specific portion of your budget set aside only for unforeseen expenses. This money isn't for splurging on upgraded countertops; it's earmarked for genuine surprises. A good rule of thumb is to set aside 10% to 20% of your total estimated construction cost.

So, if your addition is priced at $200,000, your contingency fund should be between $20,000 and $40,000. Where you land in that range depends on the project's risk. Renovating an older Puget Sound home with a century of secrets hidden in its walls? Leaning toward 20% is a smart move. For newer construction with fewer unknowns, you might feel comfortable closer to 10%.

Pro Tip: Consider your contingency fund to be your project's insurance policy. You hope you never need it, but you'll be incredibly glad it's there if you do. It's the number one tool for protecting your budget and your peace of mind.

What kind of problems does this fund solve? Here are a few real-world examples we’ve seen:

  • Surprise Structural Needs: We open up a wall and discover the main support beam has termite damage and needs to be replaced.
  • Difficult Ground Conditions: Excavation for the new foundation hits a massive boulder that wasn’t on any survey, requiring heavy equipment and extra labor to remove.
  • Code-Required Upgrades: Your current electrical panel is maxed out, and the building inspector requires a full upgrade to support the addition's new circuits.
  • Permitting Hurdles: The city planning department suddenly requires a new drainage survey, adding unexpected engineering fees and delaying the start date.

Looking Beyond the Obvious "Hidden" Costs

Construction surprises aren't the only expenses that can sneak up on you. A truly comprehensive budget accounts for the peripheral costs that are easy to overlook in the early planning stages.

Make sure your home addition cost estimator includes line items for these possibilities:

  • Temporary Living Expenses: If the project impacts your kitchen or only bathroom for a few weeks, you may need to budget for a short-term rental or hotel stays.
  • Higher Utility Bills: Running power tools, fans, and heaters—plus having walls open to the elements—can cause a temporary spike in your energy costs.
  • Landscaping Restoration: Construction is tough on a yard. Factor in the cost of repairing lawns, replacing plants, or fixing sprinkler lines damaged by equipment and foot traffic.
  • Future Property Tax Increases: A bigger, more valuable home means a higher assessed value. Be prepared for your property tax bill to rise in the year following the project's completion.

Smart Ways to Manage Your Home Addition Budget

A beautiful, functional home addition doesn’t require a blank check. With smart planning and strategic decisions, you can keep your project's costs in check without compromising on your goals.

The most powerful tool for controlling your budget is simple: make your decisions early and stick to them.

Even a seemingly small change after construction starts can create a domino effect of added costs. Deciding to move a window just a few inches can mean re-framing a wall, ordering new materials, and impacting the schedule for three different tradespeople—and you'll pay for all of it. Finalizing every detail, from outlet placement to grout color, before the first hammer swings is the single best way to protect your budget.

Plan and Prioritize for the Biggest Impact

Good budget management starts long before the crew shows up. It’s all about making savvy choices that deliver the most value.

One great strategy is phased construction. Let's say your dream is a large addition with a new primary suite and an expanded family room. You could build the entire shell—foundation, framing, and roof—all at once. Then, you only finish the interior of the family room for now. In a few years, when you've replenished your budget, you can finish the primary suite without starting another massive structural project from scratch.

You can also find significant savings in the design itself. Work with your designer and contractor to:

  • Keep the Footprint Simple: A basic rectangular addition is far less expensive to frame, roof, and finish than a complex design with lots of corners and bump-outs.
  • Align with Your Existing Home: Whenever you can, line up new walls and rooflines with the house's current structure. It simplifies the engineering and construction work, making it more cost-effective.
  • Use Standard Sizes: Custom windows and doors come with a custom price tag. Designing your addition around standard, off-the-shelf sizes can save you a surprising amount of money.

Making Smart Choices on Materials and Systems

It’s easy to get carried away with high-end finishes, but you can achieve a premium look without the premium cost. The key is knowing where to save and where it’s worth it to splurge.

For example, you could opt for a high-quality Luxury Vinyl Plank (LVP) floor instead of pricey hardwood, potentially saving thousands. That money could then go toward a showstopper feature, like a massive picture window or those quartz countertops you really want. Knowing how to budget for different spaces is a skill, especially when it comes to high-cost areas like kitchens. We break this down in our guide on planning your kitchen remodel.

It's also critical to think long-term. Investing in high-quality, energy-efficient windows and insulation might cost more upfront, but it will literally pay you back for years in lower heating and cooling bills. That’s a smart investment, not just an expense.

The Value of a Good Partnership

Ultimately, the best way to manage your budget is to have a strong, transparent relationship with your residential contractor. An experienced local partner like Wheeler Painting can offer invaluable advice during the planning stage.

We can help you weigh the pros and cons of different materials, suggest creative and cost-effective alternatives you might not have considered, and give you a detailed, line-item estimate so you know exactly where every dollar is going. This kind of collaboration allows you to make informed decisions that bring your vision to life without breaking the bank, creating a space you’ll love for years to come.

Partnering with a Pro for an Accurate Quote

An online cost estimator is a great first step. It gives you an initial ballpark figure to see if your project is feasible. But to get a number you can actually take to the bank, you need to bring in an expert for an on-site consultation. This is where real planning begins.

A construction worker in a hard hat and safety glasses measures outside a house with a tablet, while a woman watches.

Working with an experienced general contractor closes the gap between your initial calculation and a true, project-ready budget. At Wheeler Painting, our entire process is built on transparency and collaboration, and it all begins with a comprehensive on-site visit.

From Vision to Vetted Proposal

During our consultation, we’ll walk the property with you. We're there to listen to your vision and, just as importantly, to use our trained eye to spot the real-world challenges specific to your home and lot.

This is the information no online tool can ever see. We're looking at factors like tricky soil conditions that could affect the foundation, complex rooflines that need to be tied into seamlessly, or the current state of your home's electrical and plumbing systems.

Getting this hands-on assessment is more critical now than ever. The construction industry is facing significant skilled labor shortages, a trend that can add unexpected risks and costs to any project. An established contractor’s network of reliable subcontractors is your best defense against these challenges.

From there, we build out a completely transparent, line-item proposal. Every single cost is broken down so you can see exactly where your money is going, from city permits to the final coat of paint.

Our goal is simple: to transform your ideas into a clear, manageable plan. A detailed proposal from a trusted professional is the most important tool you have for a stress-free project that stays on budget and on schedule.

This commitment to clear communication is the foundation of a successful partnership. To learn more about what to look for, check out our guide on how to choose a general contractor.

Ready to take the next step? Contact the Wheeler Painting team today, and we’ll provide a detailed, no-obligation estimate for your project.

Common Questions We Hear About Home Addition Costs

When you start thinking about expanding your home, the financial questions can feel a bit overwhelming. Let's tackle some of the most common ones we hear from homeowners right here in the Puget Sound area to give you a clearer picture.

What's the Real Cost Per Square Foot for a Home Addition?

This is always a key question. The honest answer is, it truly depends. Here in the Puget Sound, you're typically looking at a range of $250 to over $600 per square foot.

So, what pushes a project to one end of that spectrum or the other? A more basic addition, like extending a family room, will naturally fall on the lower end. But if you're planning a complex second-story addition or adding a space with heavy plumbing and electrical, like a kitchen or bathroom, you’ll be heading toward that $600+ mark. The only way to nail down a precise number is to have a local contractor walk the property and provide a detailed quote based on your home's unique layout and your vision.

Are Permits Really That Big of a Deal?

Permit fees themselves are a relatively small slice of the overall budget, but they're absolutely essential. For a home addition in Western Washington, you can expect these to run anywhere from a few hundred to several thousand dollars.

The exact cost is set by your local city or county and is tied to the project's size and complexity. These fees aren't just red tape; they pay for crucial plan reviews and on-site inspections. Think of it as a built-in quality control system that ensures everything is done safely and to code. Your general contractor handles all the paperwork and coordination, so you don't have to navigate it alone.

It's easy to see permits as just another fee, but that’s a mistake. They are your insurance policy, a critical step that protects your investment and the long-term safety of your home.

How Can I Keep My Project Costs in Check?

The single most effective way to manage your budget is through meticulous planning. Locking in all of your design and material choices before construction begins is the key to avoiding costly change orders mid-project.

Beyond that, here are a few other strategies that work:

  • Keep the footprint simple. A straightforward rectangular design is always more budget-friendly to build than a complex shape with lots of corners and jogs.
  • Stick to standard sizes. Custom-ordered windows and doors come with a premium price tag. Opting for standard, off-the-shelf sizes can save you a bundle.
  • Be smart with your finishes. You can get a beautiful, high-end look without the eye-watering cost. We can help you find those "sweet spot" materials that deliver great value and style.

At the end of the day, partnering with an experienced professional is your best bet. An expert can steer you away from common pitfalls and manage the project efficiently, preventing the kinds of mistakes and delays that blow budgets out of the water.


A home addition is a major investment, and you need a partner you can count on to do it right. At Wheeler Painting, we bring decades of local experience to every residential and commercial construction project. We'll guide you from the first estimate to the final walkthrough with total transparency and expert craftsmanship. Contact us today for a detailed, no-obligation proposal.

Construction Quality Control Checklist for Flawless Projects

For property owners and facility managers in the Puget Sound area, a successful construction or painting project isn’t just about the final look; it’s about lasting quality and peace of mind. From preventing costly rework to ensuring safety and durability in our unique Pacific Northwest climate, a systematic approach to quality is non-negotiable. Whether you’re planning a residential remodel, a commercial build-out, or a large-scale painting job, overlooking small details can lead to significant problems. This is where a comprehensive construction quality control checklist becomes essential.

It transforms complex projects from overwhelming undertakings into manageable, step-by-step processes. For local homeowners undertaking a siding replacement or business owners planning an office space renovation, this checklist serves as a roadmap to excellence. It provides a clear framework for verifying materials, inspecting workmanship, and ensuring every aspect of the job meets exacting standards. A well-defined quality plan is the single most effective tool for minimizing defects, avoiding budget overruns, and achieving the desired outcome on schedule.

At Wheeler Painting & Restoration, we’ve spent decades refining our quality control to deliver dependable results for businesses and homeowners across our community. This guide shares our field-tested construction quality control checklist, breaking down the critical inspection points for everything from structural integrity to the final paint finish. We’ll provide actionable steps and clear standards to help you, ensuring your next project meets the highest benchmarks from foundation to final closeout.

1. Material Inspection and Certification

The foundation of any high-quality construction or painting project is the materials themselves. This critical first step in a construction quality control checklist involves the comprehensive verification that every single product brought on-site, from lumber and drywall to paint and sealants, meets or exceeds project specifications. It’s a methodical process of confirming that materials are undamaged, authentic, and certified for their intended application, especially in the demanding climate of the Pacific Northwest.

A construction worker in a hard hat reviews a checklist while inspecting materials outdoors.

For a commercial build-out or a residential remodel, this means more than just a quick visual scan. It’s about documenting batch numbers, cross-referencing product data sheets with architectural plans, and ensuring every component has the right certifications to guarantee performance, safety, and longevity. Using the wrong materials can lead to premature failure, warranty voids, and costly rework.

Why This Step Is Crucial

Proper material inspection directly impacts durability and compliance. For instance, using an interior-grade coating on an exterior surface in rainy Western Washington will inevitably lead to failure. Verifying an ASTM-certified exterior paint ensures it can withstand moisture and UV exposure. Similarly, confirming drywall batch certifications before a residential kitchen remodel guarantees consistent quality and fire-resistance ratings.

Actionable Implementation Tips

To integrate this check into your process, consider these straightforward steps:

  • Create a Detailed Receiving Log: Document the date, supplier, product name, lot number, and inspector’s initials for every delivery. This creates an unbroken chain of custody.
  • Photograph Everything: Take clear photos of material labels, certification stamps, and any visible damage upon arrival. This documentation is invaluable for warranty claims and project records.
  • Implement Just-In-Time Delivery: Coordinate with suppliers to have materials delivered shortly before they are needed. This minimizes on-site storage, reducing the risk of damage, moisture absorption, or theft.
  • Proper On-Site Storage: If materials must be stored, ensure they are in a climate-controlled, dry environment. This prevents issues like moisture absorption in drywall or paint degradation from temperature swings.

2. Surface Preparation and Substrate Assessment

Even the highest quality materials will fail if applied to a compromised surface. This step in a construction quality control checklist involves the rigorous evaluation and preparation of all substrates before painting, coating, or attaching new materials. Proper substrate assessment identifies and corrects issues like hidden moisture, previous coating failures, or structural damage that could otherwise jeopardize the entire project’s integrity and longevity—a critical concern in the damp Puget Sound environment.

A home inspector in a blue hard hat performs a moisture test on brown house siding with a handheld meter.

For a commercial build-out or a home remodel, this means going beyond a simple visual check. It requires meticulous testing for moisture content, assessing the pH of concrete floors before an epoxy application, and identifying any underlying rot or mold. Skipping this foundational work is a direct path to peeling paint, delaminating coatings, and costly, frustrating rework down the line.

Why This Step Is Crucial

Thorough surface preparation directly dictates the adhesion, performance, and lifespan of finishes and materials. For example, applying a fresh coat of paint over exterior wood siding with a high moisture content will inevitably lead to blistering and failure as the water tries to escape. Similarly, identifying and performing mold remediation on drywall in a storm-damaged home is essential before repainting to ensure a healthy and durable interior environment.

Actionable Implementation Tips

To make this a non-negotiable part of your quality control process, follow these steps:

  • Use Calibrated Moisture Meters: Invest in and regularly calibrate professional-grade moisture meters. Document readings on all substrates, especially in corners, near windows, and on weather-exposed surfaces.
  • Establish Clear Thresholds: Define and adhere to acceptable moisture levels before proceeding. A common standard is ensuring wood moisture content is at or below 15% before painting.
  • Document with Photos: Take detailed “before” and “after” photos of all surface preparation work. This provides transparent proof of due diligence for the client and serves as a valuable project record.
  • Allow Adequate Drying Time: After pressure washing, cleaning, or making repairs, enforce a strict drying period. Rushing to apply coatings before the substrate is fully dry is a primary cause of adhesion failure.

3. Dimensional Accuracy and Layout Verification

Once materials are on-site, the focus shifts to ensuring they are assembled precisely as designed. This step in the construction quality control checklist is a systematic process of measuring and verifying every dimension, layout, and alignment. From structural framing to the final placement of fixtures, this verification guarantees that the physical build-out perfectly matches the architectural plans and building codes, a non-negotiable step for any successful project.

For a commercial tenant improvement in an office space or a complex kitchen remodel, this means confirming that every wall, opening, and fixture location is exact. A deviation of even half an inch can cause a cascade of problems, from ill-fitting cabinetry and countertops to compliance issues with ADA regulations. This meticulous verification prevents costly rework and ensures all subsequent trades can perform their jobs correctly.

Why This Step Is Crucial

Precise layout verification is the backbone of a project’s integrity. For example, during a residential exterior restoration, verifying window opening dimensions ensures the new units and their flashing will fit perfectly, creating a weathertight seal against Puget Sound’s damp climate. In a commercial build-out, confirming the layout against drawings ensures that specific operational and tenant requirements are met, preventing expensive changes after walls are closed.

Actionable Implementation Tips

To integrate dimensional checks into your workflow, implement these practical strategies:

  • Measure at Multiple Points: Never trust a single measurement. Verify dimensions at several points along any given element (e.g., top, middle, and bottom of a door opening) to check for squareness and consistency.
  • Utilize Laser Levels: For establishing consistently level horizontal and vertical lines across large spaces, such as for countertop installations or ceiling grids, modern laser levels are indispensable tools.
  • Mark and Sign Off: Clearly mark approved layout lines and dimensions on the floor or framing with chalk or tape. Have the lead carpenter or site supervisor sign off on these critical checkpoints before the next phase begins.
  • Schedule Verification Gates: Build formal verification checks into the project schedule at key milestones: after framing is complete, before drywall is installed, and prior to final fixture placement.

4. Paint Application Process Control

The aesthetic appeal and long-term durability of a finish depend entirely on how it’s applied. This step in a construction quality control checklist moves beyond material selection to standardize the entire application process, from surface preparation and priming to the final topcoat. It establishes a repeatable, documented procedure for every coating, ensuring consistent, high-quality results across diverse projects, from residential remodels to large-scale commercial renovations.

For a commercial facility or a home exterior, this means controlling every variable. It involves documenting environmental conditions like temperature and humidity, verifying proper coating thickness at each stage, and adhering to manufacturer-specified drying times. This meticulous control prevents common failures like peeling, blistering, and uneven sheen, safeguarding the investment and ensuring a flawless finish.

Why This Step Is Crucial

Standardized application directly impacts coating performance and longevity. For example, applying an exterior marine-grade coating system to a home without verifying the dry film thickness (DFT) could leave the substrate vulnerable to moisture intrusion from the constant Puget Sound rain. Similarly, an interior kitchen remodel requires enamel paint applied over a moisture-resistant primer; skipping this control can lead to premature failure in a high-humidity environment.

Actionable Implementation Tips

To integrate this check into your process, consider these straightforward steps:

  • Establish Environmental Limits: Define and document the acceptable temperature and humidity ranges for each coating product. Empower teams to halt work when conditions fall outside these limits to prevent application defects.
  • Use Film Thickness Gauges: Regularly measure wet film thickness (WFT) during application with a simple gauge to ensure sufficient material is being applied. This is a quick, real-time check for proper coverage.
  • Verify Dry Film Thickness (DFT): Use an electronic DFT meter to confirm the final coating thickness meets the project specifications before applying subsequent coats. This is crucial for performance coatings. To learn more about how professional application impacts results, explore our specialized painting services.
  • Maintain On-Site Logs: Keep a detailed daily log of temperature, humidity, and moisture readings. This documentation provides a verifiable record of quality control and is invaluable for project closeout.

5. Drywall and Interior Finish Quality Standards

The final appearance of any interior space hinges on the quality of the surface beneath the paint. This step in a construction quality control checklist focuses on the systematic inspection of drywall installation and finishing, from hanging the sheets to the final sanding. It’s a meticulous process ensuring that every wall and ceiling provides a smooth, uniform, and flawless canvas for paint, which is essential for both high-end residential and professional commercial interiors.

For a commercial tenant improvement in an office or a kitchen remodel, this means verifying everything from proper fastener countersinking to the smoothness of joint compound. Skipping this detailed inspection can lead to visible seams, shadowing, and surface imperfections that even the best paint cannot hide, resulting in a finish that looks unprofessional and requires costly rework.

Why This Step Is Crucial

A flawless finish directly impacts the aesthetic quality and client satisfaction of a project. For instance, a residential kitchen remodel that specifies a Level 5 drywall finish requires a perfectly smooth surface to accommodate high-gloss paints and under-cabinet lighting, which accentuate imperfections. In a commercial setting, ensuring detailed drywall inspection protocols are met guarantees the professional appearance required for client-facing spaces. This attention to detail is a cornerstone of successful residential construction projects.

Actionable Implementation Tips

To guarantee superior interior finishes, integrate these checks into your workflow:

  • Define and Communicate Finish Levels: Clearly specify the required drywall finish level (from 0 to 5) in project documents and ensure the installation crew understands the standard for each room.
  • Inspect with Critical Lighting: Use a work light held at a low angle to the wall surface. This technique, known as side-lighting, casts shadows that reveal subtle waves, tool marks, and sanding imperfections invisible under direct overhead light.
  • Stage-Gate Inspections: Don’t wait until the end. Conduct separate inspections after taping, after each coat of mud, and after sanding. Catching issues early is far more efficient than correcting them after primer has been applied.
  • Mandate Primer Application: Document that a full coat of high-quality primer has been applied and approved before any other trades (like cabinet installers or painters) begin their work. This seals the surface and ensures proper paint adhesion.

6. Flashing and Waterproofing Verification

In the moisture-rich climate of the Pacific Northwest, water is the primary enemy of building integrity. This makes flashing and waterproofing one of the most critical steps in any construction quality control checklist. This phase involves the meticulous inspection of all installations designed to prevent water intrusion, from the seals around windows and doors to the flashing at every roof penetration and exterior transition. It’s a non-negotiable step for ensuring a building’s long-term health.

Whether it’s a commercial build-out or a residential siding replacement, getting this detail wrong leads to catastrophic failures. Proper verification means checking sealant application, ensuring correct material overlaps, and confirming proper fastening techniques. Overlooking a single improperly sealed window can result in rot, mold, and structural damage that costs thousands to remediate.

Why This Step Is Crucial

Effective flashing and waterproofing are the building’s first and most important line of defense against water damage. In a residential roof restoration, for example, detailed inspection of flashing at all penetrations like vents and chimneys prevents leaks that could undermine the entire project. Similarly, for a commercial waterproofing project, verifying sealant effectiveness and membrane integrity ensures the structure remains dry and sound for decades.

Actionable Implementation Tips

To ensure your project is watertight, integrate these verification steps:

  • Photo-Document Everything: Take detailed photographs of all flashing and waterproofing installations before they are covered by siding, roofing, or trim. This creates a permanent record of proper installation.
  • Verify Material Compatibility: Ensure that the sealants used are chemically compatible with the adjacent materials (e.g., metal flashing, vinyl window frames, fiber cement siding). Using the wrong sealant can cause it to fail prematurely.
  • Schedule Pre-Closure Water Testing: For critical areas, conduct a controlled water test after installation but before the final coverings are put on. This proactive check can reveal any small leaks or imperfections that are easy to fix at this stage.
  • Train Crews on Overlap Direction: Ensure every team member understands that all flashing and weather-resistant barriers must be installed shingle-style. This means the upper layers overlap the lower layers to shed water down and away from the structure.

7. Structural Inspection and Load-Bearing Verification

Ensuring a building’s structural integrity is non-negotiable, whether it’s a new home addition or a commercial expansion. This step in a construction quality control checklist is a rigorous verification that all load-bearing elements like beams, headers, joists, and their connections are installed correctly according to engineering plans and building codes. It’s the framework that guarantees the safety and longevity of the entire structure.

For a residential kitchen remodel that involves removing a wall, this means confirming the new support beam can handle the load. In a commercial construction project, it involves ensuring a new mezzanine floor meets all seismic and live-load requirements. Skipping this verification can lead to catastrophic failures, compromising safety and resulting in immense liability.

Why This Step Is Crucial

Proper structural verification is the backbone of safe construction. In the Pacific Northwest, this is particularly important due to regional seismic activity and wind load requirements. An improperly secured connection between a new addition and an existing home can create a critical failure point during an earthquake. Likewise, a commercial tenant improvement that adds significant weight without reinforcing the structure below is a disaster waiting to happen. This check ensures the building can safely handle all intended and environmental stresses.

Actionable Implementation Tips

To effectively integrate structural verification into your workflow, follow these steps:

  • Schedule a Framing Inspection: Arrange for the local building department to conduct a framing inspection before any drywall or insulation is installed. This allows for easy visibility and modification if needed.
  • Photograph All Connections: Document every structural connection, fastener pattern, and load-bearing element with clear photos. This creates a visual record that proves compliance with engineered drawings.
  • Cross-Reference Plans and Codes: Meticulously compare the installed framing against the approved architectural and engineering plans. Verify that all materials and fasteners meet the specific building codes for the Puget Sound region.
  • Use Rated Fasteners: Ensure all structural screws, bolts, and hangers are rated for the seismic and wind loads common in Western Washington. Using standard fasteners where engineered ones are specified is a common but dangerous mistake.

8. HVAC, Plumbing, and MEP Rough-In Inspection

The hidden systems behind your walls, including mechanical, electrical, and plumbing (MEP), are the lifelines of any modern building. This step in a construction quality control checklist is a systematic verification of these systems during the rough-in phase, performed after installation but before drywall or other finishes conceal them. It is a non-negotiable checkpoint to prevent catastrophic failures and expensive, invasive repairs down the line.

For a commercial tenant improvement in an office space, this involves verifying that HVAC zoning, fire suppression systems, and plumbing for new restrooms meet all local codes before the walls are closed. Likewise, during a residential kitchen remodel, it’s the final opportunity to confirm that the plumbing for a new island sink is properly vented and all new electrical circuits are correctly routed, ensuring functionality and safety for years to come.

Why This Step Is Crucial

A meticulous MEP rough-in inspection is about proactive problem-solving. Identifying a poorly sealed duct joint, an unsupported plumbing line, or an improperly secured electrical box at this stage is a simple fix. Discovering the same issue after the walls are painted requires demolition, rework, and significant project delays. This check ensures system integrity, code compliance, and long-term operational efficiency, directly impacting utility costs and occupant comfort.

Actionable Implementation Tips

To effectively integrate MEP rough-in checks into your workflow, follow these best practices:

  • Schedule a Coordinated Walk-Through: Hold the inspection with the mechanical, electrical, and plumbing foremen present. This allows for immediate clarification and on-the-spot resolution of any identified issues.
  • Conduct Pressure and Integrity Tests: Don’t just rely on visual checks. Use a hydronic flush test for plumbing supply lines and a static pressure test for ductwork to definitively confirm that there are no leaks.
  • Create a Photographic Record: Take detailed, high-resolution photos of all systems within the wall and ceiling cavities. This documentation is invaluable for future maintenance, troubleshooting, or renovation planning.
  • Verify Code-Mandated Clearances: Use a tape measure to confirm that all installations meet required clearances, such as proper spacing for pipe supports and ensuring electrical boxes are not recessed too far into stud cavities.

9. Safety Compliance and Fall Protection Inspection

Beyond materials and workmanship, a project’s ultimate quality is measured by its safety record. This non-negotiable step in a construction quality control checklist involves the continuous verification that the worksite adheres to all OSHA standards. It focuses on the proactive management of hazards, including fall protection systems, scaffolding integrity, proper ladder use, personal protective equipment (PPE), and clear hazard communication to protect everyone involved.

Whether it’s a “residential contractor near me” painting a multi-story home or a commercial crew renovating a local retail space, safety protocols are paramount. This isn’t a one-time check but a daily commitment to identifying and mitigating risks. For example, any restoration work on a high-pitched roof requires certified scaffolding and constant monitoring, while a commercial painting project mandates daily safety briefings to address the day’s specific tasks and potential hazards.

Why This Step Is Crucial

A rigorous safety program protects lives and ensures legal and insurance compliance. An accident can halt a project indefinitely, lead to severe legal penalties, and irreparably damage a company’s reputation. Proactive inspections and documented safety measures demonstrate a commitment to crew and client well-being, which is a hallmark of a professional contractor. It prevents costly delays and protects the project’s financial and legal standing.

Actionable Implementation Tips

To effectively integrate safety compliance into your workflow, consider these critical actions:

  • Develop Site-Specific Safety Plans: Before work begins, create a unique safety plan that identifies the specific hazards of that project, from electrical risks in an office renovation to fall hazards on an exterior repaint.
  • Conduct Daily Pre-Work Safety Meetings: Start each day with a brief “toolbox talk” to discuss the day’s tasks, associated risks, and the required safety measures. This keeps safety top-of-mind for the entire crew.
  • Inspect All Equipment Before Use: Every harness, lanyard, ladder, and scaffold component must be inspected for damage or wear before each use. Damaged equipment must be immediately removed from service.
  • Maintain Certifications and Documentation: Ensure crew leads have current OSHA 10-hour certification. Meticulously document all safety inspections, training sessions, and incidents to protect against liability and satisfy insurance requirements.

10. Final Inspection and Punch List Documentation

The final inspection and punch list represent the project’s last critical quality gate before handover. This step in a construction quality control checklist is a comprehensive walkthrough with clients, architects, and stakeholders to formally document completion, identify any outstanding items, and verify that all work meets the approved specifications and the client’s expectations. It is the definitive moment where craftsmanship is confirmed and the project is brought to a successful close.

Two men conducting a final walkthrough inspection of kitchen cabinets, one writing notes, the other pointing.

Whether it’s a commercial build-out for an expanding business or a home remodel, this process is far more than a simple visual check. It’s a methodical review where every detail, from the fit of a cabinet door to the finish on a freshly painted wall, is scrutinized against the project scope. Creating a detailed punch list ensures that even the smallest deficiencies are captured, tracked, and resolved before the final payment is made and the keys are handed over.

Why This Step Is Crucial

A thorough final inspection is the key to client satisfaction and a professional project closeout. For example, during the final walkthrough of a residential kitchen remodel, our team methodically verifies countertop fit, hardware installation, and plumbing functionality to ensure the space is move-in ready. Similarly, a final walkthrough for a commercial tenant improvement with a property manager confirms that every fixture is installed correctly and all code requirements are met before the tenant takes occupancy. This structured process prevents post-project disputes and ensures the finished product aligns perfectly with the client’s vision.

Actionable Implementation Tips

To execute a seamless final inspection and punch list process, follow these steps:

  • Use a Standardized Checklist: Create a detailed final inspection checklist tailored to the specific project scope. This ensures no area, from electrical outlets to paint touch-ups, is overlooked.
  • Schedule Ample Time: Book the final walkthrough with enough time scheduled to allow for minor, on-the-spot corrections, which can significantly shorten the final punch list.
  • Document with Photos: Take clear photographs of the completed work as a whole, and then take separate, detailed photos of each identified punch list item. This visual evidence eliminates ambiguity.
  • Prioritize the Punch List: Categorize items by urgency: safety issues (must-fix before occupancy), functional problems (affecting use), and cosmetic imperfections. This helps structure the final corrective work efficiently.
  • Set a Clear Timeline: Agree on a specific timeframe for completing all punch list items. Follow up with a final re-inspection of the corrected work before issuing the final invoice and closing out the project.

Construction Quality Control: 10-Point Comparison

Item Implementation complexity Resource requirements Expected outcomes Ideal use cases Key advantages
Material Inspection and Certification Moderate — procedural checks and documentation QA inspector, receiving log, storage space, supplier certifications Verified compliant, undamaged materials and valid warranties Specialty coatings, exterior PNW projects, commercial tenant work Prevents rework, ensures code/warranty compliance, builds trust
Surface Preparation and Substrate Assessment High — diagnostic testing and remediation Moisture meters, pH/salinity testers, trained technicians, drying time Identified moisture/adhesion issues and prepared substrates for coatings Post-storm restoration, concrete epoxy prep, moisture-prone exteriors Prevents coating failure, extends coating lifespan
Dimensional Accuracy and Layout Verification Low–Medium — measurement and plan verification Laser/tape measures, levels, blueprints, trained measurers Accurate layouts and alignment, reduced fitment errors Additions, kitchen remodels, commercial fit-outs Ensures design intent and code compliance, avoids costly rework
Paint Application Process Control Medium — process and environmental controls Environmental monitors, thickness gauges, applicators, primers Consistent, durable finishes and documented coating thickness Exterior PNW painting, specialty finishes, commercial coatings Produces consistent quality, improves longevity and warranty compliance
Drywall and Interior Finish Quality Standards Medium — multi-stage finishing and inspections Skilled finishers, sanding tools, inspection lighting, primers Smooth, defect-free surfaces ready for paint Interior remodels, Level 4–5 finish requirements, commercial interiors Reduces visible defects and touch-ups, enhances final appearance
Flashing and Waterproofing Verification High — critical detail work and testing High-quality sealants, fasteners, thermal imaging/water tests, skilled installers Minimized water intrusion and protected building envelope Roof restorations, window/door installations, coastal exteriors Prevents leaks and moisture damage, preserves structural integrity
Structural Inspection and Load-Bearing Verification High — engineering and code checks Structural inspector/engineer, certified fasteners, permits, documentation Safe, code-compliant load-bearing elements Additions, island installations, mezzanines and expansions Ensures occupant safety and long-term structural performance
HVAC, Plumbing, and MEP Rough-In Inspection Medium–High — multi-trade coordination Trades crews, pressure/static testers, labeling, photo documentation Functional, accessible MEP systems with fewer hidden defects Remodels with new MEP, commercial tenant improvements Prevents costly post-closure repairs, ensures system efficiency
Safety Compliance and Fall Protection Inspection Medium — continuous oversight and enforcement Fall protection systems, scaffolding, PPE, training, inspection logs Reduced injuries, OSHA compliance, documented safety practices Multi-story painting, roofing, high-access restoration work Protects workers, lowers liability and insurance risk
Final Inspection and Punch List Documentation Low–Medium — administrative walkthrough and documentation Standardized checklists, photos, client/inspector coordination Documented completion, identified punch-list items before closeout Project closeout, client handover, insurance claim completion Prevents disputes, ensures client satisfaction and permit closure

Partner with a Team That Puts Quality First

Moving from a conceptual plan to a finished, functional space is a complex journey filled with countless decisions and potential pitfalls. This comprehensive construction quality control checklist is designed to demystify that process, transforming it from an overwhelming task into a manageable, step-by-step roadmap to success. By systematically addressing each phase, from pre-construction verification to the final punch list, you create a framework for accountability, precision, and excellence.

The checkpoints we’ve explored, such as Material Inspection, Surface Preparation, and Waterproofing Verification, are not just isolated tasks. They are interconnected elements in a larger system designed to prevent costly rework, ensure structural integrity, and deliver a final product that stands the test of time. For local homeowners undertaking a remodel or businesses planning a commercial build-out, this structured approach is the most effective way to protect your investment and achieve your vision.

Key Takeaways for Your Next Project

Mastering quality control is less about memorizing a list and more about adopting a mindset of proactive diligence. Here are the most critical takeaways to implement immediately:

  • Documentation is Your Strongest Ally: Verbal agreements are fleeting. A project binder, whether digital or physical, containing signed-off checklists, material certifications, photos, and communication logs provides an indisputable record of progress and standards.
  • Early Detection Saves Everything: The cost and complexity of fixing an error skyrocket as a project progresses. Verifying foundation layout before concrete is poured is simple; adjusting a structural wall after drywall is installed is a nightmare. This principle applies to every trade, from MEP rough-ins to paint prep.
  • Empowerment Through Specificity: Vague instructions lead to ambiguous results. Instead of asking if the “paint looks good,” a quality checklist asks, “Is the paint free of runs, sags, and holidays? Is the color consistent across all surfaces under various lighting conditions?” This level of detail removes subjectivity and sets clear, measurable standards for success.

Putting Quality Control into Action

The true value of a robust construction quality control checklist is realized when it becomes a living document, actively used by a dedicated team. It fosters a culture of shared responsibility where every team member, from the project manager to the specialty subcontractor, understands the quality standard and their role in upholding it. This collaborative approach ensures that potential issues are identified and resolved at the earliest possible stage, maintaining momentum and keeping the project on schedule and within budget.

For property owners and facility managers in Western Washington, this isn’t just about avoiding problems; it’s about achieving peace of mind. Knowing that a methodical, documented process is guiding your project allows you to focus on the bigger picture rather than worrying about the small details. It transforms the client-contractor relationship from a transactional service into a trusted partnership built on transparency and a mutual commitment to excellence. Ultimately, a project guided by a meticulous quality control process doesn’t just look better on day one, it performs better for years to come.


When your project demands a partner who has built quality control into the very fabric of their process, turn to the experts at Wheeler Painting & Restoration Services. Our decades of experience in residential and commercial construction in the Puget Sound region are founded on the meticulous principles outlined in this guide, ensuring your project is a resounding success. Start your project with confidence by visiting us at Wheeler Painting & Restoration Services to schedule your on-site consultation today.