Tag Archive for: tenant improvement

What is a Tenant Improvement Allowance?

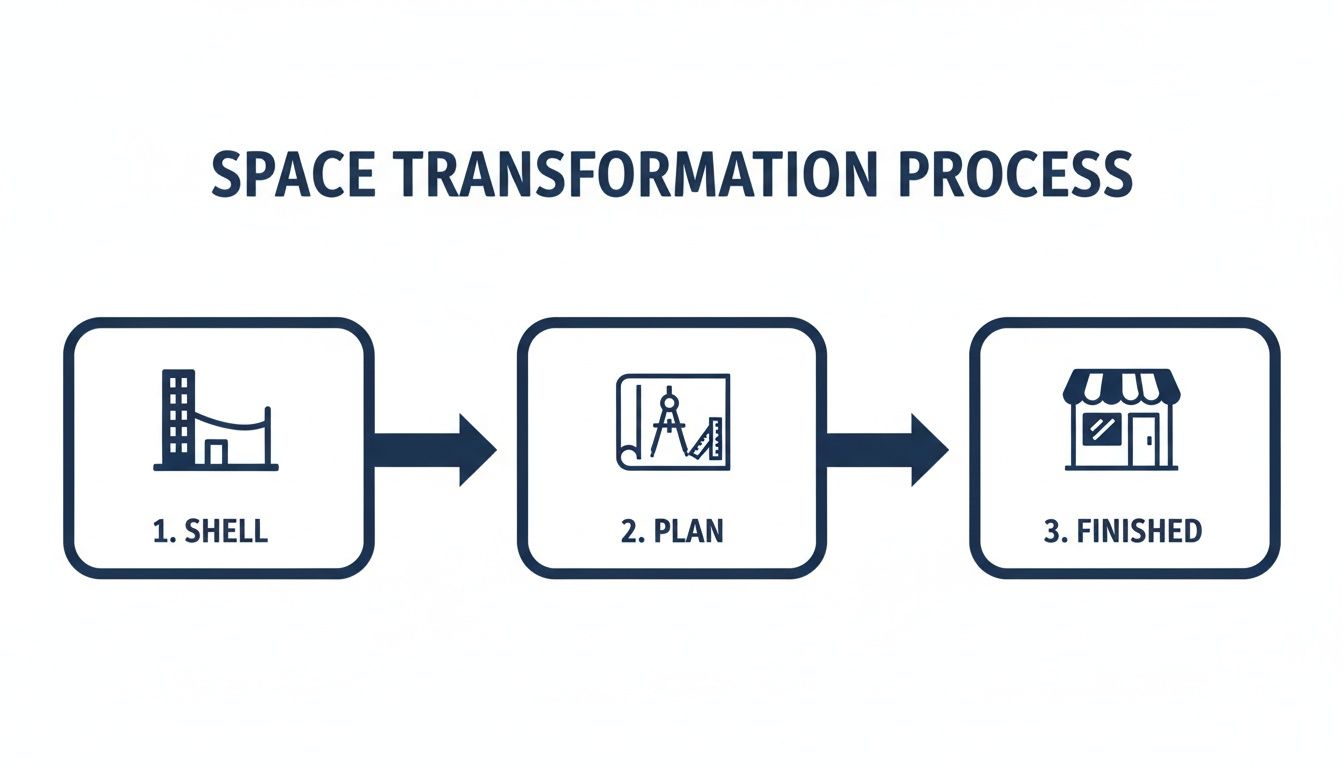
You found a commercial space in Seattle, Kent, or Tacoma that looks promising. The location works. The parking works. The lease terms seem close. Then you walk inside and realize it still needs real work before your team can use it.

Maybe it’s an open shell. Maybe the walls are wrong, the flooring is worn out, and the lighting doesn’t fit your business. That’s where many small and mid-size business owners get stuck. They know the space could work, but they don’t know who pays for the build-out.

A tenant improvement allowance is often the answer. It’s the part of the lease that can help fund the changes needed to turn a generic commercial space into something your business can operate in.

If you’ve been searching for what is a tenant improvement allowance, this guide gives you the practical version. Not the abstract real estate version. The version that matters when you’re trying to open on time, stay on budget, and avoid ugly surprises during construction.

Your Guide to Commercial Space Build-Outs

A lot of business owners in the Seattle to Tacoma corridor run into the same situation. They finally find a decent location, sign or nearly sign the lease, and then discover the space still needs drywall repairs, paint, flooring, lighting updates, office partitions, or plumbing and electrical changes before anyone can move in.

A professional woman holding architectural blueprints stands in an unfinished office space overlooking the Seattle city skyline.

That gap between “good address” and “ready for business” is exactly why TIAs exist. In simple terms, the landlord sets aside a renovation budget inside the lease so the tenant can improve the space. Sometimes the landlord pays contractors directly. Sometimes the tenant pays first and gets reimbursed. Sometimes the landlord delivers a finished space.

For a small business, that can be the difference between a workable deal and a bad one.

Why this matters early

The build-out conversation shouldn’t start after the lease is signed. It should start while you’re still pricing the space and deciding whether the landlord’s offer is strong enough.

A rough sketch and a hopeful budget won’t protect you. A defined scope does. Good planning, realistic bids, and clear approvals matter before any walls are framed or paint goes on.

If you're still sorting out layout options, a resource on office space planning and design can help you think through how your team will use the space day to day.

What local owners usually need

In the Puget Sound area, small to mid-size tenant improvement projects often include:

  • Office reconfiguration: Adding private offices, conference rooms, or reception areas
  • Finish upgrades: Interior painting, wall repairs, flooring replacement, and ceiling work
  • System changes: Electrical, plumbing, HVAC adjustments, and code-related updates
  • Operational improvements: Storage areas, wash-up spaces, or practical work zones tied to your business

If your project is moving toward construction, it helps to understand what a commercial build-out usually includes. This overview of https://wheelerpainting.com/commercial-build-out-services/ gives a practical look at the work involved.

A TIA isn’t free money. It’s part of the lease economics, and the details around how it’s used matter just as much as the dollar amount.

Understanding Tenant Improvement Allowance Basics

A tenant improvement allowance, or TIA, is the portion of the lease deal a landlord sets aside for build-out work inside your space. In plain terms, it is money committed toward making the suite usable for your business.

An infographic explaining the basics of a tenant improvement allowance, detailing its function, benefits, and common improvements.

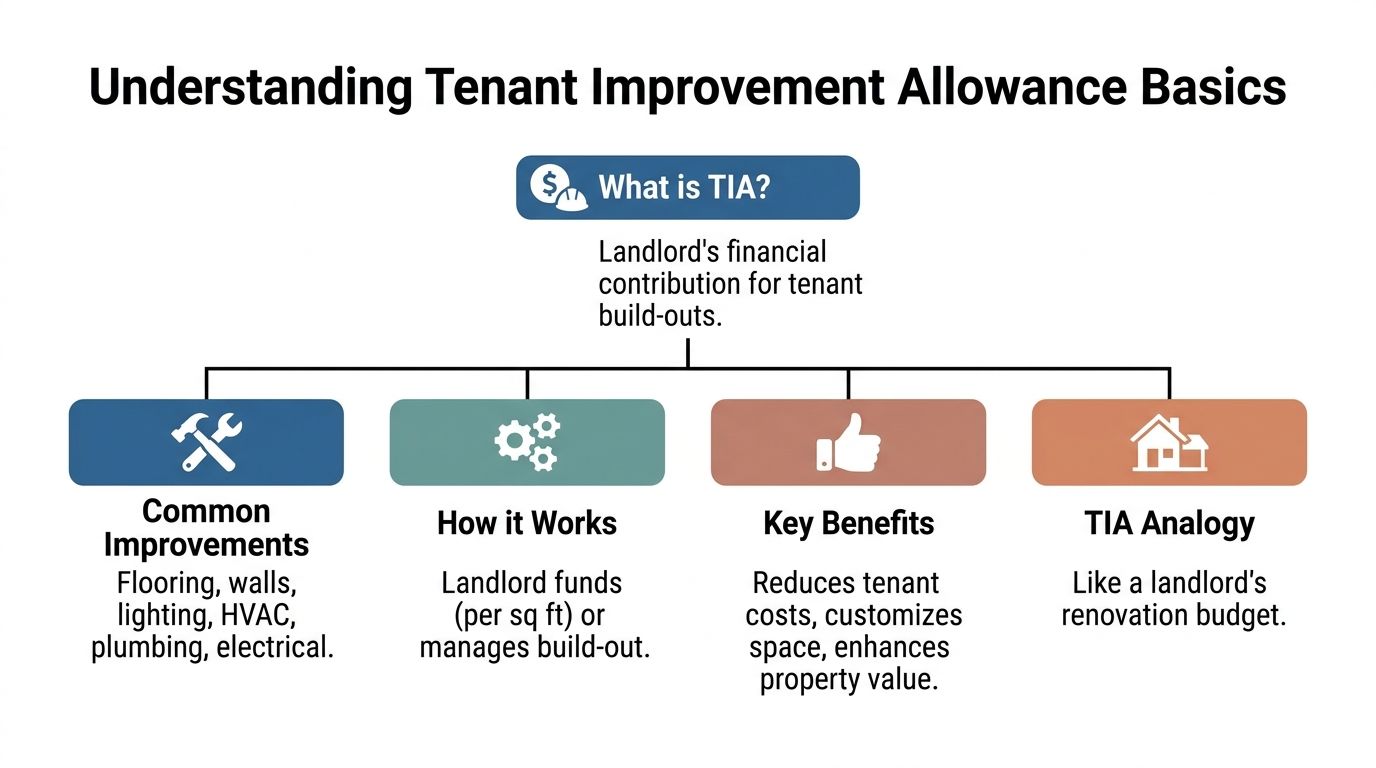
For a small business owner in Seattle, Kent, or Tacoma, that can mean help paying for walls, lighting, flooring, plumbing changes, HVAC adjustments, ADA updates, or a basic reception area. It is usually quoted per rentable square foot, then folded into the lease economics.

Why landlords offer TIAs

Landlords offer TIAs to help get vacant space leased and keep good tenants in place longer. If the improvements stay with the building after the lease ends, the owner may also benefit from a better space for the next tenant.

That is why allowance dollars rarely stand alone. The amount is usually shaped by lease term, tenant credit, vacancy in the building, and how much work the space needs before it can be occupied.

In the Puget Sound corridor, that last point matters a lot. Older office and flex buildings in South Seattle, Kent Valley, and Tacoma often need more than paint and carpet. Electrical capacity, mechanical updates, permit requirements, and accessibility work can push costs up fast.

How the math works

Most TIAs are calculated with a simple formula:

Rentable square footage x negotiated TIA rate = total allowance

Here is what that looks like:

Space size TIA rate Total allowance
2,000 RSF $10 per RSF $20,000
10,000 RSF $30 per RSF $300,000

The important part is not just the formula. It is whether the total allowance lines up with your actual scope.

A 2,000 RSF office with minor cosmetic work may function well with a modest allowance. The same square footage for a medical-adjacent user, light industrial office, or customer-facing showroom may need far more because the build-out is more demanding.

What counts as a good allowance

There is no single "good" TIA number that applies to every deal in this region. A fair allowance depends on the starting condition of the space, the type of use, permit complexity, and who is carrying which costs under the lease.

In practice, I tell tenants to judge the allowance against the work list, not against a headline number. A landlord offering a lower rate on a clean second-generation office can be making a better deal than a landlord offering a higher rate on a tired shell that needs major mechanical and code work.

That is the benchmark.

Why local owners should care

In Seattle-Tacoma-Kent deals, the allowance can look reasonable until contractor pricing, permit review, and lead times are added to the picture. Local labor costs are not cheap, and even straightforward projects can get more expensive once demolition opens up walls or building systems need upgrades to meet current code.

Practical rule: The number that matters is whether the allowance covers the improvements you need to open, operate, and pass inspections.

A lower rent does not automatically mean a better deal. If the TIA leaves you funding a large gap out of pocket, the cheaper lease can become the more expensive decision.

How a Tenant Improvement Allowance Works in Practice

A Kent business owner finds a decent suite, signs the lease, and sees a tenant improvement allowance in the deal. Then the key questions start. Who hires the contractor, who pays first, what gets approved, and what happens if the city requires more work than anyone expected?

That is where the allowance either helps the project or creates friction.

In the Seattle-Tacoma-Kent corridor, I see tenants focus on the dollar amount and miss the funding structure. The structure affects cash flow, decision speed, and how much control you keep once drawings, permits, and contractor bids are in play.

Three common TIA structures

The same allowance can feel very different depending on how it is set up.

Reimbursement

With reimbursement, the tenant pays approved project costs first and the landlord pays back those costs up to the allowance cap.

This setup gives the tenant more say over contractor selection, scheduling, and finish choices. It also puts pressure on working capital. If your build-out includes permit review, demolition, electrical work, paint, flooring, and inspections, that money often goes out long before reimbursement comes in.

The practical risk is simple. If costs rise after walls are opened or code items are added, the tenant usually covers the difference unless the lease says otherwise. In this region, that happens more often than small business owners expect.

Direct landlord payment

Some landlords pay the contractor directly after approving the scope, bid, and invoices.

That can reduce the amount of cash the tenant needs to float. The trade-off is speed. Payment requests, substitutions, and change orders usually move through the landlord’s approval process, so decisions can take longer than they would on a tenant-run job.

This structure works best when the plans are well defined before construction starts.

Turnkey build-out

In a turnkey deal, the landlord runs the project and delivers the space ready for occupancy.

That can be a good fit for a straightforward office, retail, or service business that wants fewer construction decisions on its plate. It is less flexible if your business has specific operational needs, custom finishes, or equipment requirements. I tell tenants to be careful here. If the finish level, layout, and approval rights are vague, the landlord will usually choose the cheaper acceptable option.

If you are deciding who should control the work, this breakdown of design-build versus general contractor options helps clarify how delivery method affects cost, coordination, and decision-making.

What the allowance usually pays for

Most TIAs are meant for permanent improvements inside the leased space that help make it usable for the tenant.

Common covered items include:

  • Interior walls and doors: Framing, drywall, insulation, and basic door installation
  • Flooring and wall finishes: Carpet, LVT, tile, paint, and wall repair
  • Electrical and lighting work: New circuits, relocated outlets, light fixtures, and panel-related changes tied to the build-out
  • Mechanical and plumbing modifications: HVAC distribution, restroom updates, sink additions, and similar scope tied to occupancy
  • Code-driven work inside the suite: Accessibility items and other improvements needed for permit sign-off

What often falls outside the allowance

Here, budgets get squeezed.

Many tenants assume the allowance covers everything needed to open for business. In practice, leases often exclude costs that are real, necessary, and easy to overlook during deal review.

Typical exclusions include:

  • Furniture, fixtures, and loose equipment: Desks, seating, display racks, and movable shelving
  • IT and business equipment: Computers, servers, phones, and specialty wiring beyond the landlord’s standard scope
  • Moving and setup costs: Relocation labor, storage, and reinstallation of existing equipment
  • Brand-specific upgrades: Custom millwork, specialty lighting, feature walls, and upgraded finish selections
  • Soft costs, in some leases: Design fees, permit fees, engineering, project management, and expediting, unless the lease says they are covered

Where deals usually go wrong

Problems usually start before construction, not during it. The lease says there is an allowance, but it does not clearly say how funds are released, which costs qualify, who owns unused funds, or who pays if the city or the building requires extra work.

A clean bid package fixes a lot of that. The best results come from matching the lease language to actual plans, finish selections, and contractor pricing. If those documents line up, disputes are fewer and approvals are faster.

That is the practical side of a TIA. It is not just money in the lease. It is a construction process with rules, timing, and real cost exposure.

Negotiating Your TIA for a Puget Sound Commercial Space

You tour a Kent flex space or a small office in Tacoma, the rent looks workable, and the landlord offers a TIA that sounds decent on paper. Then your contractor prices the actual scope, and the gap shows up fast.

That gap is where a lot of small and mid-size tenants in the Seattle-Tacoma-Kent corridor get into trouble. The allowance number matters, but the deal terms around that number often matter just as much.

A professional man and woman discussing a lease agreement document at a desk in an office.

Bring real project costs to the lease conversation

The strongest argument in a TIA negotiation is a real estimate tied to a real scope. Landlords respond better when you can show what it will cost to make the space usable for your business in this market, with current labor, materials, permitting, and building requirements in mind.

That matters in Puget Sound because build-out costs vary a lot by building type and city. A light office refresh in Seattle is one thing. A medical, retail, or warehouse office build-out in Kent or Tacoma can involve different utility work, code triggers, and schedule risk. If the suite needs paint, flooring, partitions, coatings, repairs, or utility changes before you can open, price those items before you settle the lease.

If you're weighing project delivery options while the deal is still forming, this comparison of https://wheelerpainting.com/design-build-vs-general-contractor/ is useful because the structure you choose affects cost control and decision speed.

What to ask for

A better TIA deal is not always the highest dollar amount. In many leases, the safer deal is the one that spells out how money is approved, released, and applied if the scope changes.

Focus on these points:

  • Allowance amount: Ask whether the landlord will adjust the per-square-foot allowance based on your bid package and lease term
  • Disbursement method: Confirm whether the landlord reimburses you, pays contractors directly, or delivers the work as a turnkey project
  • Timing: Get approval timelines and payment timing in writing so cash flow does not become your problem
  • Overrun treatment: Ask whether costs above the allowance can be rolled into rent, split, or value-engineered before work starts
  • Change order rules: Set clear approval steps for added work, especially if demolition exposes building issues
  • Unused funds: Confirm whether leftover allowance can go toward other approved improvements, permits, or related costs such as signage project management

Use local market conditions to improve your bargaining position

Overrun risk is real. If a $20 PSF TIA on 2,000 sq ft yields $40,000 but the total project reaches $60,000, the tenant usually covers the excess unless that issue was negotiated ahead of time, based on this overview of tenant improvement allowances.

That same source states that post-pandemic hybrid office demands have spiked TIAs by 15% to 25% in major U.S. markets like Seattle, often tied to longer leases of 7+ years. For tenants here, that lines up with what shows up in actual lease discussions across the corridor. Landlords are often more open to a higher allowance, or a cleaner reimbursement structure, when the term is longer and the tenant improves the asset in a lasting way.

The source also notes that tenants can ask for contingency clauses worth 10% to 15% of the TIA, and that those protections can reduce overruns by 18%. In Seattle-area deals, I would treat that less as a universal rule and more as a useful negotiating benchmark. The practical takeaway is local: if you are taking second-generation space with unknown conditions, ask for a contingency bucket or a written process for handling hidden conditions. Older buildings in Seattle and Tacoma can produce surprises after demolition, and those surprises are expensive.

A landlord may not grant every request.

But a tenant who brings pricing, a defined scope, and a reasonable lease term usually has a better bargaining position before the lease is signed than after permits are underway and opening dates are fixed.

Here’s a quick explainer that helps many tenants understand how these trade-offs show up in lease talks:

The best time to deal with overruns is before the lease is final. After that, your negotiating power drops and the project clock starts running.

Managing Your Tenant Improvement Project from Plan to Finish

After the lease is signed, the TIA stops being a negotiation topic and becomes a project management issue. At that point, success depends less on the headline allowance and more on how well the job is documented and administered.

Who handles what

A smooth tenant improvement project usually depends on three groups doing their jobs clearly.

The landlord

The landlord typically reviews plans, approves scope, releases funds under the lease, and may require inspections before payment. In a landlord-managed build-out, the owner also controls contractor procurement and delivery standards.

The tenant

The tenant makes business decisions. That includes layout approval, finish selections, schedule priorities, and budget choices when alternates or overruns come up.

The contractor

The contractor turns drawings and lease language into actual work. That means sequencing trades, managing change orders, tracking invoices, and keeping the project aligned with the reimbursement rules.

Documentation is not optional

If your TIA is reimbursement-based, paperwork becomes part of the job itself.

Keep these items organized from day one:

  • Approved plans: Match the lease scope and any landlord review comments
  • Invoices and receipts: Every reimbursable cost should be easy to trace
  • Change orders: Signed approvals matter before added work starts
  • Lien waivers: These protect the property and are often required before payment
  • Inspection records: Some landlords want third-party verification before reimbursement

A similar principle applies to exterior branding and site coordination. If your project includes signs, wayfinding, or storefront updates, good signage project management keeps permits, fabrication, and installation aligned with the construction schedule.

The accounting side matters too

The accounting treatment of TIAs can be more complicated than many tenants expect. Under ASC 842, TIAs paid at or before lease commencement are treated as lease incentives and directly reduce the opening balance of the right-of-use asset, according to FinQuery’s discussion of tenant improvement allowance accounting.

That same source says 70% of lessees struggle with TIA classification, which can lead to audit issues. It also notes that overages beyond the TIA must be tenant-funded and capitalized separately.

Ask your accountant how the allowance should be recorded before the first reimbursement hits your books. It’s easier to set it up correctly than fix it later.

For most small businesses, the practical takeaway is simple. Keep clean records, align construction paperwork with the lease, and involve your accountant early if the allowance is significant.

Real-World TIA Examples in the Seattle-Tacoma Area

The idea gets easier to understand when you look at normal local scenarios. These are illustrative examples, built around common small to mid-size commercial projects in the corridor between Seattle and Tacoma.

Three common situations

A small office user in Seattle may lease a second-generation suite that needs paint, a few new walls, lighting updates, and flooring replacement. The space isn’t a full shell, but it still needs work before staff can move in.

A retailer in downtown Tacoma may need a cleaner customer-facing layout. That often means finish upgrades, fitting rooms, better lighting, and back-of-house adjustments.

A warehouse user in Kent may only need a modest office build-out inside a larger industrial space. The work can be focused and practical, but it still needs to be budgeted correctly under the lease.

Sample TIA estimations in Puget Sound

Business Type & Location Square Footage Typical TIA Rate Total TIA Amount Potential Project Focus
Office user in Seattle 2,000 sq ft $20 PSF $40,000 Interior paint, flooring, partitions, lighting
Retail boutique in Tacoma 1,500 sq ft $15 PSF $22,500 Finish refresh, display lighting, fitting area improvements
Logistics company in Kent 5,000 sq ft $25 PSF $125,000 Office build-out within warehouse, break area, wall systems, flooring

These examples use TIA rates already discussed earlier in the article. Real numbers depend on lease structure, building condition, and the actual scope of work.

What matters most is fit. A modest allowance can work well if the space already has usable infrastructure. A larger allowance can still fall short if the suite needs extensive rework.

Partnering for a Successful Build-Out

A tenant improvement allowance can be one of the most useful tools in a commercial lease. It can reduce upfront build-out cost, make a better space financially workable, and give your business room to open in a location that otherwise wouldn’t pencil out.

But the allowance only helps if the scope is realistic, the lease language is clear, and the project is managed carefully. That’s where many tenants run into trouble. They focus on the allowance amount and not the process around it.

For small and mid-size businesses in the Seattle, Kent, and Tacoma area, the smartest approach is simple. Price the work early. Negotiate from actual scope. Document everything. Choose a contractor who can manage both the build quality and the paperwork.

If you're evaluating firms before moving ahead, this guide on https://wheelerpainting.com/how-to-choose-a-general-contractor/ is a good place to start.

Frequently Asked Questions about Tenant Improvement Allowances

Can a tenant improvement allowance be used for furniture

Usually, no. TIAs generally apply to permanent or semi-permanent improvements to the leased space, such as walls, flooring, electrical, plumbing, and similar construction items. Furniture, movable shelving, and décor are often excluded unless the lease specifically allows them.

What happens if the build-out costs more than the allowance

The tenant usually pays the difference unless the lease says otherwise. That’s why overrun language matters so much. If you expect potential surprises, try to address them before signing the lease.

What happens if the project costs less than the allowance

That depends on the lease. Some landlords cap reimbursement at actual construction cost and keep the unused portion. Others may allow flexibility, but only if the lease spells it out clearly.

Is a higher TIA always the better deal

Not always. A higher allowance can come with trade-offs, including higher rent or a longer lease term. A lower allowance paired with stronger overall lease economics can sometimes be the better business decision.

Does the tenant or landlord choose the contractor

Either setup can happen. In reimbursement deals, the tenant often has more say. In turnkey projects, the landlord usually controls contractor selection. The lease should define the approval process.

Are paint and finish work usually covered

Often, yes, if they’re part of the approved build-out scope. Interior painting, wall repairs, coatings, and finish upgrades are common parts of tenant improvement work when they’re tied to preparing the space for occupancy.

Does a TIA cover permits and design fees

Sometimes, but not automatically. Some leases allow certain pre-construction costs as part of the allowance, while others restrict reimbursement to physical construction only. Read that section carefully.

Why do small businesses need contractor pricing before lease signing

Because you can’t negotiate effectively without knowing the actual build-out cost. A landlord’s allowance may sound reasonable until a real scope is priced. Early bids help you avoid underfunded projects and reduce the chance of disputes once construction starts.


If you're planning a commercial move, office build-out, retail refresh, or tenant improvement project in Seattle, Kent, Tacoma, or the communities in between, Wheeler Painting & Restoration Services can help you price the work clearly and move from lease negotiation to construction with less guesswork. Reach out to discuss your space, your scope, and what it will take to get the job done right.

Your Guide to Commercial Build Out Services

So, you’ve leased a new commercial space in Kent, WA. It’s exciting, but when you walk in, you’re greeted by four concrete walls, a bare floor, and maybe a few wires hanging from the ceiling. This is what we in the industry call a "shell." A commercial build-out is the process of transforming that empty shell into a space that’s ready for business. It’s the journey from a blank canvas to a fully functional office, storefront, or facility.

As a local business owner or facility manager, the process might feel overwhelming. That's where a trusted partner comes in. A build-out covers everything that happens between getting the keys and opening your doors—from putting up walls and installing plumbing to painting and laying down flooring.

What Is A Commercial Build Out?

Think of a commercial build-out as custom-tailoring a suit, but for your business. The empty commercial space is the raw fabric. It has potential, but it isn't functional yet. A build-out is the entire construction process that shapes that raw space into a finished environment designed specifically for your operations.

This isn't just a simple paint job or a minor renovation. It's a full-scale construction project inside an existing building, managed by a contractor who coordinates every detail. The goal is to create a space that not only looks great but also supports your workflow, reflects your brand, and meets all safety codes in your local area, whether it's Seattle or Tacoma.

From Empty Shell To Finished Space

The scope of every build-out is different, but they all involve turning a blank canvas into a fully functional facility. This could mean creating individual offices, a bustling kitchen, a sleek retail floor, or a high-tech medical clinic.

A professional contractor will manage a wide range of services to bring the vision to life, including:

  • Interior Construction: Framing and erecting walls, installing ceilings, and building out the core floor plan.
  • Systems Installation: All the essentials like HVAC (heating, ventilation, and air conditioning), electrical wiring, data cables, and plumbing.
  • Flooring and Finishes: Laying your chosen flooring—be it tile, wood, or commercial-grade carpet—and handling all drywall, painting, and trim work.
  • Fixtures and Cabinetry: Installing light fixtures, bathroom components, custom reception desks, shelving, and any other built-in elements.

This process is the backbone of the commercial real estate world. In fact, the global market for commercial buildings, which depends on these essential services, is projected to hit $1,990.53 billion in 2026. This growth reflects a huge demand for new and updated spaces, from e-commerce warehouses to modern offices.

At Wheeler Painting, we've been guiding businesses through this journey in Kent, Tacoma, and Seattle since 1991. As a local contractor, our job is to make the complex feel manageable. We handle the blueprints, permits, and construction, so you can stay focused on your business.

Whether you're launching a new restaurant, expanding your office, or opening a boutique, professional commercial construction services are what make sure your space is built right, on time, and ready for business from day one.

The Commercial Build Out Process From Start To Finish

Taking on a commercial build-out can feel overwhelming, but with a clear roadmap, the process becomes much more manageable. At Wheeler Painting, we've spent decades refining our approach for businesses across the Puget Sound region, so you feel confident from the first phone call right up to your grand opening. We break every project down into five distinct, manageable phases.

This structured journey takes a raw building shell or an outdated floor plan and turns it into a fully customized storefront, office, or facility ready for business.

A three-step diagram illustrating the space transformation process for commercial build-outs, from shell to finished.

The image above gives you a bird's-eye view of how a build-out moves from a basic shell, through detailed planning, and finally to a polished, business-ready environment. It’s a simple illustration of our core promise: turning your vision into a functional reality.

Phase 1: Consultation and Design

Every great project starts with a simple conversation. During this initial phase, we sit down with you to truly understand your goals, day-to-day operational needs, brand identity, and budget. This goes beyond just aesthetics; it's about figuring out how the space needs to work for your team and your customers.

We’ll talk through everything—from the number of offices you need to the specific layout for a retail floor or the technical requirements of a commercial kitchen. Our team then translates those ideas into preliminary drawings and architectural plans. This collaborative design stage is all about making sure the final layout is perfectly aligned with your business objectives before a single hammer is swung.

Phase 2: Pre-Construction and Permitting

Once the design gets your stamp of approval, we shift into the critical pre-construction phase. This is where all the behind-the-scenes work happens that sets a project up for success. We perform a thorough site analysis, create a detailed project schedule, and lock in material selections.

A huge part of this stage is value engineering, where we comb through the plans to find smart ways to save money without sacrificing quality or the design you love. We also take on the complex process of securing building permits from local jurisdictions like Kent, Seattle, or Tacoma. Getting this paperwork handled correctly upfront is key to preventing costly delays later on.

Think of pre-construction as the foundation of your project. By locking in every detail and securing permits early, we eliminate surprises and create a clear path forward for the entire construction team.

Phase 3: Construction and Project Management

Now for the exciting part—this is where your vision starts to become a physical reality. Your dedicated project manager becomes your single point of contact, coordinating all the action on-site and keeping you in the loop every step of the way. We manage the construction process meticulously, ensuring everything follows the schedule and plans we agreed upon.

Key activities during this phase include:

  • Demolition: Carefully removing any existing walls, finishes, or structures that aren't part of the new plan.
  • Framing: Building the new interior walls that will define your offices, conference rooms, and other key areas.
  • MEP Installation: Coordinating licensed plumbers, electricians, and HVAC technicians to install all the essential mechanical, electrical, and plumbing systems.
  • Drywall and Painting: Hanging and finishing drywall to create smooth surfaces before our professional painters apply the final colors.

Our deep experience with the design-build project delivery method is a real asset here, ensuring seamless coordination between our design and construction teams for better efficiency and accountability.

Phase 4: Finishes and Fixtures

With the main construction work done, our focus shifts to the details that bring your brand’s personality and the space’s function to life. This is where your business's unique character really starts to shine through. Our skilled craftspeople work with absolute precision to install all the final elements.

The finishing stage typically involves:

  • Flooring Installation: Laying everything from durable LVP and wood and tile floors to commercial-grade carpet.
  • Custom Cabinetry and Millwork: Installing reception desks, breakroom cabinets, retail displays, and other custom-built features.
  • Light and Plumbing Fixtures: Setting up all final lighting, faucets, sinks, and other essential hardware.
  • Final Touches: Adding trim, hanging doors, and applying any specialty wallcoverings or finishes that complete the look.

Phase 5: Final Inspections and Handover

The project wraps up with a detailed walkthrough and the last round of inspections. We go over every inch of the build-out with you to create a "punch list"—a final list of any small items that need a touch-up. Our team addresses these points quickly to make sure the result meets our high standards, and more importantly, yours.

From there, we coordinate with city inspectors for final occupancy approval. Once all inspections are passed and you are 100% happy with the work, we officially hand over the keys. You're now ready to move in and prepare for your grand opening, confident that your new commercial space is built right and ready for business.

Build-Outs, Renovations, And Tenant Improvements Explained

In commercial construction, you’ll hear "build-out," "renovation," and "tenant improvement" thrown around, sometimes all in the same conversation. While they’re all related to transforming a commercial space, the differences matter. Getting the terms right helps you define your project's scope and communicate a clear vision to your commercial contractor near me.

It’s the first step toward a successful project, ensuring everyone is speaking the same language from day one.

The Build-Out: Creating Something From Nothing

A commercial build-out is exactly what it sounds like: building a finished interior from a completely raw, empty space. We usually start with what’s called a "grey shell"—basically just concrete floors, unfinished walls, and the main utility lines capped and waiting. From there, we build your business from scratch.

This is the most involved type of project. It’s a total transformation that includes:

  • Framing all the new interior walls to create offices, conference rooms, and hallways.
  • Installing brand-new HVAC, electrical, and plumbing systems from the ground up.
  • Putting in insulation, drywall, and ceilings.
  • Adding every last finish, from flooring and paint to light fixtures and cabinetry.

A great example is taking a vacant ground-floor unit in a new Seattle high-rise and turning it into a fully functioning coffee shop. This is where Wheeler Painting shines. We specialize in these smaller to mid-size commercial build out services that larger firms often pass on, giving your project the hands-on focus it needs.

The Renovation: Refreshing An Existing Space

A commercial renovation, on the other hand, breathes new life into a space that’s already been built out and occupied. The basic bones are there—walls, plumbing, and electrical are in place—but it’s time for an upgrade. The goal is to modernize, reconfigure, or rebrand the existing environment.

Renovation projects often involve a mix of demolition and new construction:

  • Taking down a few non-structural walls to create a more open, collaborative office.
  • Swapping out old lighting for modern, energy-efficient fixtures.
  • Tearing out worn-out flooring and giving the whole interior a fresh coat of paint.
  • Updating restrooms to meet current ADA standards.

Think of an outdated Tacoma office getting a complete facelift. We might add a custom breakroom, new paint, and sleek finishes to help a company attract top talent. This is a booming market; commercial renovation services are projected to jump from $1,598 million in 2026 to $2,621 million by 2032. It shows just how many businesses in Kent and across the region are investing in smart upgrades—a core specialty for our team. You can dive into the numbers in the latest market analysis.

Tenant Improvements: The Custom Fit

So, where do tenant improvements (TI) fit in? This is more of a catch-all term that describes any custom work a landlord does to prepare a space for a new tenant. It’s the critical step that makes a generic space perfect for a specific business.

A TI project can be a complete build-out (if the space is a raw shell) or a renovation (if the space just needs an update). The key difference is that the scope of work is defined by the lease agreement between the landlord and tenant, and it's often funded by a "TI allowance."

Whether your property needs a full build-out or a targeted renovation, Wheeler Painting is the perfect partner for facility managers and property owners in the Puget Sound area. As a nimble, focused firm, we provide the dedicated, hands-on service that these crucial facility maintenance projects demand.

Understanding The Costs Of A Commercial Build Out

Let's get right to the question on every business owner's mind: "How much is this going to cost?" It's the most important question, and the answer isn't a single number. Think of your final project cost as a puzzle—it's made up of several distinct pieces that all fit together.

From the square footage of your new office to the specific type of lighting you choose for your retail store, every decision shapes the final budget. Our job is to give you a clear map of these costs so you know exactly where every dollar is going, right from the start.

Calculator, material samples, and color swatches with a cost estimation document for project planning.

Hard Costs: The Physical Build

The bulk of your budget will be dedicated to hard costs. These are the straightforward, tangible expenses you can see and touch—the actual materials and the skilled labor needed to put them all together.

Here’s what drives your hard costs:

  • Size and Scope: It's simple math—a 10,000-square-foot office will require more materials and labor hours than a 2,000-square-foot cafe. Likewise, a project that starts with major demolition will naturally cost more than a simple cosmetic update.
  • Quality of Materials: This is where your choices make a huge difference. High-end finishes like custom millwork, imported stone countertops, and designer light fixtures will carry a higher price tag than standard, builder-grade options.
  • Labor: This covers the wages for the entire team of tradespeople bringing your vision to life—carpenters, electricians, plumbers, and painters. Labor rates can fluctuate based on the project's complexity and the current market in places like Seattle and Tacoma.

Another huge factor is the starting condition of the space. Are you leasing a "grey shell" (raw, unfinished space with concrete floors and exposed studs) or a "vanilla shell" (a space with ceilings, basic lighting, and primed walls already in place)? The former is a blank slate but requires a significantly larger investment to build out.

Soft Costs: The Behind-The-Scenes Expenses

Beyond the construction itself, you have soft costs. These are the essential, behind-the-scenes services and fees that make the project possible. They aren't as visible as new walls or flooring, but they are absolutely critical for a smooth, legal, and successful build out.

Think of soft costs as the project's brain and nervous system. They handle the planning, compliance, and legal framework that allows the physical construction to happen. Budgeting for them upfront prevents major headaches and delays down the road.

Common soft costs include:

  • Architectural and Design Fees: The cost for a professional to create the blueprints and detailed plans that act as the roadmap for the entire project.
  • Permit and Inspection Fees: Every city, from Kent to Tacoma, has its own schedule of fees for issuing building permits and conducting mandatory inspections.
  • Engineering Fees: If your project involves changing the building's structure, or requires a complex new HVAC or electrical system, you'll need a specialized engineer's stamp of approval.
  • Insurance and Legal Costs: These are non-negotiable protections for you, the property owner, and your contractor throughout the construction process.

A Transparent Approach To Your Budget

We've seen it all, and we know the best projects are the ones where everyone is on the same page financially. That’s why we provide detailed, itemized proposals that break down every single anticipated cost. No surprises, no guesswork—just a clear plan that empowers you to make smart decisions.

To help manage these details, we often rely on sophisticated tools like Exayard construction estimating software to ensure our projections are as accurate as possible from day one. This table breaks down the main factors that will influence your final budget.

Commercial Build Out Cost Influencers

Cost Factor Description Impact on Budget
Space Condition The state of the commercial space before work begins (e.g., grey shell vs. vanilla shell). High
Material Quality The selection of finishes, from flooring and lighting to fixtures and paint. High
Project Scope The extent of the work, from cosmetic updates to full-scale demolition and reconstruction. High
Design Complexity Intricate layouts, custom-built features, and unique architectural elements. Medium
Location Local labor rates, permit costs, and material availability in your specific city or region. Medium
Permits & Fees The costs associated with city permits, inspections, and engineering reviews. Low to Medium

Ultimately, a good contractor is a partner, not just a vendor. We actively practice value engineering, a process where we look for ways to reduce costs without sacrificing the quality or integrity of your design. This could mean suggesting an alternative material with a similar aesthetic for a lower price or re-working a construction sequence to be more efficient.

This collaborative approach ensures your vision comes to life on budget. To get a preliminary idea for your own planning, check out our easy-to-use commercial painting cost estimator and start building your budget today.

Navigating Permits And Building Codes In Washington

Let’s be honest—for most business owners, the maze of permits, codes, and inspections is the single most daunting part of a construction project. In Washington, especially, navigating the specific rules for cities like Seattle, Tacoma, or Kent can feel like a full-time job. Our job is to take that entire administrative headache off your plate so you can focus on your business.

Think of building codes not just as rules, but as a framework for protecting your investment. They ensure your space is safe for employees and customers, and that it’s built to last. Getting it wrong isn't an option. It can lead to failed inspections, expensive rework, and significant delays in opening your doors.

A building permit document on a clipboard, hard hat, and measuring tape on a white table.

Ensuring Full Compliance And Safety

As your general contractor, our responsibility goes beyond the physical construction. We make sure your commercial build out services are 100% compliant with all local and federal regulations. We don’t just build to your vision; we build to code.

Having been a part of the Puget Sound construction scene since 1991, we've built real, working relationships with the permitting offices and inspectors in the region. This isn't just a talking point—it's a critical advantage. We know the people, we understand the nuances of each jurisdiction, and we know how to prepare documentation that gets approved without a hitch.

We bake compliance into the project from day one. Instead of reacting to inspection issues, we design the project around local codes and the Americans with Disabilities Act from the start. This proactive approach prevents costly surprises and ensures your space is built right the first time.

Integrating ADA Requirements Seamlessly

One of the most important layers of compliance is the Americans with Disabilities Act (ADA). This is about much more than putting a ramp out front. It's about ensuring your commercial space is genuinely accessible to everyone.

We weave ADA requirements into the core design of your space, considering details like:

  • Accessible Entrances: Making sure doorways meet width standards and thresholds are low.
  • Clear Pathways: Designing intuitive layouts that are easy to navigate for all.
  • Compliant Restrooms: Building restrooms with the right clearances, grab bars, and fixture heights.

The Value Of Experienced Permit Management

Understanding the local commercial building permit requirements is step one. But successfully managing the process is what keeps your project on track and on budget. With the commercial services market projected to reach USD 10.32 trillion by 2030, avoiding permitting delays is more important than ever to stay competitive. You can read more about this market growth at Research and Markets.

Handing this over to an experienced team means you avoid the pitfalls that can derail a project. It's about getting you open for business on schedule, with the peace of mind that every "i" is dotted and every "t" is crossed.

Why Choose Wheeler Painting For Your Build Out Project

Picking the right contractor for your build out isn't just about hiring someone to put up walls—it's about finding a true partner you can trust with your vision and your investment. For business owners and facility managers across the Puget Sound, Wheeler Painting brings something different to the table: deep construction know-how combined with an expert's eye for painting and specialty finishes.

This unique blend means we manage your entire project under one roof, from the initial framing all the way to the final brushstroke. You get a single, accountable team dedicated to getting the job done right, eliminating the headaches of coordinating multiple contractors. We understand a build out can feel overwhelming, so we focus on clear communication and dependable craftsmanship to turn your goals into reality, on time and on budget.

Your Local Small-To-Mid-Size Project Specialist

Since 1991, Wheeler Painting has been a fixture in the local business community, helping companies in Kent, Seattle, and Tacoma transform their spaces. We intentionally focus on the small to mid-size projects that larger general contractors often pass over.

This specialization is our strength. It allows us to give your project the focused, personal attention it deserves. You’re not just another job number on a massive project board; you’re a valued partner, and your success is our priority.

We deliver on this promise with:

  • Integrated Expertise: Our ability to merge construction work with high-end painting and finishing means you get a seamless, top-quality result without juggling different vendors.
  • Transparent Communication: You can expect honest, frequent updates and straightforward proposals. We find that an informed client is a confident one.
  • Proven Reliability: With decades of local experience, we have a long history of delivering on our word and completing projects as promised.

Choosing Wheeler Painting means choosing peace of mind. We take the guesswork out of the process, providing a clear path from concept to completion for your commercial build out services.

Experience the difference of working with a local team that’s genuinely invested in your business. Let us handle the complexities of your build out so you can stay focused on what you do best.

Common Questions About Commercial Build-Outs

When you're thinking about a commercial build-out, a lot of practical questions come to mind. It's only natural. Getting straight answers is the first step, so let's dive into some of the most common questions we hear from business owners across the Puget Sound.

How Long Does a Typical Commercial Build-Out Take?

This is the big one, and the honest answer is: it depends. A simple cosmetic refresh of an existing office space renovation might take as little as 4-6 weeks. But if we're starting from a completely empty shell for a new restaurant or retail store, you're more likely looking at 3-6 months, sometimes longer.

The real drivers of your timeline are the complexity of your design, lead times for specific materials (like custom millwork or specialty flooring), and frankly, how quickly we can move through permitting in your specific city, be it Seattle, Kent, or Tacoma. A big part of our job in the beginning is to map all this out into a detailed, realistic schedule so you know exactly what to expect.

What’s the Difference Between a "Vanilla Shell" and a "Grey Shell"?

Think of it like this: a "vanilla shell" is a blank canvas that's already been prepped for you. The space is nearly ready for business, usually with finished ceilings, primed walls, basic lighting and HVAC, and a restroom that's up to code. It’s a great starting point.

A "grey shell", on the other hand, is completely raw. You’re literally starting with bare concrete floors, uninsulated exterior walls, and just the basic utility hookups for plumbing and power. A grey shell build-out is a much bigger undertaking, but it also gives you total freedom to create a space from the ground up. We can help you walk any potential property in the Puget Sound area and give you a clear-eyed assessment of what it will take to get it ready for business.

Can We Stay Open During a Renovation?

In many cases, yes. Keeping your doors open while we work is definitely possible, but it requires smart, strategic phasing. We can map out a plan to tackle the project in contained sections or schedule the noisiest work for your off-hours to keep disruptions to your team and customers at an absolute minimum.

A phased renovation in an occupied space is all about control and safety. It means creating secure barriers between the work zone and your public areas. As a contractor that’s handled these complex projects for years, we’re experts at managing the logistics so you can keep running your business.

Who Pays for a Tenant Improvement Build-Out?

Who foots the bill is a critical part of any commercial lease negotiation. Most of the time, the landlord will offer a "Tenant Improvement Allowance" (or TI Allowance). This is a set amount of money, often calculated per square foot, that they contribute toward the construction.

If your dream space costs more than the allowance to build, you as the tenant are generally responsible for covering the difference. We’re used to working with both tenants and landlords across the Seattle-Tacoma metro to keep projects on budget and ensure every dollar is tracked with complete transparency.


Ready to take your vision from blueprint to reality? The team at Wheeler Painting has been the go-to partner for businesses throughout the Puget Sound since 1991. Let's talk about your project and show you how our deep experience in commercial build-outs can make the whole process a success.

Schedule Your Free Estimate with Wheeler Painting