How Long Does Paint Last After Opening? A WA Guide

A lot of people ask the same question right after opening a cabinet, basement shelf, or garage corner and finding an old paint can they forgot about. Maybe it is left over from a living room repaint in Seattle, a rental turnover in Kent, or a hallway touch-up from a Tacoma office suite. The can is half full, the label looks familiar, and throwing it out feels wasteful.

That instinct makes sense. Leftover paint can save time on touch-ups, help you match an existing color, and keep a small maintenance job from turning into a bigger purchase. But old paint can also create more work than it saves. A bad batch can leave lap marks, weak coverage, odd texture, or a color mismatch that stands out even more after it dries.

In the Puget Sound area, storage conditions matter more than many people realize. Paint often ends up in garages, sheds, and utility rooms that deal with damp air, cool nights, and temperature swings through the year. That is where a perfectly good can starts to fail sooner than expected.

If you are wondering how long does paint last after opening, the short answer is that it depends on the type of paint and how it was stored. The more useful answer is knowing when an old can is still worth using, when it needs testing, and when it is better to stop before it ruins the finish.

That Half-Empty Can in the Garage

A common version of this starts with a homeowner getting ready to patch a scuff in a hallway. Another version comes from a facility manager opening a janitor closet before a tenant improvement punch list. In both cases, the goal is simple. Use what is already on hand and avoid buying another can for a small job.

Sometimes that works out well. Sometimes the can opens and the paint underneath looks separated, smells wrong, or has a thick skin across the top. That is when a quick touch-up turns into wall prep, repainting, and a second trip to the store.

Why people try to save it

Most leftover paint is kept for a good reason.

  • Color matching matters: Touch-ups look best when you still have the original product.
  • Small jobs feel manageable: A door edge, trim nick, or office wall mark does not seem to justify a full repaint.
  • Waste feels unnecessary: Nobody likes discarding usable material.

Storage is often the weak link. Paint gets shoved behind holiday bins, landscaping supplies, and old tools. If that sounds familiar, this practical guide on the best way to organize a garage can help create a cleaner, more stable spot for anything you plan to keep, including paint.

Tip: If you cannot find the room name, date, and sheen on the can, treat it like an unknown product until you test it.

The local reality

In Western Washington, people tend to assume the climate is mild enough that storage is not a big issue. But paint does not care whether the weather feels moderate to us. It reacts to air exposure, moisture, and temperature swings. A garage in Kent or Tacoma can still be a rough place for opened paint, especially near an exterior wall or concrete floor.

For home touch-ups and facility maintenance, the right move is not guessing. It is checking the type of paint, how it was stored, and whether it still behaves like paint should.

Paint Shelf Life by Type A Quick Guide

Homeowners around the Puget Sound often want one clean answer here. The truth is simpler and less convenient. Water-based paint usually has a shorter usable life after opening than oil-based paint, and storage conditions matter as much as the label.

Infographic

A half-empty can from a living room repaint does not age like a sealed trim enamel used once on a front door. That difference shows up all the time on touch-up jobs, especially when paint has been sitting through damp winters in a garage or maintenance shed.

Opened paint shelf life at-a-glance

Paint Type Typical Shelf Life (Opened) Best For
Latex paint A few years if stored well Interior walls and ceilings
Acrylic paint A few years if stored well Interior and exterior surfaces where water-based durability is needed
Oil-based paint Often longer than water-based products Trim, doors, specialty coatings, and some restoration work
Enamel paint Depends on whether it is water-based or oil-based Doors, trim, cabinets, and surfaces that need a harder finish

Why the differences matter

Latex and acrylic paints are what we see most in homes, tenant improvements, and routine facility touch-ups. They clean up easily, dry faster, and work well for a lot of interior and exterior projects. The trade-off is storage life. Once opened, these products are less forgiving if the lid was loose, the rim was dirty, or the can sat through temperature swings.

Oil-based coatings usually keep longer in a properly sealed can. That makes them worth checking before you toss them, especially on older trim, doors, railings, or specialty finishes. But a longer shelf life does not guarantee a good result on the wall or woodwork. Old oil paint can still skin over, thicken, and brush out poorly.

What about enamel

Enamel is not one single category for shelf life. It describes the finish and performance more than the base chemistry. Some enamels are latex or acrylic. Others are oil-based.

For enamel, the better question is whether the product is water-based or oil-based.

That matters on real jobs. A homeowner in Bellevue trying to touch up a cabinet door and a facility manager in Tacoma patching scuffs in an office suite both need the original coating type to line up. If the old can is the wrong base, wrong sheen, or too far gone, the touch-up can flash, drag, or fail to blend.

Key takeaway: Read the can for the product type first. The chemistry gives a better shelf-life clue than the color name.

The practical answer

If the can is several seasons old and water-based, treat it carefully and plan to test it. If it is oil-based and was sealed well, it may still be usable. Around Western Washington, I would be more skeptical of anything stored on a cold concrete floor or against an exterior garage wall. Those storage spots shorten the odds for both homeowners and maintenance teams.

What Really Ruins Leftover Paint

Paint rarely “goes bad” for no reason. Most failures come from three things. Air, temperature, and contamination.

For latex paints, Consumer Reports notes that degradation happens because of bacterial growth and evaporation of water content, and that can lead to can bulging from gas production by microorganisms. The same source says temperatures outside 60-80°F (15-27°C) can trigger phase separation. Freezing ruptures emulsion droplets, and heat causes viscosity spikes.

An open can of gray interior latex paint sitting on a workshop floor next to its lid.

Air is the first problem

Every time the lid comes off, the paint gets exposed to oxygen. If the rim is messy or the lid does not seal fully, that exposure continues while the can sits.

That causes problems like:

  • Skinning at the surface: You peel back a rubbery layer and hope the paint below is fine.
  • Thickening over time: The product no longer levels the way it should.
  • Uneven finish: Even if the paint goes on, it may not dry smoothly.

A can that is only one-quarter full is usually at greater risk than one that is almost full because there is more air sitting above the paint.

Temperature does more damage than people expect

Uninsulated storage is hard on paint. In the Puget Sound region, garages often feel safe enough because they are not as extreme as other parts of the country. But repeated seasonal shifts still work against the material.

A water-based paint that freezes can be done for even if the can looks normal from the outside. A can that sits through heat can become thick and hard to remix. Both problems show up later as poor flow, poor adhesion, or a patchy touch-up.

Contamination finishes the job

Paint also gets ruined when people work directly from the can and introduce dust, debris, rust flakes, or moisture. That is common on home projects and even more common on maintenance jobs where speed takes over.

Watch for contamination from:

  • Dirty brushes or rollers
  • Rust around the lid and rim
  • Water accidentally introduced during cleanup
  • Debris from a garage shelf or workshop area

Tip: If the can lid is puffed up, do not assume stirring will fix it. Pressure in a latex can is a warning sign, not a minor nuisance.

The regional storage mistake

The most common local mistake is simple. People store paint on a concrete garage floor near an exterior wall. That spot tends to be colder, damper, and harder on the can itself. Even when the paint survives, the can may rust and contaminate what is inside.

For residential remodeling, facility maintenance, and commercial renovations, paint condition affects more than touch-up convenience. It affects finish quality. That is why professional crews spend so much effort on storage, labeling, and handling long before a brush ever hits the wall.

How to Test If Your Paint Is Still Usable

You pull an old can off the garage shelf because a wall in the hallway needs a quick touch-up before guests arrive or before a tenant walk-through. The label looks right. The color might be right. What matters is whether that paint will still lay down cleanly on the surface you care about.

A person wearing work gloves mixing light beige interior paint in a metal can with a wooden stick.

A quick check in the can saves a lot of cleanup later. Around Puget Sound, I see people lose time on old paint that looked acceptable until it hit the wall and flashed, dragged, or dried with a rough edge.

Start with the can itself

Check the container before you stir anything.

A rusted rim, warped lid, leaking groove, or swollen top usually means the seal failed at some point. Once air or moisture gets in, the odds drop fast. For maintenance work in offices, retail spaces, and multifamily buildings, that is usually enough reason to stop and grab fresh material instead of risking a bad patch.

Then open the lid and study the surface under good light.

  • Light separation: Usually normal, especially in older latex paint.
  • Mold or fuzzy growth: Throw it out.
  • A thick skin across the top: Sometimes removable, but only if the paint underneath still mixes smooth.
  • Hard chunks throughout the can: Usually a sign the paint has started to fail.

Use your nose

Spoiled paint often gives itself away right here.

Latex paint that smells sour, rotten, or unusually harsh is not a candidate for finish work. Healthy paint has a familiar paint smell. If the odor makes you question it, do not use it on a wall, door, cabinet, or any surface where the repair needs to disappear.

Stir and watch the texture

Use a clean stir stick and mix from the bottom up. Give it a real stir, not two quick turns at the top.

Usable paint comes back together into a uniform liquid with consistent color and body. Bad paint stays grainy, stringy, lumpy, or separated no matter how long you work it. Earlier in the article, we noted manufacturer shelf-life guidance. On site, this mix test tells you more than the date written on the lid.

Brush a small amount onto cardboard, scrap drywall, or a piece of trim stock if you have it. Let it spread out and watch the edge.

  • Good paint levels out and covers evenly.
  • Bad paint drags, clumps, leaves grit, or dries with an uneven sheen.

For exterior touch-up paint, sun exposure can complicate the decision even if the product still mixes well. A can may be usable, but the old finish on the house may have faded enough that the patch still stands out. That is especially common on south- and west-facing walls here. Our guide to UV-resistant paint for Northwest homes explains why.

Here is a quick visual walkthrough if you want to compare what mixing and texture should look like before you use old material on a wall.

When to stop testing

Stop as soon as one major failure shows up. A bad smell, mold, persistent lumps, or rough test coverage is enough.

Trying to stretch questionable paint rarely saves money. It usually creates more work, especially on trim touch-ups, occupied commercial spaces, and repaints where the finish has to match the surrounding area.

Key takeaway: If the paint cannot pass a stir test and a small sample test, do not trust it on your wall, door, or tenant space.

Pro Tips for Extending Your Paint's Life

Good storage starts before the lid goes back on. Most paint fails early because the can was closed carelessly, stored in the wrong place, or left with too much air inside.

For oil-based paints, The Style Saloniste notes that they can last 10-15 years after opening because solvents inhibit microbial growth, but oxidation still thickens the product. The same source recommends minimizing air in the can by placing plastic wrap directly on the paint surface or moving the paint into a smaller airtight container.

Several open cans of paint arranged on wooden storage shelves inside a well-lit garage or workshop.

What works in the field

These habits make a real difference:

  • Clean the rim first: Wipe paint off the groove and lid edge before sealing. A dirty rim prevents an airtight close.
  • Use a rubber mallet, not a hammer: Tap the lid down evenly without deforming the metal.
  • Reduce the air space: If only a little paint is left, move it to a smaller sealed container.
  • Add plastic wrap when needed: This helps limit air contact before the lid goes on.
  • Store off the floor: A shelf is better than concrete, especially in a damp garage.
  • Label clearly: Room name, sheen, date opened, and surface type all matter later.

Best storage spots around the home or facility

Paint lasts longer in a space that stays dry and more stable. A utility room, conditioned storage room, or interior closet is usually better than a shed or detached garage.

In commercial settings, organized storage helps maintenance teams avoid using the wrong can on the wrong surface. In homes, good labeling prevents the common problem of four white paints with no clue which one belongs to the hallway.

If you are planning a repaint and also thinking about durability, this guide to https://wheelerpainting.com/a-property-owners-guide-to-uv-resistant-paint/ is useful for understanding how product choice affects long-term performance on exposed surfaces.

The upside-down can debate

Some people store cans upside down to help the paint create a tighter internal seal. That can work in some cases, but it is not my first recommendation for most homeowners or facilities teams.

The risk is simple. If the lid was not seated perfectly, you can end up with a leak, a mess, and a ruined can label. A clean rim, a tight seal, and a stable storage area are more reliable than trying shortcuts.

Tip: The best “paint-saving trick” is not a trick at all. Keep air out, keep temperatures stable, and make sure future-you knows what is in the can.

Disposal and When to Call a Professional Painter

Not every leftover can deserves one more chance. Sometimes disposal is the smart move.

According to Old Crow Painting, an estimated 55 million gallons of paint are discarded annually in the U.S., much of it prematurely because of improper storage. The same source notes that the shift to latex paints in the 1940s shortened post-opening shelf life compared with older oil formulas. That matters because many people still assume modern paint stores as well as older products did.

When disposal is the better decision

Set the can aside for disposal if you find any of the following:

  • Persistent foul odor
  • Bulging lid
  • Heavy skinning and unrecoverable lumps
  • Visible mold or contamination
  • A finish test that dries rough, streaky, or weak

For local homeowners and facility teams in King County and Pierce County, it is worth checking current hazardous waste guidance before tossing anything. If you want a plain-English overview of options and precautions, this article on how to get rid of paint is a helpful starting point.

When leftover paint is a false economy

A small closet touch-up is one thing. A visible wall in a lobby, retail suite, office renovation, or residential exterior is something else.

Old paint becomes risky when:

  • Color consistency matters across a large surface
  • The coating protects high-traffic or moisture-prone areas
  • You are repainting after repairs
  • The job involves commercial renovations or tenant improvement work
  • The existing paint type is uncertain

In those cases, “using what you have” can lead to flashing, sheen mismatch, adhesion issues, or a full do-over. That is especially true when one patch has aged differently than the surrounding finish.

If you are dealing with older coatings and prep questions before repainting, this resource on https://wheelerpainting.com/how-to-remove-old-paint/ can help clarify what proper removal and surface prep involve.

The practical dividing line

Use leftover paint for small, low-risk touch-ups only when it passes testing and the match still makes sense. For larger spaces, customer-facing interiors, and surfaces that need durability, fresh material and proper prep are usually the better call.

That is true whether you are searching for a residential contractor near me, planning commercial construction near me, or trying to keep a property looking sharp without creating avoidable rework.

Ensure a Perfect Finish on Your Next Project

The useful answer to how long does paint last after opening is not just a number. It is a decision based on paint type, storage, and testing.

Latex and acrylic products usually have a shorter window after opening. Oil-based products can last much longer if they were sealed and stored well. In every case, the can still has to pass the basic checks. Look at it, smell it, stir it, and test it before it goes anywhere near a finished surface.

For a small touch-up in a bedroom, storage room, or maintenance area, old paint can still be worth using. For a full interior repaint, a commercial suite, a siding project, or a high-visibility entry, guessing is expensive. Finish quality depends on the right product, proper prep, and clean application.

Ceilings are a good example. Even when the old paint is technically usable, the wrong sheen or uneven touch-up can stand out badly once daylight hits it. If that is part of your project, this guide to https://wheelerpainting.com/finish-for-ceiling-paint/ is worth reviewing before you start.

A clean, durable result is what people remember. Not the can you saved. Not the trip you avoided. The finished room is what stays with you.


If you want help with a residential repaint, commercial renovation, tenant improvement, facility maintenance, or a finish that holds up in Kent, Seattle, Tacoma, and the communities in between, contact Wheeler Painting & Restoration Services. Their team handles the prep, product selection, and application details that take the guesswork out of painting and construction work.

Seattle & Tacoma Home Interior Paint Color Guide

Standing in a paint aisle with a fan deck in one hand and six nearly identical whites in the other is a familiar kind of frustration. One chip looks soft and clean in the store. Then you get home to Seattle, Kent, or Tacoma, hold it up in your living room, and suddenly it looks blue, yellow, or flat.

That’s normal. Choosing a home interior paint color is rarely about picking the prettiest chip. It’s about choosing the color that works with your light, your flooring, your trim, and the way the room gets used.

That’s also why generic advice often falls short around Puget Sound. Our homes deal with overcast daylight, long gray stretches in winter, and green reflections coming in from trees and landscaping. A color that looks balanced in a sunny showroom can shift fast once it’s on a wall here.

Your Guide to Choosing the Perfect Paint Color

A lot of homeowners start in the same place. They want “a warm white,” “a better beige,” or “a gray that doesn’t turn weird.” Then they discover there are dozens of versions of each, and none of them seem clearly right.

That confusion makes sense. The paint market is large, and homeowners have more choices than ever. The 2025 interior paint color trends overview notes that architectural paints accounted for over $82 billion of the global market in 2023, and a 2024 survey found that 68% of U.S. homeowners favor warm earth tones. You can feel that shift in real homes. Cooler grays haven’t disappeared, but warmer neutrals, earthy greens, and softer browns are taking over because they’re easier to live with.

Why homeowners get stuck

The challenge isn't a deficit in color sense. They’re trying to make a permanent decision using a tiny sample under the wrong light.

Common pain points usually look like this:

  • Too many similar choices: One white is creamy, one is gray, one is slightly green, and the labels don’t tell you how they’ll behave in your room.
  • Conflicting opinions: Family members often react to a color based on personal taste, not how it works with the house.
  • Lighting surprises: A neutral that looked calm at noon can look muddy by late afternoon.
  • Fear of making an expensive mistake: Repainting a room because the color feels off is frustrating and avoidable.

Practical rule: The best paint color isn’t the one that looked best under store lighting. It’s the one that still looks right in your home on a cloudy morning and under your lamps at night.

A good color process takes the guesswork down to size. Start with the room, then the light, then the undertone, and only then the final shade. When that order gets reversed, people usually end up chasing a chip they loved in theory but not on the wall.

Color Theory Fundamentals for Your Home

Color theory sounds more complicated than it is. For interior painting, it really comes down to a few practical ideas. You don’t need to think like a designer. You just need to know how colors behave when they sit next to wood floors, countertops, cabinets, and natural light.

A diagram explaining five essential color theory fundamentals for home interior design and wall painting projects.

The five ideas that matter most

  • Hue: This is the basic family. Blue, green, red, yellow, and everything in between.
  • Value: This tells you whether a color is light or dark. A pale beige and a deep mocha can share a similar base, but their value changes the whole feel of the room.
  • Saturation: This is intensity. A muted sage feels quieter than a vivid green.
  • Warm and cool: Warm colors lean toward red, yellow, and brown. Cool colors lean toward blue, green, and violet.
  • Harmony: This is how colors relate to each other across a home.

Warm vs cool in real rooms

The easiest way to think about warm and cool is this. Warm colors feel like lamp light. Cool colors feel like an overcast afternoon.

In a Puget Sound home, that difference matters. A warm neutral can soften a north-facing room and make it feel more welcoming. A cool neutral can feel crisp in the right setting, but it can also go cold fast if the room already gets blue-gray light.

If you want a deeper look at how color affects mood and perception, this piece on color psychology in interior design is a useful companion. It’s helpful when you’re trying to decide whether a room should feel calm, grounded, energetic, or quiet.

Harmony matters more than trendiness

Homeowners often ask for a single perfect color. In practice, what works better is a coordinated palette.

A good palette usually has:

  • A main wall color that can carry most of the house
  • A supporting neutral for nearby spaces
  • One deeper color for contrast, built-ins, or an accent wall
  • A trim and ceiling white that doesn’t fight the wall color

A house feels finished when the colors relate to one another, not when each room tries to stand alone.

That’s the difference between a home that feels smooth and intentional and one that feels like every room was chosen in isolation.

Why Light and Undertones Are Your Most Important Guides

Most paint mistakes don’t happen because the color was ugly. They happen because the undertone was wrong for the room.

A paint can read beige, gray, white, or greige at first glance. Underneath that main impression, though, it may lean pink, green, yellow, blue, or violet. That hidden bias is what shows up once the paint meets your flooring, your cabinets, and your lighting.

A living room interior featuring a wall sample test with gray and blue paint swatches on the floor.

What undertones actually do

Undertones explain why two grays can behave completely differently. One gray looks soft and balanced. Another turns green by dinner time. One white reads creamy and inviting. Another feels stark next to warm trim.

You’ll see this most clearly with neutrals:

  • Gray with blue undertones can feel crisp, but it can also go cold in overcast rooms
  • Gray with green undertones often reacts strongly to trees, lawns, and landscaping outside
  • Warm beige or greige usually feels steadier in homes with softer daylight and warm interior finishes
  • Off-whites can look either clean or dingy depending on the cabinet, countertop, and bulb temperature beside them

Why Puget Sound homes are different

Homes in Seattle, Kent, Tacoma, and the communities in between don’t get the same kind of light you see in many national design articles. Our daylight is often cooler and flatter. North-facing rooms already lean blue-gray. Add evergreen reflections outside the windows, and some neutrals pick up a green cast that never showed in the store.

That’s why local color selection needs more restraint. The wrong cool neutral can feel lifeless here. The right warm neutral can still feel clean without turning yellow.

If a homeowner says, “This color looked fine on the sample card but strange on my wall,” lighting is usually the reason.

How LRV helps you choose better

Light Reflectance Value, or LRV, measures how much light a paint color reflects on a scale from 0 to 100. It’s one of the most practical tools for selecting a home interior paint color because it tells you how heavy or bright a color may feel once it covers the full room.

The LRV guide for interior paint notes that for dimly lit Puget Sound interiors, choosing a color with an LRV of 65 to 75 can make a space feel 15% to 25% brighter without the yellowing that can happen with very high-LRV paints under artificial light.

That range works well in a lot of local homes because it balances brightness with control. Too dark, and the room feels flat. Too bright, and the color can bounce warm lamp light in a way that changes the whole look.

A practical way to read a room

Use this as a quick filter before you fall in love with a color chip:

Room condition What usually works better
North-facing room with limited sun Warm neutral or soft off-white with enough body to avoid looking cold
Room surrounded by trees Neutrals that resist going green
Open-concept main floor Mid-light neutrals that connect spaces without sharp color breaks
Small room with weak daylight Balanced colors with enough LRV to keep the room from closing in

Undertones decide whether the color belongs. LRV decides whether it has the right weight in the room. You need both.

Selecting the Right Paint Finish for Every Surface

Color gets most of the attention, but finish changes how that color performs. The sheen affects durability, washability, and how much wall texture shows after the paint dries. The same color in matte and semi-gloss can look like two different products.

A comparison of four different wall paint finishes including matte, eggshell, satin, and semi-gloss sheen levels.

The finish spectrum in plain English

Finish Look Best use Watch for
Flat or matte Soft, low sheen Ceilings, low-traffic adult spaces Less washable
Eggshell Slight glow Living rooms, bedrooms, halls Can still show prep flaws if wall repair is rough
Satin Noticeably smoother Family rooms, kids’ rooms, some commercial interiors Highlights patches and roller marks more than eggshell
Semi-gloss Reflective and durable Trim, doors, kitchens, baths Shows surface defects clearly
High-gloss Very shiny Specialty accents, select millwork Demands excellent prep

What works in everyday homes

Flat paint hides imperfections well, which is why many ceilings still get a low-sheen finish. If you’re trying to minimize surface flaws overhead, that’s usually the safe choice. For more detail on that specific decision, this guide on choosing the right finish for ceiling paint is worth a look.

For walls, eggshell is a dependable middle ground. It has enough softness to keep walls from looking shiny, but it’s easier to maintain than a dead-flat finish. Satin can work well too, especially in active households, but it puts more pressure on the prep work. Uneven texture, drywall patches, and lap marks show up faster as sheen goes up.

Rooms that need tougher finishes

Bathrooms, laundry rooms, mudrooms, and kitchens ask more from paint. Moisture, wiping, and frequent use change the equation.

A simple rule set helps:

  • Trim and doors: Semi-gloss is still a strong choice because it cleans well and gives crisp separation from the wall color.
  • Bathrooms: Use a finish that handles moisture better than flat wall paint.
  • Busy hallways: Eggshell or satin usually gives a better balance of appearance and durability.
  • Commercial interiors or tenant spaces: Choose finish based on traffic, cleaning needs, and how perfect the walls are.

The shinier the finish, the better the cleanup. The trade-off is that every patch, dent, and sanding miss becomes easier to see.

That trade-off matters. A beautiful color can still disappoint if it’s put in the wrong sheen.

Room-by-Room Palettes for Puget Sound Homes

A color palette works best when it respects how each room functions. The right home interior paint color for a bedroom may not be the right move for an entry, a kitchen, or an open living room. Around Puget Sound, the strongest palettes usually lean warm, grounded, and flexible.

There’s also a resale argument for keeping things steady. Zillow’s 2023 analysis of over 250,000 home sales found that homes with warm neutral interiors sold for an average of 1.5% more according to the Benjamin Moore color trend reference. That doesn’t mean every room should be beige. It means buyers tend to respond well to interiors that feel warm, livable, and easy to picture as their own.

Living room and main area palettes

In many Seattle and Tacoma homes, the living room does a lot of work. It connects to the kitchen, receives mixed daylight, and needs to feel comfortable in both summer and winter.

A reliable direction is:

  • Main wall color: warm neutral or soft greige
  • Trim: a white that doesn’t read icy
  • Accent option: muted green, earthy clay, or soft brown
  • Textiles and decor: natural wood, woven textures, black accents used sparingly

If you like richer contrast, a brown and blue scheme can work beautifully when the blue stays controlled and the brown adds warmth. This guide to brown and blue interiors gives some helpful visual ideas for that balance.

For more living-room-specific inspiration, this article on interior design paint colors for living room spaces can help narrow the field.

Bedrooms and offices

Bedrooms usually benefit from quieter color movement. That doesn’t always mean pale. It means the color shouldn’t fight the room.

Good options include:

  • dusty green
  • warm taupe
  • soft beige
  • muted blue used carefully in rooms with decent natural light

Home offices are a little different. They need focus without feeling sterile. Warm neutrals still do a lot of the heavy lifting, especially if the room doubles as a guest room.

Kitchens, baths, and transition spaces

Hallways, entries, and kitchens need colors that connect rooms without causing abrupt shifts. In homes with open layouts, people often overcomplicate color decisions.

A practical approach is to treat the house as one palette:

Space Best palette direction
Entry and hallway Slightly deeper warm neutral to ground the transition
Kitchen Clean but not stark wall color that works with cabinet tone
Bathroom Soft neutral with enough warmth to resist feeling cold under task lighting
Dining area Opportunity for a richer supporting shade if it still ties back to the main neutral

A cohesive house usually has one lead neutral, one or two supporting colors, and a few darker moments for depth.

That’s enough variety to feel intentional without making each doorway a hard reset.

The Professional Method for Sampling and Testing Paint

The fastest way to waste money on paint is to skip proper sampling. Small chips are helpful for narrowing options, but they are not enough for a final decision. Paint covers a large surface, and color changes when it expands across a wall.

A man stands in a bright room, examining six different paint color swatches on a wall.

How to test paint the right way

A good sampling process is simple, but it needs discipline.

  1. Narrow your options first
    Pick two or three strong candidates. More than that usually creates noise.

  2. Use large sample areas
    Don’t rely on a tiny brushout. Paint a large board or a meaningful wall section so you can read the color.

  3. Move the sample around
    If you sample on boards, move them from wall to wall. A color near a window can behave very differently on an interior wall.

  4. Look in morning, afternoon, and evening
    Don’t decide at one time of day. Cloud cover, shadows, and indoor lighting all affect the result.

  5. Check the sample next to fixed finishes
    Flooring, counters, backsplash tile, cabinets, brick, and trim all influence how paint reads.

  6. Remove losing options quickly
    Once a color is clearly wrong, stop giving it attention.

What homeowners often miss

The biggest mistake isn’t choosing the wrong color family. It’s evaluating the sample in isolation.

A warm white may look perfect until it sits beside cool quartz. A soft gray may seem balanced until it reflects green from the yard. Sampling is where those conflicts show up before the whole room gets painted.

This video walks through practical paint-selection thinking and is useful if you want to see the process in action:

When to trust your first reaction

Your first reaction matters, but only after you’ve seen the color in real conditions. If a sample keeps bothering you, there’s usually a reason. Maybe it’s too pink, too gray, too bright, or just disconnected from the room.

Good sampling doesn’t make the decision harder. It removes the colors that were never right in the first place.

That’s what saves time. Not more samples. Better testing.

Why Partnering with a Local Painting Pro Matters

Paint looks simple from the outside. Pick a color, buy the product, put it on the wall. In practice, getting a result that still looks right months later takes more judgment than one might assume.

That’s especially true in this region. The issue isn’t just applying paint cleanly. It’s reading the room correctly before the first gallon gets opened.

Local experience solves local problems

A broad national article can tell you warm neutrals are popular. It can’t stand in your Kent living room and notice the north light, the dark fir floors, the green cast from the backyard, and the way your lamps shift the walls at night.

That kind of judgment matters because color regret is common. A Pacific Northwest paint survey summary reports that 62% of Pacific Northwest homeowners repainted within two years due to color dissatisfaction from lighting mismatches. That’s a costly redo homeowners would rather avoid.

A local pro helps with more than labor:

  • Room-by-room color filtering: narrowing choices based on exposure and existing finishes
  • Surface prep: drywall repair, patch blending, sanding, caulking, and priming
  • Product matching: selecting coatings that fit the room’s use and moisture conditions
  • Execution: consistent cut lines, proper coverage, and finish selection that suits the surface

It’s also about process

Homeowners often search for interior painters near me when their true need is confidence. They want someone who can spot problems early and keep the project from turning into a series of expensive guesses.

Facility managers and property owners have the same concern on a larger scale. In tenant improvements, office repainting, and occupied commercial spaces, the color has to work, the finish has to hold up, and the schedule has to be realistic. A local contractor who understands smaller to mid-size projects can often make those moving parts feel much more manageable.

Paint is cheap compared to repainting. Expertise is what keeps a color choice from becoming a correction job.

That’s the value. Not just coating walls, but reducing risk.

Frequently Asked Questions About Interior Painting

A few questions come up on almost every interior painting project, especially when homeowners are trying to balance looks, durability, and air quality.

Common questions and practical answers

Question Short Answer
What’s the safest color family if I don’t want surprises? Warm neutrals are usually the safest starting point because they tend to be steadier in Puget Sound light.
Should every room be the same color? Not necessarily. It’s better to use a coordinated palette than force one color into every room.
Is flat paint ever a good choice for walls? Yes, in low-traffic spaces or where hiding surface flaws matters more than washability.
What finish is best for trim? Semi-gloss remains a dependable choice for trim and doors because it cleans well and separates nicely from wall finishes.
Do ceilings have to be bright white? No. A ceiling color should relate to the wall and the room’s light, not just default to the brightest white available.

Are low-VOC and zero-VOC paints durable enough

Usually, yes, but product selection and prep matter.

The undertone and paint behavior guide notes that post-2024 EPA regulations have driven a 28% market shift to zero-VOC formulas. It also notes an important trade-off in humid climates like Puget Sound. Some dark neutrals may yellow 15% faster in high humidity without proper primers and sealant application.

That means low-VOC and zero-VOC paints can perform well, but they shouldn’t be treated like all formulas behave exactly the same.

What’s the best paint for bathrooms and other humid rooms

Use a product and finish suited for moisture, and make sure the surface is properly prepared before paint goes on. Bathrooms fail early when there’s poor ventilation, weak prep, or the wrong sheen for the conditions.

How do I choose a ceiling color

Most ceilings look best when they support the wall color instead of competing with it. In some rooms, that means a soft white. In others, it means a toned-down version of the wall color or a neutral that keeps the room from feeling chopped up.

How many colors should I test

Two or three final contenders is usually enough. If you’re testing eight or ten, the problem usually isn’t lack of options. It’s lack of filtering.

Fewer, better candidates lead to better decisions than a wall full of maybes.

If you're planning a home update, remodel, tenant improvement, or repaint in Seattle, Kent, Tacoma, or the communities in between, Wheeler Painting & Restoration Services can help you sort through color, finish, prep, and project scope with a clear local perspective. Whether you need interior painting, drywall repair, restoration work, or a broader residential or commercial renovation partner, their team brings practical Puget Sound experience that helps projects run smoothly from estimate to final walkthrough.

Commercial Tenant Improvement Contractor: Puget Sound

You signed a lease in Seattle, Kent, or Tacoma. On paper, the space works. Good address, decent parking, fair terms, and enough square footage to grow.

Then you walk it with your team and reality shows up fast. The layout doesn’t fit your operation. The lighting is wrong. The flooring is tired. The break room is in the wrong place. There’s no clean path for new offices, reception, storage, or customer flow. If the building is occupied, you also have neighbors, access rules, noise limits, and a landlord who wants everything done by the book.

That’s where a commercial tenant improvement contractor earns their keep. The right one doesn’t just build walls and paint surfaces. They help turn a lease into a usable business space while protecting your timeline, budget, and day-to-day operations.

Your Guide to Commercial Tenant Improvements in Puget Sound

Around Puget Sound, this scenario is common. A business finds a promising office, retail, medical, or light commercial space, then realizes the interior needs serious work before anyone can move in. Sometimes it’s a full build-out from a shell. Sometimes it’s a targeted renovation in an occupied building. Either way, the pressure is the same. You need decisions, sequencing, permits, and clean execution.

Landlords understand that the building itself now plays a bigger role in keeping tenants happy and competitive. Industry data shows 92% of commercial real estate landlords recognize tenants want more from their buildings, which is why tenant improvements have become such a central part of commercial property strategy, according to commercial real estate tenant experience research.

A new property manager often starts with the visible items. Paint, flooring, wall locations, lighting, and finishes. Those matter, but they’re only part of the job. In Seattle, Tacoma, and Kent, tenant improvement work usually also involves permit review, landlord approval, scheduling around occupants, and coordination between trades that can’t afford to get in each other’s way.

The best TI projects feel organized from the start. The worst ones look simple until hidden constraints start stacking up.

That’s why contractor selection matters so much on small to mid-size projects. A hands-on contractor can keep the job moving, flag lease issues before they become change orders, and make sure the finish work matches the business you’re trying to run. For a local property manager, that means fewer surprises and a much clearer path from lease signing to move-in.

What a Commercial Tenant Improvement Contractor Really Does

A commercial tenant improvement contractor sits in the middle of three moving parts. The tenant has operational goals. The landlord has building standards and lease requirements. The city has code, permit, and inspection requirements.

A professional construction project manager and a client discussing office renovations inside a commercial space.

If those three aren’t aligned early, the project starts burning time. A wall gets framed before final approval. An electrical change triggers a permit issue. A finish selection doesn’t meet building standards. In occupied properties, even basic access can become a problem if the work plan doesn’t match site rules.

More than a builder

A good TI contractor handles construction, but the greatest value is coordination. That means reviewing plans for constructability, organizing trade partners, sequencing deliveries, identifying long-lead items, and spotting problems before they hit the field.

It also means understanding what the finished space has to do for the business. A retail layout has to guide customer movement. An office renovation has to support acoustics, circulation, power needs, and day-to-day use. A service business may need durable finishes in back-of-house areas and a cleaner customer-facing front.

Strategic improvements can pay off in real business terms. Companies that invest in quality workspace renovations report up to 25% higher employee retention, and green or healthy certified buildings can command rental premiums of up to 10% and lease faster, according to this guide to commercial tenant improvement projects.

Why commercial TI work is different

Tenant improvement work inside existing buildings is less forgiving than ground-up construction. You’re tying new work into old conditions. Ceiling cavities rarely look exactly like the drawings. Existing power may not be where you want it. HVAC distribution may need more adjustment than expected. And if other tenants are already operating nearby, your work hours and staging options shrink.

That’s also why field discipline matters. Site protection, dust control, signage, safe walk paths, and documentation aren’t extras. They’re basic job requirements. Property managers who want a practical outside resource on that topic can look at creating compliant health and safety systems, especially when coordinating work in active buildings.

A quick overview helps if you’re new to TI planning:

From Blueprint to Build-Out The Tenant Improvement Phases

Most TI projects become manageable once the sequence is clear. Problems usually start when owners or managers rush into construction before the design, lease review, or permit path is settled.

Pre-construction and design

The early phase is where the expensive mistakes get prevented. You establish the scope, confirm the intended use, review the lease, and decide what stays, what gets removed, and what needs to be added.

For a small office renovation in Kent, that may mean reworking a reception area, adding a conference room, and updating finishes. For a retail space in Tacoma, it may mean adjusting customer flow, improving lighting, and coordinating new flooring with fixture locations. For a Seattle office suite, it may start with simple partition changes that turn out to affect life safety, accessibility, or HVAC balance.

A design-build approach helps here because the people drawing the work and the people building it are talking at the same time. According to design-build guidance for tenant improvements, integrating design and construction phases can reduce project timelines by 15-25% compared to traditional models.

A six-step infographic illustrating the commercial tenant improvement process from initial consultation to final space handover.

If you’re comparing delivery options, it helps to review examples of commercial build-out services so you can see how planning, estimating, and execution fit together under one roof.

Bidding and contractor selection

Once the scope is defined, bidding becomes useful. Before that, it is often just a price exercise based on assumptions. The better approach is to compare contractors after the plans, approvals, and responsibilities are clear enough to price accurately.

Many smaller projects often go sideways. One contractor carries permit coordination. Another assumes the owner handles it. One includes temporary protection and phased access. Another does not. On paper, both numbers look close enough to compare. In the field, they’re not the same job.

Practical rule: If a bid is hard to compare, the work is probably hard to control.

Construction and close-out

Construction starts after approvals, scheduling, material releases, and site rules are lined up. The visible work happens here: demolition, framing, drywall, electrical, plumbing, paint, flooring, millwork, and finish installation.

Close-out matters just as much as build-out. The final walkthrough should catch punch items, verify that the agreed scope is complete, and make sure the space is ready for furniture, staff, or customers. Good close-out also means clean records, not just a clean floor.

A smooth TI project doesn’t happen because everything goes perfectly. It happens because the contractor resolves issues before they stall the entire sequence.

Core Services for Your Commercial Renovation Project

A tenant improvement contractor should be able to organize the full package of work, not leave the owner juggling trades. On small and mid-size projects, that single point of accountability saves a lot of confusion.

Professional contractors working on electrical, plumbing, and framing tasks in a commercial building renovation project.

The trades that shape the finished space

Here’s what usually sits inside a commercial renovation scope:

  • Demolition and prep work
    Existing walls, flooring, ceilings, fixtures, and damaged finishes often need to come out first. Clean demo protects what stays and gives the next trades a clear start.

  • Framing and drywall
    Layout translates into real rooms, corridors, offices, and service areas during this phase. In TI work, framing isn’t just about dividing space. It affects acoustics, traffic flow, visibility, and code compliance.

  • Interior and exterior painting
    Paint changes how a business presents itself faster than almost any other finish. In commercial settings, the right product selection also matters for durability, maintenance, washability, and cure time. If budgeting is part of your planning, a commercial painting cost estimator can help frame finish decisions early.

  • Floor repairs and replacements
    Carpet tile, LVP, wood, tile, and other commercial flooring products all carry different installation demands and downtime implications. Flooring also has to coordinate with entry transitions, cabinetry, and base details.

  • Cabinetry and millwork
    Reception desks, storage systems, break room cabinets, and built-in work surfaces can make a smaller commercial space function much better. Poorly planned millwork, on the other hand, creates pinch points and service headaches.

The services people forget to coordinate

The hidden work often drives the schedule:

  • Electrical coordination
    New walls and workstations usually mean new power, switches, lighting, or data locations.

  • Plumbing changes
    Restrooms, break rooms, sinks, and service areas need plumbing that fits the final layout, not the old one.

  • HVAC adjustments
    Once rooms move, air distribution usually needs to move with them. A space that looks finished but never gets comfortable isn’t actually done.

  • Finish detailing
    Wall coverings, sealants, touch-up, and final punch work are what separate a rushed project from a professional one.

Good tenant improvements don’t just look updated. They let staff work better, customers navigate more easily, and property managers maintain the space without fighting the finishes.

One practical option in this market is Wheeler Painting & Restoration Services, which handles tenant improvement, commercial renovation, painting, drywall, and related coordination for small to mid-size projects across the Puget Sound area.

Navigating Puget Sound Codes and Permit Requirements

Permit and code work is where local experience starts paying for itself. Seattle, Tacoma, and Kent all require careful review, but they don’t process every TI job the same way. A contractor who works these jurisdictions regularly knows that the same interior change can move differently depending on occupancy type, existing conditions, and the building’s own requirements.

A professional commercial tenant improvement contractor reviewing architectural blueprints in a modern office overlooking the city.

Dual compliance is the real challenge

Commercial TI work doesn’t answer to one authority. It answers to two. The project has to satisfy the lease and landlord requirements, and it also has to satisfy city code and inspection requirements.

That dual-compliance obligation is one of the biggest differences between casual renovation work and actual tenant improvement work. As noted in guidance on choosing the right tenant improvement contractor, partition walls, electrical upgrades, and HVAC modifications can each trigger different approval paths, and non-compliance can lead to costly work stoppages.

What that looks like on a real project

A property manager may think a new office partition is simple. Then the plan review raises questions about egress, accessibility, or mechanical distribution. Or a tenant wants to swap lighting and add receptacles, but the building has specific shutdown rules and the landlord requires pre-approval on materials and insurance documentation.

In occupied spaces, there’s another layer. Access windows, noise restrictions, elevator reservations, protection of common areas, and safety paperwork can all affect the start date. If that coordination is loose, crews show up ready to work and can’t get into the area they were scheduled for.

Here are the local habits that usually help:

  • Review the lease before final design
    Building rules often shape materials, access, insurance, and approval chains.

  • Confirm permit path early
    Don’t assume a simple interior change is exempt from review.

  • Coordinate building operations
    Elevators, loading, after-hours access, and shutdowns need to be on the calendar, not just in conversation.

  • Document field conditions
    Existing commercial spaces almost always contain surprises above ceilings and behind walls.

In Puget Sound TI work, the permit itself usually isn’t the hardest part. The hard part is lining up the permit path, landlord expectations, and jobsite logistics so the field crew can keep moving.

That’s why local familiarity matters so much for a new property manager. You don’t need a contractor who only knows how to build. You need one who knows how to get the work approved, scheduled, inspected, and finished without dragging the building into avoidable conflict.

Your Checklist for Choosing the Right TI Contractor

A low bid can be useful information. It shouldn’t be the deciding factor.

In tenant improvements, the hidden costs usually come from delay, confusion, and scope gaps. If your contractor doesn’t understand occupied-building work, permit timing, or your lease obligations, the savings on bid day can disappear quickly in downtime, change orders, and coordination problems.

Start with the lease, not the paint color

One of the most overlooked parts of contractor selection is lease fluency. Many business owners and newer property managers don’t realize how much the lease can shape the construction plan. TI allowances, landlord cost-sharing, insurance requirements, approval rights, and existing infrastructure limitations can all affect scope and budget, as explained in this piece on tenant improvement allowance and lease-related project obligations.

That doesn’t mean your contractor needs to act like an attorney. It means they should be able to read the relevant project clauses, identify practical risks, and ask the right questions before work starts.

Questions worth asking in the interview

Use the conversation to test how the contractor thinks. Are they reacting to your wish list, or are they actively protecting the project?

Question Category Essential Questions to Ask
Experience with similar work What types of tenant improvement projects do you handle most often? Have you worked in occupied commercial buildings like ours?
Local permits and inspections How do you approach permit coordination in Seattle, Tacoma, or Kent? Who tracks inspections and corrections?
Lease awareness Will you review the lease requirements that affect construction, approvals, insurance, and building access?
Schedule management How do you build a timeline for an occupied building or a tight move-in date? What usually causes delays on projects like this?
Trade coordination Who manages electrical, plumbing, HVAC, drywall, flooring, and paint sequencing? Is there one project lead?
Change management How do you handle hidden conditions, scope changes, and pricing approvals once work begins?
Communication How often will we get updates, and who do we call when a decision needs to be made quickly?
Site protection and operations How will you control dust, noise, deliveries, and access so nearby tenants or staff can keep functioning?
Close-out What does your final walkthrough include, and how do you handle punch-list items?

What strong answers sound like

A strong contractor usually asks you for more information, not less. They’ll want the lease, any landlord exhibits, as-built drawings if available, access rules, building contacts, and a realistic occupancy date.

Weak answers often sound confident but thin. “We’ll figure it out in the field” is not a schedule strategy. “Permits usually aren’t a problem” is not permit management. And “we just need a quick deposit and can start right away” should make you slow down, not speed up.

Choose the contractor who spots risk early and explains it clearly. That contractor usually protects your budget better than the one who simply promises the lowest number.

For a property manager in Puget Sound, the goal is simple. Hire the commercial tenant improvement contractor who can reduce disruption while keeping the work aligned with the lease, the building, and the city.

Partner with Wheeler for Your Next Puget Sound TI Project

A commercial space rarely starts out ready for your exact use. It becomes ready through planning, coordination, and disciplined field execution. That’s especially true in Seattle, Tacoma, Kent, and the communities between them, where permit requirements, occupied buildings, and landlord approvals all add pressure to the job.

The right contractor helps you avoid the expensive problems that don’t show up on a finish board. Missed approvals. Poor sequencing. Lease misunderstandings. Trade conflicts. Access issues that stall work for days. Those are the details that separate a manageable TI project from a frustrating one.

For owners and property managers comparing partners, it can also help to look outside the local market and study how others evaluate fit-out firms. A broader example is this roundup of best office fit-out providers 2026, not because the market is the same, but because it highlights the same core questions about planning, delivery, and workplace function.

Wheeler Painting brings long-standing Puget Sound experience to small and mid-size tenant improvement and facility projects. That matters when you need a contractor who can coordinate the work, communicate clearly, and keep disruption under control from pre-construction through final walkthrough.


If you're planning a tenant improvement, office renovation, retail build-out, or facility upgrade in Seattle, Kent, Tacoma, or nearby communities, contact Wheeler Painting & Restoration Services to discuss the space, the lease constraints, and the most practical path to get your project built.

Kitchen Colors With Dark Cabinets: Expert Guide

You’re probably standing in your kitchen with a few paint chips in hand, looking at your dark cabinets and thinking two things at once. They look beautiful, and choosing the wrong wall color could make the whole room feel too heavy.

That tension is common in homes across Seattle, Kent, Tacoma, and the towns in between. Dark cabinets can look polished and grounded, but in the Puget Sound region, our softer daylight changes how every wall color reads. A white that looked clean in the store can turn cold at home. A greige that seemed safe can go flat by late afternoon.

The good news is that dark cabinetry gives you a strong starting point, not a problem to solve. Once you understand how undertones, light, flooring, and sheen work together, kitchen colors with dark cabinets become much easier to narrow down.

Why Dark Cabinets Are a Great Choice for Your Home

A lot of homeowners second-guess dark cabinets right after installation. The room suddenly has more contrast, more presence, and more personality than it did before. That can feel risky for a day or two.

In practice, dark cabinets are one of the easier foundations to design around. They already bring visual structure to the room, so the rest of the palette can do one of two jobs. It can either lighten and balance the kitchen, or lean into the mood and make the space feel bespoke.

A modern, minimalist kitchen featuring dark wood cabinetry, a light stone island, and sleek integrated appliances.

Why homeowners keep choosing dark cabinetry

Dark cabinetry has stayed popular because it does more than look dramatic. Dark finishes hide dirt, smudges, and scratches better than lighter cabinets, and darker hues including matte black, deep greens, and navy blues are identified as projected 2025 must-have color trends in this dark cabinet trend overview.

That matters in real kitchens, not showroom kitchens. If you cook often, have kids, entertain, or move quickly through the space every day, dark lower cabinets usually wear daily life better.

A few practical upsides homeowners notice right away:

  • Less visible wear: Fingerprints, minor scuffs, and day-to-day marks don’t jump out as quickly.
  • Stronger contrast: Light counters, tile, and trim read cleaner against a dark cabinet line.
  • Flexible styling: Dark finishes work with brass, chrome, black hardware, wood accents, and stone surfaces.
  • Longer design life: Dark cabinets usually don’t feel trendy in the wrong way. They tend to age better than highly specific novelty colors.

What dark cabinets do to the room

Dark cabinets make a kitchen feel more grounded. Sometimes they also make it feel a little smaller, especially in homes where natural light is indirect most of the year.

That’s not automatically a downside. In many Puget Sound homes, especially in older neighborhoods around Seattle and Tacoma, that slight visual compression can make a kitchen feel cozier and more intentional. The key is balance. You don’t want the room to feel dim, boxed in, or muddy.

Practical rule: If the cabinets are the heavy visual element, the walls, counters, ceiling, and lighting need to do the lifting.

That’s why color selection matters so much after cabinet installation. The cabinet color is only half the decision. The room around it decides whether the final result feels rich or oppressive.

Understanding Color Principles for Dark Cabinets

Most paint mistakes with dark cabinets come from one problem. Homeowners choose a wall color by itself instead of choosing a wall color in relation to the cabinet undertone.

Start there first. Ask whether your cabinets read warm or cool.

Warm dark cabinets usually include espresso, walnut, mahogany, and dark brown stains with red or golden undertones. Cool dark cabinets usually include charcoal, slate, deep gray, navy, and some black finishes.

Match the wall to the cabinet undertone

When undertones fight each other, the room feels off even if every individual material is attractive.

One way to simplify it:

  • Cool cabinets: Pair well with light gray, soft white, and cooler off-white walls.
  • Warm cabinets: Usually look better with beige, taupe, creamy white, and warmer greige walls.
  • Mixed finishes: Need a reference point. If your counters are warm but the cabinets are cool, the backsplash or floor often has to bridge the gap.

If you have navy or charcoal cabinets, a yellow-beige wall usually looks disconnected. If you have espresso cabinets with warm brown depth, a stark blue-white can feel harsh.

Use LRV to avoid a heavy room

Homeowners don’t need to become paint chemists, but one measurement does help. Light Reflectance Value, or LRV, tells you how much light a color reflects.

For kitchen colors with dark cabinets, wall colors in the 60–75 LRV range are often the safest place to start. Soft grays, taupes, and warm off-whites in that range help balance dark cabinetry and keep the room from feeling heavy, especially in kitchens with moderate natural light, as noted in this guidance on light and dark cabinet color balance.

A graphic design titled Mastering Kitchen Color with Dark Cabinets outlining three tips for balanced interior design.

That range gives you enough reflectivity to brighten the room without creating a jarring showroom-white contrast.

Contrast should feel intentional, not loud

A lot of homeowners think they need maximum contrast. They don’t. They need the right contrast.

Here’s what usually works better in lived-in homes:

Contrast level What it looks like When it works
Low contrast Warm off-white or soft greige with espresso cabinets Traditional, transitional, and cozy kitchens
Medium contrast Soft gray or light taupe with navy or charcoal cabinets Most Puget Sound homes
High contrast Crisp white walls with black or near-black cabinets Modern kitchens with strong light and simple finishes

A balanced kitchen usually has one dramatic element, not five. If the cabinets already command attention, the wall color should support them.

A quick test before you commit

Tape large samples on multiple walls. Then check them in morning light, late afternoon, and after your overhead lights are on.

If the sample suddenly looks green, pink, or dingy at night, that’s not a small issue. In a kitchen, you’ll notice it every day. The right color should hold together across changing conditions, especially here in Western Washington where daylight shifts more than people expect.

Proven Paint Color Palettes for Your Kitchen

Once you know whether your cabinets lean warm or cool, choosing a palette gets easier. The goal isn’t to find a “perfect” paint color in isolation. The goal is to choose a wall color that makes the cabinets look intentional, the counters look cleaner, and the room feel brighter than the weather outside.

Sample boards are important. A color that looks excellent in a paint deck can completely change next to a dark stained cabinet door or a slab backsplash.

Three palette directions that usually work

Some homeowners want a lighter kitchen without repainting cabinets. Others want a moodier result that still feels clean. Most successful kitchens with dark cabinets fall into one of these directions:

  • Crisp and clean neutrals: Good for black, charcoal, and navy cabinets when you want contrast.
  • Warm and inviting tones: Better for espresso, chocolate, or brown-black cabinetry that needs softness.
  • Cool and refined hues: Useful when you want a composed, designer-led look without going sterile.

If you’re collecting inspiration before you buy samples, this roundup of blue kitchen visuals for designers can help you see how cooler hues behave with cabinetry and metal finishes.

Paint color ideas for dark kitchen cabinets

Palette Type Paint Color Example Notes
Crisp and clean Sherwin-Williams Alabaster SW 7008 Softer than stark white. Good with charcoal, black, and navy cabinets.
Crisp and clean Benjamin Moore White Dove OC-17 A dependable off-white for kitchens that need brightness without a cold cast.
Crisp and clean Sherwin-Williams Crushed Ice SW 7647 A light gray that can work with cool dark cabinets in moderate daylight.
Warm and inviting Sherwin-Williams Accessible Beige SW 7036 Useful with espresso or dark brown cabinets when you want warmth without yellowing the room.
Warm and inviting Benjamin Moore Pale Oak OC-20 A soft greige that often bridges warm wood tones and lighter counters well.
Warm and inviting Sherwin-Williams Agreeable Gray SW 7029 A flexible greige, but it needs testing because local light can shift it.
Cool and tailored Benjamin Moore Classic Gray OC-23 Very light, subtle, and often cleaner than many beige-leaning neutrals.
Cool and tailored Sherwin-Williams Sea Salt SW 6204 Best used carefully. It can look calm and refined, but test it hard in overcast light.
Cool and tailored Benjamin Moore Gray Owl OC-52 A soft gray choice for cool cabinet finishes and simple backsplash materials.

What works and what usually doesn’t

A few practical calls from jobsite experience in the Puget Sound area:

  • Works well: Off-whites with a little softness. They brighten the room without fighting dark cabinets.
  • Often works: Light greiges that can connect wood floors, stone counters, and cabinet color in one move.
  • Risky: Bright, stark whites in kitchens that don’t get direct sun. They can look cold fast.
  • Also risky: Muddy mid-tone grays. Against dark cabinets, they often flatten the whole room.

If your kitchen has a lot of fixed finishes already, don’t choose the paint first. Choose the paint last. Cabinets, counters, flooring, and backsplash lock in the undertone story. Paint is the adjustment layer.

For homeowners comparing cabinet and wall combinations from the same brand family, this guide to Sherwin-Williams kitchen cabinet colors is a useful reference point for narrowing compatible directions.

Bring your cabinet sample, countertop sample, and flooring sample together before making a final paint call. Separately, each one can look right. Together, they tell the truth.

Lighting and Finishes for Puget Sound Homes

The same paint color won’t behave the same way in Phoenix and Seattle. That’s why generic kitchen advice often fails here.

Across the Puget Sound region, natural light is softer, cooler, and more diffused for much of the year. In a kitchen with dark cabinets, that means color depth increases quickly. A soft gray can become dull. A warm white can lose warmth. A dark blue cabinet can suddenly dominate the room by late afternoon.

A modern kitchen featuring dark cabinets, light marble countertops, stainless steel appliances, and a beautiful window view.

Good lighting keeps paint honest

For kitchens with dark cabinetry, layered lighting works best at 3000 K to 3500 K with a CRI of 90+, because higher CRI helps off-white, beige, and soft gray walls keep their intended hue instead of turning muddy under artificial light, according to this article on lighting for dark cabinet color schemes.

That sounds technical, but the practical takeaway is simple. Cheap bulbs can make a well-chosen paint color look wrong.

Use layers instead of relying on one overhead fixture:

  • Ambient lighting: Recessed lights or ceiling fixtures for general visibility
  • Task lighting: Under-cabinet strips over work surfaces
  • Accent lighting: Pendants, sconces, or interior cabinet lighting for depth

When all three are working together, dark cabinets look richer and more dimensional.

Sheen matters more than people think

Paint sheen changes how much light a surface throws back into the room. In kitchens around Kent, Seattle, and Tacoma, that matters because winter daylight is limited and often gray.

A few practical rules hold up well:

  • Walls in matte or eggshell: Usually the safest choice. They soften reflections and hide surface imperfections.
  • Trim in satin or semi-gloss: Adds definition and reflectivity around doors and windows.
  • Ceilings with a touch of sheen when needed: In darker kitchens, a little extra reflectivity overhead can help.

If your project includes stained wood elements, matching the depth and finish of those surfaces matters too. This guide on how to stain wood cabinets is useful for understanding how stain tone and finish affect the final color balance in the room.

In Western Washington, light quality is part of the color palette. If you ignore that, the paint can still be “right” on paper and wrong in the room.

What fails most often

The most common lighting mistake is combining dark cabinets with cool, low-quality bulbs and a flat middle-gray wall. That combination tends to kill contrast, flatten surfaces, and pull strange undertones out of otherwise decent paint colors.

The better move is warm-neutral lighting, cleaner wall color, and enough layered light to keep corners from disappearing.

Coordinating Floors, Ceilings, and Backsplashes

A kitchen doesn’t read wall color by itself. It reads the whole room at once.

That’s why many homeowners still feel stuck even after narrowing down paint. The walls may be fine, but the floor is too close to the cabinet value, the ceiling absorbs light, or the backsplash introduces a competing undertone. Good kitchen colors with dark cabinets depend on hierarchy. Something needs to be dark, something needs to be light, and the in-between materials need to connect them.

A modern galley kitchen featuring dark charcoal cabinets, white marble countertops, patterned tile backsplash, and light flooring.

Floors should support the cabinets, not disappear into them

In Western Washington, a slightly lighter floor finish like light oak can bounce useful light back into a room with dark cabinets, and ceiling finishes with more sheen can increase perceived brightness even when the ceiling color isn’t a pure white, as discussed in this article on color schemes for kitchens with dark cabinets.

That doesn’t mean every floor needs to be pale. It means the floor should make a deliberate contribution.

Three common floor directions:

  • Lighter wood or wood-look flooring: Often the safest move in Seattle-area homes with softer daylight.
  • Mid-tone flooring: Works if the undertone clearly relates to the cabinetry and counters.
  • Dark flooring with dark cabinets: Can work, but only if ceilings, walls, and counters are doing enough to keep the room from closing in.

If you’re comparing wood and gray-toned floor directions, this 2026 grey kitchen flooring guide is a helpful visual resource for seeing how gray flooring shifts the mood of a kitchen.

Ceilings and backsplashes do more than fill space

Ceilings are often treated as an afterthought. They shouldn’t be. In darker kitchens, the ceiling is one of your biggest light-management tools.

A few good approaches:

Surface Safer choice Bolder choice
Ceiling Soft white with a bit of reflectivity Very light greige if trim and walls stay bright
Backsplash Warm white tile or soft stone Patterned tile with controlled contrast
Grout Mid-light neutral Slightly darker grout for definition

For ceiling finish questions, this overview of the right finish for ceiling paint helps clarify where flat works and where a touch of sheen helps more.

The whole-room hierarchy that usually works

When a kitchen feels professionally pulled together, it usually follows a simple order:

  1. Cabinets anchor the room
  2. Counters and backsplash create contrast
  3. Walls soften the transition
  4. Flooring stabilizes the palette
  5. Ceilings and trim restore light

That’s the sequence many online guides miss. They focus only on wall paint, but the room works as a system. If one finish is too dark, too yellow, too gray, or too shiny, it changes how every other finish feels.

From Plan to Paint Your Next Steps with Wheeler Painting

A lot of Puget Sound homeowners hit the same point. The dark cabinets look right, but the wall color still feels uncertain once you bring home samples and see them on a gray Seattle morning or under warm light at dinner.

That hesitation is normal. Dark cabinets give a kitchen structure, but they also make color mistakes easier to see. The good news is that the final decision usually gets clearer once you narrow the room down to its fixed surfaces and test paint in the actual space.

A simple way to make the final call

Start with the finishes that are expensive or inconvenient to change. In most kitchens, that means cabinets, counters, flooring, and often the backsplash. Wall color comes after that, not before.

Then test with discipline:

  • Use large samples: Paint sample boards or peel-and-stick sheets need enough size to show undertone. A tiny chip will not tell you much next to dark cabinetry.
  • Move the sample around the room: North-facing kitchens in Seattle, Kent, and Tacoma often read cooler along one wall and noticeably warmer under artificial light.
  • Check the sample at more than one time of day: Morning cloud cover, a break of afternoon sun, and evening task lighting can all shift the same color.
  • Compare it beside every fixed finish: Cabinets matter, but so do the floor, counter edge, tile, and trim.

If flooring is still part of the decision, this guide to flooring color considerations is useful because floor tone often decides whether dark cabinets feel grounded or too heavy.

When to bring in a contractor

Some kitchens only need paint. Others need wall repair, trim work, cabinet touch-up, lighting updates, or better coordination between trades. That is where projects tend to drift off course.

I see it often in older Puget Sound homes. A homeowner picks a wall color that looked balanced in the store, then the existing drywall texture, yellowed ceiling paint, or outdated can lights throw everything off once the work starts. Fixing that late costs more than sorting it out at the front end.

Wheeler Painting & Restoration Services handles color consultation, interior painting, drywall work, cabinet-related finishing, and broader remodel coordination across the Puget Sound area.

The right kitchen color holds up in real life. It still works on a dark winter afternoon, under under-cabinet lighting, and during the few bright summer hours when the room gets full sun.

What to do next

Pull together your cabinet, counter, backsplash, and floor samples first. Narrow your paint choices to a short list. Then test them where you live, with your lighting, in your kitchen.

That slower process usually prevents the expensive mistake. It also gives you a kitchen that feels calm, consistent, and right for the way homes in this part of Washington look through the year.

8 Ceiling Paint Color Trends for 2026

Are you still painting every ceiling flat white just because that is what the last owner, the last tenant, or the last contractor did?

I see that habit all over the Puget Sound, from Seattle offices to Tacoma retail suites to homes in Kent and the smaller communities in between. Property owners will weigh wall color, flooring, cabinet finish, lighting temperature, and furniture placement, then treat the ceiling like an afterthought. Around here, that choice has bigger consequences than people expect because our natural light is different.

Western Washington light stays cool and diffused for much of the year. Under gray skies, a ceiling color that looks crisp in a sunnier market can read harsh, flat, or slightly dingy here. A warmer white can soften that effect. A deeper color can add shape and intimacy. The wrong finish or sheen can also telegraph every patch, roller mark, and seam, especially in large commercial spaces with long sightlines.

Ceiling color trends have shifted for that reason. Owners are using ceilings more deliberately now, as part of the room’s lighting plan, mood, and proportions instead of as the last coat at the end of a project.

That applies to both houses and commercial properties.

In a bungalow with low winter light, the goal may be to keep the room open without making it feel cold. In a lobby, restaurant, office, or tenant improvement project, the ceiling often has to do more. It may need to hide imperfections, support brand colors, reduce glare, or tie exposed elements together. Some looks are straightforward to paint. Others, especially dark colors, metallics, precise color matching, and specialty matte finishes over repaired drywall, are where a professional contractor earns the money.

If you are planning a remodel, turnover, office refresh, or one-room update, the ceiling is one of the fastest ways to change how a space feels without changing the footprint. It can also work alongside clever room design ideas when you want a smaller room to feel more balanced or open.

1. Moody Dark Ceilings

Could a dark ceiling make your room feel sharper and more intentional, or would it just make a gray Puget Sound day feel heavier? That depends on the room, the light, and the finish.

Deep charcoal, navy, forest green, and soft black can add structure in a way plain white often does not. I see this work especially well in Seattle lofts, dining rooms with focused pendant lighting, and commercial spaces with exposed ducts or beams where the goal is to make the overhead plane feel designed instead of ignored. Designers also keep coming back to darker, mood-driven palettes in broader interiors coverage, including Lewis and Sheron's design playbook, and ceilings are part of that shift.

A modern, minimalist living room featuring a striking black painted ceiling and warm terracotta accent wall

Where dark ceilings work best

Dark ceilings perform best when the room has enough volume, enough lighting, or a clear reason for the added depth.

These are usually the safest bets:

  • Tall residential spaces: Living rooms, entry halls, and dining rooms with good ceiling height can carry charcoal or navy without feeling squeezed.
  • Hospitality and gathering spaces: Restaurants, lounges, lobbies, and club rooms often benefit from the more intimate feel of a darker overhead color.
  • Home offices and media rooms: Dark ceilings can cut visual glare and help the room feel calmer and more grounded.
  • Commercial interiors with exposed elements: In office renovations and retail build-outs, a dark ceiling can visually pull sprinklers, conduits, and structure into one cleaner composition.

A simple field rule helps. If the room already feels low, dim, and boxed in, a dark ceiling usually makes that more obvious.

That caution matters more here than it does in sunnier markets. In Tacoma, Everett, or along the water, our daylight is often cool and diffused for long stretches of the year. A sample that reads rich and balanced online can turn flat, muddy, or overly heavy by midafternoon in a north-facing room. I always recommend checking large samples on the ceiling itself, not just on a wall board, and looking at them in both daylight and evening artificial light.

What tends to go wrong

Dark paint is less forgiving overhead. Roller lines, flashing over patches, uneven cut lines, and slight sheen changes show up fast, especially across broad ceilings with side light from large windows.

The practical trade-off is maintenance and execution. A dark ceiling can look excellent when the substrate is clean, the repairs are feathered properly, and the finish is applied evenly. It can also highlight every drywall seam and every shortcut.

For that reason, this is one of the trends where hiring a professional contractor often makes sense. That is especially true for occupied homes, multi-tenant commercial properties, restaurants, and offices where containment, scheduling, lift work, and coordination with fixtures all affect the result. Property managers also need a plan for sprinkler heads, diffusers, speakers, access panels, and lighting trims. If those stay bright white against a near-black ceiling, the room can look unfinished rather than intentional.

2. Soft White and Warm Neutral Ceilings

Want a ceiling color that still feels current five years from now? In a lot of Puget Sound properties, soft white and warm neutrals are still the safest answer, and they are getting more refined, not less relevant.

Flat bright white used to be the default. Now owners and property managers are asking for whites with a little warmth built in. Soft whites, light greiges, pale taupes, and off-whites keep the ceiling bright while making the room feel less stark.

That shift matters here. In Seattle, Tacoma, Everett, and shoreline neighborhoods, our light is often cool and filtered for long stretches of the year. A sharp blue-white ceiling can look crisp on a sunny day, then feel cold and slightly clinical by late afternoon. A warmer white usually holds up better under gray daylight and evening LED lighting.

I steer a lot of clients toward this range when they want the room to feel clean without that hard commercial glare. The goal is a ceiling that stays quiet and flattering while still reflecting light.

A few places where this trend works especially well:

  • Residential kitchens and open living areas: Warm ceiling whites sit more comfortably with wood floors, painted cabinetry, and mixed metal finishes.
  • Professional offices and common areas: Soft neutrals reduce the stark contrast that can show up under rows of overhead fixtures.
  • Healthcare, wellness, and tenant improvement spaces: Gentle off-whites feel calmer and more finished than a cold stock white.
  • Turnover units and mixed-use properties: Neutral ceilings coordinate with a wider range of wall colors, which helps simplify future repaint decisions.

Undertone matters more than the label on the paint chip. A white that reads creamy in a showroom can turn yellow next to cool gray walls, and a greige ceiling can look flat if the room already gets limited daylight. If you are pairing the ceiling with feature walls, trim, or nearby finishes, it helps to review accent wall color ideas for cohesive room palettes and compare them against your actual lighting. Broader interior guidance like Lewis and Sheron's design playbook can help narrow the palette, but final choices should always be tested on site.

A good ceiling white does its job subtly.

Best use case

Warm neutral ceilings are a strong fit for resale prep, tenant turnover, and commercial spaces that need broad appeal. They age well, they work with more wall colors, and touch-ups are usually easier to blend than with darker or more saturated ceiling colors.

This is also one of the more forgiving trends for occupied properties, but finish quality still matters. On older ceilings with patchwork, stains, texture repairs, or long runs of side light, I would still bring in a professional crew. Uniform coverage overhead takes skill, especially in offices, retail suites, and larger homes where inconsistent rolling or flashing can spoil an otherwise simple color choice.

3. Ceiling as Fifth Wall Art

What if the ceiling carried the design instead of fading into the background?

That idea is showing up more often in Puget Sound homes and commercial spaces, especially in rooms that need a clear identity. Under our gray skies and softer daylight, a painted ceiling can read richer and more intentional than it would in harsher sun. A pattern, mural, or color-blocked treatment overhead often feels less glaring here, which gives owners a little more freedom to be creative.

A modern dining room featuring a geometric triangle patterned ceiling painted in blue and gold tones.

The best results come from rooms with a defined purpose. Dining rooms, powder rooms, boutique retail, lobby areas, children’s spaces, and creative offices all make sense because the ceiling helps shape the experience of the room. In larger open plans, I’m more selective. A decorative ceiling can look great, but it needs enough architecture or furnishing below it to feel grounded.

For property managers, this trend works best in spaces where visual identity supports the use of the building. A restaurant private room, leasing office, salon, or reception area can benefit from a ceiling treatment that people remember. In a standard apartment turnover or a generic office suite, it usually adds cost without adding much practical value.

If you’re already planning stronger wall features, the ceiling should relate to them instead of competing with them. Wheeler has shared useful inspiration on accent wall color ideas that can pair well with a more intentional overhead treatment.

The trade-offs are real. Ceiling art asks for accurate layout, clean masking, and careful planning around lights, diffusers, sprinklers, access panels, and framing that may not be perfectly square. I’ve seen good concepts fall apart because nobody checked the fixture spacing before the pattern was laid out. On older homes, patched texture and uneven drywall joints can also telegraph through crisp geometric designs.

This is usually the point where a professional crew earns its keep. Murals, striping, metallic accents, repeated patterns, and any finish that needs exact symmetry are hard to pull off overhead. Commercial properties have another layer to consider. Future maintenance. If electricians, HVAC techs, or fire-sprinkler crews need to open that ceiling later, touch-ups can become expensive unless the original colors, sheen, layout dimensions, and product data are documented.

Moisture matters too. In bathrooms, spa areas, and other humid rooms, decorative work has to start with the right coating system or the finish will age poorly. If that applies to your project, review this guide to waterproof ceiling paint for bathroom applications before choosing the design.

Here’s an example of the style direction many clients are drawn to:

4. Sustainable and Low-VOC Ceiling Finishes

Need to repaint a ceiling without filling the whole building with odor for two days?

That question comes up a lot around Puget Sound, especially in occupied homes, clinics, offices, schools, and tenant improvement work. Sustainable and low-VOC ceiling finishes have become a practical choice because they reduce disruption while still giving owners the finish quality they expect. In our gray, diffused local light, ceilings also need good hide and an even look. A weak product shows every lap mark and missed patch fast.

Low-VOC paint helps with scheduling as much as air quality. Property managers can turn units faster. Homeowners can stay in the house more comfortably. Commercial tenants can often keep operating with less disruption, provided the right product is paired with a realistic phasing plan.

There is still a trade-off. Some low-VOC products cover beautifully, and some do not. I’ve seen green-labeled paints that needed an extra coat overhead because the hide was thin or the dry time ran longer than expected in cool, damp weather. That matters here. Puget Sound conditions can slow curing, especially in bathrooms, laundry areas, and buildings with limited ventilation.

Product selection should match the room, not the marketing on the label. A bedroom ceiling usually does well with a flat low-VOC coating. A clinic corridor, school, or commercial restroom may need better washability, stain resistance, or moisture tolerance. Owners comparing options should also look at the right finish for ceiling paint before choosing by color alone.

Bathrooms and other damp spaces need extra care. If moisture resistance is part of the job, Wheeler has a more specific guide to waterproof ceiling paint for bathroom applications and when a specialty product makes sense.

Professional application matters more with certain low-odor systems. Deep-tint products, ultra-flat finishes, fast-turn commercial repaints, and ceilings with stains or past water damage are the jobs where a contractor usually saves time and callbacks. The crew needs to know how the product flows overhead, how it flashes in soft daylight, and whether primer is needed to keep touch-ups from standing out later.

For both residential owners and commercial managers, the best result usually comes from a simple approach. Choose a proven low-VOC system, match it to the room’s moisture and maintenance demands, and do not assume every eco-friendly label performs the same once it is rolled across a full ceiling.

5. Textured and Matte Ceiling Finishes

Why do so many ceilings that look fine on a paint chip wall fall apart once they are overhead?

Sheen is usually the reason. In Puget Sound light, ceilings read differently than they do in sunnier climates. Our gray skies and diffused daylight are forgiving in one sense, but they also make flashing, patch edges, and roller marks show up in a slow, flat way that property owners notice over time. A matte or very low-sheen finish usually handles that better than anything with noticeable shine.

That matters in both homes and commercial buildings. In a Seattle craftsman with older lid lines, matte helps soften small drywall irregularities. In offices, clinics, and retail suites, it cuts glare from overhead fixtures and window walls without making the ceiling feel dull.

Texture can help too, but only when it is intentional.

A light, uniform texture can disguise minor repairs and keep a broad ceiling plane from looking sterile. Heavy texture is harder to justify now. It tends to date the room, collects dust, and makes later patching more obvious, especially in tenant spaces where lighting or mechanical work may change.

Here are the cases where I still see textured or ultra-flat ceilings work well:

  • Older residential rooms: A subtle profile can downplay uneven patches, old tape lines, and minor surface waviness.
  • Commercial remodels: Matte finishes reduce visual noise under LEDs, which helps in lobbies, waiting rooms, and open work areas.
  • Newer spaces that feel too plain: A restrained texture can add depth without turning the ceiling into the focal point.

Lighting still affects the result. Before choosing a dead-flat white or a tinted matte, it helps to compare the room’s lamp color to daylight using the Conservation Mart LED color chart. That step prevents a ceiling from looking creamy in the afternoon and cold at night.

For owners weighing sheen levels, this guide to the best finish for ceiling paint explains where flat, matte, and low-sheen products each make sense.

The main trade-off is maintenance. The flatter the finish and the deeper the texture, the harder it is to clean evenly. That is usually fine in bedrooms, living rooms, and private offices. It is less practical in corridors, break rooms, busy retail spaces, or anywhere ceiling surfaces may need regular washing.

Some ceilings also need a pro from the start. Sprayed matte black, skim-coated lids, specialty textures, and large commercial ceilings with critical side-lighting are the jobs where application quality shows immediately. If the substrate is uneven, stained, or patched in several places, the crew needs to correct the surface before texture or ultra-flat paint goes on. Otherwise, the finish can make the defects look random instead of finished.

6. Color Matching and Continuity Ceilings

Want a room to feel more settled and better proportioned without adding trim, texture, or a dramatic ceiling color? Start by treating the ceiling as part of the room’s color plan, not a separate plane that has to turn white.

Matching the ceiling to the walls, or keeping it in the same color family, creates a cleaner envelope and cuts the visual break at the top of the room. In Puget Sound homes and commercial spaces, that approach often reads better under our softer gray daylight than a stark white lid that can feel flat or slightly blue for much of the year. I see this work especially well in bedrooms, home offices, conference rooms, boutique retail, and tenant improvement spaces where owners want the room to feel intentional from every angle.

Where continuity works best

Use this approach where calm, focus, or brand consistency matters more than contrast.

Common fits include:

  • Home offices: Wall and ceiling continuity reduces visual breaks and keeps the room quieter.
  • Bedrooms: Matching soft neutrals or muted colors can make the room feel more restful.
  • Retail, salons, and hospitality spaces: A continuous color field often looks more custom and less builder-grade.
  • Commercial tenant improvements: Carrying a brand tone upward can help define a suite or zone without adding more materials.

Lighting changes everything here. A color that feels balanced on the wall can look deeper overhead, especially under cool LEDs or in north-facing rooms. The Conservation Mart LED color chart is a useful reference for comparing lamp color to daylight before you commit.

Exact matching is not always the best call. In a low ceiling, a full wall-to-ceiling match can feel heavy if the color already has a lot of depth. In that case, color-capping usually works better. Keep the ceiling one or two steps lighter than the wall, or shift to the same undertone at a lower intensity. You still get continuity, but with less weight overhead.

Sample placement matters more than owners expect. Test color on the ceiling itself, not only on a wall board leaned in the room. Diffused local light, can lights, skylights, and evening LEDs all change how that finish reads.

Professional help matters on some of these jobs. Double-height foyers, open office ceilings with long sightlines, occupied retail spaces, and projects where the wall and ceiling color must meet cleanly across imperfect drywall usually need a skilled crew. Any lap marks, cut-line wobble, or patch flashing stands out faster when everything is close in color.

7. Reflective and Metallic Ceiling Finishes

Could a reflective ceiling improve the room, or would it just spotlight every flaw overhead? That is the right question to ask before treating a ceiling with pearl, metallic, or high-gloss paint.

These finishes can look sharp in the right setting. Soft champagne, brushed pewter, pale bronze, and low-key pearl all bounce light differently than flat paint. In the Puget Sound, that matters. Our gray skies and diffused daylight usually soften glare, which can make a reflective ceiling feel richer and less harsh than it would in a sunnier climate. Under cool LEDs, though, the same finish can turn cold fast.

A luxurious lounge area featuring a reflective gold ceiling, elegant beige furniture, and modern spherical pendant lighting.

Interest in bolder ceilings has clearly grown, as noted earlier in the article. Reflective and metallic finishes are part of that shift, but they still belong in a narrower lane than standard color trends. I recommend them for spaces where lighting is designed, sightlines are controlled, and the finish supports the use of the room.

Where reflective finishes make sense

Use them selectively.

Good candidates include:

  • Restaurant bars and lounges: Metallic or gloss overhead can work with pendant lighting and backbar glow to build mood.
  • Boutique retail or branded commercial interiors: A reflective ceiling can reinforce a premium identity without adding another wall finish.
  • Residential powder rooms, dining rooms, or entry ceilings: Smaller areas usually carry this look better than large family spaces.
  • Commercial lobbies and reception zones: Property managers can use a metallic accent ceiling to create a stronger first impression in a contained area.

Metallic and high-gloss ceilings do not forgive surface defects. Average prep will show up immediately.

That is the trade-off. A reflective finish highlights taped seams, roller marks, patched fastener holes, uneven texture, and cut lines that would disappear under flat ceiling paint. On older homes around Seattle, Tacoma, and the Eastside, that can mean more skim coating, more sanding, and more labor before the first finish coat goes on.

This is also where hiring a professional contractor stops being optional and starts making financial sense. High-gloss and metallic ceilings need careful substrate repair, lighting checks, consistent application, and clean scheduling with other trades. In occupied restaurants, retail spaces, condo common areas, or homes with tall entries, one late patch or scuff can force a costly repaint of the whole plane.

For most Puget Sound properties, the best use is controlled and intentional. A metallic ceiling in a powder room, lounge nook, or reception area can look custom. A full reflective ceiling across a low-lit living room or large office usually asks too much of the finish, the drywall, and the maintenance team.

8. Biophilic and Nature-Inspired Ceiling Colors

What ceiling color feels right in a region defined by gray skies, evergreen trees, and soft water light?

Biophilic ceiling colors answer that question better than a lot of short-lived trends. Soft sage, muted blue, clay, driftwood, and mossy green can make a room feel settled and connected to the Northwest without turning the ceiling into a gimmick. Around Puget Sound, that reads natural because it matches what property owners already see outside.

I see this work best when the color is restrained. In our diffused light, a ceiling color that looked fresh on a paint chip can lose brightness fast once it goes overhead. A dusty blue in a sunny photo may read cooler and heavier through a Seattle winter. A muted green can feel calm in a daytime office, then turn flat under older commercial lighting. Sample first, and check the color at the times the space is used.

This approach tends to fit a few property types especially well:

  • Homes with wood trim or natural cabinetry: Sage, blue-gray, and softened earth tones usually sit well with fir, oak, walnut, and cedar.
  • Medical, wellness, and hospitality spaces: Nature-based ceilings can soften the clinical feel that plain white sometimes creates.
  • Creative offices and shared workspaces: These colors add identity without the visual push of a saturated accent ceiling.
  • Commercial common areas managed for tenant appeal: A subtle nature-inspired ceiling often feels current longer than a trend color with more punch.

There is a trade-off. The more pigment you add to a ceiling, the more lighting and edge work matter. On upper hallways, open office ceilings, and larger living rooms, uneven cut lines or patch flashing show sooner than owners expect, especially under LED fixtures. Flat finishes still help, but they do not hide poor prep if the color has depth.

Moisture also matters here in ways trend roundups often skip. In bathrooms, mudrooms, covered entry transitions, and some multifamily or commercial settings, color choice is only half the job. Product selection and surface prep need to match the room. If a property manager is repainting a spa area, locker room, or a residence with recurring bath humidity, I recommend bringing in a professional crew that knows which ceiling coatings hold up and how to correct stains, peeling, or mildew history before repainting.

Used with restraint, nature-inspired ceiling colors feel right at home in the Puget Sound. They suit the light, they pair well with local materials, and they give both homes and commercial spaces a calmer look that usually lasts beyond one trend cycle.

8-Point Ceiling Color Trends Comparison

Style Implementation Complexity Resource Requirements Expected Outcomes Ideal Use Cases Key Advantages
Moody Dark Ceilings Medium, requires skilled application and lighting planning Premium high‑coverage paints, multiple coats, professional painters, lighting design Dramatic, intimate feel; highlights architecture and fixtures High ceilings, lofts, home offices, hotel lobbies, dining rooms High‑impact aesthetic; hides imperfections; emphasizes lighting
Soft White & Warm Neutral Ceilings Low, straightforward painting process Quality warm‑neutral paints, sample testing, minimal specialty tools Bright, warm, timeless; preserves perceived space Most residential and commercial spaces, kitchens, offices, healthcare Versatile; easy maintenance; broadly appealing long‑term choice
Ceiling as Fifth Wall Art Very high, custom design and artisan execution Skilled artists/designers, custom paints/finishes, extended labor and prep Unique focal point; strong personality and branding Hotels, restaurants, boutiques, creative studios, luxury homes Memorable, fully customizable, powerful branding opportunity
Sustainable & Low‑VOC Ceiling Finishes Medium, requires sourcing and contractor familiarity Low/zero‑VOC or plant‑based paints, certification checks, possible higher material cost Improved indoor air quality; reduced odor; eco‑friendly appeal Healthcare, schools, LEED projects, wellness‑oriented offices and homes Healthier interiors; supports green certification; narrowing cost gap
Textured & Matte Ceiling Finishes Medium–High, specialized techniques and finish control Texture materials, trained applicators, possible acoustic products Reduced glare, hides flaws, refined contemporary texture Luxury homes, hospitality, offices, studios, open commercial spaces Conceals imperfections; improves acoustics; modern aesthetic
Color Matching & Continuity Ceilings Medium, precise color selection and coordination Color consultation, high‑quality paint, in‑room samples and testing Cohesive, unified interiors; can alter perceived height Open‑plan homes, branded commercial spaces, high‑end residences Cohesive look; customizable; enhances architectural flow
Reflective & Metallic Ceiling Finishes Very high, specialty products and careful lighting study Metallic/pearlescent paints, expert applicators, lighting optimization Luxurious, light‑amplifying, dynamic shimmer Luxury hotels, upscale restaurants, flagship retail, designer lobbies Amplifies light; high‑end visual impact; emphasizes fixtures
Biophilic & Nature‑Inspired Ceiling Colors Medium, careful shade selection and testing Quality nature‑toned paints, samples, design coordination with materials Calming, restorative atmospheres that support wellbeing Wellness centers, healthcare, offices, residences, educational spaces Supports wellbeing; pairs with natural materials; subtly timeless

Choosing the Right Ceiling Trend for Your Puget Sound Property

The best ceiling paint color trends aren’t really about following trend reports. They’re about choosing a finish that fits the room, the light, the use of the space, and the level of maintenance you’re willing to live with. A dramatic charcoal ceiling can look perfect in a Seattle loft with tall ceilings and layered lighting. The same color can feel heavy in a low-ceiling bedroom in Kent. A warm neutral may sound safe, but in the right home or commercial renovation, it can be the most polished choice in the whole project.

That’s the part property owners often underestimate. Ceilings show flaws fast. Miss a seam, leave roller lines, skip prep, choose the wrong sheen, or rush the cut-in work, and the eye goes straight up. That’s why some of these ideas are realistic DIY projects, and some really aren’t.

If you’re painting a straightforward bedroom ceiling in a soft white, a careful DIY job can work. If you’re doing a deep color, a specialty finish, a color-matched ceiling, a textured surface, or a commercial tenant improvement with occupied schedules and multiple trades involved, professional application makes a big difference. The finish quality matters, but so does sequencing, protection, product selection, and clean handoff.

That’s where local experience helps. In the Puget Sound area, ceiling color has to work with cool daylight, long gray seasons, and the practical realities of moisture, ventilation, and mixed-use spaces. Homes in Tacoma don’t read color exactly like homes in sunny inland markets. Retail ceilings in Seattle need a different conversation than a family room in Kent or an office remodel in between.

Wheeler Painting works with both homeowners and commercial clients, so the guidance stays practical. Sometimes the right answer is a timeless warm white that supports resale and makes the room feel clean. Sometimes it’s a dramatic dark tone that gives the space identity. Sometimes it’s a matte finish that hides flaws, or a low-VOC product that makes an occupied remodel easier on everyone in the building.

If you’re comparing house painting near me, commercial painting services near me, residential contractor near me, or commercial construction near me, it helps to work with one team that understands both design and execution. Ceiling decisions are small on paper, but they have an outsized effect on the finished space. A good recommendation saves rework. A good paint crew makes the result look easy.


If you're planning interior painting, a residential remodel, or a commercial tenant improvement anywhere from Tacoma to Seattle, Wheeler Painting & Restoration Services can help you choose a ceiling color and finish that fits your space, lighting, and budget. Reach out for a detailed, transparent proposal and practical guidance from a local team that knows what works in Puget Sound properties.

Best Paint for Bathrooms in Puget Sound Homes

If you're staring at peeling paint above the shower, brownish drip lines on the ceiling, or those little black specks that keep coming back no matter how often you wipe them down, you're not dealing with a simple paint problem. You're dealing with a bathroom system problem.

That matters in Puget Sound homes. A bathroom in Kent, Seattle, or Tacoma doesn't live in the same conditions as one in a dry climate. We get long damp seasons, older housing stock, and a lot of bathrooms that were built before ventilation was treated like a real priority. So when people ask about the best paint for bathrooms, the honest answer isn't just a brand name. It's the right mix of prep, primer, paint, sheen, and moisture control.

Why Your Bathroom Paint Fails in the Puget Sound Climate

A common local scenario goes like this. The bathroom got painted a few years ago. It looked fine at first. Then the ceiling started spotting near the shower, the corners turned gray, and the wall by the tub began to bubble.

That doesn't always mean the painter used the wrong product. In many Puget Sound bathrooms, the bigger issue is trapped moisture. During showers, bathroom humidity can spike fast, and in our region that moisture often hangs around longer because the house already starts from a damp baseline.

A person touching peeling paint and mold on a bathroom wall near a bathtub.

Older homes between Tacoma and Seattle make this worse. A lot of them have undersized fans, no fan at all, or bathrooms that rely on a small window that barely helps in winter. That's why paint selection is critical in this market. One useful regional point from this bathroom moisture guidance for high-moisture areas is that bathroom exhaust fans can reduce humidity by 30-50%, which changes how hard the paint has to work.

Moisture beats weak systems

If the wall wasn't cleaned well, if mildew was painted over, or if the room stays damp for hours after every shower, even decent paint can fail early. The finish softens. Moisture gets behind it. Then you see peeling, blistering, or recurring mildew.

Practical rule: In a Puget Sound bathroom, paint isn't the first line of defense. It's one layer in the defense system.

That's also why it's smart to rule out hidden damage before repainting. If stains keep returning or the drywall feels soft, check for bigger moisture issues such as the warning signs covered in these wall water damage indicators.

What actually changes the outcome

The bathrooms that hold up usually have three things working together:

  • Better airflow: A fan that gets used after showers.
  • Correct surface prep: Clean, dry, solid walls with any mildew properly addressed.
  • A moisture-resistant coating system: Primer and finish paint matched to the room's conditions.

People often want one magic can of paint. In real bathrooms around Kent and the South Sound, that's not how long-term results happen.

Choosing the Right Paint Formula for Moisture and Mold

The label matters more than the color chip. For bathrooms, the key phrase to look for is 100% acrylic. That's the formula type that tends to hold up better when steam hits the walls day after day.

A strong bathroom coating also needs mildew resistance built into the formula. That doesn't mean you can paint over active mold and call it done. It means the dried paint film is better equipped to resist the conditions that help mildew take hold on the surface.

What a good bathroom formula is doing

In plain English, a quality bathroom paint should do four jobs:

  1. Resist moisture absorption
  2. Stand up to repeated cleaning
  3. Slow mildew growth on the paint film
  4. Keep its bond when the room cycles between damp and dry

Benjamin Moore Aura Bath & Spa is a clear example of that type of specialty formula. According to this product overview of bathroom paint performance, it uses a 100% acrylic formula and anti-microbial additives that achieved a 99.9% reduction in mold colony formation under ASTM D5590 testing. In a bathroom, that matters because condensation often settles on cooler walls and ceilings first.

Premium paint earns its keep in bathrooms

This is one room where bargain paint usually turns into expensive paint. Cheap interior wall paint may look fine on day one, but bathrooms punish weak coatings fast. They see steam, splashing, soap residue, and frequent wiping.

Here’s the practical difference between a standard interior paint and a bathroom-specific formula:

  • Standard wall paint: More likely to absorb moisture, mark up during cleaning, and fail sooner in a steamy room.
  • Bathroom-specific acrylic paint: Built for repeated humidity exposure and cleanup.
  • Premium specialty bathroom paint: Better fit when the room has poor ventilation, frequent use, or a history of mildew.

If you're also comparing options for ceilings, this guide to waterproof ceiling paint for bathroom areas is useful because the ceiling usually takes the first hit from rising steam.

Formula matters, but sanitation still matters

Even the right paint won't fix dirt, soap film, or hidden growth behind trim and caulk lines. Before repainting a commercial restroom, rental unit, or heavily used family bath, it helps to think beyond the visible wall surface. For cleanup habits and overlooked trouble spots, the WipesBlog tips for commercial cleanliness are a helpful outside reference.

A bathroom paint can resist a harsh environment. It can't compensate for a wall that was never properly cleaned, dried, or stabilized before coating.

One other practical note. A premium coating is often worth the upcharge in a bathroom because repainting this room is disruptive. You usually have tight spaces, lots of cut-in work, fixtures in the way, and family schedules to work around. If a better formula buys you a longer-lasting result, that's often the cheaper path overall.

Decoding Paint Sheens from Matte to High-Gloss

One simple rule was traditionally taught. Bathroom equals semi-gloss. That advice isn't wrong, but it's incomplete.

Sheen affects how the paint looks, how easily it cleans, and how much wall texture it reveals. In bathrooms, it also changes how the surface handles repeated moisture exposure. The right answer depends on whether you're painting walls, trim, ceiling areas, or cabinetry, and whether the room is a bright primary bath or a small dim space in an older house.

An infographic chart displaying five different paint sheens suitable for bathrooms, ranging from matte to high-gloss finishes.

Traditional choice versus newer options

Semi-gloss has stayed popular for a reason. Sherwin-Williams Duration Home® is often recommended in semi-gloss for bathrooms, and this bathroom paint reference notes its 100% acrylic latex base and scrub resistance of more than 1,000 cycles per ASTM D2486. That kind of durability is useful when a family bathroom gets wiped down often.

But modern bathroom paint technology has changed the conversation. Some premium matte and low-sheen products now perform far better than old flat paints ever did. So the question isn't just "how shiny should it be?" It's "how much protection do you need, and how much texture are you willing to see?"

Paint sheen comparison for bathrooms

Sheen Durability & Moisture Resistance Hides Imperfections Best For
Matte Lower with standard paint, better only in specialty bathroom formulas Excellent Ceiling or walls when using a premium bathroom-specific product
Eggshell Moderate in lower-moisture baths Very good Powder rooms or bathrooms with lighter moisture load
Satin Strong balance of cleanability and softer appearance Good Most bathroom walls
Semi-gloss Very good for moisture and repeated cleaning Fair Family bathrooms, kids' baths, trim, doors
High-gloss Excellent surface toughness Poor Cabinets, vanities, selected trim

What works well in real bathrooms

A practical breakdown looks like this:

  • Use satin on walls when you want durability without a noticeably shiny look.
  • Use semi-gloss in harder-working bathrooms, especially where ventilation isn't ideal.
  • Use high-gloss selectively on cabinets or trim, not typically on every wall.
  • Use matte carefully and only when the product is specifically made for bathrooms.

The shinier the finish, the more it tends to show patches, sanding marks, and old wall repairs.

That's the trade-off many homeowners discover too late. They choose the most moisture-resistant sheen they can find, then hate how every seam and roller mark shows in daylight. In older Kent and Tacoma homes, where bathroom walls are rarely perfectly flat, satin or a specialty low-sheen bathroom paint often gives the better balance.

Proper Prep Work for a Lasting Bathroom Paint Job

Most failed bathroom paint jobs don't fail because the topcoat was terrible. They fail because the surface under it was dirty, damp, chalky, glossy, or unstable.

Prep is the part people rush because it isn't fun and it doesn't feel visible. But a long-lasting result is won or lost at this stage.

A professional painter applies masking tape to a wall above bathroom tiles to prepare for painting.

Start with cleaning, not painting

Bathrooms collect more than steam. They also collect hairspray, soap film, body oils, dust, and invisible residue that keeps new paint from bonding well.

A solid prep sequence usually includes:

  • Wash the surfaces: Remove soap scum and residue, especially near the vanity and shower.
  • Treat mildew correctly: Clean and address affected areas before any primer goes on.
  • Let the room dry fully: Paint over trapped moisture and you'll regret it.
  • Dull glossy surfaces: Light sanding gives the new coating something to grip.
  • Repair defects: Patch nail holes, soft drywall spots, and old failed areas.

Primer is not optional on problem walls

A good primer bridges the gap between the old surface and the new finish coat. In bathrooms with prior mildew staining, repairs, or patched drywall, skipping primer is one of the fastest ways to waste good paint.

The prep system matters even more in wet zones and heavy-moisture spaces. If your bathroom design includes areas that need stronger moisture protection, wet room waterproofing guidance is worth reviewing before the finish stage.

Here’s a useful visual on detailed prep and coating technique:

Where DIY jobs usually go sideways

The most common mistakes aren't dramatic. They're small shortcuts.

  • Painting over mildew stains: The spot comes back and the homeowner blames the paint.
  • Using a deglosser-free shortcut on glossy walls: The new coat doesn't bond as well.
  • Skipping repairs around failed caulk lines or soft drywall: The finish looks bad even if the color is nice.
  • Rushing recoat timing in a damp room: The film doesn't build the way it should.

Field note: If the wall feels cool and damp after cleaning, it's not ready. Wait. Bathroom painting rewards patience more than speed.

For homeowners, that's the point where hiring a drywall contractor or painter starts making sense. For facility managers, it's also why a repaint should be treated as maintenance work, not just decoration.

Smart Color Strategies for Small or Low-Light Bathrooms

A lot of bathrooms in older Puget Sound homes are short on natural light. Some have no window at all. Others have one frosted window that does almost nothing for half the year. In those rooms, color choice matters almost as much as product choice.

Lighter colors usually make the room feel cleaner and more open. Soft whites, warm off-whites, pale gray-greens, and muted blue tones tend to work well because they reflect available light without feeling harsh. In a small bathroom, that can make the room feel less boxed in.

Keep contrast under control

Heavy contrast can chop up a small bathroom. Dark walls with a bright white ceiling often make the ceiling feel lower. Painting the walls and ceiling in the same color family can make the room feel taller and calmer.

That doesn't mean every bathroom should be white. It means the visual transitions should be gentle. In a Seattle or Kent hallway bath with limited light, softer contrast usually reads better than bold color blocking.

Use sheen to help the room, not fight it

A little reflectivity can brighten a bathroom. Too much can make it feel cold and show every flaw in the drywall.

Good design choices often look like this:

  • Satin on walls when you want a clean, soft lift in low light
  • Semi-gloss on trim and vanity areas where durability matters
  • A coordinated ceiling color to reduce the chopped-up look
  • Simpler palettes in small footprints so the room feels quieter

In a small bathroom, color doesn't just set the mood. It changes the perceived size of the room.

If you're torn between warm and cool tones, look at the fixed finishes first. Tile, countertop, floor color, and lighting temperature should drive the paint decision. The best bathroom color is the one that makes those permanent materials look intentional.

Long-Term Maintenance and Cleaning Tips

A fresh bathroom paint job lasts longer when people treat it like a finish, not like tile. Painted walls need gentler care.

Start with ventilation habits. Run the fan during showers and keep it going after the room is empty. In homes where the fan is weak, leaving the door open after bathing also helps the room dry out faster.

Simple habits that protect the finish

  • Wipe splashes early: Water spots, soap, and toothpaste are easier to remove before they harden.
  • Use mild cleaners: Soft cloths and gentle soap are safer than abrasive pads.
  • Watch corners and ceilings: Those are usually the first places where moisture problems show up.
  • Check caulk lines: Failed caulk lets water get where paint can't protect it.

For commercial bathrooms and shared residential spaces, routine cleaning matters even more because the room doesn't get much downtime between uses. A maintenance mindset protects the paint and helps catch bigger issues before they spread.

Know the warning signs

If you see recurring spotting, persistent staining, bubbling, or a musty smell that doesn't go away, don't assume it just needs touch-up paint. Those clues often point to a moisture source, failed ventilation, or hidden deterioration behind the surface.

A good bathroom finish should be durable. It still needs dry conditions and reasonable care to stay that way.

Ensuring a Perfect Finish When to Hire a Pro

Some bathroom painting jobs are straightforward. Others are really repair projects wearing a paint-project label.

If the room has recurring mildew, peeling around the ceiling line, soft drywall, old water staining, or layers of previous paint failure, the smartest move is often to bring in a pro. The same goes for tall ceilings, occupied commercial restrooms, or bathrooms where downtime needs to be tightly managed.

A professional contractor in white overalls discussing renovation plans with a homeowner in a bright bathroom.

Why pro work holds up better

A professional approach usually catches the things that homeowners and maintenance staff are most likely to miss:

  • Moisture diagnosis: Is this steam, a leak, failed caulk, or damaged substrate?
  • Surface correction: Can the wall be painted, or does it need repair first?
  • Product matching: Which coating fits this exact room condition?
  • Application control: Proper film build, clean cut lines, and realistic dry times

That matters in Puget Sound because bathrooms here often sit in older structures with uneven walls, limited airflow, and a long history of patchwork fixes. What looks like "bad paint" is often a sign that the full assembly needs attention.

A realistic call on mold and mildew

If mildew is light and limited to the surface, cleanup may be manageable. If it keeps returning, covers larger areas, or seems tied to damaged drywall, it needs a more careful response. For general household guidance on cleanup methods, best way to clean mould is a useful outside resource.

Wheeler Painting & Restoration Services handles residential and commercial painting, repairs, waterproofing, and related construction work in Kent, Seattle, Tacoma, and nearby communities, which makes it a practical option when the bathroom needs more than a simple repaint.

A clean-looking finish isn't the same as a stable finish. The goal is a bathroom that still looks good after months of steam, not just the day the paint dries.

If you're comparing house painting near me, commercial painting services near me, or a residential contractor near me for a bathroom update, the right choice is the one that can evaluate the whole problem. Not just sell you a gallon of paint.


If your bathroom paint keeps failing, Wheeler Painting & Restoration Services can help you sort out whether the issue is paint choice, prep, ventilation, water damage, or a combination of all four. Reach out for an estimate or consultation if you want a clear plan for a bathroom that looks better and holds up in Puget Sound conditions.

Expert Guide to Staining Cedar Shingles in Wet Climates

You walk outside after a stretch of rain, look up at the cedar shingles, and see what every Puget Sound homeowner eventually sees. The color has gone flat. A few courses stay dark longer than the rest. Moss is trying to get comfortable near the lower edges, and the whole wall or roofline looks more tired than old.

That’s usually the moment people start searching for answers about staining cedar shingles. Some want to bring back color. Some are trying to stop further wear before they have to replace sections. Most are somewhere in the middle. They know cedar is worth saving, but they also know Western Washington is hard on exposed wood.

In Kent, Seattle, Tacoma, and the towns in between, cedar doesn’t fail because it’s a bad material. It fails when moisture gets trapped, prep gets rushed, or the wrong coating gets laid on a surface that never had a chance to dry properly. A good stain job respects the wood, the weather, and the way cedar behaves in a wet climate.

Why Proper Staining is Crucial for Puget Sound Homes

Cedar shingles can handle a lot, but the Puget Sound climate asks for discipline. Rain hangs around. Morning moisture lingers. Shaded walls dry slowly. Even when the sun finally comes out, ultraviolet exposure keeps working on the surface.

That combination is why staining cedar shingles is a protection job first and an appearance job second. A good finish helps slow moisture uptake, limits weathering, and keeps the surface from breaking down faster than it should. A bad finish, or a good finish applied at the wrong time, can lock in trouble.

Cedar is durable, but it still needs the right timing

Western Red Cedar contains natural tannins that help with durability and resistance to decay and insects. Those same tannins can create extractive bleeding and finish problems if you coat the wood too soon. Cedar shingles should be at a minimum moisture content of 15% before staining or painting, and for maximum durability with opaque finishes, an alkyd-oil-based primer on all sides before installation is a best practice, according to guidance on finishing cedar correctly.

That matters here more than people think. In Western Washington, shingles can look dry from the driveway and still hold enough moisture to cause blotching, discoloration, or early coating failure.

Practical rule: If the wood isn’t ready, the stain isn’t the problem. The schedule is.

Our climate punishes shortcuts

On a dry-climate house, a rushed stain job may limp along for a while. Around Seattle, Tacoma, and Kent, shortcuts show up faster. Moisture sits in overlaps, at butt joints, under courses, and along shaded elevations. If stain can’t breathe or the cedar wasn’t dry enough, the surface starts telling on the installer.

The most common problems look familiar:

  • Dark bleed marks that show through a fresh finish
  • Patchy absorption where some shingles drink the stain and others reject it
  • Premature peeling or bubbling on film-forming products
  • Mildew and moss regrowth in areas that stay damp

A lot of homeowners think the answer is “more product.” Usually it’s better prep and a finish that matches the wood and the climate.

Stain protects the investment, not just the look

Cedar is one of the few exterior materials that can still make a house feel warm and regional in a way manufactured products rarely do. That’s worth preserving. If you want broader background on how cedar assemblies perform over time, this comprehensive guide to cedar wood shake roofing is a useful companion read.

The local lesson is simpler. In wet Western Washington, a stain system only works when the installer respects moisture, tannins, and drying conditions. That’s what separates a finish that settles in and protects from one that starts failing before the homeowner even trusts it.

Preparing Your Cedar Shingles for a Lasting Finish

Most failed cedar jobs start long before stain hits the wood. The surface was dirty, too wet, partially rotted, or washed too aggressively. Prep decides whether the finish bonds, penetrates, and weathers evenly.

On cedar shingles, preparation isn’t glamorous, but it’s where the job is won.

Start with inspection, not washing

Before cleaning anything, walk the whole surface and look closely. Cedar shingles can hide trouble in plain sight, especially on north-facing walls and low roof sections that stay damp.

Check for:

  • Split or cupped shingles that won’t hold finish evenly
  • Soft areas that suggest rot
  • Loose fasteners or slipped pieces that need correction first
  • Old film-forming residue that may need removal before a new stain system
  • Moss-heavy sections where trapped moisture has been sitting too long

If you find old failing coatings, don’t stain over them and hope for the best. Surface removal comes first. If you need a practical reference for that part of the process, removing old paint the right way is the place to start.

A close-up view of a hand lifting a cedar shingle during a cedar shingle staining project.

Clean gently and keep water under control

A lot of DIY damage happens during washing. Cedar is softer than many homeowners expect, and shingles are thinner and more delicate than broad siding boards. If you gouge the face or force water behind the courses, you’ve created a new problem.

Wood restoration experts recommend a maximum of 1,500-2,000 PSI when washing cedar shingles, and in humid regions like Puget Sound, a 7-14 day dry time after washing is recommended so the wood can drop below 12% moisture, which helps prevent lap marks and tannin bleed on the new finish, as noted in this cedar washing guidance.

That drying window is one of the biggest differences between internet advice and field reality in Western Washington. You can’t wash on Saturday and assume Sunday is stain day just because the forecast looks decent.

If shingles still feel cool and damp in shaded sections, they probably aren’t ready.

A workable prep sequence for Puget Sound homes

A solid prep routine usually looks like this:

  1. Inspect first. Replace damaged shingles before cleaning so you’re not washing loose material and hoping it holds.
  2. Use a wood cleaner suited to cedar. Let the cleaner do the work instead of trying to blast dirt out with pressure.
  3. Rinse with control. Keep the spray angle and distance consistent so you aren’t shredding fibers or driving water uphill behind the courses.
  4. Let the house dry fully. In our climate, patience after washing is part of the application process.
  5. Recheck absorbency and surface condition. Weathered spots, repairs, and old exposed areas can all take stain differently.

If you’re comparing contractor pricing and trying to understand what washing costs usually cover, this overview of detailed Upstate SC washing costs is helpful for seeing how cleaning scope gets broken down, even though labor conditions differ from Western Washington.

Prep is where professionals separate themselves

Anyone can buy cleaner, rent a washer, and pick up stain. The hard part is reading the surface correctly. A professional notices where a wall dries last, where prior coatings are still hiding, where pollen and mildew will come back, and where repairs should happen before color ever enters the conversation.

That’s why a lot of cedar jobs look decent for a month and disappointing by the next wet season. The mistake wasn’t always the stain. It was what happened before it.

Choosing the Right Stain for Western Washington Weather

Picking the stain is the decision most homeowners focus on first. It’s important, but only after the wood is clean, sound, and dry enough to accept it. Once prep is handled, product choice determines how the shingles will age, how much grain you’ll see, and how much maintenance you’ll be signing up for.

On weathered cedar in damp climates like Puget Sound, experts favor microporous, water-repellent preservative stains over film-forming paints because traditional acrylics can trap water and lead to bubbling and failure. They also note that about 90% of the final result is determined before application begins in this weathered cedar finishing discussion.

A comparison chart outlining the pros and cons of different cedar stain types for Western Washington weather.

Semi-transparent versus solid stain

For most cedar shingle projects, homeowners narrow it down to two looks.

Finish type What it does well Trade-off
Semi-transparent stain Shows more of the cedar grain and texture Usually needs more frequent maintenance
Solid stain Hides more variation and gives a more uniform color Covers much of the natural grain character

Semi-transparent finishes tend to appeal to homeowners who love cedar for its texture and variation. Solid stains make more sense when the surface is weathered, patched, uneven in color, or when the design goal is a cleaner painted look without using a full film-forming paint.

Oil-based versus water-based products

Climate and substrate matter in this context. Penetrating oil-based stains usually perform well on weathered cedar because they soak into the wood rather than building a heavy surface film. That’s useful in a wet region where trapped moisture causes so many headaches.

Water-based products can still have a place, especially in solid-color systems, but they need the right surface and the right build. On cedar shingles, I’m always more concerned with whether the finish can move moisture out than whether cleanup is easier for the applicator.

“Breathable” isn’t marketing language on cedar in Western Washington. It’s a requirement.

Match the product to the wood, not just the color card

Cedar is a softwood, and that matters because absorption, movement, and weathering are different from denser species. If you want a quick primer on species behavior, this breakdown of hardwood vs softwood gives useful context for why cedar accepts finishes the way it does.

For homeowners comparing project types, some of the same selection logic carries over to fences and other exterior wood. This guide to the best stain choices for fences helps explain how exposure and maintenance shape product selection.

What usually works best here

In Western Washington, the best cedar shingle finish is usually the one that balances these three things:

  • Moisture management so shingles can release trapped dampness
  • Adequate UV protection so the surface doesn’t wash out too quickly
  • A maintenance plan the owner is able to follow

If the cedar is in good shape and you want the grain to show, a penetrating semi-transparent system is often the right fit. If the surface is blotchy, repaired, or you want a more uniform appearance, a solid-color system can make better sense. The wrong answer is usually a heavy film on damp wood.

Your Step-by-Step Guide to Applying Cedar Stain

Application day is where patience pays off. By this point, the hard part should already be done. The shingles are repaired, cleaned, dry, and ready to take stain evenly. Now the job is to apply enough product for protection without flooding the surface, creating lap marks, or leaving shiny spots that never soak in.

A close-up view of a person applying protective wood stain to cedar shingles with a brush.

Brush first if you want the best finish

According to Real Cedar finishing guidance, two coats of penetrating oil-based stain significantly extend service life over a single coat, brushing is the preferred method, and spraying followed by back-brushing is also effective. The same guidance warns against using steel wool or wire brushes because metal deposits can react with cedar’s natural chemicals and leave dark stains.

That lines up with what works in the field. Brushing gives you the best control over coverage, penetration, edges, and drips. It’s slower, but on shingles, slower often means better.

If the project is large and you spray, don’t stop there. Back-brushing matters because it works the stain into the surface, evens out heavy spots, and prevents that sprayed-on look where the finish sits unevenly on the face.

A practical application sequence

Use a repeatable system. Cedar rewards consistency.

  1. Work in the shade if possible. Direct sun speeds the surface dry and makes lap marks more likely.
  2. Start at the top and move down. That keeps drips from landing on finished sections.
  3. Keep a wet edge. Finish a natural section before stopping so you don’t leave visible overlap lines.
  4. Brush stain into the face and exposed edges. Shingles weather at edges first.
  5. Let the first coat absorb. Don’t rush the second coat if the surface is still rejecting product.
  6. Apply the second coat only where the wood will take it. Cedar has a limit. Excess product becomes a future problem.

Some homeowners ask when the weather is cooperative enough to do exterior work in our region. Timing matters as much as technique. If you’re planning the season, this guide to the best time to paint a house exterior is a useful companion.

Tools that help and tools that hurt

A few tools make cedar work cleaner. Others leave visible mistakes.

Helpful tools

  • Quality natural-bristle or stain brush for working product into texture
  • Pump sprayer or airless setup when paired with immediate back-brushing
  • Stiff bristle brush for cleaning dirt and loose fibers before refinishing
  • Moisture meter if you want confidence before coating

Tools to avoid

  • Steel wool
  • Wire brushes
  • Heavy roller-only application on textured shingles
  • Anything that encourages flooding the surface

Here’s a quick visual reference if you want to watch cedar stain application techniques before starting:

The difference between enough and too much

Most DIY cedar stain problems come from one of two extremes. Either the applicator gets timid and leaves a starved, uneven coat, or they lay it on like deck paint and assume more product equals more protection.

It doesn’t. Cedar should absorb the stain. Once it stops taking material, the extra product sits on top. That’s where you get shiny areas, slow drying, and uneven weathering. The goal is a fed surface, not a coated shell.

Good cedar staining looks quiet. Even color, no puddled edges, no glossy patches, no obvious stop lines.

Maintaining Stained Shingles and Troubleshooting Problems

A stained cedar surface doesn’t stay healthy on autopilot. It needs periodic cleaning, a watchful eye, and quick correction when small issues show up. That’s especially true on homes near trees, on shaded exposures, and in the long damp stretches that are normal around Seattle, Kent, and Tacoma.

Done right, maintenance is light work. Ignored too long, it turns into restoration.
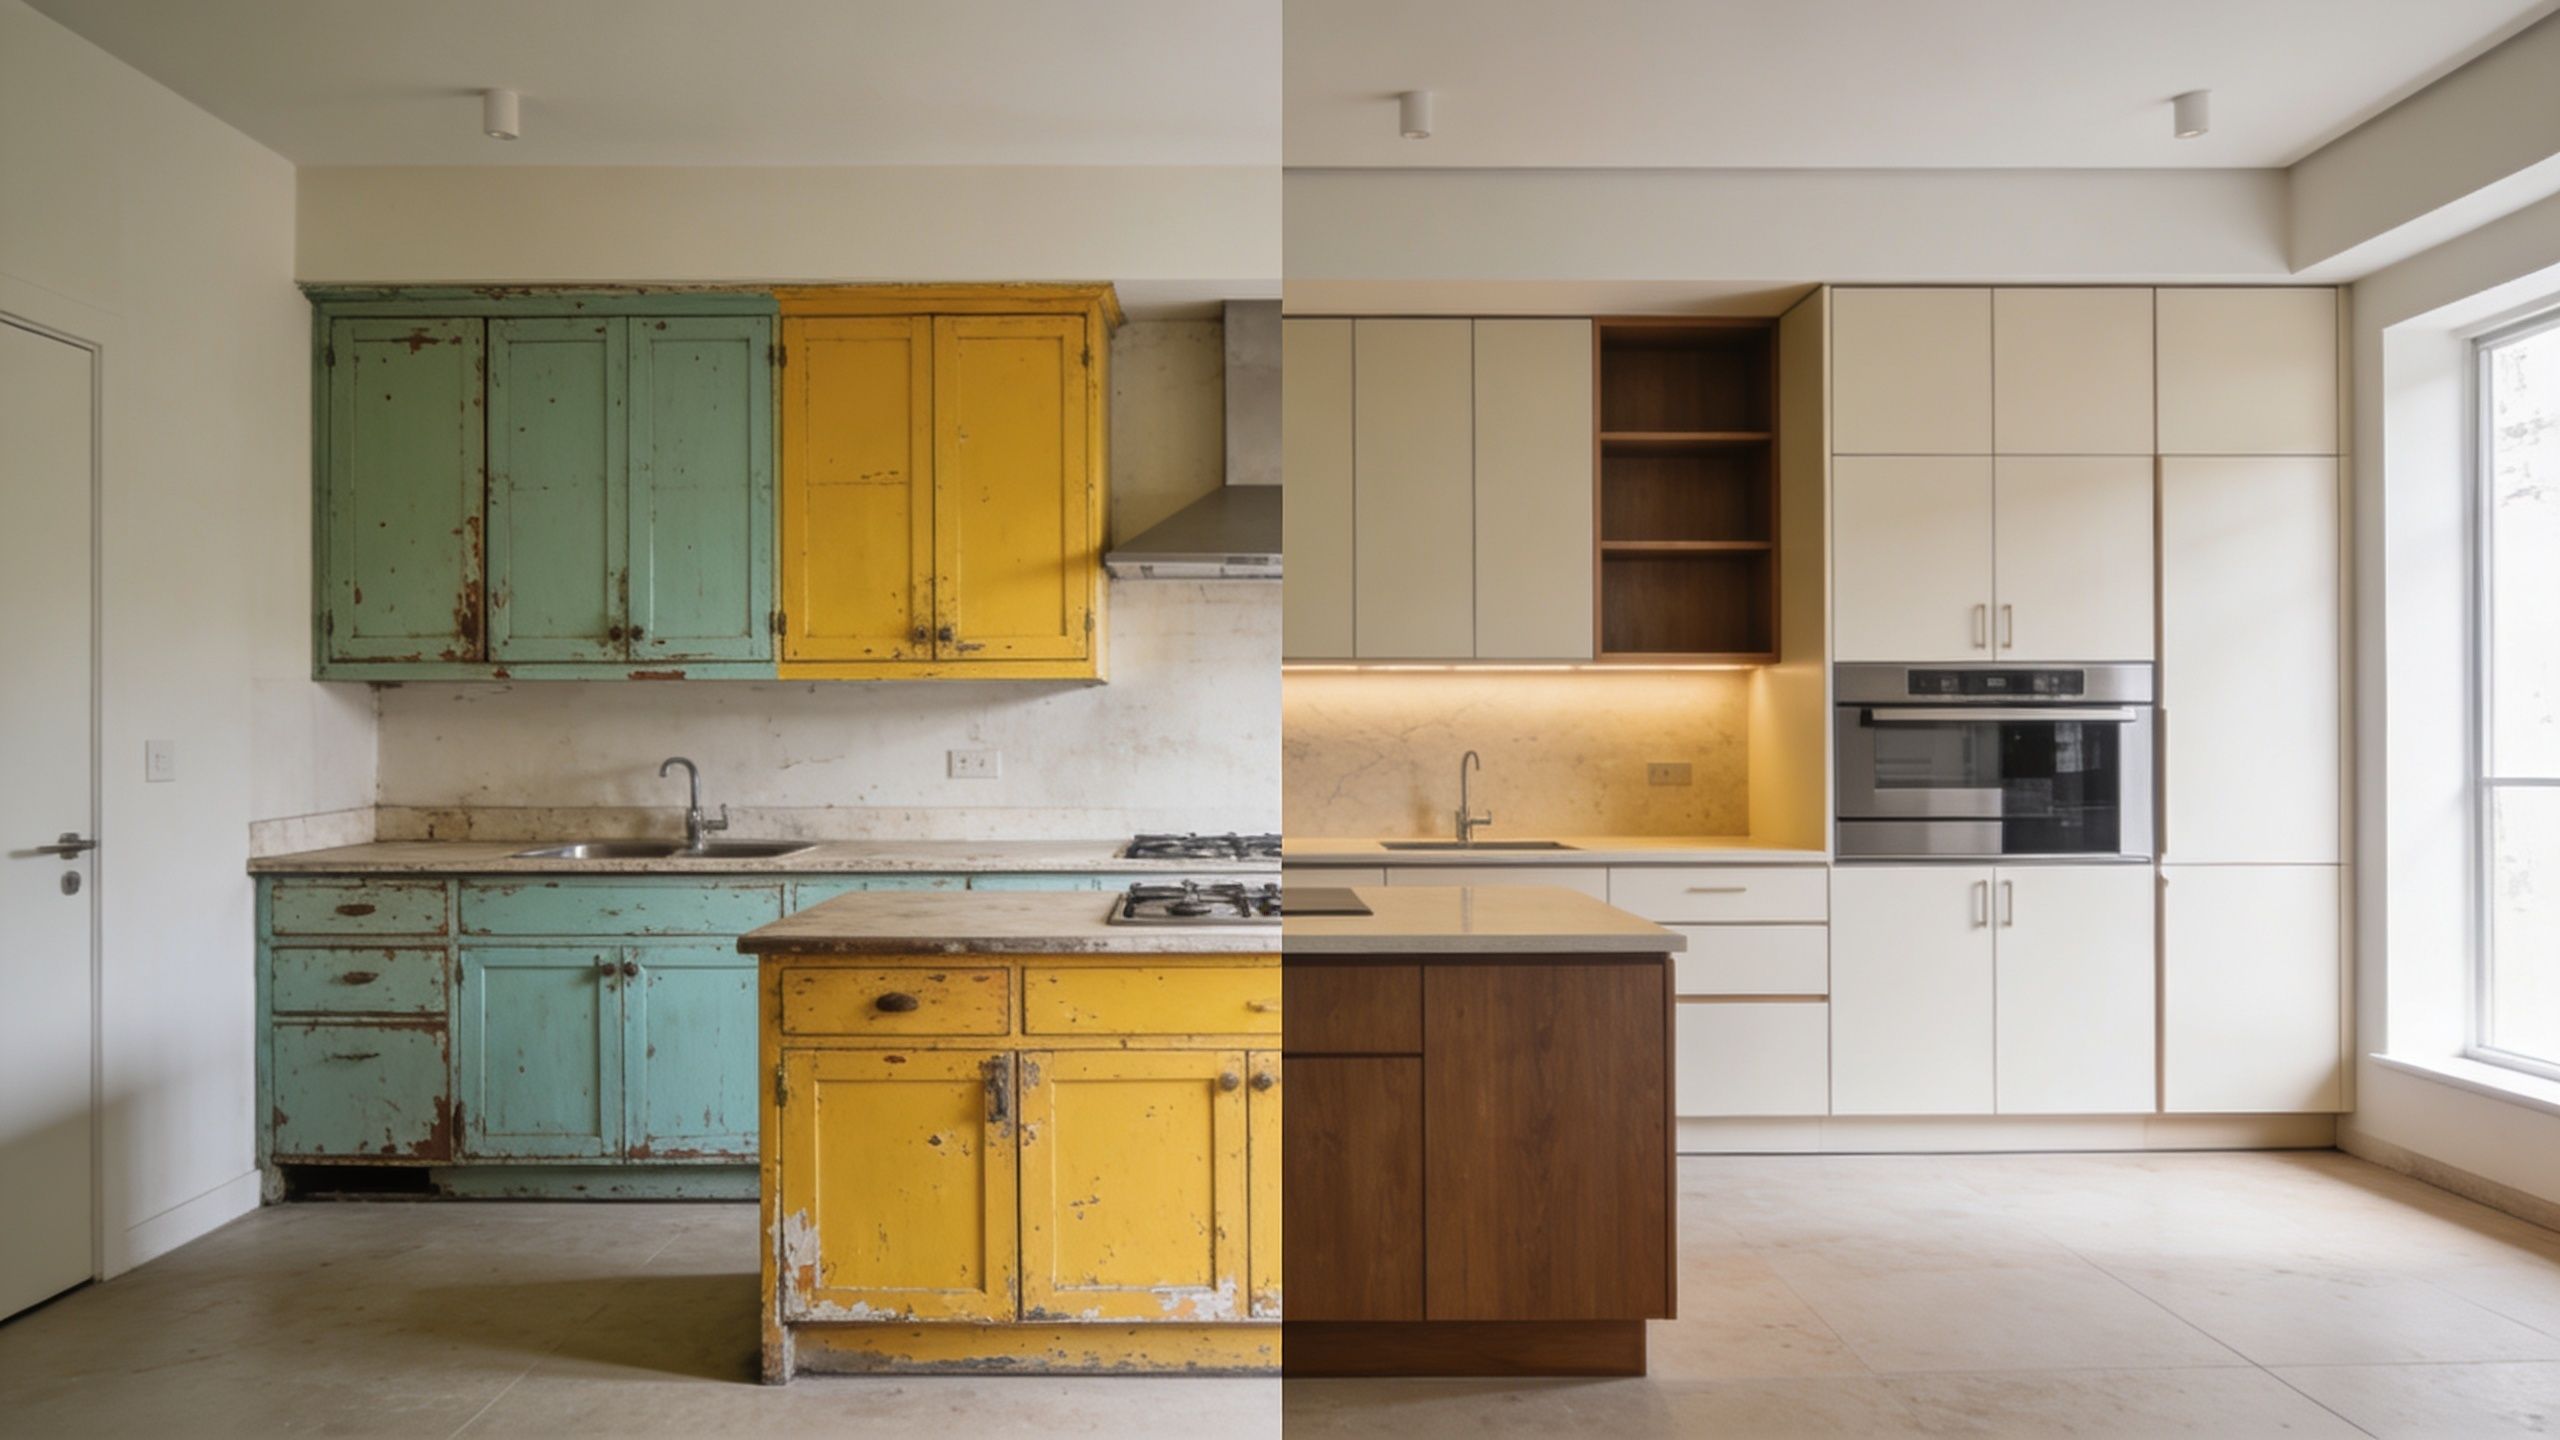
What a maintenance routine should look like

A properly applied solid-color acrylic stain over an oil-based primer can last 10-15 years with maintenance, while skipping primer or relying on a self-priming product on weathered cedar often leads to bubbling and failure within 5-7 years. The same guidance notes that semi-annual cleaning with a water-repellent/mildewcide can extend service life by an additional 20-30%, according to this cedar siding maintenance reference.

That doesn’t mean every homeowner needs an elaborate checklist. Keep it practical:

  • Wash gently on a regular schedule so dirt, mildew, and organic buildup don’t become a film
  • Inspect shaded walls and lower courses where moisture lingers longest
  • Trim back vegetation that blocks airflow or keeps shingles wet
  • Touch up worn areas early before broad failure spreads

How to read common problems

Not every flaw means total failure. Cedar usually gives you warning signs.

Problem Likely cause What to do
Fading Normal weathering and UV exposure Clean and evaluate whether a maintenance coat is due
Mildew returning Persistent shade, moisture, or organic buildup Clean more consistently and improve airflow where possible
Bubbling or peeling Wrong product system or poor priming Remove failed material and rebuild the system correctly
Shiny spots Over-application Let them weather or correct during maintenance if they remain uneven

When stain wears thin, maintenance is straightforward. When stain peels, the repair gets expensive.

Don’t wait for full failure

Homeowners often wait until the whole elevation looks bad before acting. That’s understandable, but it’s not efficient. Cedar is easiest to maintain when the finish is still mostly intact and the issues are local.

A light cleaning and timely maintenance coat cost less effort than stripping widespread failure. On cedar shingles, small corrections made early usually preserve the texture and keep the next round of work simple.

When to DIY vs When to Call the Professionals at Wheeler

Some cedar shingle projects are reasonable DIY work. If the area is small, easy to reach, structurally sound, and you’re comfortable with ladders, prep, and patient application, you can get a respectable result.

The catch is that cedar punishes overconfidence. A job that looks straightforward from the yard can turn complicated fast once you find damaged shingles, stubborn old coatings, or surfaces that refuse to dry on your timeline.

A DIY project makes sense when

You’re probably a good candidate to handle it yourself if most of these are true:

  • The work is low-risk to access and doesn’t involve steep roof sections or difficult heights
  • The shingles are generally sound with only minor spot repairs
  • You have time to wait for dry conditions instead of forcing the project into a weekend
  • You’re willing to prep carefully and apply the stain methodically
  • You’re okay with maintenance work later if the first round needs touch-up

A man in workwear contemplates staining cedar shingles, next to a DIY stain kit box and supplies.

Call a professional when the risk goes up

A contractor is usually the better choice when any of these show up:

  • The home is multi-story
  • You’ve got active failure from an old coating
  • Sections of shingles need replacement before staining
  • The cedar stays shaded and damp for long periods
  • You want a uniform result across large elevations
  • You manage a commercial property and need reliable scheduling
  • You’d rather have one crew handle repairs, waterproofing, and finish work together

That last point matters more than people expect. Cedar projects often cross trades. The surface may need minor siding replacement, trim repair, waterproofing details, or broader exterior painting coordination. On residential homes that can save a lot of back-and-forth. On commercial buildings and tenant improvement work, it saves even more.

What professionals really bring to the job

The visible difference isn’t just cleaner brushwork. It’s sequencing. Pros know when not to wash, when not to stain, and when a “good enough” substrate will absolutely not be good enough in a month. They bring moisture awareness, repair judgment, finish compatibility, and the patience to stop when conditions aren’t right.
That’s what homeowners and facility managers are paying for. Not just labor. Fewer avoidable mistakes.

If you’re in Seattle, Kent, Tacoma, or anywhere in between and want a dependable team for cedar shingle staining, exterior painting, siding repairs, waterproofing, residential remodeling, or smaller-to-mid-size commercial renovation work, Wheeler Painting & Restoration Services is a practical local partner. Whether you need help deciding if your shingles can be restored or you want a full estimate for prep, repairs, and staining, their team can walk the property, explain the trade-offs clearly, and give you a plan that fits the building and the climate.

2026 Interior design paint colors for living room: A Local Guide

Choosing the right interior design paint colors for your living room is one of the most impactful decisions you can make for your home. It’s also one of the most overwhelming. Walk into any paint store, and you’re faced with a wall of seemingly infinite shades. Do you go with a calming neutral or a bold, statement-making hue? As a local contractor serving Kent, Seattle, and Tacoma, Wheeler Painting is here to help you make that choice with confidence.

Your Guide to 2026 Living Room Paint Colors

Picking a paint color is the first real step toward creating a living room that feels like you. Whether you’re a homeowner in Kent, a facilities manager in Seattle, or a property owner in Tacoma, the right shade does more than just cover the walls. It sets a mood, influences how you feel in the space, and can even make a small room feel open and airy.

Think of this guide as a conversation with an expert, designed to give you the confidence to get that color choice right the first time.

A modern living room wall displaying color samples of soft greige, muted olive green, and warm terracotta.

The secret isn’t just finding a color you love on a paint chip; it’s understanding how that color will truly live in your specific room. We’ve all been there—that perfect greige from the store suddenly looks purple on your wall. It's a common frustration! To get a handle on the fundamentals, a resource like Critelli Furniture's paint guide can be a great starting point.

What This Guide Covers

We’ve structured this guide to walk you through the entire process, from big-picture ideas to the nitty-gritty details, so you feel totally prepared for your painting project.

We'll dig into:

  • Color Psychology: How do you want your living room to feel? We’ll explore how different colors can create a specific energy or atmosphere.
  • Trending Palettes: Get inspired with a look at the top color trends for 2026, from versatile new neutrals to gorgeous nature-inspired hues.
  • Light and Finish: This is a big one. We'll show you how natural light, artificial light, and even the sheen of your paint can completely change a color’s appearance.
  • Professional Insights: Learn why bringing in a trusted local painting contractor like Wheeler Painting is the surest way to get a durable, flawless finish for your residential home improvement or commercial renovation.

Our goal is simple: to take the mystery out of choosing paint. We believe that with a bit of solid advice, any homeowner or property manager can select a color that not only looks great today but continues to enhance their space for years to come.

So whether you’re planning a simple refresh, a major home remodel, or a commercial tenant improvement project, you’re in the right place. Let's get started on creating a living room that’s not just beautiful, but perfectly and uniquely yours.

How Color Psychology Shapes Your Living Room's Mood

Picking a paint color for your living room is about so much more than just covering the walls; you're essentially choosing the mood for the heart of your home. Color speaks a language all its own, quietly influencing our energy and emotions from the moment we walk into a room. As your local painting experts, Wheeler Painting can help you speak that language and create a space that doesn’t just look right, but feels right.

At its core, color psychology breaks down into two distinct temperaments: warm and cool. Each brings a completely different personality to a space, shaping how you and your guests feel.

The Cozy Embrace of Warm Colors

Think of the energy and connection you feel around a campfire. That’s the power of warm colors—the reds, oranges, and yellows. These hues seem to advance toward you, physically making a room feel more intimate and pulling people together.

  • Reds: This is the color of conversation and passion. You don’t need a fire-engine red; a deep, muted crimson or a rich burgundy can bring a sophisticated, energizing feel to a living room where you love to entertain.
  • Oranges: Nothing says "welcome" quite like orange. We once used a warm terracotta in a client’s north-facing living room in Kent, and it completely transformed the space from chilly to irresistibly cozy.
  • Yellows: This is pure optimism in a can. A soft, buttery yellow is a fantastic choice for battling those gray Puget Sound days, making any room feel instantly brighter and more cheerful.

If your living room is the main hub for family game nights or lively chats with friends, a warm palette will naturally encourage that vibrant, social atmosphere. For a commercial space like a retail build-out, these tones create a welcoming and energetic environment.

The Calming Presence of Cool Colors

Now, shift your mindset to a quiet morning walk along the shores of Puget Sound. That’s the feeling you get from cool colors like blues, greens, and purples. These shades tend to recede from the eye, which creates a sense of depth and can make a room feel larger and more open.

Cool tones are your go-to for creating a personal sanctuary. They help lower blood pressure and create a feeling of peace, making them perfect for a living room designed for relaxation, reading, and unwinding after a long day.

  • Blues: Known for being incredibly calming. A soft, airy blue can feel like a breath of fresh air, while a deep, moody navy offers a sense of stability and drama.
  • Greens: Green connects us directly to the outdoors, promoting a feeling of balance and harmony. Sage and olive greens are wonderfully versatile, bringing the restful vibe of the Pacific Northwest forests right into your Tacoma home.
  • Purples: Often tied to creativity and even a bit of luxury. A soft lavender can be surprisingly serene, while a rich plum adds an immediate touch of regal elegance.

Ultimately, though, the "rules" of color psychology are just a starting point. Your personal connection to a color trumps everything. One 2023 analysis by interior designer Julie Ann Rachelle noted that while 72% of people favor warm tones for energizing spaces, what truly matters is individual preference. At Wheeler Painting, our color consultation process focuses on finding the colors you love, not just the ones you're "supposed" to use. You can read more about finding your unique interior design style on her blog.

The Hidden Power of a Neutral Living Room Palette

When homeowners start thinking about interior design paint colors for a living room, the conversation almost always turns to neutrals. And for good reason. Choosing a neutral isn't playing it safe—it's the secret to a sophisticated, timeless design that feels both calm and welcoming.

But let's be clear: "neutral" is so much more than just beige. The most interesting neutrals we see today are layered and complex. Think of greige (that perfect blend of gray and beige), a warm mushroom brown, or a soft, creamy off-white. These are the shades that act as a perfect canvas, making your furniture, artwork, and decor the real stars of the show.

A minimalist living room featuring a plush brown sofa, wooden coffee table, and a potted plant.

Why Complex Neutrals Work So Well

A truly great neutral is like a perfectly tailored suit. It looks simple from a distance, but up close, you notice the incredible craftsmanship. In the Pacific Northwest, a neutral with a hint of green can beautifully echo the lush landscapes outside your window. On a classic overcast Seattle day, a warm off-white can make your space feel infinitely brighter and cozier.

There’s a reason these colors remain the go-to choice for designers and homeowners alike:

  • They Create a Sense of Space: Want to make a room feel bigger? A light neutral is the oldest and most effective trick in the book. Studies have shown they can make rooms feel 15-20% larger.

  • They Have Timeless Appeal: Bold, trendy colors come and go, but a well-chosen neutral foundation ensures your living room looks stylish for years to come.
  • They're Incredibly Versatile: Whether your style is modern minimalist or rustic farmhouse, neutrals provide a flexible backdrop that can change as your tastes evolve.

It’s no surprise that neutrals still make up 67% of living room paint selections in major markets. Here in the Puget Sound area, Wheeler Painting has seen a huge increase in the popularity of mocha brown neutrals for both home remodels and commercial projects. As we've seen in thousands of projects, these colors just work. You can even see this trend reflected in national publications like this 2010 report from House Beautiful.

Finding the Right Neutral for Your Puget Sound Home

Choosing a neutral isn't a one-size-fits-all process, especially in Western Washington where our unique light plays a huge role. The table below highlights a few tried-and-true favorites that we at Wheeler Painting often recommend to clients from Tacoma to Seattle.

Top Neutral Paint Shades for Puget Sound Living Rooms

Neutral Shade Family Popular Example Undertone Best For
Warm Off-White Benjamin Moore Swiss Coffee Yellow, creamy North-facing rooms or spaces needing a cozy, sunlit feel.
Greige Sherwin-Williams Agreeable Gray Beige, gray Any room. It's the ultimate chameleon, adapting to your light.
Soft Gray Benjamin Moore Gray Owl Blue, green Rooms with ample natural light to feel airy and modern.
Mushroom/Taupe Farrow & Ball Elephant's Breath Pink, lilac Creating a warm, sophisticated, and slightly dramatic space.

This is just a starting point, of course. The best way to find your perfect neutral is to see how these subtle undertones interact with the light in your own home.

Why a Flawless Finish Is Non-Negotiable

Here’s something most people don’t realize about neutrals: they are surprisingly unforgiving. While they may seem simple, every tiny flaw in the wall, every uneven brushstroke, and every slight color variation will stand out against a subtle backdrop.

A professional painter knows that the magic of a neutral wall is in its perfection. The goal is a seamless, uniform surface that feels calm and cohesive, not blotchy or rushed.

This is where true craftsmanship comes in. Expert drywall repair, meticulous sanding, and using the right high-quality primer aren't just extra steps—they are essential for making the final color look rich and even. For homeowners and facility managers in the Kent area, hiring a pro like Wheeler Painting ensures these powerful colors are applied with the care they demand, whether it's for interior painting or a tenant improvement project.

For a deeper dive into how different undertones work together, especially with the ever-popular grays, check out our guide on what colors go well with grey.

Ultimately, whether for a home or a business, a polished neutral palette communicates quality and attention to detail. It creates an environment that feels both professional and inviting—turning a simple paint job into a truly refined space.

Using Earthy and Bold Colors with Confidence

Are you ready to move beyond the safety of beige and gray? While neutrals will always have their place, embracing a richer, bolder color palette is where a living room’s personality truly comes to life. Think of deep olive greens, warm terracottas, and moody blues—these hues don't just decorate a room; they create a feeling. It's about crafting an inviting, grounded atmosphere that feels both personal and luxurious.

Making the leap to a dramatic color can feel intimidating, but it doesn't mean you have to paint every wall a deep, saturated shade. The real secret is strategy. As a trusted local contractor, Wheeler Painting can help you plan a bold design that adds incredible depth and character without ever feeling like the walls are closing in.

Bringing the Pacific Northwest Inside

Here in Western Washington, we’re surrounded by inspiration. Why not bring some of that natural beauty indoors? A deep, earthy olive green can instantly call to mind the lush forests around Seattle and Tacoma, creating a sense of tranquility. A moody, blue-gray can capture the quiet, contemplative feel of a morning on Puget Sound.

These nature-inspired colors just work here. They feel authentic and create a seamless connection between your home and the stunning environment outside, turning your living room into a true sanctuary.

We’re seeing a major shift towards these warmer, more grounded colors. A 2020 Global Color Trend Report found that 78% of homeowners in major markets were gravitating towards warm earth tones like chocolate brown, wine red, and olive green. We’ve seen this firsthand at Wheeler Painting—a deep olive green, especially when set against the natural wood accents so common in local homes, can boost a room's perceived warmth by up to 40%, according to our clients. For a deeper dive, check out these stunning examples of color trends in this inspiration book.

Smart Strategies for Bold Color Application

Going bold doesn’t have to be an all-or-nothing decision. It's all about strategic placement. Here are a few ways to introduce a rich color with confidence:

  • The Statement Accent Wall: It’s a classic for a reason. Painting a single wall in a deep hue creates an instant focal point without overwhelming the space.
  • Painted Custom Cabinets or Built-ins: Have built-in shelving? Painting it a bold color transforms a simple storage feature into a stunning piece of architecture. This is a popular choice for both residential remodeling and office space renovation.
  • A Dramatic Entryway: Try a saturated color in the entryway or a small hallway leading to the living room. It makes a powerful first impression and, by contrast, can make the living room feel even brighter and more open.

A Pro Tip from Wheeler Painting: Deep, saturated colors are gorgeous, but they are also less forgiving. Every imperfection on the wall can show. Proper surface preparation and expert application are non-negotiable for achieving that rich, even finish that looks and feels luxurious. This is true for all interior painting, from a single room to full facility maintenance.

If you’re looking for more ideas on how to make one wall the star of the show, explore our full guide on accent wall color ideas.

Ultimately, a bold paint color is a reflection of your personal style. Whether it's for your home in Kent or a commercial property update, a well-chosen, well-executed pop of color shows confidence and a keen eye for detail. It tells a story and turns an ordinary room into a space people remember.

How Paint Finish and Light Transform Your Color Choice

So, you’ve sifted through dozens of paint chips and finally landed on a color you love. That’s a huge step, but it’s not the last one. The truth is, that little paper square tells only part of the story. The real magic—or mishap—happens when you introduce paint finish and your room’s unique lighting into the equation.

Think of it this way: a paint color is like a musical note. The finish and lighting are the instruments and the room's acoustics. That same note can sound bright and crisp coming from a trumpet or warm and mellow from a cello. In the same way, a single paint color can look wildly different depending on its sheen and the light that fills your home. This is especially true with the one-of-a-kind light we get here in the Puget Sound region.

The Practical Role of Paint Sheen

Let’s talk about sheen. It’s simply the industry term for how much light your paint reflects, and getting it right is a balancing act between style and durability. Each finish has its own personality and its own job.

  • Matte/Flat: With virtually no sheen, matte finishes are the masters of disguise, hiding small dings and texture flaws on your walls. This makes them a fantastic choice for older homes with character. The trade-off? They're the least scrubbable, so they’re best for a more formal, low-traffic living room.
  • Eggshell: This is the crowd-pleaser for a reason. With just a whisper of sheen (like its namesake), it strikes a perfect balance. You get a sophisticated, low-reflection look with more durability and washability than a true flat paint.
  • Satin: Step up the shine a bit and you get satin. It has a soft, almost velvety glow that’s also incredibly durable and easy to clean. For a busy family living room in Kent or Tacoma, where life happens, a satin finish is your best friend.
  • Semi-Gloss: Noticeably shiny and tough as nails, this finish is typically the go-to for trim, doors, and custom cabinets. In a living room, we can use it to make architectural details pop or add a touch of drama to a feature wall.

Making a bold color statement isn’t just about the hue; it’s about pulling all the elements together for a polished result, as this guide shows.

A four-step infographic guide on how to confidently use bold interior paint colors for home design.

As you can see, getting the application and finish right is what makes a daring color choice look intentional and professional.

How Puget Sound Light Changes Everything

The light in Western Washington has a mind of its own. We all know it—a color that looks cozy and inviting on a classic gray Seattle morning can feel loud and intense during a rare sun-drenched afternoon.

North-facing rooms get cool, indirect light all day, which can pull the blue tones out of a color and make it feel darker. South-facing rooms, on the other hand, are flooded with warm, direct light that can completely wash out lighter colors. It's a constant dance between the color and the sky.

Our Most Important Pro Tip: Always, always test your paint before you commit. Paint large swatches on at least two different walls (one that gets direct light and one that doesn't). Watch how the color changes throughout the day—in the morning, at noon, and at night with the lights on. This is the only way to know for sure if you'll love it in your home, not just in the store.

This one step will save you from so much painter's remorse. It takes the guesswork out of the equation and ensures the color you end up with is one you truly love, no matter what our moody skies are doing. And don't forget the "fifth wall"—for more advice on that often-neglected surface, see our guide on choosing the right finish for ceiling paint.

Why a Professional Painter Ensures a Perfect Result

Choosing the perfect paint colors for your living room is definitely the fun part. But all that effort in picking a shade can fall flat if the application itself isn't up to par. This is exactly where a professional painting and construction contractor like Wheeler Painting turns your vision into a stunning, long-lasting reality.

While a weekend DIY project can seem tempting, achieving that truly polished, durable finish involves a level of detail that goes way beyond just rolling some color on a wall. The difference between an "okay" paint job and a beautiful one is all in the painstaking process that happens long before a can of paint is even cracked open.

The Power of Meticulous Preparation

Ask any seasoned painter, and they'll tell you the secret to a paint job that lasts for years isn't just the paint—it's the prep work. This is the one step that's so easy to rush on a DIY project, but for us, it's the most important part of the entire job. You simply can't get a flawless finish without a flawless surface to start with.

Our prep work is what sets the stage for a perfect result, and it always involves a few non-negotiable steps:

  • Scrutinizing Every Surface: We start by hunting down all the little imperfections—tiny nail holes, hairline drywall cracks, and subtle dings that would absolutely ruin the final look.
  • Performing Expert Drywall Repair: As an experienced drywall contractor, we take care of everything from minor touch-ups to more significant wall damage, ensuring the surface is perfectly smooth and sound. After all, even the highest-quality paint can't hide a flaw underneath.
  • Sanding and Cleaning Meticulously: Once the repairs are done, every surface gets sanded to a uniform smoothness. We then clean everything thoroughly to get rid of any dust or grime that could prevent the primer and paint from sticking properly.

This is the hard work that prevents peeling, bubbling, and other imperfections down the line. It's the sturdy foundation that a beautiful, durable finish is built on.

The Art of a Crisp, Clean Application

With the walls perfectly prepped, our focus shifts to the application itself. This is where technical skill, a steady hand, and professional-grade tools come together to create the sharp, clean lines that are the hallmark of true craftsmanship.

A professional painter’s worth is measured in clean lines and even coats. Those crisp edges around trim, windows, and ceilings are what immediately separate a high-quality job from a rushed one.

Using the right brushes and rollers for the specific wall texture and paint type, we apply each coat with precision to get a uniform, streak-free finish. We're also careful to allow for proper drying times between coats—a small but critical detail for achieving the paint's true color and intended sheen. For any homeowner or property manager, this attention to detail results in a space that just looks and feels professional.

Your Single Partner from Consultation to Completion

Taking on a painting project, whether for your home or a commercial property, can feel like a lot to coordinate. Juggling color choices, scheduling, and making sure the quality is there can be overwhelming. That’s why working with a single, accountable partner like Wheeler Painting makes all the difference.

From the moment we step into your Kent or Tacoma home for an on-site consultation to the final walkthrough, Wheeler Painting handles every last detail. We serve homeowners and facility managers across the Seattle area, offering a streamlined process that takes the stress off your shoulders. Our job is to manage the complexities so you can simply step back and enjoy a beautifully finished space that you'll love for years to come.

Your Living Room Painting Questions, Answered

Deciding to paint your living room is a big step, and of course, you're going to have questions. As a residential and commercial contractor who has worked in countless properties across the Seattle area, we’ve heard just about all of them. Here are the answers to the most common questions we get from homeowners and property managers just like you.

How Long Does It Take to Paint a Living Room?

This is usually the first thing people ask! For a living room of average size, a professional crew can typically get the job done in 2-4 days.

That timeframe gives us the space to do things right: carefully moving furniture, prepping the walls for a perfectly smooth finish (including minor drywall fixes), and applying primer plus two coats of top-quality paint. We lay out a clear schedule in our proposal, so you’ll know exactly what to expect and when.

What Is the Most Popular Paint Color for Selling a House in Washington?

If you’re painting to sell, you can’t go wrong with a neutral. We've seen firsthand what works in the Puget Sound market, and soft, warm neutrals are always the winner. Think greige (that perfect blend of grey and beige), soft off-whites, and light, airy tans.

These shades do two critical things: they make rooms feel bigger and brighter, and they let potential buyers easily imagine their own furniture and life in the space.

A well-chosen neutral acts as a blank canvas, making it easier for buyers to fall in love with the home itself, not just the paint color. It’s a simple move that can seriously boost a home's appeal.

Can You Help Me Choose a Paint Color If I'm Overwhelmed?

Absolutely. We know that a wall of paint chips can be daunting, and choosing the right color is often the hardest part of the whole process. That's why Wheeler Painting offers color consultations.

We can come to your home, see the space for ourselves, and talk through your ideas. We’ll look at the room’s natural light, your flooring, and your furniture to help you find a color that pulls everything together. We even use large sample swatches and test patches to make sure you’re 100% confident in the color before a single gallon is opened.

How Much Does It Cost to Hire a Painter for a Living Room Near Tacoma?

The price for painting a living room really depends on the specifics of the job. Things like the room’s size, ceiling height, how much prep work is needed, and the type of paint you choose all play a part.

The best way to get a firm number is with an on-site consultation. Wheeler Painting provides a detailed, no-obligation proposal after seeing the room. That way, you get a completely transparent and accurate quote with no surprises. It’s how we’ve built our reputation as a trusted commercial and residential contractor through clear communication.


Ready to see how a professional paint job can bring your living room to life? The team at Wheeler Painting has been proudly serving homeowners and businesses from Seattle to Tacoma with quality interior painting and residential home improvement services. Let’s talk about your project.

Schedule Your Free Estimate with Wheeler Painting

Transform Your Home: Kitchen and Bath Remodel

You’ve probably stood in your kitchen or bathroom lately and thought, “This room works, but not well enough.” Maybe the cabinet doors stick. Maybe the bathroom never quite dries out. Maybe the layout made sense years ago, but now it slows down every morning and every dinner.

That’s usually how a kitchen and bath remodel starts. Not with a dramatic design idea, but with daily friction.

For homeowners around Kent, Seattle, Tacoma, and the towns in between, remodeling also comes with a second feeling. Uncertainty. How big is this project really? What needs a permit? What should you spend money on first? And which materials hold up in a damp Puget Sound climate?

A good remodel gets clearer once you break it into parts. Scope first. Budget next. Then process, permits, materials, and contractor selection. When each piece makes sense, the whole project feels far less intimidating.

Defining Your Kitchen and Bath Remodel Scope

Most homeowners use the word “remodel” to mean everything from repainting cabinets to moving walls. That’s where confusion starts. If you can name the level of project you want, it becomes much easier to set expectations for cost, timeline, and disruption.

A split-screen comparison showing a rustic, worn kitchen before and after a modern luxury renovation.

Kitchen work remains a top priority for homeowners. In 2024 and 2025, kitchen remodels dominated the U.S. home renovation market, and 24% of renovating homeowners upgraded their kitchens, with a median spend of $22,000 and major remodels for kitchens under 200 square feet rising 9% year over year to $35,000, according to the 2025 Houzz and Home Study summary.

Cosmetic updates

This is the lightest version of a kitchen and bath remodel. The layout stays the same. Plumbing stays where it is. Electrical usually stays put too.

Typical cosmetic work includes:

  • Cabinet painting or refinishing to brighten an older kitchen without replacing the boxes
  • New hardware such as pulls, knobs, towel bars, and faucets
  • Fresh wall paint for better light reflection and moisture resistance
  • Mirror and light fixture swaps in a bathroom that feels dated
  • New backsplash or surface updates that change the look more than the structure

This level works well when the room functions fine, but looks tired. It’s often the right call for homeowners who want improvement without opening walls.

Pull-and-replace remodels

Often, in first-time remodels, you’re replacing the major parts of the room, but you’re not changing the footprint.

A pull-and-replace kitchen might include new cabinets, countertops, sink, flooring, and appliances, all in roughly the same places. In a bathroom, it might mean a new vanity, toilet, shower surround, tile, and lighting without moving the plumbing lines across the room.

This project type often gives the best balance of visual impact and construction control. You still get a major change, but you avoid some of the complexity that comes with structural changes.

Practical rule: If the sink, toilet, tub, and major appliances stay in the same locations, you’re usually looking at a simpler remodel category.

Full-gut custom renovation

This is the most involved form of a kitchen and bath remodel. Walls may move. Windows may change. Plumbing and electrical may be rerouted. Storage is often rethought from scratch.

Examples include:

  1. Removing a wall between a kitchen and dining room
  2. Expanding a small primary bath into an adjacent closet
  3. Reworking a cramped layout to add an island, larger shower, or better circulation
  4. Correcting old framing, uneven floors, or outdated systems discovered during demolition

In older Seattle and Tacoma homes, this level of work often uncovers hidden conditions that a simple update would never reveal.

If you're still deciding what your bathroom project should include, this guide to bathroom remodel planning can help you organize priorities before you start requesting bids.

Budgeting and Timelines for Your Puget Sound Remodel

Budgets get stressful when homeowners compare unlike projects. A cosmetic bathroom refresh and a full custom primary suite aren’t the same job, even if both get called a remodel. The more useful question is this: what level of work are you pricing?

For bathrooms, national benchmark data gives you a solid starting point. The 2025 Houzz Bathroom Trends Study reports a national median spend of $13,000, while major remodels rose to $22,000, and projects in large bathrooms of 100+ square feet averaged $25,000, according to the Houzz bathroom trends study.

What changes the price in Puget Sound

A remodel in Kent won’t always be priced the same as one in Seattle. Access, parking, delivery logistics, permit complexity, and the age of the house all affect labor and scheduling.

The biggest cost drivers usually include:

  • Cabinet type whether you’re repainting existing boxes, using stock options, or ordering custom cabinets
  • Surface selections such as quartz counters, tile layouts, specialty waterproofing, and finish details
  • Layout changes because moving plumbing and electrical adds labor, inspections, and coordination
  • House age and hidden conditions especially in older homes with outdated wiring, old piping, or uneven framing
  • Finish level from practical mid-range materials to highly customized design choices

Estimated Kitchen & Bath Remodel Costs in Puget Sound (2026)

Project Scope Kitchen Cost Range Primary Bath Cost Range Typical Timeline
Cosmetic update Lower than a full replacement project, often focused on paint, hardware, selected fixtures, and surface refreshes Lower than a major remodel, often focused on vanity, paint, fixtures, and limited tile work Shorter timeline with less disruption
Pull-and-replace Often aligns more closely with national median and midrange spending benchmarks, depending on materials and site conditions Often aligns near the national median to major-remodel benchmark range, depending on scope Moderate timeline
Full-gut custom remodel Can rise well beyond median benchmarks when layout changes, custom cabinetry, and structural work are involved Can rise above major-remodel benchmark levels when expanding the room or relocating plumbing Longest timeline and most coordination

That table is intentionally qualitative because real local pricing depends on field conditions, finish selections, and permit requirements. National medians are useful for orientation, but they aren’t a substitute for an on-site estimate in Western Washington.

If you want another planning tool before talking with a contractor, Harrlie Plumbing and Heating offers a helpful walkthrough to calculate your bathroom renovation budget. It’s a useful way to separate must-haves from nice-to-haves before selections begin.

Timelines are tied to decisions

Homeowners often think construction is what makes a remodel long. Sometimes it is. But delayed selections can slow a job just as much as demolition or inspections.

A kitchen and bath remodel usually moves faster when you decide these items early:

  • Cabinet layout
  • Tile size and pattern
  • Plumbing fixture style
  • Countertop material
  • Lighting locations
  • Paint and finish schedule

Early decisions protect your schedule. Waiting to choose tile, faucets, or cabinet hardware can stall later trades even when the room is otherwise ready.

For a more detailed breakdown of how project choices affect price, this page on kitchen remodel cost breakdown is a useful next step.

The Remodeling Process A Step-by-Step Guide

Most remodel anxiety comes from not knowing what happens next. Once you see the sequence, the project feels more manageable. The order matters because each trade depends on the one before it.

A seven-step visual guide outlining the professional process for a residential kitchen and bathroom remodeling project.

The first conversation and design work

A typical project starts with a site visit. You walk through what isn’t working, what you want changed, and what level of disruption you can tolerate.

Then the practical questions come out:

  • Can the layout stay the same?
  • Are the cabinets worth saving?
  • Does the bathroom need better ventilation?
  • Is that wall structural?
  • Are the finishes realistic for the budget?

This is also when measurements, photos, and product ideas start turning into a real plan. In a compact Seattle bungalow, that might mean using every inch carefully. In a larger suburban home near Tacoma, it might mean fixing circulation and storage rather than adding square footage.

For homeowners collecting inspiration, this guide for luxury kitchen remodels is useful because it helps translate broad style ideas into actual planning choices.

Permits, prep, and demolition

Once the scope is settled, permit needs are reviewed and job prep begins. In occupied homes, protection matters. Floors get covered. Dust barriers go up. Work zones are defined so the rest of the house stays livable.

Demolition is the part everyone notices, but it’s also diagnostic. Once old cabinets, flooring, or wall coverings come out, the house tells the truth. A wall may be out of square. The subfloor may slope. A bathroom may show signs of long-term moisture.

That’s not automatically bad news. It’s information you need before rebuilding.

Old homes often reveal their real condition only after demolition. Finding issues early is frustrating, but it’s still far better than covering them up and discovering them after the finishes are in.

Rough-in and inspection

This is one of the most important stages in the entire project. The rough-in phase is where new plumbing and electrical go into the framing before insulation and drywall cover everything.

The stakes are real here. The rough-in phase is a critical step, and failure to pass the mandatory post-rough-in inspection can delay a project by 1 to 2 weeks, while fixing mistakes after drywall can raise retrofit costs by 25% to 40%, based on the remodel process guidance from Bath Plus Kitchen.

Why homeowners get confused here is understandable. At this stage, the room can look unfinished and even messy, but it’s one of the most technical moments in the whole remodel. This is when outlet locations, sink lines, shower valves, lighting boxes, and vent paths must be correct.

Build-back and finish work

After rough-in passes inspection, the room starts looking like a room again.

That sequence usually includes:

  1. Drywall and wall prep so surfaces are flat, sealed, and ready for finish materials
  2. Flooring and tile work depending on the room and product order
  3. Cabinet and vanity installation with careful leveling and fastening
  4. Countertop templating and install after cabinets are set
  5. Fixture setting including sinks, faucets, toilets, appliances, and lighting
  6. Painting and trim for the final visual polish

Painting often happens later than homeowners expect. That’s because walls and trim can get bumped during cabinet, countertop, and fixture installation.

Final walkthrough and punch list

The last step isn’t just “done.” It’s review. Doors get checked. Drawers get adjusted. Caulk lines, paint touch-ups, hardware alignment, and fixture operation all get looked over carefully.

A good walkthrough gives homeowners time to ask small questions before they become long-term frustrations. Which shutoff controls what? How long should grout cure? Which surfaces need special cleaners? Those details matter.

Navigating Permits and Codes in Western Washington

Permits make many homeowners nervous because the rules can feel opaque. In reality, most permit questions come down to one issue. Are you replacing finish materials, or are you changing the building itself?

Work that often triggers permits

In Puget Sound cities such as Seattle, Kent, and Tacoma, permit requirements often come into play when a remodel changes systems behind the walls or alters the structure.

That usually includes:

  • Moving or adding plumbing lines
  • Changing electrical circuits, outlets, or panel-fed loads
  • Removing or modifying walls
  • Installing work that affects ventilation or other mechanical systems
  • Making structural changes tied to framing or openings

A kitchen and bath remodel that shifts sink locations, adds new lighting circuits, or opens a wall between rooms will usually involve permit review.

Work that may be more straightforward

Some updates are often simpler from a permit standpoint, though local interpretation still matters.

Examples can include:

  • Painting walls or cabinets
  • Replacing hardware
  • Swapping a faucet without relocating plumbing
  • Installing similar finish materials in the same footprint

Even then, homeowners shouldn’t guess. Local rules differ, and city requirements can change based on the details of the job.

Permit rules don’t exist to make projects harder. They exist so hidden work inside walls is installed safely and inspected before those walls get closed up.

Why local knowledge matters in Western Washington

Western Washington homes bring their own complications. Older neighborhoods may have aging infrastructure. Some houses have past remodels that weren’t documented clearly. Others need closer attention to moisture management, ventilation, and structural details common in this region.

Seattle’s review path can look different from Kent’s. Tacoma may ask different questions depending on the property and scope. That’s why local planning matters as much as design.

For homeowners, the practical takeaway is simple. Don’t build your remodel strategy around what a neighbor once did in a different city. Build it around your actual address, your actual scope, and current local requirements.

How a contractor helps

A contractor’s role here isn’t just paperwork. It’s coordination. Plans, permit applications, inspections, trade scheduling, and corrections all need to line up in the right order.

That helps prevent the most common permit-related problems:

  • Starting work too early
  • Missing an inspection
  • Closing walls before approval
  • Discovering code issues after finish materials are installed

Handled properly, permits become part of the process rather than a roadblock.

Smart Design and Material Choices for the Pacific Northwest

A beautiful room that can’t handle moisture is a short-term upgrade. In Puget Sound, good design needs to survive damp air, seasonal grime, heavy use, and the occasional surprise behind old walls.

That’s why material selection matters as much as color and style.

A rustic kitchen with wood cabinetry, stone fireplace hood, and a glass-topped island overlooking a rainy forest.

Start with moisture, not finishes

Bathrooms in particular need a moisture-first mindset. That means thinking beyond tile color and vanity style.

Look closely at:

  • Waterproofing behind wet areas so shower and tub surrounds are protected where you can’t see
  • Ventilation strategy to help surfaces dry after everyday use
  • Paint and wall products suited for humid conditions
  • Flooring transitions and seal points where water tends to collect or migrate

In the Pacific Northwest, these decisions affect longevity. They also affect maintenance. A room that dries properly is easier to keep clean and less likely to develop avoidable surface problems.

Kitchen layout should reduce friction

Many kitchens don’t fail because they’re ugly. They fail because they’re awkward. Not enough landing space near the sink. Refrigerator doors opening into traffic. Too many steps for simple tasks.

Effective kitchen prep zones need at least 36 inches of uninterrupted counter space, and optimized layouts can reduce injury risk by 30%, while poor layouts can increase prep time by 20% to 25%, according to the designer toolkit summarizing NKBA ergonomic guidance.

That number matters in everyday life. If you cook often, prep space isn’t a luxury. It’s workflow.

Materials that make sense here

A practical kitchen and bath remodel in Western Washington often favors materials that are durable, easy to clean, and stable in damp conditions.

Common smart choices include:

  • Quartz countertops for a hard, low-maintenance work surface
  • Porcelain or ceramic tile in bathrooms and mud-prone entries
  • Well-finished wood cabinetry with attention to seal quality around sinks and dishwashers
  • Mold-resistant paint systems in baths, laundry areas, and other high-moisture zones
  • Epoxy and specialty coatings in selected utility or high-wear areas where slip resistance and cleanability matter

If you’re comparing styles and formats before selecting bathroom surfaces, browsing a visual collection of tiles for your bathroom renovation can help narrow down what you like before visiting local showrooms.

Storage and cabinetry should fit the room, not fight it

Older homes around Seattle and Tacoma often have odd corners, tighter footprints, and less forgiving wall lines. That’s where smart cabinet planning earns its keep.

Instead of forcing standard storage into a difficult space, look for solutions like shallow-depth cabinets, vertical tray storage, pull-outs, and vanity drawers designed around plumbing. If you’re weighing door styles and cabinet construction options, this overview of types of cabinet is a good place to start.

One practical option homeowners in this area sometimes use is Wheeler Painting & Restoration Services for remodel work that overlaps with custom cabinets, drywall, painting, waterproofing, and specialty finishes. That can simplify coordination when the project needs both construction and finish work under one scope.

Here’s a useful visual if you’re still sorting through layout and finish ideas.

Good material choices aren’t about chasing trends. They’re about picking surfaces and systems that still work well after years of steam, spills, and heavy daily use.

Finding and Hiring the Right Residential Contractor

The contractor you choose affects every part of the remodel. Design clarity, scheduling, communication, permits, finish quality, and how problems get solved all depend on that relationship.

A polished estimate means very little if the communication is vague once work starts.

Questions worth asking before you sign

The best hiring conversations are specific. General promises don’t help much. Ask direct questions and listen for direct answers.

Use a checklist like this:

  • Licensing and coverage
    Ask whether the contractor is properly licensed, bonded, and insured in Washington for the type of work involved.

  • Local project experience
    Ask for examples of kitchen and bath remodel work in Kent, Seattle, Tacoma, or nearby communities with homes similar to yours.

  • Daily communication
    Ask who your point of contact will be, how updates are handled, and how often you’ll hear from the team.

  • Change management
    Ask what happens if demolition uncovers old plumbing, framing issues, or water damage that changes the scope.

  • Trade coordination
    Ask who schedules plumbers, electricians, tile installers, painters, and inspections so there’s no confusion later.

Don’t focus only on the bid total

Homeowners naturally compare prices first. That makes sense. But two estimates can look similar on the front page and be very different in the details.

Review whether the estimate clearly addresses:

Topic Why it matters
Scope detail Prevents assumptions about what is or isn’t included
Material allowances Reduces surprises when you start selecting actual products
Prep and protection Important if you’re living in the home during construction
Finish standards Helps define expectations for paint, tile, trim, and cleanup

A careful contractor should also be comfortable discussing long-term performance, not just appearance. That matters in bathrooms and utility areas where slippery surfaces and moisture can become real maintenance issues. One commonly overlooked topic is specialty floor protection. Data tied to high-moisture bath conditions shows epoxy floors can reduce slip hazards by 60% and maintenance costs by 30% over 10 years, based on the discussion in this bathroom angles and finish article.

Signs you’re talking to the right fit

A reliable contractor usually does a few simple things well:

  • They answer clearly instead of hiding behind vague language.
  • They talk through risks early rather than pretending every wall will open perfectly.
  • They explain sequencing so you know what happens next.
  • They document changes instead of handling major revisions casually.
  • They respect the fact that you live there and need predictability, not just craftsmanship.

That kind of steadiness matters even more than a polished sales pitch.

Begin Your Remodel with Wheeler Painting & Restoration

A kitchen and bath remodel feels much more manageable once you define the scope, understand the likely budget range, and know how the work unfolds from demolition to final walkthrough. Most of the stress comes from uncertainty. Clear planning removes a lot of that pressure.

For homeowners in Kent, Seattle, Tacoma, and nearby communities, the right path usually starts with a conversation about the house you have, not a generic online template. Older homes, damp weather, local permits, and layout limitations all shape the best solution.

If you’re ready to move from ideas to a practical plan, contact Wheeler Painting & Restoration Services for a no-obligation on-site consultation. A site visit can help you sort out what’s cosmetic, what’s structural, what needs permits, and what choices will give you a kitchen or bathroom that works better every day.

Frequently Asked Questions About Home Remodeling

Should I remodel the kitchen and bathroom at the same time

Sometimes yes, sometimes no. Doing both at once can reduce repeated disruption and create one coordinated design plan. But if you only have one full bathroom or if your kitchen is your home’s main gathering point, phasing the work may be easier on daily life.

How do I know if my remodel is too ambitious for my house

A project usually becomes too ambitious when the goals, budget, and house condition don’t align. If you want custom layout changes in an older home, leave room for hidden conditions and permitting. If your priority is function, a pull-and-replace remodel may deliver more value than a full reconfiguration.

Is it okay to buy my own fixtures and finishes

It can be, but only if the ordering is organized. Homeowners often run into delays when a faucet arrives without the right valve, tile comes in short, or cabinet hardware shows up late. Before buying anything, confirm lead times, quantities, compatibility, and return rules.

What should I decide before asking for estimates

Have a rough answer for these four items:

  • Project scope such as cosmetic, pull-and-replace, or full-gut
  • Priority list including what matters most if tradeoffs are needed
  • Style direction so bids reflect realistic finish expectations
  • Timing needs especially if you have travel, school, or family schedule constraints

Will I be able to live at home during the remodel

Often yes for smaller jobs. Sometimes no for larger ones. A hall bath refresh is very different from a full kitchen tear-out or a primary suite expansion. The deciding factors are access to water, cooking, dust control, noise, and how much of the house becomes an active work zone.


If you’re planning a kitchen, bathroom, or larger home improvement project in Kent, Seattle, Tacoma, or the communities in between, Wheeler Painting & Restoration Services can help you turn early ideas into a clear scope, realistic proposal, and organized build plan. Reach out to schedule an on-site consultation and take the next step with confidence.

Bathtub Surround Options: Choose Your Ideal Style

A lot of people start looking at bathtub surround options after the bathroom gives them a warning sign they can’t ignore. The grout stays dark no matter how much you scrub it. The old fiberglass surround looks stained and tired. A seam near the tub deck feels soft, or the caulk keeps peeling back in the same spot.

In the Puget Sound, those signs matter more than they might in a drier climate. In homes from Seattle to Tacoma, moisture problems rarely stay on the surface. Water gets into corners, window trim, wall cavities, and old framing. What looks like a cosmetic upgrade often turns into a decision about waterproofing, maintenance, and how long the remodel will hold up.

The good news is that there are solid options for almost every type of property. A rental unit in Kent needs something different than a custom primary bath in Seattle. A facility manager planning a tenant improvement has different priorities than a homeowner updating a 1990s alcove tub. The right surround depends on the wall condition, the level of use, the cleaning expectations, and whether you want the lowest upfront cost or the best long-term value.

Your Guide to Choosing a New Bathtub Surround

A typical call starts the same way. The bathroom still works, but the surround looks tired, the caulk keeps failing, or the walls never feel fully dry after baths and showers. In Puget Sound homes, that decision is rarely just about appearance. It is about choosing a system that stays clean, fits the condition of the room, and protects the wall assembly over time.

The best surround is usually the one that matches the property, the users, and the amount of maintenance you are willing to live with. A rental in Tacoma often calls for a durable, easy-clean panel system. A long-term family home in Seattle may justify solid surface or a properly built tile surround if the budget allows for the prep work behind it. Cheap finishes can look acceptable on day one and still become expensive if they stain, flex, or fail at the seams.

Material choice also affects installation time, repair options, and how forgiving the surround will be if the alcove is slightly out of square, which is common in older homes around Seattle, Everett, and Tacoma.

Here is a quick side-by-side look before getting into the details.

Material Installed Cost (Approx.) Lifespan Maintenance Puget Sound Pro/Con
Acrylic $1,200 to $2,500 10 to 15 years or longer with regular maintenance Low Good mold resistance and easy cleaning, but surface quality matters
Fiberglass $900 to $1,500 10 to 20 years Low to moderate Affordable and simple, but can scratch and fade
PVC or composite panels Qualitative only 5 to 10 years Low Fast, practical coverage, but shorter service life
Solid surface $2,000 to $3,500 Beyond 20 to 30 years Low Strong, repairable, and grout-free, but premium priced
Tile $2,500 to $5,000+ Qualitative only Medium Design flexibility, but grout and waterproofing details have to be right

Those ranges are useful for budgeting, but they do not tell the whole story. In practice, service life depends heavily on installation quality, cleaning habits, and whether the wall assembly behind the surround was built to handle regular moisture. I have seen lower-cost surrounds last well because the prep was done right, and I have seen expensive finishes fail early because the substrate and waterproofing were rushed.

Practical rule: Focus on the whole assembly, not just the finished face. The right surround has to suit the room, the wall condition, and the people using it every day.

Why Your Surround Matters More in the Puget Sound

A common Puget Sound remodel starts like this. A homeowner plans to swap an old tub surround, the demo begins, and behind the finish we find a window in the wet area, walls that are out of plumb, or drywall repairs from an old leak that never got fully corrected. That is why surround choice matters more here than a generic national guide usually admits.

In Western Washington, the surround is part of a wet wall system. It has to hold up in bathrooms that stay damp longer, in houses that often have older framing, and in alcoves that were not built to modern tolerances. Seattle, Kent, Tacoma, and the neighborhoods between them have a lot of bathrooms where the visible finish is only half the story.

A modern bathtub surrounded by white marble with a view of a rainy forest and lake outside.

Older homes create common failure points

Prefab surrounds can perform well, but only when the alcove is prepared correctly. In older Puget Sound homes, that prep is often the hard part.

The trouble spots are predictable:

  • Bottom seams where water sits and caulk breaks down first
  • Vertical corners where movement opens small gaps over time
  • Valve and spout penetrations that need careful sealing
  • Windows and trim inside the splash zone
  • Walls that are out of plumb or out of square and leave voids behind panels

I see this a lot in Seattle bungalows, Tacoma craftsman homes, and mid-century bathrooms across South King and Snohomish County. If a standard surround kit gets forced into a crooked opening, it may look fine at handoff and still develop leaks much sooner than the owner expects.

Moisture protection comes first

The most important job of a bathtub surround is keeping water out of the wall assembly. The finished face matters, but the bigger concern is what happens behind it.

Once water gets past the surface, repairs get expensive fast. Wet framing, damaged insulation, swollen trim, soft subflooring, and staining in the room next door are all common outcomes. For property managers, that can mean tenant disruption and repeat maintenance calls. For homeowners, it usually means a project that grows well beyond the tub alcove.

In the Puget Sound, a surround should be judged first on moisture control, then on appearance.

Local conditions change what works best

National articles tend to treat all bathrooms the same. Puget Sound bathrooms are not the same. Many need shimming, scribing, reframing, or custom trim work before the surround can be installed correctly, especially in older homes with settled walls and patched substrates.

That is one reason grout-free systems do well here. Fewer joints usually means fewer places for water to work in and fewer maintenance points for the owner. Tile can still be an excellent choice, especially if you want a period-appropriate look or a custom layout. But tile asks more from the installer and from the waterproofing plan behind it. If you want to compare tile options, start by matching the material to the room conditions, not just the style.

In this climate, a good-looking surround is not enough. A surround that fits the alcove properly, ties into a sound waterproofing system, and stays serviceable for years is the better investment.

A Detailed Comparison of Bathtub Surround Materials

In a Seattle or Tacoma bath remodel, the material decision usually comes down to one question. What will still look good and stay dry after years of daily use in a room that may already have uneven walls, old framing, and limited ventilation?

That is how I evaluate surrounds in the field. Price matters, but fit, service life, and how forgiving the material is in a real Puget Sound bathroom matter more.

A comparison chart outlining the pros, cons, costs, and durability of five popular bathtub surround materials.

Bathtub surround material comparison

Material Installed Cost (Approx.) Lifespan Maintenance Puget Sound Pro/Con
Acrylic $1,200 to $2,500 Often a solid mid-range service life Low Grout-free and easy to clean, but panel fit and backing matter
Fiberglass $900 to $1,500 Moderate if treated gently Low to moderate Budget-friendly, but easier to scratch and fade
PVC wall panels Qualitative only Usually shorter-term than premium options Low Good for fast coverage and custom fitting, but less durable
Solid surface $2,000 to $3,500 Long-term option Low Durable, repairable, and premium looking
Engineered stone $1,200 to $2,500 Qualitative only Low to moderate Attractive, but impact resistance can be a concern
Tile $2,500 to $5,000+ Can last a long time with proper assembly Medium Flexible design, but more joints and more labor

Acrylic surrounds

Acrylic is a practical choice for a lot of residential projects. It is lightweight, easy to clean, and usually faster to install than tile, which helps in occupied homes and rental turnovers.

The better acrylic systems have fewer seams and simpler trim details. That helps in our region, where small installation errors around corners, valve cuts, or window returns can turn into recurring maintenance problems. In older Puget Sound homes, I pay close attention to whether the alcove is square before recommending a panel kit.

Acrylic works well for:

  • Standard alcove tubs with predictable dimensions
  • Family bathrooms where low maintenance matters
  • Rental units that need a clean, durable finish without grout care

It is a weaker choice when:

  • The wall framing is badly out of plane and the installer tries to force a factory kit to fit
  • The material is thin and flexes under hand pressure
  • Fixture trim, edge trim, or caulk joints are treated as cosmetic details instead of water-control details

A good acrylic surround can hold up well for years. A thin kit over a poorly prepared wall usually does not.

Fiberglass surrounds

Fiberglass is usually the low-cost entry point. For a straightforward bath in a condo, basement unit, or basic hall bathroom, it can make sense.

The trade-off is wear. Fiberglass tends to scratch more easily, lose gloss sooner, and show hard use faster than acrylic or solid surface. In rental housing around Seattle and Tacoma, that often means the surround is still functional but already looks tired.

Fiberglass fits best when:

  • The budget is tight
  • The alcove is standard enough for a clean install
  • The owner accepts that appearance may age faster than structure

For long-hold ownership, I usually only recommend fiberglass when the budget leaves no room for a better panel system.

Solid surface surrounds

Solid surface is one of the best long-term values if the budget allows it. It feels more substantial than thin panel products, avoids grout maintenance, and can often be repaired if it gets scratched.

The product data is strong. Corian solid surface polymer in 1/2-inch (13 mm) thickness is listed with 6000 psi tensile strength, 1.5 x 10^6 psi tensile modulus, and 7890 psi flexural strength in this specification on solid surface shower and tub wall surrounds. The same source notes installed costs of $2,000 to $3,500 and lifespan beyond 20 to 30 years. It also notes 99% water impermeability post-install.

In practical terms, that means fewer maintenance calls, easier cleaning, and a surround that still feels solid years later. For homeowners planning to stay put, or property managers trying to reduce repeat turnover work, solid surface is often money well spent.

Best uses include:

  • Primary bathrooms where durability matters more than lowest first cost
  • Higher-end remodels that still need easy cleaning
  • Commercial or multi-unit settings where repairability has value

The main drawback is the upfront price. Still, compared with redoing a cheaper surround too soon, the math can work out in its favor.

To sort out whether a tiled look is worth the added joints and maintenance, it can help to compare tile options before choosing between true tile and large-format wall panels.

PVC and composite wall panel systems

PVC and other composite panels fill a specific niche. They install quickly, cover a lot of wall area, and can be useful when a bathroom needs a practical reset without the time and cost of tile.

High molecular PVC systems are specified at a minimum 0.090-inch sheet thickness, with ceiling-height models reaching about 82 inches from tub rail to ceiling and covering 100+ square feet in larger applications, according to these PVC tub and shower surround specifications. The same source notes that standard 60×30-inch 3-piece kits cover about 40 to 45 square feet, and that full-wall coverage can cut labor 20 to 30% versus custom tile.

That labor savings is useful in occupied units, insurance repairs, and commercial work where downtime costs money. Some systems also handle custom trimming better than off-the-shelf fiberglass units.

The trade-off is longevity and feel. Many of these products are better suited to utility-minded remodels than premium bathrooms, especially if the room gets hard daily use.

A good fit:

  • Rental properties
  • Basement or secondary bathrooms
  • Commercial washrooms where cleanability matters more than a custom finish

A poor fit:

  • High-end remodels
  • Homes where owners want the surround to feel substantial and age gracefully

Here’s a useful installation overview if you want to see how some systems are assembled in the field.

Tile surrounds

Tile remains a strong option, especially in older Puget Sound homes where walls are rarely simple and the bathroom may need custom cuts around windows, niches, sloped ceilings, or trim conditions. A good tile installer can solve design problems that prefab panels cannot.

Tile also asks more from the assembly. More joints mean more maintenance, and the finish is only as reliable as the substrate, membrane, and sealant work behind it. If you want a tile surround, make sure the installer also understands wet-area waterproofing in construction, not just layout and grout lines.

Tile makes the most sense when:

  • The bathroom has unusual dimensions
  • The design needs a custom layout or period-appropriate finish
  • The owner is willing to maintain grout and sealant joints

Tile causes trouble when:

  • Waterproofing is treated as a separate issue instead of part of the whole wall assembly
  • Cheap setting materials are used to save a little money upfront
  • Corner joints, tub transitions, and penetrations are finished carelessly

In Seattle craftsman homes and Tacoma foursquares, tile can be the right answer. It just has to be built correctly.

Engineered stone and cultured marble style systems

Engineered stone and cultured marble products sit between basic panel systems and premium solid surface. They can give a bathroom a cleaner, more upscale look than fiberglass or thin acrylic, often with fewer joints than tile.

Their weak point is impact performance and repair expectations. The solid surface specification cited above compares solid surface favorably against engineered stone in impact resistance, noting that solid surface is less likely to crack under normal residential impacts such as dropped shampoo bottles. That does not rule out engineered stone. It means the buyer should understand how the product behaves before choosing it.

These systems work best for owners who want an upgraded look without committing to a full tile installation. If the priority is maximum repairability and long service life, solid surface is often the better value.

Beyond the Panels Waterproofing and Backer Boards

A surround can only perform as well as the assembly behind it. If the wall system isn’t built for moisture, even a premium finish won’t save the bathroom.

That’s where many remodels go wrong. Homeowners focus on panel style, color, and edge trim. The contractor should be focused just as hard on the substrate, waterproofing layers, penetrations, and transitions at the tub flange.

A bathtub during the installation process showing framing and concrete support wall in a bathroom renovation.

What should be behind the surround

In wet areas, the usual conversation is between cement board, fiber cement board, and waterproof foam board systems. Each has a place. What matters is using a system designed for a wet wall and installing it completely.

Common good choices include:

  • Cement board for tile assemblies where rigidity and moisture tolerance matter
  • Fiber cement board when the installer wants a strong, stable tile backer
  • Waterproof foam boards such as KERDI-BOARD style systems for lighter, integrated waterproofing assemblies

What should raise concern is ordinary drywall inside a tub surround area. Even moisture-resistant drywall is not the same thing as a true wet-area assembly. Once water finds a path through a seam or penetration, the wall can deteriorate quickly.

For a plain-language overview of why this matters, this guide on what waterproofing means in construction is a useful starting point.

Waterproofing is a system, not a product

A lot of failures happen because people talk about “waterproof walls” as if one material handles everything. It doesn’t.

A reliable tub surround assembly usually includes several coordinated steps:

  1. Wall prep
    The framing is checked, shimmed, or corrected so the surround sits flat and drains the way it should.

  2. Backer selection
    The right board is installed for the chosen finish material.

  3. Seam treatment
    Joints, corners, and fastener penetrations are handled according to the system requirements.

  4. Tub-to-wall transition
    The detail at the tub flange is built so water returns to the tub, not behind it.

  5. Penetration sealing
    Valves, spouts, and accessory mounts are sealed without guesswork.

If the installer can’t explain the waterproofing sequence clearly, that’s a warning sign.

Where older bathrooms need extra attention

Puget Sound remodels often need more than standard prep. In older houses, the walls may bow, old finishes may hide damage, and windows inside the splash area may need a full waterproof trim strategy.

That’s one reason some “one-day install” promises fall apart on real remodels. The visible surround might go up quickly. The hard part is making sure the substrate is flat, stable, and dry enough for a long-lasting result.

A good surround installation looks simple when it’s finished. The work that makes it reliable is mostly the part you don’t see.

Important Design and Accessibility Considerations

A bathtub surround should look right in the room, but it also needs to work for the people using it. That includes how it feels to clean, how it handles daily wear, and whether the bathroom will still be practical years from now.

For bathtub surrounds, style and function must align. A glossy acrylic panel can brighten a small hall bath in Kent. A matte solid surface surround can create a more polished finish in a Seattle primary bath. Tile can add character in older Tacoma homes where a perfectly symmetrical panel layout may not suit the architecture.

A walk-in bathtub installed in a bathroom with safety grab bars and a beige tiled surround.

Design choices that age well

The safest design choice is usually the one that doesn’t fight the room. In practical terms, that means:

  • Large panels help small bathrooms feel less busy
  • Tile patterns add visual detail, but they also add maintenance points
  • Stone-look finishes can give a high-end appearance without the upkeep of natural stone
  • Neutral surround colors tend to stay relevant longer than highly specific trends

If the surround will sit next to a glass enclosure, it helps to think through those pieces together. Homeowners comparing configurations often find it useful to design your custom shower door before finalizing wall finishes, especially when trying to balance trim finishes, panel thickness, and door swing.

Accessibility starts behind the finish

Accessibility features should be planned before the walls are closed up. That’s true whether the project is for aging in place, post-injury recovery, or commercial use where safer access matters.

Grab bars, handheld showerheads, low-threshold entries, and seating all require backing and layout planning. Some surround materials make that easier than others. Tile gives flexibility for accessory placement, but the wall backing still has to be there. Solid surface and panel systems can look clean and modern, but they also need support points mapped out in advance.

Important questions to ask:

  • Will this tub or shower area need grab bars now or later?
  • Is there a user who has limited mobility or balance concerns?
  • Will a handheld shower make the space easier to use?
  • Should shelving be recessed, surface-mounted, or built in?

For households planning ahead, this page about a handicap accessible shower gives a good overview of what to think about before final design selections are locked in.

The best accessible bathroom doesn’t look institutional. It looks intentional, comfortable, and easy to use.

Practical comfort matters

A surround should also support everyday comfort. Shelf placement, cleaning reach, glare from glossy finishes, and how cold or warm a material feels all affect whether people end up liking the bathroom once the remodel is done.

That’s why the “best” bathtub surround option is rarely just a material decision. It’s a use decision.

DIY Installation vs Hiring a Professional Contractor

A bathtub surround can look straightforward on delivery day and still go sideways once the walls are open. I see that often in Seattle and Tacoma area homes, especially where an older bathroom has been patched a few times, the framing is out of square, or past moisture has softened the wall cavity around the tub.

A careful DIY install can work in the right setting. A basic acrylic or fiberglass kit in a newer home, with a standard alcove and solid, dry walls, gives you a fair shot. But the work has to be accurate from the substrate forward. Panel fit, fixture cutouts, adhesive, corner treatment, and tub-to-wall sealing all have to be right the first time, because small water-entry points rarely stay small in our climate.

When DIY can work

DIY is more realistic if the project looks like this:

  • Standard alcove tub with predictable dimensions
  • Walls that are dry and solid after demolition
  • No window in the wet area
  • No plumbing moves or framing repair
  • A surround system built for straightforward installation

Even with those conditions, attaching panels is only part of the job. Keeping water out of the wall assembly is what determines whether the installation holds up.

When a professional is the safer choice

Professional installation usually makes more sense in the kinds of bathrooms common around Puget Sound. Older homes often have bowed studs, plaster transitions, hidden rot at the tub flange, or layers of previous remodel work that were never corrected. Condensation and slow leaks also tend to leave more damage than homeowners expect.

Tile surrounds, custom panel layouts, in-shower windows, and accessibility upgrades raise the difficulty fast. So do tenant turns and primary bathrooms, where downtime and callbacks cost real money.

The expensive part of a failed install is rarely the surround itself. It is opening the walls again, replacing damaged backer, drying the cavity, repairing trim or flooring outside the tub area, and then reinstalling the surround correctly.

DIY mistakes usually do not show up on install day. They show up later at a seam, a corner, or the ceiling below the bathroom.

The practical decision

DIY can reduce labor cost up front. Hiring a contractor lowers the chance of leaks, manufacturer warranty problems, uneven panel lines, and tear-out work a year later.

For a low-use guest bath with simple conditions, DIY may be a reasonable choice. For a main bath, an older Seattle craftsman, a Tacoma rental, or any bathroom where moisture control matters more than first cost, professional installation is usually the better value.

If you are still weighing scope, budget, and how much risk makes sense for your property, this bathroom remodel planning guide will help you sort out those decisions before materials are ordered.

Finding the Right Remodeling Partner in the Puget Sound

The right contractor for a bathtub surround project isn’t just someone who can install panels or tile. You want a remodeling partner who understands moisture management, older regional housing stock, and the difference between a quick cosmetic fix and a durable bathroom assembly.

What to look for

A few things separate a dependable contractor from a risky one:

  • Local remodel experience
    A contractor who regularly works in Seattle, Kent, Tacoma, and the communities between them will be more prepared for older wall conditions, window details, and uneven framing.

  • Clear waterproofing approach
    Ask what goes behind the surround, how corners are treated, and how the tub-to-wall transition is handled.

  • Detailed written proposals
    Good proposals explain scope, not just price.

  • Relevant project examples
    Look for similar bathrooms, not just pretty finished photos.

  • Communication style
    Bathroom remodels go better when the contractor explains options plainly and flags issues early.

For anyone planning a larger bathroom update, this guide to bathroom remodel planning is a helpful checklist for the conversations you should be having before materials are ordered.

A good fit matters

Some companies are built for very large projects only. Others focus only on quick-turn bath systems. Many homeowners and property managers need something in between. They want a contractor who can handle small to mid-size remodels, tenant improvements, and moisture-related repairs without treating the project like an afterthought.

That’s especially important when the surround decision is tied to broader work such as drywall repair, trim replacement, waterproofing, painting, or floor restoration.

Frequently Asked Questions About Bathtub Surrounds

Can you install a new surround over existing tile

Sometimes, but it depends on the condition of the existing tile, the wall flatness, and whether there’s any hidden moisture damage. Covering tile can make sense in limited situations with certain panel systems. It’s a poor choice if the substrate is loose, uneven, or already leaking.

What’s the best bathtub surround option for a rental property

For many rentals, acrylic or a durable panel system is the practical choice because cleaning is easier and grout maintenance is reduced. The right answer still depends on turnover, expected wear, and whether the bathroom walls need correction before new materials go in.

How do you maintain a solid surface surround

Solid surface is one of the easier materials to live with. Regular cleaning with non-abrasive products usually does the job, and minor surface scratches can often be repaired rather than forcing a full replacement. That repairability is one reason many owners choose it for long-term value.

Are eco-friendly bathtub surround options available

Yes, but “eco-friendly” can mean different things. Some owners focus on longevity and choosing a material that won’t need replacement soon. Others care more about manufacturing content or the ability to repair instead of replace. In practice, the most sustainable option is often the one that stays watertight, lasts well, and avoids repeated tear-outs.

Is tile always the most upscale option

No. Tile can look excellent, but upscale doesn’t always mean best. A well-designed solid surface or slab-look panel surround can feel cleaner, more modern, and easier to maintain than a busy tile layout with a lot of grout joints.


If you’re weighing bathtub surround options for a home, rental, or commercial bathroom between Seattle and Tacoma, Wheeler Painting & Restoration Services can help you sort through the trade-offs. Their team handles residential remodeling, tenant improvements, waterproofing, and restoration work with the practical local experience these bathrooms require. Reach out for a consultation if you want a surround that looks good, protects the structure, and holds up in the Puget Sound.