Tag Archive for: exterior painting

Paint or Stain? Guide for Kent, Seattle, Tacoma

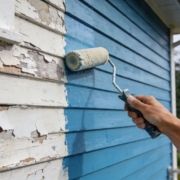
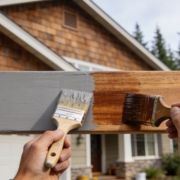
A lot of people in Kent, Seattle, and Tacoma end up at the same point. The deck boards are weathered, the cedar siding has lost its crisp look, or a commercial entry has started showing mildew and wear. You know the surface needs protection, but the next question gets harder fast. Should you paint it, or should you stain it?

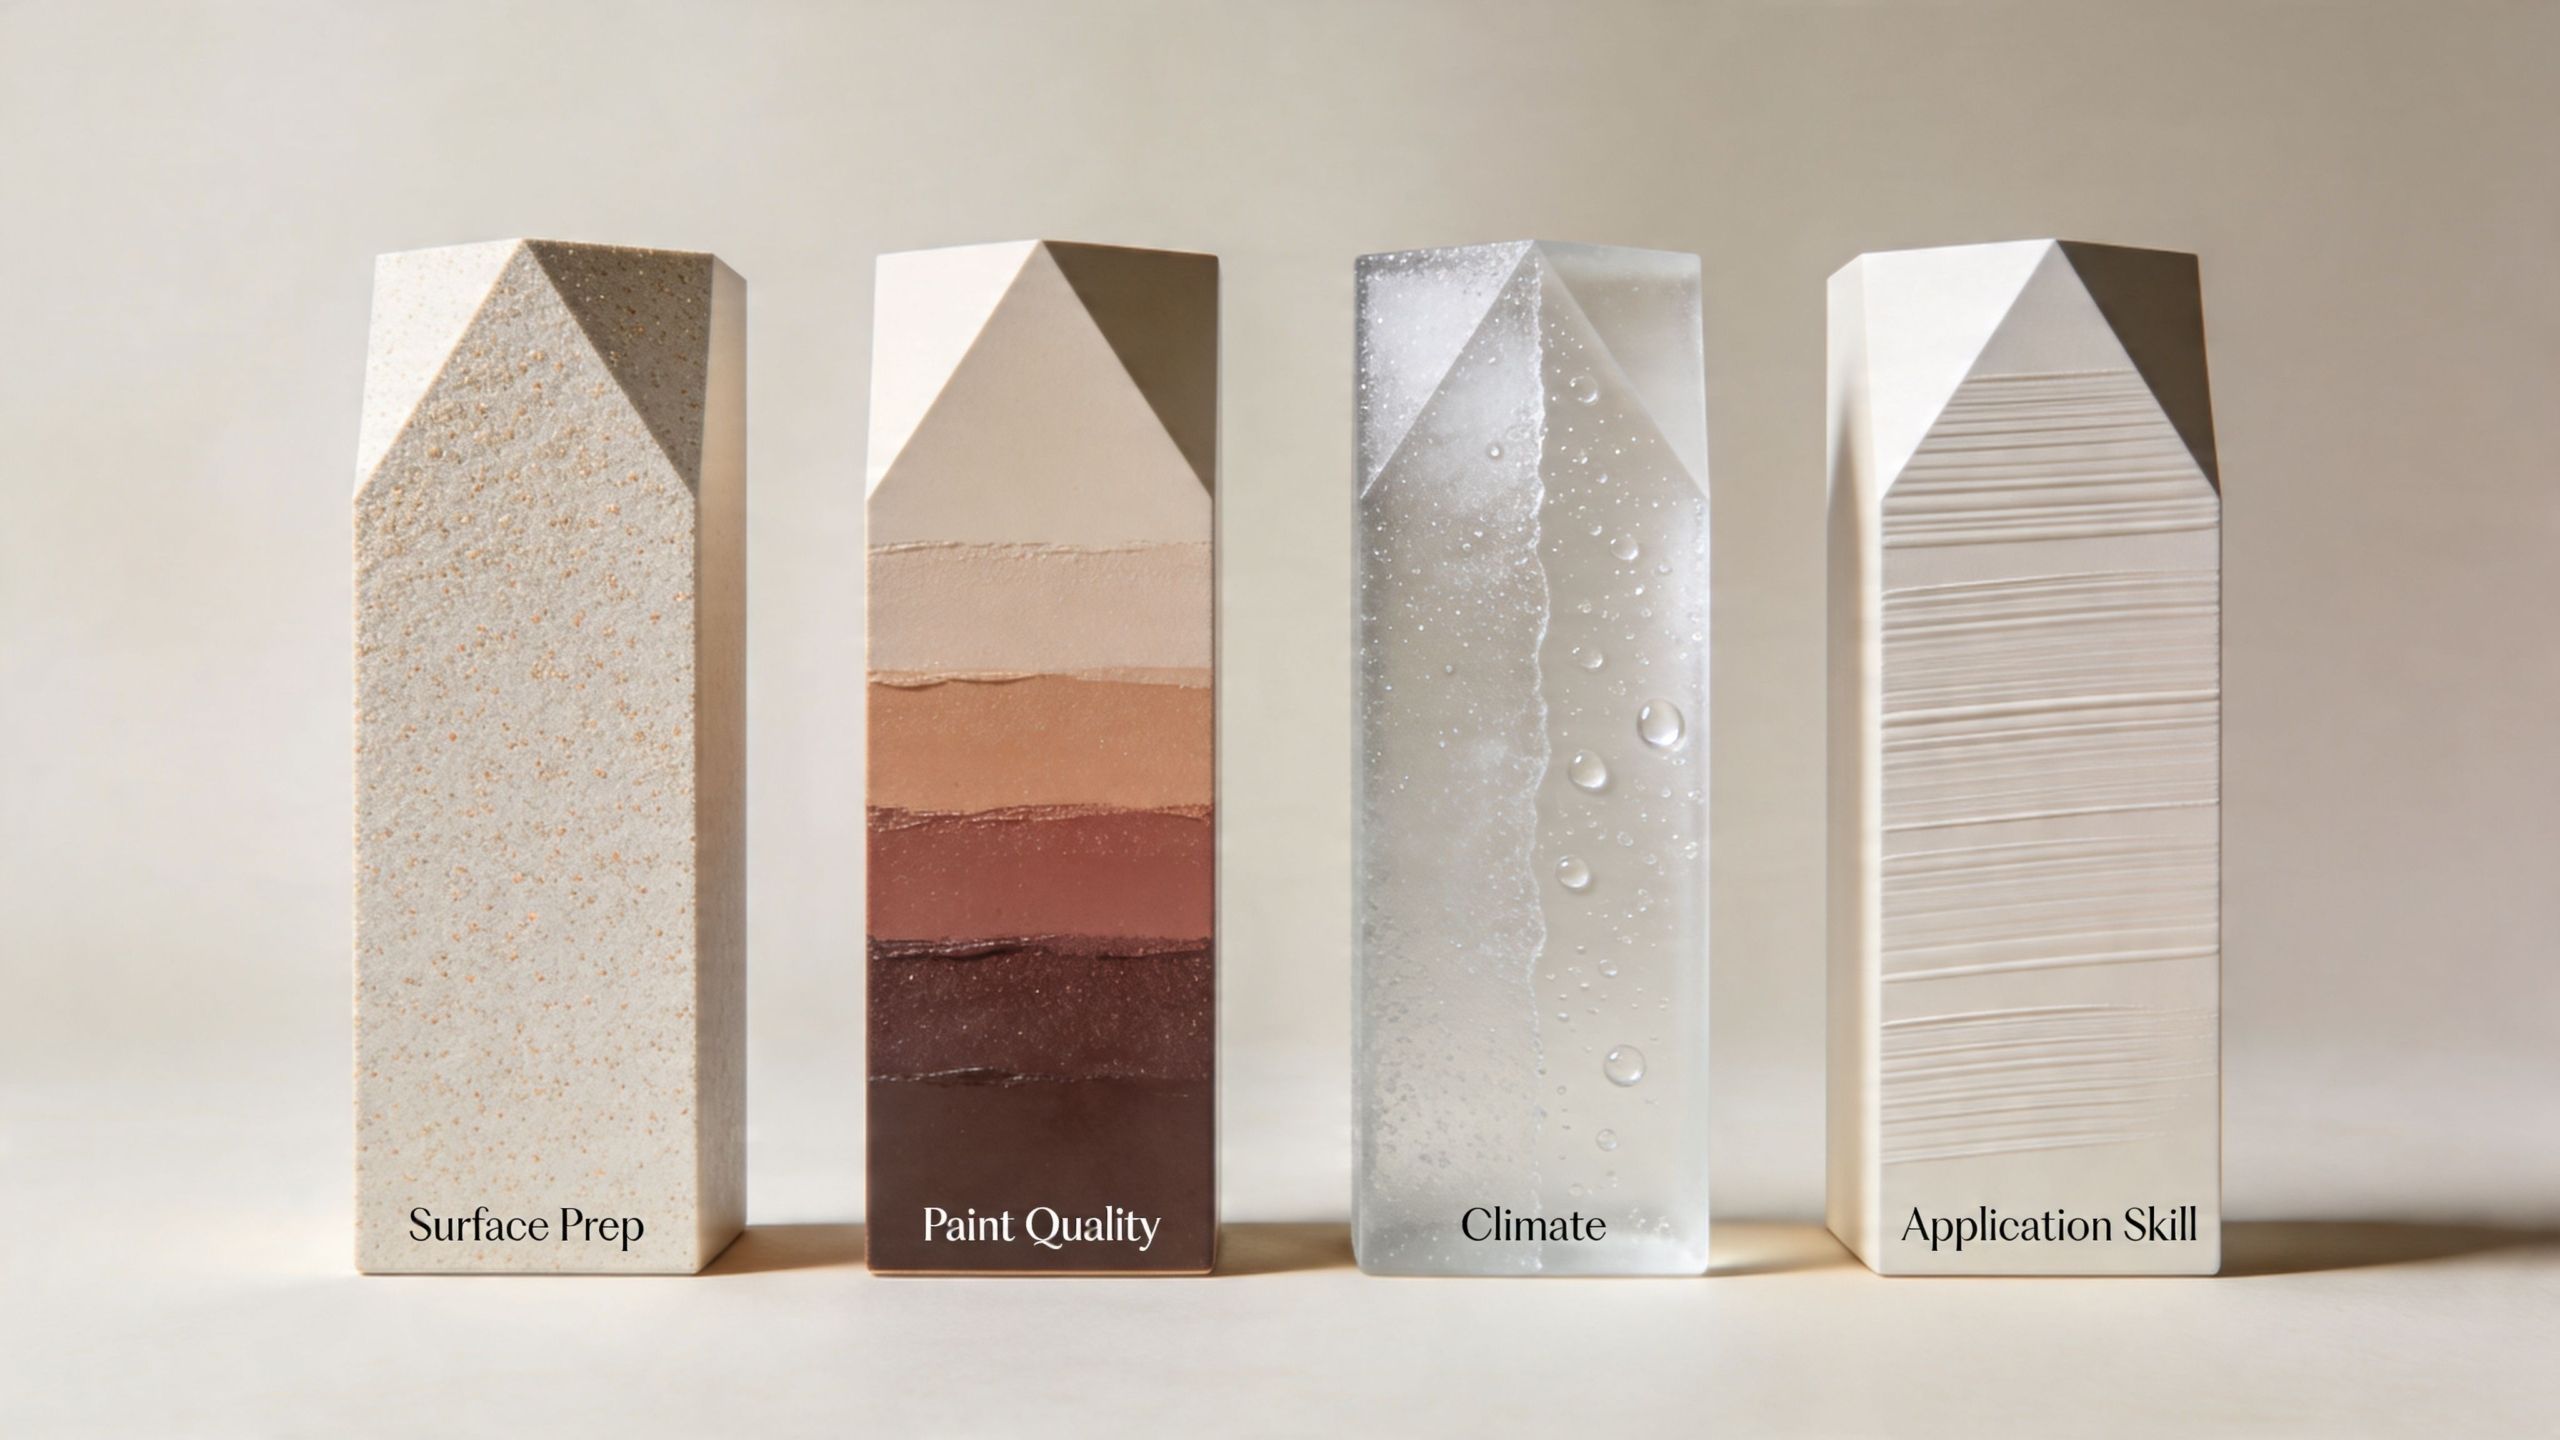
That choice matters more in Puget Sound than it does in many other regions. Moisture sits on exterior surfaces for long stretches. Shade slows drying. Then summer shows up and UV starts working on the same boards and siding that just spent months damp. What looks like a simple finish decision often turns into a maintenance decision, a durability decision, and a budget decision at the same time.

Paint has a long history as a protective finish. The first recorded paint mill in America was established in Boston in 1700 by Thomas Child, and in 1867 ready-mixed paint changed the trade by making professional-quality coatings far more accessible, as noted by the American Coatings Association’s paint industry history. Today, that same basic purpose still drives the decision on homes and commercial properties across the Puget Sound region. You want a finish that looks right, holds up, and doesn’t create bigger repair problems later.

The mistake is treating paint or stain as just a color choice. It isn’t. On some surfaces, paint is the practical answer. On others, stain is the smarter system because it works with the wood instead of sealing over it. The right answer depends on what you’re coating, how exposed it is, how much maintenance you can tolerate, and whether you care more about hiding the surface or showing it.

The Puget Sound Homeowner’s Dilemma Paint or Stain

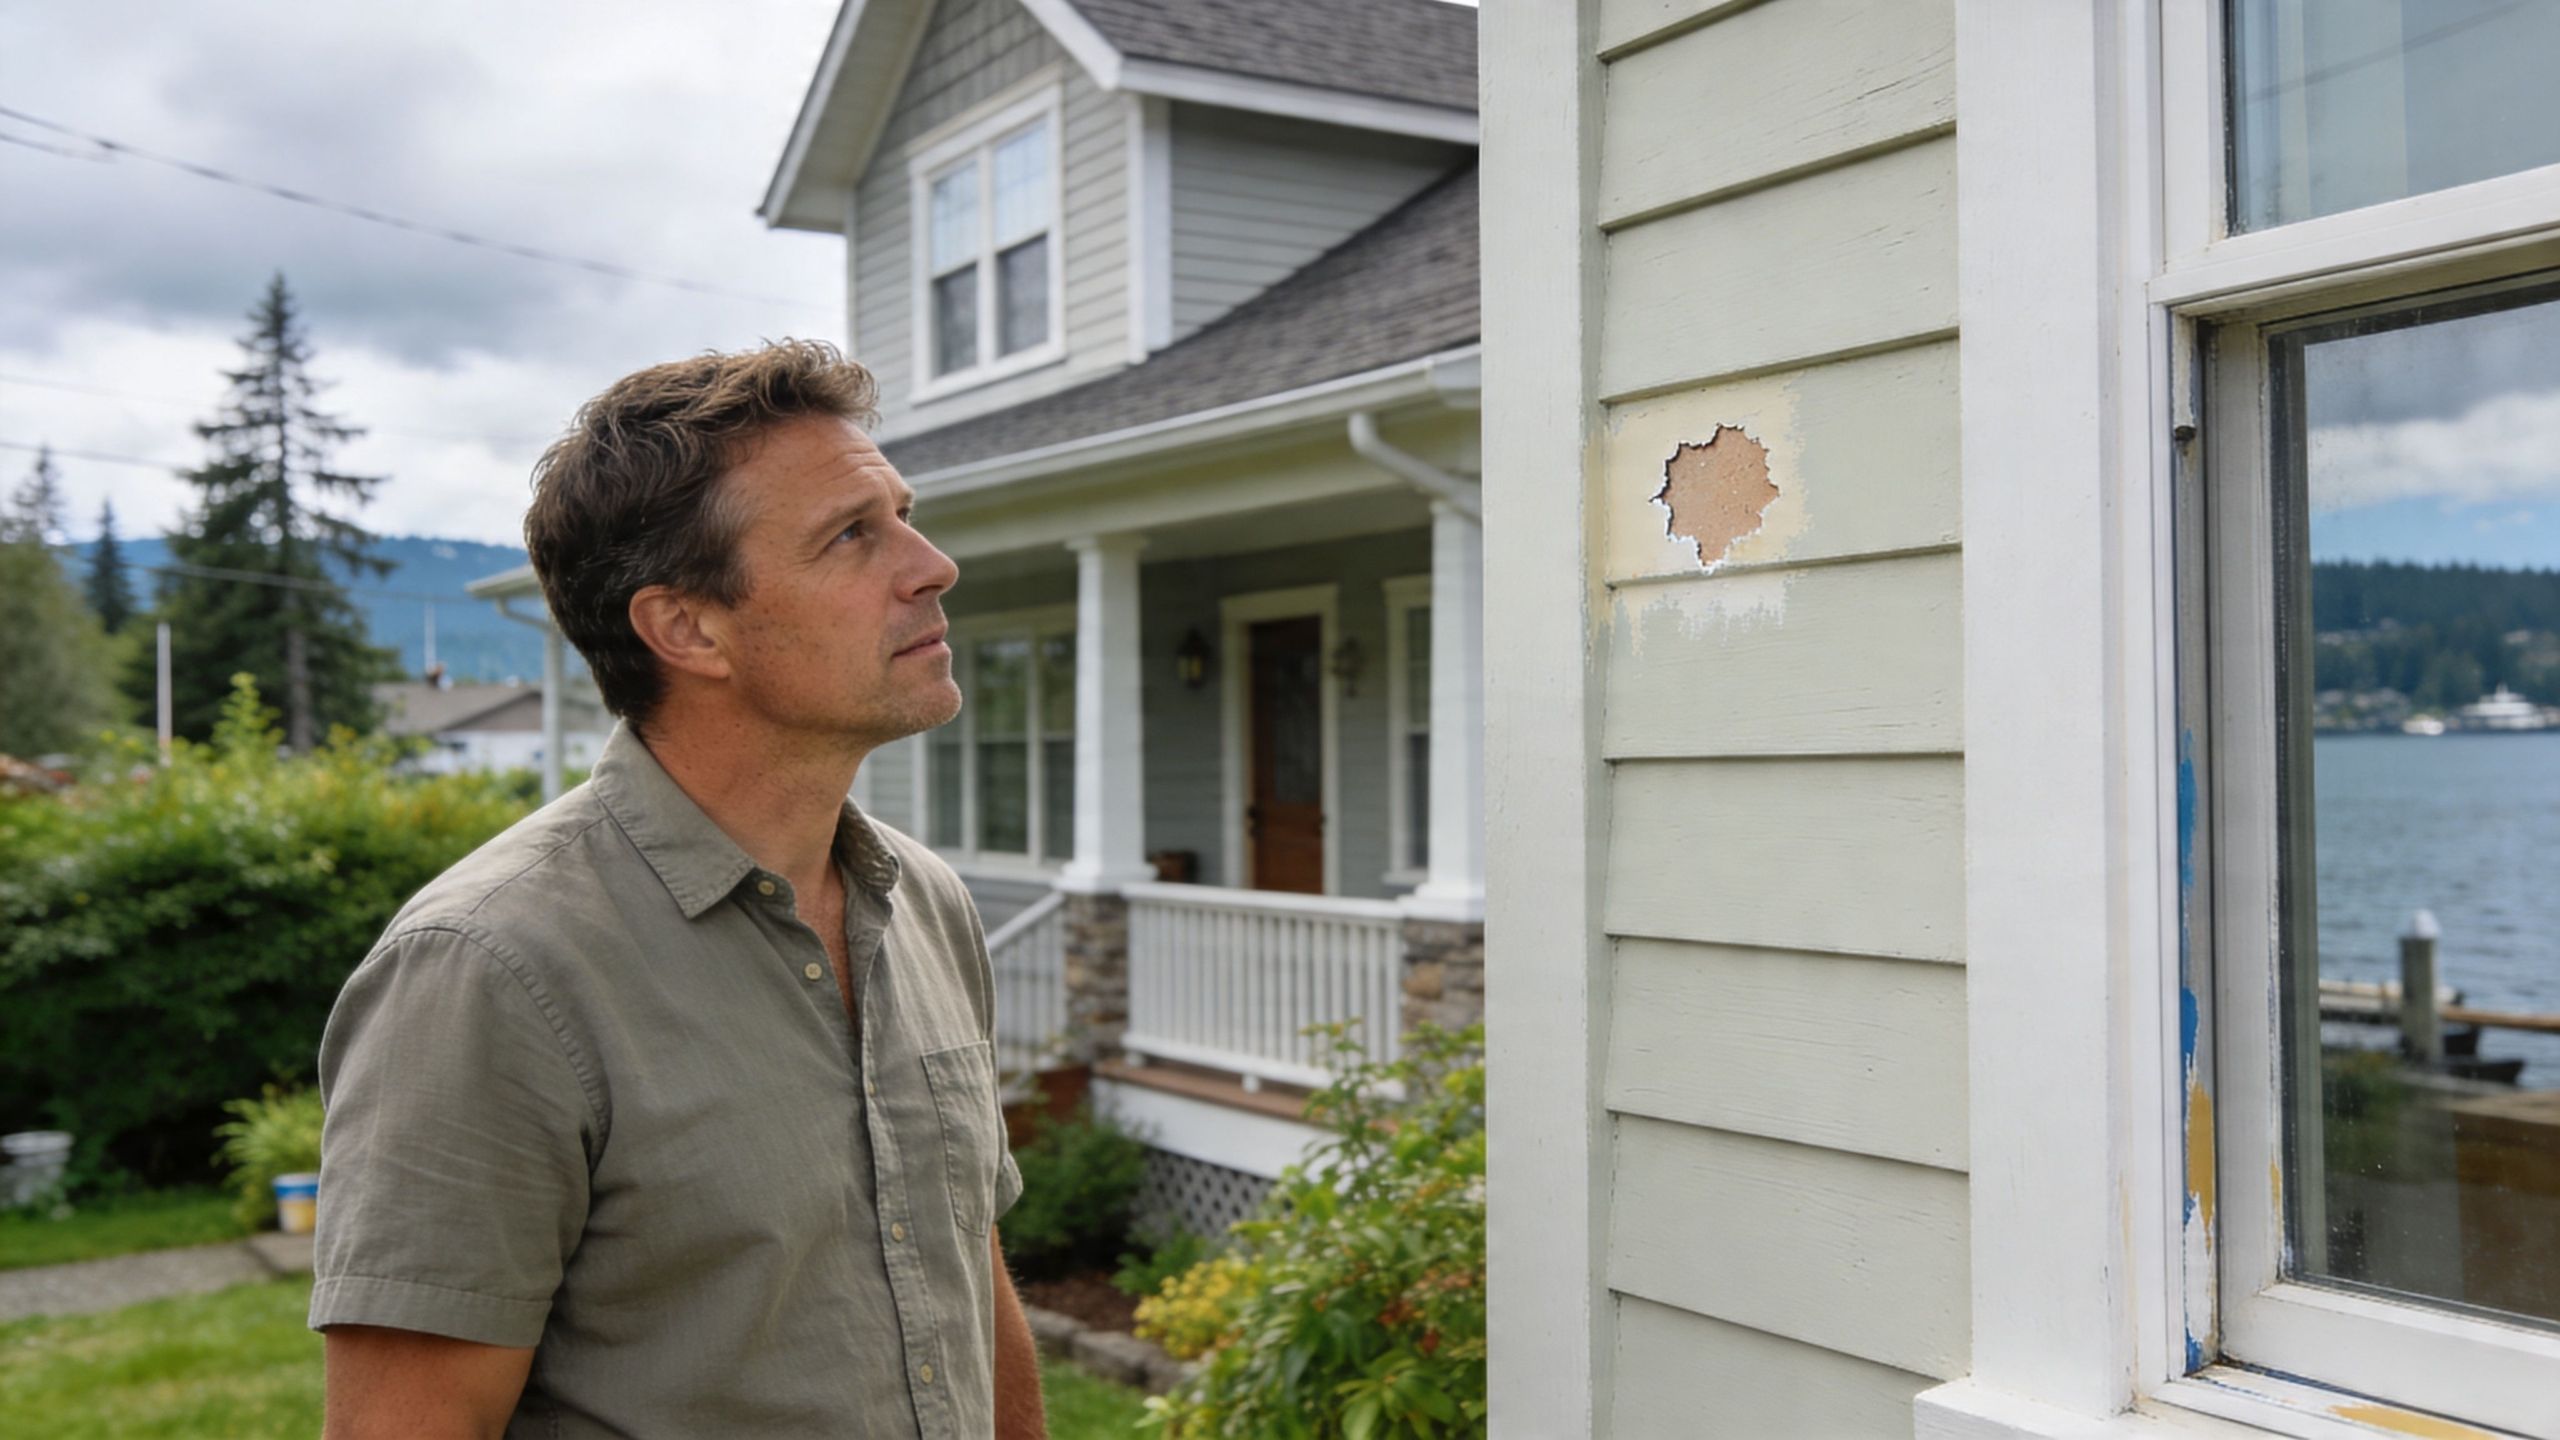
A common local scenario goes like this. A homeowner in Tacoma has a cedar fence and a back deck that looked great a few years ago, but now the boards are uneven in color and the rails stay damp well into the day. Or a facility manager in Seattle is trying to decide how to finish exterior wood trim on a small commercial renovation without setting up constant repaint cycles.

In both cases, the finish has to do more than improve appearance. It has to protect the material through damp winters, mildew pressure, and seasonal sun. That’s where people often get pulled in two directions. Paint offers a cleaner, more uniform look and can fit a wider color scheme. Stain keeps the natural character of the wood and often behaves better when moisture is part of the job.

Here’s the practical problem. The wrong choice can look fine at first and still fail you later. A painted deck may look sharp when it’s fresh, then start trapping moisture where the wood needs to breathe. A stained siding job may preserve the grain beautifully, but if the owner expected a fully opaque, trim-perfect look, they may be disappointed from day one.

Decision factor Paint Stain
How it looks Opaque finish that hides grain Natural look that shows grain
Where it works Wood, drywall, plaster, metal, and more Primarily wood
How it ages Can chip, scratch, or peel on poor surfaces Usually fades instead of peeling
Moisture behavior Forms a surface film Penetrates wood and allows more vapor movement
Common local use Trim, siding, interior walls, commercial interiors Decks, fences, wood siding, exterior wood features

In the Puget Sound, the finish that looks better on day one isn’t always the finish that performs better after a few wet seasons.

Paint and Stain The Fundamental Differences

Paint and stain don’t just look different. They work in different ways at the material level, and that’s why they succeed or fail on different surfaces.

What paint does

Paint forms a film on the surface. It has a higher binder content and around 300 grams of pigment per liter, which helps create a solid, protective layer over the substrate, while stain has higher solvent content and only 50 to 100 grams of pigment per liter so it can penetrate wood, according to Angi’s breakdown of stain vs. paint.

That film-building quality is why paint works across many materials. On a typical project, you can use it on drywall, trim, siding, plaster, and some metal surfaces. It’s also why paint gives you a broad design range. If you need a clean white fascia, a deep charcoal storefront accent, or a uniform finish on repaired trim, paint can deliver that look in a way stain cannot.
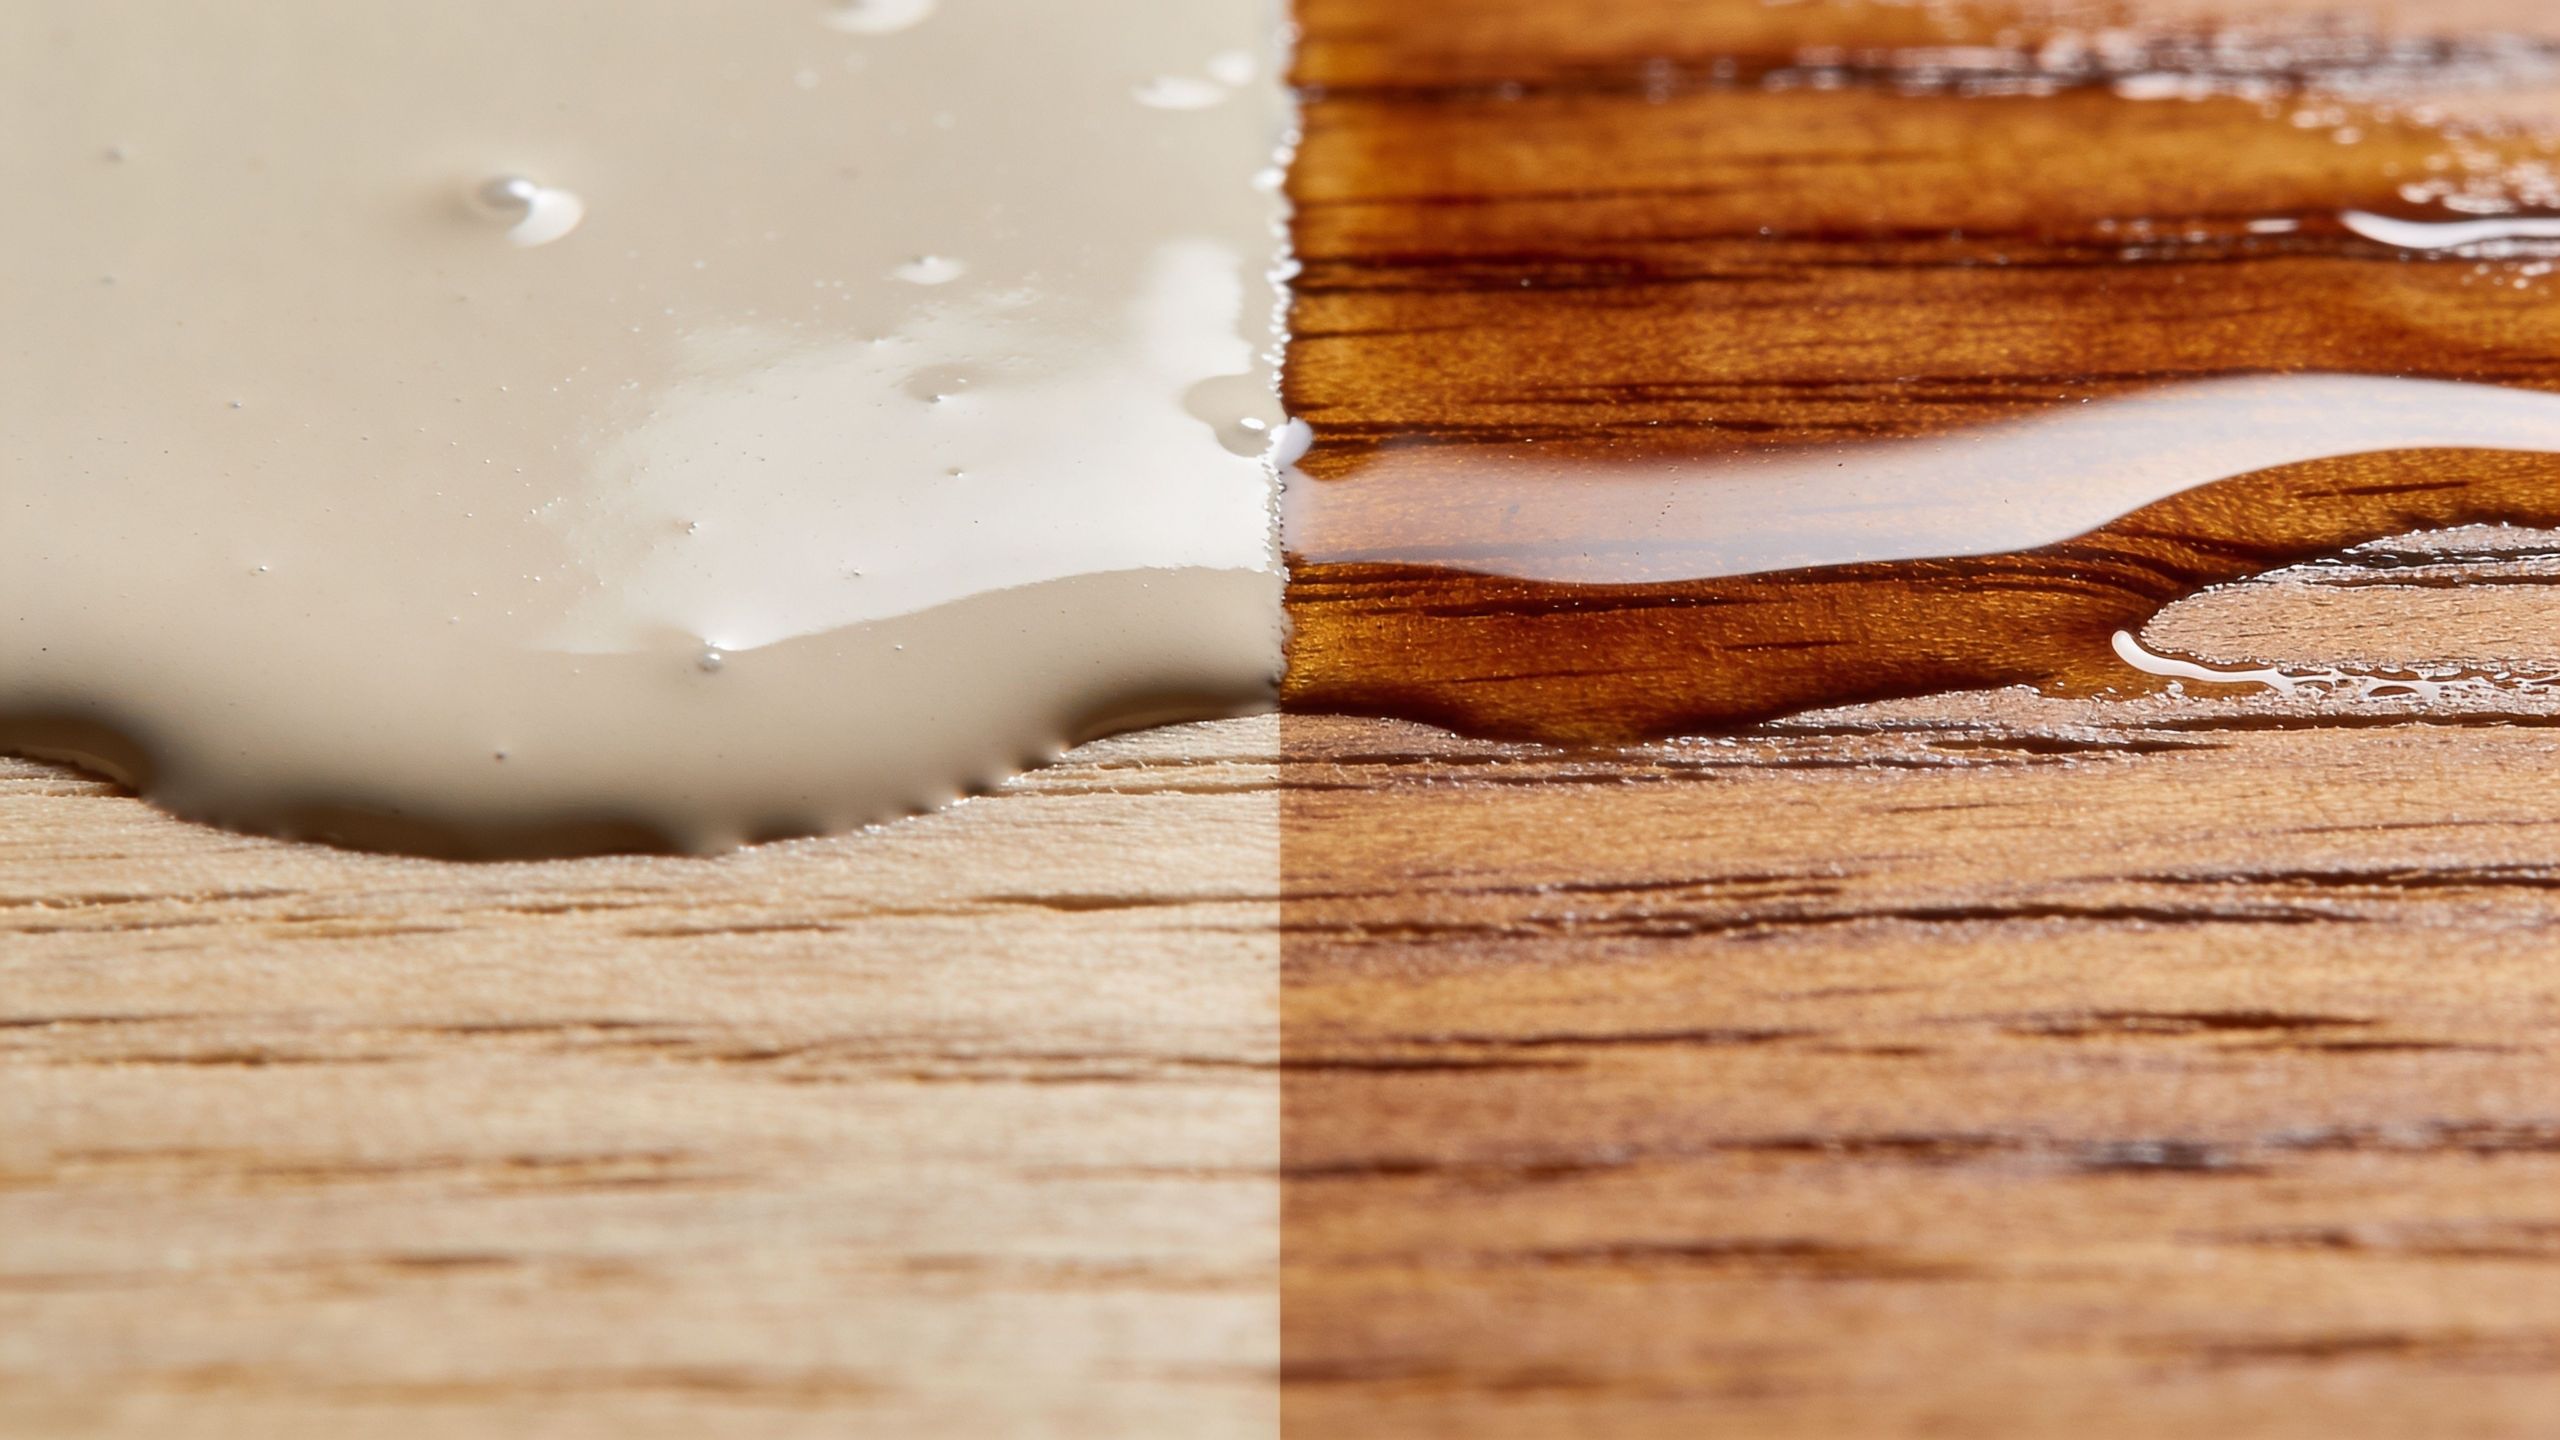
What stain does

Stain soaks into the wood instead of sitting on top of it. That’s the key idea. Rather than creating a thick outer skin, it colors and protects the wood while keeping more of the grain and texture visible.

That makes stain a wood-specific finish. It isn’t the tool for drywall or metal, and it isn’t meant to hide a rough patchwork of repairs the way paint can. But on wood that still has good character, stain often gives a richer and more natural result.

A close-up view comparing paint on raw wood versus wood stain on finished wooden flooring material.

Why one chips and the other fades

Understanding the behavior of paint and stain often proves challenging for property owners. Because paint stays on the surface, it can chip or peel when adhesion breaks down, especially on badly prepped wood or on areas that move and hold moisture. Stain usually behaves differently. It tends to wear away and fade from UV and weather exposure instead of lifting off in sheets.

That doesn’t mean stain is maintenance-free. It means its failure pattern is usually less dramatic and often easier to manage on exterior wood.

Clear coats change the result too

On floors, millwork, or interior wood trim, the topcoat system matters almost as much as the stain color. If you’re comparing finish systems for interior wood, this guide to the difference between oil and water-based polyurethane is useful because it explains why two stained surfaces can look and wear very differently even when the color underneath is similar.

Detailed Comparison Paint and Stain Head to Head

The best way to decide on paint or stain is to compare them where owners feel the consequences. Appearance matters. So do maintenance cycles, labor, and how the finish handles moisture over time.

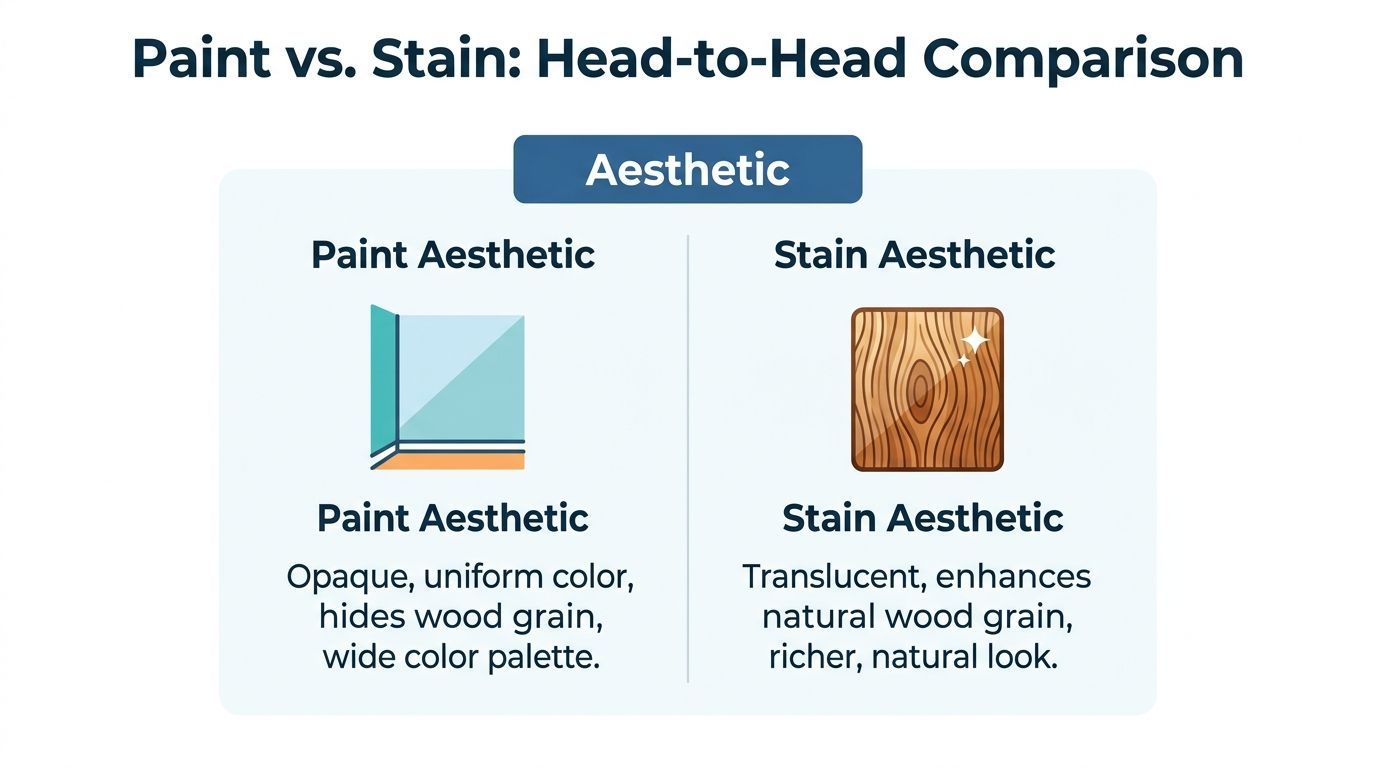
Aesthetic differences

Paint gives you control. If the goal is a consistent color across patched siding, replacement trim, or mixed materials, paint is usually the stronger option. It hides grain, covers visual inconsistency, and helps you match a broader exterior or interior scheme.

Stain does the opposite. It works best when the wood itself deserves to be seen. Cedar, fir, and other wood surfaces often gain character from stain because the grain remains part of the final look instead of disappearing under a solid film.

A comparison chart showing the aesthetic differences between painting and staining wood surfaces with descriptive text.

It's helpful to consider the following:

  • Choose paint when you want uniformity, strong color control, and the ability to hide flaws.
  • Choose stain when you want texture, variation, and the natural look of real wood.

Durability and lifespan

On paper, paint often wins the lifespan comparison. Sherwin-Williams notes that paint can last 5 to 10 years, while stain ranges from 2 to 8 years, depending on conditions and product type, in its guide to stain vs. paint for wood.

That number matters, but it doesn’t settle the decision. In our climate, the surface itself matters just as much as the calendar. A deck is the clearest example. Even though paint may last longer in ideal conditions, stain is often the better choice on decks in high-moisture areas because it allows wood to release moisture instead of trapping it.

Practical rule: Longer advertised lifespan doesn’t automatically mean better real-world performance on exterior wood in a damp climate.

Maintenance and recoating

Paint and stain age differently, so maintenance feels different too.

With paint, isolated failures often show up as chips, scratches, peeling edges, or visible breaks in the film. Those areas may be touch-up friendly at first, but once failure spreads, prep gets heavier. That can mean scraping, sanding, priming, caulking, and repainting multiple sections to regain a uniform finish.

With stain, maintenance is more about wear and fading. On fences, siding, and decks, a weathered stain often tells you it’s time for cleaning and another application rather than a full failure event. That’s one reason many owners prefer stain on wood they expect to maintain regularly.

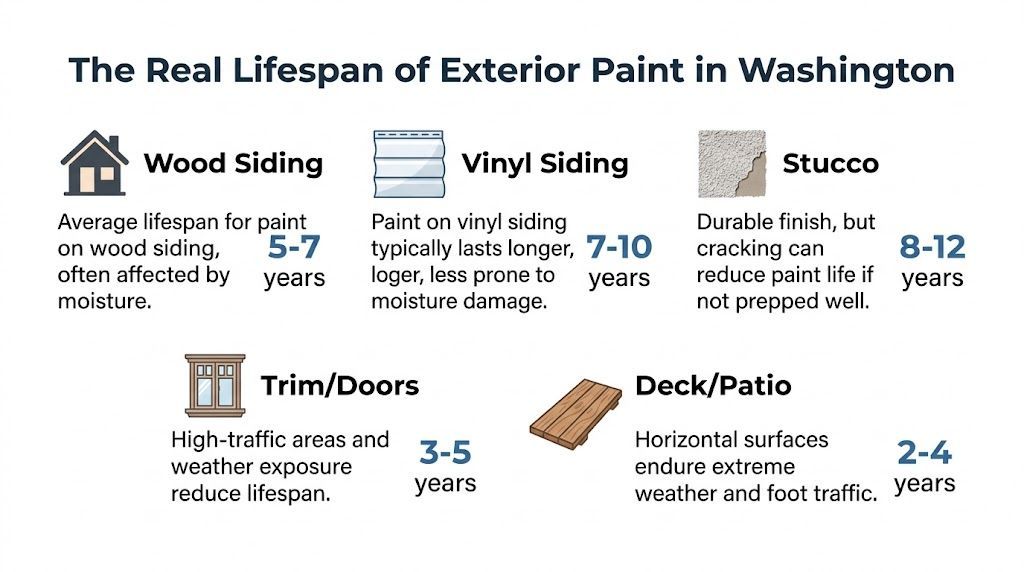
For readers comparing repaint cycles on other surfaces, this overview of how long house paint lasts is a good companion when you’re planning maintenance timing.

Cost and labor reality

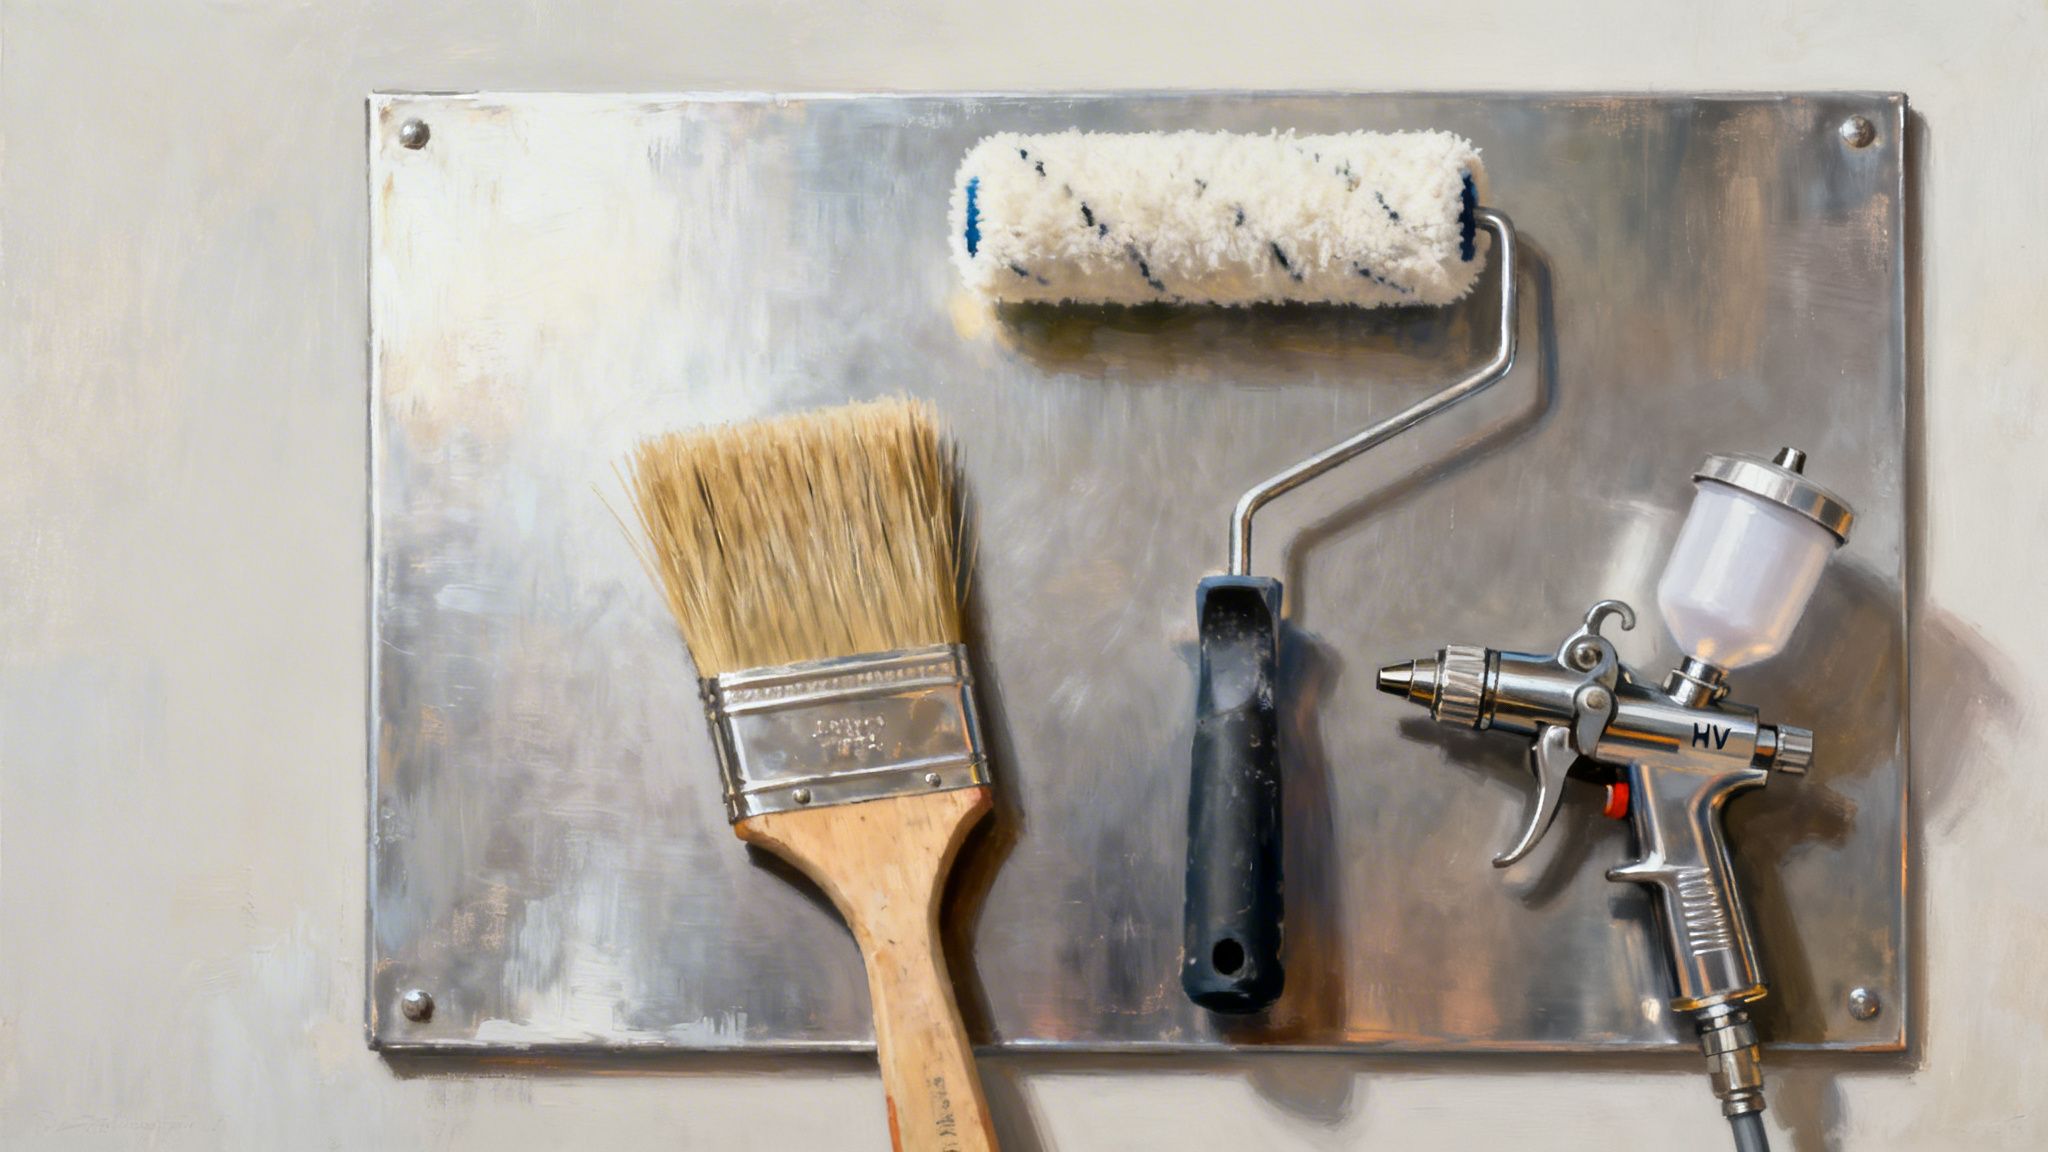
Material price alone won’t give you the full answer. Paint commonly needs more build in the system. Depending on the substrate and condition, you may be looking at primer, sealer, and multiple finish coats. Stain is often simpler to apply, especially on clean, absorbent wood, though it still demands good prep and even application.

Here are the trade-offs most owners notice:

  • Upfront labor for paint can rise fast when surfaces need repair, patching, sanding, and primer before finish coats go on.
  • Stain can save time on application because it’s often a lighter system, especially on exterior wood that doesn’t need an opaque look.
  • Long-term budgeting can favor either one depending on the surface. Paint may go longer between full recoats, but stain can be less disruptive to refresh.

Where each one usually makes sense

A balanced decision often looks like this:

Surface or goal Usually better fit
Deck boards and porches Stain
Exterior trim needing crisp color Paint
Cedar siding with visible grain Stain or solid stain, depending on look
Drywall and commercial interiors Paint
Mixed-material surfaces Paint
Feature wood elements Stain

The best finish is the one that fits the material, the exposure, and the maintenance plan. That’s the part generic national articles often skip.

Choosing the Right Finish for Your Project

Most owners don’t need a chemistry lesson. They need a practical answer for the actual surface in front of them. That’s where the paint or stain decision gets easier.

Decks and porches

For most exposed decks in Kent, Seattle, and Tacoma, stain is the safer choice. Deck boards take standing moisture, foot traffic, and direct sun. A finish that penetrates the wood and lets moisture move out tends to behave better than a surface film on horizontal boards.

A modern outdoor balcony deck featuring painted light gray floorboards next to a wooden privacy fence.

That doesn’t mean every stain is equal. Transparency level matters, prep matters, and wood condition matters. On weathered fencing and outdoor wood, this guide on the best stain for fences helps explain why product choice should match exposure and wood age.

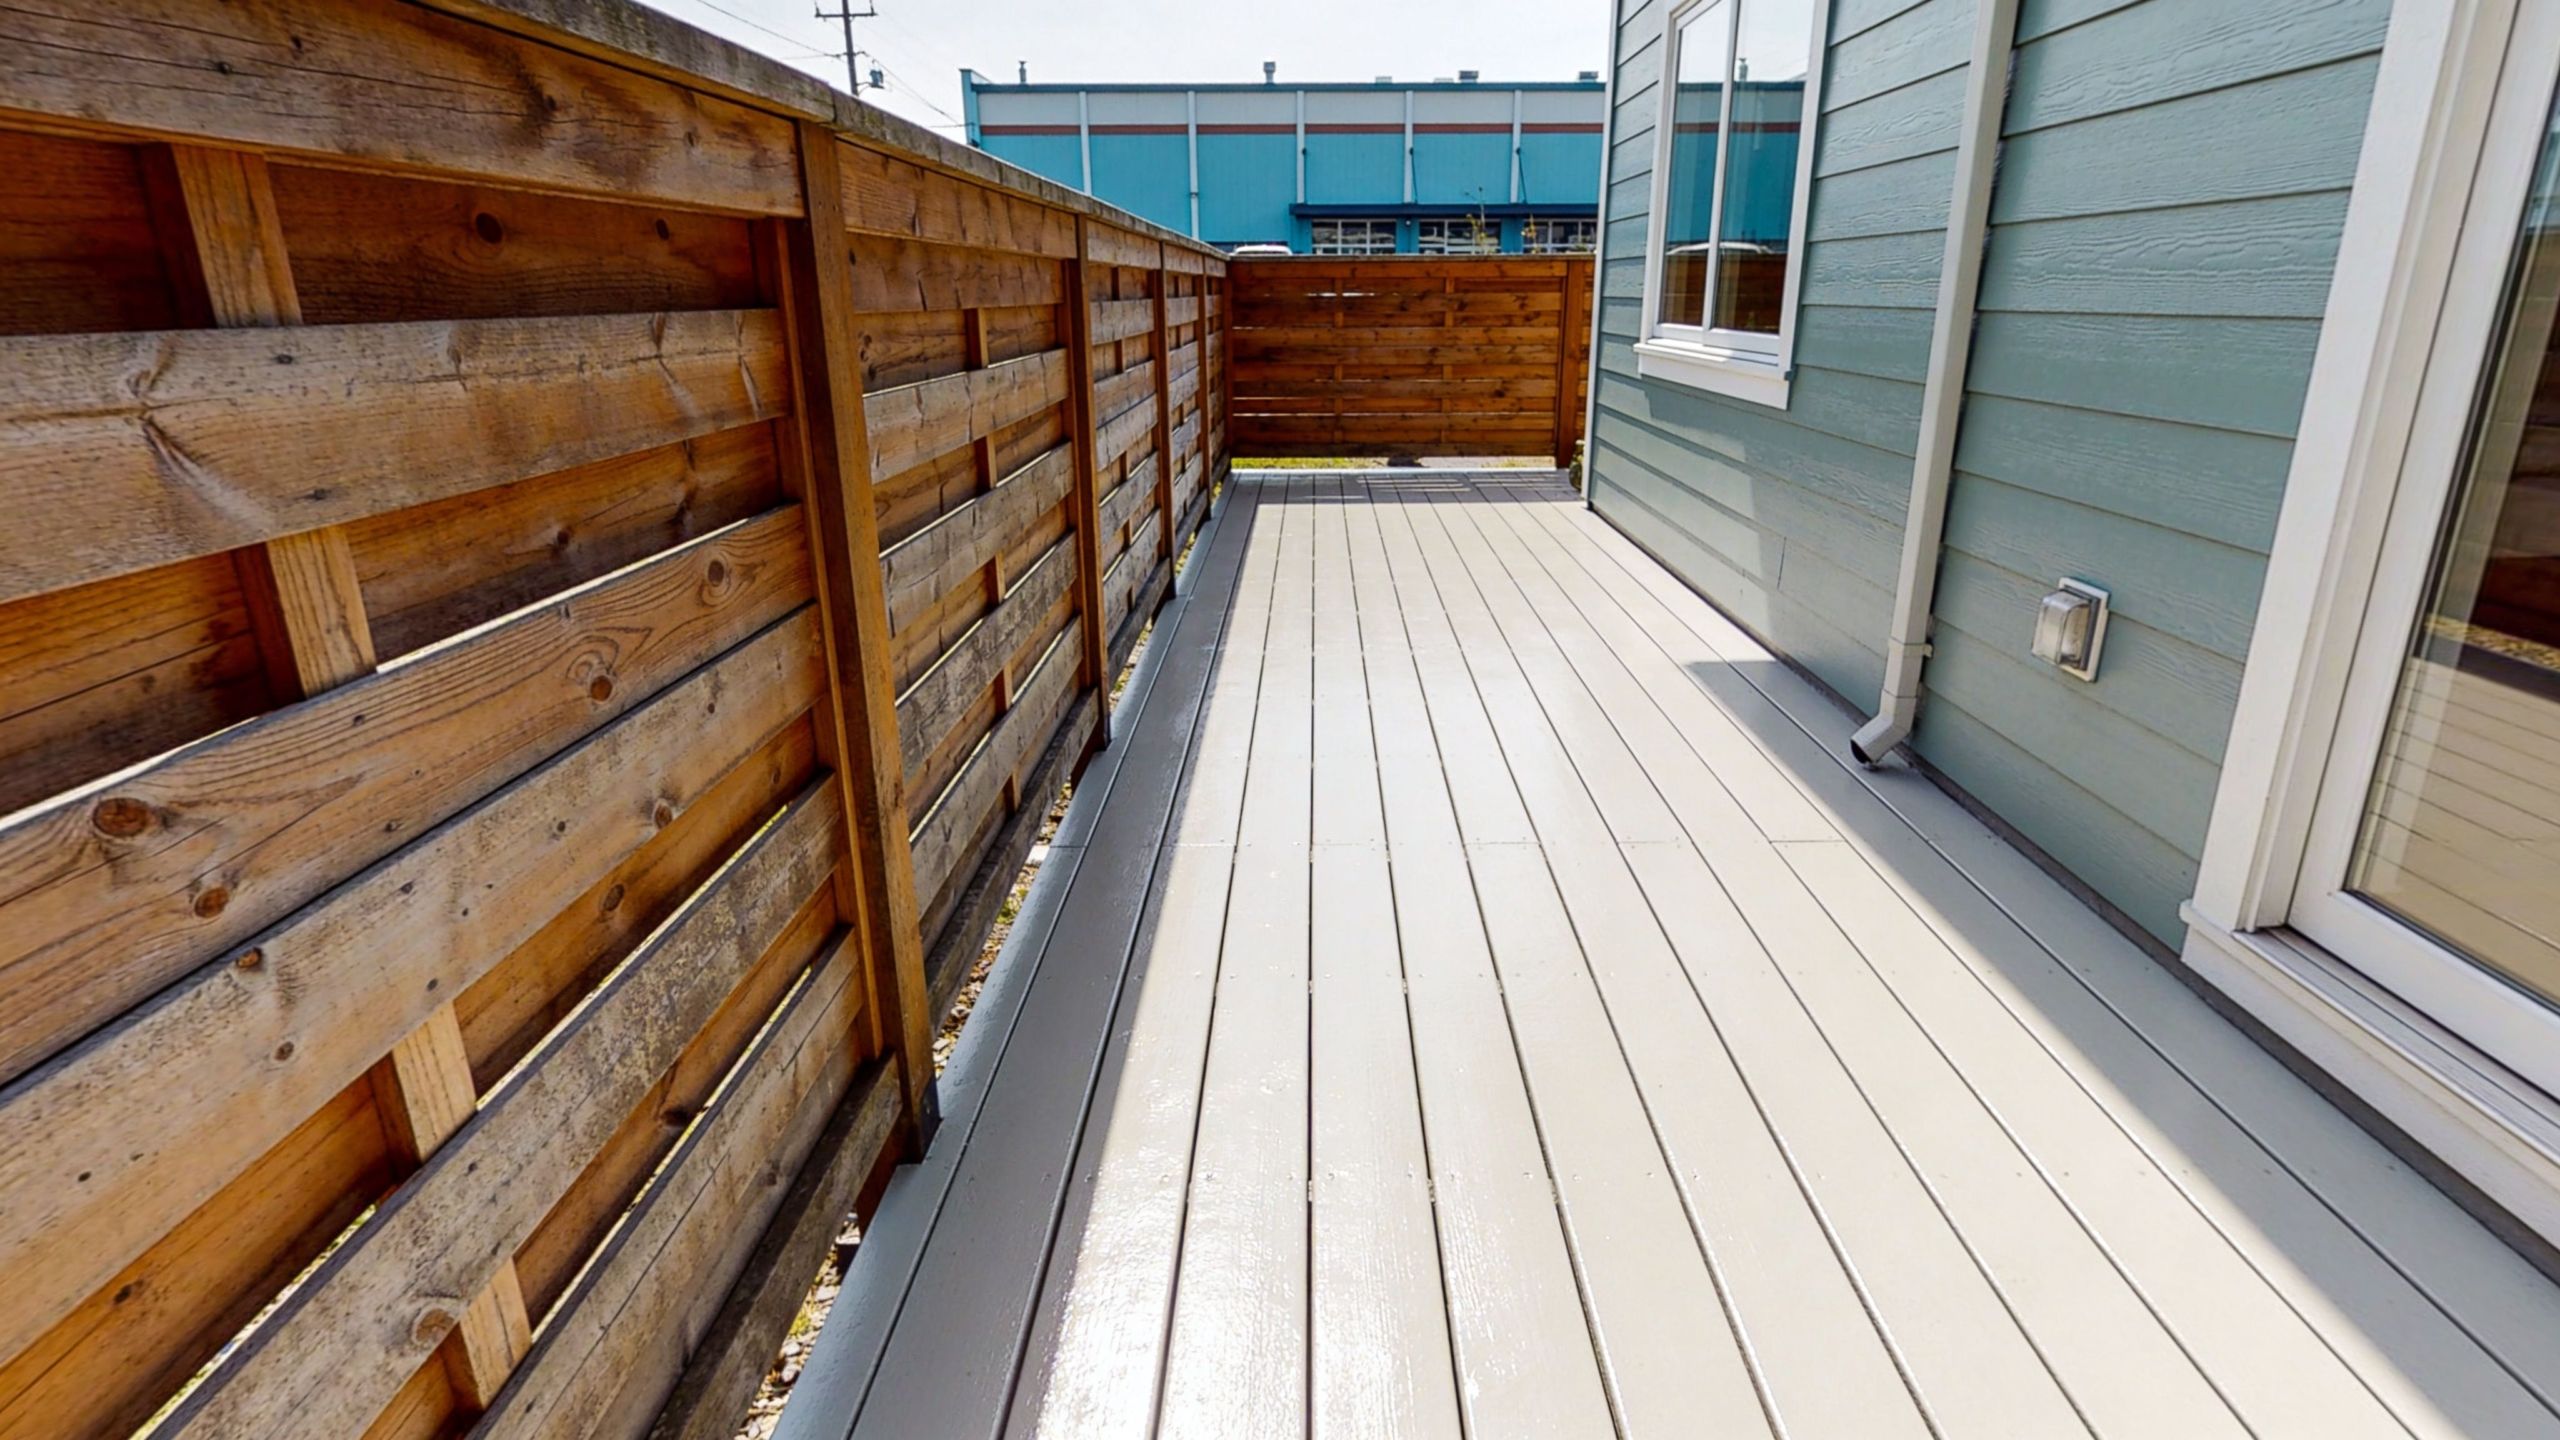
Siding and exterior wood walls

Siding is where the answer starts to split.

If the siding has attractive wood grain and the owner wants a natural exterior, stain can preserve that character. This is especially appealing on cedar and other species that already bring warmth and texture on their own. A well-chosen stain can make the house look like wood, not like a coated imitation of wood.

Paint is often the better answer when the siding has repairs, mixed boards, uneven coloration, or when the building design calls for a strong, controlled color. Commercial properties often fall into this category because consistency matters more than showcasing the grain.

Trim, fascia, and windows

Trim usually leans toward paint. These areas benefit from a crisp, defined edge and a uniform finish that ties the exterior together. On windows, door casings, fascia, and other architectural details, paint often creates the cleaner visual line that owners expect.

That said, mixed-finish assemblies require careful planning. If a project includes stained siding with painted trim, or stained interior wood next to painted casing, sequencing and masking become critical. Poor transitions are where otherwise good work starts to look sloppy.

When wood movement, moisture, and multiple finishes meet in the same assembly, the detailing work matters as much as the coating choice.

Commercial interiors and tenant improvements

For office space renovation, retail build-outs, and small to mid-size tenant improvement work, paint is usually the main finish because most interior commercial substrates are drywall, metal, or previously painted surfaces. It also supports tighter brand control for color and appearance.

Stain still has a role. Reception desks, wood feature walls, trim packages, doors, cabinets, and select millwork often look better with stain, especially when the goal is warmth rather than a flat uniform finish.

This short walkthrough is helpful if you want to see common field considerations before finalizing a finish plan:

Interior residential projects

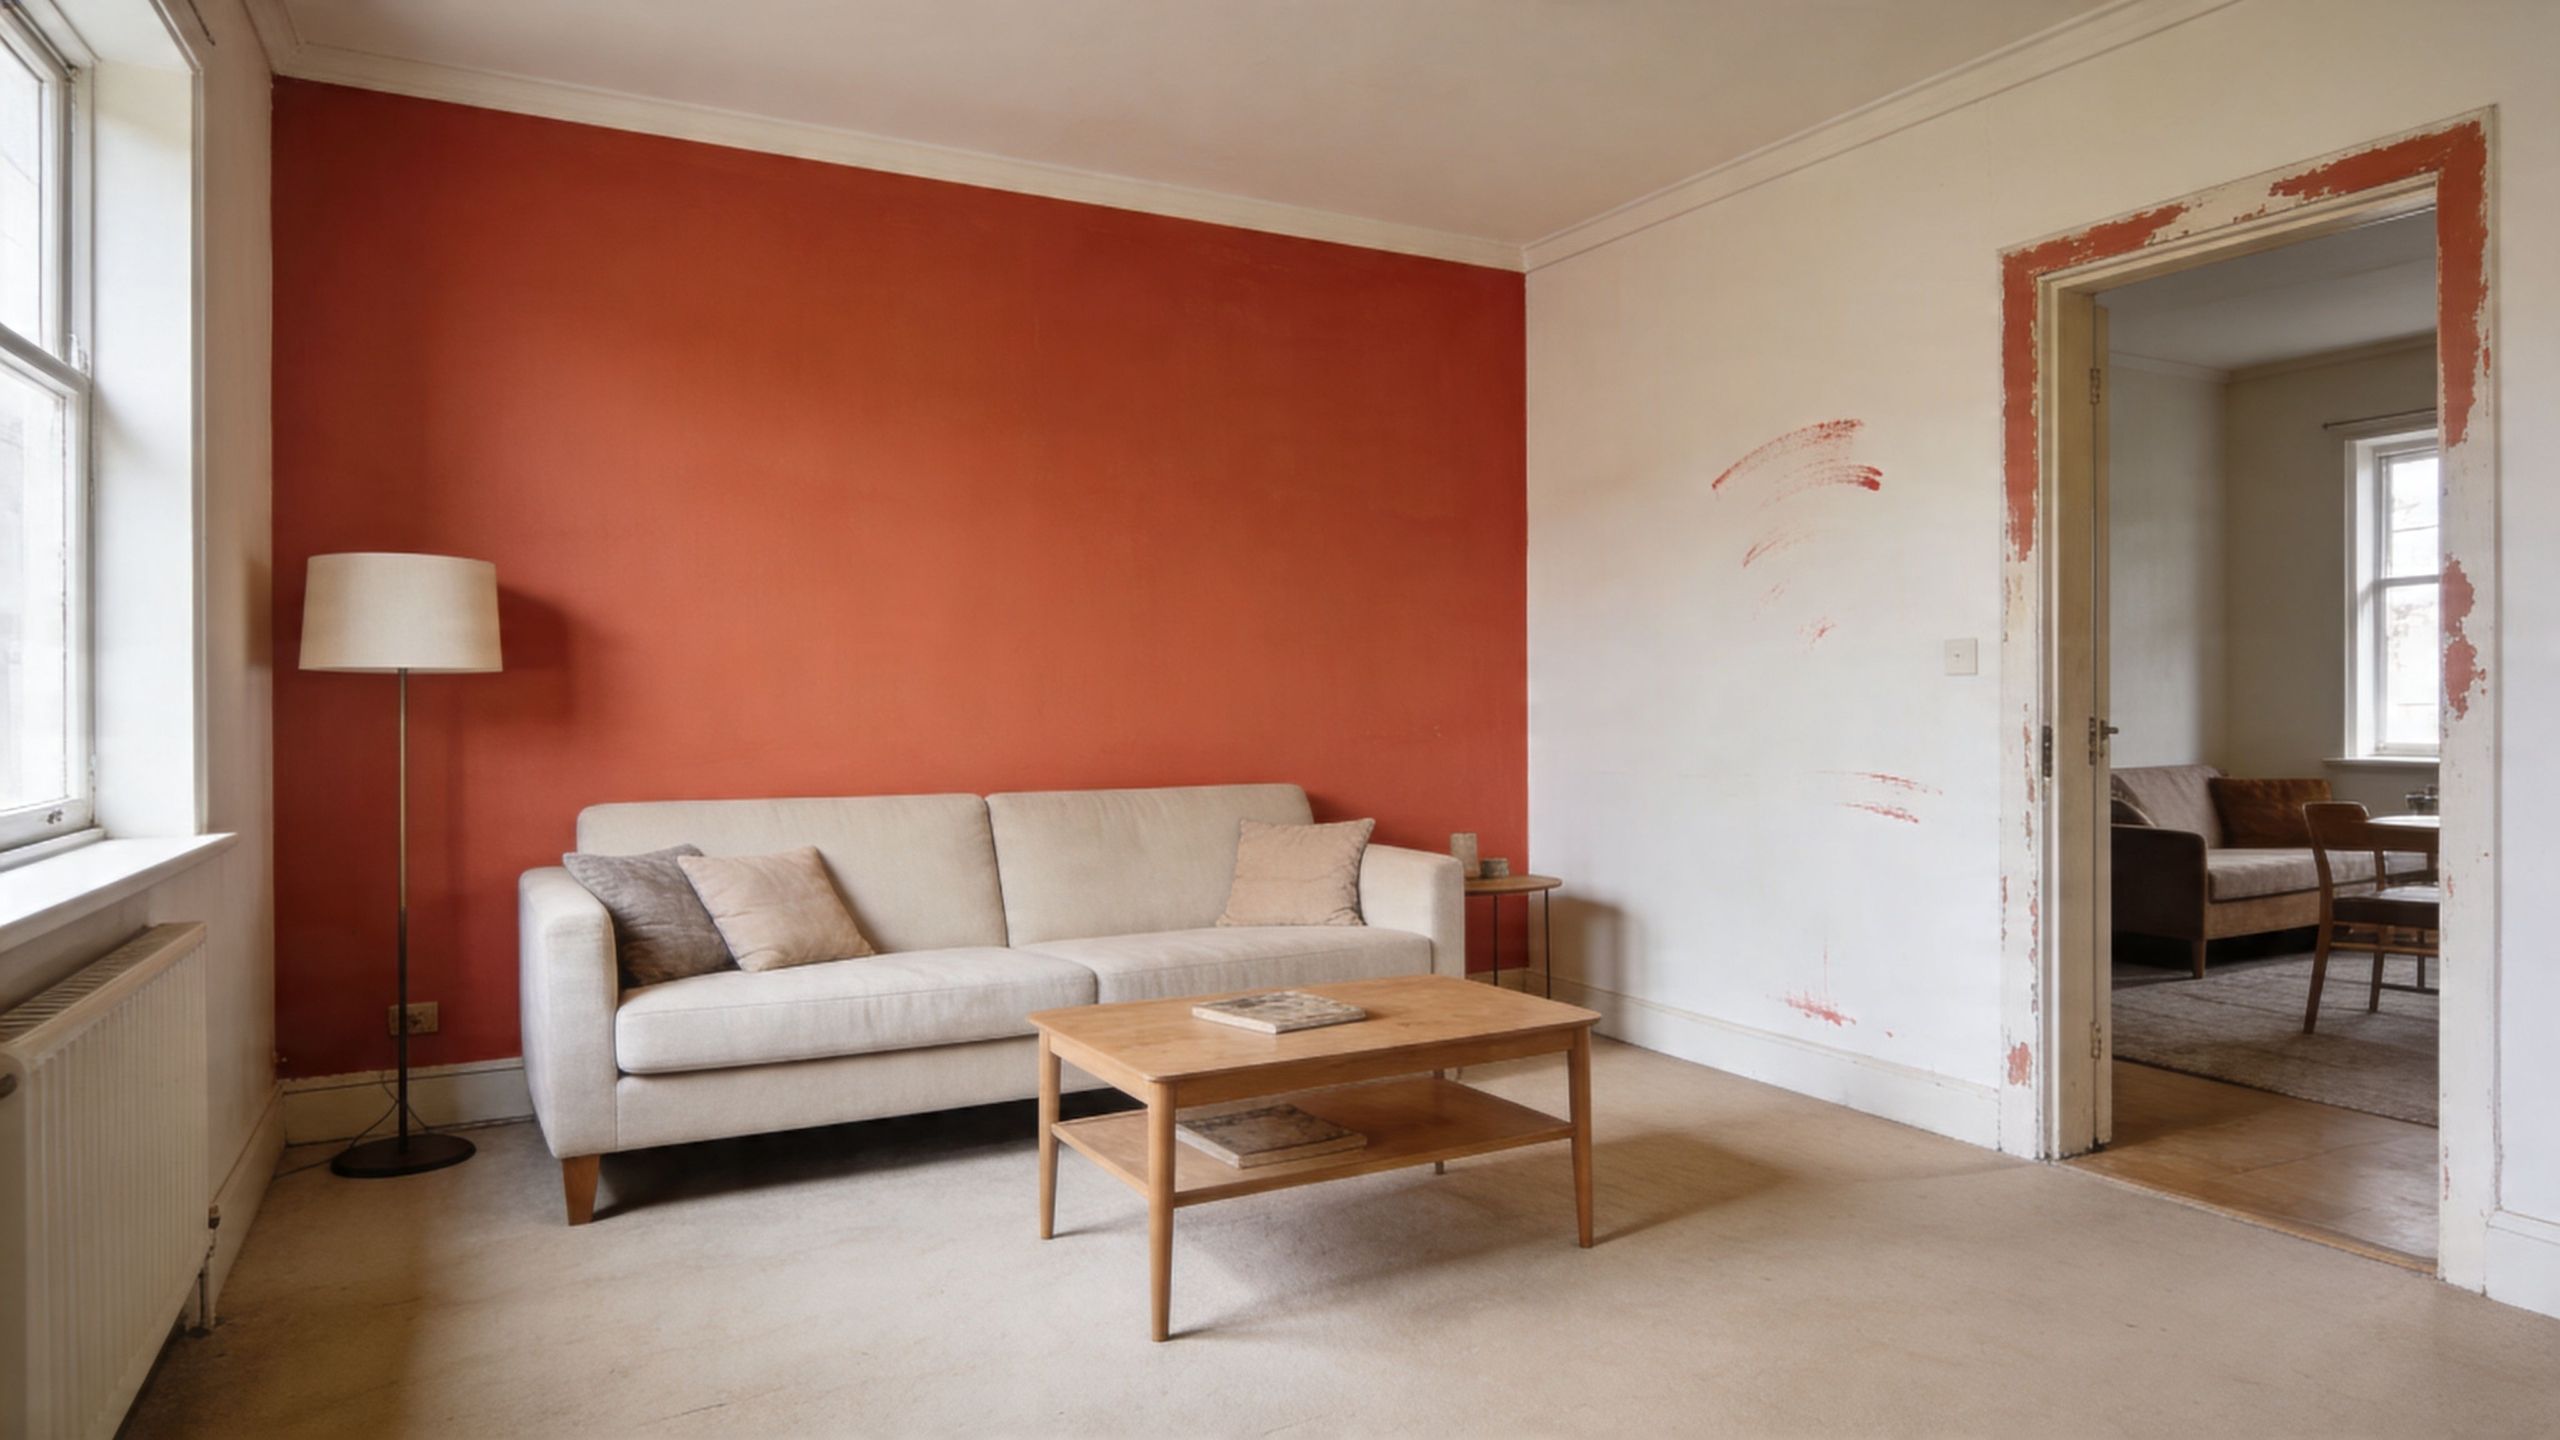
Inside the home, the decision usually comes down to whether the surface should disappear into the room or stand out as wood.

  • Walls and ceilings usually call for paint.
  • Cabinetry and built-ins can go either way depending on style.
  • Wood doors, beams, and stair parts often benefit from stain if the grain is worth showing.
  • Previously damaged or patched woodwork often looks cleaner under paint.

For project planning, one practical option in the region is Wheeler Painting & Restoration Services, which handles both residential and commercial painting, staining, restoration, drywall, waterproofing, and related finish work across the Puget Sound. That matters when one project includes decks, siding, trim, drywall, and repair work under a single scope.

Special Considerations for the Puget Sound Climate

National paint or stain advice often misses the local problem. In Puget Sound, coatings don’t just deal with rain. They deal with repeated dampness, slow dry-out conditions, shade, mildew pressure, and then strong summer UV on the same exterior.

Why local moisture changes the answer

Wood doesn’t fail only because water hits it. It fails because water stays in it. That’s a major distinction in Western Washington. If a finish traps moisture where the wood should be drying, the coating can start a chain of problems that has less to do with color and more to do with substrate health.

That’s why local surface choice matters so much on decks, fences, and wood siding. Some owners focus first on opacity and appearance, but the bigger issue is often vapor movement and how the wood handles a long wet season.

What the local testing suggests

Recent ASTM testing on 200 Puget Sound homes found that semi-transparent stains outperformed paints in our climate, showing 40% better UV/moisture resistance and reducing mildew incidence by 55% on fir siding. That’s one of the clearest local data points available for owners deciding between these systems on exposed wood.

Those results line up with what many contractors see in the field. When wood needs to breathe and release moisture, a penetrating finish often gives you a more forgiving maintenance path than a film-forming one.

Where paint still makes sense here

None of that means paint is wrong for the Puget Sound. It means paint needs to be used where it matches the substrate and the exposure.

Paint still makes strong sense for:

  • Interior walls and ceilings where moisture cycling is controlled
  • Exterior trim where clean lines matter and detailing is tight
  • Commercial interiors where broad substrate compatibility is needed
  • Repaired surfaces that need visual uniformity

What doesn’t work is applying a generic national rule to every local surface. A product that performs well on a dry-climate exterior may be a poor fit for a damp Seattle-side deck or a shaded Tacoma fence line.

In Western Washington, moisture management is part of finish selection. It isn’t a separate issue.

Prep is more important here than in drier regions

The Puget Sound climate punishes shortcuts. Algae, mildew, chalking, dirt, and residual moisture all interfere with adhesion and penetration. If the surface isn’t properly cleaned, dried, and prepared, both paint and stain can disappoint for reasons that have nothing to do with the can label.

That’s why good local finish work starts before coating ever begins. Cleaning methods, dry-time judgment, sanding, and moisture awareness all matter more here than most DIY articles admit.

Application Prep and Process Differences

Owners often compare paint or stain by finish alone, but the process is where the outcome is won or lost. Prep for paint and prep for stain are not interchangeable.

Prep for stain

Stain needs access to the wood. If old coating, mill glaze, embedded dirt, or failed sealer is still in the way, the stain won’t absorb evenly. That’s when you get blotchy areas, dark lap marks, or patches that weather at different speeds.

Typical stain prep may include:

  • Cleaning the surface thoroughly so mildew, dirt, and oxidation don’t block penetration
  • Sanding weathered fibers where the wood has gone fuzzy or uneven
  • Removing failed old coatings if the existing finish prevents absorption

A split-screen view showing a woodworker sanding a wooden surface and applying dark wood stain.

A useful outside perspective on this is the crucial role of proper surface preparation, which shows why shortcut prep usually leads to coating failure long before owners expect it.
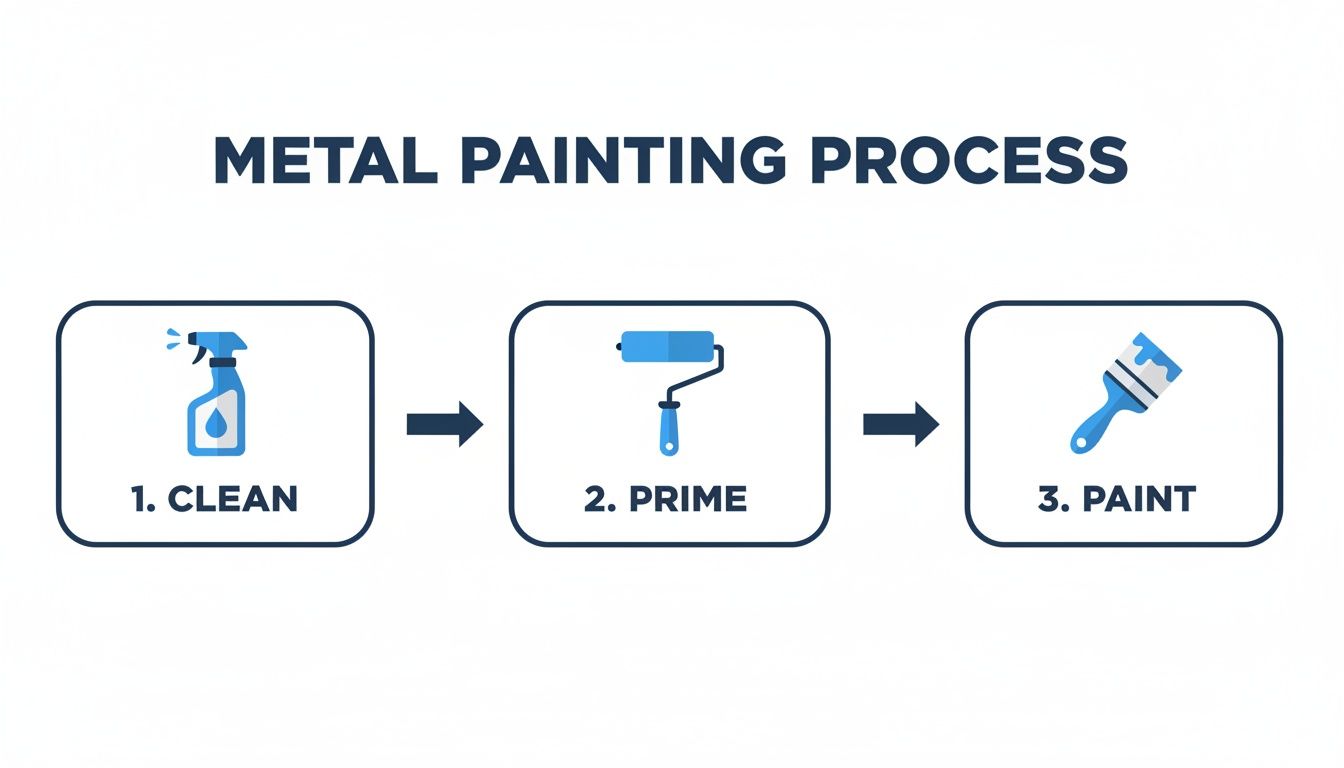
Prep for paint

Paint prep is different because the goal is adhesion and a stable film. If the surface is peeling, chalking, or soft, fresh paint won’t solve the underlying issue. It will just temporarily hide it.

Paint prep commonly includes scraping, sanding, patching, caulking where appropriate, and priming bare or repaired areas before finish coats go on. The cleaner and more stable the substrate, the better the final film performs.

Mixed surfaces need sequence discipline

The most overlooked technical issue is where painted and stained surfaces meet. Window trim, door assemblies, interior casings, and custom wood details often combine both finishes in the same area.

According to a 2025 PCA study, staining first and then taping and painting reduced edge bleed by 67% compared with painting first, as discussed in this Houzz discussion referencing the sequence issue. That sequence matters on cedar and fir in the Pacific Northwest because those species can make finish transitions less forgiving.

If your project includes cabinets or interior woodwork that will be stained rather than painted, this walkthrough on how to stain wood cabinets is a useful example of how much the prep and application process shape the result.

Making Your Final Decision with Wheeler Painting

If you’re still weighing paint or stain, the simplest way to decide is to start with the surface and the maintenance reality, not the color chip.

A practical decision guide

  • Choose stain if you want to preserve visible wood grain and the surface needs to release moisture, especially on decks, fences, and many exterior wood features.
  • Choose paint if you need a uniform, opaque finish across wood, drywall, trim, plaster, or mixed materials.
  • Lean toward stain when the wood is part of the design.
  • Lean toward paint when repairs, patching, or color consistency matter more than grain.

When DIY can work

A small, accessible fence section or a straightforward interior wood element can be a realistic DIY stain project if the surface is clean, conditions are right, and expectations are modest. The same goes for limited interior painting where substrate condition is predictable.

Even then, finish work rewards patience. Brush marks, lap lines, poor masking, rushed dry times, and skipped prep show up quickly. If you want a broader view of craft considerations, Mastering Wood Finishing Techniques is a helpful read.

When hiring a professional is the better call

Professional help becomes the smarter choice when any of these are true:

  • The project is exterior and exposed to sustained moisture or sun
  • There’s existing failure like peeling, mildew, greying wood, or uneven old coatings
  • Paint and stain intersect in the same assembly
  • The scope includes repairs along with coating work
  • A commercial schedule matters and rework would disrupt operations

For homeowners and facility managers in Kent, Seattle, Tacoma, and the towns in between, the biggest value of a professional evaluation is getting the system right before the work starts. The expensive mistakes usually happen at the decision stage, not at the checkout counter.

Frequently Asked Questions About Paint and Stain

Can I paint over a stained surface

Yes, but only with proper prep. The surface needs to be cleaned, dulled or sanded as needed, and primed appropriately so the new paint can bond. If the stained wood is glossy, contaminated, or failing, paint over the top won’t hold well.

Can I stain over a painted surface

Usually not without stripping the paint off first. Stain needs to penetrate wood, and paint blocks that path. If a painted surface stays painted, repainting is generally the practical route.

What is a solid stain

A solid stain sits between traditional paint and more transparent stains in how people think about it visually. It gives you a more opaque look than semi-transparent stain, but it’s still used within stain systems and is often chosen when owners want more coverage without fully shifting to a conventional paint look.

What usually lasts longer on wood

That depends on the surface, exposure, and whether the finish matches the material. Paint often lasts longer in ideal conditions, but on exterior wood that needs to manage moisture, stain may be the better long-term decision because it tends to fail more gracefully and can be easier to maintain.

What’s the most common wrong choice in the Puget Sound

Painting horizontal exterior wood is a frequent one. The finish may look great at first, but if that wood regularly holds moisture, a film-forming system can create bigger maintenance headaches later.


If you’re comparing finishes for a home, tenant improvement, exterior repaint, deck restoration, or facility maintenance project, Wheeler Painting & Restoration Services can help you sort out the right system for the surface, the climate, and the maintenance plan. A clear site evaluation often saves far more than guessing between paint or stain and having to redo the work later.

How Long Does House Paint Last? A Puget Sound Guide

TL;DR: Exterior paint in the Puget Sound lasts 5 to 7 years, while interior paint lasts 5 to 10 years on average. Those are only starting points. In Seattle, Tacoma, and Kent, rain, humidity, shade, and surface prep can shorten or stretch that lifespan in a big way.

If you're asking how long does house paint last, you're probably already seeing something that doesn't look right. Maybe the south side still looks decent, but the shaded wall has green staining. Maybe the trim is failing before the siding. Maybe an interior bathroom ceiling started looking tired long before the bedroom walls did.

That disconnect is normal in Western Washington. Generic national advice often assumes a drier climate, more sun, and fewer moisture cycles. Around Puget Sound, paint doesn't just age from time. It ages from wet siding, long damp mornings, mossy exposure, limited drying time, and surfaces that hold moisture longer than people expect.

A paint job is part finish and part protective shell. When that shell starts to weaken, the question isn't only cosmetic. It's whether the coating is still doing its job.

Is It Time to Repaint Your Puget Sound Property?

A homeowner in the Seattle area often notices the change gradually. First it's a little fading near the entry. Then the trim starts to look rougher than the field siding. After another wet season, a few spots begin to peel, and now the whole house looks older even if the structure is still in good shape.

A man looking at peeling paint on the exterior siding of a light green house.

Property managers in Kent and Tacoma run into the same thing from a different angle. One building in the portfolio holds up fine, another starts showing mildew staining and edge failure sooner than expected, even though both were painted around the same time. The difference usually comes down to exposure, maintenance, and how well the original prep matched the building.

What homeowners usually notice first

The early signs aren't always dramatic:

  • Uneven color: One elevation fades or dulls faster than the others.
  • Dirty-looking walls: The paint film starts trapping grime, mildew, or airborne residue.
  • Peeling around joints: Trim corners, window heads, and lower siding courses often show trouble first.
  • A rough or chalky feel: The coating no longer feels sealed and stable.

A house can look only slightly worn and still be overdue for repainting in a wet climate. The coating often fails at edges and vulnerable details before broad walls look bad from the street.

That matters because repaint timing in Puget Sound is rarely just about curb appeal. It's about catching failure before moisture gets deeper into wood trim, siding edges, and caulk lines.

Why local guidance matters more than generic advice

A national blog may tell you paint should last a long time, and sometimes that's true in dry climates. But Seattle, Tacoma, and Kent aren't dry climates. Shaded walls stay wet longer. Moss and mildew are real maintenance issues. Marine air, tree cover, and repeated rain events all change the lifespan of a coating.

For owners searching for house painting near me or commercial painting services near me, the useful answer isn't a single number. It's whether your building is aging normally for this region or showing signs that need attention sooner.

The Real Lifespan of Exterior Paint in Washington

For wood siding in humid regions like Puget Sound, high-quality latex or acrylic paint typically lasts 5 to 7 years before significant degradation, and 100% acrylic latex formulations with mildewcides can extend that to 7 to 10 years on properly primed cedar or fir siding common in Western Washington, according to this paint lifespan guide for humid climates.

An infographic detailing the average lifespan of exterior house paint on various surfaces in Washington state.

Those numbers are the most useful baseline for our area because they match what owners experience here. Wet winters, mild but persistent moisture, and long shaded periods can wear on a paint film differently than intense inland heat does.

Why Puget Sound exteriors fail sooner than people expect

Exterior paint in Western Washington usually doesn't fail for one reason alone. Several things happen at once.

  • Moisture sits longer: Siding, trim, and caulk joints don't dry as quickly after rain.
  • Mildew grows on shaded faces: North and east elevations often look older first.
  • Wet-dry cycling stresses the film: Wood moves, coatings flex, and weak areas open up.
  • UV still matters: Even with cloud cover, sun breaks down binders over time and contributes to chalking.

The result is a coating that may look passable from the driveway but is already weakening at the details that matter most.

Practical rule: In Puget Sound, the wall that stays damp longest usually tells the truth about the condition of the paint job.

Siding material changes the timeline

Not every exterior surface behaves the same. Wood siding is the biggest concern because it absorbs and releases moisture. Cedar and fir, both common in Western Washington, can perform well when they are properly primed, sealed, and painted with the right product, but they also punish shortcuts.

Fiber cement is generally more stable than wood, so the paint film usually has an easier job. Brick and masonry present a different challenge. They don't move like wood, but they can hold moisture and telegraph failures if the wrong coating is used or if drainage issues are ignored.

Trim and doors often fail before broad siding fields because they take more abuse. Sun exposure, hand contact, sprinklers, and sharp edges all work against them. That's why a house can need selective repainting on details before the main body fully reaches end of life.

Paint grade isn't optional here

In this climate, the difference between a lower-grade exterior paint and a true 100% acrylic latex product isn't academic. Better binders hold up longer under damp conditions, and mildewcides help protect the surface where mildew pressure is persistent.

Cheap paint can look acceptable when it first goes on. What it usually doesn't do well is keep its film strength after repeated moisture exposure. Once the film weakens, blistering, peeling, and edge failure start showing up where water intrusion is already trying to happen.

A better coating still won't save a bad prep job. But in Seattle, Kent, and Tacoma, lower-grade paint narrows your margin for error fast.

Timing matters too

Even the right product can underperform if it's applied under poor conditions. Surfaces need time to dry, and the work window matters more here than in many other regions. If you're comparing repaint timing, Wheeler's guide on the best time to paint a house exterior is useful because scheduling around moisture exposure is part of getting the full life from the coating.

For building owners looking for a residential contractor near me or support with facility maintenance, this is the takeaway. Exterior paint lasts longest when the siding condition, product selection, and weather window all line up. If one of those pieces is off, the clock starts running early.

How Long Interior Paint Lasts Room by Room

Inside the building, the right question isn't just how long does house paint last. It's which room are we talking about. Interior paint wears according to traffic, moisture, cleaning frequency, and how people use the space.

A minimalist living room with a beige sofa, wooden coffee table, and a burnt orange accent wall.

According to this interior paint lifespan reference, high-traffic areas like hallways and kitchens typically need repainting every 3 to 5 years, bedrooms and living rooms usually last 7 to 10 years, and bathrooms often last only 3 to 4 years because high humidity breaks down paint polymers.

High-traffic rooms wear out first

Hallways, stairwells, entry areas, break rooms, and active common spaces take constant contact. People brush walls, move furniture, carry bags, and leave marks that cleaning can't always solve without also wearing the finish.

Kitchens also age faster, but for a different reason. It's less about bumps and more about residue, cleaning, and moisture in the air. Even in a well-kept home, kitchen walls work harder than bedroom walls do.

For commercial interiors, this same pattern shows up in corridors, tenant entries, and shared use areas. An office with controlled use may hold paint well. A retail space or active common hallway usually won't.

Low-impact rooms can go much longer

Bedrooms and living rooms usually keep their appearance longer because they don't deal with the same daily abuse or humidity load. That doesn't mean they're maintenance-free. Sunlight, furniture scuffs, and lifestyle still matter. But these rooms generally age more slowly and more evenly.

Guest rooms are the classic example. They often look good long after the rest of the house has obvious wear because they don't see the same use.

Here's a simple planning view:

Room type Typical paint life Main reason
High-traffic areas 3 to 5 years Contact, scuffs, repeated cleaning
Kitchens 3 to 5 years Heat, moisture, residue
Bathrooms 3 to 4 years Humidity and repeated moisture
Bedrooms and living rooms 7 to 10 years Lower wear and lower moisture

Bathrooms are their own category

Bathrooms deserve separate treatment because humidity changes everything. Repeated showering introduces moisture that weakens adhesion over time, and poor airflow makes the problem worse. In Puget Sound homes, where ambient moisture is already part of daily life, a bathroom without good ventilation can age paint quickly.

That doesn't always start as peeling. It may begin as dullness, patchy sheen, or recurring surface discoloration that returns after cleaning.

A quick visual example helps here:

What owners should do with this information

Use room-by-room repaint cycles for planning, not panic. If a hallway looks tired after a few years, that doesn't mean the whole house or whole tenant suite needs repainting at once. It means the maintenance schedule should reflect real use.

  • Prioritize active zones: Entry halls, corridors, and kitchens usually need attention first.
  • Budget bathrooms separately: Moisture-prone rooms rarely stay on the same cycle as dry rooms.
  • Match finish to function: Washability and moisture resistance matter more in workhorse spaces.
  • Think by occupancy type: A family home, office suite, and retail build-out all wear differently.

For owners managing commercial construction near me searches or planning tenant improvement work, that's often the practical path. Repaint where use demands it, not just where the calendar says you should.

Four Key Factors That Determine Paint Durability

Paint lifespan isn't controlled by paint alone. Four things decide whether a coating holds up or disappoints in Western Washington: the product, the prep, the environment, and the application itself.

Four geometric pillars displaying textures representing surface preparation, paint quality, environmental climate, and application skill factors.

When those four line up, paint lasts closer to its full potential. When one fails, the whole system gets weaker.

Paint quality

Material selection matters most when the surface is exposed to moisture, abrasion, or cleaning. On exteriors, stronger acrylic binders are better suited to a damp climate. Indoors, the right finish helps walls resist scuffs, washing, and humidity.

This isn't about buying the most expensive can on the shelf. It's about using a coating that fits the substrate and the environment. A bargain product on a demanding surface often costs more later because the repaint cycle comes sooner.

If UV exposure is part of the problem, especially on sun-hit walls, doors, or trim, it helps to understand how UV-resistant paint fits into the bigger durability picture.

Surface preparation

Prep is where long-lasting jobs are won or lost. A surface can look paintable and still be a bad candidate for coating if it's dirty, chalky, damp, unstable, or carrying hidden failure at joints and edges.

On exterior work, prep may involve washing, scraping, sanding, spot priming, caulk replacement, and in some cases carpentry or siding replacement before paint begins. On interiors, prep often means drywall repair, stain blocking, patching, and making sure the substrate is clean enough for proper adhesion.

If mildew is painted over instead of removed, or if damp siding is coated because the schedule is tight, the finish usually tells on that shortcut later.

For owners comparing cladding options on future projects, this guide to siding materials is useful background because the substrate itself affects how hard the paint system has to work.

Environmental exposure

Puget Sound weather creates a slow, persistent kind of wear. Rain is obvious, but the harder issue is often extended dampness. Shaded walls, overgrown landscaping, clogged gutters, and splash-back near grade all keep surfaces wetter longer.

Indoors, the environmental issue is usually ventilation. Bathrooms, laundry areas, kitchens, and commercial wash zones punish coatings when airflow is poor. That doesn't always produce immediate failure. It often gradually shortens the useful life until the room suddenly looks older than the rest of the building.

A few examples show how exposure changes outcomes:

  • South-facing trim: More sun, more UV stress, faster fading.
  • North-facing siding under trees: More shade, more mildew pressure, slower drying.
  • Bathroom ceilings: Repeated humidity load, especially when fans are weak or rarely used.
  • Retail entries: Frequent touch points, frequent cleaning, higher wear.

Application skill

Even good paint on a well-prepped surface can underperform if it's applied poorly. Thin coverage, rushed dry times, missed caulk failure, sloppy cut lines around joints, and bad timing with weather all shorten the life of the coating.

Application skill also includes knowing when not to paint yet. In this region, patience matters. A surface that still holds moisture shouldn't be coated just because the calendar says the crew is due on site.

For smaller residential work and mid-size facility maintenance, Wheeler Painting & Restoration Services is one option owners use when they need painting tied to broader repair scope such as drywall, trim repair, waterproofing, or tenant improvement, where durability depends on the whole assembly being addressed rather than just the finish coat.

Your Puget Sound Paint Inspection Checklist

A good inspection doesn't require specialty equipment. You can learn a lot just by walking the property slowly and checking the same trouble points a contractor checks first. The goal isn't to diagnose every technical issue. It's to spot whether the paint is still protecting the building or just covering it.

What to look for outside

Start with the elevations that stay wet longest, then move to trim, doors, and lower siding.

  • Chalky residue on the surface: Rub your hand lightly across the paint. If color dust transfers easily, the binder may be breaking down.
  • Blistering or bubbling: Raised areas often point to trapped moisture or adhesion failure.
  • Cracking or alligatoring: When paint loses flexibility, it can split into a cracked pattern instead of moving with the substrate.
  • Peeling at edges and joints: Check butt joints, trim corners, window heads, and horizontal transitions.
  • Mildew or dark staining: In Puget Sound, persistent staining on shaded walls often signals prolonged moisture exposure, not just dirt.

What to look for inside

Interior problems usually show up where moisture, cleaning, or repeated contact are concentrated.

Area Warning sign What it often means
Bathroom walls or ceiling Dull, patchy, or peeling finish Moisture stress or weak ventilation
Hallways and entries Scuffs that won't clean off Finish is worn, not just dirty
Kitchen walls Staining or uneven sheen Residue buildup and repeated washing
Window-adjacent walls Fading or patchiness Surface is aging unevenly

Walk the building in daylight if you can. Early failure is easier to spot when raking light shows sheen changes, raised edges, and surface texture.

A few places people miss

Some of the most useful inspection spots aren't the largest walls. They're the details.

  • Below gutters and downspouts: Overflow and splash patterns often show here first.
  • At the bottom edge of siding: Ground moisture and poor drainage stress these areas.
  • Door frames and thresholds: Repeated use and weather exposure hit these hard.
  • Behind shrubs: Airflow drops, drying slows, and mildew pressure rises.

If you see multiple signs at once, cleaning and touch-up may not be enough. At that point, it helps to understand whether the surface needs localized prep or full coating removal. This overview on how to remove old paint gives a useful starting point for what that process can involve.

Extend Your Paint's Life With Practical Maintenance

Most paint jobs don't fail overnight. They lose life in small steps. A little mildew that isn't cleaned. A gutter overflow that keeps soaking one wall. A bathroom fan that never quite clears the room. Maintenance works because it interrupts those small problems before they become coating failure.

Exterior habits that help

You don't need to baby your exterior paint, but you do need to keep water and organic buildup from sitting on it too long.

  • Wash siding carefully: Remove surface grime and mildew without damaging the paint film. If you're deciding how often to pressure wash your house, use methods that clean the surface without forcing water into joints or behind siding.
  • Keep gutters and downspouts working: Overflowing gutters shorten paint life fast, especially at fascia, trim, and lower walls.
  • Trim back vegetation: Shrubs and tree branches reduce airflow and keep walls damp.
  • Handle failed caulk early: Small openings around trim and penetrations can turn into paint failure if water keeps getting in.

Interior habits that matter

Interior maintenance is usually about moisture control and gentle cleaning.

  • Use bath fans consistently: Let surfaces dry out after showers.
  • Clean with mild products: Aggressive scrubbing can burnish or wear the finish.
  • Touch up damage early: Small chips and scuffs are easier to deal with before they collect dirt and expand.
  • Watch recurring stains: If a mark keeps returning, the issue may be moisture, not paint alone.

Store leftover paint the right way

Touch-up paint is only helpful if it's still usable. According to Consumer Reports on leftover paint storage, leftover latex paint can remain usable for up to 10 years if stored correctly. Warning signs include bulging cans, a thick rubberlike film on the surface, or paint that fails to mix uniformly. If you're unsure, test it on cardboard before putting it on the wall.

That advice matters for homeowners doing phased room updates and for property managers holding stock for routine touch-ups. Good labeling helps too. Keep the room name, color, sheen, and date on the lid so the paint is useful later, not a guessing game.

Hiring a Professional vs DIY Painting A Cost and Quality Guide

DIY painting can make sense for a small, simple room with sound walls and easy access. It gets harder when the project includes exterior prep, moisture problems, ladder work, repaired substrates, or color matching across a larger property.

The hidden cost in DIY usually isn't the roller cover or brush. It's time, prep, and rework. Most paint failures people blame on product quality are really prep failures, application timing issues, or skipped repairs underneath the coating.

When DIY is usually reasonable

A do-it-yourself approach is often workable when:

  • The surface is already sound: No peeling, moisture damage, or patching issues.
  • Access is straightforward: Standard walls, limited masking, no major safety concerns.
  • The stakes are low: A secondary room or light refresh where minor imperfections are acceptable.

When professional work usually pays off

Hiring a contractor is the better value when the building needs more than color change.

  • Exterior painting in Puget Sound: Moisture timing, mildew treatment, and substrate condition matter too much to guess at.
  • Commercial or occupied spaces: Scheduling, protection, workflow, and finish consistency matter.
  • Projects tied to repairs: Drywall work, trim replacement, waterproofing, and surface correction should be handled as one scope.
  • Difficult surfaces: High walls, failing wood trim, older coatings, and detail-heavy exteriors need experience.

Professional painting isn't just about getting paint onto a surface. It's about knowing what has to happen before and after the coating so the job lasts.

For owners comparing bids, the smart question isn't "What's the cheapest way to get color on the wall?" It's "Which approach gives this building the longest useful life with the fewest callbacks?"

Protect Your Investment With a Professional Assessment

In Seattle, Tacoma, Kent, and the towns in between, paint life depends less on generic timelines and more on moisture, exposure, prep quality, and maintenance. Exterior coatings on wood siding often live in the 5 to 7 year range in our climate, while interior paint can last far longer or wear out much sooner depending on the room and how it's used. The difference is local conditions.

If your property is showing mildew, blistering, chalking, peeling, or uneven wear, a careful inspection is the right next move. It helps you decide whether you need cleaning, repairs, touch-up work, or a full repaint.


If you'd like a practical, no-pressure evaluation of your home, facility, office, or tenant space, contact Wheeler Painting & Restoration Services to discuss the condition of the surfaces, likely causes of wear, and the most sensible next step for your property.

Top Outside Brick Colors for Seattle & Tacoma Homes

You’re probably looking at your brick house in Seattle, Tacoma, Kent, or somewhere in between and thinking the same thing a lot of homeowners think. The brick is solid. The house has good bones. But the color feels stuck in another decade.

That’s where people get hung up. Outside brick colors look simple until you have to choose one for your own home. Then every sample starts to look different in the morning than it does in the afternoon, and the gray Northwest sky changes everything again. Add moss, moisture, and trim that may already be fighting the brick, and the decision gets heavy fast.

The good news is that brick color doesn’t have to be a guessing game. If you understand what kind of brick you have, what undertones are sitting in it, and how Puget Sound weather affects the finish, you can make a choice that looks right and lasts.

Your Home’s Brick Exterior A Fresh Start

A lot of homeowners reach this point the same way. They replace the roof, update the landscaping, repaint the trim, and then the brick suddenly stands out for the wrong reasons. What looked “fine” before now looks too orange, too pink, too blotchy, or just too tired against the rest of the house.

That’s especially common in Western Washington. Our light is softer than what you see in national design photos. A brick color that looks warm and balanced online can turn muddy under overcast skies. A color that seems clean and modern on a sunny day can feel flat for most of the year.

I’ve seen homeowners pause for months because they’re afraid of making an expensive mistake. That caution makes sense. Brick is a major visual anchor on the exterior. Once you change it, every other element responds to it. Trim, siding, front door, roofing, and landscaping all start reading differently.

“If the brick feels off, the whole house feels off, even when everything else is in good shape.”

The right outside brick colors don’t just modernize a home. They settle it down. They make the roof make sense. They make the trim feel intentional. They help the house look like it belongs in its setting, not like it was assembled from five separate decisions.

Understanding Your Brick Foundation

Start at the wall, not the color fan deck. On Puget Sound homes, the condition and texture of the brick often matter just as much as the color you put on it, because damp air, moss, algae, and flat winter light change how that surface reads from the street.

A split-screen comparison showing modern smooth extruded bricks next to weathered, textured older bricks in sunlight.

I see this all the time in Seattle, Tacoma, and the older neighborhoods between them. Two houses can use a similar brick color, but the one with rougher, more porous faces looks darker, dirtier, and more uneven by February. The smoother brick beside it still reads fairly clean. That difference is not your imagination. Surface texture holds moisture differently, and our climate makes that show.

Shape tells you what kind of update will read well

Older brick often has softer edges, small size variation, and a handmade look. It brings depth and character, but it also exaggerates shifts in tone from brick to brick. If you coat or stain that kind of wall, the result usually looks best with some softness in the final color rather than a flat, stark finish.

Extruded brick is more precise. The corners are cleaner, the faces are more uniform, and the wall usually reads more consistent after staining or coating. That can work well for homeowners who want a sharper, more current look.

Mixed brick is where people get into trouble. An addition may be close in color but different in texture, density, or mortar profile. Under bright sun you might barely notice it. Under overcast Western Washington light, the mismatch often stands out more.

Texture affects maintenance, not just appearance

A rough, open-faced brick collects more biological growth. North-facing walls and shaded entries are the usual problem spots. If the brick already gets green in the wet season, a very light color can look tired faster unless the prep work is thorough and the product is right for masonry.

Dense, smoother brick usually stays visually cleaner longer, but it can make color look stronger than expected. I have seen homeowners sample a warm greige on a rough historic brick and get a soft, settled result. That same color on a smooth addition can read colder and more modern than they intended.

The Brick Industry Association explains common brick textures such as wire-cut, molded, and smooth finishes, and those categories are useful because each one reflects light and shows variation differently in its guide to brick textures.

What to check before choosing a color

Walk the house in dry weather and again after a few wet days. You are looking for how the brick behaves, not just what color it is.

  • Surface absorption: Does the face darken quickly after rain, or stay fairly even?
  • Growth patterns: Are there green or black areas near grade, under eaves, or on the north side?
  • Edge condition: Are the brick corners crisp, or softened by age and wear?
  • Existing variation: Does the wall already have a lot of movement, or is it visually uniform?
  • Patch history: Do repairs, additions, or replaced units already stand out?

Field rule: Test color only after you understand where the wall stays wet, where it stains, and where texture changes from one elevation to another.

That matters on homes that borrow from warehouse or loft styling, where homeowners like the look of exposed brick in industrial design. Exterior brick has a harder job. It has to handle rain, organic growth, and low-angle gray light for much of the year. A good color choice starts with the brick you have, not the brick in a sunny photo from somewhere drier.

The Science and Art of Brick Color

A brick wall can read one way at noon in July and another way after a week of October rain. That matters in Puget Sound, where overcast light cools color down and moisture brings out undertones you will miss in a bright showroom sample.

Brick gets its base color from the clay, the minerals in that clay, and how the unit was fired. Iron-rich clay usually fires into reds, russets, and brown-reds. More lime can push the result lighter, sometimes into buff or yellow ranges. The firing process changes the finish too. The Brick Industry Association’s overview of brick color explains how raw materials and kiln conditions affect the final look.

Why the same brick looks different on different houses

Age is part of it. Weather is the other part.

Older brick often has more visible variation because manufacturing was less uniform, but I also see homeowners misread brick because our climate keeps changing the wall surface. A damp north elevation can look cooler and darker than the south side of the same house. Moss, algae, and shaded mortar joints shift the whole color read. On a clear, dry day, the brick may look warmer again.

That is why color decisions made from one photo usually go sideways.

How to read undertones in real conditions

Start outside, not at the paint counter. Look at the brick in morning light, afternoon light, and after rain. Puget Sound skies flatten contrast, so subtle undertones show up more than they would in a sunnier climate.

Use this quick field check:

  • Warm brick shows orange, cinnamon, rust, or pink cast.
  • Cool brick shows charcoal, muted brown, violet-brown, or soft gray.
  • Mixed brick can swing warm or cool depending on the mortar, roof, and nearby trim color.

Set your samples against both the brick and the mortar. Mortar is often cooler than the brick itself, and that can make a trim color look cleaner or dirtier than expected. If you want a broader framework for coordinating those pieces, this guide on how to choose exterior paint colors is a useful next step.

Good exterior color work respects variation

Brick has depth because it is not flat or uniform. That is part of the appeal people respond to with exposed brick in industrial design, and it matters even more outdoors where moisture and cloud cover keep changing the surface.

On exterior brick, the goal is not to force a perfect single note. The goal is to choose colors that stay believable with the brick’s built-in range. If the wall carries warmth, trim that is too icy can feel sharp and disconnected. If the brick reads as cool and ashy for much of the year, creamy beige can look muddy under gray skies.

The best results come from working with the brick you have, in the light and weather your house gets.

Perfect Palettes for Puget Sound Homes

National color advice often misses the local issue that matters most. Puget Sound light is cool, filtered, and often overcast. A palette that looks crisp in Arizona or Southern California can look drained out here.

A guide listing five tips for choosing brick colors that harmonize with Pacific Northwest lighting conditions.

Colors that usually work well here

Muted, grounded combinations tend to hold up visually in Seattle, Kent, and Tacoma. They feel settled under gray skies and still look good when the sun does come out.

Good local pairings often include:

  • Red brick with charcoal trim: This gives traditional brick a cleaner frame without making it feel harsh.
  • Brown-red brick with deep forest green accents: Strong with mature landscaping and lots of evergreen backdrop.
  • Gray-washed brick with black details: More contemporary, especially on mid-century and simple ranch profiles.
  • Softened brick with taupe or warm greige trim: Helpful when the goal is to reduce visual noise, not create contrast.

The 60 30 10 rule still helps

For exterior color balance, use the brick as the main visual mass. One verified guideline notes that warm orange-red brick pairs well with taupe or beige paints when the 60/30/10 rule is respected, with brick carrying the dominant share of the palette from this brick color combination discussion.

On a house, that often looks like this:

  • 60 percent main field: the brick itself
  • 30 percent secondary support: siding, large trim areas, garage doors
  • 10 percent accents: front door, shutters, metal details, lighting, or fascia contrast

That keeps the house from looking chopped up.

Rain changes the maintenance side of color

In our region, appearance and upkeep are tied together. In rainy areas like Puget Sound, which see 150+ rainy days per year, regional contractor data shows that darker bricks can reduce visible algae growth and cleaning frequency by up to 40% compared with lighter brick, which shows efflorescence and mildew more quickly from this Pacific Northwest exterior color discussion.

That doesn’t mean every home should go dark. It does mean light cream or pale buff brick needs a more realistic maintenance conversation in Western Washington.

Homes near heavy tree cover usually tolerate mid-tone and darker brick finishes better than very light ones.

What works for common problem bricks

A lot of homeowners aren’t starting with ideal brick. They’re starting with dated brick.

If the existing brick reads too orange, avoid trying to “correct” it with bright white trim alone. That usually exaggerates the orange. A muted charcoal, earthy green, or soft greige nearby often calms it down better.

If the brick has pink or salmon undertones, black accents can sharpen it, but they can also make the pink more obvious if the field color is left untouched. In those cases, a more blended, toned-down finish usually looks more natural.

For homeowners sorting through paint relationships around the whole exterior, Wheeler has a useful guide on how to choose exterior paint colors that complements brick decisions well.

Painted Versus Stained Brick A Durable Choice

A lot of Puget Sound homeowners reach this point after one wet winter too many. The brick looks tired, the color feels dated, and the first instinct is to paint it. Before choosing a finish, it helps to know whether you need full coverage or a treatment that still lets the masonry breathe.

That difference matters here. Our long damp seasons, shaded walls, and slow drying conditions are hard on the wrong coating system.

What paint does

Paint forms a film over the brick. It gives you the biggest visual reset and can cover uneven color, past patchwork, or mismatched additions better than stain.

It also changes the maintenance pattern.

On a rainy Northwest exterior, any coating that traps moisture can become the spot where peeling, blistering, or edge failure starts first, especially on walls that get little sun. Once painted brick begins to fail, repairs usually involve more prep, more scraping, and more touch-up work than homeowners expected at the start.

What stain does

Brick stain soaks into the masonry instead of sitting on top of it. That usually leaves more of the original texture, variation, and character visible, which is why stained brick tends to look more natural from the street.

For homes in the Puget Sound region, that breathable finish is often the better long-term fit on sound, uncoated brick. It handles moisture movement more gracefully, and it is less likely to announce every future maintenance issue with peeling edges.

Side by side comparison

Feature Painting Brick Staining Brick
Appearance More opaque, larger color change More natural, keeps brick character visible
Texture visibility Can soften texture and visual variation Usually preserves both
Moisture behavior Surface film needs careful product selection and prep in wet conditions Works with the masonry instead of covering it with a film
Maintenance pattern More likely to need scraping, spot repair, and repainting over time Usually easier to maintain when the brick is a good stain candidate
Best use case Major color reset, mismatched areas, previously painted brick Tonal correction, muting orange, deepening color, updating without flattening

When paint makes sense

Paint has a place. I recommend it when the brick has already been painted, when different additions need to read as one exterior, or when the design goal is an opaque finish that stain cannot deliver.

It can also be the practical choice when the surface history has already pushed the house into a coating system. In that case, the job is less about preserving raw brick and more about managing that system correctly.

When stain is usually the better fit

Stain is often the smarter option when the brick is bare, sound, and worth keeping visible.

That usually includes:

  • Orange brick that needs to be toned down, not hidden
  • Red brick that needs more depth
  • Homes with good original masonry texture
  • Owners who want lower-fuss maintenance in a damp climate

Practical rule: If you like the texture and dislike the tone, stain is usually the first option to examine.

The catch is that not every brick can be stained well. Some brick is too dense, too damaged, or already sealed in a way that limits absorption. That is why surface testing and prep matter as much as color selection.

Wheeler Painting & Restoration Services handles exterior coatings, sealants, and waterproofing as part of that broader brick decision. On houses near tree cover, salt air, or persistent shade, those details often matter more than the color chip.

If you are weighing brick work against the rest of the exterior scope, this guide on the average cost of painting an exterior of a house helps put the budget in context.

Testing Colors Before You Commit

Small swatches lie. They’re useful for narrowing choices, but they’re not enough to make the final call on outside brick colors.

Brick has texture, shadow lines, mortar joints, and natural variation. All of that changes what a color does at scale.

A person testing paint color samples on an exterior brick wall of a house.

How to test the right way

Use larger samples directly on the house. A test area should be big enough to read from the street, not just from arm’s length.

A solid process looks like this:

  1. Choose more than one wall. Front elevation only isn’t enough if one side gets more light than another.
  2. Place samples near fixed elements. Test next to roofing, trim, and stone that aren’t changing.
  3. Watch them in different weather. Morning, afternoon, overcast, and the end of day all matter here.
  4. Stand in the street. Curb appeal decisions happen from distance, not six inches away.

What homeowners miss most often

They sample color but ignore the existing surface condition. If old coating is peeling or the masonry needs prep, the test won’t tell the full story.

A proper evaluation may also uncover old paint that has to come off before a new system is applied. If that’s part of your project, Wheeler’s overview on how to remove old paint is a helpful starting point.

Give a sample a few days before judging it. In Seattle weather, one cloudy afternoon can make a color seem flatter than it really is.

Wheeler's Portfolio Local Brick Transformations

A brick project in Puget Sound usually starts with a house that looks fine on a sunny listing photo and tired for most of the year in real weather. After a wet winter, the true issues show up. Orange brick turns louder under gray skies, shaded walls collect algae, and old repairs stand out more than the owner ever noticed before.

A split image showing a weathered red brick house compared to a restored grey painted brick home.

Tacoma rambler with strong orange cast

This mid-century rambler had solid brick and a good roofline, but the exterior read too warm for the rest of the updates. In our overcast light, that orange cast felt stronger, not softer. The owners wanted the brick to stay recognizable as brick, so a full paint system was the wrong fit.

A charcoal-leaning stain pulled the color back into balance without covering the masonry texture. That matters in wet climates. Once brick loses its natural variation under a heavy coating, every bit of moss, splash-back, and grime tends to show faster on the surface.

Kent commercial frontage with mismatched additions

This frontage had two problems at once. The original brick and the later addition did not belong together visually, and the owner needed a finish tenants could live with for years.

A breathable coating brought the elevations closer without forcing everything into one flat color. That trade-off made sense here. On a commercial building, perfect visual consistency matters less than a finish that handles moisture, cleans up well, and does not create constant maintenance calls.

Seattle traditional home that needed restraint

Some projects improve because the brick changes. Others improve because the surrounding colors stop fighting it.

This Seattle home had brick with good depth already, especially in the softer light we get for much of the year. The problem was the trim, accent colors, and exterior details pulling attention away from it. Instead of chasing a trend, the better move was to quiet the supporting palette. Cleaner trim colors and darker accents gave the brick room to do its job.

That is a common call around here. Under cloud cover, subtle brick usually ages better than high-contrast color schemes that look sharp for a month and harsh for the next ten years.

Why project photos help

Real project photos are useful because they show what brick looks like after weather, repairs, and daily life, not just right after installation. A strong portfolio of completed projects gives homeowners a better read on how stain, paint, mortar, and trim settle together on finished homes and buildings.

That matters more in Puget Sound than in drier regions. You need to see how a color holds up on north-facing walls, under deep eaves, and through long stretches of damp gray weather. The best brick transformations usually look settled, durable, and right for the house. Not flashy.

Frequently Asked Questions About Brick Exteriors

Is staining only for houses, or does it work for commercial buildings too

It works well for both when the masonry is a good candidate. That’s one reason more property managers are asking about it.

For commercial properties, stained brick is an emerging sustainable option. Verified data states that its use grew 35% in 2025-2026, offering 10+ year durability, 25% lower reapplication costs, and over 70% lower VOCs than traditional paint, making it a practical fit for tenant improvements and facility maintenance from this commercial brick color guidance.

Is painting ever the better option

Yes. If the brick has already been painted, if the facade is highly mismatched, or if the goal is a complete visual reset, paint can be the right tool. The key is going in with realistic expectations about prep and long-term maintenance.

How long does a brick exterior project take

That depends on condition more than color. Clean brick in sound shape moves much faster than brick that needs repairs, coating removal, moisture work, or careful masking around detailed trim.

Weather also matters in Western Washington. Scheduling needs to account for surface dryness and cure conditions, not just crew availability.

What color mistakes should homeowners avoid

The most common ones are:

  • Choosing from online photos only: Screen images don’t match local light.
  • Ignoring undertones: Brick that looks “neutral” can still clash hard with the wrong trim.
  • Going too bright in gray weather: Very light finishes can feel washed out here.
  • Thinking only about curb appeal: Maintenance matters, especially with moisture and tree cover.

Should I update the brick or the trim first

Usually, decide the brick direction first. Brick covers more area, carries more visual weight, and is harder to change later. Once that anchor is set, trim and accent colors fall into place much more easily.


If you’re weighing outside brick colors for a home or commercial property in Seattle, Tacoma, Kent, or the communities in between, Wheeler Painting & Restoration Services can help you evaluate the masonry, test practical options, and choose a finish that makes sense for Puget Sound weather as well as the look you want.

Can You Paint Metal? A Pro Guide for Lasting Results

Absolutely, you can paint metal. The real question is, can you paint it so it lasts? For homeowners and business owners in our local community, a quick paint job is a recipe for failure. A quality coating is the single most important barrier between your property’s metalwork and the damp air that’s always looking to start rust.

Why a Proper Paint Job is Non-Negotiable for Metal

As a local painting and construction contractor, I’ve seen it countless times: a commercial steel door or a beautiful aluminum railing that starts peeling and blistering within a year. Why? Because someone skipped a step. Painting metal isn't just about changing the color; it's a technical process designed to protect an expensive asset from corroding into dust.

Cutting corners—like painting over dirt or skipping primer—guarantees you'll be redoing the work sooner rather than later, and it will cost you more the second time around.

For anyone managing a business, facility, or home, understanding the right way to do this is crucial. It gives you the confidence to tackle a project yourself or to know exactly what to look for when you're hiring a commercial painting contractor.

The Real-World Payoff of Doing It Right

A meticulously painted metal surface does more than just look good. It delivers tangible benefits that protect your investment, whether it’s for a commercial facility, retail space, or your own home.

  • Stops Corrosion in Its Tracks: This is the big one. A complete coating system seals the metal off from moisture and oxygen. For a business with steel support beams or a homeowner with a wrought iron gate, preventing rust isn't just a good idea—it's essential maintenance.

  • Extends the Life of Your Assets: Metal doors, window frames, siding, and railings aren't cheap. A proper paint job can add years to their lifespan, pushing back expensive replacement costs and saving facilities managers and homeowners significant money in the long run.

  • Boosts Curb Appeal and Value: There’s no denying the visual impact. A crisp, uniform finish on metal elements makes a property look sharp and well-maintained. On a commercial building, it signals professionalism. On a house, it directly contributes to its market value.

  • Improves Safety and Functionality: Rust isn't just ugly; it's destructive. Corrosion actively weakens metal. By keeping rust at bay, a quality paint job maintains the structural integrity of critical components like handrails, fire escapes, and support posts.

The secret to a durable finish that stands up to our local weather is sticking to a proven method. It's all about the prep work—cleaning, sanding, and priming—before a drop of paint is even applied. Get that right, and you'll have a coating that adheres properly and protects your property for years.

Preparing Metal Surfaces for a Flawless Finish

A great paint job on metal is all about what you do before you even crack open a can of paint. If you’ve ever wondered, "Can you paint metal?" the answer is yes, but it’s the prep work that makes or breaks the project. Slapping a new coat over grease, rust, or flaking old paint is a surefire recipe for peeling and blistering in just a few months.

Every metal painting job, whether it’s a simple handrail or a large commercial steel building, starts with a good, hard look at the surface. Get up close and inspect it for rust spots, paying special attention to welds and crevices where moisture loves to hide. You'll also want to check for peeling paint, chalky residue from old coatings, and any oily films. These are the enemies of adhesion.

Cleaning and Etching for Lasting Adhesion

Once you know what you’re up against, it’s time to clean. And we don’t mean a quick wipe-down. Each type of metal needs a specific approach to get it ready for primer and paint to grab hold and stay there.

  • Steel and Iron: These ferrous metals are all about rust. Your first move is to get aggressive with a wire brush or scraper to knock off all the loose rust and failing paint. For bigger jobs, a power washer can do a lot of the heavy lifting. Once the loose stuff is gone, wipe the entire surface down with a good degreaser to get rid of any grime or oil.
  • Aluminum: Aluminum is tricky. It doesn’t rust like steel, but it quickly forms an invisible layer of oxidation that paint simply won't stick to. After cleaning it with a degreaser, you need to scuff the entire surface. This process, called etching, can be done with fine-grit sandpaper or an abrasive pad to create a microscopic texture for the primer to grip.
  • Galvanized Metal: New galvanized metal is notorious for shedding paint because of its slick, oily zinc coating. You have to start by cleaning it with a solvent to cut through that oily residue. After that, a mild acid wash—something as simple as white vinegar works great—will gently etch the surface, giving it the tooth it needs for a lasting finish.

For business owners and homeowners in the area dealing with years of built-up grime, looking into professional power washing services near me can be a game-changer. It saves a ton of time and ensures you’re starting with a truly clean slate.

Our rule of thumb is simple: If the surface isn’t perfectly clean and properly profiled, the paint will fail. This is non-negotiable in our local climate, where relentless dampness will find and exploit any weakness in your paint job. A little extra time spent on prep will save you a world of headaches down the road.

This diagram really boils the process down to its three essential parts.

A diagram illustrating the three-step metal painting process: clean, prime, and paint.

Think of it this way: painting is just the final step. The real work that guarantees a beautiful, durable finish happens long before you pick up a brush.

Choosing the Right Primer and Paint for Your Project

Three metal plates display rust-inhibiting primer, self-etching primer, and a glossy topcoat with paint can and brush.

You’ve put in the hard work to get your metal surface perfectly clean and prepped. Honestly, that’s half the battle right there. But the choices you make now—the primer and paint—will determine whether that beautiful finish lasts for years or starts failing in a few seasons.

Think of primer as the ultimate peacemaker between the metal and the paint. Without the right one, your topcoat simply has nothing to grab onto, and it's only a matter of time before it starts to peel and flake away. This is one step you absolutely cannot skip.

I’ve seen it countless times: a beautiful paint job fails because the wrong primer was used—or worse, none at all. The primer’s job is to create an unbreakable bond for the paint while also providing the first line of defense against the elements. It’s the foundation for a lasting finish.

Matching Primer to the Metal

Your primer choice comes down to one thing: the type of metal you're painting. Grabbing a generic can off the shelf is a recipe for disaster. Each formula is designed to solve a specific problem.

  • For Steel and Iron: In our damp local climate, rust is your number one enemy. You need a rust-inhibiting primer, plain and simple. These are typically loaded with zinc, which actively fights corrosion by creating a barrier that locks out moisture. It’s non-negotiable for iron railings, steel gates, or any ferrous metal exposed to our weather.
  • For Aluminum: Aluminum is slick and non-porous, making it notoriously difficult for paint to stick. The solution is a self-etching primer. This stuff is brilliant—it contains a mild acid that microscopically "bites" into the surface, creating a textured profile for the paint to grip onto for a tenacious bond.
  • For Galvanized Metal: That shiny zinc coating on galvanized steel is designed to prevent rust, but it also repels paint. You need a dedicated galvanized metal primer that’s formulated to adhere to that slick surface without damaging the protective zinc layer underneath.

Selecting a Durable Topcoat

With the primer properly applied and cured, you’re ready for the topcoat. This is what provides the color, the sheen, and the final shield against UV rays, rain, and physical abuse. What you choose depends entirely on where and how the metal will be used.

For highly specialized applications, like marine environments, the product choice is even more critical. You can find excellent resources on topics like choosing antifouling paint for aluminum boats that show just how specific you need to get.

For most residential and commercial projects, these are our go-to options:

  • Oil-Based Enamel: A true workhorse. We use it on high-touch surfaces like handrails, doors, and machinery because it dries to an incredibly hard, durable finish that stands up to a ton of wear and tear.
  • Acrylic Latex Paint: Modern acrylics are fantastic for exterior metal that expands and contracts, like siding or architectural features. Their built-in flexibility prevents the cracking and chipping that can happen with more rigid paints.
  • Epoxy Coatings: When you need maximum durability, this is the answer. Two-part epoxies create a finish that’s practically bulletproof, offering unmatched resistance to chemicals, moisture, and abrasion. We rely on them for demanding commercial spaces like warehouse floors and professional kitchens.

Choosing Your Tools: How to Apply Paint for a Professional Finish

A paint brush, paint roller, and spray gun displayed on a brushed metal sheet.

You've done the prep work and picked the perfect paint. Now comes the moment of truth: the application. The tool you choose is what separates an amateur job from a durable, professional-grade finish. Your choice really depends on the size, shape, and texture of the metal surface you're working on.

Brushing: For Control and Detail Work

When it comes to intricate jobs, nothing gives you more control than a good brush. This is perfect for projects like wrought-iron railings, metal window frames, or cutting in the edges of a metal door.

A high-quality, synthetic-bristle angled sash brush is your best friend here. It’s designed for creating those razor-sharp lines. The trick is to dip only the first third of the bristles into the paint and then use long, steady strokes with light pressure. This helps you avoid overloading the surface and leaving behind those telltale brush marks.

Rolling: The Go-To for Large, Flat Areas

If you’re facing a big, flat surface like a commercial roll-up door, a large metal gate, or siding panels, a roller will be your most efficient option. But not just any roller will do—the roller cover (or nap) is everything.

  • Smooth Metal: For a perfectly smooth surface, grab a short-nap roller, something in the 1/4" to 3/8" range. This gives you great coverage without laying the paint on too thick, which is key to avoiding drips and getting a clean, uniform look.
  • Textured or Corrugated Metal: If your surface has some texture, like corrugated siding, you’ll want a slightly thicker nap of around 1/2". This ensures the paint gets into every groove and valley for complete protection.

Spraying: For the Ultimate Flawless Finish

For that pristine, straight-from-the-factory look, you simply can't beat spraying. This is the method we use for most of our commercial painting services near me, especially on large-scale projects. High-Volume, Low-Pressure (HVLP) or airless sprayers atomize the paint into a fine mist, which lays down in a perfectly even layer without a single brush or roller mark.

Of course, professional spray equipment requires maintenance to perform at its best. If you're managing your own gear, knowing about topics like choosing the right pump repair kit for your airless sprayer is essential for keeping your projects on track.

Even aerosol spray cans can give you a great finish on smaller jobs. The secret is to keep the can moving in smooth, overlapping passes about 8-12 inches from the. Always apply several thin coats rather than one thick one to prevent runs.

No matter which tool you use, the golden rule is this: thin, even coats are always better. It might feel slower, but two or three thin coats will cure harder, look smoother, and last significantly longer than one thick, heavy coat that's prone to sagging and drips.

When to Call a Professional for Your Painting Project

Let's be honest, not every metal painting job is a good fit for a DIY weekend. While tackling a small fence or some outdoor furniture can be rewarding, knowing when to call in a professional is the real key to a great result that protects your investment.

Sometimes, the scale, complexity, or materials involved just demand a professional touch. For both homeowners and facilities managers, making that call can be the difference between a finish that lasts for years and one that fails before the next season. It's less about whether you can do it and more about whether you can do it safely, efficiently, and to a standard that protects your property.

Large-Scale and Complex Projects

The most obvious sign it's time to look for professional painting and construction services is the sheer size of the job. Are you thinking about painting the entire metal siding of a commercial building, a huge warehouse, or an extensive metal roof? This is where a DIY approach quickly becomes impractical and, frankly, unsafe.

Professional crews have this down to a science. They arrive with commercial-grade sprayers for a perfectly uniform coat, along with the proper scaffolding and aerial lifts to safely reach every corner. A coordinated team can get a massive project done in a fraction of the time, minimizing disruption to your business. This is especially critical for projects involving large-scale facility construction services.

Specialized Coatings and Finishes

Some projects require coatings that you just can't find at the local hardware store. When you step into the world of industrial-grade finishes, it’s time to bring in someone who handles them every day.

We see this all the time with:

  • Two-Part Epoxies: These are fantastic for high-traffic floors or commercial kitchens, but they require precise mixing and have a very short window for application. Get it wrong, and the product won't cure.
  • Specialty Urethanes: Perfect for providing UV resistance on exterior architectural metal, but they can be tricky to apply without streaks or bubbles.
  • Complex Commercial Renovations: Jobs like retail build-outs or an office space renovation often have strict specifications for durability and performance that only professional-grade products can meet.

A seasoned professional has the muscle memory that comes from working with these demanding products. They know exactly how to prep the surface, the right application technique for a flawless finish, and how to manage curing times to ensure the coating performs exactly as it's designed to.

The Value of Local Expertise

Here in our community, the perpetually damp climate is the ultimate test for any paint job. This is where a local professional's experience becomes invaluable. They’ve spent years seeing what works—and what doesn't—in our soggy environment.

A local contractor who truly understands the weather knows which primers are essential for fighting off relentless moisture and how to time an application so it cures properly, even on a cool, overcast day.

Partnering with an experienced local team like Wheeler Painting isn't just about hiring painters; it's an investment in a guaranteed, long-lasting result. You’re getting peace of mind and protecting your property from the costly cycle of paint failure and repairs.

Frequently Asked Questions About Painting Metal

After years of serving homeowners and businesses in our area, we’ve found that the same few questions come up on almost every job. Everyone wants to know how to get a paint job that lasts. So, let's clear up some of the most common concerns.

Can I Just Paint Over Rust?

It’s tempting, we get it. You see a little rust and think a quick coat of paint will hide it. But this is probably the single biggest mistake you can make.

Painting over rust is like putting a small bandage on a serious wound. The rust won't stop growing just because it's covered. It will continue to eat away at the metal underneath, causing your brand-new paint to bubble, crack, and flake off in no time. You'll be right back where you started, but with a bigger mess.

The only way to get a lasting finish is to deal with the rust head-on. You have to remove every bit of loose, flaky rust with a wire brush, scraper, or sander. For really stubborn areas, a rust converter can be a lifesaver—it chemically changes the rust into a stable, paintable surface. Only then, once the surface is clean and sound, can you even think about priming.

What’s the Best Paint for Outdoor Metal?

In our damp climate, choosing the right paint is all about fighting off moisture. There’s no single "best" paint—the right choice depends entirely on what kind of metal you're working with.

  • For Steel or Wrought Iron: We almost always lean toward a direct-to-metal (DTM) oil-based enamel. These create a tough, rock-hard shell that’s fantastic at blocking moisture and preventing rust from starting.
  • For Aluminum: You'll want to go with a high-quality acrylic latex paint. Aluminum expands and contracts a lot with our temperature swings, and acrylics are flexible enough to move with it without cracking.

No matter which paint you choose, the real secret to success is the prep work. A thorough cleaning followed by the right primer—a rust-inhibiting one for steel and a self-etching one for aluminum—is what makes the topcoat stick and gives you that long-term protection.

Do I Always Need to Use a Primer on Metal?

Yes. Pretty much always. Skipping the primer is the most common shortcut we see, and it’s almost always the reason a metal paint job fails. Primer does two critical jobs: adhesion and protection.

Metals like aluminum and galvanized steel are notoriously slick, and paint has a hard time grabbing on. A self-etching primer actually bites into the metal, creating a perfect surface for your paint to adhere to. For iron and steel, a rust-inhibiting primer acts as your frontline defense against corrosion, which is a constant battle in our local climate.

We get asked about "paint-and-primer-in-one" products all the time. While they have their place for certain indoor projects, they simply don't offer the same level of grip or long-term protection as a dedicated primer coat, especially for anything that lives outside.

How Long Does Professionally Painted Metal Last?

This depends on a few things: the quality of the prep work, the specific coatings used, and how much abuse the metal takes from weather and use.

For a professionally painted exterior metal surface in our region, you can realistically expect the finish to last anywhere from 5 to 15 years. For example, a commercial steel door we coat with a high-performance two-part epoxy might look great for over a decade. A decorative wrought iron railing painted with a standard enamel, on the other hand, will probably need a refresh in about 5-7 years.

A little maintenance, like annual cleaning, can go a long way in getting the most life out of any paint job.


For residential or commercial construction projects big or small, having a professional handle the job ensures the prep is done right and the finish is built to last. If you're considering a painting or renovation project for your property, the team at Wheeler Painting is here to help our community.

Get Your Free Estimate from Wheeler Painting

A Property Owner’s Guide to UV Resistant Paint

Let’s get straight to it: UV resistant paint is essentially high-performance sunscreen for your home or commercial property. It’s a special kind of coating formulated specifically to stand up to the sun’s relentless ultraviolet (UV) rays, which are the real culprits behind faded, cracked, and peeling paint. Making the right choice can feel overwhelming, but this guide will walk you through what you need to know in simple, helpful terms.

Protecting Your Property With UV Resistant Paint

A vibrant green house by the ocean with a shimmering protective shield over its windows.

Here in our local service area, we cherish our sunny days, but that intense summer sun can be brutal on a building's exterior. That rich, vibrant color you loved when you first painted can look dull and chalky in just a few years. This isn't just about looks—it’s a clear warning that your property's first line of defense is failing.

Most standard exterior paints just aren't built to handle the constant UV exposure. Day after day, the sun’s radiation breaks down the chemical binders in the paint, a process called photo-oxidation. This assault leaves the paint film brittle and weak, unable to protect the wood, fiber cement, or metal underneath.

The Long-Term Value of Advanced Protection

Opting for a quality uv resistant paint is one of the smartest long-term decisions a property owner, business owner, or facilities manager can make. These advanced coatings contain special pigments and additives that either absorb or reflect UV radiation before it can degrade the paint. This means colors stay true and the paint finish remains flexible and intact for far longer than you'd get from a conventional paint.

For a business, that means maintaining a sharp, professional curb appeal. For a homeowner, it’s about protecting your biggest asset and avoiding premature maintenance headaches.

A great paint job isn't just cosmetic; it's a protective shield. By deflecting the sun's attack, UV resistant paints drastically cut down on how often you need to repaint, saving you thousands of dollars over the life of your building.

This level of protection is a game-changer in our region. Our unique climate cycle of damp winters followed by bright, dry summers puts incredible stress on any painted surface. Applying the right coating—and applying it correctly—is the key to a beautiful finish that lasts. At Wheeler Painting, a trusted local provider, we specialize in helping property owners choose and apply coatings designed to withstand our local weather, ensuring your investment looks fantastic for years to come.

How UV-Resistant Paint Defends Your Surfaces

Ever wonder why the paint on an old shed or park bench gets that dull, chalky look? Or why a once-vibrant front door starts to fade after just a few years? The culprit is the sun. Its invisible ultraviolet (UV) rays are constantly bombarding your building's exterior, and standard paint just can't hold up.

Think of a newspaper left on the dashboard of a car. In a short time, the sun yellows the paper and makes it brittle enough to crumble. A similar process, called photo-oxidation, happens to regular paint. UV radiation attacks the chemical bonds that hold the paint together, breaking them down one by one. This is what causes colors to fade, the finish to go chalky, and the paint to crack and peel, leaving the surface underneath exposed.

This isn't a minor issue—it's the primary reason exterior paint jobs fail. In fact, solar radiation is responsible for about 80% of all exterior paint failures. It's no surprise, then, that the global market for weather-resistant coatings was valued at USD 8.5 billion in 2024 and is expected to climb to USD 14.3 billion by 2032, according to market analysis from IntelMarketResearch.com. Homeowners and property managers are catching on: fighting the sun requires a specialized formula.

The Science: Sunscreen and a Repair Crew for Your Walls

So, what makes UV-resistant paint different? It's all in the additives. These paints are engineered with a powerful one-two punch that neutralizes UV radiation before it has a chance to wreak havoc.

First up are additives called UV absorbers. Their job is simple: act like a high-SPF sunscreen for your siding. These microscopic compounds are specifically designed to absorb incoming UVA and UVB rays. They take the hit, convert that energy into a tiny, harmless amount of heat, and release it. The paint’s binders and color pigments are never touched.

By essentially sacrificing themselves, these absorbers form the first line of defense, stopping the vast majority of damaging radiation right at the surface.

UV absorbers are the silent heroes in your paint. They take the hit from solar radiation so the paint’s color and structure don’t have to, preserving your property's vibrant appearance and protective layer.

A Microscopic Repair Crew That Never Quits

Even the best sunscreen can miss a few spots. Some UV radiation will inevitably sneak past the absorbers. That's where the second key ingredient comes in: Hindered Amine Light Stabilizers, better known as HALS.

If UV absorbers are the shield, HALS are the microscopic, always-on-call repair crew. When a stray UV ray gets through and creates a destructive molecule known as a "free radical," HALS spring into action. They find these free radicals and neutralize them on the spot, stopping them from starting a chain reaction of damage within the paint film.

The truly amazing thing about HALS is that they are self-regenerating. After neutralizing a free radical, they return to their original state, ready to do it all over again. This means they don't get used up, allowing them to patrol and protect the paint for years.

This powerful combination is what gives uv resistant paint its incredible staying power:

  • UV Absorbers: Block most of the incoming solar radiation at the surface.
  • HALS: Continuously patrol the paint film, cleaning up any damaging free radicals that form.

Together, they ensure the paint holds its color, stays flexible, and continues to protect your property. This advanced chemistry is why a high-performance coating is such a smart investment for any property owner, especially in our local service area where the summer sun can be surprisingly intense.

Choosing the Right UV Resistant Coating

Picking the right UV resistant paint isn't a one-size-fits-all decision. It's really about matching the product to the surface and the environment. You wouldn't use wall paint on your deck, and for the same reason, different exterior materials need specific kinds of protection to stand a fighting chance against the sun.

Not all UV coatings are built the same. Each type brings something different to the table, whether you're handling a residential home improvement project or painting a massive commercial building. Getting this choice right from the start is the key to a paint job that lasts and looks great for years. Let's walk through the main options and see where they shine.

Exterior Acrylic and Latex Paints

For the vast majority of homes in our community, a high-quality acrylic or latex paint is your best bet for exterior painting. Today’s formulas are light-years ahead of old oil-based paints. They’re durable, they hold their color exceptionally well, and they’re flexible. Most importantly, they breathe, letting moisture escape from inside the walls—a must-have feature in our damp climate.

These paints work beautifully on all sorts of common surfaces:

  • Wood Siding and Trim: They expand and contract right along with the wood as temperatures fluctuate, which dramatically cuts down on cracking and peeling.
  • Fiber Cement Siding: They create a strong bond with fiber cement, resulting in a smooth, long-lasting finish that handles both sun and relentless rain.
  • Vinyl Siding: There are even specialized formulas that stick to vinyl without causing it to warp, giving it a complete refresh as part of a residential remodeling project.

The best of these paints are made with 100% acrylic binders, which are naturally great at resisting UV damage. This makes them a reliable, smart choice for most homes. They deliver solid protection without needing complex or specialized application. And if you're thinking about a new look, our guide on how to choose exterior paint colors can help you find a palette that will last.

This flowchart shows how the special additives in these paints work together as a team to guard the surface.

Flowchart illustrating how UV paint works, explaining its components: UV absorbers and HALS.

As you can see, it’s a two-pronged defense: UV absorbers act like a primary shield, and HALS clean up any rays that sneak past, giving the paint a much longer life.

High-Performance Elastomeric Coatings

When you need to protect surfaces like commercial masonry, stucco, or concrete, elastomeric coatings are in a league of their own. This stuff is thick—it can be applied up to 10 times thicker than standard paint. But its real superpower is its incredible flexibility. It can stretch and snap back to its original form without a single crack.

Think of elastomeric paint as a thick, waterproof, rubber-like membrane for your building. It doesn't just color the surface; it seals it completely against the elements.

This amazing stretchiness allows elastomeric coatings to bridge the hairline cracks that inevitably appear in masonry. As a building settles or shifts with temperature changes, the coating simply stretches over the gaps, keeping the waterproof barrier intact. For commercial properties, retail build-outs, and other large facilities, this is a game-changer, preventing water intrusion that could lead to huge repair bills. These are key considerations for "commercial painting services near me."

Specialized UV Resistant Clear Coats

Sometimes, you love the look of a surface and just want to protect it, not cover it up. This is where UV-resistant clear coats are perfect. These transparent finishes create a tough, non-yellowing shield that takes the brunt of the sun's abuse, letting the natural beauty of the material underneath show through.

Clear coats are an ideal solution for:

  • Deck & Porch Staining: Protecting decks, front doors, or porches from fading while preserving the rich wood grain.
  • Exposed Metal: Stopping architectural metal features from oxidizing or losing their color.
  • Painted Artwork: Shielding outdoor murals and other custom finishes from sun damage.

These coatings act as a sacrificial layer, absorbing the UV radiation so the material they're protecting doesn't have to.

UV Resistant Coating Comparison Guide

To make it even clearer, here’s a quick breakdown of how these different coatings stack up and where they’re best used on properties in our service area.

Coating Type Best For Key Benefit Typical Lifespan (Years)
Acrylic Latex Paint Wood, fiber cement, vinyl siding Breathability & color retention 7 – 10
Elastomeric Coating Concrete, stucco, masonry, brick Crack-bridging & waterproofing 10 – 15+
UV Clear Coat Stained wood, metal, murals Protects underlying material 3 – 7

By understanding these options, you can feel confident that your property is not only beautiful but also truly defended against the sun for years to come.

Understanding Paint Performance and Durability

When you invest in a new paint job for your home or business, you're not just picking a color—you're buying protection. But how do you know if a high-quality UV resistant paint is actually going to last? The difference between a paint job that looks great for a decade and one that fails after a few years of local sun and rain comes down to a few key performance metrics.

As professional painters, we see firsthand what holds up and what doesn't. Understanding these factors helps you look past the fresh shine and see the real value you're getting from a superior coating.

Key Metrics of a Lasting Finish

When we're evaluating a paint’s real-world performance, we look at how it's going to stand up to the elements over time. Three of the most critical factors are color retention, gloss retention, and chalk resistance.

  • Color Retention: This is simply a measure of how well a paint resists fading. A paint with poor color retention will see its vibrant color wash out under UV exposure, turning a deep, rich blue into a dull, dusty gray. The best UV-resistant paints use incredibly stable pigments and binders that lock in color for years.

  • Gloss Retention: This describes how long a paint keeps its original sheen, whether it's a flat, satin, or semi-gloss finish. When a paint loses its gloss, it’s not just a cosmetic issue; it’s an early sign that the paint film is starting to break down, making it harder to clean and less protective.

  • Chalk Resistance: Have you ever run your hand over an old, faded paint job and come away with a powdery residue? That’s "chalking." It happens when UV rays destroy the paint’s binders, leaving the pigment particles behind as dust. A great paint will resist this breakdown, maintaining a solid, intact surface that shields your property.

These qualities aren't just about looking good; they have a direct impact on your wallet. A durable paint job means you can go much longer between expensive repaints. The technology making this possible is often adapted from high-stakes industries where failure is not an option. For instance, the market for UV-resistant aircraft exterior paints is expected to hit nearly USD 946.9 million by 2036. For homeowners in our community, that same advanced science gives us paints that resist chalking up to 70% longer than standard acrylics, saving property owners thousands over the life of their home. You can read more on this market's growth at Future Market Insights.

Demystifying Paint Warranties

Many property owners are surprised to learn what a manufacturer's paint warranty actually covers—and more importantly, what it doesn't. It’s crucial to have realistic expectations, because these guarantees are often more limited than you might think.

A paint warranty almost always covers the product itself, not the labor to reapply it. If the paint is found to be defective, the manufacturer will typically provide replacement paint but will not pay for the cost of scraping, preparing, and repainting the surface.

This is exactly why professional application is so vital. A manufacturer will void their warranty in a heartbeat if the paint was applied improperly—over a dirty surface, in the wrong weather, or without the right primer. Warranties also won’t cover failures caused by underlying issues with your home, like moisture intrusion or rotted siding.

Think of a warranty as a statement of the manufacturer's confidence in their product when used correctly. Choosing a top-tier UV resistant paint is the first step. The second, and equally important, step is hiring a trusted local provider who stands behind their own work. For specialized surfaces that need extreme durability, like garage floors or commercial spaces, other coatings like epoxy offer similar protective benefits; you can check out our guide on epoxy floor coatings to see if it's right for you.

Professional Application for Maximum Longevity

Man in high-visibility vest and hard hat painting a house exterior white with a paint roller.

Even the most advanced uv resistant paint will fail if it's not applied correctly. Think of it like buying top-of-the-line tires for your car. If they’re mounted improperly, they won't perform well or last long. The exact same principle applies to paint—the quality of the application is just as crucial as the quality of the product itself.

Getting a beautiful, durable finish that can withstand the unique challenges of our local weather is part science, part craft. A professional crew with local experience knows all the variables that can make or break a project, from the condition of the siding to the humidity in the air. That expertise is what turns an investment in premium paint into the outstanding, long-term results you expect when searching for "house painting near me."

The Non-Negotiable Foundation: Surface Preparation

The single most critical step of any paint job happens before a can is even opened. Proper surface preparation is the bedrock of a lasting finish. It's a non-negotiable part of any professional project, because slapping new paint over a dirty, peeling, or failing surface is a surefire recipe for premature failure.

A truly meticulous prep process always includes several key stages:

  1. Thorough Cleaning: Every square inch of the exterior needs to be pressure washed or hand-washed. This removes all the built-up dirt, mildew, pollen, and chalky old paint residue, giving the new primer and paint a clean, stable surface to grab onto.
  2. Scraping and Sanding: We scrape away every bit of loose, peeling, or cracking paint. Then, we "feather sand" the edges to create a smooth, seamless transition between the bare surface and the old paint. This prevents ugly lines from telegraphing through the final coats.
  3. Repairs: Any damaged siding, rotted trim, or other structural problems have to be fixed first. Painting over compromised materials is like putting a bandage on a broken bone—it might hide the problem for a little while, but it doesn’t actually solve it. This is a crucial step for both residential remodeling and commercial renovations.
  4. Priming: A high-quality primer is applied to any bare wood and repaired spots. Primer is the essential bridge between the surface and the topcoat; it seals stains, ensures a strong bond, and creates a uniform canvas so the final color and sheen look perfect.

Here's a statistic that shocks many property owners: poor surface preparation is the culprit behind over 80% of all paint failures. A professional crew spends the majority of their time on these foundational steps, knowing that this is where the longevity of the job is truly won or lost.

Applying Paint in the Right Conditions

For paint to cure into that hard, protective shell it’s designed to be, it has to be applied within a specific window of temperature and humidity. In our service area, that’s especially important. Our weather can be all over the place, but experienced local painters know how to work with it, not against it.

Putting on paint when it's too cold can stop it from curing properly, leaving the finish soft and vulnerable to damage. On the flip side, painting in direct, hot sun can make it dry too fast, causing brush marks, blisters, and weak adhesion. If you've ever seen paint bubble on walls, for example, the conditions during application were likely a major factor. For a deeper look, our article explaining what causes paint to bubble on walls breaks it down further.

The Value of Experienced Execution

When you hire a seasoned team like Wheeler Painting, you’re not just paying for people to roll paint on your walls. You’re investing in a guaranteed outcome. We have the right equipment, a deep understanding of how different uv resistant paint formulas behave, and the local knowledge to get every single step right.

Whether we’re managing a residential home improvement project or large-scale commercial renovations, our process is built to ensure your property is protected and looks fantastic for years to come.

When to Call in the Pros for Your Project

Most of us have tackled a weekend painting project. But sometimes, what looks like a simple repaint is actually your house telling you something much bigger is wrong. Knowing the difference between a DIY touch-up and a job that needs a professional eye can save you a ton of frustration and money.

If you see paint cracking in a pattern that looks like alligator skin, or if it's peeling off in big sheets, stop and put the scraper down. These aren't just cosmetic issues. They're giant red flags signaling deeper trouble. An experienced pro can spot the real culprits—things like hidden rot in the trim, moisture wicking up through the siding, or failing window seals that are letting water in.

Just slapping new paint over these problems is like putting a small bandage on a major injury. A team that handles both painting and repairs can diagnose the root cause, ensuring you're not just hiding rot but actually fixing it for good.

Beyond Just a Paint Job: The Value of a True Restoration

When you discover that peeling paint is just the tip of the iceberg, the last thing you want is the headache of managing two different contractors. Imagine finding out your siding is compromised. Now you have to find and schedule a construction crew, wait for them to finish, and then bring the painters back.

A full-service team like Wheeler Painting, your "residential contractor near me," eliminates that chaos. We handle both the structural repairs and the flawless finish, all under one roof. This seamless approach is a lifesaver for property owners in our community. We're equipped to manage:

  • Residential Remodeling: Whether it's siding replacement or fixing dry rot found under old paint, we coordinate the construction and finishing touches perfectly.
  • Commercial Renovations: Time is money for any business. We keep retail build-outs and office space renovations on track, handling everything from new drywall to the final coat of paint.
  • Institutional Painting and Facility Construction Services: Our experience with larger projects ensures we deliver on time and within budget, from new builds to major renovations. We are your partner for "commercial construction near me."

Professional expertise also means access to the latest coating technologies. For example, the market for UV-curable coatings is exploding—projected to hit nearly USD 15 billion by 2033—because they dry instantly and offer immediate UV protection. Wheeler Painting uses these advanced finishes to protect everything from high-traffic commercial interiors to custom cabinetry, drastically reducing sun-fading. If you're interested in the data, you can explore the full market research from GrandViewResearch.com.

If your property is showing signs of serious paint failure or you're planning a bigger project, don't leave it to guesswork. Contact Wheeler Painting for an expert consultation. We’ll build a comprehensive plan to restore your property and protect your investment for years to come.

Frequently Asked Questions About UV Resistant Paint

As professional painters in our local community, we get a lot of questions from property owners trying to protect their homes and businesses from the sun. Here are some straightforward answers to the questions we hear most often about UV resistant paint.

Is UV Resistant Paint Really Worth the Extra Cost?

That's a smart question, and we hear it all the time. It's easy to look at the higher price per gallon and wonder if it's just a gimmick. But the real value isn't in the can; it's in the years of performance you get out of it.

These advanced paints are formulated to last, often twice as long as their standard counterparts. This means you can push back your next full, expensive repaint—and all the labor and material costs that come with it—for several more years. For any building in our local service area, that adds up to fewer headaches and a much lower cost to maintain your property over time.

Can I Just Paint Over My Old Flaking Paint?

I know it’s tempting to just slap a coat of new paint over the old stuff, but that’s the fastest way to guarantee your new paint job will fail. The new paint needs a solid, stable surface to grab onto. If the layer underneath is already peeling, the new paint will just come right off with it.

Think of it like this: all the cleaning, scraping, sanding, and priming we do isn't just busywork. It's the foundation of the entire project. Getting that surface preparation perfect is what allows a high-quality coating to bond properly and give you the durable, long-lasting finish you're paying for.

Are UV Resistant and Weatherproof Paints the Same Thing?

They're related, but not quite the same. "Weatherproof" is a catch-all term for paints that can handle moisture, humidity, and big temperature swings. "UV resistant," on the other hand, is all about fighting off damage from the sun's radiation.

The good news is that you don't have to choose. Any high-quality exterior paint worth its salt will have strong UV blockers built right in, because the sun is a huge part of what we call "weather." For our unique climate—wet winters and surprisingly intense sunny summers—you absolutely need a paint that excels at both.

Should I Use UV Resistant Paint Inside My Home?

Yes, it’s often a great idea, especially in rooms that get flooded with natural light. If you have big south-facing windows, French doors, or skylights, you've probably seen how sunlight can fade walls, hardwood floors, and even furniture over time.

Using an interior painting product with built-in UV protection can dramatically slow down that aging process. We also use clear UV-blocking topcoats on things like stained wood cabinets, trim, and built-ins. It's a fantastic way to keep your home’s interior looking fresh and vibrant for years, protecting the investment you've made in its appearance.


Ready to protect your property with a finish that’s built to last? The team at Wheeler Painting has the local expertise to choose and apply the perfect UV resistant paint for your home or business.

Contact us today to schedule your consultation.

8 Professional Tips for Painting Trim Like a Pro

Crisp, clean trim is the finishing touch that elevates any room, home exterior, or commercial space. Achieving a professional-looking finish, however, requires more than just a brush and a can of paint. For property owners, business owners, and facilities managers in Western Washington, painting trim comes with unique challenges, from our humid climate to ensuring long-lasting durability against daily wear. This guide breaks down essential tips for painting trim, covering everything from meticulous preparation to applying the final, perfect coat.

Whether you're tackling a home refresh or overseeing a commercial renovation, these straightforward steps will help you achieve the sharp lines and smooth finish that define high-quality work. We'll explore the techniques and materials that professionals, like our experienced local team at Wheeler Painting, use to deliver exceptional results on both residential and commercial projects throughout the Puget Sound region. Inside, you'll find clear guidance on proper caulking, surface prep, and selecting the right paint and tools for the job. Following these expert recommendations will not only improve the appearance of your space but also protect your investment for years to come.

1. Proper Surface Preparation and Cleaning

The most critical step for a durable, professional finish on your trim isn't the final coat of paint—it's the prep work. Proper surface preparation is the foundation of any successful painting project, ensuring the paint adheres correctly and stands up to wear and tear. At Wheeler Painting, we know from experience that an impressive 80% of a high-quality paint job's longevity comes directly from meticulous preparation.

This initial step is more than a quick wipe-down. It requires thoroughly cleaning all trim to remove dust, grime, oils, and any signs of mildew, which is especially important in the damp Puget Sound climate. After a deep clean, careful sanding creates a uniform, slightly abraded surface that allows the primer and paint to form a strong bond. This applies to both interior trim, like baseboards and door casings, and exterior elements like fascia boards exposed to Western Washington’s weather.

Why This Step is Crucial

Skipping or rushing preparation is the main cause of paint failure, leading to peeling, chipping, and bubbling down the road. For commercial spaces, such as in tenant improvements or office renovations, preparing high-traffic trim areas ensures the finish can withstand daily use. Similarly, for residential projects like kitchen remodels, this detailed work is what allows cabinet and molding finishes to look great for years. The specific techniques for prepping high-use surfaces are a key part of our process, which you can explore further in our guide to painting kitchen cabinet doors.

Actionable Tips for Perfect Prep:

  • Deep Clean First: Use a TSP (trisodium phosphate) substitute or a quality degreasing cleaner to wash all trim surfaces. This is especially important in kitchens and bathrooms where grease and product residue can build up.
  • Sand for Success: After the surface is completely dry, sand it with 120 to 150-grit sandpaper. The goal is to scuff the old finish, not strip it. This micro-texture gives the new paint something to grip.
  • Remove All Dust: Vacuum the trim and surrounding areas thoroughly with a brush attachment. Follow up with a tack cloth or a lightly dampened microfiber cloth to remove every last bit of sanding dust.
  • Address Moisture (Exterior): For exterior trim in our region, confirm there are no underlying moisture issues. Paint won't fix rot or water damage; these problems must be repaired first for a lasting result.

2. Selecting the Right Primer for Trim

Just as crucial as surface prep, choosing the right primer acts as the essential middleman between the trim and the final paint color. Primer is the key to a uniform, long-lasting finish. It ensures the topcoat adheres properly, blocks underlying stains, and creates a consistent base for the true color to shine through. At Wheeler Painting, we see primer as non-negotiable insurance for a professional result, whether it's for interior baseboards or exterior window casings facing the Puget Sound elements.

The type of trim, its current condition, and its location dictate the best primer for the job. You wouldn't use the same product on new, unfinished wood as you would on old, glossy, oil-painted trim. Each scenario requires a specific formulation to solve potential problems before they arise. For example, the beautiful cedar trim common in Western Washington homes often requires a specialty primer to block natural tannins from bleeding through and discoloring the new paint.

Why This Step is Crucial

Using the wrong primer or skipping it entirely can undermine all your careful preparation. It can lead to poor adhesion, resulting in peeling paint, or allow old stains to reappear weeks or months later. In our commercial work, such as office renovations or retail build-outs, using a high-hide primer tinted toward the topcoat color can reduce the number of finish coats needed. This saves on material costs and accelerates the project timeline—a critical factor for businesses needing to minimize downtime.

Actionable Tips for Perfect Priming:

  • Match Primer to the Problem: Use a stain-blocking primer on any trim with water, smoke, or tannin bleed. For covering old, glossy oil paint, a bonding primer provides superior grip.
  • Consider a Tinted Primer: Ask your paint store to tint your primer to a lighter shade of your topcoat color. This improves the new color’s coverage and can often save you from needing a third coat of paint.
  • Go Mildew-Resistant for Exteriors: For exterior trim constantly exposed to our damp climate, a high-quality, mildew-resistant primer is essential to prevent unsightly growth and protect the wood.
  • Test for Compatibility: Before committing, always apply your chosen primer to a small, inconspicuous area. Let it dry completely to ensure it adheres properly and doesn't react negatively with the existing finish.

3. Using Quality Brushes and Application Tools

The quality of your painting tools directly translates to the quality of your finish. While it may seem like a small detail, the difference between a cheap brush and a professional-grade applicator is immediately visible in the final result. At Wheeler Painting, our experience across thousands of local residential and commercial projects has taught us that premium tools are a non-negotiable investment for achieving crisp lines, smooth surfaces, and lasting durability on trim.

Using the wrong tools is a common pitfall that leads to frustration. Low-quality brushes shed bristles into your fresh paint, create uneven coverage, and leave behind unsightly brush marks. For detailed trim work, precision is everything, and only the right tools can deliver the control needed for a flawless application. This is particularly important for commercial tenant improvements where efficiency and a pristine appearance are paramount, and for high-detail residential jobs like cabinet door painting.

Close-up of a paint brush with white paint coating its bristles on a white painted trim.

Why This Step is Crucial

Investing in quality tools saves time and prevents rework. A good brush holds more paint, applies it more evenly, and cuts a cleaner line, reducing the need for extensive touch-ups. For property managers overseeing office space renovations or retail build-outs in the Puget Sound area, efficient application means fewer labor hours and faster project completion. Similarly, for homeowners, the right brush makes the difference between a frustrating DIY struggle and a satisfying, professional-looking outcome on baseboards, window casings, and crown molding.

Actionable Tips for Perfect Application:

  • Invest in Angled Sash Brushes: These are essential for "cutting in" clean lines where trim meets walls or ceilings. The angled tip provides superior control for detailed work.
  • Choose the Right Size: Use a 2 to 3-inch trim brush for wider, flat surfaces like door casings and baseboards. Select smaller, specialized brushes for intricate moldings.
  • Match Bristle to Paint Type: Use synthetic bristle brushes (like nylon or polyester) for latex/water-based paints. Natural bristles should be reserved for oil-based products.
  • Proper Brush Care is Key: Clean brushes thoroughly after use. For short breaks with latex paint, wrap brushes tightly in plastic.
  • Know When to Replace: Once bristles become frayed, stiff, or damaged, it's time for a new brush. A worn-out tool will compromise your finish.

4. Masking and Protecting Adjacent Surfaces

A sharp, professional trim paint job is defined by its clean lines and flawless edges. Achieving this level of precision requires diligently protecting all adjacent surfaces—a step known as masking. This process involves strategically covering floors, walls, and hardware to prevent accidental paint transfer. Not only does this ensure a pristine finish, but it also dramatically reduces cleanup time and protects your property from damage.

For any project, from a residential remodel to a complex commercial build-out, meticulous masking is a non-negotiable part of our workflow. It's the difference between an amateur result and a truly professional one. Protecting new flooring during a kitchen renovation or ensuring an occupied tenant space remains spotless during a remodel are practical applications of this essential technique. Modern materials, like advanced painter's tapes, have made it easier than ever to achieve perfect lines without leaving residue or damaging surfaces.

Blue painter's tape applied along a white baseboard, preparing a room for painting.

Why This Step is Crucial

Careless paint splatters on walls or floors can turn a simple project into a costly and frustrating repair job. Proper masking contains the mess from the start, safeguarding your investments and ensuring the only surface that gets painted is the one you intend. In a commercial setting, like an office space renovation, effective masking contains dust and fumes, allowing business operations to continue with minimal disruption. For homeowners, it provides peace of mind that new carpets, hardwood floors, or custom wallpaper will remain untouched.

Actionable Tips for Perfect Masking:

  • Invest in Quality Tape: Use a high-quality painter's tape designed for clean lines. The small extra cost pays off by preventing paint from bleeding underneath.
  • Secure the Edges: After applying the tape, run a putty knife or your fingernail along the edge to press it down firmly. This creates a tight seal that paint cannot penetrate.
  • Cover Broadly: Lay down drop cloths or plastic sheeting to cover floors and furniture. A good rule is to extend this protection at least two feet beyond the area where you are working.
  • Remove Tape Correctly: For the sharpest lines, pull the tape off while the paint is still slightly tacky but not fully wet. Pull it away from the trim at a 45-degree angle to avoid lifting the fresh paint.
  • Protect Hardware: Whenever possible, remove door handles, hinges, and outlet covers. If removal isn't an option, wrap them carefully and completely with painter's tape.

5. Applying Paint in Optimal Temperature and Humidity Conditions

The success of a paint job, particularly for detailed trim work, is deeply connected to the environmental conditions during application and curing. Temperature and humidity directly influence how paint flows, levels, and adheres. In the damp, often cool climate of Western Washington, managing these variables is a non-negotiable step for achieving a professional, long-lasting finish on both interior and exterior projects.

At Wheeler Painting, our extensive experience in the Puget Sound region has taught us to plan projects around the weather. Ideal conditions typically fall between 50-85°F with humidity levels between 40-60%. Applying paint outside this range can lead to poor adhesion, uneven sheen, and prolonged drying times, compromising the entire project. For commercial tenant improvements in occupied spaces, this means using climate control to create a stable environment, ensuring work is completed efficiently without disrupting business operations.

Why This Step is Crucial

Ignoring temperature and humidity is a common mistake that leads to frustrating and costly paint failures. Paint applied in cold, damp conditions may never cure properly, remaining soft and susceptible to damage. Conversely, high heat can cause paint to dry too quickly, showing brush marks and creating a weak bond. For residential remodeling, such as after water damage, we must ensure all moisture is fully addressed before any trim painting begins to prevent blistering and peeling. Understanding these environmental factors is a core part of providing reliable, high-quality tips for painting trim.

Actionable Tips for Perfect Application Conditions:

  • Plan Around the Forecast: Before starting any exterior trim painting, check the local forecast for a clear, dry window. In the Puget Sound area, this often means scheduling projects during the summer months.
  • Monitor Interior Conditions: For interior projects during damp seasons, consider using temporary heating and dehumidifiers to create an optimal environment. A moisture meter can confirm that surfaces are dry enough for painting.
  • Allow for Extended Drying: Be patient. Cool or humid weather significantly extends the time paint needs to dry and cure. Rushing the process by closing windows too soon can trap moisture and ruin the finish.
  • Know When to Stop: If rain is expected within the paint’s required drying window, it’s best to stop painting. You can find more details in our guide on the right temperature for exterior painting.

6. Multiple Thin Coats Rather Than Single Heavy Coat

The desire for a quick finish often tempts painters to apply one thick, heavy coat of paint, hoping to achieve full coverage in a single pass. However, professionals know this is a shortcut to an inferior result. The secret to a smooth, durable, and truly professional finish on trim lies in applying multiple thin coats. This methodical approach ensures superior color uniformity, better adhesion, and a flawless surface that a single heavy coat can never replicate.

This principle is fundamental across all our projects at Wheeler Painting, from the glass-like finish on custom residential cabinetry to the resilient trim in high-traffic commercial build-outs. A thick coat of paint dries unevenly from the outside in, trapping solvents and moisture underneath. This can lead to sagging, running, and a soft, easily damaged surface. In contrast, thin coats dry quickly and cure uniformly, creating a harder, more durable finish that stands up to the demands of daily life and business operations.

Why This Step is Crucial

Opting for one heavy coat is a primary cause of common paint defects like drips, runs, and a textured "orange peel" effect. It compromises both the appearance and the longevity of the paint job. For tenant improvements in office spaces or retail build-outs, a multi-coat system ensures that door casings and baseboards can withstand bumps from carts, vacuums, and foot traffic. In residential remodels, this technique is what gives window sills and crown molding that elegant, professionally finished look that lasts for years.

Actionable Tips for Perfect Application:

  • Load Your Brush Properly: Dip only the first third of your brush bristles into the paint. Tap off the excess on the inside of the can instead of scraping it on the rim. The goal is to have enough paint for a smooth stroke without overloading the brush.
  • Allow Proper Dry Time: Always follow the manufacturer's recommended recoat time. Rushing this step can cause the new coat to pull up the still-curing layer beneath it, ruining the finish. In the damp Puget Sound climate, you may need to add extra time.
  • Sand Lightly Between Coats: Once a coat is fully dry, a quick, gentle scuff with 220-grit sandpaper will knock down any minor imperfections and create an ideal surface for the next coat. Always wipe away the dust before recoating.
  • Aim for Two to Three Topcoats: Over a properly prepared and primed surface, two to three thin topcoats is the professional standard for trim. This builds depth of color and creates a robust, protective film.

7. Choosing Paint Finish Type Appropriate for Trim Location and Use

The paint finish, or sheen, you select for your trim is just as important as the color. This choice directly impacts not only the final look but also the durability, cleanability, and maintenance requirements of the surface. Selecting the right finish ensures your trim can handle its environment, whether it's a high-traffic commercial corridor or a moisture-prone residential bathroom.

At Wheeler Painting, we help our local clients choose a finish that balances aesthetic desires with practical needs. The sheen determines how light reflects off the surface; higher gloss levels reflect more light and are more durable, while lower sheens offer a softer appearance but are less resilient. For most trim, a finish with some degree of gloss is essential for protection against scuffs, moisture, and daily wear—a key consideration for homeowners and facility managers throughout the Puget Sound region.

Why This Step is Crucial

Using the wrong finish can lead to premature wear, difficulty cleaning, and an overall unsatisfactory appearance. A flat finish on a bathroom baseboard, for example, will quickly absorb moisture and show scuffs, while a high-gloss finish in a dimly lit living room might create unwanted glare. In commercial spaces like retail stores or offices, a durable semi-gloss finish is often standard because it withstands frequent cleaning and heavy use. Similarly, for residential kitchen remodels, we specify a scrubbable semi-gloss for baseboards and casings to handle spills and moisture, ensuring longevity and easy upkeep.

Actionable Tips for Selecting a Finish:

  • Go-To for High-Traffic/Moisture: Use a semi-gloss finish for trim in kitchens, bathrooms, laundry rooms, and on doors and their casings. Its hard, durable surface resists moisture and is easy to wipe clean.
  • Balance for Living Areas: A satin finish is an excellent choice for trim in living rooms, bedrooms, and hallways. It offers good durability with a softer, less reflective look than semi-gloss.
  • Maximize Exterior Protection: For exterior trim, fascia, and door frames, a semi-gloss or gloss finish provides the best protection against Western Washington’s rain and temperature fluctuations.
  • Test Sheen in Place: Always test a paint sample on a small, inconspicuous area of the trim. The way a finish looks can change dramatically depending on the room's natural and artificial lighting.
  • Prep for Gloss: Remember, the higher the gloss, the more it highlights imperfections. Flawless surface preparation is non-negotiable when using semi-gloss or gloss finishes.
  • Think Beyond Color: Your finish choice can complement your wall colors and overall design. Explore our guide on kitchen cabinet paint color ideas to see how sheen and color work together.

8. Caulking and Filling Gaps Before Final Paint Application

A truly professional trim paint job is defined by its clean lines and seamless transitions. The secret to achieving this flawless appearance lies in meticulously caulking gaps and filling imperfections before the final coat of paint is ever applied. This critical step goes beyond cosmetics; it creates a continuous, unbroken surface that prevents moisture intrusion and provides a durable, polished look that elevates the entire space.

Freshly applied caulk forms a wavy line along a white baseboard and wall joint, with a tool nearby.

This process involves applying a flexible, paintable caulk into the gaps between trim and walls, as well as filling any nail holes or dents with spackling compound. For both residential home improvements and large-scale commercial build-outs, this attention to detail is non-negotiable. In the damp Western Washington climate, properly sealed trim is essential for preventing moisture from seeping behind baseboards and casings, which can lead to much larger problems over time.

Why This Step is Crucial

Ignoring gaps and holes results in a finish that looks rushed and incomplete. Dark, shadowed lines will be visible where trim meets the wall, and every nail hole will appear as a small dimple under the new paint. In commercial settings like office renovations or retail spaces, a polished appearance directly reflects the brand's quality. For homeowners, especially in kitchen and bathroom remodels, strategic caulking prevents water damage and ensures the finish looks pristine for years to come. It’s a foundational step that distinguishes an amateur paint job from a professional one.

Actionable Tips for Perfect Caulking and Filling:

  • Choose the Right Product: Use a flexible, paintable acrylic latex caulk for standard interior gaps between trim and walls. This allows for natural expansion and contraction without cracking.
  • Fill Holes First: Before caulking, fill all nail holes and minor imperfections with a quality spackling compound. Sand the patches smooth once they are fully dry.
  • Apply a Consistent Bead: Cut the caulk tube tip at a 45-degree angle to create a small opening. Apply a steady, continuous bead of caulk into the gap.
  • Smooth for a Clean Finish: Use a wet finger or a specialized caulking tool to smooth the bead immediately after application. This presses the caulk into the gap and removes excess, creating an invisible transition.
  • Respect Drying Times: Always check the manufacturer's instructions for drying times. Painting over wet caulk will ruin the finish and can cause it to crack prematurely.

Trim Painting Tips — 8-Point Comparison

Item Implementation Complexity Resource Requirements Expected Outcomes Ideal Use Cases Key Advantages
Proper Surface Preparation and Cleaning High — labor‑intensive sanding/cleaning and attention to detail Cleaning agents (TSP alternatives), 120–150 grit sandpaper, dust containment, time Strong adhesion, uniform surface, longer-lasting finish, fewer failures Interior and exterior trim, restorations, moisture‑exposed assemblies Dramatically improves longevity and finish quality
Selecting the Right Primer for Trim Medium — requires material selection and correct application Oil/latex/specialty primers, solvents for oil cleanup, tinted primers, drying time Stain blocking, improved adhesion, color uniformity, reduced topcoat coats Glossy or stained surfaces, tannin‑rich wood, water‑damaged trim Prevents stain bleed, reduces topcoat needs, ensures adhesion
Using Quality Brushes and Application Tools Low–Medium — basic skill plus brush technique Professional brushes (angled sash, trim sizes), tool maintenance, higher upfront cost Smoother application, fewer brush marks, precise detail, improved efficiency Detailed moldings, cabinet doors, finish work requiring precision Better finish quality and faster, more consistent application
Masking and Protecting Adjacent Surfaces Medium — time‑consuming, requires precise placement Painter’s tape (various grades), drop cloths, plastic sheeting, removal labor Clean lines, minimal cleanup, protected fixtures and floors Occupied spaces, kitchens, tenant improvements, new flooring protection Prevents overspray/bleeds and reduces cleanup time and damage risk
Applying Paint in Optimal Temperature and Humidity Conditions Medium — scheduling and environmental control needed Weather monitoring, moisture meter, temporary HVAC/dehumidifiers Proper leveling and drying, reduced defects, predictable schedules Pacific Northwest exteriors, humid interiors, sensitive finish work Improved finish quality and drying reliability
Multiple Thin Coats Rather Than Single Heavy Coat Medium — more coats and drying cycles required More labor/time, additional paint, light sanding between coats Even coverage, improved durability, fewer sags and brush marks Cabinets, high‑traffic trim, high‑quality finish requirements Superior uniformity, longevity, and smoother final appearance
Choosing Paint Finish Type Appropriate for Trim Location and Use Low–Medium — selection based on traffic and moisture Variety of finish paints (flat, eggshell, satin, semi‑gloss, gloss) Appropriate durability, cleanability, and aesthetic match Bathrooms/kitchens (semi‑gloss), living areas (satin), exterior trim Balances durability and appearance; easier maintenance where needed
Caulking and Filling Gaps Before Final Paint Application Low–Medium — requires careful application and tooling Paintable latex/acrylic caulk, silicone for wet areas, spackling, tooling Seamless joints, moisture resistance, professional appearance Gaps between trim and walls, bathrooms, exterior joints Prevents water intrusion and creates polished, finished appearance

When to Call the Pros for Your Residential or Commercial Project

Putting a fresh, sharp coat of paint on trim seems like a straightforward DIY project, but as we’ve explored, the details make all the difference. Mastering these tips for painting trim is about more than just applying paint; it’s about a meticulous process that transforms the look and feel of a space. From the critical first step of surface preparation and choosing the right primer to the final application techniques using quality tools, each stage builds upon the last.

Successfully painting trim means understanding the nuances of the Puget Sound climate, applying multiple thin coats for durability, and selecting the perfect sheen for each location. It requires patience to caulk gaps meticulously and the foresight to protect surrounding surfaces. When executed correctly, these steps result in clean lines, a durable finish, and a professional-grade appearance that elevates your entire property, whether it's a single-family home or a multi-unit commercial facility. The satisfaction of a job well done is immense, and the visual impact is undeniable.

Recognizing When You Need a Professional Contractor

While these guidelines can empower a motivated homeowner or property manager, it’s important to assess the scale and complexity of your project honestly. Ask yourself a few key questions:

  • Do you have the time? A single room might be a manageable weekend project. An entire house, a retail build-out, or an office space renovation requires a significant time commitment that can disrupt home life or business operations.
  • Is there underlying damage? If you discover soft wood, signs of water damage, or significant siding issues, painting becomes secondary. These problems require a residential or commercial contractor with the skills to perform proper repairs before any paint is applied.
  • Does the project involve heights or difficult access? Painting high ceilings, second-story exterior trim, or intricate architectural details can be dangerous and requires specialized equipment like scaffolding and ladders, along with the expertise to use them safely.
  • Is a flawless finish non-negotiable? For high-visibility areas in a commercial setting or a high-end residential remodel, the precision and efficiency of a professional crew are often necessary to achieve a perfect, long-lasting result.

If you find yourself hesitating on any of these points, it may be time to consider professional help. For business owners, facility managers, and homeowners across Western Washington, the investment in a professional painting and construction contractor ensures the job is done right, on schedule, and to the highest standard, protecting your property’s value and saving you from costly mistakes and rework.


For projects that require guaranteed quality, from detailed interior trim work to comprehensive commercial construction services, the team at Wheeler Painting has the experience to deliver exceptional results. We handle every step, ensuring your residential or commercial property in the Puget Sound area looks its absolute best. Contact us today for a professional consultation and estimate.