Tag Archive for: house painting

What Causes Paint to Bubble on Walls and How to Fix It

When you see paint bubbling on a wall, it’s easy to feel frustrated. But those bubbles are more than just an eyesore—they’re a clear signal that something’s wrong underneath the surface. The number one reason paint starts to bubble is almost always moisture. Still, other issues like poor prep work, using the wrong kind of paint, or even too much heat can also be the culprit.

Understanding the cause is the first step toward a lasting solution, whether you're a homeowner or a business owner managing a commercial property.

Why Is My Wall Paint Bubbling?

Man inspecting bubbling and peeling paint on a wall in a home, indicating water damage.

It helps to think of a paint bubble as a warning light on your car’s dashboard. It’s an undeniable sign of a problem, and just painting over it is like putting a piece of tape over the light—it doesn't fix the engine. The real issue could be anything from a hidden plumbing leak and trapped humidity to mistakes made the last time the room was painted.

For a homeowner, bubbling paint in a bathroom often points straight to a ventilation issue. If you're a business owner or facilities manager, it might mean the sealant is failing on the outside of your commercial building. Figuring out the root cause is the critical first step toward a fix that will actually last.

The Science Behind a Paint Bubble

Paint is supposed to create a strong, protective film that sticks tightly to the surface below, whether it's drywall, wood, or plaster. A bubble is simply what happens when that bond breaks. Something gets trapped between the paint film and the wall itself, physically pushing the paint away from the surface.

So, what breaks that bond? The most common culprits are:

  • Water or Moisture: From leaks, high humidity, or condensation.
  • Air or Solvents: Trapped during painting because of high heat or bad technique.
  • Contaminants: Any dirt, grease, or dust left on the wall before painting.

Moisture: The Arch-Nemesis of Paint

Water is, without a doubt, the biggest enemy of a flawless paint job, especially here in our local service area. Industry data shows that water is behind up to 70% of paint bubbling issues in residential and commercial properties. As trapped moisture heats up and cools down, it expands and contracts, literally forcing the paint off the wall and creating those familiar blisters. You can find more details on how this works over at alsqualitypainting.com.

This guide will help you play detective and understand what’s happening behind the paint. This knowledge is crucial whether you’re a homeowner planning a weekend repaint or a facilities manager overseeing a commercial renovation. It’s the only way to ensure the problem gets solved for good.

The Role of Moisture and Hidden Leaks

Peeling paint and water bubbles on a wall next to a window with condensation, indicating water damage.

When you see paint bubbling, your first thought should always be water. Moisture is almost always the culprit. Just think of the drywall or plaster on your wall as a stiff sponge. It will quietly soak up any water it comes across, whether from a dripping pipe or just humid air. This is the single biggest reason what causes paint to bubble on walls is such a headache for property owners.

The real problem begins when that trapped moisture tries to get out. As the wall warms up and cools down, the water caught behind your paint expands and contracts. That movement creates a surprising amount of pressure, pushing outward until it finally breaks the paint's grip on the wall. The result? Those ugly blisters and bubbles.

For anyone managing property in our local communities, this fight against moisture can feel never-ending. And the source isn't always something dramatic like a burst pipe; it's often a much quieter, sneakier problem.

Finding the Source of the Water

To fix the problem for good, you have to figure out if you're dealing with a direct leak or just high humidity. Water is a sneaky invader. It can get into your walls from all sorts of places, and the bubble you see might be far from the actual entry point. An experienced pro knows exactly where to start looking.

Here are some of the usual suspects we see in residential and commercial buildings:

  • Plumbing Leaks: That slow, silent drip from a pipe hidden in a wall can saturate drywall for months before you ever see a bubble.
  • Failing Roof Flashing: The seals around chimneys, vents, and skylights are common weak spots. Rain gets in, runs down through the attic, and shows up on an interior wall.
  • Improperly Sealed Windows and Doors: In our climate, wind-driven rain is a fact of life. If the caulk around your windows and doors is old and cracked, water will find its way in.
  • Clogged Gutters: When gutters get backed up, water can pour over the side and run down your siding. It doesn't take much for that water to get behind the paint and into the wall itself.

Expert Insight: In both homes and commercial buildings around here, the most deceptive source of moisture is condensation. Our cool, damp climate creates the perfect storm. Warm, moist air inside hits a cold exterior wall, and that water vapor turns right back into liquid. This is why you so often see bubbling paint on the exterior walls of poorly ventilated kitchens and bathrooms.

Direct Leaks vs. High Humidity

It’s critical to know what kind of water problem you have. If you press on a paint bubble and it feels soft, squishy, or even drips a little, you almost certainly have a direct and active leak. These need immediate attention to stop serious structural damage. For these kinds of complex water issues, our team offers professional guidance on water removal and restoration to make sure the root cause is solved before we even think about painting.

On the other hand, if you see lots of small, hard blisters scattered across a wall, that's usually a sign of high humidity or condensation. We see this all the time in bathrooms without a good exhaust fan or in certain commercial spaces. While it’s not as urgent as an active leak, it’s still telling you that the environment is ruining your paint job. The fix usually involves improving ventilation or using a paint designed specifically for high-moisture areas. A professional assessment will save you the frustration of a repair that just fails again.

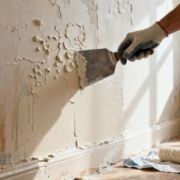
How Poor Surface Prep Guarantees Bubbles

While moisture gets most of the blame for bubbling paint, a rushed or lazy prep job is right behind it. Think of your wall as a canvas. Trying to paint over a dirty, dusty, or greasy surface is like slapping a sticker on a sandy beach—it’s just not going to hold. Paint needs a perfectly clean, stable foundation to grab onto and form a lasting bond.

Even contaminants you can't see will sabotage your new paint. Things like oil from fingerprints, airborne cooking grease in a kitchen, or even the residue left behind by common cleaning products can create a microscopic barrier. This film stops the new paint from gripping the surface properly, creating weak spots that are guaranteed to bubble and peel away.

The Professional Prep Process

For any experienced painting contractor, surface preparation isn't a suggestion; it's a non-negotiable part of the job that ensures the final finish actually lasts. It’s the most critical phase of any residential remodel or commercial construction project we undertake.

A proper prep job always includes these steps:

  • Thorough Cleaning: A simple wipe-down with water won’t cut it. Professionals use solutions like trisodium phosphate (TSP) to break down years of accumulated grime, grease, and other contaminants that normal cleaning leaves behind.
  • Sanding for Grip: Old glossy or semi-gloss surfaces are sanded to "scuff up" the finish. This microscopic abrasion gives the new paint a rougher texture to mechanically grab onto, creating a much stronger bond.
  • Meticulous Dust Removal: After sanding, every last speck of dust has to go. We use tack cloths or shop vacuums with brush attachments. Any dust left behind will just mix into the wet paint and prevent it from sticking to the wall.

Meticulous preparation is the difference between a paint job that looks great for a decade and one that fails in a year. A significant 60% of bubbling complaints stem from painting over unclean surfaces, especially in homes with residue from cooking or smoking. You can find more about how surface issues cause paint failure by reading this informative guide from makeitright.ca.

Why Priming Is Not Optional

After cleaning and sanding comes the final, crucial step: priming. A good primer acts as the ultimate bridge, connecting the wall to the paint. It seals the underlying surface, blocks tough stains from bleeding through, and creates the perfect uniform base for your topcoat to adhere to beautifully. Skipping this, especially over new drywall or patched areas, is one of the fastest ways to see bubbles pop up.

For our teams, whether it's a small bedroom or a huge retail build-out, priming is non-negotiable. To see why this step is so vital for professional-grade results, check out our guide on why you must prime new sheetrock before painting. It’s a step that protects your investment and is the key to a bubble-free finish, saving homeowners and facilities managers from expensive repairs down the road.

When Heat and Humidity Are the Problem

Even if you’ve prepped a surface perfectly, the environment itself can sabotage your paint job. Extreme temperatures and humidity are notorious culprits behind paint bubbling, especially in a place with unpredictable weather like our local area. Think of paint like a cake batter—if the oven is too hot or the kitchen is too humid, it’s just not going to turn out right.

Painting a wall while it's baking in direct sunlight is a classic mistake. The intense heat flash-dries the very top layer of the paint, creating a skin before the solvents or water underneath can evaporate. These trapped vapors have to go somewhere, so they push up against that semi-dry skin, creating a rash of blisters across the surface.

The Problem With Local Humidity

Just as bad as high heat is the high humidity we’re so familiar with here in our community. When the air is already heavy with moisture, the water in latex paint has nowhere to go. This slows the curing process to a crawl, leaving the paint film weak and susceptible to problems. Before you know it, you can see sagging, streaking, and eventually, bubbling as moisture remains trapped.

We see this all the time on both residential and commercial projects. For facilities managers overseeing office space renovations, a wall next to a new heat-generating appliance or a large, sun-drenched window can become a bubble-prone hotspot. A fresh coat of paint in these areas requires a careful eye on the climate to stand a chance.

A 2026 Angi survey of Pacific Northwest contractors revealed that our region's wild temperature and humidity swings contribute to 30% of all paint bubbling service calls. The data also shows a 40% spike in paint failure when surface temperatures climb over 90°F, as the top layer dries too fast and traps solvents.

Common Application Mistakes That Create Bubbles

Beyond just the weather, simple mistakes during the application process can introduce bubbles into the finish. Using the wrong technique or tool can be just as damaging as painting on a blistering hot day.

Two of the most common errors we fix are:

  • Applying Coats Too Thickly: It’s tempting to slather on a heavy coat to finish faster, but this is a recipe for disaster. A thick layer of paint traps air and solvents, preventing it from drying evenly and leading straight to bubbles.
  • Using the Wrong Roller Cover: A roller with a nap that’s too long for a smooth wall will whip tiny air bubbles into the paint film as you roll. A pro knows to match the roller nap to the surface texture for a smooth, bubble-free application.

Managing all these environmental and technical details is exactly why professional timing is so crucial. A skilled painter understands the ideal conditions needed for a durable, long-lasting finish. You can learn more about this in our guide on the best time to paint your house exterior. This expertise is what separates a quick job from a quality result, whether it’s for a home remodel or a large-scale commercial building.

Your Step-by-Step Guide to Fixing Paint Bubbles

Seeing paint bubbles pop up is one of those frustrating home or property maintenance moments. The good news is that fixing them is usually a straightforward process, but only if you do it right. We'll walk you through how to repair those small, annoying bubbles and, just as importantly, how to spot the signs that you’re dealing with a bigger issue that needs a pro.

The absolute first step is a bit of detective work. Before you can even think about picking up a scraper, you have to figure out what causes paint to bubble on walls in your specific spot. Once you’ve solved that mystery—whether it's a slow leak, a steamy bathroom with no ventilation, or just a bad prep job from years ago—you can finally start the repair.

A Three-Step Repair Process

If you're dealing with a few small, localized bubbles (and you're positive there isn't an active leak), this is a repair you can likely handle yourself. The key is to create a perfectly smooth, clean, and stable foundation for the new paint.

  1. Scrape and Remove: Grab a putty knife or a good paint scraper. You'll want to carefully get under the bubble and lift off all the loose, peeling paint. Don't be shy here—keep scraping a little bit beyond the bubbled spot until you hit paint that's firmly stuck to the wall.
  2. Sand the Edges: Now, take some 180-grit sandpaper and feather the edges where the old paint meets the bare patch. The goal is to make the transition so smooth you can't feel it when you run your hand over it. This little step is what keeps that ugly paint ridge from showing through your fresh coat.
  3. Clean and Prime: Wipe down the entire area to get rid of every last speck of dust. Then, apply a high-quality primer to the bare spot. This seals the surface and gives the new paint something to really grab onto.

This handy flowchart can help you quickly run through the likely culprits behind your paint bubbling woes.

A flowchart diagnosing paint bubbles by checking conditions like hot, humid, or wrong tools.

As you can see, what’s happening in the room—like high heat or humidity—is often just as critical as the tools and techniques you used to paint.

When to Call a Professional Contractor

A quick DIY fix is perfect for small cosmetic flaws. But sometimes, those little bubbles are like the tip of an iceberg, signaling a much bigger problem lurking beneath the surface. For both homeowners and facilities managers, knowing when to put the tools down and call for help is the most important step of all.

If you scrape off a paint bubble and the drywall or plaster behind it feels soft, damp, or looks discolored, stop what you're doing immediately. This is a clear sign of a serious moisture issue that a simple patch-and-paint job will never fix.

You should get in touch with a professional contractor like Wheeler Painting if you’re seeing any of these red flags:

  • Bubbles that keep coming back in the same spot, even after you've repaired them.
  • Widespread bubbling across an entire wall or even multiple walls.
  • Paint bubbles that feel soft or squishy when you press on them.
  • Any visible water stains, dark spots, or a musty smell near the bubbles.

When you're facing these more complex scenarios in a home or commercial building, a professional diagnosis is the only way to safeguard your property. A trusted local pro can pinpoint the true source of the problem, whether it's a hidden pipe leak or a flaw in the building's exterior, and make sure the fix is a permanent one.

Your Partner for Lasting Painting and Construction

At the end of the day, bubbling paint is more than just an eyesore. It’s a clear signal from your walls that something deeper is wrong, and a quick-fix paint job just won’t cut it. As we’ve covered, a truly lasting repair means getting to the root of the problem, and that requires a professional eye. With decades of local experience, Wheeler Painting is here to provide exactly that kind of peace of mind.

We offer a full range of painting, restoration, and construction services for homeowners and businesses all over our local service area. Whether you're planning a major residential remodeling project, managing a commercial renovation, or just need a reliable partner for facility construction services, our team is built on clear communication and craftsmanship you can count on.

We believe complex projects should be straightforward for our clients. By handling everything from the initial diagnosis to the final coat of paint, we take the stress out of your next project and ensure every detail is handled correctly.

Our team has been serving the community since 1991, and we're ready to help protect your investment for years to come. From retail build-outs and office space renovations to siding replacement and interior painting, we have the expertise to deliver results that last. Contact us for an on-site consultation and see how our commitment to quality can make all the difference.

Common Questions About Paint Bubbling

We get asked all the time about what causes paint to bubble on walls. It's a frustrating problem, but understanding why it happens is the first step to getting it fixed for good, whether you're a homeowner or a facilities manager. Here are some quick, straightforward answers to the questions we hear most often.

Can I Just Scrape and Paint Over the Bubbles?

That’s probably the most common mistake people make, and it’s a recipe for frustration. Just scraping off the blister and slapping on a new coat of paint only hides the problem for a little while. The issue that caused the bubble in the first place—usually moisture or a contaminated surface—is still trapped underneath.

Before you know it, the bubble will be back, and it's often worse the second time around. The only way to fix it properly is to get to the root of the problem. You have to scrape away all the loose and failing paint, sand the edges smooth, fix what caused the bubble, prime the bare spot, and then you can repaint.

Why Does My Bathroom Paint Always Bubble?

Ah, the bathroom. It’s the perfect storm for paint problems. The constant humidity from hot showers and baths creates a ton of moisture in the air. This steamy air then condenses into water droplets on the cooler surfaces of your walls and ceiling.

That water eventually works its way behind the paint, breaking the bond with the wall and causing those familiar bubbles and blisters.

Pro Tip: Your best defense is a good exhaust fan. Run it during every shower and leave it on for at least 30 minutes afterward to pull all that damp air out. Also, make sure you’re using a high-quality paint formulated specifically for high-moisture areas like bathrooms and kitchens. It makes a huge difference.

Will Bubbles Go Away on Their Own?

It would be nice if they did, but unfortunately, no. Once the paint has lifted and the bond with the surface is broken, it can't re-adhere on its own. The bubble is there to stay.

If you ignore it, the problem will only get worse. The bubble will likely grow, the paint will start to flake and peel, and you could even end up with damage to the drywall or plaster underneath.


If you’re seeing bubbles that point to a bigger moisture problem, getting a professional opinion is your best bet. The experienced teams at Wheeler Painting can pinpoint the exact cause and deliver a solution that lasts. Schedule your on-site consultation today and protect your property.

Best Time to Paint Your House Exterior: A Guide for Puget Sound Property Owners

Let's get straight to the point: if you're planning to paint your house exterior in the unpredictable climate of Western Washington, your best bet is from late spring through early fall. This ideal window, generally running from May through September, gives residential homes and commercial buildings the best possible chance at a beautiful, durable finish that will last for years.

Finding the Perfect Window for Exterior Painting in the Puget Sound

Timing a painting project in our region is everything. Think of it as giving the paint the perfect environment to do its job—curing into a hard, protective shell that can stand up to our notoriously damp winters. Nailing this timeframe is the single most important step toward a successful project that not only boosts your curb appeal but also protects your property investment.

This decision is critical whether you're a homeowner looking to refresh your siding or a facilities manager scheduling a large-scale commercial renovation. A well-timed project is your best defense against costly failures like peeling, blistering, and premature fading, which are common when paint is applied in less-than-ideal weather.

The Goldilocks Zone for Painting

For anyone living in the Puget Sound, the goal is to find that “Goldilocks” period—not too hot, not too cold, and definitely not too wet. This simple timeline shows the ideal, acceptable, and risky times for exterior painting right here in our community.

A painting seasons timeline graphic, indicating summer (June-August) as ideal, and winter (Dec-Feb), spring/autumn (Mar-May / Sep-Nov) as risky times for painting.

As you can see, summer offers the most reliable window. The shoulder seasons of spring and fall can be a gamble, and winter is a definite no-go for a quality finish.

This seasonal sweet spot is backed by decades of on-the-job experience and paint chemistry. Here in the Puget Sound, the prime time to paint is when temperatures are consistently between 50°F and 85°F. Why? Because most exterior latex paints are formulated to adhere and cure best within this range. The absolute sweet spot for maximum durability is actually a bit cooler, around 50–70°F. You can dig deeper into how temperature affects paint application with resources from industry leaders.

Choosing the right time to paint isn't just about convenience; it's a strategic decision that directly impacts the longevity and performance of your home or building's protective coating. A project completed in July will almost always outperform one rushed in November.

To give you a clearer picture, here’s a quick breakdown of what to expect throughout the year.

Puget Sound's Annual Painting Calendar at a Glance

This table summarizes the painting conditions for each season, helping you plan your exterior project with confidence.

Season Months Conditions & Temperature Paint Application Suitability
Winter December–February Cold, rainy, and often freezing. Temps regularly dip below 40°F. Not Recommended. High risk of paint failure due to moisture and low temps.
Spring March–May Unpredictable. Mix of sun and rain, with temps often fluctuating below 50°F. Risky. Possible, but requires careful weather monitoring. Late May is more reliable.
Summer June–August Warm, dry, and stable. Temps consistently stay in the 60s-80s. Ideal. This is the prime season for exterior painting with the best results.
Fall September–November Variable. Early fall can be great, but rain and cooler temps increase by October. Acceptable to Risky. September is often excellent, but the window closes quickly.

Ultimately, a paint job is only as good as the conditions it's applied in, which is why timing is so crucial in our unique climate.

Why This Timing Matters for Your Property

Whether you’re managing a retail build-out or planning a simple residential repaint, proper paint adhesion is your first line of defense against the elements.

Painting during the optimal summer window provides several key benefits:

  • Superior Adhesion: Paint bonds much more effectively to surfaces that are warm and completely dry, which is the best way to prevent future peeling and chipping.
  • Proper Curing: Consistent, mild temperatures allow the paint to cure (harden) correctly, forming a tough, resilient film that protects your property.
  • Avoiding Moisture Issues: Lower humidity and less rainfall mean moisture won’t get trapped under the new paint, which is what causes ugly blistering and bubbling.
  • Predictable Scheduling: Booking your project during stable weather helps local contractors deliver on time and on budget, without frustrating weather delays.

At the end of the day, respecting the season ensures your investment pays off. A professional finish applied under the right conditions will protect your siding and trim for years to come, saving you the headache and expense of premature repairs.

How Weather Science Impacts Your Paint Job

Exterior house painting project in progress by a lake, with a ladder, paint can, and brush.

Ever notice how professional painters seem obsessed with the weather forecast? It’s not just about staying dry. The real secret to a lasting paint job is understanding how the science of weather interacts with the chemistry of paint. This is what separates a beautiful, durable finish from one that starts failing in just a year or two.

Applying paint is a chemical process. For it to properly cure into a hard, protective layer, it needs the right atmospheric conditions. Get it wrong, and you're looking at a mess that leads to costly repairs.

The Temperature Sweet Spot

Temperature is the most important piece of the puzzle. The vast majority of exterior latex and acrylic paints are formulated to be applied when both the air and surface temperatures are between 50°F and 85°F.

  • Too Cold (Below 50°F): When it's too chilly, the chemical reactions that allow paint to cure slow down significantly. The paint can't form a strong bond with the surface, which is a recipe for future cracking and peeling.

  • Too Hot (Above 85°F): On the flip side, extreme heat makes the paint dry way too fast. This prevents the paint from leveling out smoothly, leaving you with ugly brush marks and an uneven texture. This rapid surface drying can also trap moisture underneath, causing blisters and bubbles.

Here in Western Washington, that means we’re always looking for those precious days where the temperature will reliably stay above 50°F for a full 24-hour cycle—especially overnight. This gives the new paint a fighting chance to begin curing properly.

Humidity and the Dew Point Danger

Just as critical as temperature is the amount of moisture in the air, or humidity. The ideal range for most paint jobs is a relative humidity between 40% and 70%. When the air is too damp, the water in latex paint can't evaporate efficiently, which dramatically slows down drying time.

This leads us to a common problem that trips up many property owners: the dew point.

The dew point is the exact temperature at which air gets so saturated with moisture that dew begins to form on surfaces. If your siding's temperature drops to the dew point while your new paint is still wet, it’s like giving your house a fine mist of water—effectively ruining the finish.

This is a classic issue during the cool evenings of spring and fall in the Puget Sound. A seasoned professional knows to watch this closely. A non-negotiable rule is to stop painting when the surface temperature is within 5°F of the dew point. This foresight prevents an entire day's work from being ruined and is a huge reason why hiring an experienced residential or commercial painting contractor makes all the difference for a reliable result.

Why Professional Painters Often Prefer the Fall

Most people think of summer as prime time for exterior painting, but ask any seasoned pro in Western Washington, and they'll likely let you in on a little secret: early fall is often the real best season for the job. That window from September into early October gives us a unique set of advantages we rely on to deliver a superior, long-lasting finish on homes and commercial buildings alike.

This isn't just a preference; it's a strategic move based on the science of how paint actually works. The intense, direct heat of summer can be a problem, causing paint to dry too quickly. When that happens, solvents get trapped, and the paint can't form a strong, even bond with the surface—a classic recipe for premature failure.

The Perfect Mix of Temperature and Humidity

Fall in the Puget Sound region offers a much more stable and forgiving environment. The weather usually settles into a rhythm of mild, warm days and lower humidity—the absolute sweet spot for painting. Instead of getting baked onto the siding by the harsh summer sun, the paint is able to dry and cure at a slower, more predictable rate.

That slower cure time is the key to durability. It gives the paint polymers the time they need to cross-link correctly, creating a much harder, more resilient film. This powerful bond is exactly what you need to protect your property from our long, damp winters, whether it’s your home's siding or a large commercial exterior.

Forget the "Hotter is Better" Myth

It’s a common belief that the hottest, sunniest days are perfect for painting. Truthfully, that’s almost never the case.

  • The Summer Heat Problem: High temperatures cause the paint to "skin over" almost instantly, trapping moisture underneath. This is a leading cause of bubbles and blisters.
  • The Fall Stability Advantage: Cooler fall temperatures allow the liquids in the paint to evaporate evenly. This ensures the entire layer cures as one solid, cohesive unit.

The goal of a professional paint job isn't just to get the paint to dry fast; it's to make sure it cures properly. Fall’s moderate weather gives us the ideal timeline for this crucial chemical process, leading to a finish that’s tougher and more weather-resistant.

It’s all about focusing on long-term quality over short-term speed. We’re not just trying to make a building look good for a season; we’re creating a protective shield that will perform for years.

Why Fall is a Smart Move for Property Owners

For homeowners and facilities managers, the benefits of painting in the fall are clear. In a mild climate like ours, fall stands out by offering lower humidity and stable temperatures that dramatically reduce the risk of paint failure. September and October typically give us average temperatures of 60-70°F with humidity dropping to 50-60%. Compare that to summer's 70%+ humidity peaks, which can disrupt film formation and shorten the paint's lifespan. You can find more details on how weather impacts paint adhesion on AGWilliamsPainting.com.

Here at Wheeler Painting, we often guide our clients toward this "secret season" because it aligns with our commitment to dependable craftsmanship. Whether we’re tackling a complex office space renovation or providing expert exterior painting for a neighborhood home, we always aim for the conditions that will give you the most durable and flawless result. By understanding and taking advantage of the fall painting season, we help you protect your investment.

The Critical Role of Surface Prep and Curing

You can have the perfect weather and the ideal season, but none of it matters if the surface of your home isn’t properly prepared. A professional paint job that lasts for years is built on a foundation of meticulous prep work. This is the single biggest difference between a finish that lasts a decade and one that starts to fail after a couple of seasons.

This is where our focus shifts from when you paint to how a surface needs to be treated before a single can is even opened.

New paint needs a clean, stable, and completely dry surface to grab onto. Skipping or rushing this groundwork is a recipe for disaster, and for us, it's a non-negotiable part of any project, from a simple residential repaint to a full commercial construction job.

The Foundation of a Flawless Finish

Before our team even thinks about laying down a coat of primer, we follow a strict preparation process. It’s all about creating the perfect canvas for your new paint.

Our essential steps always include:

  • Thorough Cleaning: First, we get rid of years of built-up dirt, grime, mildew, and pollen. This usually means a professional power wash to strip away anything that could get between the new paint and the siding.
  • Scraping and Repairing: Next, we get hands-on, scraping away every bit of loose or peeling paint. If we find wood rot or damaged siding, we repair or replace it to create a solid surface.
  • Sanding for Adhesion: After scraping, we sand the edges to feather them smoothly into the surrounding surface. This is crucial for getting that seamless look and helping the new paint bond tightly.
  • Priming Bare Spots: Any exposed wood or repaired areas get a coat of primer. Primer is the ultimate bonding agent, sealing the surface and preventing old stains from bleeding through.

This is where true craftsmanship makes a difference. It’s time-consuming, but it’s what a quality paint job is all about. To learn more about how this first stage sets up the entire project for success, check out our guide on the benefits of professional power washing services.

The Hidden Importance of Curing Time

Once the last coat of paint is on, another critical phase begins: curing. This is easily the most misunderstood part of the whole process. Paint might feel "dry to the touch" within a few hours, but it’s nowhere near fully hardened.

Curing is the chemical process where the polymers in the paint cross-link and bond together, forming a hard, durable film. This takes a lot longer than simple drying and can last up to 30 days, depending on the paint and the weather.

It’s a lot like pouring concrete. You can walk on a new sidewalk after a day, but it takes nearly a month for that slab to reach its maximum strength. Paint is no different. While it’s curing, it's still vulnerable.

That’s why a professional team’s patience is so valuable. We manage the project to give the paint the uninterrupted time it needs to cure into a tough, weather-resistant shield. This attention to the "unseen" part of the job is what protects your investment and ensures your property can stand up to Puget Sound winters for years to come.

Getting Your Painting Project on the Calendar

House exterior showing before and after renovation: fresh white paint vs. peeling green paint with tools.

Knowing the perfect window for exterior painting is one thing, but actually getting the project done right is another. It all comes down to smart planning and scheduling. Whether you're a homeowner or a facilities manager, a little foresight can transform a potentially chaotic job into a smooth, rewarding experience.

The best local painting contractors get booked up fast. Their schedules for the prime summer and early fall seasons often fill up months in advance. If you start calling around for estimates in June, you’ll likely find that the top-tier crews are already booked solid through September.

Locking in Your Spot

This is where being proactive pays off. By reaching out to a trusted local contractor in the late winter or early spring, you’re not just getting a quote—you’re securing your spot in that coveted prime-weather window.

Booking early does more than just get you on the list.

  • You get your first choice of painters. You won’t be stuck settling for a less experienced crew.
  • It’s far less stressful. Planning ahead eliminates the last-minute scramble and gives you plenty of time to choose colors and ask questions.
  • It creates a weather buffer. If a surprise squall delays the start, your project is still a priority and can be easily shifted within the optimal season.

What to Expect From a Professional Consultation

Once you’ve scheduled a consultation, a true professional will have a two-way conversation with you, listening to your goals while inspecting every inch of your property.

During this on-site meeting, the contractor should be assessing the condition of your siding, trim, and other surfaces. They’ll point out areas needing extra attention—like scraping, sanding, or wood repair—and walk you through the best product options for our climate.

A detailed, itemized proposal is the hallmark of a true professional. It should spell out every single step, from the exact prep work and materials to the project timeline and total cost. No surprises, no ambiguity.

This document is your project's blueprint. It empowers you by showing exactly what you're paying for and setting clear expectations. To get a sense of how detailed this process should be, take a look at a professional construction quality control checklist; it reveals how meticulous planning leads to a successful outcome.

Prepping Your Property for the Painting Crew

With your project officially booked, the final step is getting your home or building ready. A little bit of prep on your end helps the entire project run more efficiently.

Here are a few simple things you can do:

  1. Clear the perimeter. Move patio furniture, grills, potted plants, and hoses at least 10-15 feet away from the exterior walls.
  2. Trim back landscaping. Cut back any shrubs, vines, or tree branches that are touching or hanging close to the siding.
  3. Plan for family and pets. Figure out a plan to keep kids and pets safely away from the work zone.
  4. Point out the essentials. Make sure the crew knows where to find outdoor water spigots and electrical outlets.

By taking care of these small tasks, you create a work environment where the pros can focus on what they do best: delivering a beautiful, durable finish.

Finding the Right Partner for a Flawless Finish

A woman and a contractor discuss house plans and color options at an outdoor table.

Knowing the perfect time to paint is half the battle. The other half is finding a local professional who can deliver a paint job that lasts. Bringing it all together requires a team that truly understands the unique challenges of the Puget Sound climate.

That's where we come in. As a trusted local provider, we have decades of hands-on experience, from cozy residential repaints to large-scale commercial painting and construction projects that need to stay on schedule. We understand how to navigate logistics and keep disruptions to a minimum, no matter the job.

Our promise is simple: top-tier craftsmanship, dependable schedules, and a completely transparent, stress-free process. We're here to deliver a beautiful, durable finish that protects your investment.

So, whether you're planning a full siding replacement or just searching for the best exterior painters near me, our team is ready to help. If you're looking for a trusted local expert who treats your project with the care it deserves, your search ends here.

Ready to get started? Contact Wheeler Painting for a detailed, no-obligation consultation and see how our community-focused approach makes all the difference.

Your Top Exterior Painting Questions Answered

When you're thinking about painting your property's exterior, a lot of questions come up. As a local painting and construction company that has served the Pacific Northwest for years, we hear the same concerns time and again. Here are some simple, straightforward answers to the questions we get asked most.

Can You Paint My House Exterior If It Rains?

In a word: no. We can't, and frankly, no professional painter ever should. Applying paint in the rain or when it's about to pour is asking for trouble.

Fresh paint needs a few hours of dry weather to form its initial protective "skin." Rain hitting it too soon can wash the paint right off your siding or leave ugly streaks and blisters. We're constantly watching the local forecast and will only start painting when we see a clear, dry window. If a surprise shower does pop up, we wait until the surface is bone dry, which can sometimes mean waiting a full day or more.

How Long Does Siding Need to Dry After Pressure Washing?

This completely depends on the weather. On a perfect, warm summer day here in Western Washington, wood or composite siding might be ready for primer in about 24-48 hours.

However, if we're working in the cooler, damper days of late spring or early fall, that drying time can easily stretch to 3-4 days. Painting over a damp surface traps moisture underneath, which is the number one cause of blistering and peeling paint. Our crew doesn't guess; we use professional moisture meters to get an exact reading. We won't touch a surface with a primer brush until we know for a fact it's dry enough for the paint to hold tight.

Is It Ever Possible to Paint in the Winter?

Generally, winter is the worst time for an exterior paint job. You’re fighting a constant battle against low temperatures, high humidity, and limited daylight. While special low-temperature paints exist that claim to work in weather as cold as 35°F, their use is extremely limited.

Think of these specialty paints as a last resort for urgent touch-ups or a commercial project with a deadline that absolutely cannot move. For nearly every home and commercial building, trying to paint in the winter is a gamble. The risk of paint failure and a much shorter lifespan just isn't worth it. We will always advise waiting for that prime spring-to-fall window to get the durable, high-quality finish you're paying for.

How Does Timing Differ for Commercial Properties Versus Homes?

The science behind a great paint job doesn't change—the perfect weather conditions are the same whether we're painting a house or a storefront. The real difference is all about logistics and scheduling.

Commercial painting projects, like updating a retail space or an office building, usually come with tight deadlines and the need to work around business hours to avoid disrupting customers and employees. This makes the stable, predictable weather of late summer and early fall even more critical for our commercial clients. With our extensive experience in commercial renovations, we excel at building detailed plans that respect your business operations while ensuring every coat of paint goes on during the perfect weather window for a flawless, long-lasting result.


Your property deserves a finish that can handle whatever the Pacific Northwest throws at it. Whether you’re a homeowner preparing for a residential remodeling project or a facilities manager undertaking a large-scale commercial renovation, trust the local experts who live and work in the Puget Sound climate. For dependable craftsmanship and a stress-free process, contact Wheeler Painting & Restoration Services for a detailed estimate today at https://wheelerpainting.com.