Tag Archive for: puget sound

Paint or Stain? Guide for Kent, Seattle, Tacoma

A lot of people in Kent, Seattle, and Tacoma end up at the same point. The deck boards are weathered, the cedar siding has lost its crisp look, or a commercial entry has started showing mildew and wear. You know the surface needs protection, but the next question gets harder fast. Should you paint it, or should you stain it?

That choice matters more in Puget Sound than it does in many other regions. Moisture sits on exterior surfaces for long stretches. Shade slows drying. Then summer shows up and UV starts working on the same boards and siding that just spent months damp. What looks like a simple finish decision often turns into a maintenance decision, a durability decision, and a budget decision at the same time.

Paint has a long history as a protective finish. The first recorded paint mill in America was established in Boston in 1700 by Thomas Child, and in 1867 ready-mixed paint changed the trade by making professional-quality coatings far more accessible, as noted by the American Coatings Association’s paint industry history. Today, that same basic purpose still drives the decision on homes and commercial properties across the Puget Sound region. You want a finish that looks right, holds up, and doesn’t create bigger repair problems later.

The mistake is treating paint or stain as just a color choice. It isn’t. On some surfaces, paint is the practical answer. On others, stain is the smarter system because it works with the wood instead of sealing over it. The right answer depends on what you’re coating, how exposed it is, how much maintenance you can tolerate, and whether you care more about hiding the surface or showing it.

The Puget Sound Homeowner’s Dilemma Paint or Stain

A common local scenario goes like this. A homeowner in Tacoma has a cedar fence and a back deck that looked great a few years ago, but now the boards are uneven in color and the rails stay damp well into the day. Or a facility manager in Seattle is trying to decide how to finish exterior wood trim on a small commercial renovation without setting up constant repaint cycles.

In both cases, the finish has to do more than improve appearance. It has to protect the material through damp winters, mildew pressure, and seasonal sun. That’s where people often get pulled in two directions. Paint offers a cleaner, more uniform look and can fit a wider color scheme. Stain keeps the natural character of the wood and often behaves better when moisture is part of the job.

Here’s the practical problem. The wrong choice can look fine at first and still fail you later. A painted deck may look sharp when it’s fresh, then start trapping moisture where the wood needs to breathe. A stained siding job may preserve the grain beautifully, but if the owner expected a fully opaque, trim-perfect look, they may be disappointed from day one.

Decision factor Paint Stain
How it looks Opaque finish that hides grain Natural look that shows grain
Where it works Wood, drywall, plaster, metal, and more Primarily wood
How it ages Can chip, scratch, or peel on poor surfaces Usually fades instead of peeling
Moisture behavior Forms a surface film Penetrates wood and allows more vapor movement
Common local use Trim, siding, interior walls, commercial interiors Decks, fences, wood siding, exterior wood features

In the Puget Sound, the finish that looks better on day one isn’t always the finish that performs better after a few wet seasons.

Paint and Stain The Fundamental Differences

Paint and stain don’t just look different. They work in different ways at the material level, and that’s why they succeed or fail on different surfaces.

What paint does

Paint forms a film on the surface. It has a higher binder content and around 300 grams of pigment per liter, which helps create a solid, protective layer over the substrate, while stain has higher solvent content and only 50 to 100 grams of pigment per liter so it can penetrate wood, according to Angi’s breakdown of stain vs. paint.

That film-building quality is why paint works across many materials. On a typical project, you can use it on drywall, trim, siding, plaster, and some metal surfaces. It’s also why paint gives you a broad design range. If you need a clean white fascia, a deep charcoal storefront accent, or a uniform finish on repaired trim, paint can deliver that look in a way stain cannot.

What stain does

Stain soaks into the wood instead of sitting on top of it. That’s the key idea. Rather than creating a thick outer skin, it colors and protects the wood while keeping more of the grain and texture visible.

That makes stain a wood-specific finish. It isn’t the tool for drywall or metal, and it isn’t meant to hide a rough patchwork of repairs the way paint can. But on wood that still has good character, stain often gives a richer and more natural result.
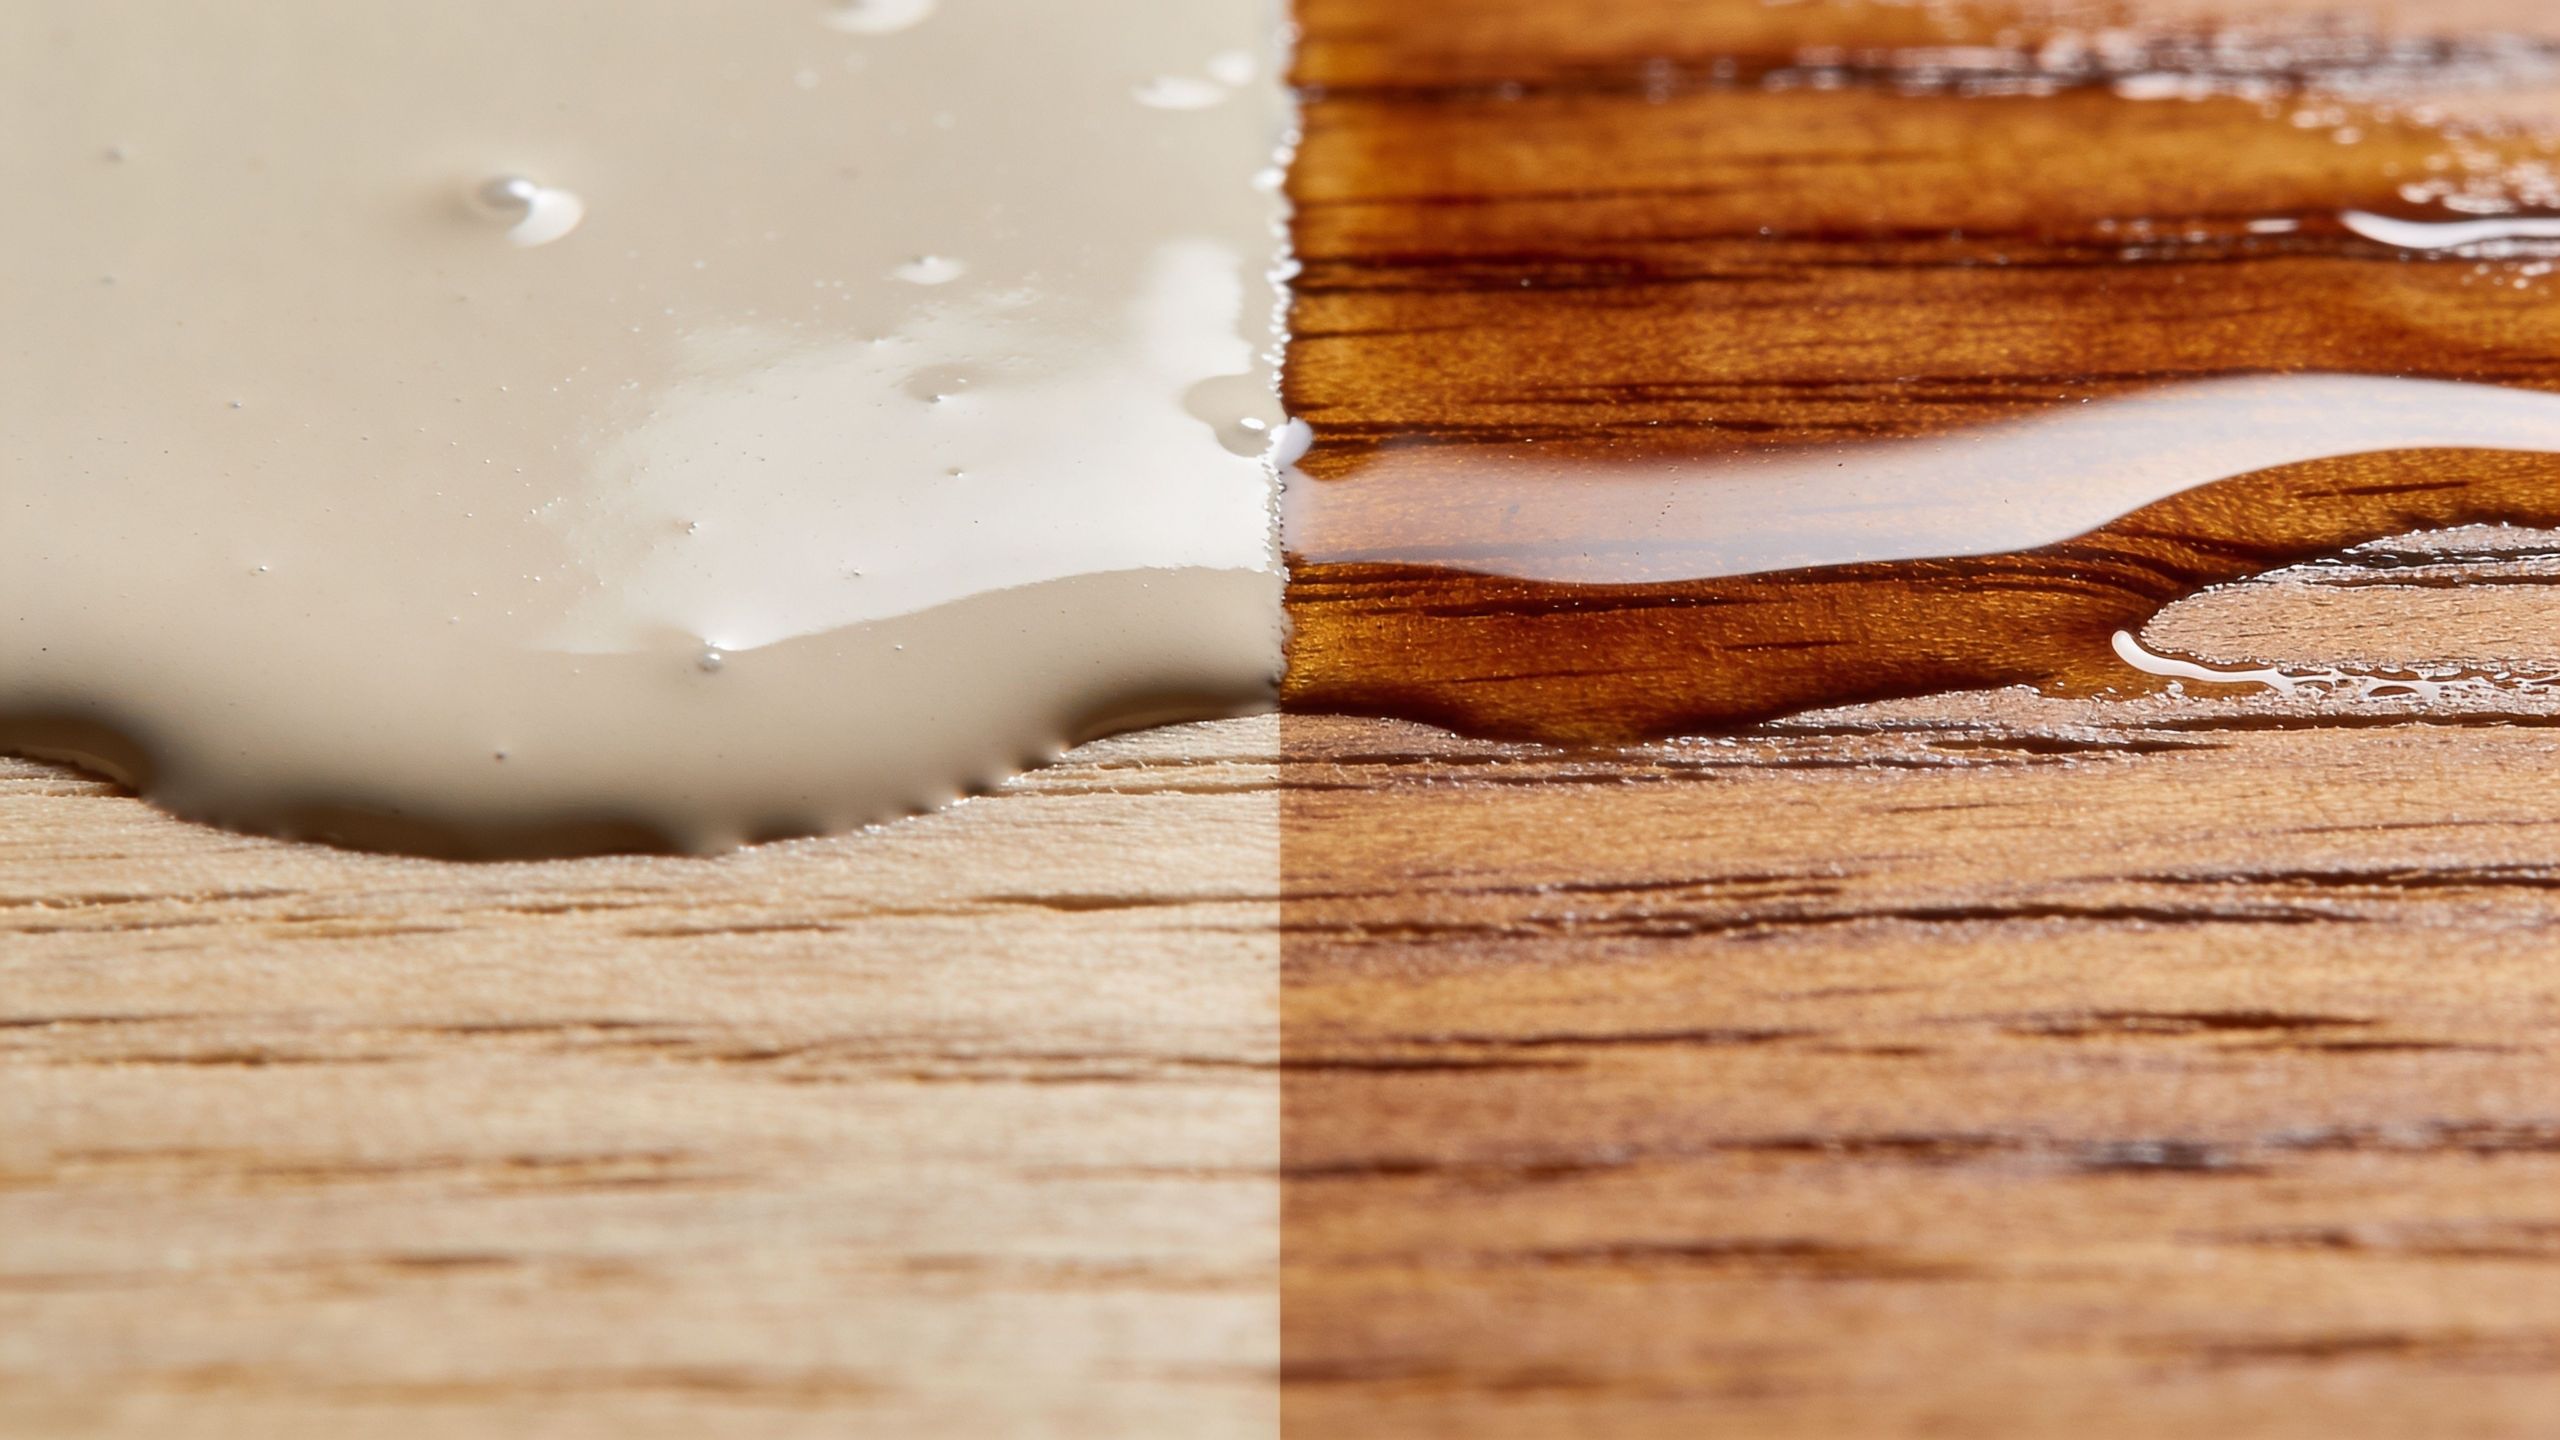
A close-up view comparing paint on raw wood versus wood stain on finished wooden flooring material.

Why one chips and the other fades

Understanding the behavior of paint and stain often proves challenging for property owners. Because paint stays on the surface, it can chip or peel when adhesion breaks down, especially on badly prepped wood or on areas that move and hold moisture. Stain usually behaves differently. It tends to wear away and fade from UV and weather exposure instead of lifting off in sheets.

That doesn’t mean stain is maintenance-free. It means its failure pattern is usually less dramatic and often easier to manage on exterior wood.

Clear coats change the result too

On floors, millwork, or interior wood trim, the topcoat system matters almost as much as the stain color. If you’re comparing finish systems for interior wood, this guide to the difference between oil and water-based polyurethane is useful because it explains why two stained surfaces can look and wear very differently even when the color underneath is similar.

Detailed Comparison Paint and Stain Head to Head

The best way to decide on paint or stain is to compare them where owners feel the consequences. Appearance matters. So do maintenance cycles, labor, and how the finish handles moisture over time.

Aesthetic differences

Paint gives you control. If the goal is a consistent color across patched siding, replacement trim, or mixed materials, paint is usually the stronger option. It hides grain, covers visual inconsistency, and helps you match a broader exterior or interior scheme.

Stain does the opposite. It works best when the wood itself deserves to be seen. Cedar, fir, and other wood surfaces often gain character from stain because the grain remains part of the final look instead of disappearing under a solid film.
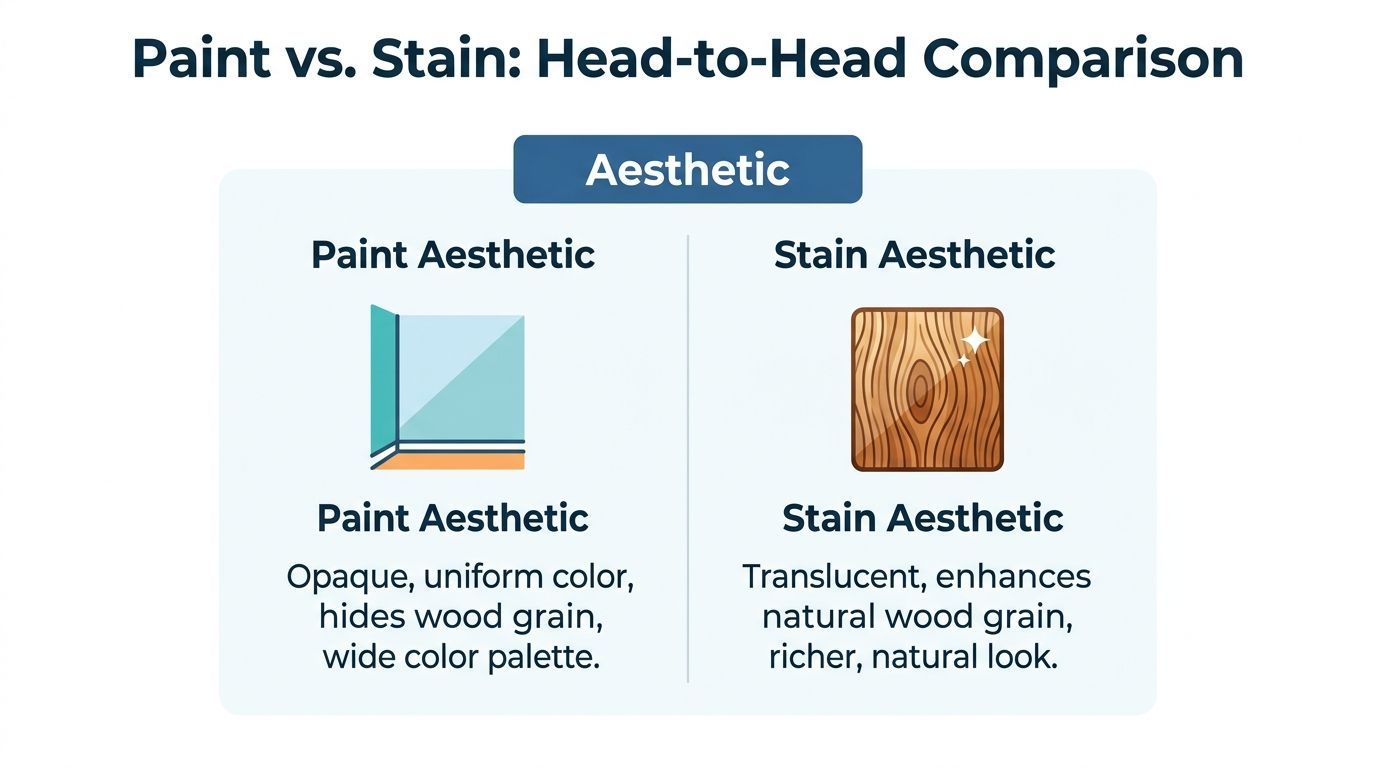
A comparison chart showing the aesthetic differences between painting and staining wood surfaces with descriptive text.

It's helpful to consider the following:

  • Choose paint when you want uniformity, strong color control, and the ability to hide flaws.
  • Choose stain when you want texture, variation, and the natural look of real wood.

Durability and lifespan

On paper, paint often wins the lifespan comparison. Sherwin-Williams notes that paint can last 5 to 10 years, while stain ranges from 2 to 8 years, depending on conditions and product type, in its guide to stain vs. paint for wood.

That number matters, but it doesn’t settle the decision. In our climate, the surface itself matters just as much as the calendar. A deck is the clearest example. Even though paint may last longer in ideal conditions, stain is often the better choice on decks in high-moisture areas because it allows wood to release moisture instead of trapping it.

Practical rule: Longer advertised lifespan doesn’t automatically mean better real-world performance on exterior wood in a damp climate.

Maintenance and recoating

Paint and stain age differently, so maintenance feels different too.

With paint, isolated failures often show up as chips, scratches, peeling edges, or visible breaks in the film. Those areas may be touch-up friendly at first, but once failure spreads, prep gets heavier. That can mean scraping, sanding, priming, caulking, and repainting multiple sections to regain a uniform finish.

With stain, maintenance is more about wear and fading. On fences, siding, and decks, a weathered stain often tells you it’s time for cleaning and another application rather than a full failure event. That’s one reason many owners prefer stain on wood they expect to maintain regularly.

For readers comparing repaint cycles on other surfaces, this overview of how long house paint lasts is a good companion when you’re planning maintenance timing.

Cost and labor reality

Material price alone won’t give you the full answer. Paint commonly needs more build in the system. Depending on the substrate and condition, you may be looking at primer, sealer, and multiple finish coats. Stain is often simpler to apply, especially on clean, absorbent wood, though it still demands good prep and even application.

Here are the trade-offs most owners notice:

  • Upfront labor for paint can rise fast when surfaces need repair, patching, sanding, and primer before finish coats go on.
  • Stain can save time on application because it’s often a lighter system, especially on exterior wood that doesn’t need an opaque look.
  • Long-term budgeting can favor either one depending on the surface. Paint may go longer between full recoats, but stain can be less disruptive to refresh.

Where each one usually makes sense

A balanced decision often looks like this:

Surface or goal Usually better fit
Deck boards and porches Stain
Exterior trim needing crisp color Paint
Cedar siding with visible grain Stain or solid stain, depending on look
Drywall and commercial interiors Paint
Mixed-material surfaces Paint
Feature wood elements Stain

The best finish is the one that fits the material, the exposure, and the maintenance plan. That’s the part generic national articles often skip.

Choosing the Right Finish for Your Project

Most owners don’t need a chemistry lesson. They need a practical answer for the actual surface in front of them. That’s where the paint or stain decision gets easier.

Decks and porches

For most exposed decks in Kent, Seattle, and Tacoma, stain is the safer choice. Deck boards take standing moisture, foot traffic, and direct sun. A finish that penetrates the wood and lets moisture move out tends to behave better than a surface film on horizontal boards.
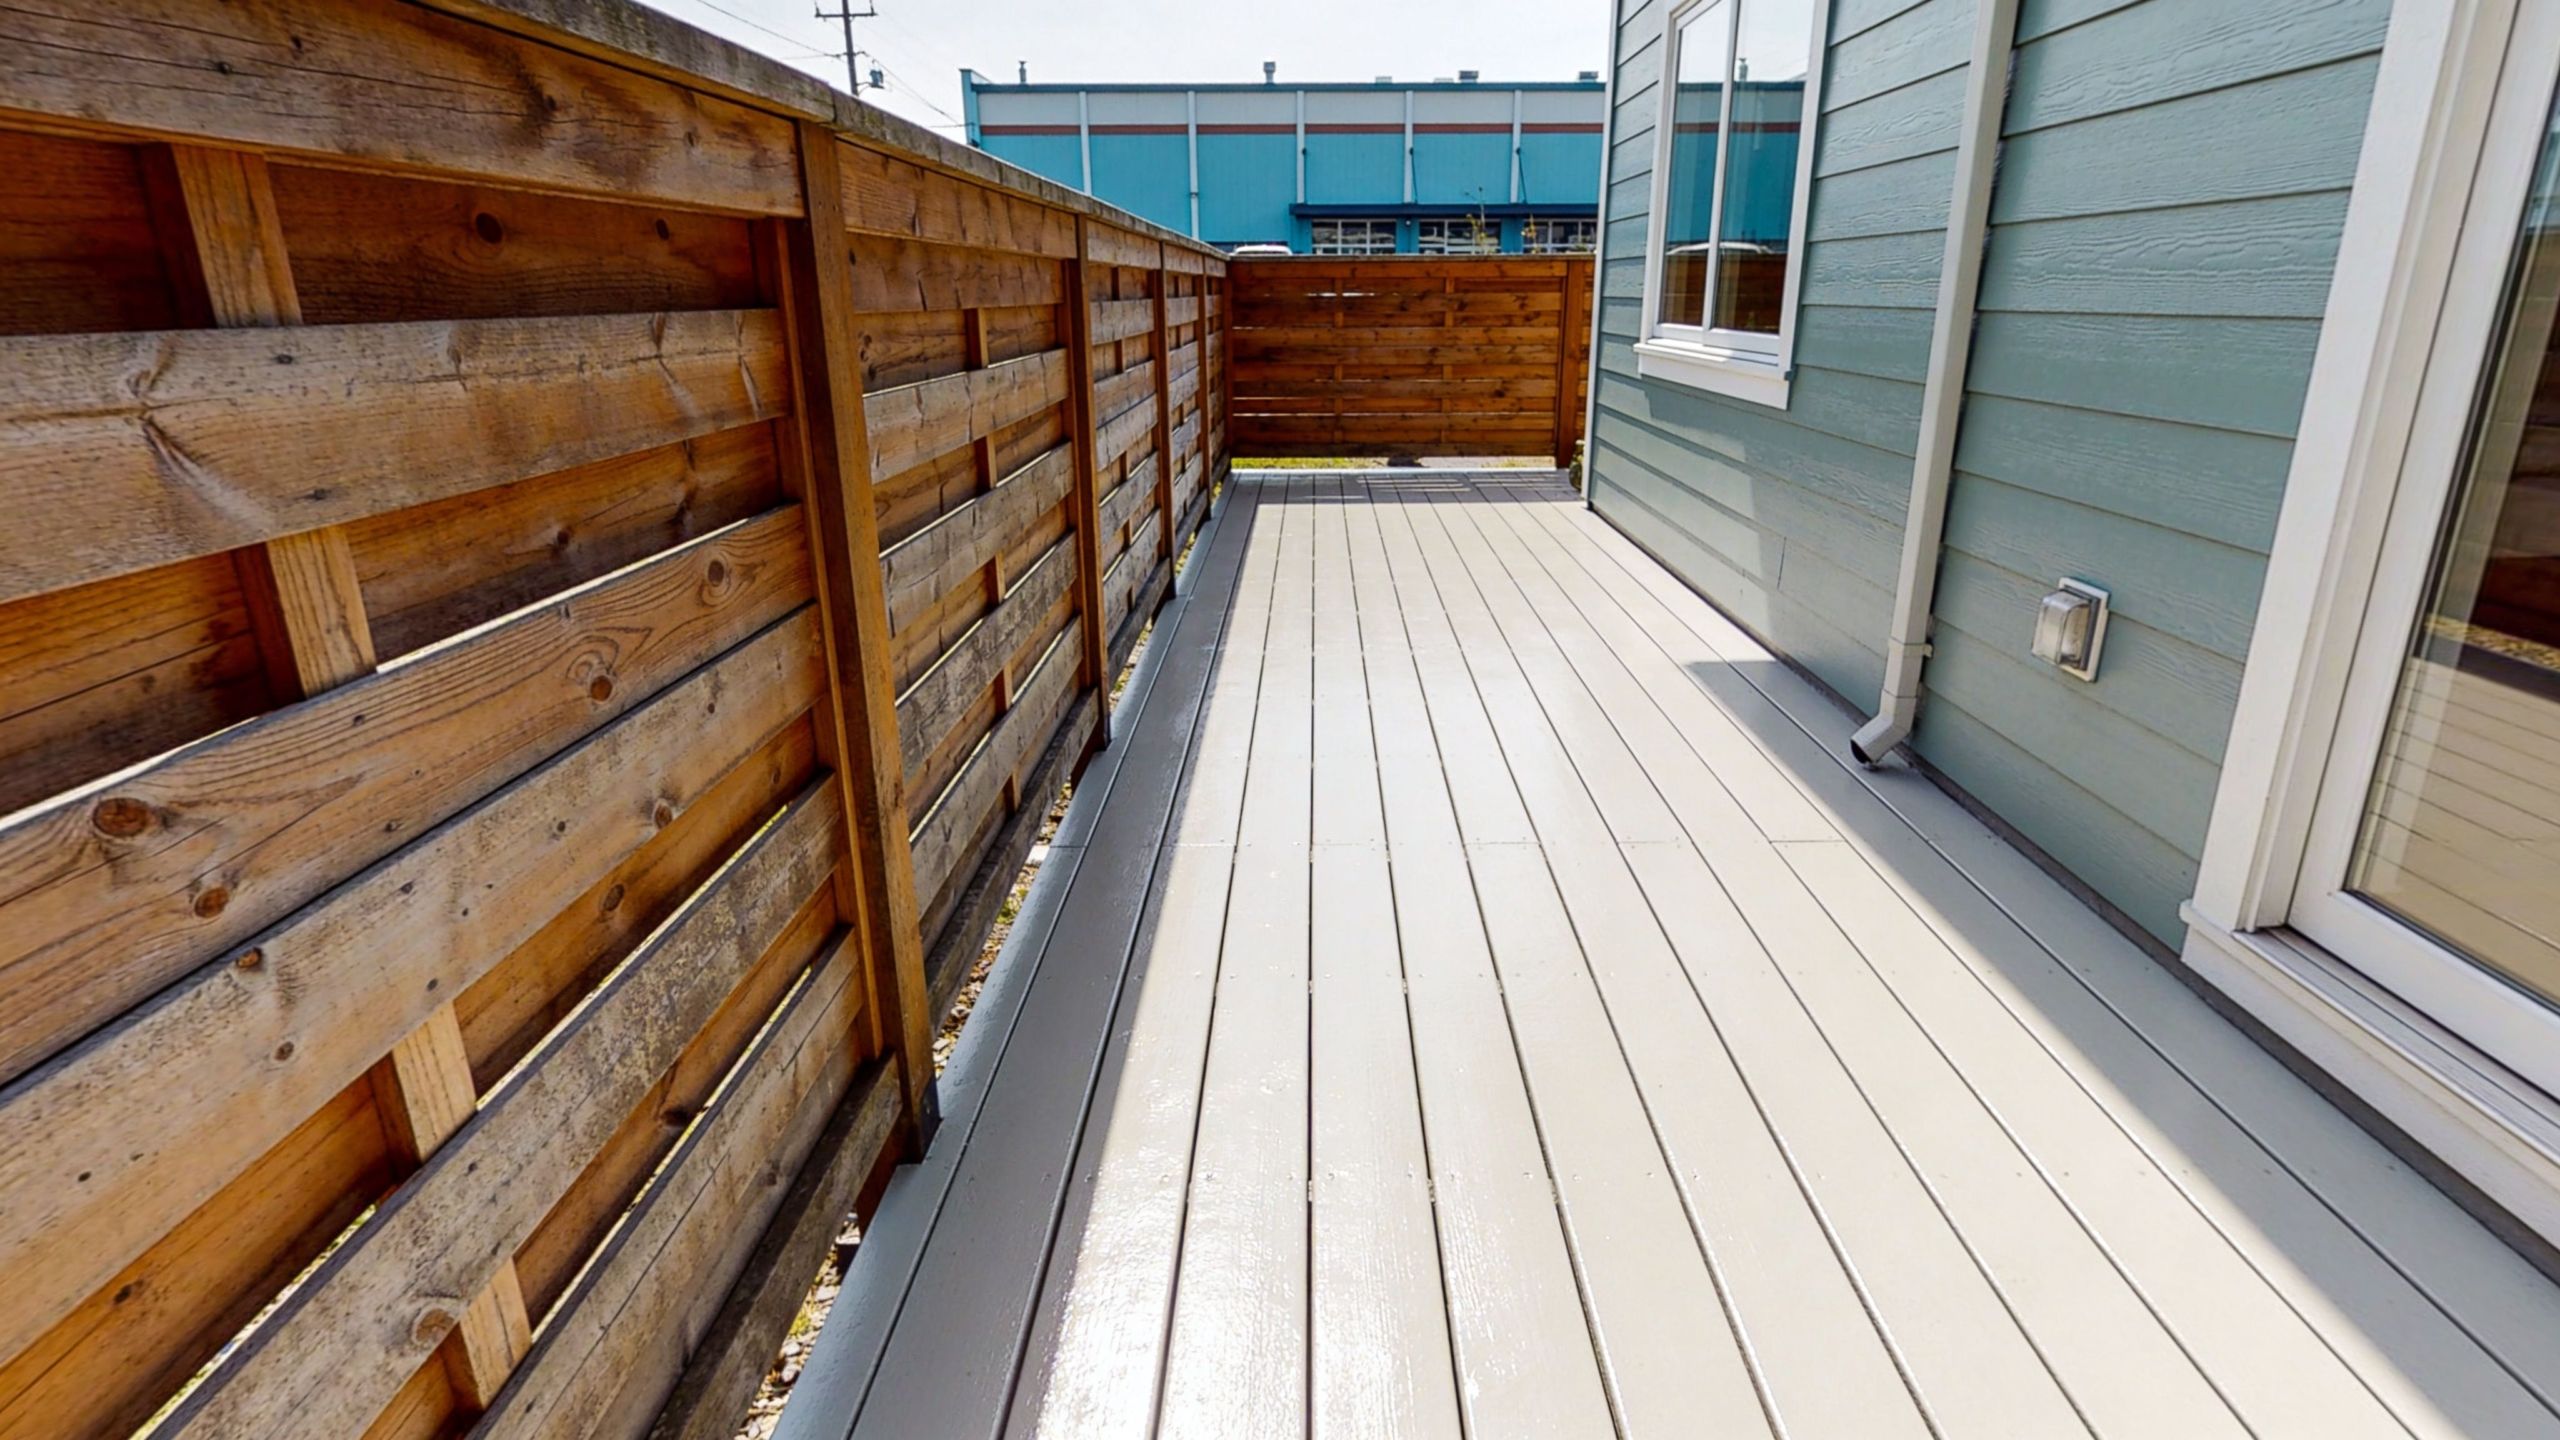
A modern outdoor balcony deck featuring painted light gray floorboards next to a wooden privacy fence.

That doesn’t mean every stain is equal. Transparency level matters, prep matters, and wood condition matters. On weathered fencing and outdoor wood, this guide on the best stain for fences helps explain why product choice should match exposure and wood age.

Siding and exterior wood walls

Siding is where the answer starts to split.

If the siding has attractive wood grain and the owner wants a natural exterior, stain can preserve that character. This is especially appealing on cedar and other species that already bring warmth and texture on their own. A well-chosen stain can make the house look like wood, not like a coated imitation of wood.

Paint is often the better answer when the siding has repairs, mixed boards, uneven coloration, or when the building design calls for a strong, controlled color. Commercial properties often fall into this category because consistency matters more than showcasing the grain.

Trim, fascia, and windows

Trim usually leans toward paint. These areas benefit from a crisp, defined edge and a uniform finish that ties the exterior together. On windows, door casings, fascia, and other architectural details, paint often creates the cleaner visual line that owners expect.

That said, mixed-finish assemblies require careful planning. If a project includes stained siding with painted trim, or stained interior wood next to painted casing, sequencing and masking become critical. Poor transitions are where otherwise good work starts to look sloppy.

When wood movement, moisture, and multiple finishes meet in the same assembly, the detailing work matters as much as the coating choice.

Commercial interiors and tenant improvements

For office space renovation, retail build-outs, and small to mid-size tenant improvement work, paint is usually the main finish because most interior commercial substrates are drywall, metal, or previously painted surfaces. It also supports tighter brand control for color and appearance.

Stain still has a role. Reception desks, wood feature walls, trim packages, doors, cabinets, and select millwork often look better with stain, especially when the goal is warmth rather than a flat uniform finish.

This short walkthrough is helpful if you want to see common field considerations before finalizing a finish plan:

Interior residential projects

Inside the home, the decision usually comes down to whether the surface should disappear into the room or stand out as wood.

  • Walls and ceilings usually call for paint.
  • Cabinetry and built-ins can go either way depending on style.
  • Wood doors, beams, and stair parts often benefit from stain if the grain is worth showing.
  • Previously damaged or patched woodwork often looks cleaner under paint.

For project planning, one practical option in the region is Wheeler Painting & Restoration Services, which handles both residential and commercial painting, staining, restoration, drywall, waterproofing, and related finish work across the Puget Sound. That matters when one project includes decks, siding, trim, drywall, and repair work under a single scope.

Special Considerations for the Puget Sound Climate

National paint or stain advice often misses the local problem. In Puget Sound, coatings don’t just deal with rain. They deal with repeated dampness, slow dry-out conditions, shade, mildew pressure, and then strong summer UV on the same exterior.

Why local moisture changes the answer

Wood doesn’t fail only because water hits it. It fails because water stays in it. That’s a major distinction in Western Washington. If a finish traps moisture where the wood should be drying, the coating can start a chain of problems that has less to do with color and more to do with substrate health.

That’s why local surface choice matters so much on decks, fences, and wood siding. Some owners focus first on opacity and appearance, but the bigger issue is often vapor movement and how the wood handles a long wet season.

What the local testing suggests

Recent ASTM testing on 200 Puget Sound homes found that semi-transparent stains outperformed paints in our climate, showing 40% better UV/moisture resistance and reducing mildew incidence by 55% on fir siding. That’s one of the clearest local data points available for owners deciding between these systems on exposed wood.

Those results line up with what many contractors see in the field. When wood needs to breathe and release moisture, a penetrating finish often gives you a more forgiving maintenance path than a film-forming one.

Where paint still makes sense here

None of that means paint is wrong for the Puget Sound. It means paint needs to be used where it matches the substrate and the exposure.

Paint still makes strong sense for:

  • Interior walls and ceilings where moisture cycling is controlled
  • Exterior trim where clean lines matter and detailing is tight
  • Commercial interiors where broad substrate compatibility is needed
  • Repaired surfaces that need visual uniformity

What doesn’t work is applying a generic national rule to every local surface. A product that performs well on a dry-climate exterior may be a poor fit for a damp Seattle-side deck or a shaded Tacoma fence line.

In Western Washington, moisture management is part of finish selection. It isn’t a separate issue.

Prep is more important here than in drier regions

The Puget Sound climate punishes shortcuts. Algae, mildew, chalking, dirt, and residual moisture all interfere with adhesion and penetration. If the surface isn’t properly cleaned, dried, and prepared, both paint and stain can disappoint for reasons that have nothing to do with the can label.

That’s why good local finish work starts before coating ever begins. Cleaning methods, dry-time judgment, sanding, and moisture awareness all matter more here than most DIY articles admit.

Application Prep and Process Differences

Owners often compare paint or stain by finish alone, but the process is where the outcome is won or lost. Prep for paint and prep for stain are not interchangeable.

Prep for stain

Stain needs access to the wood. If old coating, mill glaze, embedded dirt, or failed sealer is still in the way, the stain won’t absorb evenly. That’s when you get blotchy areas, dark lap marks, or patches that weather at different speeds.

Typical stain prep may include:

  • Cleaning the surface thoroughly so mildew, dirt, and oxidation don’t block penetration
  • Sanding weathered fibers where the wood has gone fuzzy or uneven
  • Removing failed old coatings if the existing finish prevents absorption
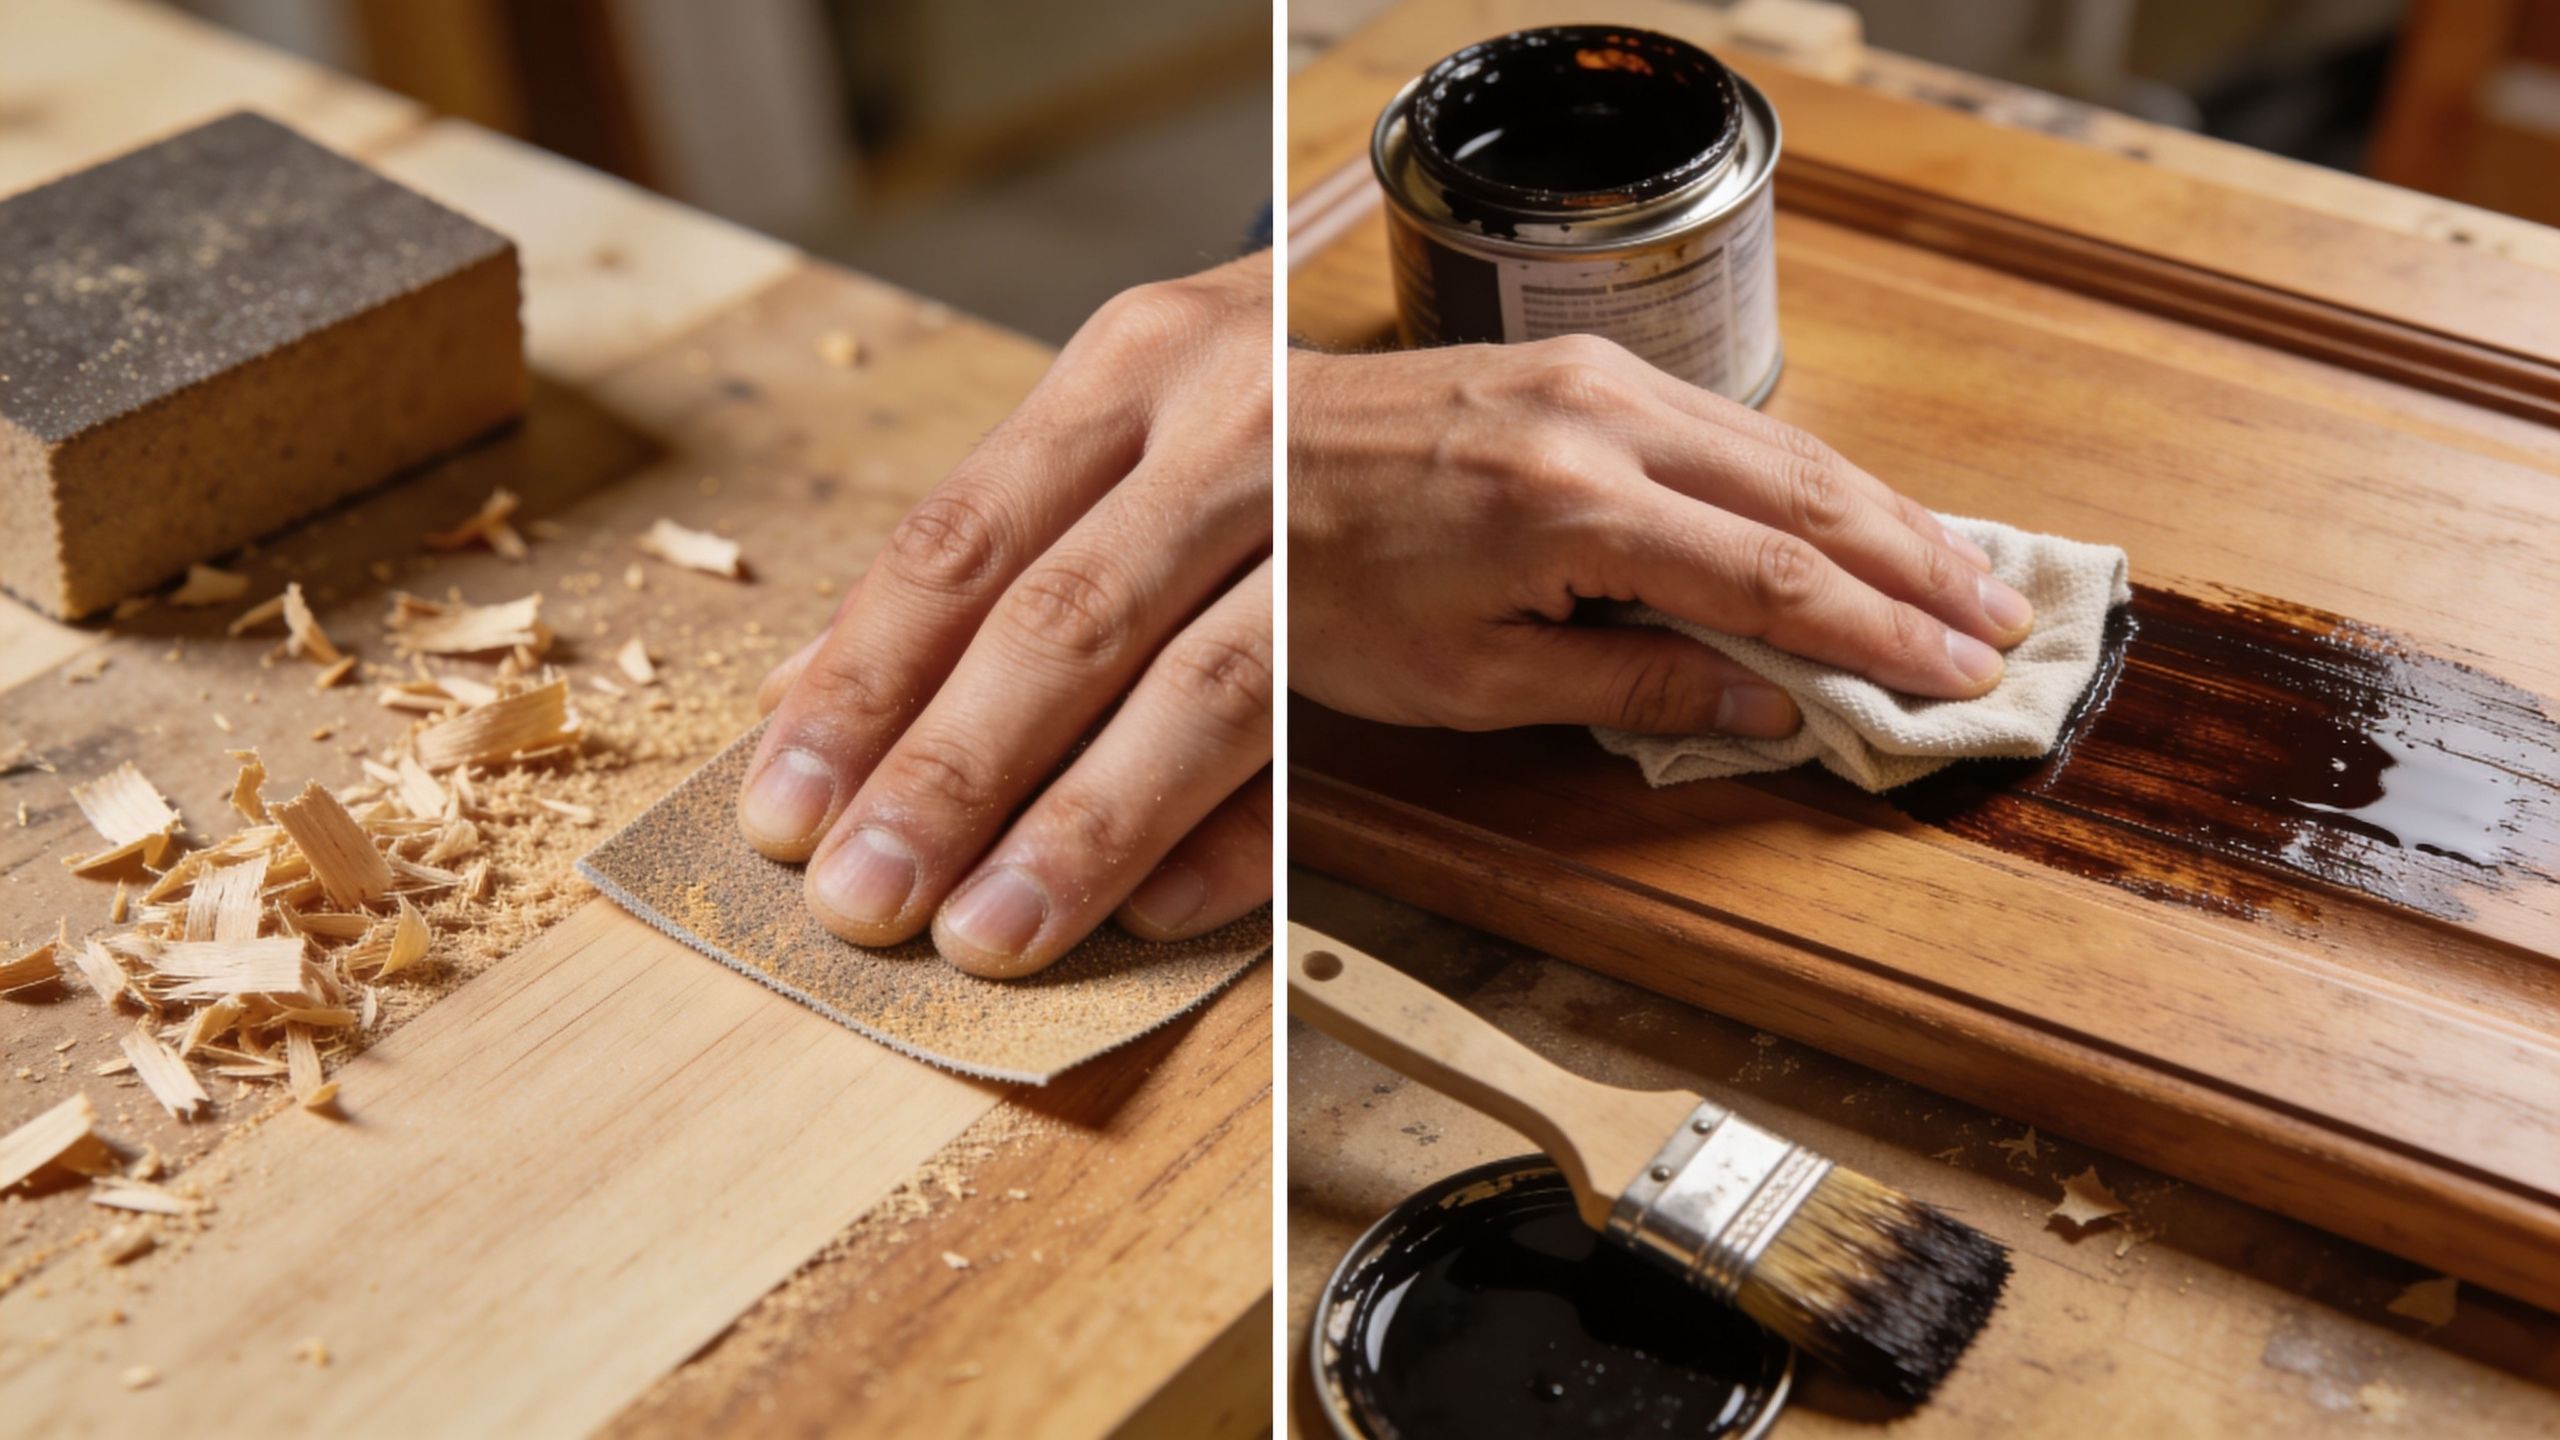
A split-screen view showing a woodworker sanding a wooden surface and applying dark wood stain.

A useful outside perspective on this is the crucial role of proper surface preparation, which shows why shortcut prep usually leads to coating failure long before owners expect it.

Prep for paint

Paint prep is different because the goal is adhesion and a stable film. If the surface is peeling, chalking, or soft, fresh paint won’t solve the underlying issue. It will just temporarily hide it.

Paint prep commonly includes scraping, sanding, patching, caulking where appropriate, and priming bare or repaired areas before finish coats go on. The cleaner and more stable the substrate, the better the final film performs.

Mixed surfaces need sequence discipline

The most overlooked technical issue is where painted and stained surfaces meet. Window trim, door assemblies, interior casings, and custom wood details often combine both finishes in the same area.

According to a 2025 PCA study, staining first and then taping and painting reduced edge bleed by 67% compared with painting first, as discussed in this Houzz discussion referencing the sequence issue. That sequence matters on cedar and fir in the Pacific Northwest because those species can make finish transitions less forgiving.

If your project includes cabinets or interior woodwork that will be stained rather than painted, this walkthrough on how to stain wood cabinets is a useful example of how much the prep and application process shape the result.

Making Your Final Decision with Wheeler Painting

If you’re still weighing paint or stain, the simplest way to decide is to start with the surface and the maintenance reality, not the color chip.

A practical decision guide

  • Choose stain if you want to preserve visible wood grain and the surface needs to release moisture, especially on decks, fences, and many exterior wood features.
  • Choose paint if you need a uniform, opaque finish across wood, drywall, trim, plaster, or mixed materials.
  • Lean toward stain when the wood is part of the design.
  • Lean toward paint when repairs, patching, or color consistency matter more than grain.

When DIY can work

A small, accessible fence section or a straightforward interior wood element can be a realistic DIY stain project if the surface is clean, conditions are right, and expectations are modest. The same goes for limited interior painting where substrate condition is predictable.

Even then, finish work rewards patience. Brush marks, lap lines, poor masking, rushed dry times, and skipped prep show up quickly. If you want a broader view of craft considerations, Mastering Wood Finishing Techniques is a helpful read.

When hiring a professional is the better call

Professional help becomes the smarter choice when any of these are true:

  • The project is exterior and exposed to sustained moisture or sun
  • There’s existing failure like peeling, mildew, greying wood, or uneven old coatings
  • Paint and stain intersect in the same assembly
  • The scope includes repairs along with coating work
  • A commercial schedule matters and rework would disrupt operations

For homeowners and facility managers in Kent, Seattle, Tacoma, and the towns in between, the biggest value of a professional evaluation is getting the system right before the work starts. The expensive mistakes usually happen at the decision stage, not at the checkout counter.

Frequently Asked Questions About Paint and Stain

Can I paint over a stained surface

Yes, but only with proper prep. The surface needs to be cleaned, dulled or sanded as needed, and primed appropriately so the new paint can bond. If the stained wood is glossy, contaminated, or failing, paint over the top won’t hold well.

Can I stain over a painted surface

Usually not without stripping the paint off first. Stain needs to penetrate wood, and paint blocks that path. If a painted surface stays painted, repainting is generally the practical route.

What is a solid stain

A solid stain sits between traditional paint and more transparent stains in how people think about it visually. It gives you a more opaque look than semi-transparent stain, but it’s still used within stain systems and is often chosen when owners want more coverage without fully shifting to a conventional paint look.

What usually lasts longer on wood

That depends on the surface, exposure, and whether the finish matches the material. Paint often lasts longer in ideal conditions, but on exterior wood that needs to manage moisture, stain may be the better long-term decision because it tends to fail more gracefully and can be easier to maintain.

What’s the most common wrong choice in the Puget Sound

Painting horizontal exterior wood is a frequent one. The finish may look great at first, but if that wood regularly holds moisture, a film-forming system can create bigger maintenance headaches later.


If you’re comparing finishes for a home, tenant improvement, exterior repaint, deck restoration, or facility maintenance project, Wheeler Painting & Restoration Services can help you sort out the right system for the surface, the climate, and the maintenance plan. A clear site evaluation often saves far more than guessing between paint or stain and having to redo the work later.

Finding the Best Stain for Fences in Western Washington

When you’re trying to pick the best stain for your fence, the answer really depends on what you're trying to achieve. If you want serious durability and water repellency for our wet Pacific Northwest climate, an oil-based, semi-transparent stain is hard to beat. But if you're looking to completely refresh an older fence or get maximum UV protection, a solid-color stain is probably your best bet. It all comes down to finding that sweet spot between the look you want and the protection your fence desperately needs.

Protecting Your Fence in the Pacific Northwest Climate

For any property owner in Western Washington, a fence is a huge investment. It gives you privacy, adds a layer of security, and frames your home or business. But our local climate is notoriously tough on wood. The constant rain, high humidity, and even our seasonal sun exposure create a perfect storm that can wreck an unprotected fence in just a few years.

Staining your fence isn’t just about making it look nice—it’s the single most important thing you can do to protect it and make it last. A quality stain is your frontline defense against everything the PNW weather throws at it. A trusted local provider like Wheeler Painting can help you make the right choice for your home or commercial property.

Key Threats to Fences in Western Washington

Here in the Pacific Northwest, we know a thing or two about rain. But it’s the combination of threats that really does a number on wood fences.

  • Moisture Saturation: All that dampness soaks into the wood, causing it to swell and then shrink as it dries. This constant movement leads to warping, cracking, and splitting, which gives rot an open invitation.
  • Mold and Mildew: High humidity is the ideal breeding ground for mold and mildew. Before you know it, you’ll see those ugly black and green streaks that don't just look bad—they can permanently stain the wood.
  • Sun Damage (UV Rays): It's not just about the rain. Even our cloudy days let enough UV rays through to break down wood fibers. This is what turns a beautiful cedar fence gray and brittle over time.

A well-chosen fence stain does more than just add color. It actively pushes water away, contains fungicides to stop mold in its tracks, and uses pigments to shield the wood from damaging UV radiation. It's a proactive investment in your property's value.

Why Staining is a Smart Financial Decision

This protective quality is exactly why stained coatings dominate the global wood fencing market. It’s a massive industry—valued at USD 8.71 billion in 2024—and stained coatings make up USD 7.03 billion of that. The numbers don't lie. Professionals and property owners alike rely on stains to fight oxidation and preserve the wood's natural color, especially in demanding climates like ours. You can dig deeper into the data by checking out the full market research on wood fencing trends.

By applying the right stain, you can head off expensive repairs down the road and potentially double the life of your fence. This holds true whether you're a homeowner trying to protect your backyard oasis or a facilities manager tasked with maintaining perimeter fencing for a commercial property. Getting the timing right is just as important as the stain you choose. For more on that, take a look at our guide on the best time to paint your house exterior, as many of the same rules apply to staining.

Oil-Based vs. Water-Based Stain Performance

When it comes to protecting your fence, the first and most important choice you'll make is between an oil-based and a water-based stain. This decision is everything. It will dictate how well your fence weathers the relentless dampness we know all too well here in the Pacific Northwest. Let's move beyond a generic pro/con list and dig into how each type actually holds up against Western Washington’s specific challenges.

This is a core part of property maintenance. As the flowchart below shows, every property owner faces a clear choice: proactively protect your investment, or get ready for the much higher cost of replacing it down the road.

A flowchart guiding decisions on fence protection, from start to maintenance or replacement.

The takeaway is simple: in our wet climate, staining isn't just an aesthetic choice—it's the only way to ensure your fence lasts.

Understanding Oil-Based Stains

For decades, oil-based stains have been the go-to workhorse for exterior wood, and for good reason. They are formulated with natural oils, like linseed or tung, which are suspended in a solvent base. When you apply an oil-based stain, it doesn’t just sit on top; it soaks deep into the wood fibers.

This deep penetration is its superpower, especially in our climate. By saturating the wood from the inside out, the oil creates a robust, water-repelling barrier. For a fence in the Puget Sound that's constantly battered by rain and humidity, this is your best defense against rot and decay.

The numbers back this up. Oil-based wood stains represent 26.1% of the U.S. market, with USD 628.5 million in sales in 2024 and a projected 8.4% CAGR. Their ability to form a tenacious bond deep within the wood grain provides lasting color and adhesion that often outmatches water-based options, which is why exterior applications alone accounted for USD 2 billion in 2023. You can see more details in these industry-leading wood stain statistics.

Key Differentiator: The real strength of an oil-based stain is its deep penetration. It’s like conditioning leather—it nourishes the wood while building a resilient, water-repellent shield that’s exceptionally effective against our constant moisture.

However, this high performance comes with some trade-offs. Oil-based stains contain higher levels of volatile organic compounds (VOCs), which means a strong odor during application and a bigger environmental footprint. Cleanup requires mineral spirits, and the drying time is significantly longer—you'll often need a 24-48 hour rain-free window for it to cure properly.

The Rise of Modern Water-Based Stains

For years, water-based stains had a reputation for being unsuitable for tough outdoor jobs, but modern chemistry has completely changed the game. Today’s premium water-based (often called acrylic) stains are a fantastic alternative with their own distinct advantages.

Instead of penetrating like an oil, a water-based stain is engineered to form a protective, flexible film on the wood's surface. This flexibility is a huge plus in a climate with our temperature swings. As the wood naturally expands and contracts, the acrylic film moves with it, making it far less likely to crack, peel, or blister over time.

This surface-level protection also gives it superior color retention and UV resistance. Because the pigments are locked into that acrylic film, they are much less prone to fading from sun exposure.

For homeowners and business owners, the practical benefits are hard to ignore:

  • Faster Drying Times: Most are dry to the touch in a few hours, dramatically lowering the risk of a surprise rain shower ruining your work.
  • Low VOCs: The odor is much milder, making them a more pleasant and environmentally sound choice for homes and businesses.
  • Easy Cleanup: All you need is soap and water. This simplifies the entire project, whether you're a DIYer or a seasoned residential contractor.

While they don't soak in as deeply as oils, the best water-based stains create a tough, breathable barrier. This is a critical feature, as it allows any moisture vapor trapped inside the wood to escape, preventing the perfect conditions for mold and mildew to grow from within.


To make the decision clearer, here’s a direct comparison of how these two stain types perform in our wet environment.

Oil-Based vs Water-Based Fence Stains Performance in Wet Climates

Performance Factor Oil-Based Stain Water-Based Stain Best Use Case in the PNW
Water Repellency Excellent; penetrates deep to block water from within the wood fibers. Good to Excellent; forms a protective surface film that sheds water. Oil-Based: For maximum protection on older, weathered fences or those in extremely damp, shaded areas.
Durability Prone to cracking/fading over time, especially in direct sun. Requires reapplication every 2-3 years. Highly flexible; resists cracking and peeling. Better UV resistance means less fading. Reapplication every 3-5 years. Water-Based: For newer fences or those in sunny spots where flexibility and color retention are key.
Application Longer dry time (24-48 hrs), strong odor (high VOCs), requires mineral spirits for cleanup. Fast dry time (1-4 hrs), low odor (low VOCs), easy soap-and-water cleanup. Water-Based: Ideal for DIY projects or when you need to finish the job quickly with minimal disruption.
Mold/Mildew Can be susceptible to mildew growth if additives are not included. The breathable film allows moisture to escape, reducing the risk of mold growth from within. Both: Look for products with high-quality mildewcides, but water-based has a slight edge due to breathability.

Ultimately, for anyone prioritizing ease of use, environmental impact, and long-term color stability, a premium water-based stain is an outstanding choice for protecting a fence in Western Washington.

Choosing Your Stain Finish and Opacity

Once you’ve decided between an oil or water-based formula, the next big question is about appearance and protection. How much of that wood grain do you want to see? This choice, called opacity, is where you balance the look you want with the level of durability you need.

It's a practical decision. The opacity you choose determines how much the natural wood shows through, but it also dictates how much UV protection your fence gets. This is a crucial factor for any home or commercial property, especially with the kind of weather we get here. Your fence's age and condition will play a big part in this decision, too.

Three sets of wooden fence pickets showing solid, semi-transparent, and clear stain finishes.

Solid Color Stains: Maximum Protection, Total Transformation

Think of a solid color stain as being closer to paint. It completely covers the wood grain, creating an opaque, uniform finish. This makes it the undisputed champion for hiding imperfections and delivering the absolute best UV protection available. The pigments form a powerful shield against the sun, which is why solid stains last longer than any other option.

A solid stain is often the perfect solution for:

  • Older or Weathered Fences: If your fence has seen better days—with uneven coloring, old repairs, or different types of wood—a solid stain creates a clean, consistent surface that looks brand new.
  • Precise Color Matching: Need to match your company’s branding or your home’s trim? Solid stains can be tinted to virtually any color, offering total design control.
  • High-Traffic Commercial Areas: These coatings are tough. Their durability is ideal for the perimeters of retail centers, office parks, and busy businesses where fences see more wear and tear.

The demand for high-performance coatings like these is soaring. The global wood coatings market is expected to jump from USD 12.22 billion in 2025 to USD 17.83 billion by 2033. Much of that growth comes from powerful polyurethane resins, which made up 60.14% of coatings in 2025 and are a key ingredient in the toughest solid stains we use at Wheeler Painting for commercial painting services.

Semi-Transparent Stains: The Best of Both Worlds

For many property owners, a semi-transparent stain hits the sweet spot. It offers a beautiful compromise between protection and natural aesthetics. It has enough pigment to add rich color and provide substantial UV defense, but it’s still sheer enough to let the wood's unique grain and texture shine through.

This makes it our most popular request for homeowners and businesses who want to enhance their wood fence, not hide it. It's the perfect choice for a beautiful new cedar fence where you want that classic, high-quality wood look to be the star.

Key Insight: Here in the Pacific Northwest, a semi-transparent stain is our go-to for most deck & porch staining projects. It delivers the protection we need against our notorious rain and sun while preserving the authentic, rustic character of wood that defines so many of our local properties.

Because they have a good amount of pigment, semi-transparent stains are great at preventing wood from turning gray and brittle. If you're curious about the science, you can learn more by reading our guide on choosing a UV-resistant paint.

Clear Sealers: A Natural Look with a Trade-Off

Clear sealers, which are sometimes just called water repellents, contain almost no pigment. As the name implies, their main job is to repel moisture and stop water from soaking into the wood. They do this very well, but they offer virtually no protection from the sun’s damaging UV rays.

Without pigments to block the sun, the wood underneath will naturally weather and turn gray over time. This makes clear sealers a very specific choice. They’re best for situations where you actually want the wood to develop that silvery-gray patina as it ages, but you still need to protect it from rot and decay caused by moisture.

A clear sealer might be right for you if:

  • You have a new, high-quality wood fence like cedar or redwood.
  • You prefer a naturally weathered, rustic look for your property.
  • You're committed to more frequent reapplication (often yearly) to keep the water repellency effective.

Ultimately, the best stain for your fence comes down to what you value most. If maximum lifespan and color control are your top priorities for a commercial or older residential fence, a solid stain can't be beaten. But for that classic, protected wood look, a semi-transparent stain is the perfect middle ground.

Why Professional Prep is Everything for a Lasting Fence Stain

You can pick the absolute best stain on the market, but if you put it on a poorly prepped fence, it’s going to fail. It's a hard truth we've seen play out time and time again. Think about it—you wouldn't slap a coat of paint on a dirty, greasy wall inside your home. So why would you do it on an exterior fence that’s constantly battling rain, sun, and grime?

Proper prep isn't just a suggestion; it's the entire foundation for a finish that looks great and actually lasts. For a facilities manager trying to keep a large commercial fence looking sharp or a homeowner protecting their investment, cutting corners here is a guaranteed way to see peeling, blotchy color within a year. A professional crew knows the real work happens before a single drop of stain is even opened.

Man in safety glasses and gloves applies cedar stain to a wooden fence with an applicator.

Step 1: A Deep Clean to Eliminate Contaminants

Here in Western Washington, fences are a magnet for organic growth. Those green and black streaks aren't just an eyesore; they're mold, mildew, and algae actively eating away at the wood fibers. If you just stain over them, you’re essentially trapping the enemy inside. The growth will continue to flourish under the stain, eventually pushing the new finish right off the surface.

That’s why a professional cleaning is non-negotiable. We start with a specialized wood cleaner designed to kill every last organic spore. Then, we follow up with a careful power wash—not to blast the wood, but to gently strip away the dead growth, dirt, and weathered gray fibers. Getting this step right is exactly why clients often have us handle all their property's power washing needs at the same time.

Step 2: Patience is Key—Letting the Wood Dry Completely

After a thorough wash, the next step is the one that tests everyone's patience in our damp climate: waiting for the wood to dry completely. Applying stain to damp wood is a catastrophic mistake. The moisture gets trapped, preventing the stain from soaking into the wood pores. Instead of bonding, the stain just sits on top, ready to fail.

So, how long is long enough? Depending on the weather, a fence might need 24 to 72 hours—sometimes more—to dry out. A pro doesn't guess; we use a moisture meter to get a definitive reading. This single, patient step is what separates a quality job from a failure in the Puget Sound region.

A professional's most valuable tool is often patience. Waiting for the wood to dry completely is the single most critical factor in preventing stain failure in the Pacific Northwest. Rushing this step will compromise the entire project.

Step 3: A Light Sand to Open the Wood's Pores

Once the fence is clean and bone-dry, we often give it a light sanding. The goal here isn't to make the wood feel like a piece of furniture. It’s all about opening up the wood’s pores. The power washing process, while essential, can sometimes flatten the surface fibers, especially on older wood.

A quick scuff with the right grit sandpaper roughens the surface just enough to allow for maximum stain absorption. This ensures the stain penetrates deeply and evenly, which means you get richer color and a much stronger, more durable bond. It’s a small detail that makes a huge difference in the final look and longevity.

Step 4: The Art of a Flawless Application

Finally, it’s time to apply the stain, and how it’s done matters. A DIYer might reach for a roller and brush, but for a truly professional finish, we rely on a "spray and back-brush" method. This technique gives you the speed of a sprayer and the quality control of a brush.

It’s a two-person job that works like this:

  • Spray: The first person applies a thin, even coat of stain with a professional-grade sprayer, covering the area quickly.
  • Back-Brush: A second person follows immediately behind with a high-quality brush, working the stain into the wood grain, corners, and between the boards.

This system eliminates drips, prevents pooling, and forces the stain deep into every nook and cranny. The result is a beautiful, uniform finish that's built to withstand the elements. This is the kind of meticulous process that separates a professional project from a weekend attempt, ensuring you get the absolute best performance out of your stain.

Long-Term Maintenance and Stain Lifespan

Once your fence is beautifully stained, the next question is always the same: How long will it last? It’s a great question, especially here in Western Washington where the constant rain and surprisingly strong summer sun put any exterior finish to the test.

Thinking about maintenance right from the start isn’t just about planning—it’s about protecting your investment. A good stain job isn't a one-and-done deal. It’s the beginning of a simple care routine that keeps your fence looking great and prevents costly repairs down the road, whether for your home or at a commercial facility.

Expected Lifespan for Different Stain Types

The real-world lifespan of a fence stain comes down to two things: the quality of the product and its opacity. The more pigment a stain contains, the more UV protection it offers, and that's the single biggest factor in how long it will hold up.

Here are some honest timelines we’ve seen over the years in the Puget Sound region:

  • Solid Color Stains: These are your workhorses. Because they're opaque like paint, they provide a powerful barrier against sun and moisture. You can realistically expect a solid stain to last 5 to 7 years before needing a fresh coat.
  • Semi-Transparent Stains: This is the go-to for many who want to see the wood grain. They strike a nice balance but offer less UV defense, so you're looking at a shorter maintenance cycle—typically re-coating every 2 to 4 years.
  • Clear Sealers: With little to no pigment, these products are all about repelling water. They offer minimal UV protection, which means the sun will break them down quickly. Plan on reapplying a clear sealer every 1 to 2 years to keep the wood protected from moisture.

Keep in mind that a fence's exposure plays a huge role. A south-facing fence that gets direct sunlight all day may need attention sooner than one in a shaded, protected area.

Your Practical Maintenance Schedule

A little bit of attention each year goes a long way. A straightforward maintenance plan will dramatically extend the life of your stain, pushing back the need for a full re-staining project and keeping your property looking sharp.

Annual Inspection (Spring is the perfect time)
Take a slow walk along your fence line once a year. You’re looking for the first signs of wear:

  • Fading or Discoloration: Does one side look more washed-out than the other? This is usually the side that gets the most sun.
  • Peeling or Flaking: Look closely for any spots where the stain is lifting away from the wood. This is a clear sign the finish is starting to fail.
  • Mold or Mildew Growth: Check for those tell-tale green or black specks, especially in damp corners or areas shaded by trees.
  • Water Absorption: This is the key test. After it rains, does water bead up nicely on the surface? Or does it soak in and make the wood look dark and wet? If it’s soaking in, the seal has been compromised.

Gentle Annual Cleaning
Every spring, give your fence a quick bath. All you need is a garden hose, a soft-bristled brush, and a gentle, pH-neutral wood cleaner. This isn’t about aggressive scrubbing; it’s about rinsing away the winter’s accumulation of dirt, pollen, and mildew spores that can eat away at the stain.

This simple wash prevents grime from working its way into the finish and causing it to break down prematurely. When your annual inspection shows it's finally time for a professional re-coat, Wheeler Painting is ready to step in and get your fence’s protection and beauty fully restored.

Why Choose a Local Pro for Your Staining Project

Picking the right stain is just half the battle. The real test comes down to who applies it, because even the best product will fail if it's not put on correctly. While going the DIY route can seem like a good way to save money, a bad staining job in Western Washington often leads to peeling, blistering, and trapped moisture—problems that can cost a fortune to fix later.

Simply put, you need a contractor who knows our climate as well as they know their products. That local expertise is what makes all the difference.

Experience That Matters in the Puget Sound

Wheeler Painting & Restoration Services is more than just another name in the phone book. We've been staining fences and protecting properties right here in the Puget Sound area since 1991. That's over three decades of seeing exactly what our damp winters and surprisingly strong summer sun can do to wood.

This hands-on, local experience means we know which stains hold up and which ones don't. We've honed our application techniques specifically for this environment to ensure your fence gets the maximum protection possible. We’re not just a company; we’re your neighbors, committed to doing the job right.

Serving Both Residential and Commercial Needs

Whether it’s the fence around your backyard or the perimeter of a large commercial property, our team brings the same level of care and attention to detail. A properly maintained fence is just as important for a home's curb appeal as it is for a business's professional image.

  • For Homeowners: We protect your investment with a beautiful finish that enhances your property and stands up to the weather.
  • For Businesses: Facility managers rely on us for large-scale commercial painting and institutional painting because we deliver consistent, professional results that safeguard their assets without disrupting operations.

When you hire a long-standing local pro like Wheeler Painting, you’re getting a team that’s accountable to the community. We build our reputation on dependable work and clear, honest communication from the first meeting to the final inspection.

We manage the entire project from start to finish, making sure everything stays on schedule and on budget. From the initial on-site consultation to the detailed proposal and the final walkthrough, you’ll know you’ve picked a trusted partner for the job.

Ready to protect your investment with a flawless, durable finish? Whether you need professional fence staining, a residential remodel, or commercial construction services near you, the Wheeler Painting team is here to help. Contact us today for a comprehensive estimate and see why we've been a trusted name in Western Washington for over 30 years.

Common Questions About Staining Your Fence

If you're thinking about staining your fence, you've probably got a few questions. That's a good thing. Making the right choices upfront saves a lot of headaches later on. Here are the answers to some of the most common questions we get from homeowners and business owners around Puget Sound.

How Long Should I Wait to Stain a New Cedar Fence?

This is a big one. For a new cedar fence here in Western Washington, you’ll want to let it "weather" for 3 to 12 weeks before you even think about staining it. It might seem strange to leave beautiful new wood exposed, but this waiting period is non-negotiable.

New cedar is often slick with a "mill glaze" from the milling process and is also full of natural oils. Letting it sit allows the rain and sun to break down that glaze and wash away those surface oils. If you stain too soon, the product won't be able to penetrate the wood, leading to a weak finish that peels and fails in a hurry.

Can You Stain a Fence That's Already Been Painted or Stained?

Yes, you absolutely can, but be prepared for some serious prep work. If the fence was painted, the old paint has to come off—all of it. Stain has to soak into bare wood, and it simply can't get through a layer of paint.

If it has an old stain on it, the job involves a deep cleaning and usually a light sanding to open up the wood pores again. This is especially true if you're switching from a dark, solid stain to a lighter, semi-transparent one. It's a tough, labor-intensive process, and getting the prep right is what makes or breaks the final result.

Pro Tip: The best application method is what we call 'spray and back-brush.' We spray the stain on for speed and even coverage, but then immediately follow with a brush to work it deep into the wood's grain. This gives you the best of both worlds: efficiency and a durable, uniform finish without any drips.

How Often Will My Fence Need to Be Restained?

How long your stain lasts really comes down to the product you choose and how much weather it sees. Our damp climate is tough on wood finishes.

  • A quality solid stain is the most durable, typically lasting 5 to 7 years.
  • A semi-transparent stain, which lets the wood grain show through, will need a fresh coat every 2 to 4 years.

Keep in mind that a fence side that gets blasted by direct sun all afternoon will fade faster than a shaded side. A little preventative maintenance, like a gentle wash each spring, can go a long way in helping your stain last as long as possible.


Ready to protect your fence with a professional, long-lasting finish? Wheeler Painting & Restoration Services has been serving homeowners and commercial clients in the Puget Sound area for over 30 years.

Contact us today for a comprehensive estimate

A Property Owner’s Guide to UV Resistant Paint

Let’s get straight to it: UV resistant paint is essentially high-performance sunscreen for your home or commercial property. It’s a special kind of coating formulated specifically to stand up to the sun’s relentless ultraviolet (UV) rays, which are the real culprits behind faded, cracked, and peeling paint. Making the right choice can feel overwhelming, but this guide will walk you through what you need to know in simple, helpful terms.

Protecting Your Property With UV Resistant Paint

A vibrant green house by the ocean with a shimmering protective shield over its windows.

Here in our local service area, we cherish our sunny days, but that intense summer sun can be brutal on a building's exterior. That rich, vibrant color you loved when you first painted can look dull and chalky in just a few years. This isn't just about looks—it’s a clear warning that your property's first line of defense is failing.

Most standard exterior paints just aren't built to handle the constant UV exposure. Day after day, the sun’s radiation breaks down the chemical binders in the paint, a process called photo-oxidation. This assault leaves the paint film brittle and weak, unable to protect the wood, fiber cement, or metal underneath.

The Long-Term Value of Advanced Protection

Opting for a quality uv resistant paint is one of the smartest long-term decisions a property owner, business owner, or facilities manager can make. These advanced coatings contain special pigments and additives that either absorb or reflect UV radiation before it can degrade the paint. This means colors stay true and the paint finish remains flexible and intact for far longer than you'd get from a conventional paint.

For a business, that means maintaining a sharp, professional curb appeal. For a homeowner, it’s about protecting your biggest asset and avoiding premature maintenance headaches.

A great paint job isn't just cosmetic; it's a protective shield. By deflecting the sun's attack, UV resistant paints drastically cut down on how often you need to repaint, saving you thousands of dollars over the life of your building.

This level of protection is a game-changer in our region. Our unique climate cycle of damp winters followed by bright, dry summers puts incredible stress on any painted surface. Applying the right coating—and applying it correctly—is the key to a beautiful finish that lasts. At Wheeler Painting, a trusted local provider, we specialize in helping property owners choose and apply coatings designed to withstand our local weather, ensuring your investment looks fantastic for years to come.

How UV-Resistant Paint Defends Your Surfaces

Ever wonder why the paint on an old shed or park bench gets that dull, chalky look? Or why a once-vibrant front door starts to fade after just a few years? The culprit is the sun. Its invisible ultraviolet (UV) rays are constantly bombarding your building's exterior, and standard paint just can't hold up.

Think of a newspaper left on the dashboard of a car. In a short time, the sun yellows the paper and makes it brittle enough to crumble. A similar process, called photo-oxidation, happens to regular paint. UV radiation attacks the chemical bonds that hold the paint together, breaking them down one by one. This is what causes colors to fade, the finish to go chalky, and the paint to crack and peel, leaving the surface underneath exposed.

This isn't a minor issue—it's the primary reason exterior paint jobs fail. In fact, solar radiation is responsible for about 80% of all exterior paint failures. It's no surprise, then, that the global market for weather-resistant coatings was valued at USD 8.5 billion in 2024 and is expected to climb to USD 14.3 billion by 2032, according to market analysis from IntelMarketResearch.com. Homeowners and property managers are catching on: fighting the sun requires a specialized formula.

The Science: Sunscreen and a Repair Crew for Your Walls

So, what makes UV-resistant paint different? It's all in the additives. These paints are engineered with a powerful one-two punch that neutralizes UV radiation before it has a chance to wreak havoc.

First up are additives called UV absorbers. Their job is simple: act like a high-SPF sunscreen for your siding. These microscopic compounds are specifically designed to absorb incoming UVA and UVB rays. They take the hit, convert that energy into a tiny, harmless amount of heat, and release it. The paint’s binders and color pigments are never touched.

By essentially sacrificing themselves, these absorbers form the first line of defense, stopping the vast majority of damaging radiation right at the surface.

UV absorbers are the silent heroes in your paint. They take the hit from solar radiation so the paint’s color and structure don’t have to, preserving your property's vibrant appearance and protective layer.

A Microscopic Repair Crew That Never Quits

Even the best sunscreen can miss a few spots. Some UV radiation will inevitably sneak past the absorbers. That's where the second key ingredient comes in: Hindered Amine Light Stabilizers, better known as HALS.

If UV absorbers are the shield, HALS are the microscopic, always-on-call repair crew. When a stray UV ray gets through and creates a destructive molecule known as a "free radical," HALS spring into action. They find these free radicals and neutralize them on the spot, stopping them from starting a chain reaction of damage within the paint film.

The truly amazing thing about HALS is that they are self-regenerating. After neutralizing a free radical, they return to their original state, ready to do it all over again. This means they don't get used up, allowing them to patrol and protect the paint for years.

This powerful combination is what gives uv resistant paint its incredible staying power:

  • UV Absorbers: Block most of the incoming solar radiation at the surface.
  • HALS: Continuously patrol the paint film, cleaning up any damaging free radicals that form.

Together, they ensure the paint holds its color, stays flexible, and continues to protect your property. This advanced chemistry is why a high-performance coating is such a smart investment for any property owner, especially in our local service area where the summer sun can be surprisingly intense.

Choosing the Right UV Resistant Coating

Picking the right UV resistant paint isn't a one-size-fits-all decision. It's really about matching the product to the surface and the environment. You wouldn't use wall paint on your deck, and for the same reason, different exterior materials need specific kinds of protection to stand a fighting chance against the sun.

Not all UV coatings are built the same. Each type brings something different to the table, whether you're handling a residential home improvement project or painting a massive commercial building. Getting this choice right from the start is the key to a paint job that lasts and looks great for years. Let's walk through the main options and see where they shine.

Exterior Acrylic and Latex Paints

For the vast majority of homes in our community, a high-quality acrylic or latex paint is your best bet for exterior painting. Today’s formulas are light-years ahead of old oil-based paints. They’re durable, they hold their color exceptionally well, and they’re flexible. Most importantly, they breathe, letting moisture escape from inside the walls—a must-have feature in our damp climate.

These paints work beautifully on all sorts of common surfaces:

  • Wood Siding and Trim: They expand and contract right along with the wood as temperatures fluctuate, which dramatically cuts down on cracking and peeling.
  • Fiber Cement Siding: They create a strong bond with fiber cement, resulting in a smooth, long-lasting finish that handles both sun and relentless rain.
  • Vinyl Siding: There are even specialized formulas that stick to vinyl without causing it to warp, giving it a complete refresh as part of a residential remodeling project.

The best of these paints are made with 100% acrylic binders, which are naturally great at resisting UV damage. This makes them a reliable, smart choice for most homes. They deliver solid protection without needing complex or specialized application. And if you're thinking about a new look, our guide on how to choose exterior paint colors can help you find a palette that will last.

This flowchart shows how the special additives in these paints work together as a team to guard the surface.

Flowchart illustrating how UV paint works, explaining its components: UV absorbers and HALS.

As you can see, it’s a two-pronged defense: UV absorbers act like a primary shield, and HALS clean up any rays that sneak past, giving the paint a much longer life.

High-Performance Elastomeric Coatings

When you need to protect surfaces like commercial masonry, stucco, or concrete, elastomeric coatings are in a league of their own. This stuff is thick—it can be applied up to 10 times thicker than standard paint. But its real superpower is its incredible flexibility. It can stretch and snap back to its original form without a single crack.

Think of elastomeric paint as a thick, waterproof, rubber-like membrane for your building. It doesn't just color the surface; it seals it completely against the elements.

This amazing stretchiness allows elastomeric coatings to bridge the hairline cracks that inevitably appear in masonry. As a building settles or shifts with temperature changes, the coating simply stretches over the gaps, keeping the waterproof barrier intact. For commercial properties, retail build-outs, and other large facilities, this is a game-changer, preventing water intrusion that could lead to huge repair bills. These are key considerations for "commercial painting services near me."

Specialized UV Resistant Clear Coats

Sometimes, you love the look of a surface and just want to protect it, not cover it up. This is where UV-resistant clear coats are perfect. These transparent finishes create a tough, non-yellowing shield that takes the brunt of the sun's abuse, letting the natural beauty of the material underneath show through.

Clear coats are an ideal solution for:

  • Deck & Porch Staining: Protecting decks, front doors, or porches from fading while preserving the rich wood grain.
  • Exposed Metal: Stopping architectural metal features from oxidizing or losing their color.
  • Painted Artwork: Shielding outdoor murals and other custom finishes from sun damage.

These coatings act as a sacrificial layer, absorbing the UV radiation so the material they're protecting doesn't have to.

UV Resistant Coating Comparison Guide

To make it even clearer, here’s a quick breakdown of how these different coatings stack up and where they’re best used on properties in our service area.

Coating Type Best For Key Benefit Typical Lifespan (Years)
Acrylic Latex Paint Wood, fiber cement, vinyl siding Breathability & color retention 7 – 10
Elastomeric Coating Concrete, stucco, masonry, brick Crack-bridging & waterproofing 10 – 15+
UV Clear Coat Stained wood, metal, murals Protects underlying material 3 – 7

By understanding these options, you can feel confident that your property is not only beautiful but also truly defended against the sun for years to come.

Understanding Paint Performance and Durability

When you invest in a new paint job for your home or business, you're not just picking a color—you're buying protection. But how do you know if a high-quality UV resistant paint is actually going to last? The difference between a paint job that looks great for a decade and one that fails after a few years of local sun and rain comes down to a few key performance metrics.

As professional painters, we see firsthand what holds up and what doesn't. Understanding these factors helps you look past the fresh shine and see the real value you're getting from a superior coating.

Key Metrics of a Lasting Finish

When we're evaluating a paint’s real-world performance, we look at how it's going to stand up to the elements over time. Three of the most critical factors are color retention, gloss retention, and chalk resistance.

  • Color Retention: This is simply a measure of how well a paint resists fading. A paint with poor color retention will see its vibrant color wash out under UV exposure, turning a deep, rich blue into a dull, dusty gray. The best UV-resistant paints use incredibly stable pigments and binders that lock in color for years.

  • Gloss Retention: This describes how long a paint keeps its original sheen, whether it's a flat, satin, or semi-gloss finish. When a paint loses its gloss, it’s not just a cosmetic issue; it’s an early sign that the paint film is starting to break down, making it harder to clean and less protective.

  • Chalk Resistance: Have you ever run your hand over an old, faded paint job and come away with a powdery residue? That’s "chalking." It happens when UV rays destroy the paint’s binders, leaving the pigment particles behind as dust. A great paint will resist this breakdown, maintaining a solid, intact surface that shields your property.

These qualities aren't just about looking good; they have a direct impact on your wallet. A durable paint job means you can go much longer between expensive repaints. The technology making this possible is often adapted from high-stakes industries where failure is not an option. For instance, the market for UV-resistant aircraft exterior paints is expected to hit nearly USD 946.9 million by 2036. For homeowners in our community, that same advanced science gives us paints that resist chalking up to 70% longer than standard acrylics, saving property owners thousands over the life of their home. You can read more on this market's growth at Future Market Insights.

Demystifying Paint Warranties

Many property owners are surprised to learn what a manufacturer's paint warranty actually covers—and more importantly, what it doesn't. It’s crucial to have realistic expectations, because these guarantees are often more limited than you might think.

A paint warranty almost always covers the product itself, not the labor to reapply it. If the paint is found to be defective, the manufacturer will typically provide replacement paint but will not pay for the cost of scraping, preparing, and repainting the surface.

This is exactly why professional application is so vital. A manufacturer will void their warranty in a heartbeat if the paint was applied improperly—over a dirty surface, in the wrong weather, or without the right primer. Warranties also won’t cover failures caused by underlying issues with your home, like moisture intrusion or rotted siding.

Think of a warranty as a statement of the manufacturer's confidence in their product when used correctly. Choosing a top-tier UV resistant paint is the first step. The second, and equally important, step is hiring a trusted local provider who stands behind their own work. For specialized surfaces that need extreme durability, like garage floors or commercial spaces, other coatings like epoxy offer similar protective benefits; you can check out our guide on epoxy floor coatings to see if it's right for you.

Professional Application for Maximum Longevity

Man in high-visibility vest and hard hat painting a house exterior white with a paint roller.

Even the most advanced uv resistant paint will fail if it's not applied correctly. Think of it like buying top-of-the-line tires for your car. If they’re mounted improperly, they won't perform well or last long. The exact same principle applies to paint—the quality of the application is just as crucial as the quality of the product itself.

Getting a beautiful, durable finish that can withstand the unique challenges of our local weather is part science, part craft. A professional crew with local experience knows all the variables that can make or break a project, from the condition of the siding to the humidity in the air. That expertise is what turns an investment in premium paint into the outstanding, long-term results you expect when searching for "house painting near me."

The Non-Negotiable Foundation: Surface Preparation

The single most critical step of any paint job happens before a can is even opened. Proper surface preparation is the bedrock of a lasting finish. It's a non-negotiable part of any professional project, because slapping new paint over a dirty, peeling, or failing surface is a surefire recipe for premature failure.

A truly meticulous prep process always includes several key stages:

  1. Thorough Cleaning: Every square inch of the exterior needs to be pressure washed or hand-washed. This removes all the built-up dirt, mildew, pollen, and chalky old paint residue, giving the new primer and paint a clean, stable surface to grab onto.
  2. Scraping and Sanding: We scrape away every bit of loose, peeling, or cracking paint. Then, we "feather sand" the edges to create a smooth, seamless transition between the bare surface and the old paint. This prevents ugly lines from telegraphing through the final coats.
  3. Repairs: Any damaged siding, rotted trim, or other structural problems have to be fixed first. Painting over compromised materials is like putting a bandage on a broken bone—it might hide the problem for a little while, but it doesn’t actually solve it. This is a crucial step for both residential remodeling and commercial renovations.
  4. Priming: A high-quality primer is applied to any bare wood and repaired spots. Primer is the essential bridge between the surface and the topcoat; it seals stains, ensures a strong bond, and creates a uniform canvas so the final color and sheen look perfect.

Here's a statistic that shocks many property owners: poor surface preparation is the culprit behind over 80% of all paint failures. A professional crew spends the majority of their time on these foundational steps, knowing that this is where the longevity of the job is truly won or lost.

Applying Paint in the Right Conditions

For paint to cure into that hard, protective shell it’s designed to be, it has to be applied within a specific window of temperature and humidity. In our service area, that’s especially important. Our weather can be all over the place, but experienced local painters know how to work with it, not against it.

Putting on paint when it's too cold can stop it from curing properly, leaving the finish soft and vulnerable to damage. On the flip side, painting in direct, hot sun can make it dry too fast, causing brush marks, blisters, and weak adhesion. If you've ever seen paint bubble on walls, for example, the conditions during application were likely a major factor. For a deeper look, our article explaining what causes paint to bubble on walls breaks it down further.

The Value of Experienced Execution

When you hire a seasoned team like Wheeler Painting, you’re not just paying for people to roll paint on your walls. You’re investing in a guaranteed outcome. We have the right equipment, a deep understanding of how different uv resistant paint formulas behave, and the local knowledge to get every single step right.

Whether we’re managing a residential home improvement project or large-scale commercial renovations, our process is built to ensure your property is protected and looks fantastic for years to come.

When to Call in the Pros for Your Project

Most of us have tackled a weekend painting project. But sometimes, what looks like a simple repaint is actually your house telling you something much bigger is wrong. Knowing the difference between a DIY touch-up and a job that needs a professional eye can save you a ton of frustration and money.

If you see paint cracking in a pattern that looks like alligator skin, or if it's peeling off in big sheets, stop and put the scraper down. These aren't just cosmetic issues. They're giant red flags signaling deeper trouble. An experienced pro can spot the real culprits—things like hidden rot in the trim, moisture wicking up through the siding, or failing window seals that are letting water in.

Just slapping new paint over these problems is like putting a small bandage on a major injury. A team that handles both painting and repairs can diagnose the root cause, ensuring you're not just hiding rot but actually fixing it for good.

Beyond Just a Paint Job: The Value of a True Restoration

When you discover that peeling paint is just the tip of the iceberg, the last thing you want is the headache of managing two different contractors. Imagine finding out your siding is compromised. Now you have to find and schedule a construction crew, wait for them to finish, and then bring the painters back.

A full-service team like Wheeler Painting, your "residential contractor near me," eliminates that chaos. We handle both the structural repairs and the flawless finish, all under one roof. This seamless approach is a lifesaver for property owners in our community. We're equipped to manage:

  • Residential Remodeling: Whether it's siding replacement or fixing dry rot found under old paint, we coordinate the construction and finishing touches perfectly.
  • Commercial Renovations: Time is money for any business. We keep retail build-outs and office space renovations on track, handling everything from new drywall to the final coat of paint.
  • Institutional Painting and Facility Construction Services: Our experience with larger projects ensures we deliver on time and within budget, from new builds to major renovations. We are your partner for "commercial construction near me."

Professional expertise also means access to the latest coating technologies. For example, the market for UV-curable coatings is exploding—projected to hit nearly USD 15 billion by 2033—because they dry instantly and offer immediate UV protection. Wheeler Painting uses these advanced finishes to protect everything from high-traffic commercial interiors to custom cabinetry, drastically reducing sun-fading. If you're interested in the data, you can explore the full market research from GrandViewResearch.com.

If your property is showing signs of serious paint failure or you're planning a bigger project, don't leave it to guesswork. Contact Wheeler Painting for an expert consultation. We’ll build a comprehensive plan to restore your property and protect your investment for years to come.

Frequently Asked Questions About UV Resistant Paint

As professional painters in our local community, we get a lot of questions from property owners trying to protect their homes and businesses from the sun. Here are some straightforward answers to the questions we hear most often about UV resistant paint.

Is UV Resistant Paint Really Worth the Extra Cost?

That's a smart question, and we hear it all the time. It's easy to look at the higher price per gallon and wonder if it's just a gimmick. But the real value isn't in the can; it's in the years of performance you get out of it.

These advanced paints are formulated to last, often twice as long as their standard counterparts. This means you can push back your next full, expensive repaint—and all the labor and material costs that come with it—for several more years. For any building in our local service area, that adds up to fewer headaches and a much lower cost to maintain your property over time.

Can I Just Paint Over My Old Flaking Paint?

I know it’s tempting to just slap a coat of new paint over the old stuff, but that’s the fastest way to guarantee your new paint job will fail. The new paint needs a solid, stable surface to grab onto. If the layer underneath is already peeling, the new paint will just come right off with it.

Think of it like this: all the cleaning, scraping, sanding, and priming we do isn't just busywork. It's the foundation of the entire project. Getting that surface preparation perfect is what allows a high-quality coating to bond properly and give you the durable, long-lasting finish you're paying for.

Are UV Resistant and Weatherproof Paints the Same Thing?

They're related, but not quite the same. "Weatherproof" is a catch-all term for paints that can handle moisture, humidity, and big temperature swings. "UV resistant," on the other hand, is all about fighting off damage from the sun's radiation.

The good news is that you don't have to choose. Any high-quality exterior paint worth its salt will have strong UV blockers built right in, because the sun is a huge part of what we call "weather." For our unique climate—wet winters and surprisingly intense sunny summers—you absolutely need a paint that excels at both.

Should I Use UV Resistant Paint Inside My Home?

Yes, it’s often a great idea, especially in rooms that get flooded with natural light. If you have big south-facing windows, French doors, or skylights, you've probably seen how sunlight can fade walls, hardwood floors, and even furniture over time.

Using an interior painting product with built-in UV protection can dramatically slow down that aging process. We also use clear UV-blocking topcoats on things like stained wood cabinets, trim, and built-ins. It's a fantastic way to keep your home’s interior looking fresh and vibrant for years, protecting the investment you've made in its appearance.


Ready to protect your property with a finish that’s built to last? The team at Wheeler Painting has the local expertise to choose and apply the perfect UV resistant paint for your home or business.

Contact us today to schedule your consultation.