Tag Archive for: commercial construction

What Is Tenant Improvement? a Puget Sound Business Guide

You signed the lease. The address looks right. The neighborhood fits your customers. The square footage seems workable. Then you step inside and realize the space still feels like the last tenant's business, or worse, it's just a shell with basic walls, rough lighting, and not much else.

That's where many business owners in Seattle, Tacoma, Bellevue, and the rest of the Puget Sound start asking the same question. What is tenant improvement, and who handles it? If you're opening a retail shop, updating an office, or reworking a small commercial suite, tenant improvement is the process that turns leased space into something your team can use.

For local owners and property managers, this part can feel more stressful than the lease itself. Permits, layouts, paint, drywall, flooring, schedules, landlord approvals, and budget decisions all start piling up at once. The good news is that TI work follows a pretty familiar path once you understand the moving parts.

Your New Commercial Space Needs Work Now What

A common Puget Sound scenario goes like this. A business owner finds a promising suite in Seattle, Bellevue, or Tacoma. The location is solid, parking works, and the rent penciled out. But inside, the space doesn't match the business at all.

A former insurance office might need to become a salon. A small clinic might need to become a professional office. A retail space in Kirkland might still have old partitions, dated flooring, and lighting that makes everything feel tired. Before anyone can move in, the space needs to be reshaped around the new use.

That reshaping is tenant improvement, often shortened to TI.

In simple terms, TI is the build-out work that makes a leased commercial space functional for the next occupant. Some projects are light. New paint, flooring, drywall repair, better lighting, and a few layout tweaks. Others are more involved, with new walls, plumbing changes, electrical work, and upgraded finishes.

A good TI project doesn't start with paint colors. It starts with how the space needs to work every day.

Here's where people often get tripped up. They assume the space is “almost ready” because it already has walls and a front door. In reality, many commercial suites in West Seattle, Issaquah, or Snoqualmie need selective demolition, cleaning, repairs, and planning before the improvement work itself can even begin. If you're taking over a second-generation space, these furniture removal insights for real estate can help you think through the handoff stage before construction starts.

For a broader look at how this kind of work comes together, Wheeler's commercial build-out services guide is a practical next read. It helps connect the dots between lease signing and move-in.

Defining Tenant Improvements

Tenant improvements are the changes made to a leased commercial space so it fits the tenant's day-to-day operations. In commercial real estate, TI work is typically defined by the lease as landlord-funded or landlord-approved interior alterations that make a space fit a tenant's operational requirements, and the scope usually covers non-structural elements such as walls, floors, ceilings, lighting, HVAC, and plumbing, as explained by Innago's overview of tenant improvement in real estate.

Buying a work truck offers a good analogy. The base vehicle gets you on the road, but it may still need shelving, racks, storage, toolboxes, and interior protection before it supports your crew. Commercial space works the same way. The lease gives you the space. TI makes it usable.

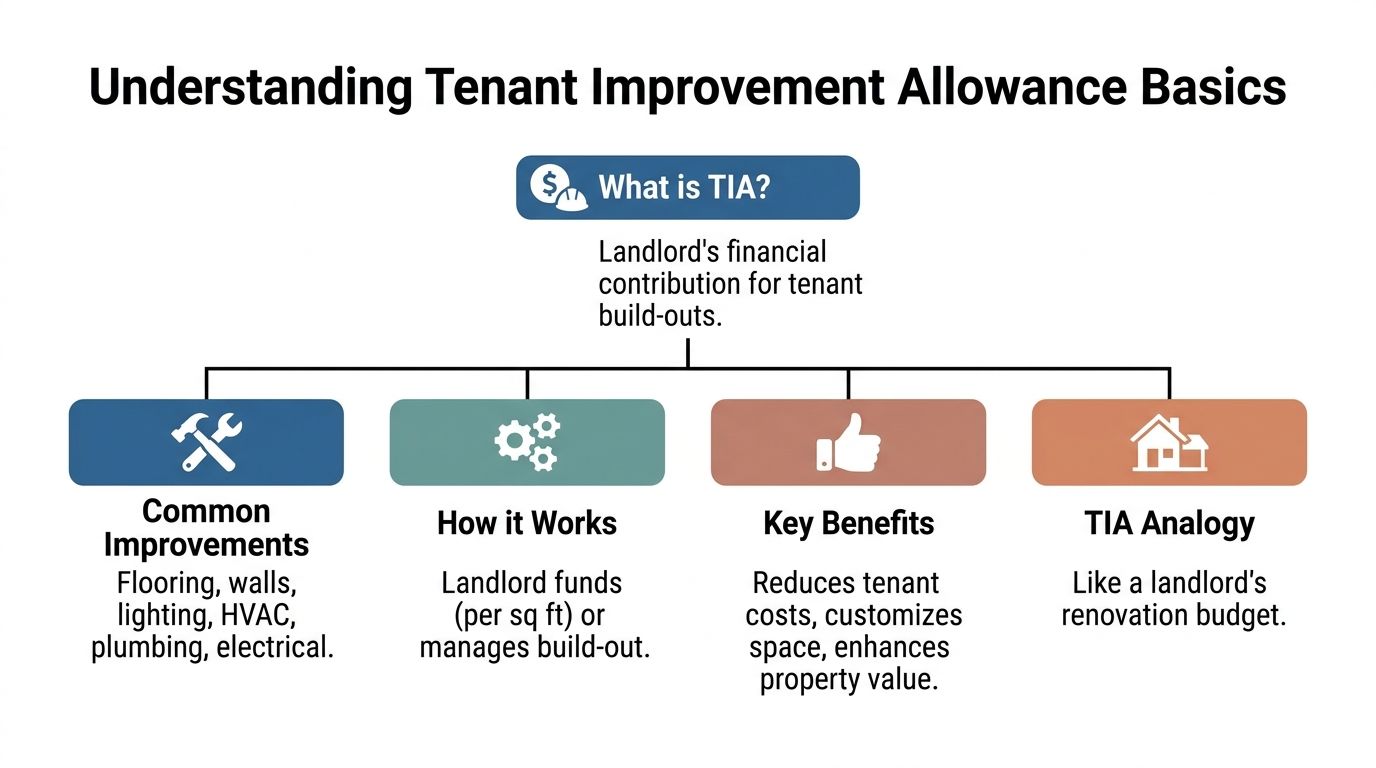
An infographic titled Understanding Tenant Improvements explaining the definition, initiation, purpose, and examples of commercial space upgrades.

What usually counts as TI work

Most small to mid-sized tenant improvement jobs in the Seattle area involve interior work that stays with the building. That often includes:

  • Interior walls and partitions to create offices, treatment rooms, storage, or conference areas
  • Drywall and finishing so altered spaces are ready for paint and occupancy
  • Flooring updates such as carpet tile, LVP, wood-look materials, or other commercial surfaces
  • Ceiling changes to repair, replace, or reconfigure overhead systems
  • Lighting upgrades for better function, appearance, and energy use
  • HVAC and plumbing adjustments when the layout changes or the business use changes
  • Electrical revisions for outlets, equipment locations, or workstation needs

If you're trying to plan an efficient layout before construction starts, these expert tips for transforming workspaces are useful for thinking through flow, visibility, and how people move through the space.

What usually does not count

Confusion often arises in lease conversations. Many owners assume anything needed for move-in is part of TI. That's usually not the case.

Items commonly treated separately include:

  • Furniture such as desks, chairs, couches, and freestanding shelving
  • Movable equipment like display racks, appliances, or specialty machines not attached as permanent improvements
  • Decor items including artwork, branded accessories, and soft goods
  • Portable technology that can leave with the tenant later

Practical rule: If the improvement is built into the space and stays behind when the tenant leaves, it's more likely to fall under TI. If it can be picked up and moved out, it often won't.

For business owners in Bellevue or New Castle, that distinction matters because it affects budgeting, landlord approvals, and the scope your contractor is pricing.

The Tenant Improvement Allowance Who Pays and How Much

Money is usually the first real pressure point. Once a tenant understands what needs to change, the next question is simple. Who's paying for it?

That's where the tenant improvement allowance, often shortened to TIA, comes in. A TIA is the amount a landlord agrees to contribute toward approved improvements in the leased space. In modern lease economics, TI allowances are commonly negotiated on a per-square-foot basis, and one industry source says the allowance is calculated by multiplying the leased square feet by the negotiated TI amount per square foot, according to Trepp's tenant improvement benchmark overview.

An infographic explaining Tenant Improvement Allowance, covering definition, calculation, cost distribution, and tenant advantages in commercial leasing.

How allowance amounts are commonly framed

Trepp notes that one 2024 industry summary reported an average office TI allowance of $87.51 per square foot, down from $97.55 in 2023, while another cited a national office average of about $75 per square foot, down 6% year over year in that summary. The same source also points out major geographic variation, including San Jose at $226 per square foot, with Orange County and Los Angeles around $160 per square foot in a 2024 report.

For Seattle-area tenants, the practical lesson isn't that your project will match any national number exactly. It's that TI dollars can be a major part of lease negotiations, and local market pressure can change what landlords are willing to offer.

Here's a short explainer that helps make the financing side easier to picture:

How payment usually works

In many leases, the landlord doesn't hand over a check on day one. TI allowances are often paid as reimbursements rather than upfront cash, and they're typically limited to permanent improvements, as described in JROC Colorado Construction's explanation of tenant improvement allowance structure.

That usually leads to one of these arrangements:

Arrangement What it looks like in practice
Landlord-funded reimbursement The tenant completes approved work, submits documentation, and gets reimbursed up to the allowance amount
Shared cost model The landlord covers approved basics, while the tenant pays for upgrades, specialty finishes, or overages
Rent-based structure Some allowance costs may be built into the lease economics rather than paid separately

What tenants in Puget Sound should watch closely

Small business owners often focus on the allowance number and miss the conditions attached to it. Those conditions matter just as much.

  • Approval requirements matter because landlords usually want control over plans, materials, and contractor scope.
  • Overage responsibility matters because once your selections go beyond the allowance, that extra cost often lands on the tenant.
  • Timing terms matter because reimbursement can affect your cash flow during build-out.
  • Lease length matters because landlords often view TI as a long-term investment tied to occupancy stability.

If the allowance looks generous but the reimbursement terms are tight, your up-front cash need may still be significant.

For a Seattle office renovation or Tacoma retail build-out, that's why a clear scope, clean pricing, and early lease review make such a big difference.

Common Tenant Improvement Project Examples

Tenant improvement gets easier to understand when you stop thinking about it as a lease term and start looking at actual spaces.

From a project-delivery standpoint, TI is not just “cosmetic work.” It is a functionality conversion of an existing shell into a use-specific environment, and the existing condition of the space directly affects both cost and schedule, as noted in Keyser's discussion of tenant improvement allowances and delivery realities.

A modern, bright office space with desks, lounge seating, and large windows showcasing the Seattle city skyline.

Office renovation in Tacoma or Bellevue

A professional office suite often needs privacy, acoustics, and a layout that supports both focused work and client meetings.

That might mean:

  • adding enclosed offices
  • reframing a reception area
  • creating a break room
  • patching and finishing drywall
  • updating paint and flooring
  • improving lighting so the space feels brighter and more current

For these projects, finish work matters more than many owners expect. A clean drywall package and crisp paint lines can make an average office feel professional fast. If wall layout changes are part of the plan, Wheeler's commercial drywall contractor services show the kind of scope often involved in TI framing and finish work.

Retail build-out in Kirkland or West Seattle

Retail TI work has a different goal. The space must support sales, traffic flow, visibility, and branding.

A boutique or specialty shop may need:

  • feature lighting
  • durable flooring
  • fitting rooms or storage partitions
  • a checkout counter area
  • wall prep for displays
  • refreshed storefront interiors

Sometimes the shell is usable but bland. In those cases, TI is about turning neutral square footage into an environment customers remember. If you want a design example that shows how intentional details can shape a customer experience, view The Rain Shop bespoke design for a good outside reference on how space, finish, and identity can work together.

Specialized suites in Seattle-area neighborhoods

Medical, dental, wellness, and service businesses usually need a tighter coordination between layout and building systems.

A small treatment suite might require:

  1. Plumbing in the right place for sinks or specialty equipment
  2. Electrical upgrades to support equipment loads and code requirements
  3. Partitions and doors that protect privacy and improve workflow
  4. Surfaces that clean easily and stand up to heavier daily use

The more specialized the use, the earlier you want construction, design, and landlord approval conversations happening together.

That's true whether the project is in Seattle, Issaquah, or North Bend.

Navigating the TI Process in Western Washington

Western Washington TI work has its own rhythm. Even modest projects can slow down if the approvals, sequencing, and ownership details aren't sorted out early.

A tenant may think the job starts with demolition. In practice, it usually starts with a lease review, an existing-space walk-through, and a realistic scope. In Seattle, Bellevue, and Tacoma, permit timelines and review comments can affect the schedule long before a painter or drywall crew arrives.

The sequence that usually works best

For small and mid-sized TI projects, a practical order looks something like this:

  1. Review the lease terms so everyone knows what the landlord approved, what the allowance covers, and where responsibility shifts.
  2. Assess the existing space because old damage, hidden patchwork, dated lighting, or awkward mechanical layouts can reshape the budget.
  3. Build a scope that matches the use instead of copying the prior tenant's layout.
  4. Coordinate drawings and approvals before materials are ordered.
  5. Schedule the work in the right order so framing, drywall, flooring, painting, and finish work don't fight each other.

That sequencing sounds basic, but it's where many TI jobs in Western Washington either stay calm or start drifting.

Who's involved in a TI project

The team changes based on complexity, but these are the usual players:

  • Tenant or property manager who defines operational needs and approves decisions
  • Landlord or asset manager who reviews lease compliance and allowance use
  • Designer or architect who translates business needs into plans
  • Contractor and trade partners who price, sequence, and complete the work
  • City reviewers and inspectors who check code compliance where permits apply

In a smaller Seattle or Tacoma build-out, one reason owners prefer a tighter, more accessible contractor team is simple. Fewer handoffs usually means fewer misunderstandings.

Keep one running list of decisions. Finishes, hardware, paint colors, flooring transitions, access dates, and landlord approvals should all live in one place.

The part many tenants overlook

A major underserved angle is tax ownership and depreciation. Who pays for the build-out and who owns the finished improvements can change the tax treatment, depreciation schedule, and whether a tenant recognizes income when a tenant improvement allowance is used. Leasehold improvements can fall under different depreciation rules, including qualified improvement property treatment, according to Plante Moran's tax treatment discussion of tenant improvements.

That means a “good deal” on paper may not be as simple as it first appears. If the landlord funds the work but retains ownership, the accounting impact may differ from a setup where the tenant pays directly for certain improvements.

For business owners and property managers, the practical move is to ask two plain questions before construction starts:

Question Why it matters
Who owns the improvements after installation Ownership can affect depreciation and long-term value treatment
How is the allowance being applied Reimbursement structure and lease language can affect cash flow and tax treatment

Your CPA and lease attorney should be part of that conversation before the TI contract is final.

Choosing Your TI Contractor in the Puget Sound Area

A tenant improvement project can look straightforward on paper and still become frustrating if the contractor isn't organized, responsive, or familiar with local commercial work.

In the Puget Sound area, a good TI contractor needs to understand occupied properties, property manager communication, phased scheduling, and finish standards that hold up in real business settings. That matters in Seattle high-rises, Tacoma storefronts, Bellevue office parks, and smaller suites in Snoqualmie or North Bend alike.

What to look for in a contractor

Not every commercial construction near me search result is the right fit for a smaller TI job. For small to mid-sized spaces, these traits usually matter most:

  • Clear scope writing so you can see what is included, what is excluded, and where allowances or owner-supplied items come into play
  • Strong communication because TI work moves faster when approvals, schedules, and change decisions are documented clearly
  • Finish experience in drywall, coatings, flooring transitions, and touch-up details that clients notice immediately
  • Local familiarity with Western Washington building conditions, permitting realities, and supplier availability

Screenshot from https://wheelerpainting.com

Why smaller firms can be a better fit

Large firms can be the right choice for complex, multi-floor projects. But many property managers and business owners aren't building a tower. They're reworking a suite, refreshing a second-generation office, or handling a practical retail build-out with real deadlines and a defined budget.

For that kind of work, a smaller contractor often brings:

  • more direct access to the people running the job
  • tighter oversight on finish details
  • less internal bureaucracy
  • better fit for mid-sized scopes that might feel too small for a large commercial builder

One local option for that type of work is Wheeler Painting & Restoration Services, which provides commercial tenant improvement contractor services for Puget Sound businesses and property managers. That kind of partner can be useful when a project needs drywall, painting, flooring coordination, repairs, and tenant-ready finish work under one roof.

Ask every contractor the same thing: Who will actually run my project, how will change requests be handled, and what happens if the space condition is worse than expected?

If the answers are vague, keep looking. A TI project doesn't have to be oversized to deserve disciplined planning.


If you're planning a tenant improvement project in Seattle, Tacoma, Bellevue, Kirkland, Issaquah, West Seattle, New Castle, North Bend, or Snoqualmie, Wheeler Painting & Restoration Services can help you evaluate the space, clarify the scope, and move toward a cleaner, more workable build-out plan.

What is a Tenant Improvement Allowance?

You found a commercial space in Seattle, Kent, or Tacoma that looks promising. The location works. The parking works. The lease terms seem close. Then you walk inside and realize it still needs real work before your team can use it.

Maybe it’s an open shell. Maybe the walls are wrong, the flooring is worn out, and the lighting doesn’t fit your business. That’s where many small and mid-size business owners get stuck. They know the space could work, but they don’t know who pays for the build-out.

A tenant improvement allowance is often the answer. It’s the part of the lease that can help fund the changes needed to turn a generic commercial space into something your business can operate in.

If you’ve been searching for what is a tenant improvement allowance, this guide gives you the practical version. Not the abstract real estate version. The version that matters when you’re trying to open on time, stay on budget, and avoid ugly surprises during construction.

Your Guide to Commercial Space Build-Outs

A lot of business owners in the Seattle to Tacoma corridor run into the same situation. They finally find a decent location, sign or nearly sign the lease, and then discover the space still needs drywall repairs, paint, flooring, lighting updates, office partitions, or plumbing and electrical changes before anyone can move in.

A professional woman holding architectural blueprints stands in an unfinished office space overlooking the Seattle city skyline.

That gap between “good address” and “ready for business” is exactly why TIAs exist. In simple terms, the landlord sets aside a renovation budget inside the lease so the tenant can improve the space. Sometimes the landlord pays contractors directly. Sometimes the tenant pays first and gets reimbursed. Sometimes the landlord delivers a finished space.

For a small business, that can be the difference between a workable deal and a bad one.

Why this matters early

The build-out conversation shouldn’t start after the lease is signed. It should start while you’re still pricing the space and deciding whether the landlord’s offer is strong enough.

A rough sketch and a hopeful budget won’t protect you. A defined scope does. Good planning, realistic bids, and clear approvals matter before any walls are framed or paint goes on.

If you're still sorting out layout options, a resource on office space planning and design can help you think through how your team will use the space day to day.

What local owners usually need

In the Puget Sound area, small to mid-size tenant improvement projects often include:

  • Office reconfiguration: Adding private offices, conference rooms, or reception areas
  • Finish upgrades: Interior painting, wall repairs, flooring replacement, and ceiling work
  • System changes: Electrical, plumbing, HVAC adjustments, and code-related updates
  • Operational improvements: Storage areas, wash-up spaces, or practical work zones tied to your business

If your project is moving toward construction, it helps to understand what a commercial build-out usually includes. This overview of https://wheelerpainting.com/commercial-build-out-services/ gives a practical look at the work involved.

A TIA isn’t free money. It’s part of the lease economics, and the details around how it’s used matter just as much as the dollar amount.

Understanding Tenant Improvement Allowance Basics

A tenant improvement allowance, or TIA, is the portion of the lease deal a landlord sets aside for build-out work inside your space. In plain terms, it is money committed toward making the suite usable for your business.

An infographic explaining the basics of a tenant improvement allowance, detailing its function, benefits, and common improvements.

For a small business owner in Seattle, Kent, or Tacoma, that can mean help paying for walls, lighting, flooring, plumbing changes, HVAC adjustments, ADA updates, or a basic reception area. It is usually quoted per rentable square foot, then folded into the lease economics.

Why landlords offer TIAs

Landlords offer TIAs to help get vacant space leased and keep good tenants in place longer. If the improvements stay with the building after the lease ends, the owner may also benefit from a better space for the next tenant.

That is why allowance dollars rarely stand alone. The amount is usually shaped by lease term, tenant credit, vacancy in the building, and how much work the space needs before it can be occupied.

In the Puget Sound corridor, that last point matters a lot. Older office and flex buildings in South Seattle, Kent Valley, and Tacoma often need more than paint and carpet. Electrical capacity, mechanical updates, permit requirements, and accessibility work can push costs up fast.

How the math works

Most TIAs are calculated with a simple formula:

Rentable square footage x negotiated TIA rate = total allowance

Here is what that looks like:

Space size TIA rate Total allowance
2,000 RSF $10 per RSF $20,000
10,000 RSF $30 per RSF $300,000

The important part is not just the formula. It is whether the total allowance lines up with your actual scope.

A 2,000 RSF office with minor cosmetic work may function well with a modest allowance. The same square footage for a medical-adjacent user, light industrial office, or customer-facing showroom may need far more because the build-out is more demanding.

What counts as a good allowance

There is no single "good" TIA number that applies to every deal in this region. A fair allowance depends on the starting condition of the space, the type of use, permit complexity, and who is carrying which costs under the lease.

In practice, I tell tenants to judge the allowance against the work list, not against a headline number. A landlord offering a lower rate on a clean second-generation office can be making a better deal than a landlord offering a higher rate on a tired shell that needs major mechanical and code work.

That is the benchmark.

Why local owners should care

In Seattle-Tacoma-Kent deals, the allowance can look reasonable until contractor pricing, permit review, and lead times are added to the picture. Local labor costs are not cheap, and even straightforward projects can get more expensive once demolition opens up walls or building systems need upgrades to meet current code.

Practical rule: The number that matters is whether the allowance covers the improvements you need to open, operate, and pass inspections.

A lower rent does not automatically mean a better deal. If the TIA leaves you funding a large gap out of pocket, the cheaper lease can become the more expensive decision.

How a Tenant Improvement Allowance Works in Practice

A Kent business owner finds a decent suite, signs the lease, and sees a tenant improvement allowance in the deal. Then the key questions start. Who hires the contractor, who pays first, what gets approved, and what happens if the city requires more work than anyone expected?

That is where the allowance either helps the project or creates friction.

In the Seattle-Tacoma-Kent corridor, I see tenants focus on the dollar amount and miss the funding structure. The structure affects cash flow, decision speed, and how much control you keep once drawings, permits, and contractor bids are in play.

Three common TIA structures

The same allowance can feel very different depending on how it is set up.

Reimbursement

With reimbursement, the tenant pays approved project costs first and the landlord pays back those costs up to the allowance cap.

This setup gives the tenant more say over contractor selection, scheduling, and finish choices. It also puts pressure on working capital. If your build-out includes permit review, demolition, electrical work, paint, flooring, and inspections, that money often goes out long before reimbursement comes in.

The practical risk is simple. If costs rise after walls are opened or code items are added, the tenant usually covers the difference unless the lease says otherwise. In this region, that happens more often than small business owners expect.

Direct landlord payment

Some landlords pay the contractor directly after approving the scope, bid, and invoices.

That can reduce the amount of cash the tenant needs to float. The trade-off is speed. Payment requests, substitutions, and change orders usually move through the landlord’s approval process, so decisions can take longer than they would on a tenant-run job.

This structure works best when the plans are well defined before construction starts.

Turnkey build-out

In a turnkey deal, the landlord runs the project and delivers the space ready for occupancy.

That can be a good fit for a straightforward office, retail, or service business that wants fewer construction decisions on its plate. It is less flexible if your business has specific operational needs, custom finishes, or equipment requirements. I tell tenants to be careful here. If the finish level, layout, and approval rights are vague, the landlord will usually choose the cheaper acceptable option.

If you are deciding who should control the work, this breakdown of design-build versus general contractor options helps clarify how delivery method affects cost, coordination, and decision-making.

What the allowance usually pays for

Most TIAs are meant for permanent improvements inside the leased space that help make it usable for the tenant.

Common covered items include:

  • Interior walls and doors: Framing, drywall, insulation, and basic door installation
  • Flooring and wall finishes: Carpet, LVT, tile, paint, and wall repair
  • Electrical and lighting work: New circuits, relocated outlets, light fixtures, and panel-related changes tied to the build-out
  • Mechanical and plumbing modifications: HVAC distribution, restroom updates, sink additions, and similar scope tied to occupancy
  • Code-driven work inside the suite: Accessibility items and other improvements needed for permit sign-off

What often falls outside the allowance

Here, budgets get squeezed.

Many tenants assume the allowance covers everything needed to open for business. In practice, leases often exclude costs that are real, necessary, and easy to overlook during deal review.

Typical exclusions include:

  • Furniture, fixtures, and loose equipment: Desks, seating, display racks, and movable shelving
  • IT and business equipment: Computers, servers, phones, and specialty wiring beyond the landlord’s standard scope
  • Moving and setup costs: Relocation labor, storage, and reinstallation of existing equipment
  • Brand-specific upgrades: Custom millwork, specialty lighting, feature walls, and upgraded finish selections
  • Soft costs, in some leases: Design fees, permit fees, engineering, project management, and expediting, unless the lease says they are covered

Where deals usually go wrong

Problems usually start before construction, not during it. The lease says there is an allowance, but it does not clearly say how funds are released, which costs qualify, who owns unused funds, or who pays if the city or the building requires extra work.

A clean bid package fixes a lot of that. The best results come from matching the lease language to actual plans, finish selections, and contractor pricing. If those documents line up, disputes are fewer and approvals are faster.

That is the practical side of a TIA. It is not just money in the lease. It is a construction process with rules, timing, and real cost exposure.

Negotiating Your TIA for a Puget Sound Commercial Space

You tour a Kent flex space or a small office in Tacoma, the rent looks workable, and the landlord offers a TIA that sounds decent on paper. Then your contractor prices the actual scope, and the gap shows up fast.

That gap is where a lot of small and mid-size tenants in the Seattle-Tacoma-Kent corridor get into trouble. The allowance number matters, but the deal terms around that number often matter just as much.

A professional man and woman discussing a lease agreement document at a desk in an office.

Bring real project costs to the lease conversation

The strongest argument in a TIA negotiation is a real estimate tied to a real scope. Landlords respond better when you can show what it will cost to make the space usable for your business in this market, with current labor, materials, permitting, and building requirements in mind.

That matters in Puget Sound because build-out costs vary a lot by building type and city. A light office refresh in Seattle is one thing. A medical, retail, or warehouse office build-out in Kent or Tacoma can involve different utility work, code triggers, and schedule risk. If the suite needs paint, flooring, partitions, coatings, repairs, or utility changes before you can open, price those items before you settle the lease.

If you're weighing project delivery options while the deal is still forming, this comparison of https://wheelerpainting.com/design-build-vs-general-contractor/ is useful because the structure you choose affects cost control and decision speed.

What to ask for

A better TIA deal is not always the highest dollar amount. In many leases, the safer deal is the one that spells out how money is approved, released, and applied if the scope changes.

Focus on these points:

  • Allowance amount: Ask whether the landlord will adjust the per-square-foot allowance based on your bid package and lease term
  • Disbursement method: Confirm whether the landlord reimburses you, pays contractors directly, or delivers the work as a turnkey project
  • Timing: Get approval timelines and payment timing in writing so cash flow does not become your problem
  • Overrun treatment: Ask whether costs above the allowance can be rolled into rent, split, or value-engineered before work starts
  • Change order rules: Set clear approval steps for added work, especially if demolition exposes building issues
  • Unused funds: Confirm whether leftover allowance can go toward other approved improvements, permits, or related costs such as signage project management

Use local market conditions to improve your bargaining position

Overrun risk is real. If a $20 PSF TIA on 2,000 sq ft yields $40,000 but the total project reaches $60,000, the tenant usually covers the excess unless that issue was negotiated ahead of time, based on this overview of tenant improvement allowances.

That same source states that post-pandemic hybrid office demands have spiked TIAs by 15% to 25% in major U.S. markets like Seattle, often tied to longer leases of 7+ years. For tenants here, that lines up with what shows up in actual lease discussions across the corridor. Landlords are often more open to a higher allowance, or a cleaner reimbursement structure, when the term is longer and the tenant improves the asset in a lasting way.

The source also notes that tenants can ask for contingency clauses worth 10% to 15% of the TIA, and that those protections can reduce overruns by 18%. In Seattle-area deals, I would treat that less as a universal rule and more as a useful negotiating benchmark. The practical takeaway is local: if you are taking second-generation space with unknown conditions, ask for a contingency bucket or a written process for handling hidden conditions. Older buildings in Seattle and Tacoma can produce surprises after demolition, and those surprises are expensive.

A landlord may not grant every request.

But a tenant who brings pricing, a defined scope, and a reasonable lease term usually has a better bargaining position before the lease is signed than after permits are underway and opening dates are fixed.

Here’s a quick explainer that helps many tenants understand how these trade-offs show up in lease talks:

The best time to deal with overruns is before the lease is final. After that, your negotiating power drops and the project clock starts running.

Managing Your Tenant Improvement Project from Plan to Finish

After the lease is signed, the TIA stops being a negotiation topic and becomes a project management issue. At that point, success depends less on the headline allowance and more on how well the job is documented and administered.

Who handles what

A smooth tenant improvement project usually depends on three groups doing their jobs clearly.

The landlord

The landlord typically reviews plans, approves scope, releases funds under the lease, and may require inspections before payment. In a landlord-managed build-out, the owner also controls contractor procurement and delivery standards.

The tenant

The tenant makes business decisions. That includes layout approval, finish selections, schedule priorities, and budget choices when alternates or overruns come up.

The contractor

The contractor turns drawings and lease language into actual work. That means sequencing trades, managing change orders, tracking invoices, and keeping the project aligned with the reimbursement rules.

Documentation is not optional

If your TIA is reimbursement-based, paperwork becomes part of the job itself.

Keep these items organized from day one:

  • Approved plans: Match the lease scope and any landlord review comments
  • Invoices and receipts: Every reimbursable cost should be easy to trace
  • Change orders: Signed approvals matter before added work starts
  • Lien waivers: These protect the property and are often required before payment
  • Inspection records: Some landlords want third-party verification before reimbursement

A similar principle applies to exterior branding and site coordination. If your project includes signs, wayfinding, or storefront updates, good signage project management keeps permits, fabrication, and installation aligned with the construction schedule.

The accounting side matters too

The accounting treatment of TIAs can be more complicated than many tenants expect. Under ASC 842, TIAs paid at or before lease commencement are treated as lease incentives and directly reduce the opening balance of the right-of-use asset, according to FinQuery’s discussion of tenant improvement allowance accounting.

That same source says 70% of lessees struggle with TIA classification, which can lead to audit issues. It also notes that overages beyond the TIA must be tenant-funded and capitalized separately.

Ask your accountant how the allowance should be recorded before the first reimbursement hits your books. It’s easier to set it up correctly than fix it later.

For most small businesses, the practical takeaway is simple. Keep clean records, align construction paperwork with the lease, and involve your accountant early if the allowance is significant.

Real-World TIA Examples in the Seattle-Tacoma Area

The idea gets easier to understand when you look at normal local scenarios. These are illustrative examples, built around common small to mid-size commercial projects in the corridor between Seattle and Tacoma.

Three common situations

A small office user in Seattle may lease a second-generation suite that needs paint, a few new walls, lighting updates, and flooring replacement. The space isn’t a full shell, but it still needs work before staff can move in.

A retailer in downtown Tacoma may need a cleaner customer-facing layout. That often means finish upgrades, fitting rooms, better lighting, and back-of-house adjustments.

A warehouse user in Kent may only need a modest office build-out inside a larger industrial space. The work can be focused and practical, but it still needs to be budgeted correctly under the lease.

Sample TIA estimations in Puget Sound

Business Type & Location Square Footage Typical TIA Rate Total TIA Amount Potential Project Focus
Office user in Seattle 2,000 sq ft $20 PSF $40,000 Interior paint, flooring, partitions, lighting
Retail boutique in Tacoma 1,500 sq ft $15 PSF $22,500 Finish refresh, display lighting, fitting area improvements
Logistics company in Kent 5,000 sq ft $25 PSF $125,000 Office build-out within warehouse, break area, wall systems, flooring

These examples use TIA rates already discussed earlier in the article. Real numbers depend on lease structure, building condition, and the actual scope of work.

What matters most is fit. A modest allowance can work well if the space already has usable infrastructure. A larger allowance can still fall short if the suite needs extensive rework.

Partnering for a Successful Build-Out

A tenant improvement allowance can be one of the most useful tools in a commercial lease. It can reduce upfront build-out cost, make a better space financially workable, and give your business room to open in a location that otherwise wouldn’t pencil out.

But the allowance only helps if the scope is realistic, the lease language is clear, and the project is managed carefully. That’s where many tenants run into trouble. They focus on the allowance amount and not the process around it.

For small and mid-size businesses in the Seattle, Kent, and Tacoma area, the smartest approach is simple. Price the work early. Negotiate from actual scope. Document everything. Choose a contractor who can manage both the build quality and the paperwork.

If you're evaluating firms before moving ahead, this guide on https://wheelerpainting.com/how-to-choose-a-general-contractor/ is a good place to start.

Frequently Asked Questions about Tenant Improvement Allowances

Can a tenant improvement allowance be used for furniture

Usually, no. TIAs generally apply to permanent or semi-permanent improvements to the leased space, such as walls, flooring, electrical, plumbing, and similar construction items. Furniture, movable shelving, and décor are often excluded unless the lease specifically allows them.

What happens if the build-out costs more than the allowance

The tenant usually pays the difference unless the lease says otherwise. That’s why overrun language matters so much. If you expect potential surprises, try to address them before signing the lease.

What happens if the project costs less than the allowance

That depends on the lease. Some landlords cap reimbursement at actual construction cost and keep the unused portion. Others may allow flexibility, but only if the lease spells it out clearly.

Is a higher TIA always the better deal

Not always. A higher allowance can come with trade-offs, including higher rent or a longer lease term. A lower allowance paired with stronger overall lease economics can sometimes be the better business decision.

Does the tenant or landlord choose the contractor

Either setup can happen. In reimbursement deals, the tenant often has more say. In turnkey projects, the landlord usually controls contractor selection. The lease should define the approval process.

Are paint and finish work usually covered

Often, yes, if they’re part of the approved build-out scope. Interior painting, wall repairs, coatings, and finish upgrades are common parts of tenant improvement work when they’re tied to preparing the space for occupancy.

Does a TIA cover permits and design fees

Sometimes, but not automatically. Some leases allow certain pre-construction costs as part of the allowance, while others restrict reimbursement to physical construction only. Read that section carefully.

Why do small businesses need contractor pricing before lease signing

Because you can’t negotiate effectively without knowing the actual build-out cost. A landlord’s allowance may sound reasonable until a real scope is priced. Early bids help you avoid underfunded projects and reduce the chance of disputes once construction starts.


If you're planning a commercial move, office build-out, retail refresh, or tenant improvement project in Seattle, Kent, Tacoma, or the communities in between, Wheeler Painting & Restoration Services can help you price the work clearly and move from lease negotiation to construction with less guesswork. Reach out to discuss your space, your scope, and what it will take to get the job done right.

Design Build vs General Contractor: Your 2026 Project Guide

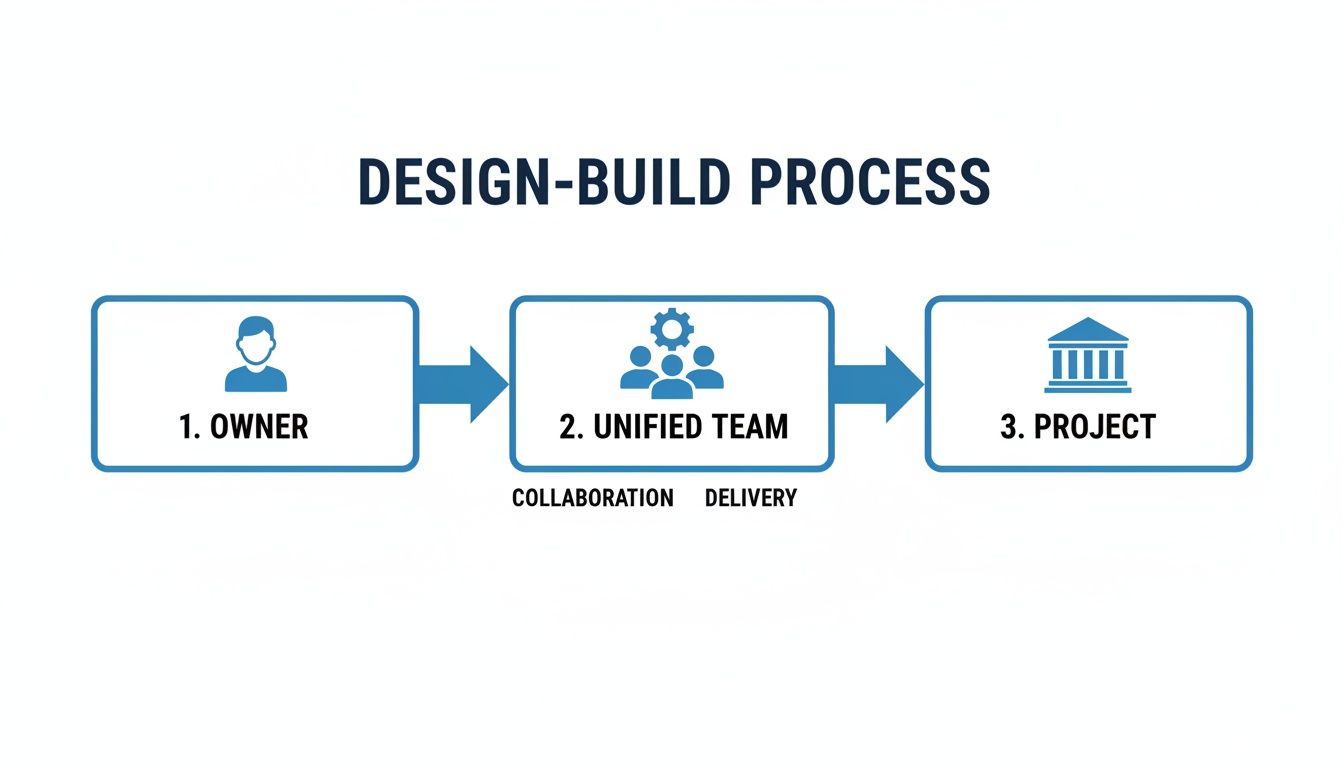
When starting a renovation or construction project, one of the first decisions you'll make is choosing between design-build vs. a general contractor. It might sound technical, but the choice is simple: Do you want one unified team handling everything, or do you prefer to hire a separate designer and builder? A design-build firm offers a single, integrated team for both the creative design and the physical construction, all under one roof. The traditional general contractor route, on the other hand, means you hire an architect first, finalize the plans, and then find a builder to bring them to life.

Understanding this choice is the first step toward a successful project, and as your local Kent, WA, construction partner, we want to make the process feel clear and reassuring, not overwhelming.

Your Project's First Big Decision

Picking your project delivery model is one of the most critical decisions for your home or commercial property. It sets the foundation for communication, budget management, and the final timeline. For property owners, business owners, and facilities managers in the Seattle and Tacoma areas, getting this right from the start is the key to a smooth and successful project.

The path you choose determines who is responsible for what. With the design-build model, a single company takes ownership of the entire project, from the first sketch to the final walkthrough. This creates a single point of accountability, which naturally encourages better teamwork and simplifies communication for you.

In contrast, the classic general contractor approach, often called design-bid-build, splits these duties. You'll manage two separate contracts—one for the architect or designer and another for the general contractor who handles construction. While this can offer a wider range of initial design ideas, it often puts you in the middle, playing coordinator between the two separate teams.

Quick Comparison: Key Differences at a Glance

To make this clearer, let's break down the core differences in how each model handles project structure, accountability, and workflow.

Key Aspect Design-Build Model General Contractor Model
Team Structure A single, unified team handles both design and construction. Separate teams and contracts for the designer and builder.
Accountability One company is responsible for the entire project outcome. Responsibility is split between the architect and contractor.
Communication Streamlined communication with a single point of contact. Property owner or manager often coordinates between parties.
Timeline Faster project delivery due to overlapping design and build phases. Slower, sequential process (design, then bid, then build).
Cost Control Costs are more predictable with early builder input during design. Bidding may offer a low initial price, but risks cost growth and changes.

This table shows how the integrated nature of design-build contrasts with the segmented approach of the traditional model. Your preference for a single trusted partner versus separate specialists is a major factor in your decision.

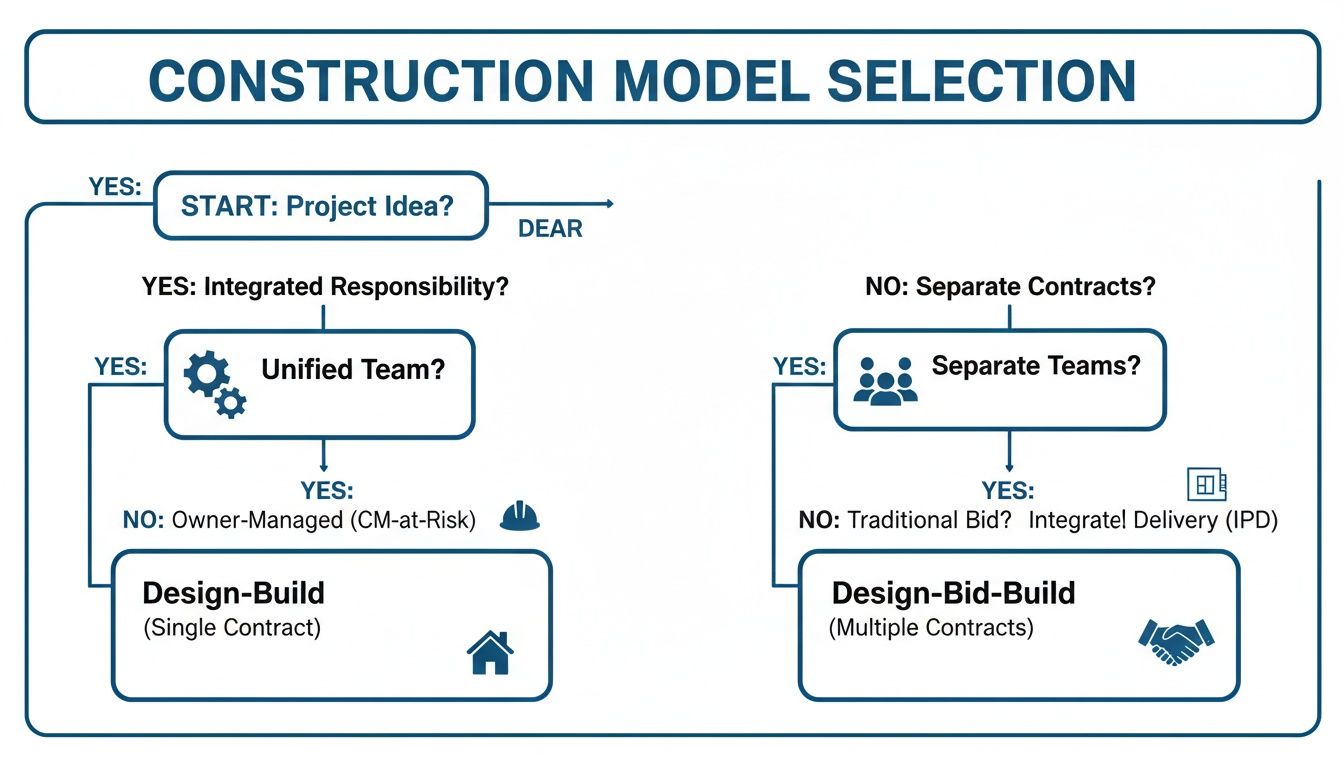
This decision tree offers a great visual for weighing whether a unified team or separate specialists is the right fit for your project.

A flowchart explaining construction model selection criteria, comparing Design-Build and Design-Bid-Build options.

As the flowchart illustrates, the core of your decision hinges on whether you'd rather have a single, integrated partner or work with separate, specialized firms.

As a full-service residential and commercial contractor, Wheeler Painting has deep experience excelling within both models. We can guide your project in Seattle, Tacoma, or Kent, whether you need a single, accountable partner for a tenant improvement or a trusted builder to execute your existing residential remodeling plans.

Our flexibility means we're focused on making your project a success, no matter which path you take. To see how this works in practice, you might find our detailed guide on the design build project delivery method helpful.

Why Design-Build is Reshaping Modern Construction

If you’ve been involved in construction recently, you've probably noticed a major shift in how projects get done. The design-build model is rapidly becoming the preferred approach for projects all across Western Washington and the rest of the country. This isn’t just an industry trend; it’s a smarter, more efficient way to deliver a project from the first sketch to the final walkthrough.

For property owners and facility managers here in the Puget Sound, understanding this shift is crucial. It’s about making an informed decision for your next retail build-out or residential renovation, one that prioritizes efficiency and clear responsibility from start to finish.

Three male architects or engineers collaborating on blueprints in a modern office overlooking a city.

A National Shift with Local Impact

This isn't just a local trend. The growth of design-build is a nationwide story. Industry research shows that design-build is on track to represent over 47% of all construction spending in major non-residential markets by 2028. That's a huge leap from just a few years ago. You can review the findings on project delivery methods from industry research.

What this means for homeowners and commercial clients in Western Washington is clear: the market is moving away from the fragmented design-bid-build process. The reason is simple—design-build offers a more integrated and reliable path to a finished project, helping you feel reassured and in control.

The Power of Single-Source Accountability

At its heart, the appeal of design-build comes down to one thing: single-source accountability. Instead of juggling separate contracts for an architect and a builder, you have one unified team responsible for everything.

This setup puts an end to the "blame game" that often happens in traditional projects when design issues cause construction headaches. When one team owns both the design and the construction, everyone is pulling in the same direction—yours.

With a single contract and a single point of contact, the design-build model streamlines communication and decision-making. This ensures that your vision, budget, and schedule remain the central focus throughout the project lifecycle.

This unified approach is a game-changer for commercial projects, especially for:

  • Office space renovations in Seattle: Tight timelines demand seamless coordination. Design-build minimizes business disruption by getting your office space renovation done right the first time.
  • Retail build-outs in Tacoma: Getting doors open on schedule is non-negotiable. This model fast-tracks delivery so you can start generating revenue sooner.
  • Facility construction services for building owners: For facility maintenance and upgrades, you need a partner who understands the building inside and out. As a smaller firm, Wheeler Painting provides the focused attention needed for these mid-size tenant improvement projects.

Because the builder is at the table during the design phase, they provide real-world input on cost and constructability from day one. This early collaboration prevents expensive redesigns and ensures the final plans are not only inspiring but also practical and on budget.

Comparing Project Workflows and Team Responsibilities

How your project unfolds day-to-day depends entirely on the construction model you choose. The differences in workflow between the design-build and general contractor approaches are significant, and they directly shape communication, accountability, and the demands placed on you as the property owner.

Let's break down what the journey really looks like for each model in a clear, straightforward way.

The Traditional Path: Design, Bid, Then Build

The classic approach is what we call design-bid-build. It’s a very linear, sequential process. Think of it as a relay race, where one professional must completely finish their part before handing the project off to the next.

Your journey starts by hiring an architect or designer to create a full set of construction plans. This design phase often happens separately from the builder who will eventually have to make it a reality. Once the plans are finalized, you take them to market, asking several general contractors to bid on the job. You then select a contractor—often based on the lowest price—and only then does construction finally begin.

This sequence creates distinct, and sometimes challenging, handoffs. Your architect's job is mostly done right when your builder’s is just getting started.

The General Contractor Workflow in Action

So, what does this feel like for a property owner? Imagine you’re planning a commercial tenant improvement for a new retail shop in Kent. Following the traditional model, you hire a Seattle architect who designs a stunning layout.

With these finished plans, you go out for bids. A contractor looking at the job might realize a key material has a long backorder, or that a planned system is incompatible with the building. Because the builder had no input during design, these problems are only discovered now. This can force you back to the drawing board for redesigns and almost guarantees delays before work even starts.

In the traditional model, you become the central hub of communication. You are responsible for mediating any conflicts between the design plans and on-site realities—a role that can be time-consuming and stressful for busy property managers and homeowners.

The Design-Build Workflow: A Collaborative Approach

The design-build model swaps the relay race for a unified team sport. From the very beginning, your designer and builder are working together under a single contract, creating a seamless and integrated workflow. The process is fluid and overlapping, not a rigid sequence of steps.

Let’s apply this to a residential remodeling project in Tacoma. With design-build, our construction experts are in the room with the designer from the first conversation. When the designer suggests a custom island or removing a wall for your kitchen remodel, our team is right there to give instant feedback on structural needs, material costs, and the overall budget. This collaboration prevents surprises and ensures the final design is both beautiful and achievable.

This integrated approach completely changes the accountability structure:

  • No more finger-pointing. If there’s an issue, it’s on the single design-build firm to resolve it. The team works together to find a solution.
  • Change orders are drastically reduced. Because the builder provides feasibility checks during design, potential issues are caught on paper, not after construction has started.
  • Budget certainty is a priority from day one. The design is developed with real-time construction cost data. This means the budget is realistic from the start.

Understanding how project management in residential construction is structured can highlight the practical advantages of having one team. For Wheeler Painting, maintaining clear processes is everything. A detailed construction quality control checklist is central to our success, ensuring high standards are met no matter which model you choose.

Analyzing Project Costs and Budget Management

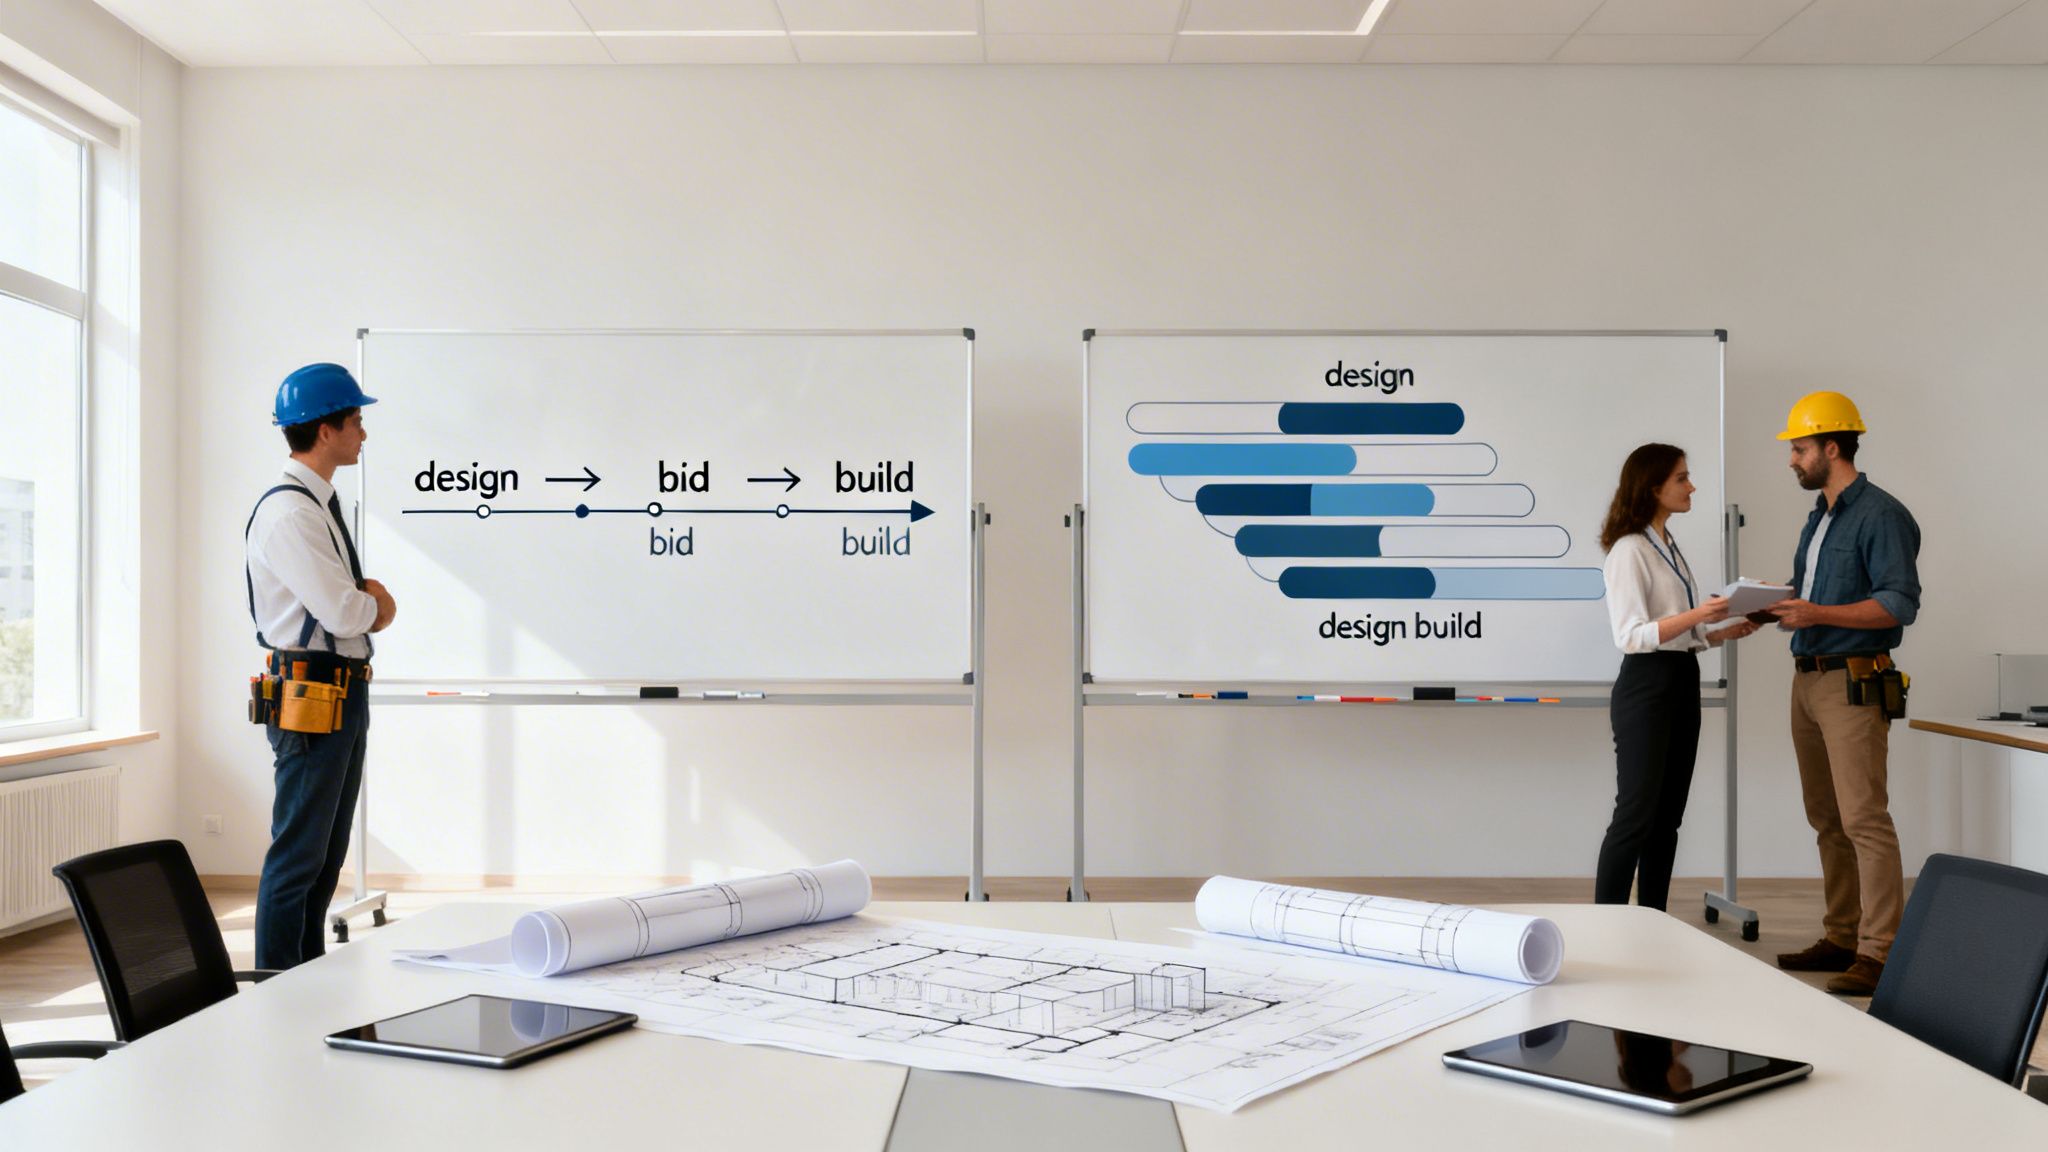
Two construction professionals discuss project delivery methods shown in diagrams on whiteboards.

When it comes to any home addition, commercial renovation, or facility maintenance project, the budget is where the rubber meets the road. How you manage costs shapes the entire experience. The choice between a design-build firm and a general contractor is one of the most significant financial decisions you'll make, and our goal is to help you feel confident in it.

How Design-Build Delivers Budget Certainty

The real financial power of the design-build model is cost predictability. From day one, the builder is at the table with the designer. As ideas take shape, the builder provides immediate, real-world cost feedback on different materials, methods, and design choices.

This early collaboration is your best defense against expensive redesigns. Instead of an architect handing off a finished plan that ends up being over budget, the integrated team finds creative solutions that honor your vision without breaking the bank.

With the design-build approach, potential budget conflicts are resolved on paper, where changes are simple. This is far better than discovering a problem in the field, where the only solution is often an expensive change order.

This is a huge advantage for business owners and facility managers in places like Seattle and Tacoma, who depend on reliable financial forecasting for tenant improvements and other commercial projects.

The Financial Risks of the Traditional Model

The traditional general contractor model (design-bid-build) has a tempting hook: competitive bidding. Once an architect completes the plans, you can send them to several contractors and pick the lowest price.

But that initial low bid can be misleading. The biggest financial trap in this model is that the contractor has no say in the design they are bidding on. They are pricing plans that may have hidden conflicts or impractical details. When those issues surface during construction—and they often do—it can trigger change orders, delays, and surprise costs.

Accurate estimates are critical, but they're only as good as the information provided. Modern construction estimating software helps, but even the best tools can't account for design flaws they don't know about.

A Data-Backed Look at Cost Savings

The cost advantage of design-build isn't just a feeling; the numbers back it up. Research has consistently shown that this integrated method leads to real savings. One comprehensive analysis found that, on average, design-build projects cost 6.1% less than their traditional design-bid-build counterparts. This is almost entirely due to the builder’s early involvement, which catches expensive issues before they happen. You can see the specifics in this federal research on project delivery cost comparisons.

Even more telling, that same research revealed that design-build projects have 5.2% less cost growth after construction begins. For a Puget Sound homeowner planning a remodel or a business owner building out a retail space, that statistic is huge. It translates to a lower risk of facing those dreaded, budget-busting surprises, giving you peace of mind that your initial cost estimate is far more likely to be your final cost.

How Each Model Impacts Your Project's Schedule

When it comes to any construction project, the timeline is everything. For a business owner in Seattle, every day of delay is a day you're not open. For a family in Tacoma, it's another day you're not able to enjoy your newly remodeled home. The path you choose—design-build or the traditional general contractor route—will have a massive impact on that schedule.

Think of the general contractor model as a relay race. The architect must finish their part (the design) completely before passing the project to the builder. This handoff and the step-by-step process naturally build pauses and potential delays into your project from the start.

The Design-Build Advantage: Overlapping Your Schedule for Faster Completion

Design-build throws out the relay race playbook and operates more like a unified team. Since the design and construction experts are on the same team from day one, their work can happen in parallel. This is where you see significant time savings.

For example, while the final details of the interior finishes are being decided, the team can already be working on site prep, foundation, and framing. We can get a head start on ordering materials with long lead times, like custom cabinets or specialty tile. This integrated approach can shave weeks, and sometimes even months, off a project's total duration.

One of the biggest reasons our local clients love the design-build process is the predictable schedule. By getting rid of the stop-and-start friction of the old model, you get a much smoother and faster journey from the first sketch to the final walkthrough.

More Than Just a Feeling: The Data on Faster Project Delivery

This isn't just a hunch; the speed advantage is backed by solid industry research. A comprehensive study found that the design-build method delivers 12% faster construction speed and an incredible 33.5% faster overall delivery speed compared to the traditional approach. You can dig deeper into how this integrated approach drives project efficiency.

This kind of acceleration is possible because everyone is collaborating from the very beginning. For a property owner, that speed means getting into your space sooner, spending less on project management, and seeing a faster return on your investment.

How This Plays Out on Real Puget Sound Projects

Let's ground this in some familiar local scenarios:

  • A Commercial Tenant Improvement in Kent: A retailer needs their new shop open for the holiday season. With design-build, we can fast-track permits and order custom fixtures while the final floor plan is being polished, hitting that critical opening date.
  • A Home Remodel in Tacoma: A homeowner needs their kitchen back to normal after a setback. The design-build model lets us begin demolition and structural work almost immediately, drastically cutting down on the time the family is displaced.
  • An Office Expansion in Seattle: A company needs to get a new floor ready for a team of new hires. The overlapping phases of design-build create a reliable schedule, which is essential for business planning and minimizing disruption to current operations.

If getting your project done quickly and on a predictable timeline is a top priority, the design-build model offers a clear, proven advantage. For projects all over the Puget Sound, that reliability is a complete game-changer.

Choosing Your Ideal Construction Partner in the Puget Sound

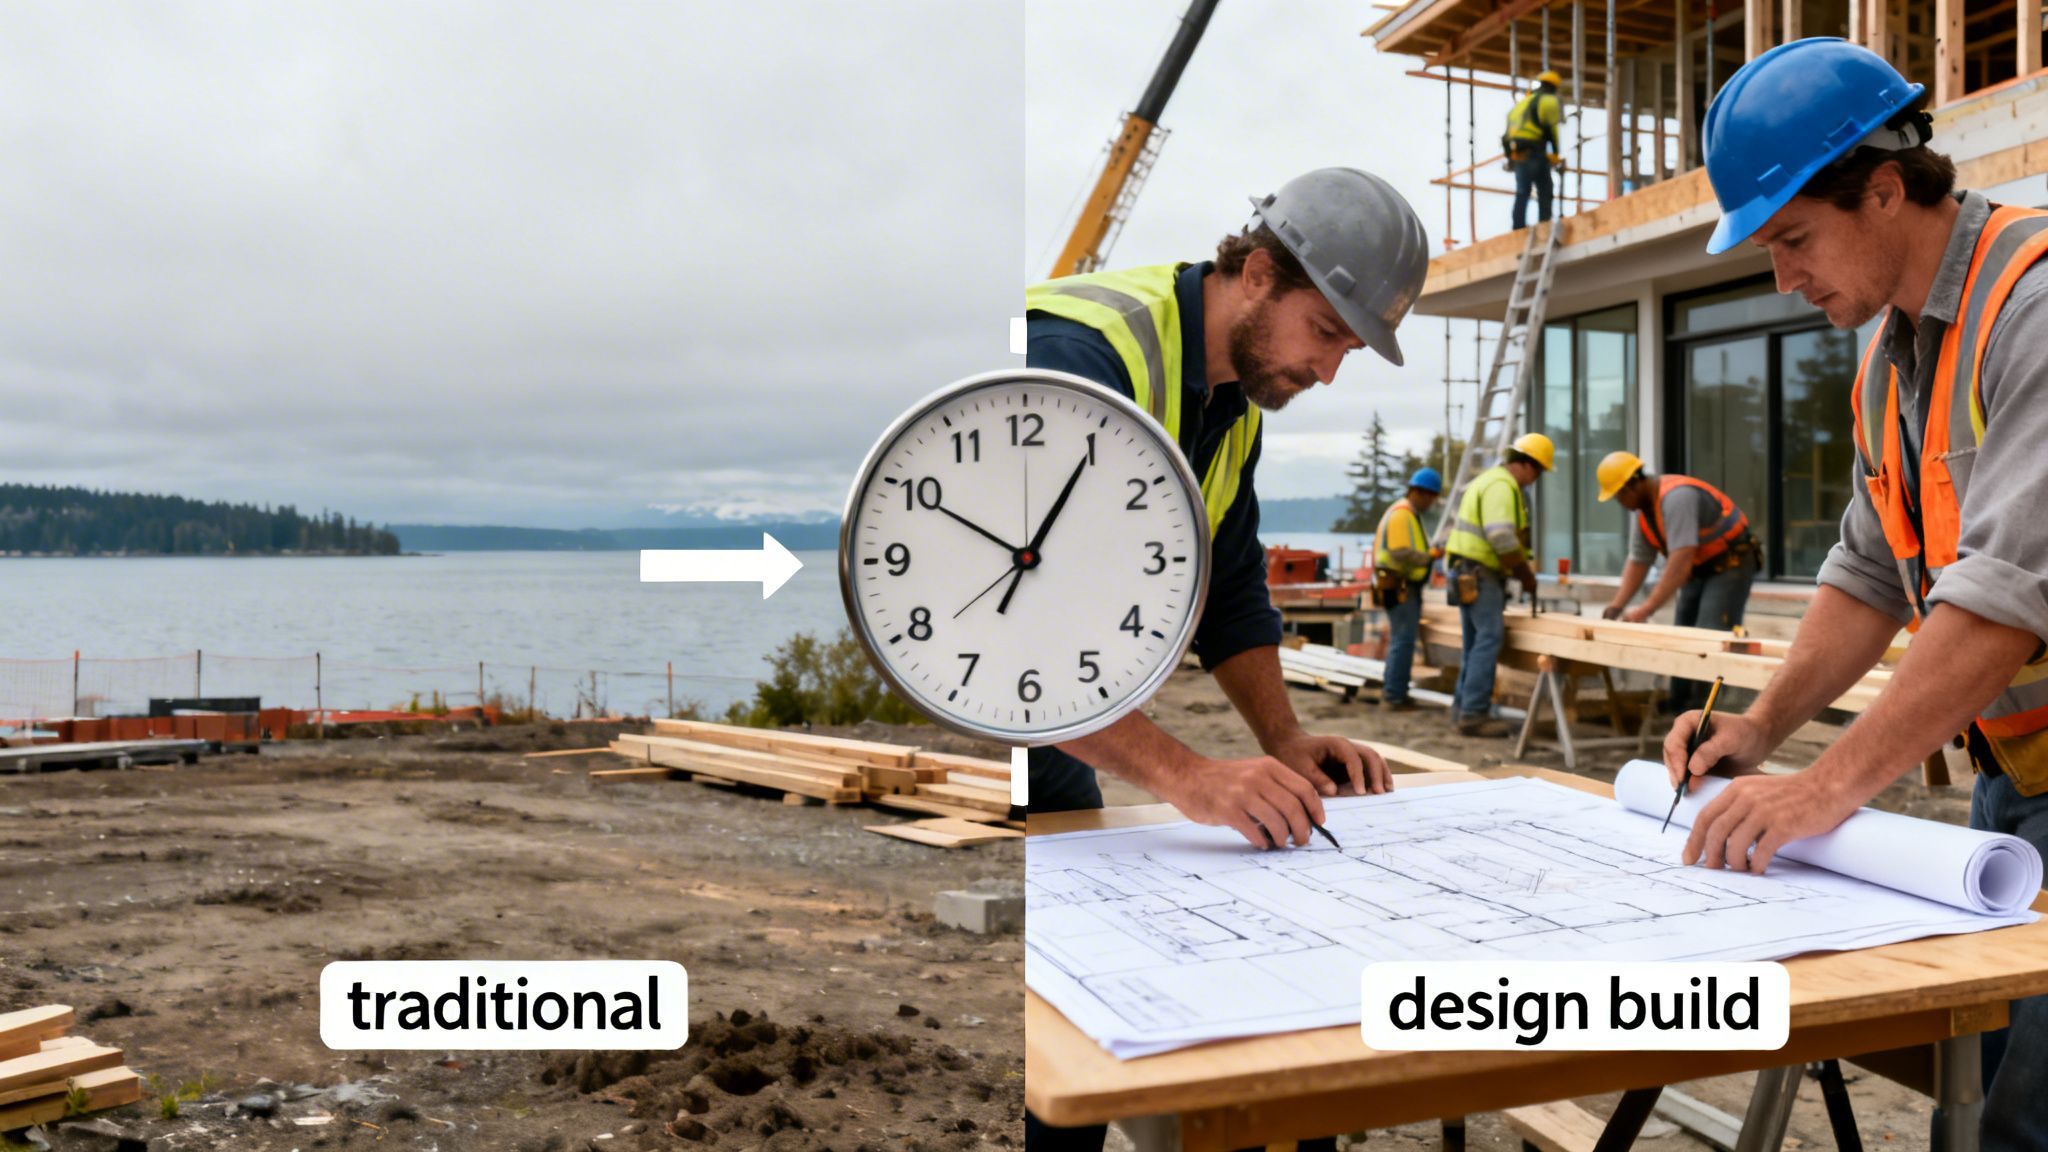
Split image showing an empty traditional construction site and a busy design-build project with workers.

Knowing the difference between the design-build vs. general contractor models is a great start. But the real key to a successful project is picking the right local partner to execute the plan. Your project’s outcome comes down to the experience, flexibility, and communication of the team you hire.

Here at Wheeler Painting, our decades of work as a full-service general contractor across the Puget Sound give us a unique perspective. We have the operational know-how to fit seamlessly into either system, always focusing on what makes the most sense for you and your project.

As Your Partner in a Design-Build Project

When you opt for the design-build route, you’re looking for a single, accountable leader. That's a role we step into with confidence. We manage every detail, from the first brainstorming sessions and cost estimates to the final construction and finishing touches, like interior painting or flooring.

This all-in-one approach is especially effective for projects where collaboration is key:

  • Commercial Tenant Improvements: We understand that downtime is lost revenue. We coordinate every detail to get your Seattle retail or office space ready for business, quickly and with minimal fuss.
  • Residential Remodeling: For a large kitchen overhaul or a home addition in Tacoma, our integrated team makes sure the design isn't just beautiful but also practical to build and within your budget.
  • Custom Decks and Patios: We blend creative vision with solid construction to build outdoor spaces that look great and last for years in our Pacific Northwest climate.

As Your Builder in a Traditional General Contractor Role

If you've already hired an architect and have a full set of plans, our role shifts. We become the dedicated residential contractor or commercial contractor tasked with bringing those plans to life. Our work across Kent, Seattle, and Tacoma shows our skill in translating complex blueprints into high-quality, finished spaces.

In this traditional model, communication is everything. We work closely with your design team to tackle any on-site issues immediately, keeping the project on track. As a "smaller" firm specializing in small to mid-size projects, we provide the focused attention that building owners, property managers, and facility managers are looking for.

Whether you need a single point of contact for the whole project or a skilled builder to execute existing plans, our promise is the same: to make your project straightforward and successful. We are your local expert for everything from siding replacement and custom cabinets to facility maintenance and floor repairs.

Our goal is simple: to build lasting relationships with our clients here in the Puget Sound. We do that by delivering solid, high-quality work and clear communication, project after project. For more on what to look for in a partner, take a look at our guide on how to choose a general contractor.

Common Questions About Construction Models

When you're deciding on a construction partner, it's natural to have questions. Here in the Puget Sound, homeowners and business owners often ask us about the practical differences between hiring a design-build firm versus a general contractor. Here are some of the most common questions, with our straightforward answers.

Which is Better for Smaller Projects?

For more contained projects—like interior painting, deck staining, or siding replacement—hiring a flexible residential contractor near me like Wheeler Painting is usually the simplest route. We can easily manage the entire job and handle any minor design details that come up without needing the formal structure of a full design-build agreement.

The design-build model really shines on larger, more involved projects like a full home addition, a major office space renovation, or a new retail build-out where the design and construction need to be perfectly in sync from day one.

Is There a Difference in Quality Between the Two?

Honestly, the quality of any project comes down to the craftsmanship of the team you hire, not the contract model. That said, the design-build setup has a built-in advantage for ensuring high quality.

When your designer and builder are part of the same team, everyone shares the same goal: a successful project. That single point of accountability eliminates the blame game, encourages creative problem-solving, and often leads to a better finished product.

In the traditional general contractor approach, quality relies on how well your architect and your builder—two separate companies—can communicate. No matter which path you take for your Seattle or Tacoma property, our team at Wheeler Painting brings the same unwavering commitment to craftsmanship to every job, from a simple drywall repair to a complex commercial renovation.

Can Wheeler Painting Recommend an Architect for Me?

Of course. After working as a contractor in Kent, Seattle, and Tacoma for decades, we’ve built strong relationships with some of the best architects and designers in the area. We know who does great work and is reliable.

If you feel the traditional design-bid-build path is the right fit for you, we’re happy to make introductions. Our main goal is to help you assemble a team that you trust and whose style matches your own, ensuring a fantastic result for your project.


Ready to figure out the best approach for your residential or commercial project? The team at Wheeler Painting has the local experience to guide you. Contact us today for a consultation, and let’s start planning together.

Your Guide to Commercial Build Out Services

So, you’ve leased a new commercial space in Kent, WA. It’s exciting, but when you walk in, you’re greeted by four concrete walls, a bare floor, and maybe a few wires hanging from the ceiling. This is what we in the industry call a "shell." A commercial build-out is the process of transforming that empty shell into a space that’s ready for business. It’s the journey from a blank canvas to a fully functional office, storefront, or facility.

As a local business owner or facility manager, the process might feel overwhelming. That's where a trusted partner comes in. A build-out covers everything that happens between getting the keys and opening your doors—from putting up walls and installing plumbing to painting and laying down flooring.

What Is A Commercial Build Out?

Think of a commercial build-out as custom-tailoring a suit, but for your business. The empty commercial space is the raw fabric. It has potential, but it isn't functional yet. A build-out is the entire construction process that shapes that raw space into a finished environment designed specifically for your operations.

This isn't just a simple paint job or a minor renovation. It's a full-scale construction project inside an existing building, managed by a contractor who coordinates every detail. The goal is to create a space that not only looks great but also supports your workflow, reflects your brand, and meets all safety codes in your local area, whether it's Seattle or Tacoma.

From Empty Shell To Finished Space

The scope of every build-out is different, but they all involve turning a blank canvas into a fully functional facility. This could mean creating individual offices, a bustling kitchen, a sleek retail floor, or a high-tech medical clinic.

A professional contractor will manage a wide range of services to bring the vision to life, including:

  • Interior Construction: Framing and erecting walls, installing ceilings, and building out the core floor plan.
  • Systems Installation: All the essentials like HVAC (heating, ventilation, and air conditioning), electrical wiring, data cables, and plumbing.
  • Flooring and Finishes: Laying your chosen flooring—be it tile, wood, or commercial-grade carpet—and handling all drywall, painting, and trim work.
  • Fixtures and Cabinetry: Installing light fixtures, bathroom components, custom reception desks, shelving, and any other built-in elements.

This process is the backbone of the commercial real estate world. In fact, the global market for commercial buildings, which depends on these essential services, is projected to hit $1,990.53 billion in 2026. This growth reflects a huge demand for new and updated spaces, from e-commerce warehouses to modern offices.

At Wheeler Painting, we've been guiding businesses through this journey in Kent, Tacoma, and Seattle since 1991. As a local contractor, our job is to make the complex feel manageable. We handle the blueprints, permits, and construction, so you can stay focused on your business.

Whether you're launching a new restaurant, expanding your office, or opening a boutique, professional commercial construction services are what make sure your space is built right, on time, and ready for business from day one.

The Commercial Build Out Process From Start To Finish

Taking on a commercial build-out can feel overwhelming, but with a clear roadmap, the process becomes much more manageable. At Wheeler Painting, we've spent decades refining our approach for businesses across the Puget Sound region, so you feel confident from the first phone call right up to your grand opening. We break every project down into five distinct, manageable phases.

This structured journey takes a raw building shell or an outdated floor plan and turns it into a fully customized storefront, office, or facility ready for business.

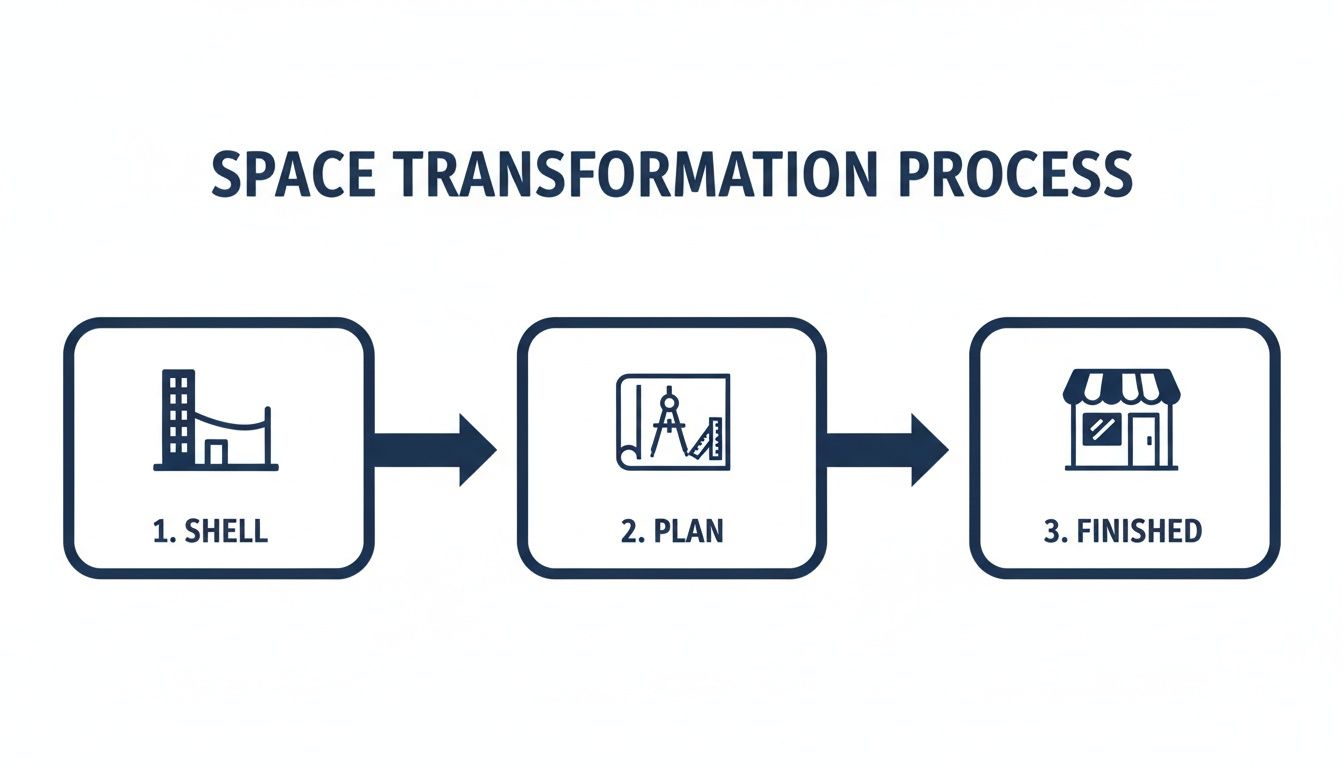
A three-step diagram illustrating the space transformation process for commercial build-outs, from shell to finished.

The image above gives you a bird's-eye view of how a build-out moves from a basic shell, through detailed planning, and finally to a polished, business-ready environment. It’s a simple illustration of our core promise: turning your vision into a functional reality.

Phase 1: Consultation and Design

Every great project starts with a simple conversation. During this initial phase, we sit down with you to truly understand your goals, day-to-day operational needs, brand identity, and budget. This goes beyond just aesthetics; it's about figuring out how the space needs to work for your team and your customers.

We’ll talk through everything—from the number of offices you need to the specific layout for a retail floor or the technical requirements of a commercial kitchen. Our team then translates those ideas into preliminary drawings and architectural plans. This collaborative design stage is all about making sure the final layout is perfectly aligned with your business objectives before a single hammer is swung.

Phase 2: Pre-Construction and Permitting

Once the design gets your stamp of approval, we shift into the critical pre-construction phase. This is where all the behind-the-scenes work happens that sets a project up for success. We perform a thorough site analysis, create a detailed project schedule, and lock in material selections.

A huge part of this stage is value engineering, where we comb through the plans to find smart ways to save money without sacrificing quality or the design you love. We also take on the complex process of securing building permits from local jurisdictions like Kent, Seattle, or Tacoma. Getting this paperwork handled correctly upfront is key to preventing costly delays later on.

Think of pre-construction as the foundation of your project. By locking in every detail and securing permits early, we eliminate surprises and create a clear path forward for the entire construction team.

Phase 3: Construction and Project Management

Now for the exciting part—this is where your vision starts to become a physical reality. Your dedicated project manager becomes your single point of contact, coordinating all the action on-site and keeping you in the loop every step of the way. We manage the construction process meticulously, ensuring everything follows the schedule and plans we agreed upon.

Key activities during this phase include:

  • Demolition: Carefully removing any existing walls, finishes, or structures that aren't part of the new plan.
  • Framing: Building the new interior walls that will define your offices, conference rooms, and other key areas.
  • MEP Installation: Coordinating licensed plumbers, electricians, and HVAC technicians to install all the essential mechanical, electrical, and plumbing systems.
  • Drywall and Painting: Hanging and finishing drywall to create smooth surfaces before our professional painters apply the final colors.

Our deep experience with the design-build project delivery method is a real asset here, ensuring seamless coordination between our design and construction teams for better efficiency and accountability.

Phase 4: Finishes and Fixtures

With the main construction work done, our focus shifts to the details that bring your brand’s personality and the space’s function to life. This is where your business's unique character really starts to shine through. Our skilled craftspeople work with absolute precision to install all the final elements.

The finishing stage typically involves:

  • Flooring Installation: Laying everything from durable LVP and wood and tile floors to commercial-grade carpet.
  • Custom Cabinetry and Millwork: Installing reception desks, breakroom cabinets, retail displays, and other custom-built features.
  • Light and Plumbing Fixtures: Setting up all final lighting, faucets, sinks, and other essential hardware.
  • Final Touches: Adding trim, hanging doors, and applying any specialty wallcoverings or finishes that complete the look.

Phase 5: Final Inspections and Handover

The project wraps up with a detailed walkthrough and the last round of inspections. We go over every inch of the build-out with you to create a "punch list"—a final list of any small items that need a touch-up. Our team addresses these points quickly to make sure the result meets our high standards, and more importantly, yours.

From there, we coordinate with city inspectors for final occupancy approval. Once all inspections are passed and you are 100% happy with the work, we officially hand over the keys. You're now ready to move in and prepare for your grand opening, confident that your new commercial space is built right and ready for business.

Build-Outs, Renovations, And Tenant Improvements Explained

In commercial construction, you’ll hear "build-out," "renovation," and "tenant improvement" thrown around, sometimes all in the same conversation. While they’re all related to transforming a commercial space, the differences matter. Getting the terms right helps you define your project's scope and communicate a clear vision to your commercial contractor near me.

It’s the first step toward a successful project, ensuring everyone is speaking the same language from day one.

The Build-Out: Creating Something From Nothing

A commercial build-out is exactly what it sounds like: building a finished interior from a completely raw, empty space. We usually start with what’s called a "grey shell"—basically just concrete floors, unfinished walls, and the main utility lines capped and waiting. From there, we build your business from scratch.

This is the most involved type of project. It’s a total transformation that includes:

  • Framing all the new interior walls to create offices, conference rooms, and hallways.
  • Installing brand-new HVAC, electrical, and plumbing systems from the ground up.
  • Putting in insulation, drywall, and ceilings.
  • Adding every last finish, from flooring and paint to light fixtures and cabinetry.

A great example is taking a vacant ground-floor unit in a new Seattle high-rise and turning it into a fully functioning coffee shop. This is where Wheeler Painting shines. We specialize in these smaller to mid-size commercial build out services that larger firms often pass on, giving your project the hands-on focus it needs.

The Renovation: Refreshing An Existing Space

A commercial renovation, on the other hand, breathes new life into a space that’s already been built out and occupied. The basic bones are there—walls, plumbing, and electrical are in place—but it’s time for an upgrade. The goal is to modernize, reconfigure, or rebrand the existing environment.

Renovation projects often involve a mix of demolition and new construction:

  • Taking down a few non-structural walls to create a more open, collaborative office.
  • Swapping out old lighting for modern, energy-efficient fixtures.
  • Tearing out worn-out flooring and giving the whole interior a fresh coat of paint.
  • Updating restrooms to meet current ADA standards.

Think of an outdated Tacoma office getting a complete facelift. We might add a custom breakroom, new paint, and sleek finishes to help a company attract top talent. This is a booming market; commercial renovation services are projected to jump from $1,598 million in 2026 to $2,621 million by 2032. It shows just how many businesses in Kent and across the region are investing in smart upgrades—a core specialty for our team. You can dive into the numbers in the latest market analysis.

Tenant Improvements: The Custom Fit

So, where do tenant improvements (TI) fit in? This is more of a catch-all term that describes any custom work a landlord does to prepare a space for a new tenant. It’s the critical step that makes a generic space perfect for a specific business.

A TI project can be a complete build-out (if the space is a raw shell) or a renovation (if the space just needs an update). The key difference is that the scope of work is defined by the lease agreement between the landlord and tenant, and it's often funded by a "TI allowance."

Whether your property needs a full build-out or a targeted renovation, Wheeler Painting is the perfect partner for facility managers and property owners in the Puget Sound area. As a nimble, focused firm, we provide the dedicated, hands-on service that these crucial facility maintenance projects demand.

Understanding The Costs Of A Commercial Build Out

Let's get right to the question on every business owner's mind: "How much is this going to cost?" It's the most important question, and the answer isn't a single number. Think of your final project cost as a puzzle—it's made up of several distinct pieces that all fit together.

From the square footage of your new office to the specific type of lighting you choose for your retail store, every decision shapes the final budget. Our job is to give you a clear map of these costs so you know exactly where every dollar is going, right from the start.

Calculator, material samples, and color swatches with a cost estimation document for project planning.

Hard Costs: The Physical Build

The bulk of your budget will be dedicated to hard costs. These are the straightforward, tangible expenses you can see and touch—the actual materials and the skilled labor needed to put them all together.

Here’s what drives your hard costs:

  • Size and Scope: It's simple math—a 10,000-square-foot office will require more materials and labor hours than a 2,000-square-foot cafe. Likewise, a project that starts with major demolition will naturally cost more than a simple cosmetic update.
  • Quality of Materials: This is where your choices make a huge difference. High-end finishes like custom millwork, imported stone countertops, and designer light fixtures will carry a higher price tag than standard, builder-grade options.
  • Labor: This covers the wages for the entire team of tradespeople bringing your vision to life—carpenters, electricians, plumbers, and painters. Labor rates can fluctuate based on the project's complexity and the current market in places like Seattle and Tacoma.

Another huge factor is the starting condition of the space. Are you leasing a "grey shell" (raw, unfinished space with concrete floors and exposed studs) or a "vanilla shell" (a space with ceilings, basic lighting, and primed walls already in place)? The former is a blank slate but requires a significantly larger investment to build out.

Soft Costs: The Behind-The-Scenes Expenses

Beyond the construction itself, you have soft costs. These are the essential, behind-the-scenes services and fees that make the project possible. They aren't as visible as new walls or flooring, but they are absolutely critical for a smooth, legal, and successful build out.

Think of soft costs as the project's brain and nervous system. They handle the planning, compliance, and legal framework that allows the physical construction to happen. Budgeting for them upfront prevents major headaches and delays down the road.

Common soft costs include:

  • Architectural and Design Fees: The cost for a professional to create the blueprints and detailed plans that act as the roadmap for the entire project.
  • Permit and Inspection Fees: Every city, from Kent to Tacoma, has its own schedule of fees for issuing building permits and conducting mandatory inspections.
  • Engineering Fees: If your project involves changing the building's structure, or requires a complex new HVAC or electrical system, you'll need a specialized engineer's stamp of approval.
  • Insurance and Legal Costs: These are non-negotiable protections for you, the property owner, and your contractor throughout the construction process.

A Transparent Approach To Your Budget

We've seen it all, and we know the best projects are the ones where everyone is on the same page financially. That’s why we provide detailed, itemized proposals that break down every single anticipated cost. No surprises, no guesswork—just a clear plan that empowers you to make smart decisions.

To help manage these details, we often rely on sophisticated tools like Exayard construction estimating software to ensure our projections are as accurate as possible from day one. This table breaks down the main factors that will influence your final budget.

Commercial Build Out Cost Influencers

Cost Factor Description Impact on Budget
Space Condition The state of the commercial space before work begins (e.g., grey shell vs. vanilla shell). High
Material Quality The selection of finishes, from flooring and lighting to fixtures and paint. High
Project Scope The extent of the work, from cosmetic updates to full-scale demolition and reconstruction. High
Design Complexity Intricate layouts, custom-built features, and unique architectural elements. Medium
Location Local labor rates, permit costs, and material availability in your specific city or region. Medium
Permits & Fees The costs associated with city permits, inspections, and engineering reviews. Low to Medium

Ultimately, a good contractor is a partner, not just a vendor. We actively practice value engineering, a process where we look for ways to reduce costs without sacrificing the quality or integrity of your design. This could mean suggesting an alternative material with a similar aesthetic for a lower price or re-working a construction sequence to be more efficient.

This collaborative approach ensures your vision comes to life on budget. To get a preliminary idea for your own planning, check out our easy-to-use commercial painting cost estimator and start building your budget today.

Navigating Permits And Building Codes In Washington

Let’s be honest—for most business owners, the maze of permits, codes, and inspections is the single most daunting part of a construction project. In Washington, especially, navigating the specific rules for cities like Seattle, Tacoma, or Kent can feel like a full-time job. Our job is to take that entire administrative headache off your plate so you can focus on your business.

Think of building codes not just as rules, but as a framework for protecting your investment. They ensure your space is safe for employees and customers, and that it’s built to last. Getting it wrong isn't an option. It can lead to failed inspections, expensive rework, and significant delays in opening your doors.

A building permit document on a clipboard, hard hat, and measuring tape on a white table.

Ensuring Full Compliance And Safety

As your general contractor, our responsibility goes beyond the physical construction. We make sure your commercial build out services are 100% compliant with all local and federal regulations. We don’t just build to your vision; we build to code.

Having been a part of the Puget Sound construction scene since 1991, we've built real, working relationships with the permitting offices and inspectors in the region. This isn't just a talking point—it's a critical advantage. We know the people, we understand the nuances of each jurisdiction, and we know how to prepare documentation that gets approved without a hitch.

We bake compliance into the project from day one. Instead of reacting to inspection issues, we design the project around local codes and the Americans with Disabilities Act from the start. This proactive approach prevents costly surprises and ensures your space is built right the first time.

Integrating ADA Requirements Seamlessly

One of the most important layers of compliance is the Americans with Disabilities Act (ADA). This is about much more than putting a ramp out front. It's about ensuring your commercial space is genuinely accessible to everyone.

We weave ADA requirements into the core design of your space, considering details like:

  • Accessible Entrances: Making sure doorways meet width standards and thresholds are low.
  • Clear Pathways: Designing intuitive layouts that are easy to navigate for all.
  • Compliant Restrooms: Building restrooms with the right clearances, grab bars, and fixture heights.

The Value Of Experienced Permit Management

Understanding the local commercial building permit requirements is step one. But successfully managing the process is what keeps your project on track and on budget. With the commercial services market projected to reach USD 10.32 trillion by 2030, avoiding permitting delays is more important than ever to stay competitive. You can read more about this market growth at Research and Markets.

Handing this over to an experienced team means you avoid the pitfalls that can derail a project. It's about getting you open for business on schedule, with the peace of mind that every "i" is dotted and every "t" is crossed.

Why Choose Wheeler Painting For Your Build Out Project

Picking the right contractor for your build out isn't just about hiring someone to put up walls—it's about finding a true partner you can trust with your vision and your investment. For business owners and facility managers across the Puget Sound, Wheeler Painting brings something different to the table: deep construction know-how combined with an expert's eye for painting and specialty finishes.

This unique blend means we manage your entire project under one roof, from the initial framing all the way to the final brushstroke. You get a single, accountable team dedicated to getting the job done right, eliminating the headaches of coordinating multiple contractors. We understand a build out can feel overwhelming, so we focus on clear communication and dependable craftsmanship to turn your goals into reality, on time and on budget.

Your Local Small-To-Mid-Size Project Specialist

Since 1991, Wheeler Painting has been a fixture in the local business community, helping companies in Kent, Seattle, and Tacoma transform their spaces. We intentionally focus on the small to mid-size projects that larger general contractors often pass over.

This specialization is our strength. It allows us to give your project the focused, personal attention it deserves. You’re not just another job number on a massive project board; you’re a valued partner, and your success is our priority.

We deliver on this promise with:

  • Integrated Expertise: Our ability to merge construction work with high-end painting and finishing means you get a seamless, top-quality result without juggling different vendors.
  • Transparent Communication: You can expect honest, frequent updates and straightforward proposals. We find that an informed client is a confident one.
  • Proven Reliability: With decades of local experience, we have a long history of delivering on our word and completing projects as promised.

Choosing Wheeler Painting means choosing peace of mind. We take the guesswork out of the process, providing a clear path from concept to completion for your commercial build out services.

Experience the difference of working with a local team that’s genuinely invested in your business. Let us handle the complexities of your build out so you can stay focused on what you do best.

Common Questions About Commercial Build-Outs

When you're thinking about a commercial build-out, a lot of practical questions come to mind. It's only natural. Getting straight answers is the first step, so let's dive into some of the most common questions we hear from business owners across the Puget Sound.

How Long Does a Typical Commercial Build-Out Take?

This is the big one, and the honest answer is: it depends. A simple cosmetic refresh of an existing office space renovation might take as little as 4-6 weeks. But if we're starting from a completely empty shell for a new restaurant or retail store, you're more likely looking at 3-6 months, sometimes longer.

The real drivers of your timeline are the complexity of your design, lead times for specific materials (like custom millwork or specialty flooring), and frankly, how quickly we can move through permitting in your specific city, be it Seattle, Kent, or Tacoma. A big part of our job in the beginning is to map all this out into a detailed, realistic schedule so you know exactly what to expect.

What’s the Difference Between a "Vanilla Shell" and a "Grey Shell"?

Think of it like this: a "vanilla shell" is a blank canvas that's already been prepped for you. The space is nearly ready for business, usually with finished ceilings, primed walls, basic lighting and HVAC, and a restroom that's up to code. It’s a great starting point.

A "grey shell", on the other hand, is completely raw. You’re literally starting with bare concrete floors, uninsulated exterior walls, and just the basic utility hookups for plumbing and power. A grey shell build-out is a much bigger undertaking, but it also gives you total freedom to create a space from the ground up. We can help you walk any potential property in the Puget Sound area and give you a clear-eyed assessment of what it will take to get it ready for business.

Can We Stay Open During a Renovation?

In many cases, yes. Keeping your doors open while we work is definitely possible, but it requires smart, strategic phasing. We can map out a plan to tackle the project in contained sections or schedule the noisiest work for your off-hours to keep disruptions to your team and customers at an absolute minimum.

A phased renovation in an occupied space is all about control and safety. It means creating secure barriers between the work zone and your public areas. As a contractor that’s handled these complex projects for years, we’re experts at managing the logistics so you can keep running your business.

Who Pays for a Tenant Improvement Build-Out?

Who foots the bill is a critical part of any commercial lease negotiation. Most of the time, the landlord will offer a "Tenant Improvement Allowance" (or TI Allowance). This is a set amount of money, often calculated per square foot, that they contribute toward the construction.

If your dream space costs more than the allowance to build, you as the tenant are generally responsible for covering the difference. We’re used to working with both tenants and landlords across the Seattle-Tacoma metro to keep projects on budget and ensure every dollar is tracked with complete transparency.


Ready to take your vision from blueprint to reality? The team at Wheeler Painting has been the go-to partner for businesses throughout the Puget Sound since 1991. Let's talk about your project and show you how our deep experience in commercial build-outs can make the whole process a success.

Schedule Your Free Estimate with Wheeler Painting

10 Crucial Questions to Ask a Contractor Before Hiring in Kent, WA

Embarking on a residential remodel, commercial build-out, or even a large-scale painting project is a significant investment. For homeowners, property managers, and facility managers in the Puget Sound area, from Tacoma to Seattle, the success of your project hinges on choosing the right partner. A great residential or commercial contractor brings not just skill but also transparency, reliability, and local expertise. The difference between a smooth, successful outcome and a stressful ordeal often comes down to asking the right questions upfront.

Before you sign any contract, it’s critical to ask the right questions. This guide provides the essential list of questions to ask a contractor to ensure you're hiring a professional, trustworthy partner like Wheeler Painting, who can navigate your project with confidence. By using this checklist, you’ll be empowered to make an informed decision, protecting your property and ensuring your vision for a residential remodel or commercial renovation is realized on time and on budget.

The vetting process is a crucial first step. It's about more than just finding the lowest bid; it’s about finding a local provider who understands the needs of businesses and homeowners in Kent, Seattle, and Tacoma. A well-prepared list of questions helps you compare potential partners systematically, ensuring you cover critical areas like licensing, payment schedules, and how unexpected issues are handled. To delve deeper into the overall process, a comprehensive guide on how to hire contractors can be invaluable. This list will equip you with the specific queries needed to verify credentials, understand project workflow, and set clear expectations, whether you're planning a tenant improvement in Kent or siding replacement in Tacoma.

1. Are You Licensed, Bonded, and Insured?

This is the most critical of all the questions to ask a contractor, acting as your first line of defense against financial risk and subpar work. Before you discuss project details, verify that any potential partner has these three credentials. In Washington State, these protections are foundational requirements that separate legitimate professionals from those who could leave you with a costly mess.

A hand points to a licensed contractor ID card, insurance certificates, and a phone on a white desk.

Understanding these three components is key to protecting your home or business in the Seattle, Tacoma, and Kent areas.

  • Licensing: General contractors must be registered with the Washington State Department of Labor & Industries (L&I). This confirms they have met state requirements, including obtaining a bond and insurance.
  • Bonding: A surety bond protects you. If a contractor fails to complete the job, doesn't pay for permits, or neglects to pay subcontractors, you can file a claim against the bond to recover financial losses.
  • Insurance: This covers accidents. General liability insurance protects your property from damage, while workers' compensation covers injuries to the contractor's employees on your job site, preventing you from being held liable.

How to Verify Contractor Credentials

Never take a contractor's word for it. Always perform your own due diligence.

  • Request Physical Copies: Ask for current certificates of insurance, a copy of their bond, and their L&I contractor number.
  • Verify with L&I: Use the "Verify a Contractor, Tradesperson or Business" tool on the L&I website. This will show if their license is active and if they have any outstanding infractions.
  • Confirm Insurance Directly: Call the insurance agent listed on the certificate to confirm the policy is active and the coverage limits are adequate for your project's scope.
  • Check Subcontractor Coverage: Ask how they ensure their subcontractors are also fully licensed and insured. Reputable general contractors like Wheeler Painting have a strict vetting process for every partner they bring onto a job site.

2. What is Your Experience With Projects Similar to Mine?

Past performance is the best predictor of future success. This essential question helps determine if a contractor has proven, hands-on expertise with your specific project type, whether it’s a commercial renovation, residential remodeling project, or an exterior painting job. A mismatch in experience is a significant red flag, as a contractor specializing in new home construction may not have the nuanced skills required for a complex commercial tenant improvement project in downtown Seattle.

Digging into a contractor’s portfolio is crucial. For instance, a "remodeling contractor" might excel at custom decks and patios but lack the specific knowledge for a large-scale retail build-out or the precision needed for institutional painting. You need a partner whose background aligns directly with the scope, complexity, and unique challenges of your job.

  • Residential vs. Commercial: The logistics, materials, and codes for residential home improvement services in Kent are vastly different from those for a commercial facility in Tacoma. A contractor must have experience navigating the right set of challenges.
  • Project-Specific Skills: A general painter may not have the training to apply durable waterproofing coatings, just as a general builder might not understand the specific demands of a facility maintenance contract.
  • Relevant Scale: A firm accustomed to small repairs may be overwhelmed by a multi-floor office space renovation. Ensure their team and resources can handle the size of your project. Wheeler Painting is perfect for building owners or facility managers looking for a smaller firm that specializes in small to mid-size tenant improvement and facility maintenance projects.

How to Verify Relevant Experience

Go beyond a simple "yes" and ask for tangible proof of their expertise. A professional contractor will be proud to showcase their work.

  • Request a Detailed Portfolio: Ask for photos and descriptions of 3-5 recently completed projects that are similar to yours in scope and style.
  • Ask for Relevant References: Inquire about clients from these specific projects. Speaking with a past customer who had a similar job is one of the most valuable forms of due diligence.
  • Inquire About Specific Challenges: A great follow-up question is, "What was the biggest unexpected challenge on that project, and how did you resolve it?" Their answer reveals problem-solving skills.
  • Discuss Your Project's Nuances: Explain any unique aspects of your project, like the need for custom cabinets or wood and tile floors, and ask how they would approach them. This tests their critical thinking and confirms their understanding. Wheeler Painting, with decades of experience in the Puget Sound region, can provide detailed case studies for everything from commercial renovations to residential siding replacement.

3. Can You Provide References From Recent Clients?

While a portfolio showcases their best work, references reveal the reality of working with them day-to-day. This is one of the most insightful questions to ask a contractor because it provides direct feedback on their communication, timeliness, and professionalism from clients who have already been through the process. Verifying recent references is your best tool for predicting your own experience with a "residential contractor near me" or a local commercial construction firm.

Hearing directly from past customers in the Seattle, Kent, or Tacoma areas offers a layer of assurance that a glossy brochure cannot.

  • Recent Projects: References from jobs completed within the last 12-24 months are most relevant. They reflect the contractor's current team, processes, and quality standards.
  • Similar Scope: Ask for references from clients who had projects similar to yours. If you need commercial painting services, a reference from a small residential deck and porch staining job is less helpful.
  • Willingness to Share: A contractor’s confidence and transparency in providing a list of contacts is a positive sign. Hesitation could be a red flag.

How to Effectively Check References

Don't just collect names and numbers; conduct a thorough inquiry to get the full picture.

  • Request 3-5 References: A quality contractor should have a healthy list of satisfied clients. Wheeler Painting can readily connect you with facility managers or homeowners who have recently completed projects.
  • Prepare Specific Questions: Go beyond "Were you happy?" Ask about their communication style, how they handled unexpected issues, if the project stayed on budget, and if the cleanup was thorough.
  • Inquire About the Team: Ask the reference about their experience with the on-site crew and project manager. Were they professional, respectful of the property, and communicative?
  • Ask the Ultimate Question: A powerful final question is, "Would you hire them again?" The answer, and any hesitation behind it, often tells you everything you need to know.

4. How Will You Handle Change Orders and Unexpected Issues?

No project is immune to surprises, making this one of the most important questions to ask a contractor. A clear, documented process for handling change orders and unforeseen problems is the hallmark of a disciplined professional. This process protects both you and the contractor from scope creep and budget overruns when unexpected issues arise, such as discovering hidden damage or needing a drywall contractor for unforeseen repairs.

A Change Order document on a clipboard with a pen, sticky notes, a yellow hard hat, and a measuring tape.

Understanding how a contractor manages these changes reveals their project management maturity. Whether it's a residential remodel in Seattle or a commercial tenant improvement in Kent, a formal change order process is essential.

  • What is a Change Order? A change order is a written amendment to the original contract that documents a change in scope, price, or schedule. It should be signed by both you and the contractor before any new work begins.
  • Why is it Necessary? It prevents misunderstandings by formally documenting new agreements. Issues like discovering rotted wood during an exterior painting job or finding outdated plumbing during a remodel require a formal change order to adjust the budget and timeline fairly.
  • What it Protects Against: A solid process prevents a contractor from billing you for unauthorized work and protects the contractor from performing extra work without compensation. Understanding specific scenarios, like those in a guide to emergency storm damage repair, can help you formulate questions about a contractor's readiness for unforeseen challenges.

How to Clarify the Change Order Process

Your contract should explicitly detail the procedure for managing changes. Discuss these points before signing anything.

  • Require a Formal Process: Insist that all changes be documented in writing on a formal change order form before work proceeds.
  • Define Approval Authority: Clearly state who has the authority to approve changes and associated costs, whether it's you, a property manager, or an architect.
  • Set Approval Timelines: Agree on how quickly you must review and approve a change order to prevent work stoppages and project delays.
  • Demand Justification: The contractor should explain the reason for the change, provide a detailed cost breakdown, and outline any impact on the project schedule. Reputable contractors like Wheeler Painting will transparently provide this documentation for any necessary changes.

5. What is Your Payment Schedule and Invoice Process?

One of the most important questions to ask a contractor revolves around money. A clear payment schedule and invoicing process are vital for managing your project's cash flow. This conversation establishes firm expectations for when and how you pay, which helps prevent billing disputes and protects you from paying too much for incomplete work. In Washington State, payment terms must be explicitly documented in your contract.

Agreeing on a payment structure before work begins is non-negotiable for any project, whether it's a "house painting near me" job in Seattle or a commercial build-out in Kent.

  • Progress Payments: Payments should be tied to specific, verifiable project milestones, not arbitrary dates. For example, a payment might be due after framing is complete and has passed inspection.
  • Deposit: A reasonable deposit secures your spot on the contractor's schedule and allows them to order initial materials. However, this initial payment should be a modest percentage of the total cost.
  • Final Payment & Retention: The final payment should only be made after all work is 100% complete, the site is clean, and you are fully satisfied. Holding back a small percentage (retention) is a standard practice that ensures the contractor finishes every last detail.

How to Structure Contractor Payments

A professional contractor will have a standard process but should be willing to negotiate terms that work for you.

  • Negotiate the Schedule: Propose a payment schedule that aligns with key construction phases. For a home addition, you can explore cost estimators to better understand the phases and their associated costs.
  • Limit the Deposit: Avoid paying more than 10-25% upfront. A contractor demanding a large deposit may be a red flag for financial instability.
  • Require Detailed Invoices: Each payment request should come with an invoice that itemizes labor, materials, and any subcontractor costs for that phase.
  • Ask for Lien Waivers: With each progress payment, request a signed lien waiver. This document confirms that the contractor and their suppliers have been paid, protecting your property from a mechanic's lien.
  • Define ‘Completion’: Clearly state in the contract what constitutes "completion" for the final payment. This should include passing final inspections, completing a final punch list, and removing all tools and debris.

6. What is Your Timeline and What Happens if You Miss Deadlines?

A clearly defined timeline is the backbone of a successful construction or painting project. This question establishes expectations for start and completion dates and, crucially, what happens if deadlines are missed. For homeowners and business operators in the Puget Sound area, understanding the project schedule is essential for managing disruptions. A professional contractor should provide a realistic timeline that accounts for project complexity and their current capacity.

This discussion also reveals a contractor's organizational skills. A vague timeline can be a major red flag, while a detailed, phase-by-phase schedule demonstrates foresight. In Western Washington, where weather can impact exterior work like siding replacement or exterior painting, this conversation is even more critical.

How to Discuss and Document Project Timelines

A verbal agreement on timing is not enough; the schedule must be part of your written contract.

  • Request a Detailed Schedule: Ask for a schedule that includes start and end dates for each major phase. For a kitchen remodel, this would mean dates for demolition, framing, electrical/plumbing rough-ins, drywall, and finishing.
  • Define Work Hours: Clarify the contractor’s standard work hours (e.g., 7:00 a.m. to 3:30 p.m., Monday-Friday). This helps you manage expectations for noise and activity on your property in Seattle or Tacoma.
  • Establish Delay Protocols: Specify which events qualify for a timeline extension, such as client-requested changes, unforeseen site conditions, or significant weather delays.
  • Include Accountability Clauses: For larger commercial or residential projects, consider a "liquidated damages" clause. This stipulates a set amount the contractor pays for each day the project runs past the agreed-upon completion date, excluding approved extensions.
  • Plan for Weather: For any exterior work in the Kent area, such as exterior painting or custom decks and patios, ensure your contract includes specific language about weather contingencies.
  • Require Progress Updates: Reputable firms like Wheeler Painting provide regular progress reports to keep you informed and ensure the project is tracking against the established schedule.

7. How Do You Manage Subcontractors, Permits, and Code Compliance?

A successful renovation or construction project involves more than just the general contractor; it’s an ecosystem of specialized trades and municipal regulations. This is one of the most important questions to ask a contractor, as their answer reveals their ability to manage the entire project. A professional "commercial construction near me" contractor takes full ownership of coordinating subcontractors, securing permits, and ensuring every aspect of the work is up to code.

In Washington State, a licensed general contractor is legally responsible for the project's compliance. A contractor with clear processes demonstrates the experience needed to protect you from liability and delays. They act as the single point of accountability, ensuring the project runs smoothly without you having to juggle multiple vendors or navigate complex city requirements in Seattle or Tacoma.

How to Verify Project Management Capabilities

A well-managed project is a stress-free project. Dig into the details to understand how a contractor will handle these critical tasks.

  • Permits and Fees: Confirm the contractor will obtain all required permits. Ask who pays the permit fees and how those costs are presented in the bid.
  • Subcontractor Vetting: Request a list of the primary subcontractors they work with for trades like electrical and plumbing. Reputable contractors like Wheeler Painting have a roster of trusted partners they rely on for projects like a full kitchen remodel or floor repairs and replacements. You can learn more about how these elements fit together by exploring a guide on how to plan a kitchen remodel.
  • Code Compliance Responsibility: The contract should state that the contractor is responsible for ensuring all work meets local and state building codes and for correcting any work that fails an inspection at their own cost.
  • Inspection Coordination: Ask about their process for scheduling and managing building inspections with the relevant city department, whether in Kent or a surrounding municipality.
  • Documentation: Request that you receive copies of all passed inspection reports and the final signed-off permit before you make your final payment.

8. What is Your Warranty and What Does It Cover?

A project isn’t truly complete until you have a clear understanding of the contractor’s responsibility after the final payment. Asking about the warranty is a critical question for any contractor, as it defines their commitment to quality. In Washington, the law implies certain warranties, but a detailed written warranty provides superior protection and clarity.

The scope and duration of a warranty can vary depending on the work. It's essential to understand these differences to set realistic expectations for your project in the Seattle, Tacoma, or Kent areas.

  • Painting & Coatings: A professional interior or exterior painting warranty might offer two years on labor and a longer term on materials. Exclusions often include issues not caused by the contractor, such as pre-existing moisture problems.
  • Remodeling & Construction: For a kitchen remodel or tenant improvement, a contractor typically offers a one-year workmanship warranty. This is separate from manufacturer warranties on appliances and fixtures.
  • Facility Construction Services: For services like waterproofing or floor repairs and replacements, the warranty should be specific to the materials used and the application process.

How to Verify Warranty Details

A verbal promise is not enough. You need the warranty terms documented to protect your investment.

  • Request Written Terms: Ask for the full warranty language to be included directly in your contract.
  • Clarify Inclusions and Exclusions: Ask for a specific list of what is covered and, just as importantly, what is not.
  • Understand Labor vs. Materials: Confirm if the warranty covers both the cost of replacement materials and the labor to install them.
  • Review the Claims Process: Ask how you should report a defect. What is the expected timeframe for a response and repair? This process is a key part of an effective construction quality control checklist.
  • Confirm No-Cost Repairs: A reputable contractor like Wheeler Painting stands behind their work and will confirm that valid warranty repairs will be performed at no additional cost to you.

9. How Will You Handle Safety, Cleanliness, and Site Management?

A project's success isn't just about the final product; it's also about how the work gets done. This question to ask a contractor reveals their professionalism and respect for your property. A well-defined plan for these elements minimizes disruption and protects your family or employees, whether it's a home in Tacoma or a commercial facility in Kent.

A room undergoing renovation with a plastic dust barrier over a doorway and construction tools.

Understanding a contractor’s approach to site management is crucial for both residential and commercial projects where daily life or business operations must continue.

  • Safety: A professional contractor will have clear protocols for securing the work area, managing tools, and addressing potential hazards.
  • Cleanliness: This goes beyond a final sweep. It involves daily cleanup, dust containment methods like plastic barriers, and organized material storage to keep your space orderly.
  • Site Management: This covers the logistics of the project, including work hours, noise levels, parking for crew vehicles, and protection for landscaping and adjacent structures.

How to Confirm a Contractor's Site Management Plan

A verbal promise isn't enough; you need specific commitments written into your agreement.

  • Describe a Typical Day: Ask the contractor to walk you through their standard daily routine from arrival to departure. What does their cleanup process look like?
  • Discuss Protection Measures: For interior painting, ask how they will contain dust and protect your furniture and flooring. For exterior projects, clarify how they will shield landscaping and windows.
  • Review Work Hours and Noise: Confirm their proposed work schedule. Discuss flexibility for commercial properties in Seattle trying to minimize business disruption.
  • Request a Safety Plan: Ask for their safety procedures, emergency contacts, and how they secure the site at the end of each day. Reputable firms like Wheeler Painting have established safety and cleanliness standards for every project.

10. How Are Disputes Handled, and Will I Receive a Written Contract?

Even the best-laid plans can encounter bumps. Discussing dispute resolution before a project begins is a sign of a mature, professional contractor. It establishes a clear, fair process for addressing disagreements over quality or costs, preventing small issues from escalating. This discussion should always conclude with a comprehensive, written contract that documents every detail.

In Washington State, a detailed contract is your best tool for ensuring clarity and accountability. A vague, lump-sum quote is a major red flag.

  • Written Estimate/Contract: This document is the blueprint for your project. It must itemize all costs, including labor and materials, and specify brands and quantities. It should also outline the project timeline, payment schedule, change order process, and warranty details.
  • Dispute Resolution Clause: A good contract specifies the steps to resolve conflicts. This often starts with direct negotiation, followed by mediation (using a neutral third party).
  • Protecting Your Investment: Having these processes defined protects both parties. It ensures there is a pre-agreed method for solving problems and keeping the project on track.

How to Ensure Your Contract is Complete

A thorough contract is your project’s most important document. Don’t rush this step.

  • Request an Itemized Estimate: Never accept a single lump-sum price. Ask for a breakdown of costs for materials, labor, permits, and other expenses.
  • Verify All Agreements: Read the contract carefully to ensure all verbal promises—such as details about color consultation or specific materials—are included in writing. If it’s not in the contract, it’s not guaranteed.
  • Clarify the Dispute Process: Ask the contractor to walk you through their standard dispute resolution clause. Is good-faith negotiation the first step?
  • Review with a Professional: For large-scale projects in the Seattle or Tacoma area, consider having an attorney review the contract. Reputable contractors like Wheeler Painting will provide their standard agreement for review and are transparent about every clause.

10 Key Contractor Questions Comparison

Item Implementation complexity Resource requirements Expected outcomes Ideal use cases Key advantages
Is the Contractor Licensed, Bonded, and Insured? Low — document verification and database checks Minimal — time, access to L&I and insurer contacts Legal protection, verified legitimacy, reduced liability Any hire; projects with regulatory or liability exposure Liability protection, recourse, professionalism
What is Your Experience With Projects Similar to Mine? Medium — portfolio review and follow-up questions Time for portfolio review, reference checks, possible site visits Better fit, fewer mistakes, realistic approach to scope Specialized or complex projects, niche trades, restorations Proven competence, local code knowledge, efficient execution
Can You Provide Multiple References From Recent Clients? Medium — conducting and documenting reference interviews Time, prepared questions, phone/email contact effort Direct insight into performance, communication, timeliness High-value contracts or unfamiliar contractors Real-world verification of claims; reveals reliability
How Will You Handle Change Orders and Unexpected Issues? Medium–High — contract clauses and approval workflows Clear change-order forms, documentation processes, approval timelines Controlled scope changes, documented decisions, fewer disputes Projects with unknowns (remodels, restorations) Transparency, cost control, dispute prevention
What is Your Payment Schedule and Invoice Process? Medium — define milestones and invoicing requirements Financial planning, lien waivers, invoice tracking Aligned cash flow, protection against overpayment Large or phased projects, projects requiring retention Financial clarity, retention leverage, reduced billing disputes
What is Your Timeline and What Happens if You Miss Deadlines? Medium — detailed scheduling and penalty clauses Project schedule, monitoring tools, contingency planning Predictable schedule, contractor accountability Time-sensitive commercial work or occupied homes Timely completion incentives; better coordination
How Do You Manage Subcontractors, Permits, and Code Compliance? High — coordination with multiple parties and jurisdictions Permit fees, subcontractor vetting, liaison time, inspections Regulatory compliance, single-point responsibility, fewer reworks Permitted projects, multi-trade build-outs, commercial jobs Reduced owner burden, inspection coordination, code compliance
What is Your Warranty and What Does It Cover? Low–Medium — specify duration and exclusions in writing Written warranty documents, clarity on labor vs. materials Post-completion protection and defined remedies Work with long-term performance concerns (coatings, finishes) Assurance of quality, recourse for defects, confidence in workmanship
How Will You Handle Safety, Cleanliness, and Site Management? Medium — establish daily protocols and containment methods PPE, dust containment, cleanup supplies, supervision Minimized disruption, lower injury and property-damage risk Occupied residences, ongoing business operations Safer site, protected property, professional site appearance
Disputes, Resolution, and Written Estimates/Contracts High — legal clauses, itemized estimates, resolution paths Legal review, detailed documentation, third-party experts Clear dispute process, enforceable expectations, fewer surprises High-value projects, multi-stakeholder contracts Reduces litigation risk, clarifies scope/costs, structured resolution

Build with Confidence: Partner with a Trusted Local Contractor

You have now worked through a detailed checklist of critical inquiries for any potential construction or painting partner. Moving beyond a simple price comparison to a thorough vetting process is the single most important step you can take to protect your investment. Asking the right questions to ask a contractor isn't about being confrontational; it's about establishing a foundation of clarity, accountability, and mutual respect.

A truly professional contractor, whether for "commercial painting services near me" in Seattle or a residential siding replacement in Tacoma, will appreciate your diligence. They understand that informed clients make the best partners. Their willingness to openly discuss licensing, insurance, and payment schedules is a direct reflection of their business ethics. Conversely, any hesitation or refusal to provide this information is the brightest red flag you can encounter.

Key Takeaways for Your Contractor Search

This comprehensive list of questions is your framework for a successful hiring decision. Let’s distill the most crucial takeaways to guide your next steps:

  • Documentation is Non-Negotiable: Always verify a contractor's license (via the L&I website), proof of insurance, and bond details. This is your primary shield against liability and financial risk.
  • Experience Must Be Relevant: A contractor’s experience is only valuable if it aligns with your specific project. Ask for a portfolio and references for projects that are similar in scope, size, and complexity to yours.
  • The Contract Governs Everything: Your written contract is the ultimate source of truth. It should explicitly detail the scope of work, a clear payment schedule, material specifications, the change order process, and warranty terms.
  • Communication is Key: Pay close attention to how a contractor communicates during the bidding process. Are they responsive, clear, and professional? This initial interaction is a strong indicator of how they will communicate once the project is underway.

Turning Questions into a Confident Decision

Armed with these questions, you can move forward with a clear plan. Start by shortlisting three to four potential contractors in your area, whether in Kent, Seattle, or surrounding Puget Sound communities. Conduct initial phone screenings, then invite your top candidates to provide a detailed, written bid. Use these bids not just to compare costs but to evaluate the thoroughness and professionalism of each company.

You are not just hiring a service; you are entering into a significant business relationship. The goal is to find a partner who will respect your property, communicate transparently, and deliver high-quality craftsmanship. For facility managers, this means finding a reliable team like Wheeler Painting for ongoing facility maintenance and tenant improvements. For homeowners, it's about entrusting your most valuable asset to a team that values quality and integrity. By using this guide, you empower yourself to make a choice that leads to a smooth, successful project and a final result you can be proud of for years to come.


The team at Wheeler Painting has built a three-decade reputation by providing clear, honest answers to every one of these questions. We believe an informed client is our best partner, and we welcome your detailed inquiries for any residential or commercial project in the Puget Sound area. Find out how our commitment to transparency and quality sets us apart by visiting Wheeler Painting & Restoration Services to schedule your detailed estimate.

Retaining Wall Design: A Homeowner’s and Business Owner’s Guide

A retaining wall isn't just a pile of rocks. It's an engineered system designed to fight gravity and immense pressure, 24/7. Here in the Puget Sound, with our notoriously hilly and water-logged terrain, a proper retaining wall design isn't just a good idea—it's absolutely critical for preventing erosion and creating stable, useful space for your home or business.

Why Professional Retaining Wall Design Is a Smart Investment

Think of a retaining wall as your property's silent guardian. Done right, it stands firm against the incredible force of soil and water, protecting your landscape and structures. But a wall that's poorly designed or shoddily built? That's not just an eyesore; it's a serious safety hazard and a ticking financial time bomb.

Understanding the fundamentals helps you make smarter choices, ensuring the final structure is both beautiful and built to last. This is non-negotiable in Western Washington, where our relentless rain can saturate the ground, massively increasing the load pushing against a wall. A professional design anticipates this from day one, giving property owners, business owners, and facilities managers peace of mind.

The Core Principles of a Successful Design

Every successful retaining wall is a masterclass in balance. On one side, you have lateral earth pressure—the constant push of the soil. On the other, you have the wall's strength and mass pushing back. An experienced local contractor knows exactly how to balance this equation for our specific conditions.

Here’s what a solid professional plan always focuses on:

  • Structural Integrity: The wall's materials and size must be calculated to handle the forces at play without bowing, cracking, or tipping over.
  • Proper Drainage: This is the most critical element. A great design must include a way for water to escape, typically using gravel backfill and perforated pipes. Without it, you get hydrostatic pressure, the number one killer of retaining walls.
  • A Solid Foundation: The wall needs a stable footing dug down to firm, undisturbed soil. This is the bedrock of its entire stability, preventing it from sinking or shifting over the years.

I've seen it a hundred times: a retaining wall fails because the designer didn't plan for drainage. When water gets trapped behind a wall, the pressure it exerts is immense. It can—and will—push a wall over.

More Than Just a Wall

For homeowners, a well-built wall can be a game-changer. It can turn a useless, muddy slope into a gorgeous terraced garden, create a flat lawn for the kids, or provide a stable base for a new patio.

For business owners and facilities managers, it’s just as vital. A good wall can create the level ground needed for a parking lot expansion, a new building foundation for a retail build-out, or safe, accessible walkways for an office space.

Ultimately, professional retaining wall design isn’t a cost; it’s an investment in your property's safety, function, and value. It's the difference between a temporary fix and a permanent solution that gives you peace of mind for decades to come.

A Look at the Different Types of Retaining Walls

Before starting a retaining wall project, you first have to understand your options. It's like picking the right tool for a tough job—choosing the correct wall type is absolutely critical for long-term success, whether you're terracing a small garden at home or securing a massive commercial site. Each style works in a fundamentally different way to fight back against the immense force of soil and water.

At its core, any retaining wall is an engineered system designed to perform a few critical jobs for your property.

This diagram breaks down how a single wall system serves three distinct but closely related purposes.

Diagram illustrating the engineered purposes of a retaining wall for erosion control, water management, and usable land.

As you can see, a well-designed wall is all about controlling erosion, managing water, and carving out usable, flat land. In the hilly, rain-soaked terrain of Western Washington, these functions are absolutely essential for both residential and commercial properties.

H3: Gravity Walls: Relying on Pure Mass

The most straightforward design is the gravity wall. It's the heavyweight champion of retaining walls, holding back soil simply by being too heavy to push over. You'll see these built from massive materials that provide all the necessary bulk.

  • How They Work: Their secret is simple: sheer weight combined with a slight backward lean (called a "batter") into the hillside. The incredible mass of the wall is more than enough to counteract the lateral earth pressure pushing against it.
  • Common Materials: Think big. Large concrete blocks, natural stone boulders, and gabions (wire cages filled with rocks) are all popular choices.
  • Best For: These are fantastic for shorter walls, usually under four to six feet, where you have plenty of room to build a nice, wide base. They’re a common sight in residential landscaping.

While the concept is simple, a proper gravity wall still needs a deep, stable foundation to keep it from settling over time.

H3: Cantilever Walls: Using Leverage to Your Advantage

When you need to go taller, the cantilever wall is a much more efficient and common choice, especially in commercial construction. This design is all about leverage. It uses a reinforced concrete footing shaped like an "L" or a "T" to cleverly convert downward pressure into rock-solid stability.

The vertical stem of the wall is what you see, holding back the soil. But the magic happens in the horizontal footing buried behind it. The weight of the soil on top of the footing’s "heel" helps pin the entire structure down, making it incredibly stable without needing the brute-force mass of a gravity wall. This engineering trick makes it a go-to for professional jobs.

A shocking number of retaining wall failures come down to a design that simply wasn't up to the task. A cantilever wall's engineered footing is specifically designed to handle the intense pressures found at greater heights—which is why you never skip the professional plans.

H3: Segmental Retaining Walls (SRWs): The Modern Workhorse

Today, perhaps the most versatile and popular option you'll see is the Segmental Retaining Wall (SRW). These are sophisticated systems of high-strength, interlocking concrete blocks. Think of them as industrial-strength LEGOs, creating walls that are both incredibly strong and surprisingly flexible.

  • How They Work: The blocks are designed with a shear key or lip that locks them together. For any wall of significant height, this system is paired with geogrid reinforcement—a super-strong, flexible mesh laid in horizontal layers between the blocks that extends deep into the soil behind them. This creates a reinforced soil mass that acts as a single, unified structure.
  • Aesthetic Flexibility: SRW blocks come in a dizzying array of colors, textures, and sizes. This allows for beautiful designs that can complement any property, from a sleek modern storefront to a classic Pacific Northwest home and garden.

H3: Anchored Walls: For the Toughest Jobs

When you’re dealing with enormous loads or have very little room to excavate, an anchored retaining wall provides the ultimate level of support. This design uses high-strength cables or rods—known as "tie-backs" or "anchors"—that are drilled deep into the stable earth behind the wall and expanded.

It’s a bit like pitching a tent on a windy day. The wall itself is the fabric, but the anchors are the stakes holding it firm against the force. This technique allows for much thinner and taller walls because the load is transferred from the wall face deep into the ground. You'll see this method used in major commercial construction and facility construction services where failure is simply not an option.

To help you visualize these options, here's a quick breakdown of how they stack up for different scenarios.

Comparing Common Retaining Wall Styles

Wall Type Primary Material Best For Typical Height Range
Gravity Boulders, Large Blocks, Gabions Shorter walls with ample space Up to 6 feet
Cantilever Reinforced Concrete Medium to tall walls, professional builds 4 to 20+ feet
Segmental (SRW) Interlocking Concrete Blocks Versatile, residential & commercial 2 to 30+ feet (with geogrid)
Anchored Concrete, Steel Very tall walls, tight spaces, heavy loads 15 to 50+ feet

Each of these designs has its place, and choosing the right one for your specific property is the first and most important step. This is where getting professional advice from an experienced local contractor pays for itself many times over.

Why Modern Retaining Wall Engineering Matters

To really appreciate the stability of a modern retaining wall, it helps to see how far we've come. For centuries, builders relied on trial and error. They stacked massive stone walls that stood the test of time, but their success was based more on brute force and a bit of luck than precise math.

Today, designing a retaining wall is a completely different process. The move from simple barriers to carefully engineered systems is a huge leap forward. This progress boils down to two things: the widespread use of reinforced concrete and a deep, scientific grasp of soil mechanics. These advances let us build walls that are not just stronger, but far more efficient.

From Ancient Mass to Modern Mechanics

The real game-changer was shifting from relying on sheer weight to using smart engineering principles. This evolution, mainly taking place in the 20th century, saw us move from basic masonry to reinforced concrete. By around the 1920s, engineers were using foundational theories to make precise calculations, building safety factors into their designs that made walls more reliable than anything that came before.

This modern approach means we no longer have to guess. We can accurately predict all the forces at play—the specific soil on your property, the hydrostatic pressure from our wet winters, and even the weight from a driveway or building above—and design a structure built to handle it all.

A modern, code-compliant retaining wall is engineered to be a permanent solution. It's not just stacking blocks; it’s creating a balanced system where every single piece, from the footing to the drainage, works together for long-term stability and safety.

The Value of Engineered Safety

All that history has a direct impact on homeowners and property managers today. An old, non-engineered wall might look solid for a decade or two before it starts to lean, bulge, or crack. A modern wall, on the other hand, is designed from the ground up for a lifespan of 50 to 100 years.

Here’s why that matters for your project:

  • Predictable Performance: Modern engineering takes the guesswork out of it. We can design a wall knowing exactly how it will behave under the unique conditions of your Puget Sound property.
  • Long-Term Durability: By using durable materials and sophisticated drainage systems, we build structures that can stand up to the constant pressure of soil and water for decades.
  • Safety and Compliance: Following strict building codes isn’t just about red tape. It's about preventing a catastrophic failure that could damage property and put people at risk.
  • Peace of Mind: An engineered wall means you don't have to worry every time a heavy winter rain rolls through Western Washington.

Tapping into these engineering principles is how a trusted local provider delivers real, lasting value. A well-built retaining wall is a critical asset, and it all starts with a design grounded in proven science. Building it right the first time is non-negotiable, which is why having a meticulous process is so vital. You can see how we apply these principles by looking over the importance of a construction quality control checklist.

The Unseen Enemy: Why Drainage and Site Assessment Are Everything

If you ask what the single biggest threat to a retaining wall is, the answer isn't the weight of the dirt. It's water. Here in Western Washington, where rain is a constant companion, managing water isn't just part of the job; it's the job. Our persistent drizzle can turn stable soil into a heavy, soupy mess, and that saturated earth exerts an almost unbelievable amount of force on anything trying to hold it back.

A newly constructed retaining wall with a visible drainage pipe and gravel channel on a sloped property.

The physics behind this is called hydrostatic pressure. Think about the force pushing against the walls of a full swimming pool—that’s exactly what happens when water gets trapped behind your retaining wall. The soil gets saturated, and with nowhere to go, that water starts pushing. And pushing.

This relentless pressure is the undisputed, number-one cause of retaining wall failure. I’ve seen walls that should have lasted a century start to bulge and lean after just a few wet seasons because the drainage was done poorly or, worse, not at all.

Fighting Back with Smart Drainage

Any professional worth hiring will design a retaining wall with a multi-layered drainage system. The entire goal is to give water an easy way out before it can build up dangerous pressure. This isn't just sticking a pipe in the ground; it's creating a "safe zone" behind the wall where pressure can't accumulate.

Here’s what a properly designed system looks like:

  • Granular Backfill: Instead of piling native soil back behind the wall, we use a thick layer of clean, crushed gravel. This creates a porous zone where water can flow freely down to the base instead of getting trapped in dense clay.
  • Perforated Drain Pipe: Tucked at the bottom of that gravel layer is a perforated pipe, sometimes called a French drain. Its job is to collect all that water and channel it away from the wall's foundation to a safe discharge point.
  • Weep Holes: You'll often see small holes or openings near the bottom of a concrete or masonry wall. These are weep holes, and they act as a critical pressure relief valve, letting any trapped water escape harmlessly.
  • Filter Fabric: This is the unsung hero. A special geotextile fabric goes between the native soil and the gravel backfill. It acts like a screen, letting water pass through but stopping the fine silts and clays that would otherwise clog up the gravel and pipe over time.

This isn't just best practice; it's the only way a residential or commercial contractor can ensure the wall you’re paying for will last a lifetime. It turns water from a destructive force into a manageable, predictable element.

Why You Can't Skip a Professional Site Assessment

Before anyone even thinks about digging, a thorough site and soil assessment is non-negotiable. This is where we gather the data that dictates the entire engineering of the wall. Skipping this step is like building a house without checking what it’s sitting on—it’s just asking for trouble down the road.

A common cause of retaining wall failures is a design that does not provide for—or a contractor who does not install—sufficient drainage behind the wall. Water is heavy, and as it builds up in the soil behind the wall, the force acting on the wall dramatically increases.

Here in the Puget Sound, our soils are a special challenge. We have a lot of clay, which is notorious for holding water and expanding. A geotechnical engineer needs to know the exact soil mix to properly calculate the forces your wall will have to fight against every single day.

The assessment will also pinpoint the local groundwater levels and how surface water runs across your property. This tells us how deep the footing needs to be and precisely how to design the drainage. A wall designed for the sandy soils of Eastern Washington would fail in a heartbeat in our wet, clay-heavy environment. This upfront work is the true foundation of a successful retaining wall—one that protects your property for decades to come.

Navigating Local Building Codes and Permits

For most property owners, the mere mention of building permits can sound like a headache. But when it comes to retaining walls, these rules aren't just bureaucratic hoops to jump through. They are critical safety measures that prevent your new wall from becoming a very expensive, and dangerous, problem.

Here in Western Washington, there’s a key number to remember: four feet. If your retaining wall is designed to hold back more than four feet of soil (measured from the bottom of the footing to the top of the wall), it’s no longer considered simple landscaping. At that point, it becomes an engineered structure, which almost always means you’ll need a building permit.

What Does the Permit Process Look Like?

This is where hiring a seasoned local pro really pays off. They know the ins and outs of the permit offices in Seattle, Bellevue, Tacoma, and all the surrounding communities. A good contractor will handle the entire process, so you don't have to.

The journey from plan to approved wall typically follows these steps:

  • Engineered Plans are Submitted: A licensed structural engineer drafts detailed blueprints. These are precise documents showing the foundation, materials, drainage, and all the math that proves the wall can handle the immense pressure behind it.
  • The City Reviews the Plans: Your local building department will go over the engineer's plans carefully, making sure everything is up to code and meets all safety and zoning rules.
  • The Permit is Issued: Once the plans get the green light, the city issues the permit. Construction can now officially begin.
  • Inspections Happen on Site: A city or county inspector will visit your property at key moments. For example, they’ll come to check the trench and rebar before the concrete footing is poured to ensure it matches the approved plans exactly.

Think of a permit as your official seal of approval. It's independent verification that your wall is designed to be safe, protecting your investment, your family, and your neighbors from the consequences of a failure.

Why You Can't Afford to Skip This Step

Building codes exist for a very good reason: to keep the incredible forces of soil and water in check. Trying to bypass the permit process by building a non-compliant wall can backfire spectacularly. You could be hit with stop-work orders, hefty fines, or even a lawsuit if the wall fails and damages the property next door.

The technology behind these walls has come a long way. The industry has pushed for safer, more resilient designs, especially in the last few decades. In fact, advanced materials like geosynthetic grids are now a huge part of the market, accounting for roughly 50 percent of segmental retaining wall sales in some areas. You can discover more insights about these advancements on masonryandhardscapes.org.

Working with a professional who gets this process right from the start is the only way to guarantee your project is built correctly and legally. The right project management approach makes a world of difference. To see how this works in practice, check out our guide on the design-build project delivery method.

How to Choose the Right Retaining Wall Contractor

Two contractors review building plans on a construction site with a concrete retaining wall.

The success of your retaining wall hinges almost entirely on the skill of the team you hire to build it. Making the right choice here is the single most important decision you'll face. It's what separates a structure that stands firm for generations from one that shows signs of stress after just a few wet Puget Sound winters.

A common mistake is to treat this like a simple landscaping job. It's not. A structural retaining wall demands a completely different level of expertise. A licensed general contractor who specializes in this work understands the complex dance between soil mechanics, structural loads, and water management in a way a general landscaper likely won't.

Questions to Ask Any Potential Contractor

When you start interviewing contractors, you have to look beyond the price tag. A low bid might seem attractive, but it often means corners are being cut on materials, drainage, or engineering—shortcuts that will cost you dearly down the road.

To protect your investment, walk into that conversation prepared. Here’s a practical checklist of questions to help you vet any "residential contractor near me" or "commercial construction near me" and make sure they’re up to the task.

  • Are you licensed, bonded, and insured in Washington? This is your first and most important question. Ask for their license number and verify it. Proper insurance is non-negotiable; it protects you from liability if an accident happens on your property.

  • Can you show me a portfolio of similar walls you’ve built in my area? You want to see experience that matches your project's scale and complexity. A contractor with a deep portfolio of local work will have firsthand knowledge of our region's specific soil and weather challenges.

  • Who handles the engineering and permits? A seasoned contractor will manage this entire process. They should have established relationships with local geotechnical engineers and know exactly how to submit plans and schedule inspections with the city or county.

  • How do you handle drainage? A good answer will be specific and immediate. They should start talking about clean gravel backfill, perforated drain pipes, filter fabric, and weep holes. This shows they understand that what’s behind the wall is just as important as the wall itself.

A true professional understands that a retaining wall is a complete system. It's not just the blocks you see. It’s the hidden foundation, the careful drainage network, and the engineered plans that guarantee its long-term safety and stability.

Differentiating Professionals from Amateurs

A real pro will welcome these questions and give you clear, confident answers. They’ll be transparent about their process, materials, and timeline. The history of retaining walls shows a clear evolution from simple mass to sophisticated engineering, especially after reinforced concrete revolutionized the industry in the 20th century. This shift allowed for taller, stronger, and more flexible retaining wall systems. A top-tier contractor not only knows this history but applies these modern, proven principles to every job. Learn more about this history from Garrett Precast.

Ultimately, you are hiring a partner to protect your property. Their expertise is your best insurance policy against a failed wall. Taking the time to find the right person is a critical first step. For more guidance on this important decision, check out our guide on how to choose a general contractor.

Common Questions About Retaining Wall Design

Even after you've got the basics down, it’s natural to have questions. When you're talking about a major structural addition to your property, you want to be sure you're making the right calls. Let's tackle some of the most practical questions we hear from clients all over the Puget Sound area.

Think of this as the real-world stuff—the concerns that pop up when the plans are off the page and you're ready to break ground.

How Long Does a Professionally Built Retaining Wall Last?

This is the big one, and for good reason. A professionally engineered and well-built retaining wall isn't a temporary fix; it's a permanent feature of your landscape. With the right design and materials, you should expect it to last 50 to 100 years, sometimes even longer.

Of course, "it depends" is always part of the answer. A wall's ultimate lifespan really hinges on a few crucial things:

  • Materials: There's a world of difference between a treated timber wall and one built from reinforced concrete or high-quality segmental blocks. The better the material, the longer the life.
  • Drainage: I can't stress this enough: drainage is everything. More walls fail from hydrostatic pressure (water pushing from behind) than anything else. A great drainage system is the secret to a century-long lifespan.
  • Installation Quality: A brilliant design on paper is useless if it isn't built correctly. Following the engineer's plans to the letter—no shortcuts—is absolutely essential.

What Are the Warning Signs of a Failing Retaining Wall?

A retaining wall almost never fails suddenly. It gives you plenty of warning signs first, whispering before it shouts. Knowing what to look for can help you catch a problem early, before it turns into a catastrophe.

A failing retaining wall is a serious safety hazard. When you see it start to lean, bulge, or crack, that’s the wall telling you its structural integrity is compromised. Don't wait. Acting fast can prevent a dangerous and incredibly expensive collapse.

Keep your eyes peeled for these key indicators:

  • Leaning or Bulging: If the wall is tilting outward or has a noticeable belly, that's a classic sign of pressure winning the battle.
  • Cracking: Look for significant horizontal cracks or "stair-step" cracks in block or concrete walls. These are telltale signs of stress.
  • Separation: Gaps opening up between blocks or seeing the wall pulling away from the soil behind it means things are moving in the wrong direction.
  • Poor Drainage: If you see water weeping through the face of the wall or pooling at the base after a rain, it means the drainage system behind it has failed or was never there to begin with.

Can I Build a Small Retaining Wall Myself?

It's tempting. A small, decorative garden wall under two or three feet can feel like a weekend project. But once you're talking about a wall that's actually retaining a slope, the game changes completely. Here in Washington state, any retaining wall over four feet tall requires a permit and an engineered design, period.

Trying to DIY a structural wall is a massive liability. A professional ensures the footing is deep enough, the drainage is perfect, and the whole thing is built to code. It's about protecting your property, your investment, and frankly, giving you peace of mind that it's not going to fall over.


A well-built retaining wall is a critical investment that protects your property and adds real value. At Wheeler Painting, we specialize in managing complex residential and commercial construction projects, making sure every detail is handled with expert care from start to finish. If you have questions about a retaining wall or another project, contact us for a consultation.

A Guide to the Design Build Project Delivery Method

Taking on a construction project can feel overwhelming. You have a vision, a budget, and a lot of questions. The design build project delivery method simplifies the entire process by bringing everyone together under one contract, one team, and one shared goal. Instead of you, the property owner, acting as the middleman between an architect and a builder, this unified approach turns potential adversaries into trusted collaborators.

Understanding the Design-Build Method

Let’s imagine you’re planning a new office space or a major home renovation. In a traditional project, you’d hire a designer to create blueprints. Then, you’d take those plans to various contractors for bids. The problem? The contractor might look at the plans and say, “This is beautiful, but it’s going to cost way more than you think,” or “This won’t work with the building’s existing structure.” Suddenly, you’re stuck in a frustrating blame game, shuttling messages back and forth.

Design-build flips that entire process on its head.

It’s a more straightforward, reassuring approach. You sign a single contract with one firm. That firm is responsible for everything, from the initial sketches and engineering to permitting and the final coat of paint. For property owners, business owners, and facilities managers in our community, this means you have a single, trusted partner guiding you from start to finish. There’s no disconnect between the vision and the execution because it’s all handled by one expert team.

A Unified Team from Day One

The real magic of the design-build method happens right at the beginning. The builders, designers, and engineers are all in the same room from day one. This isn’t just a minor detail—it’s the secret sauce to a successful project.

When the construction team is involved during the design phase, they provide immediate, practical feedback. They can flag potential issues, suggest more cost-effective materials, and ensure the design is actually buildable within your budget.

This integration delivers clear benefits:

  • No More Finger-Pointing: You have a single point of contact. If a problem arises, there’s no debate about whose fault it is; the team is collectively responsible for finding a solution.
  • Designing to a Budget: Cost isn’t an unpleasant surprise at the end. It’s a foundational piece of the design conversation, ensuring the final plans align with your financial reality.
  • A Faster Path to Completion: Design and construction can overlap. The team can start ordering long-lead-time materials or begin site prep while final design details are being finalized, shaving weeks or even months off the timeline.

The design-build model creates a true partnership. The adversarial tension that can poison a traditional project is replaced by a shared commitment to getting the job done right, on time, and on budget.

A Growing Trend in Construction

This isn’t just a niche idea; it’s rapidly becoming the go-to method for savvy property owners. What was once considered an “alternative” is now a dominant force in the industry.

In fact, research predicts that design-build will account for 47% of all U.S. construction spending by 2025. Why the massive shift? Because it consistently delivers better outcomes with less stress, especially on complex projects. You can dive into the details by reading the findings on design-build utilization from FMI Corp.

For local businesses and homeowners, this trend means you’re not a guinea pig. You’re choosing a proven, modern approach trusted to deliver great results for your residential or commercial project.

How a Design-Build Project Unfolds, Step by Step

Knowing the definition of design-build is helpful, but what does it actually look like day-to-day? To really understand it, you have to see the process in action. Unlike the classic construction model where steps are siloed and often conflicting, a design-build project is a much more logical, collaborative journey from start to finish.

For property owners, this difference is night and day. It translates to a more predictable, less stressful experience. Instead of acting as the go-between for a separate architect and builder, you have one unified team—a single partner—guiding you through every phase. Your vision for that commercial renovation or home remodel stays intact without all the usual headaches.

This simple chart shows you exactly what I mean. It cuts right to the core of the design-build advantage: the direct, uncluttered path from owner to the integrated team to the finished project.

Flowchart illustrating the design-build process from owner to unified team to project completion.

As you can see, the owner and the unified team work as one. This single entity handles everything, which is how you get to the finish line without the frustrating detours and disputes that plague other methods.

Phase 1: The Initial Consultation & Vision Setting

Every great project starts with a simple conversation. This first meeting is all about your vision, your goals, and what you need the space to do. Whether you’re planning an office space renovation or a major kitchen expansion, this is your chance to lay it all on the table.

Right away, we start talking about the budget. It’s a crucial part of the conversation. Your design-build partner will listen to your ideas and give you honest, early feedback on costs. This helps align your dreams with financial reality from the very beginning, avoiding that all-too-common heartbreak of designing a project you can’t actually afford to build.

Phase 2: Collaborative Design & Feasibility Checks

This is where the magic of the integrated model really comes alive. The architects, designers, and construction experts are all in the same room, turning your vision into a real, buildable plan. As creative ideas take shape, the construction pros are right there to provide immediate input on buildability, material costs, and potential roadblocks.

This constant feedback loop ensures the design isn’t just stunning, but also practical and affordable.

  • Constructability Reviews: The builders are looking over the designer’s shoulder, catching potential construction headaches on paper before they can become expensive problems in the field.
  • Value Engineering: The team actively looks for smarter ways to build. They might suggest alternative materials or different construction methods that deliver the same quality and look for less money.
  • Accurate Costing: Because the people pricing the job are the same ones who will build it, the cost estimates are grounded in reality, not just theory.

Phase 3: Pre-Construction & Permitting

Once you’ve signed off on the final design, the project shifts into the pre-construction phase. This is where your design-build firm manages all the critical behind-the-scenes logistics to get everything teed up for construction.

Your single point of contact will be busy finalizing the schedule, ordering materials, and navigating the permitting process with local municipalities. Having an experienced local team handle this is a massive benefit—they know the specific codes, the people at the permit office, and how to get things approved efficiently, whether it’s for a retail build-out or siding replacement.

With a unified team, pre-construction is a smooth, overlapping process. While designers put the final touches on the drawings, the construction crew is already lining up subcontractors and materials. This overlap is a key reason design-build projects can move so much faster.

Phase 4: Unified Construction & Project Management

With plans approved and permits secured, it’s time to break ground. The transition from paper to reality is incredibly smooth because the people building the project are the same ones who helped design it. The lead designer and project manager stay deeply involved, making sure the final product is a perfect match for the original vision.

Throughout the build, you still have that single point of contact providing you with regular updates and answering your questions. This clear line of communication gets rid of the confusion and delays that happen when an owner is stuck playing telephone between a separate designer and contractor.

Phase 5: Project Completion & The Final Walkthrough

As the work winds down, the team performs detailed quality checks on every last detail to make sure it meets their—and your—high standards. The final step is the walkthrough, where you and the project lead go through the finished space together.

This is your moment to inspect the work, learn how your new systems operate, and confirm that everything is exactly as you expected. A design-build project isn’t done until you are 100% satisfied with the outcome. From the first handshake to the final handover, the entire process is built around your peace of mind.

Comparing Different Project Delivery Methods

To really get a handle on the design-build method, it helps to see how it stacks up against the other ways projects get built. Whether you’re a homeowner planning a residential remodel or a business owner managing a commercial build-out, the project delivery method you choose sets the tone for everything that follows. It defines how everyone communicates, who’s responsible for what, and ultimately, it shapes the final result.

In the construction world, you’ll generally run into three main models: Design-Build (DB), the traditional Design-Bid-Build (DBB), and Construction Manager at Risk (CMAR). Each one is structured differently, and understanding those differences can save you a world of headaches down the road.

Three miniature houses and architectural blueprints on a wooden desk under 'METHOD COMPARISON' text.

Let’s break down how these methods really play out for local property owners.

The Traditional Route: Design-Bid-Build

Design-Bid-Build (DBB) is the classic approach most people picture. It’s a straight line, two-step process where you, the owner, are juggling two separate contracts. First, you hire an architect to draw up a full set of plans. Once those plans are 100% finished, you send them out for contractors to bid on, typically picking the lowest price.

The most important thing to grasp here is that the designer and the builder are in separate worlds. They have no contract with each other, and one’s job ends before the other’s begins. This fundamental separation is where most of the problems start.

Because the builder has zero input during the design phase, it’s common to get a beautiful design that’s way over budget or surprisingly complicated to actually build. When a problem pops up on-site—and they always do—it can quickly turn into a finger-pointing match between the designer and the contractor. You’re left stuck in the middle, trying to solve a problem you didn’t create.

A Hybrid Approach: Construction Manager at Risk

Construction Manager at Risk (CMAR) tries to find a middle ground. In this setup, you still hold separate contracts with the designer and a construction manager (CM). The key difference is that the CM joins the team early in the design process to provide input on costs, scheduling, and whether the design is even buildable within the budget.

The “at-risk” part is crucial. The CMAR gives you a Guaranteed Maximum Price (GMP) and is on the hook for any costs that go over that number. This gives them a powerful incentive to keep the budget under control.

While CMAR brings some much-needed collaboration to the table, it doesn’t create a truly unified team. You’re still managing two contracts and acting as the mediator if disagreements arise. It’s an improvement over the old way, but it stops just short of the single-source accountability you get with design-build. If you’re managing facility construction services or a renovation, you can see more about our integrated process for commercial construction.

A Side-by-Side Comparison

Choosing the right path for your project can feel overwhelming, but seeing the methods compared directly can make the decision much clearer. This table breaks down the key differences from a property owner’s perspective.

Project Delivery Methods at a Glance

Factor Design-Build (DB) Design-Bid-Build (DBB) Construction Manager at Risk (CMAR)
Contracts One Contract with a single design-build entity. Two Separate Contracts held by the owner (one with designer, one with builder). Two Separate Contracts held by the owner (one with designer, one with CMAR).
Accountability Single Point of Responsibility. The DB firm is accountable for everything. Divided Responsibility. The owner must manage disputes between the designer and builder. Shared Responsibility. Owner still manages two contracts, but CMAR takes on budget risk.
Timeline Faster. Design and construction phases overlap, speeding up delivery. Slower. A linear, sequential process; construction can’t start until design is fully complete. Moderate. Faster than DBB due to early CM input, but not as integrated as DB.
Cost Control Budget set early. The team designs to the budget from day one, reducing cost overruns. Cost is an unknown until the bidding phase. Designs are often over budget. Good. CM provides early cost feedback and a Guaranteed Maximum Price.
Owner’s Risk Low. The design-build firm assumes the risk for both design and construction. High. Owner is exposed to change orders, delays, and disputes between parties. Moderate. GMP transfers cost risk to the CMAR, but owner still manages two prime contracts.

Ultimately, the best choice depends on how much risk you are willing to carry and how involved you want to be in managing different players.

The most significant distinction comes down to risk and responsibility. In the Design-Bid-Build model, the owner carries the risk of the plans and specifications. In Design-Build, that risk is transferred to the unified team, giving the owner a much more predictable and secure project experience.

The Real-World Payoff of Going Design-Build

It’s one thing to understand the blueprint of the design-build project delivery method, but it’s another to see how it actually makes a difference on the ground. For homeowners and commercial property managers in our community, this unified approach isn’t just a different way of doing things—it delivers real, tangible benefits to your wallet, your schedule, and your sanity.

These advantages are the natural outcome of putting everyone on the same team, with the same goal, right from the start. Let’s break down the four biggest reasons this model works so well for everything from a major kitchen overhaul to a full commercial renovation.

Two smiling construction workers in safety vests shake hands, discussing a design-build project with paint samples.

A Single Point of Accountability

We’ve all heard the horror stories. In a traditional project, when something goes wrong, the blame game begins. The builder points to the architect’s plans, the architect blames the builder’s crew, and you, the owner, are stuck playing referee in a costly dispute.

The design-build model cuts through all that noise. With one contract and one unified team, the buck stops in one place. Your design-build firm is on the hook for everything: the design’s quality, the budget’s accuracy, and the final construction. This means problems get solved quickly and collaboratively, not debated endlessly while the project stalls.

Faster Project Completion

In construction, time is money. The old-school Design-Bid-Build method is notoriously slow and rigid. First, the design has to be 100% complete. Only then can you start the long process of finding and vetting contractors. It’s a purely sequential approach with built-in delays that can easily tack months onto your timeline.

Design-build flips that script by letting key phases overlap—a process known as fast-tracking.

  • Early Procurement: The team can order materials with long lead times, like custom windows or specialized fixtures, while the finer design details are still being worked out.
  • Site Preparation: As soon as the initial plans are solid, work on the foundation and site can kick off, shaving off valuable weeks.
  • Streamlined Permitting: The integrated team can navigate local permitting offices with a single, clear voice, preparing applications far more efficiently.

This simple overlap gets you from concept to completion much faster than the old way of doing things.

By bringing design and construction under one roof, the design-build project delivery method compresses the entire schedule. That’s a massive advantage for a business trying to open its doors or a family just wanting to get their home back.

Tighter and More Realistic Cost Control

For any property owner, the biggest fear is a budget that spirals out of control. In the traditional model, the budget is often treated as an afterthought. You get a design you love, send it out for bids, and then get hit with sticker shock when the numbers come back way over what you expected. The only solution? Costly and frustrating redesigns.

Design-build puts cost at the center of the conversation from day one. Your budget isn’t just a goal; it’s treated as a core design parameter, just like the square footage or the number of rooms. The builder’s real-world cost knowledge informs every decision the designer makes, grounding the entire project in financial reality. This collaboration means fewer surprises and a dramatic reduction in the kind of expensive change orders that blow up budgets.

Higher Quality and Innovation

When builders have a seat at the design table, the final product is almost always better. They bring a practical, hands-on perspective that a designer working alone simply can’t replicate. This early collaboration is a breeding ground for smart ideas and a higher-quality result.

Imagine this: during the design for an office renovation, the contractor suggests a new type of durable flooring that has the same look as the specified product but costs less and lasts longer. Or maybe they see a more efficient way to route the HVAC, gaining you an extra foot of ceiling height. That’s the kind of practical, invaluable insight that makes a project smarter, not just bigger.

Is the Design-Build Method Right for Your Project?

Picking a project delivery method can feel like a huge decision, but it really boils down to what matters most to you. The best approach is simply the one that aligns with your specific goals for the timeline, budget, and how hands-on you want to be. While the design-build project delivery method isn’t a silver bullet for every situation, it truly shines in a few common scenarios that many homeowners and business owners face.

Let’s walk through these key situations. By the end, you’ll have a much clearer idea of whether a unified team is the right move for your next commercial renovation or residential build.

When Speed Is a Top Priority

Got a tight deadline? Maybe you’re a business owner needing to open a new retail build-out before the holiday rush, or a homeowner trying to finish an addition before a new baby arrives. In these time-sensitive cases, the traditional, step-by-step Design-Bid-Build process can feel agonizingly slow.

This is where design-build really pulls ahead. It’s built for speed. By overlapping the design and construction phases—a strategy called “fast-tracking”—the team can get started on site prep or order materials with long lead times while the final design details are still being ironed out. This parallel workflow can easily trim weeks, sometimes even months, off the project schedule.

For Projects Demanding Close Collaboration

Some projects are just plain complicated. They have a ton of moving parts and benefit enormously from having the builder and designer in the same room from day one.

Think about projects like these:

  • Historic Restorations: You never know what you’ll find behind a 100-year-old wall. A design-build team can pivot on a dime when surprises pop up, with the builder offering practical fixes that still honor the architect’s vision.
  • Highly Custom Builds: If you have a one-of-a-kind vision, that direct line of communication is everything. The builder can give immediate feedback on whether a designer’s creative idea is actually buildable (and affordable), making sure the final plan is both incredible and practical.
  • Technically Challenging Renovations: Any job involving major structural work or complex mechanical systems needs flawless coordination. A unified team helps prevent the miscommunications between separate firms that often lead to expensive mistakes.

If You Prefer a Single Point of Contact

Look, most property owners are busy. You’re running a business or a household, and you probably don’t have the time or the desire to play mediator between a separate architect and contractor. If you value simplicity and clear accountability, design-build is a perfect fit.

With a single contract, you have one dedicated partner responsible for everything. This completely sidesteps the stressful “he said, she said” arguments that can derail a project. You have one number to call for updates, questions, and solutions.

This streamlined management keeps you in the loop and in control, but without dragging you into the day-to-day weeds. You can see how this unified approach delivers outstanding results by exploring our portfolio of completed projects.

When Budget Certainty Is Non-Negotiable

For most people, the biggest source of stress in any construction project is the budget. The traditional process can feel like a guessing game, where you don’t get a firm price until late in the game—often leading to sticker shock and having to go back to the drawing board.

The design-build model tackles this problem from the very beginning. The budget isn’t an afterthought; it’s a foundational piece of the design process itself. The entire team, from the designer to the builder, is working together to create a plan that fits your financial targets. This “designing to budget” approach gives you cost certainty early on, dramatically cutting the risk of surprise overruns and making sure your investment is handled with care.

Partnering With a Local Design-Build Expert

It’s one thing to understand the theory of the design-build project delivery method, but it’s another thing entirely to bring a vision to life. For homeowners and commercial property managers, that means finding a local partner who doesn’t just get the process but is also deeply rooted in the community they serve.

That’s where Wheeler Painting & Restoration Services comes in. We’re not just another contractor; we act as your single point of responsibility, dedicated to turning even the most complex projects into a reality.

Our whole approach is founded on the key design-build principles: accountability and communication. From the first rough sketch to the final coat of paint, our team is on top of every detail. We make sure your vision comes to life on schedule, on budget, and with the kind of craftsmanship our neighbors have trusted since 1991.

Your Single Source for Residential & Commercial Projects

Whether you’re looking for a residential contractor near you for a major home remodel, or commercial construction services for a retail build-out, our process is consistent. We build a partnership based on straightforward communication and a solid understanding of local building codes and what people in this area really need. This completely removes the headache of juggling different contracts and trying to get multiple companies on the same page.

  • For Commercial Clients: We handle everything from tenant improvements and office space renovation to full facility construction. Our goal is to make sure your business space is functional, looks incredible, and is ready for business with as little disruption as possible.
  • For Homeowners: We’re here to guide you through residential remodeling, additions, and restorations with a steady, reassuring hand. You can count on a transparent process and results that go well beyond what you hoped for.

At Wheeler Painting & Restoration, we shoulder the risk and complexity so you don’t have to. Our integrated team of designers, project managers, and builders works in lockstep, transforming the often-adversarial nature of construction into a shared mission for success.

Let’s Build Your Vision Together

Picking a contractor is a huge decision, and we believe in earning your trust long before a hammer ever swings. Our long history serving our community speaks for itself—it’s a direct result of our commitment to quality and making sure our clients are happy. You can learn more about our team and what drives us by exploring our company’s story and values.

If you’re ready for a smoother, more collaborative way to build, we’d love to talk. Contact Wheeler Painting & Restoration Services today for a consultation. Let us show you how our design-build approach delivers better results with far less stress, turning your project from an idea into a beautiful reality.

Common Questions About Design-Build

Thinking about using the design-build method for your project? It’s a different way of doing things, and it’s natural to have questions. Here are some of the most common ones we get from clients, with straightforward answers to help you understand how it all works.

How Is the Budget Handled in a Design-Build Project?

This is one of the biggest and best differences. Instead of designing first and then finding out the cost later, the budget is a core part of the conversation from day one.

You, the designer, and the builder all sit down together to establish a realistic target budget. The entire project is then designed to that number. This integrated approach practically eliminates the painful and costly surprise of getting bids back that are way over what you wanted to spend, which often forces you to go back to the drawing board.

Do I Have Less Control Over the Design in This Model?

It might seem that way, but it’s actually the opposite. In a design-build setup, the owner is a crucial part of a single, unified team. You’re not just a client handing off a vision; you’re an active participant.

You’ll be working directly with the designers and builders at the same time. When you have an idea, you get instant feedback on not just the aesthetics, but also the cost and construction timeline. This gives you more meaningful control to shape a final product that truly aligns with your vision and your budget.

Is Design-Build More Expensive Than Other Methods?

While every project is unique, design-build is often more cost-effective when you look at the total picture. By bringing everyone together under one roof, it slashes the expensive change orders and delays that come from designers and builders not being on the same page.

Think of it this way: a shorter project timeline means lower costs. Fewer disputes between separate firms means fewer budget-busting surprises.

Because the designer and builder are working as a team from the start, they’re both motivated to find smart, efficient solutions that deliver the best value. This collaborative spirit helps prevent the cost overruns that are all too common in other project models.


Ready to see how a more streamlined construction process can benefit your project? The team at Wheeler Painting & Restoration Services has been delivering dependable craftsmanship and serving businesses and homeowners in our community since 1991. Contact us to learn more about how we can support your vision.