Tag Archive for: wheeler painting

Top Outside Brick Colors for Seattle & Tacoma Homes

You’re probably looking at your brick house in Seattle, Tacoma, Kent, or somewhere in between and thinking the same thing a lot of homeowners think. The brick is solid. The house has good bones. But the color feels stuck in another decade.

That’s where people get hung up. Outside brick colors look simple until you have to choose one for your own home. Then every sample starts to look different in the morning than it does in the afternoon, and the gray Northwest sky changes everything again. Add moss, moisture, and trim that may already be fighting the brick, and the decision gets heavy fast.

The good news is that brick color doesn’t have to be a guessing game. If you understand what kind of brick you have, what undertones are sitting in it, and how Puget Sound weather affects the finish, you can make a choice that looks right and lasts.

Your Home’s Brick Exterior A Fresh Start

A lot of homeowners reach this point the same way. They replace the roof, update the landscaping, repaint the trim, and then the brick suddenly stands out for the wrong reasons. What looked “fine” before now looks too orange, too pink, too blotchy, or just too tired against the rest of the house.

That’s especially common in Western Washington. Our light is softer than what you see in national design photos. A brick color that looks warm and balanced online can turn muddy under overcast skies. A color that seems clean and modern on a sunny day can feel flat for most of the year.

I’ve seen homeowners pause for months because they’re afraid of making an expensive mistake. That caution makes sense. Brick is a major visual anchor on the exterior. Once you change it, every other element responds to it. Trim, siding, front door, roofing, and landscaping all start reading differently.

“If the brick feels off, the whole house feels off, even when everything else is in good shape.”

The right outside brick colors don’t just modernize a home. They settle it down. They make the roof make sense. They make the trim feel intentional. They help the house look like it belongs in its setting, not like it was assembled from five separate decisions.

Understanding Your Brick Foundation

Start at the wall, not the color fan deck. On Puget Sound homes, the condition and texture of the brick often matter just as much as the color you put on it, because damp air, moss, algae, and flat winter light change how that surface reads from the street.

A split-screen comparison showing modern smooth extruded bricks next to weathered, textured older bricks in sunlight.

I see this all the time in Seattle, Tacoma, and the older neighborhoods between them. Two houses can use a similar brick color, but the one with rougher, more porous faces looks darker, dirtier, and more uneven by February. The smoother brick beside it still reads fairly clean. That difference is not your imagination. Surface texture holds moisture differently, and our climate makes that show.

Shape tells you what kind of update will read well

Older brick often has softer edges, small size variation, and a handmade look. It brings depth and character, but it also exaggerates shifts in tone from brick to brick. If you coat or stain that kind of wall, the result usually looks best with some softness in the final color rather than a flat, stark finish.

Extruded brick is more precise. The corners are cleaner, the faces are more uniform, and the wall usually reads more consistent after staining or coating. That can work well for homeowners who want a sharper, more current look.

Mixed brick is where people get into trouble. An addition may be close in color but different in texture, density, or mortar profile. Under bright sun you might barely notice it. Under overcast Western Washington light, the mismatch often stands out more.

Texture affects maintenance, not just appearance

A rough, open-faced brick collects more biological growth. North-facing walls and shaded entries are the usual problem spots. If the brick already gets green in the wet season, a very light color can look tired faster unless the prep work is thorough and the product is right for masonry.

Dense, smoother brick usually stays visually cleaner longer, but it can make color look stronger than expected. I have seen homeowners sample a warm greige on a rough historic brick and get a soft, settled result. That same color on a smooth addition can read colder and more modern than they intended.

The Brick Industry Association explains common brick textures such as wire-cut, molded, and smooth finishes, and those categories are useful because each one reflects light and shows variation differently in its guide to brick textures.

What to check before choosing a color

Walk the house in dry weather and again after a few wet days. You are looking for how the brick behaves, not just what color it is.

  • Surface absorption: Does the face darken quickly after rain, or stay fairly even?
  • Growth patterns: Are there green or black areas near grade, under eaves, or on the north side?
  • Edge condition: Are the brick corners crisp, or softened by age and wear?
  • Existing variation: Does the wall already have a lot of movement, or is it visually uniform?
  • Patch history: Do repairs, additions, or replaced units already stand out?

Field rule: Test color only after you understand where the wall stays wet, where it stains, and where texture changes from one elevation to another.

That matters on homes that borrow from warehouse or loft styling, where homeowners like the look of exposed brick in industrial design. Exterior brick has a harder job. It has to handle rain, organic growth, and low-angle gray light for much of the year. A good color choice starts with the brick you have, not the brick in a sunny photo from somewhere drier.

The Science and Art of Brick Color

A brick wall can read one way at noon in July and another way after a week of October rain. That matters in Puget Sound, where overcast light cools color down and moisture brings out undertones you will miss in a bright showroom sample.

Brick gets its base color from the clay, the minerals in that clay, and how the unit was fired. Iron-rich clay usually fires into reds, russets, and brown-reds. More lime can push the result lighter, sometimes into buff or yellow ranges. The firing process changes the finish too. The Brick Industry Association’s overview of brick color explains how raw materials and kiln conditions affect the final look.

Why the same brick looks different on different houses

Age is part of it. Weather is the other part.

Older brick often has more visible variation because manufacturing was less uniform, but I also see homeowners misread brick because our climate keeps changing the wall surface. A damp north elevation can look cooler and darker than the south side of the same house. Moss, algae, and shaded mortar joints shift the whole color read. On a clear, dry day, the brick may look warmer again.

That is why color decisions made from one photo usually go sideways.

How to read undertones in real conditions

Start outside, not at the paint counter. Look at the brick in morning light, afternoon light, and after rain. Puget Sound skies flatten contrast, so subtle undertones show up more than they would in a sunnier climate.

Use this quick field check:

  • Warm brick shows orange, cinnamon, rust, or pink cast.
  • Cool brick shows charcoal, muted brown, violet-brown, or soft gray.
  • Mixed brick can swing warm or cool depending on the mortar, roof, and nearby trim color.

Set your samples against both the brick and the mortar. Mortar is often cooler than the brick itself, and that can make a trim color look cleaner or dirtier than expected. If you want a broader framework for coordinating those pieces, this guide on how to choose exterior paint colors is a useful next step.

Good exterior color work respects variation

Brick has depth because it is not flat or uniform. That is part of the appeal people respond to with exposed brick in industrial design, and it matters even more outdoors where moisture and cloud cover keep changing the surface.

On exterior brick, the goal is not to force a perfect single note. The goal is to choose colors that stay believable with the brick’s built-in range. If the wall carries warmth, trim that is too icy can feel sharp and disconnected. If the brick reads as cool and ashy for much of the year, creamy beige can look muddy under gray skies.

The best results come from working with the brick you have, in the light and weather your house gets.

Perfect Palettes for Puget Sound Homes

National color advice often misses the local issue that matters most. Puget Sound light is cool, filtered, and often overcast. A palette that looks crisp in Arizona or Southern California can look drained out here.

A guide listing five tips for choosing brick colors that harmonize with Pacific Northwest lighting conditions.

Colors that usually work well here

Muted, grounded combinations tend to hold up visually in Seattle, Kent, and Tacoma. They feel settled under gray skies and still look good when the sun does come out.

Good local pairings often include:

  • Red brick with charcoal trim: This gives traditional brick a cleaner frame without making it feel harsh.
  • Brown-red brick with deep forest green accents: Strong with mature landscaping and lots of evergreen backdrop.
  • Gray-washed brick with black details: More contemporary, especially on mid-century and simple ranch profiles.
  • Softened brick with taupe or warm greige trim: Helpful when the goal is to reduce visual noise, not create contrast.

The 60 30 10 rule still helps

For exterior color balance, use the brick as the main visual mass. One verified guideline notes that warm orange-red brick pairs well with taupe or beige paints when the 60/30/10 rule is respected, with brick carrying the dominant share of the palette from this brick color combination discussion.

On a house, that often looks like this:

  • 60 percent main field: the brick itself
  • 30 percent secondary support: siding, large trim areas, garage doors
  • 10 percent accents: front door, shutters, metal details, lighting, or fascia contrast

That keeps the house from looking chopped up.

Rain changes the maintenance side of color

In our region, appearance and upkeep are tied together. In rainy areas like Puget Sound, which see 150+ rainy days per year, regional contractor data shows that darker bricks can reduce visible algae growth and cleaning frequency by up to 40% compared with lighter brick, which shows efflorescence and mildew more quickly from this Pacific Northwest exterior color discussion.

That doesn’t mean every home should go dark. It does mean light cream or pale buff brick needs a more realistic maintenance conversation in Western Washington.

Homes near heavy tree cover usually tolerate mid-tone and darker brick finishes better than very light ones.

What works for common problem bricks

A lot of homeowners aren’t starting with ideal brick. They’re starting with dated brick.

If the existing brick reads too orange, avoid trying to “correct” it with bright white trim alone. That usually exaggerates the orange. A muted charcoal, earthy green, or soft greige nearby often calms it down better.

If the brick has pink or salmon undertones, black accents can sharpen it, but they can also make the pink more obvious if the field color is left untouched. In those cases, a more blended, toned-down finish usually looks more natural.

For homeowners sorting through paint relationships around the whole exterior, Wheeler has a useful guide on how to choose exterior paint colors that complements brick decisions well.

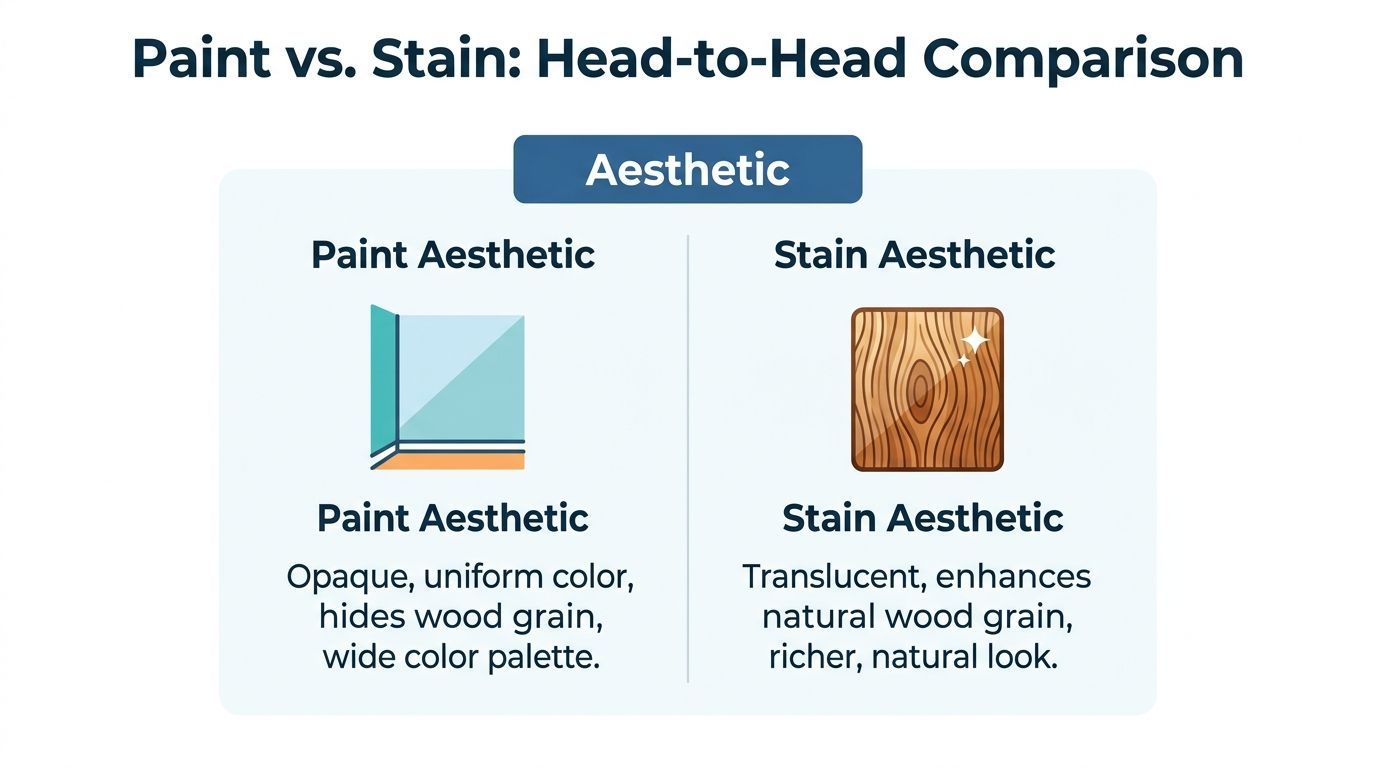
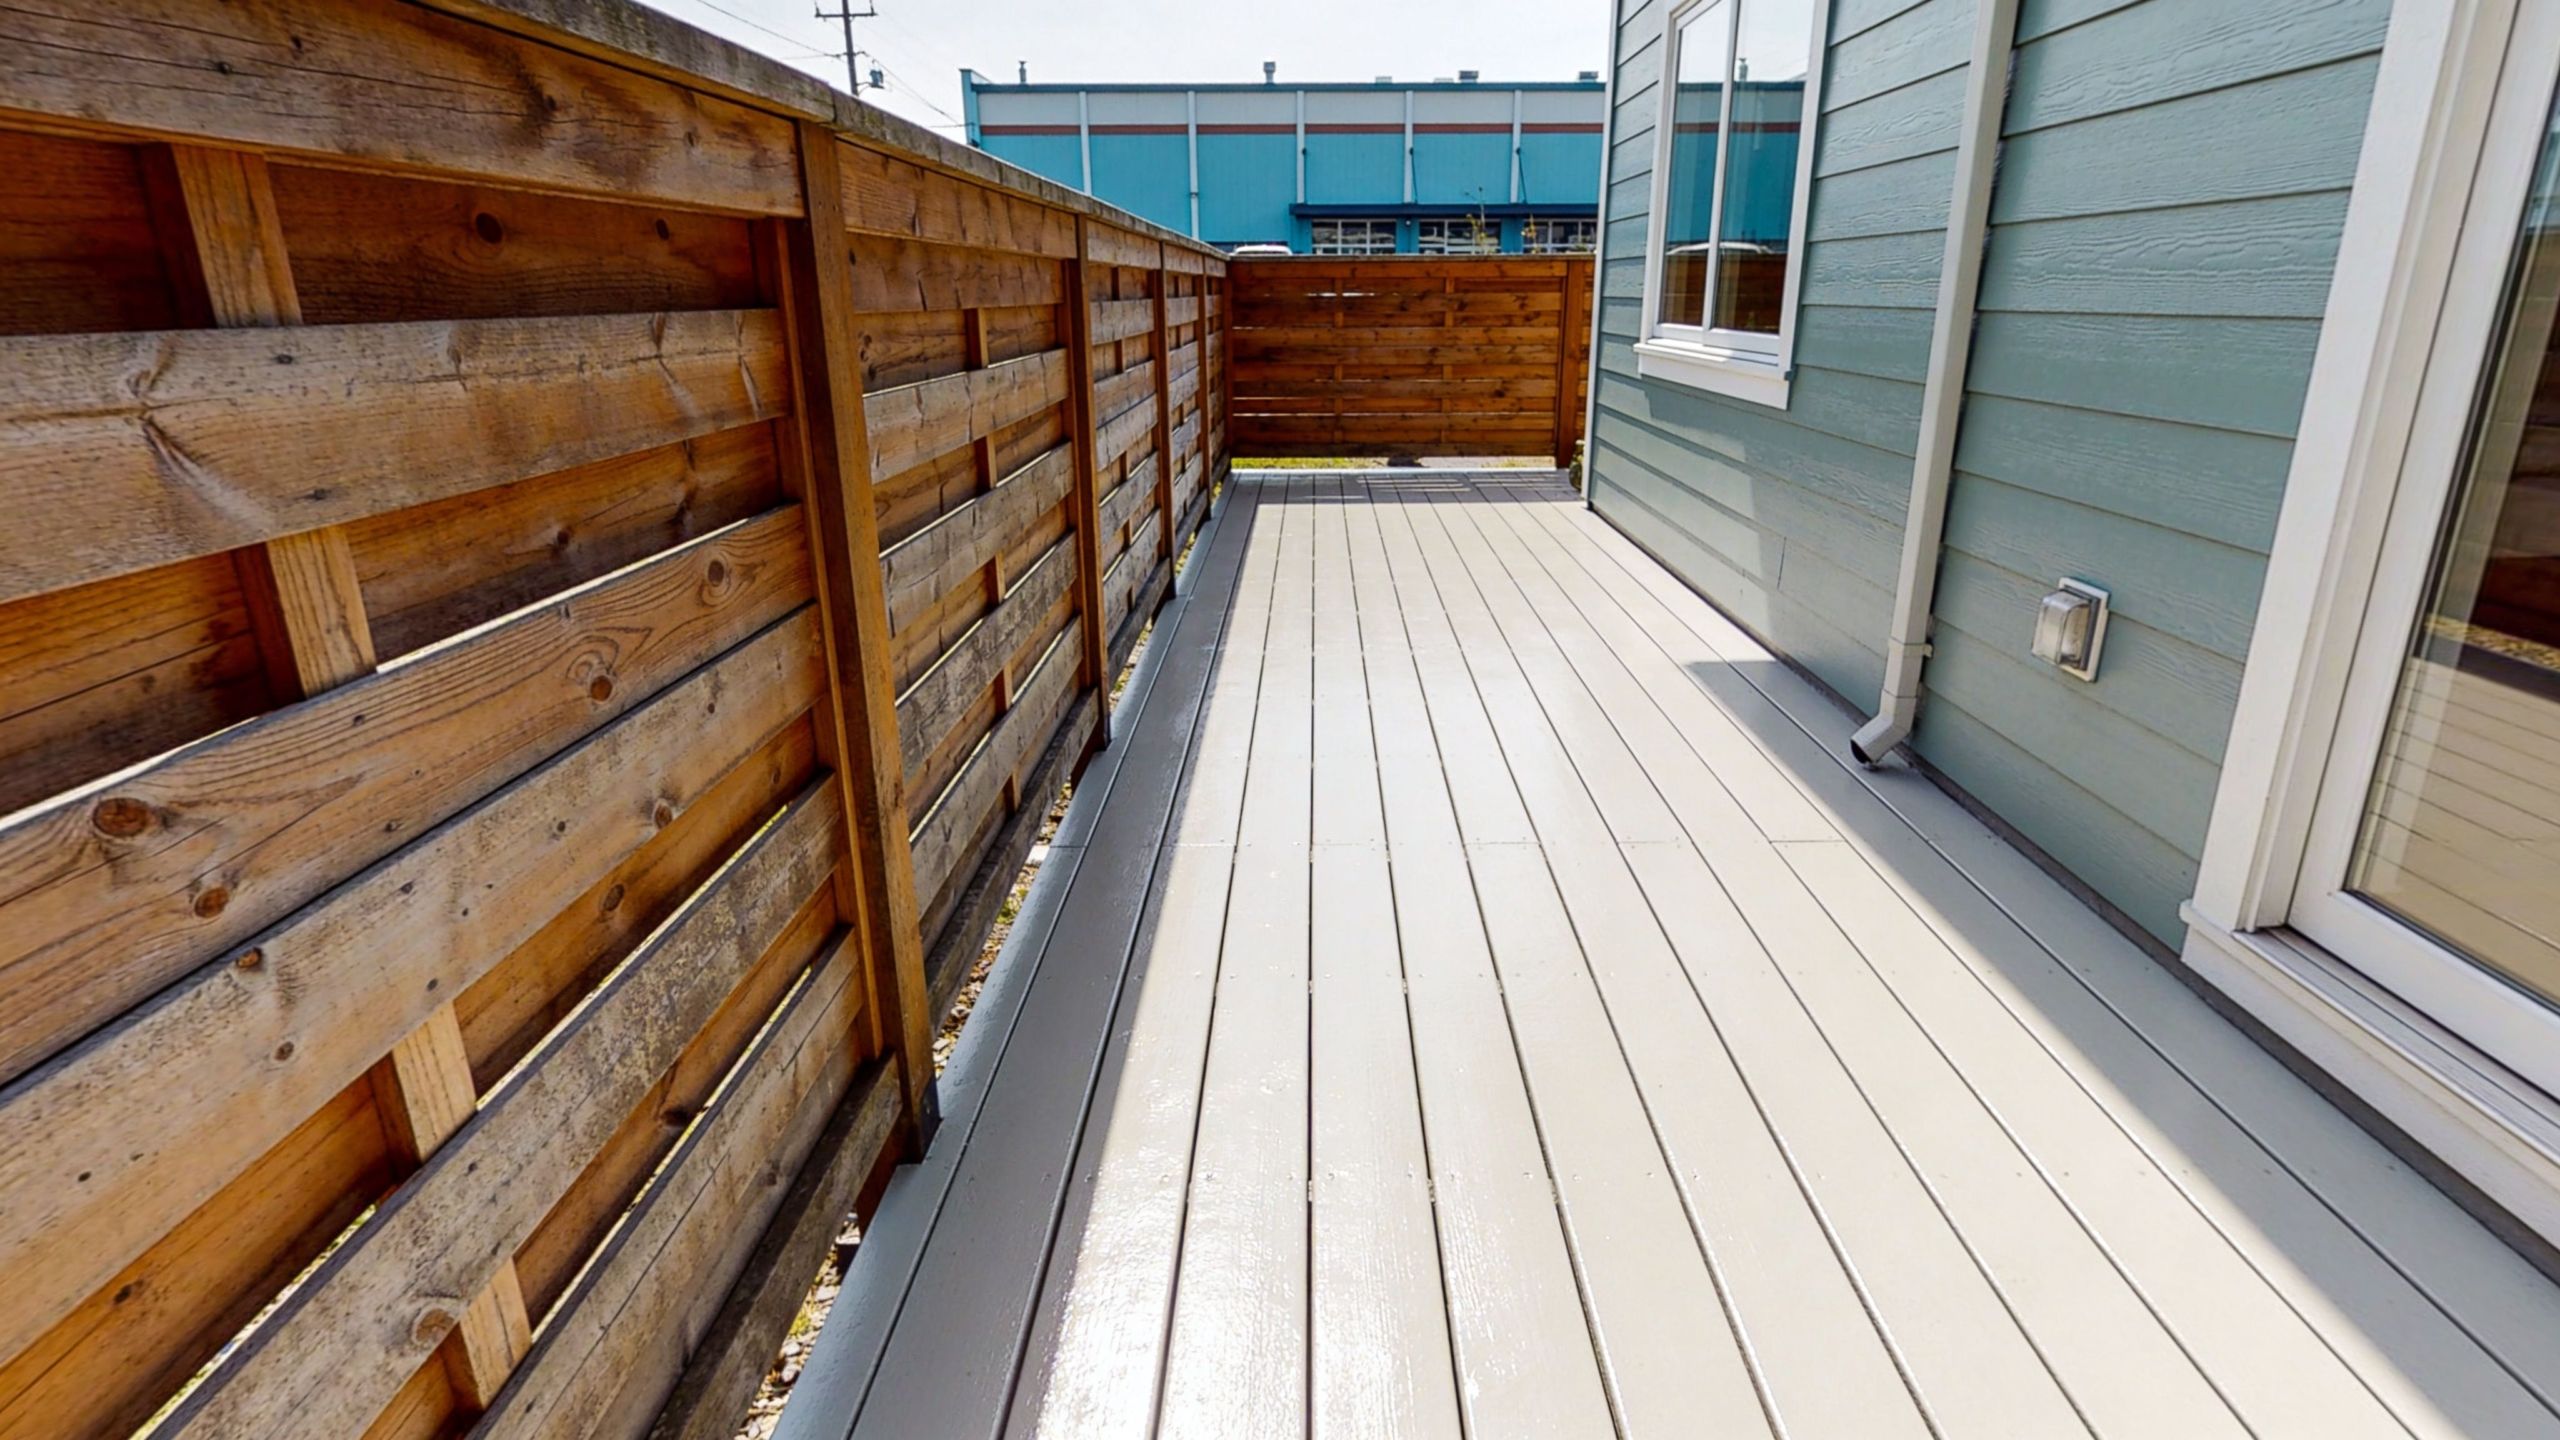
Painted Versus Stained Brick A Durable Choice

A lot of Puget Sound homeowners reach this point after one wet winter too many. The brick looks tired, the color feels dated, and the first instinct is to paint it. Before choosing a finish, it helps to know whether you need full coverage or a treatment that still lets the masonry breathe.

That difference matters here. Our long damp seasons, shaded walls, and slow drying conditions are hard on the wrong coating system.

What paint does

Paint forms a film over the brick. It gives you the biggest visual reset and can cover uneven color, past patchwork, or mismatched additions better than stain.

It also changes the maintenance pattern.

On a rainy Northwest exterior, any coating that traps moisture can become the spot where peeling, blistering, or edge failure starts first, especially on walls that get little sun. Once painted brick begins to fail, repairs usually involve more prep, more scraping, and more touch-up work than homeowners expected at the start.

What stain does

Brick stain soaks into the masonry instead of sitting on top of it. That usually leaves more of the original texture, variation, and character visible, which is why stained brick tends to look more natural from the street.

For homes in the Puget Sound region, that breathable finish is often the better long-term fit on sound, uncoated brick. It handles moisture movement more gracefully, and it is less likely to announce every future maintenance issue with peeling edges.

Side by side comparison

Feature Painting Brick Staining Brick
Appearance More opaque, larger color change More natural, keeps brick character visible
Texture visibility Can soften texture and visual variation Usually preserves both
Moisture behavior Surface film needs careful product selection and prep in wet conditions Works with the masonry instead of covering it with a film
Maintenance pattern More likely to need scraping, spot repair, and repainting over time Usually easier to maintain when the brick is a good stain candidate
Best use case Major color reset, mismatched areas, previously painted brick Tonal correction, muting orange, deepening color, updating without flattening

When paint makes sense

Paint has a place. I recommend it when the brick has already been painted, when different additions need to read as one exterior, or when the design goal is an opaque finish that stain cannot deliver.

It can also be the practical choice when the surface history has already pushed the house into a coating system. In that case, the job is less about preserving raw brick and more about managing that system correctly.

When stain is usually the better fit

Stain is often the smarter option when the brick is bare, sound, and worth keeping visible.

That usually includes:

  • Orange brick that needs to be toned down, not hidden
  • Red brick that needs more depth
  • Homes with good original masonry texture
  • Owners who want lower-fuss maintenance in a damp climate

Practical rule: If you like the texture and dislike the tone, stain is usually the first option to examine.

The catch is that not every brick can be stained well. Some brick is too dense, too damaged, or already sealed in a way that limits absorption. That is why surface testing and prep matter as much as color selection.

Wheeler Painting & Restoration Services handles exterior coatings, sealants, and waterproofing as part of that broader brick decision. On houses near tree cover, salt air, or persistent shade, those details often matter more than the color chip.

If you are weighing brick work against the rest of the exterior scope, this guide on the average cost of painting an exterior of a house helps put the budget in context.

Testing Colors Before You Commit

Small swatches lie. They’re useful for narrowing choices, but they’re not enough to make the final call on outside brick colors.

Brick has texture, shadow lines, mortar joints, and natural variation. All of that changes what a color does at scale.

A person testing paint color samples on an exterior brick wall of a house.

How to test the right way

Use larger samples directly on the house. A test area should be big enough to read from the street, not just from arm’s length.

A solid process looks like this:

  1. Choose more than one wall. Front elevation only isn’t enough if one side gets more light than another.
  2. Place samples near fixed elements. Test next to roofing, trim, and stone that aren’t changing.
  3. Watch them in different weather. Morning, afternoon, overcast, and the end of day all matter here.
  4. Stand in the street. Curb appeal decisions happen from distance, not six inches away.

What homeowners miss most often

They sample color but ignore the existing surface condition. If old coating is peeling or the masonry needs prep, the test won’t tell the full story.

A proper evaluation may also uncover old paint that has to come off before a new system is applied. If that’s part of your project, Wheeler’s overview on how to remove old paint is a helpful starting point.

Give a sample a few days before judging it. In Seattle weather, one cloudy afternoon can make a color seem flatter than it really is.

Wheeler's Portfolio Local Brick Transformations

A brick project in Puget Sound usually starts with a house that looks fine on a sunny listing photo and tired for most of the year in real weather. After a wet winter, the true issues show up. Orange brick turns louder under gray skies, shaded walls collect algae, and old repairs stand out more than the owner ever noticed before.

A split image showing a weathered red brick house compared to a restored grey painted brick home.

Tacoma rambler with strong orange cast

This mid-century rambler had solid brick and a good roofline, but the exterior read too warm for the rest of the updates. In our overcast light, that orange cast felt stronger, not softer. The owners wanted the brick to stay recognizable as brick, so a full paint system was the wrong fit.

A charcoal-leaning stain pulled the color back into balance without covering the masonry texture. That matters in wet climates. Once brick loses its natural variation under a heavy coating, every bit of moss, splash-back, and grime tends to show faster on the surface.

Kent commercial frontage with mismatched additions

This frontage had two problems at once. The original brick and the later addition did not belong together visually, and the owner needed a finish tenants could live with for years.

A breathable coating brought the elevations closer without forcing everything into one flat color. That trade-off made sense here. On a commercial building, perfect visual consistency matters less than a finish that handles moisture, cleans up well, and does not create constant maintenance calls.

Seattle traditional home that needed restraint

Some projects improve because the brick changes. Others improve because the surrounding colors stop fighting it.

This Seattle home had brick with good depth already, especially in the softer light we get for much of the year. The problem was the trim, accent colors, and exterior details pulling attention away from it. Instead of chasing a trend, the better move was to quiet the supporting palette. Cleaner trim colors and darker accents gave the brick room to do its job.

That is a common call around here. Under cloud cover, subtle brick usually ages better than high-contrast color schemes that look sharp for a month and harsh for the next ten years.

Why project photos help

Real project photos are useful because they show what brick looks like after weather, repairs, and daily life, not just right after installation. A strong portfolio of completed projects gives homeowners a better read on how stain, paint, mortar, and trim settle together on finished homes and buildings.

That matters more in Puget Sound than in drier regions. You need to see how a color holds up on north-facing walls, under deep eaves, and through long stretches of damp gray weather. The best brick transformations usually look settled, durable, and right for the house. Not flashy.

Frequently Asked Questions About Brick Exteriors

Is staining only for houses, or does it work for commercial buildings too

It works well for both when the masonry is a good candidate. That’s one reason more property managers are asking about it.

For commercial properties, stained brick is an emerging sustainable option. Verified data states that its use grew 35% in 2025-2026, offering 10+ year durability, 25% lower reapplication costs, and over 70% lower VOCs than traditional paint, making it a practical fit for tenant improvements and facility maintenance from this commercial brick color guidance.

Is painting ever the better option

Yes. If the brick has already been painted, if the facade is highly mismatched, or if the goal is a complete visual reset, paint can be the right tool. The key is going in with realistic expectations about prep and long-term maintenance.

How long does a brick exterior project take

That depends on condition more than color. Clean brick in sound shape moves much faster than brick that needs repairs, coating removal, moisture work, or careful masking around detailed trim.

Weather also matters in Western Washington. Scheduling needs to account for surface dryness and cure conditions, not just crew availability.

What color mistakes should homeowners avoid

The most common ones are:

  • Choosing from online photos only: Screen images don’t match local light.
  • Ignoring undertones: Brick that looks “neutral” can still clash hard with the wrong trim.
  • Going too bright in gray weather: Very light finishes can feel washed out here.
  • Thinking only about curb appeal: Maintenance matters, especially with moisture and tree cover.

Should I update the brick or the trim first

Usually, decide the brick direction first. Brick covers more area, carries more visual weight, and is harder to change later. Once that anchor is set, trim and accent colors fall into place much more easily.


If you’re weighing outside brick colors for a home or commercial property in Seattle, Tacoma, Kent, or the communities in between, Wheeler Painting & Restoration Services can help you evaluate the masonry, test practical options, and choose a finish that makes sense for Puget Sound weather as well as the look you want.

Seattle & Tacoma Home Interior Paint Color Guide

Standing in a paint aisle with a fan deck in one hand and six nearly identical whites in the other is a familiar kind of frustration. One chip looks soft and clean in the store. Then you get home to Seattle, Kent, or Tacoma, hold it up in your living room, and suddenly it looks blue, yellow, or flat.

That’s normal. Choosing a home interior paint color is rarely about picking the prettiest chip. It’s about choosing the color that works with your light, your flooring, your trim, and the way the room gets used.

That’s also why generic advice often falls short around Puget Sound. Our homes deal with overcast daylight, long gray stretches in winter, and green reflections coming in from trees and landscaping. A color that looks balanced in a sunny showroom can shift fast once it’s on a wall here.

Your Guide to Choosing the Perfect Paint Color

A lot of homeowners start in the same place. They want “a warm white,” “a better beige,” or “a gray that doesn’t turn weird.” Then they discover there are dozens of versions of each, and none of them seem clearly right.

That confusion makes sense. The paint market is large, and homeowners have more choices than ever. The 2025 interior paint color trends overview notes that architectural paints accounted for over $82 billion of the global market in 2023, and a 2024 survey found that 68% of U.S. homeowners favor warm earth tones. You can feel that shift in real homes. Cooler grays haven’t disappeared, but warmer neutrals, earthy greens, and softer browns are taking over because they’re easier to live with.

Why homeowners get stuck

The challenge isn't a deficit in color sense. They’re trying to make a permanent decision using a tiny sample under the wrong light.

Common pain points usually look like this:

  • Too many similar choices: One white is creamy, one is gray, one is slightly green, and the labels don’t tell you how they’ll behave in your room.
  • Conflicting opinions: Family members often react to a color based on personal taste, not how it works with the house.
  • Lighting surprises: A neutral that looked calm at noon can look muddy by late afternoon.
  • Fear of making an expensive mistake: Repainting a room because the color feels off is frustrating and avoidable.

Practical rule: The best paint color isn’t the one that looked best under store lighting. It’s the one that still looks right in your home on a cloudy morning and under your lamps at night.

A good color process takes the guesswork down to size. Start with the room, then the light, then the undertone, and only then the final shade. When that order gets reversed, people usually end up chasing a chip they loved in theory but not on the wall.

Color Theory Fundamentals for Your Home

Color theory sounds more complicated than it is. For interior painting, it really comes down to a few practical ideas. You don’t need to think like a designer. You just need to know how colors behave when they sit next to wood floors, countertops, cabinets, and natural light.

A diagram explaining five essential color theory fundamentals for home interior design and wall painting projects.

The five ideas that matter most

  • Hue: This is the basic family. Blue, green, red, yellow, and everything in between.
  • Value: This tells you whether a color is light or dark. A pale beige and a deep mocha can share a similar base, but their value changes the whole feel of the room.
  • Saturation: This is intensity. A muted sage feels quieter than a vivid green.
  • Warm and cool: Warm colors lean toward red, yellow, and brown. Cool colors lean toward blue, green, and violet.
  • Harmony: This is how colors relate to each other across a home.

Warm vs cool in real rooms

The easiest way to think about warm and cool is this. Warm colors feel like lamp light. Cool colors feel like an overcast afternoon.

In a Puget Sound home, that difference matters. A warm neutral can soften a north-facing room and make it feel more welcoming. A cool neutral can feel crisp in the right setting, but it can also go cold fast if the room already gets blue-gray light.

If you want a deeper look at how color affects mood and perception, this piece on color psychology in interior design is a useful companion. It’s helpful when you’re trying to decide whether a room should feel calm, grounded, energetic, or quiet.

Harmony matters more than trendiness

Homeowners often ask for a single perfect color. In practice, what works better is a coordinated palette.

A good palette usually has:

  • A main wall color that can carry most of the house
  • A supporting neutral for nearby spaces
  • One deeper color for contrast, built-ins, or an accent wall
  • A trim and ceiling white that doesn’t fight the wall color

A house feels finished when the colors relate to one another, not when each room tries to stand alone.

That’s the difference between a home that feels smooth and intentional and one that feels like every room was chosen in isolation.

Why Light and Undertones Are Your Most Important Guides

Most paint mistakes don’t happen because the color was ugly. They happen because the undertone was wrong for the room.

A paint can read beige, gray, white, or greige at first glance. Underneath that main impression, though, it may lean pink, green, yellow, blue, or violet. That hidden bias is what shows up once the paint meets your flooring, your cabinets, and your lighting.

A living room interior featuring a wall sample test with gray and blue paint swatches on the floor.

What undertones actually do

Undertones explain why two grays can behave completely differently. One gray looks soft and balanced. Another turns green by dinner time. One white reads creamy and inviting. Another feels stark next to warm trim.

You’ll see this most clearly with neutrals:

  • Gray with blue undertones can feel crisp, but it can also go cold in overcast rooms
  • Gray with green undertones often reacts strongly to trees, lawns, and landscaping outside
  • Warm beige or greige usually feels steadier in homes with softer daylight and warm interior finishes
  • Off-whites can look either clean or dingy depending on the cabinet, countertop, and bulb temperature beside them

Why Puget Sound homes are different

Homes in Seattle, Kent, Tacoma, and the communities in between don’t get the same kind of light you see in many national design articles. Our daylight is often cooler and flatter. North-facing rooms already lean blue-gray. Add evergreen reflections outside the windows, and some neutrals pick up a green cast that never showed in the store.

That’s why local color selection needs more restraint. The wrong cool neutral can feel lifeless here. The right warm neutral can still feel clean without turning yellow.

If a homeowner says, “This color looked fine on the sample card but strange on my wall,” lighting is usually the reason.

How LRV helps you choose better

Light Reflectance Value, or LRV, measures how much light a paint color reflects on a scale from 0 to 100. It’s one of the most practical tools for selecting a home interior paint color because it tells you how heavy or bright a color may feel once it covers the full room.

The LRV guide for interior paint notes that for dimly lit Puget Sound interiors, choosing a color with an LRV of 65 to 75 can make a space feel 15% to 25% brighter without the yellowing that can happen with very high-LRV paints under artificial light.

That range works well in a lot of local homes because it balances brightness with control. Too dark, and the room feels flat. Too bright, and the color can bounce warm lamp light in a way that changes the whole look.

A practical way to read a room

Use this as a quick filter before you fall in love with a color chip:

Room condition What usually works better
North-facing room with limited sun Warm neutral or soft off-white with enough body to avoid looking cold
Room surrounded by trees Neutrals that resist going green
Open-concept main floor Mid-light neutrals that connect spaces without sharp color breaks
Small room with weak daylight Balanced colors with enough LRV to keep the room from closing in

Undertones decide whether the color belongs. LRV decides whether it has the right weight in the room. You need both.

Selecting the Right Paint Finish for Every Surface

Color gets most of the attention, but finish changes how that color performs. The sheen affects durability, washability, and how much wall texture shows after the paint dries. The same color in matte and semi-gloss can look like two different products.

A comparison of four different wall paint finishes including matte, eggshell, satin, and semi-gloss sheen levels.

The finish spectrum in plain English

Finish Look Best use Watch for
Flat or matte Soft, low sheen Ceilings, low-traffic adult spaces Less washable
Eggshell Slight glow Living rooms, bedrooms, halls Can still show prep flaws if wall repair is rough
Satin Noticeably smoother Family rooms, kids’ rooms, some commercial interiors Highlights patches and roller marks more than eggshell
Semi-gloss Reflective and durable Trim, doors, kitchens, baths Shows surface defects clearly
High-gloss Very shiny Specialty accents, select millwork Demands excellent prep

What works in everyday homes

Flat paint hides imperfections well, which is why many ceilings still get a low-sheen finish. If you’re trying to minimize surface flaws overhead, that’s usually the safe choice. For more detail on that specific decision, this guide on choosing the right finish for ceiling paint is worth a look.

For walls, eggshell is a dependable middle ground. It has enough softness to keep walls from looking shiny, but it’s easier to maintain than a dead-flat finish. Satin can work well too, especially in active households, but it puts more pressure on the prep work. Uneven texture, drywall patches, and lap marks show up faster as sheen goes up.

Rooms that need tougher finishes

Bathrooms, laundry rooms, mudrooms, and kitchens ask more from paint. Moisture, wiping, and frequent use change the equation.

A simple rule set helps:

  • Trim and doors: Semi-gloss is still a strong choice because it cleans well and gives crisp separation from the wall color.
  • Bathrooms: Use a finish that handles moisture better than flat wall paint.
  • Busy hallways: Eggshell or satin usually gives a better balance of appearance and durability.
  • Commercial interiors or tenant spaces: Choose finish based on traffic, cleaning needs, and how perfect the walls are.

The shinier the finish, the better the cleanup. The trade-off is that every patch, dent, and sanding miss becomes easier to see.

That trade-off matters. A beautiful color can still disappoint if it’s put in the wrong sheen.

Room-by-Room Palettes for Puget Sound Homes

A color palette works best when it respects how each room functions. The right home interior paint color for a bedroom may not be the right move for an entry, a kitchen, or an open living room. Around Puget Sound, the strongest palettes usually lean warm, grounded, and flexible.

There’s also a resale argument for keeping things steady. Zillow’s 2023 analysis of over 250,000 home sales found that homes with warm neutral interiors sold for an average of 1.5% more according to the Benjamin Moore color trend reference. That doesn’t mean every room should be beige. It means buyers tend to respond well to interiors that feel warm, livable, and easy to picture as their own.

Living room and main area palettes

In many Seattle and Tacoma homes, the living room does a lot of work. It connects to the kitchen, receives mixed daylight, and needs to feel comfortable in both summer and winter.

A reliable direction is:

  • Main wall color: warm neutral or soft greige
  • Trim: a white that doesn’t read icy
  • Accent option: muted green, earthy clay, or soft brown
  • Textiles and decor: natural wood, woven textures, black accents used sparingly

If you like richer contrast, a brown and blue scheme can work beautifully when the blue stays controlled and the brown adds warmth. This guide to brown and blue interiors gives some helpful visual ideas for that balance.

For more living-room-specific inspiration, this article on interior design paint colors for living room spaces can help narrow the field.

Bedrooms and offices

Bedrooms usually benefit from quieter color movement. That doesn’t always mean pale. It means the color shouldn’t fight the room.

Good options include:

  • dusty green
  • warm taupe
  • soft beige
  • muted blue used carefully in rooms with decent natural light

Home offices are a little different. They need focus without feeling sterile. Warm neutrals still do a lot of the heavy lifting, especially if the room doubles as a guest room.

Kitchens, baths, and transition spaces

Hallways, entries, and kitchens need colors that connect rooms without causing abrupt shifts. In homes with open layouts, people often overcomplicate color decisions.

A practical approach is to treat the house as one palette:

Space Best palette direction
Entry and hallway Slightly deeper warm neutral to ground the transition
Kitchen Clean but not stark wall color that works with cabinet tone
Bathroom Soft neutral with enough warmth to resist feeling cold under task lighting
Dining area Opportunity for a richer supporting shade if it still ties back to the main neutral

A cohesive house usually has one lead neutral, one or two supporting colors, and a few darker moments for depth.

That’s enough variety to feel intentional without making each doorway a hard reset.

The Professional Method for Sampling and Testing Paint

The fastest way to waste money on paint is to skip proper sampling. Small chips are helpful for narrowing options, but they are not enough for a final decision. Paint covers a large surface, and color changes when it expands across a wall.

A man stands in a bright room, examining six different paint color swatches on a wall.

How to test paint the right way

A good sampling process is simple, but it needs discipline.

  1. Narrow your options first
    Pick two or three strong candidates. More than that usually creates noise.

  2. Use large sample areas
    Don’t rely on a tiny brushout. Paint a large board or a meaningful wall section so you can read the color.

  3. Move the sample around
    If you sample on boards, move them from wall to wall. A color near a window can behave very differently on an interior wall.

  4. Look in morning, afternoon, and evening
    Don’t decide at one time of day. Cloud cover, shadows, and indoor lighting all affect the result.

  5. Check the sample next to fixed finishes
    Flooring, counters, backsplash tile, cabinets, brick, and trim all influence how paint reads.

  6. Remove losing options quickly
    Once a color is clearly wrong, stop giving it attention.

What homeowners often miss

The biggest mistake isn’t choosing the wrong color family. It’s evaluating the sample in isolation.

A warm white may look perfect until it sits beside cool quartz. A soft gray may seem balanced until it reflects green from the yard. Sampling is where those conflicts show up before the whole room gets painted.

This video walks through practical paint-selection thinking and is useful if you want to see the process in action:

When to trust your first reaction

Your first reaction matters, but only after you’ve seen the color in real conditions. If a sample keeps bothering you, there’s usually a reason. Maybe it’s too pink, too gray, too bright, or just disconnected from the room.

Good sampling doesn’t make the decision harder. It removes the colors that were never right in the first place.

That’s what saves time. Not more samples. Better testing.

Why Partnering with a Local Painting Pro Matters

Paint looks simple from the outside. Pick a color, buy the product, put it on the wall. In practice, getting a result that still looks right months later takes more judgment than one might assume.

That’s especially true in this region. The issue isn’t just applying paint cleanly. It’s reading the room correctly before the first gallon gets opened.

Local experience solves local problems

A broad national article can tell you warm neutrals are popular. It can’t stand in your Kent living room and notice the north light, the dark fir floors, the green cast from the backyard, and the way your lamps shift the walls at night.

That kind of judgment matters because color regret is common. A Pacific Northwest paint survey summary reports that 62% of Pacific Northwest homeowners repainted within two years due to color dissatisfaction from lighting mismatches. That’s a costly redo homeowners would rather avoid.

A local pro helps with more than labor:

  • Room-by-room color filtering: narrowing choices based on exposure and existing finishes
  • Surface prep: drywall repair, patch blending, sanding, caulking, and priming
  • Product matching: selecting coatings that fit the room’s use and moisture conditions
  • Execution: consistent cut lines, proper coverage, and finish selection that suits the surface

It’s also about process

Homeowners often search for interior painters near me when their true need is confidence. They want someone who can spot problems early and keep the project from turning into a series of expensive guesses.

Facility managers and property owners have the same concern on a larger scale. In tenant improvements, office repainting, and occupied commercial spaces, the color has to work, the finish has to hold up, and the schedule has to be realistic. A local contractor who understands smaller to mid-size projects can often make those moving parts feel much more manageable.

Paint is cheap compared to repainting. Expertise is what keeps a color choice from becoming a correction job.

That’s the value. Not just coating walls, but reducing risk.

Frequently Asked Questions About Interior Painting

A few questions come up on almost every interior painting project, especially when homeowners are trying to balance looks, durability, and air quality.

Common questions and practical answers

Question Short Answer
What’s the safest color family if I don’t want surprises? Warm neutrals are usually the safest starting point because they tend to be steadier in Puget Sound light.
Should every room be the same color? Not necessarily. It’s better to use a coordinated palette than force one color into every room.
Is flat paint ever a good choice for walls? Yes, in low-traffic spaces or where hiding surface flaws matters more than washability.
What finish is best for trim? Semi-gloss remains a dependable choice for trim and doors because it cleans well and separates nicely from wall finishes.
Do ceilings have to be bright white? No. A ceiling color should relate to the wall and the room’s light, not just default to the brightest white available.

Are low-VOC and zero-VOC paints durable enough

Usually, yes, but product selection and prep matter.

The undertone and paint behavior guide notes that post-2024 EPA regulations have driven a 28% market shift to zero-VOC formulas. It also notes an important trade-off in humid climates like Puget Sound. Some dark neutrals may yellow 15% faster in high humidity without proper primers and sealant application.

That means low-VOC and zero-VOC paints can perform well, but they shouldn’t be treated like all formulas behave exactly the same.

What’s the best paint for bathrooms and other humid rooms

Use a product and finish suited for moisture, and make sure the surface is properly prepared before paint goes on. Bathrooms fail early when there’s poor ventilation, weak prep, or the wrong sheen for the conditions.

How do I choose a ceiling color

Most ceilings look best when they support the wall color instead of competing with it. In some rooms, that means a soft white. In others, it means a toned-down version of the wall color or a neutral that keeps the room from feeling chopped up.

How many colors should I test

Two or three final contenders is usually enough. If you’re testing eight or ten, the problem usually isn’t lack of options. It’s lack of filtering.

Fewer, better candidates lead to better decisions than a wall full of maybes.

If you're planning a home update, remodel, tenant improvement, or repaint in Seattle, Kent, Tacoma, or the communities in between, Wheeler Painting & Restoration Services can help you sort through color, finish, prep, and project scope with a clear local perspective. Whether you need interior painting, drywall repair, restoration work, or a broader residential or commercial renovation partner, their team brings practical Puget Sound experience that helps projects run smoothly from estimate to final walkthrough.

Kitchen Colors With Dark Cabinets: Expert Guide

You’re probably standing in your kitchen with a few paint chips in hand, looking at your dark cabinets and thinking two things at once. They look beautiful, and choosing the wrong wall color could make the whole room feel too heavy.

That tension is common in homes across Seattle, Kent, Tacoma, and the towns in between. Dark cabinets can look polished and grounded, but in the Puget Sound region, our softer daylight changes how every wall color reads. A white that looked clean in the store can turn cold at home. A greige that seemed safe can go flat by late afternoon.

The good news is that dark cabinetry gives you a strong starting point, not a problem to solve. Once you understand how undertones, light, flooring, and sheen work together, kitchen colors with dark cabinets become much easier to narrow down.

Why Dark Cabinets Are a Great Choice for Your Home

A lot of homeowners second-guess dark cabinets right after installation. The room suddenly has more contrast, more presence, and more personality than it did before. That can feel risky for a day or two.

In practice, dark cabinets are one of the easier foundations to design around. They already bring visual structure to the room, so the rest of the palette can do one of two jobs. It can either lighten and balance the kitchen, or lean into the mood and make the space feel bespoke.

A modern, minimalist kitchen featuring dark wood cabinetry, a light stone island, and sleek integrated appliances.

Why homeowners keep choosing dark cabinetry

Dark cabinetry has stayed popular because it does more than look dramatic. Dark finishes hide dirt, smudges, and scratches better than lighter cabinets, and darker hues including matte black, deep greens, and navy blues are identified as projected 2025 must-have color trends in this dark cabinet trend overview.

That matters in real kitchens, not showroom kitchens. If you cook often, have kids, entertain, or move quickly through the space every day, dark lower cabinets usually wear daily life better.

A few practical upsides homeowners notice right away:

  • Less visible wear: Fingerprints, minor scuffs, and day-to-day marks don’t jump out as quickly.
  • Stronger contrast: Light counters, tile, and trim read cleaner against a dark cabinet line.
  • Flexible styling: Dark finishes work with brass, chrome, black hardware, wood accents, and stone surfaces.
  • Longer design life: Dark cabinets usually don’t feel trendy in the wrong way. They tend to age better than highly specific novelty colors.

What dark cabinets do to the room

Dark cabinets make a kitchen feel more grounded. Sometimes they also make it feel a little smaller, especially in homes where natural light is indirect most of the year.

That’s not automatically a downside. In many Puget Sound homes, especially in older neighborhoods around Seattle and Tacoma, that slight visual compression can make a kitchen feel cozier and more intentional. The key is balance. You don’t want the room to feel dim, boxed in, or muddy.

Practical rule: If the cabinets are the heavy visual element, the walls, counters, ceiling, and lighting need to do the lifting.

That’s why color selection matters so much after cabinet installation. The cabinet color is only half the decision. The room around it decides whether the final result feels rich or oppressive.

Understanding Color Principles for Dark Cabinets

Most paint mistakes with dark cabinets come from one problem. Homeowners choose a wall color by itself instead of choosing a wall color in relation to the cabinet undertone.

Start there first. Ask whether your cabinets read warm or cool.

Warm dark cabinets usually include espresso, walnut, mahogany, and dark brown stains with red or golden undertones. Cool dark cabinets usually include charcoal, slate, deep gray, navy, and some black finishes.

Match the wall to the cabinet undertone

When undertones fight each other, the room feels off even if every individual material is attractive.

One way to simplify it:

  • Cool cabinets: Pair well with light gray, soft white, and cooler off-white walls.
  • Warm cabinets: Usually look better with beige, taupe, creamy white, and warmer greige walls.
  • Mixed finishes: Need a reference point. If your counters are warm but the cabinets are cool, the backsplash or floor often has to bridge the gap.

If you have navy or charcoal cabinets, a yellow-beige wall usually looks disconnected. If you have espresso cabinets with warm brown depth, a stark blue-white can feel harsh.

Use LRV to avoid a heavy room

Homeowners don’t need to become paint chemists, but one measurement does help. Light Reflectance Value, or LRV, tells you how much light a color reflects.

For kitchen colors with dark cabinets, wall colors in the 60–75 LRV range are often the safest place to start. Soft grays, taupes, and warm off-whites in that range help balance dark cabinetry and keep the room from feeling heavy, especially in kitchens with moderate natural light, as noted in this guidance on light and dark cabinet color balance.

A graphic design titled Mastering Kitchen Color with Dark Cabinets outlining three tips for balanced interior design.

That range gives you enough reflectivity to brighten the room without creating a jarring showroom-white contrast.

Contrast should feel intentional, not loud

A lot of homeowners think they need maximum contrast. They don’t. They need the right contrast.

Here’s what usually works better in lived-in homes:

Contrast level What it looks like When it works
Low contrast Warm off-white or soft greige with espresso cabinets Traditional, transitional, and cozy kitchens
Medium contrast Soft gray or light taupe with navy or charcoal cabinets Most Puget Sound homes
High contrast Crisp white walls with black or near-black cabinets Modern kitchens with strong light and simple finishes

A balanced kitchen usually has one dramatic element, not five. If the cabinets already command attention, the wall color should support them.

A quick test before you commit

Tape large samples on multiple walls. Then check them in morning light, late afternoon, and after your overhead lights are on.

If the sample suddenly looks green, pink, or dingy at night, that’s not a small issue. In a kitchen, you’ll notice it every day. The right color should hold together across changing conditions, especially here in Western Washington where daylight shifts more than people expect.

Proven Paint Color Palettes for Your Kitchen

Once you know whether your cabinets lean warm or cool, choosing a palette gets easier. The goal isn’t to find a “perfect” paint color in isolation. The goal is to choose a wall color that makes the cabinets look intentional, the counters look cleaner, and the room feel brighter than the weather outside.

Sample boards are important. A color that looks excellent in a paint deck can completely change next to a dark stained cabinet door or a slab backsplash.

Three palette directions that usually work

Some homeowners want a lighter kitchen without repainting cabinets. Others want a moodier result that still feels clean. Most successful kitchens with dark cabinets fall into one of these directions:

  • Crisp and clean neutrals: Good for black, charcoal, and navy cabinets when you want contrast.
  • Warm and inviting tones: Better for espresso, chocolate, or brown-black cabinetry that needs softness.
  • Cool and refined hues: Useful when you want a composed, designer-led look without going sterile.

If you’re collecting inspiration before you buy samples, this roundup of blue kitchen visuals for designers can help you see how cooler hues behave with cabinetry and metal finishes.

Paint color ideas for dark kitchen cabinets

Palette Type Paint Color Example Notes
Crisp and clean Sherwin-Williams Alabaster SW 7008 Softer than stark white. Good with charcoal, black, and navy cabinets.
Crisp and clean Benjamin Moore White Dove OC-17 A dependable off-white for kitchens that need brightness without a cold cast.
Crisp and clean Sherwin-Williams Crushed Ice SW 7647 A light gray that can work with cool dark cabinets in moderate daylight.
Warm and inviting Sherwin-Williams Accessible Beige SW 7036 Useful with espresso or dark brown cabinets when you want warmth without yellowing the room.
Warm and inviting Benjamin Moore Pale Oak OC-20 A soft greige that often bridges warm wood tones and lighter counters well.
Warm and inviting Sherwin-Williams Agreeable Gray SW 7029 A flexible greige, but it needs testing because local light can shift it.
Cool and tailored Benjamin Moore Classic Gray OC-23 Very light, subtle, and often cleaner than many beige-leaning neutrals.
Cool and tailored Sherwin-Williams Sea Salt SW 6204 Best used carefully. It can look calm and refined, but test it hard in overcast light.
Cool and tailored Benjamin Moore Gray Owl OC-52 A soft gray choice for cool cabinet finishes and simple backsplash materials.

What works and what usually doesn’t

A few practical calls from jobsite experience in the Puget Sound area:

  • Works well: Off-whites with a little softness. They brighten the room without fighting dark cabinets.
  • Often works: Light greiges that can connect wood floors, stone counters, and cabinet color in one move.
  • Risky: Bright, stark whites in kitchens that don’t get direct sun. They can look cold fast.
  • Also risky: Muddy mid-tone grays. Against dark cabinets, they often flatten the whole room.

If your kitchen has a lot of fixed finishes already, don’t choose the paint first. Choose the paint last. Cabinets, counters, flooring, and backsplash lock in the undertone story. Paint is the adjustment layer.

For homeowners comparing cabinet and wall combinations from the same brand family, this guide to Sherwin-Williams kitchen cabinet colors is a useful reference point for narrowing compatible directions.

Bring your cabinet sample, countertop sample, and flooring sample together before making a final paint call. Separately, each one can look right. Together, they tell the truth.

Lighting and Finishes for Puget Sound Homes

The same paint color won’t behave the same way in Phoenix and Seattle. That’s why generic kitchen advice often fails here.

Across the Puget Sound region, natural light is softer, cooler, and more diffused for much of the year. In a kitchen with dark cabinets, that means color depth increases quickly. A soft gray can become dull. A warm white can lose warmth. A dark blue cabinet can suddenly dominate the room by late afternoon.

A modern kitchen featuring dark cabinets, light marble countertops, stainless steel appliances, and a beautiful window view.

Good lighting keeps paint honest

For kitchens with dark cabinetry, layered lighting works best at 3000 K to 3500 K with a CRI of 90+, because higher CRI helps off-white, beige, and soft gray walls keep their intended hue instead of turning muddy under artificial light, according to this article on lighting for dark cabinet color schemes.

That sounds technical, but the practical takeaway is simple. Cheap bulbs can make a well-chosen paint color look wrong.

Use layers instead of relying on one overhead fixture:

  • Ambient lighting: Recessed lights or ceiling fixtures for general visibility
  • Task lighting: Under-cabinet strips over work surfaces
  • Accent lighting: Pendants, sconces, or interior cabinet lighting for depth

When all three are working together, dark cabinets look richer and more dimensional.

Sheen matters more than people think

Paint sheen changes how much light a surface throws back into the room. In kitchens around Kent, Seattle, and Tacoma, that matters because winter daylight is limited and often gray.

A few practical rules hold up well:

  • Walls in matte or eggshell: Usually the safest choice. They soften reflections and hide surface imperfections.
  • Trim in satin or semi-gloss: Adds definition and reflectivity around doors and windows.
  • Ceilings with a touch of sheen when needed: In darker kitchens, a little extra reflectivity overhead can help.

If your project includes stained wood elements, matching the depth and finish of those surfaces matters too. This guide on how to stain wood cabinets is useful for understanding how stain tone and finish affect the final color balance in the room.

In Western Washington, light quality is part of the color palette. If you ignore that, the paint can still be “right” on paper and wrong in the room.

What fails most often

The most common lighting mistake is combining dark cabinets with cool, low-quality bulbs and a flat middle-gray wall. That combination tends to kill contrast, flatten surfaces, and pull strange undertones out of otherwise decent paint colors.

The better move is warm-neutral lighting, cleaner wall color, and enough layered light to keep corners from disappearing.

Coordinating Floors, Ceilings, and Backsplashes

A kitchen doesn’t read wall color by itself. It reads the whole room at once.

That’s why many homeowners still feel stuck even after narrowing down paint. The walls may be fine, but the floor is too close to the cabinet value, the ceiling absorbs light, or the backsplash introduces a competing undertone. Good kitchen colors with dark cabinets depend on hierarchy. Something needs to be dark, something needs to be light, and the in-between materials need to connect them.

A modern galley kitchen featuring dark charcoal cabinets, white marble countertops, patterned tile backsplash, and light flooring.

Floors should support the cabinets, not disappear into them

In Western Washington, a slightly lighter floor finish like light oak can bounce useful light back into a room with dark cabinets, and ceiling finishes with more sheen can increase perceived brightness even when the ceiling color isn’t a pure white, as discussed in this article on color schemes for kitchens with dark cabinets.

That doesn’t mean every floor needs to be pale. It means the floor should make a deliberate contribution.

Three common floor directions:

  • Lighter wood or wood-look flooring: Often the safest move in Seattle-area homes with softer daylight.
  • Mid-tone flooring: Works if the undertone clearly relates to the cabinetry and counters.
  • Dark flooring with dark cabinets: Can work, but only if ceilings, walls, and counters are doing enough to keep the room from closing in.

If you’re comparing wood and gray-toned floor directions, this 2026 grey kitchen flooring guide is a helpful visual resource for seeing how gray flooring shifts the mood of a kitchen.

Ceilings and backsplashes do more than fill space

Ceilings are often treated as an afterthought. They shouldn’t be. In darker kitchens, the ceiling is one of your biggest light-management tools.

A few good approaches:

Surface Safer choice Bolder choice
Ceiling Soft white with a bit of reflectivity Very light greige if trim and walls stay bright
Backsplash Warm white tile or soft stone Patterned tile with controlled contrast
Grout Mid-light neutral Slightly darker grout for definition

For ceiling finish questions, this overview of the right finish for ceiling paint helps clarify where flat works and where a touch of sheen helps more.

The whole-room hierarchy that usually works

When a kitchen feels professionally pulled together, it usually follows a simple order:

  1. Cabinets anchor the room
  2. Counters and backsplash create contrast
  3. Walls soften the transition
  4. Flooring stabilizes the palette
  5. Ceilings and trim restore light

That’s the sequence many online guides miss. They focus only on wall paint, but the room works as a system. If one finish is too dark, too yellow, too gray, or too shiny, it changes how every other finish feels.

From Plan to Paint Your Next Steps with Wheeler Painting

A lot of Puget Sound homeowners hit the same point. The dark cabinets look right, but the wall color still feels uncertain once you bring home samples and see them on a gray Seattle morning or under warm light at dinner.

That hesitation is normal. Dark cabinets give a kitchen structure, but they also make color mistakes easier to see. The good news is that the final decision usually gets clearer once you narrow the room down to its fixed surfaces and test paint in the actual space.

A simple way to make the final call

Start with the finishes that are expensive or inconvenient to change. In most kitchens, that means cabinets, counters, flooring, and often the backsplash. Wall color comes after that, not before.

Then test with discipline:

  • Use large samples: Paint sample boards or peel-and-stick sheets need enough size to show undertone. A tiny chip will not tell you much next to dark cabinetry.
  • Move the sample around the room: North-facing kitchens in Seattle, Kent, and Tacoma often read cooler along one wall and noticeably warmer under artificial light.
  • Check the sample at more than one time of day: Morning cloud cover, a break of afternoon sun, and evening task lighting can all shift the same color.
  • Compare it beside every fixed finish: Cabinets matter, but so do the floor, counter edge, tile, and trim.

If flooring is still part of the decision, this guide to flooring color considerations is useful because floor tone often decides whether dark cabinets feel grounded or too heavy.

When to bring in a contractor

Some kitchens only need paint. Others need wall repair, trim work, cabinet touch-up, lighting updates, or better coordination between trades. That is where projects tend to drift off course.

I see it often in older Puget Sound homes. A homeowner picks a wall color that looked balanced in the store, then the existing drywall texture, yellowed ceiling paint, or outdated can lights throw everything off once the work starts. Fixing that late costs more than sorting it out at the front end.

Wheeler Painting & Restoration Services handles color consultation, interior painting, drywall work, cabinet-related finishing, and broader remodel coordination across the Puget Sound area.

The right kitchen color holds up in real life. It still works on a dark winter afternoon, under under-cabinet lighting, and during the few bright summer hours when the room gets full sun.

What to do next

Pull together your cabinet, counter, backsplash, and floor samples first. Narrow your paint choices to a short list. Then test them where you live, with your lighting, in your kitchen.

That slower process usually prevents the expensive mistake. It also gives you a kitchen that feels calm, consistent, and right for the way homes in this part of Washington look through the year.

Best Paint for Bathrooms in Puget Sound Homes

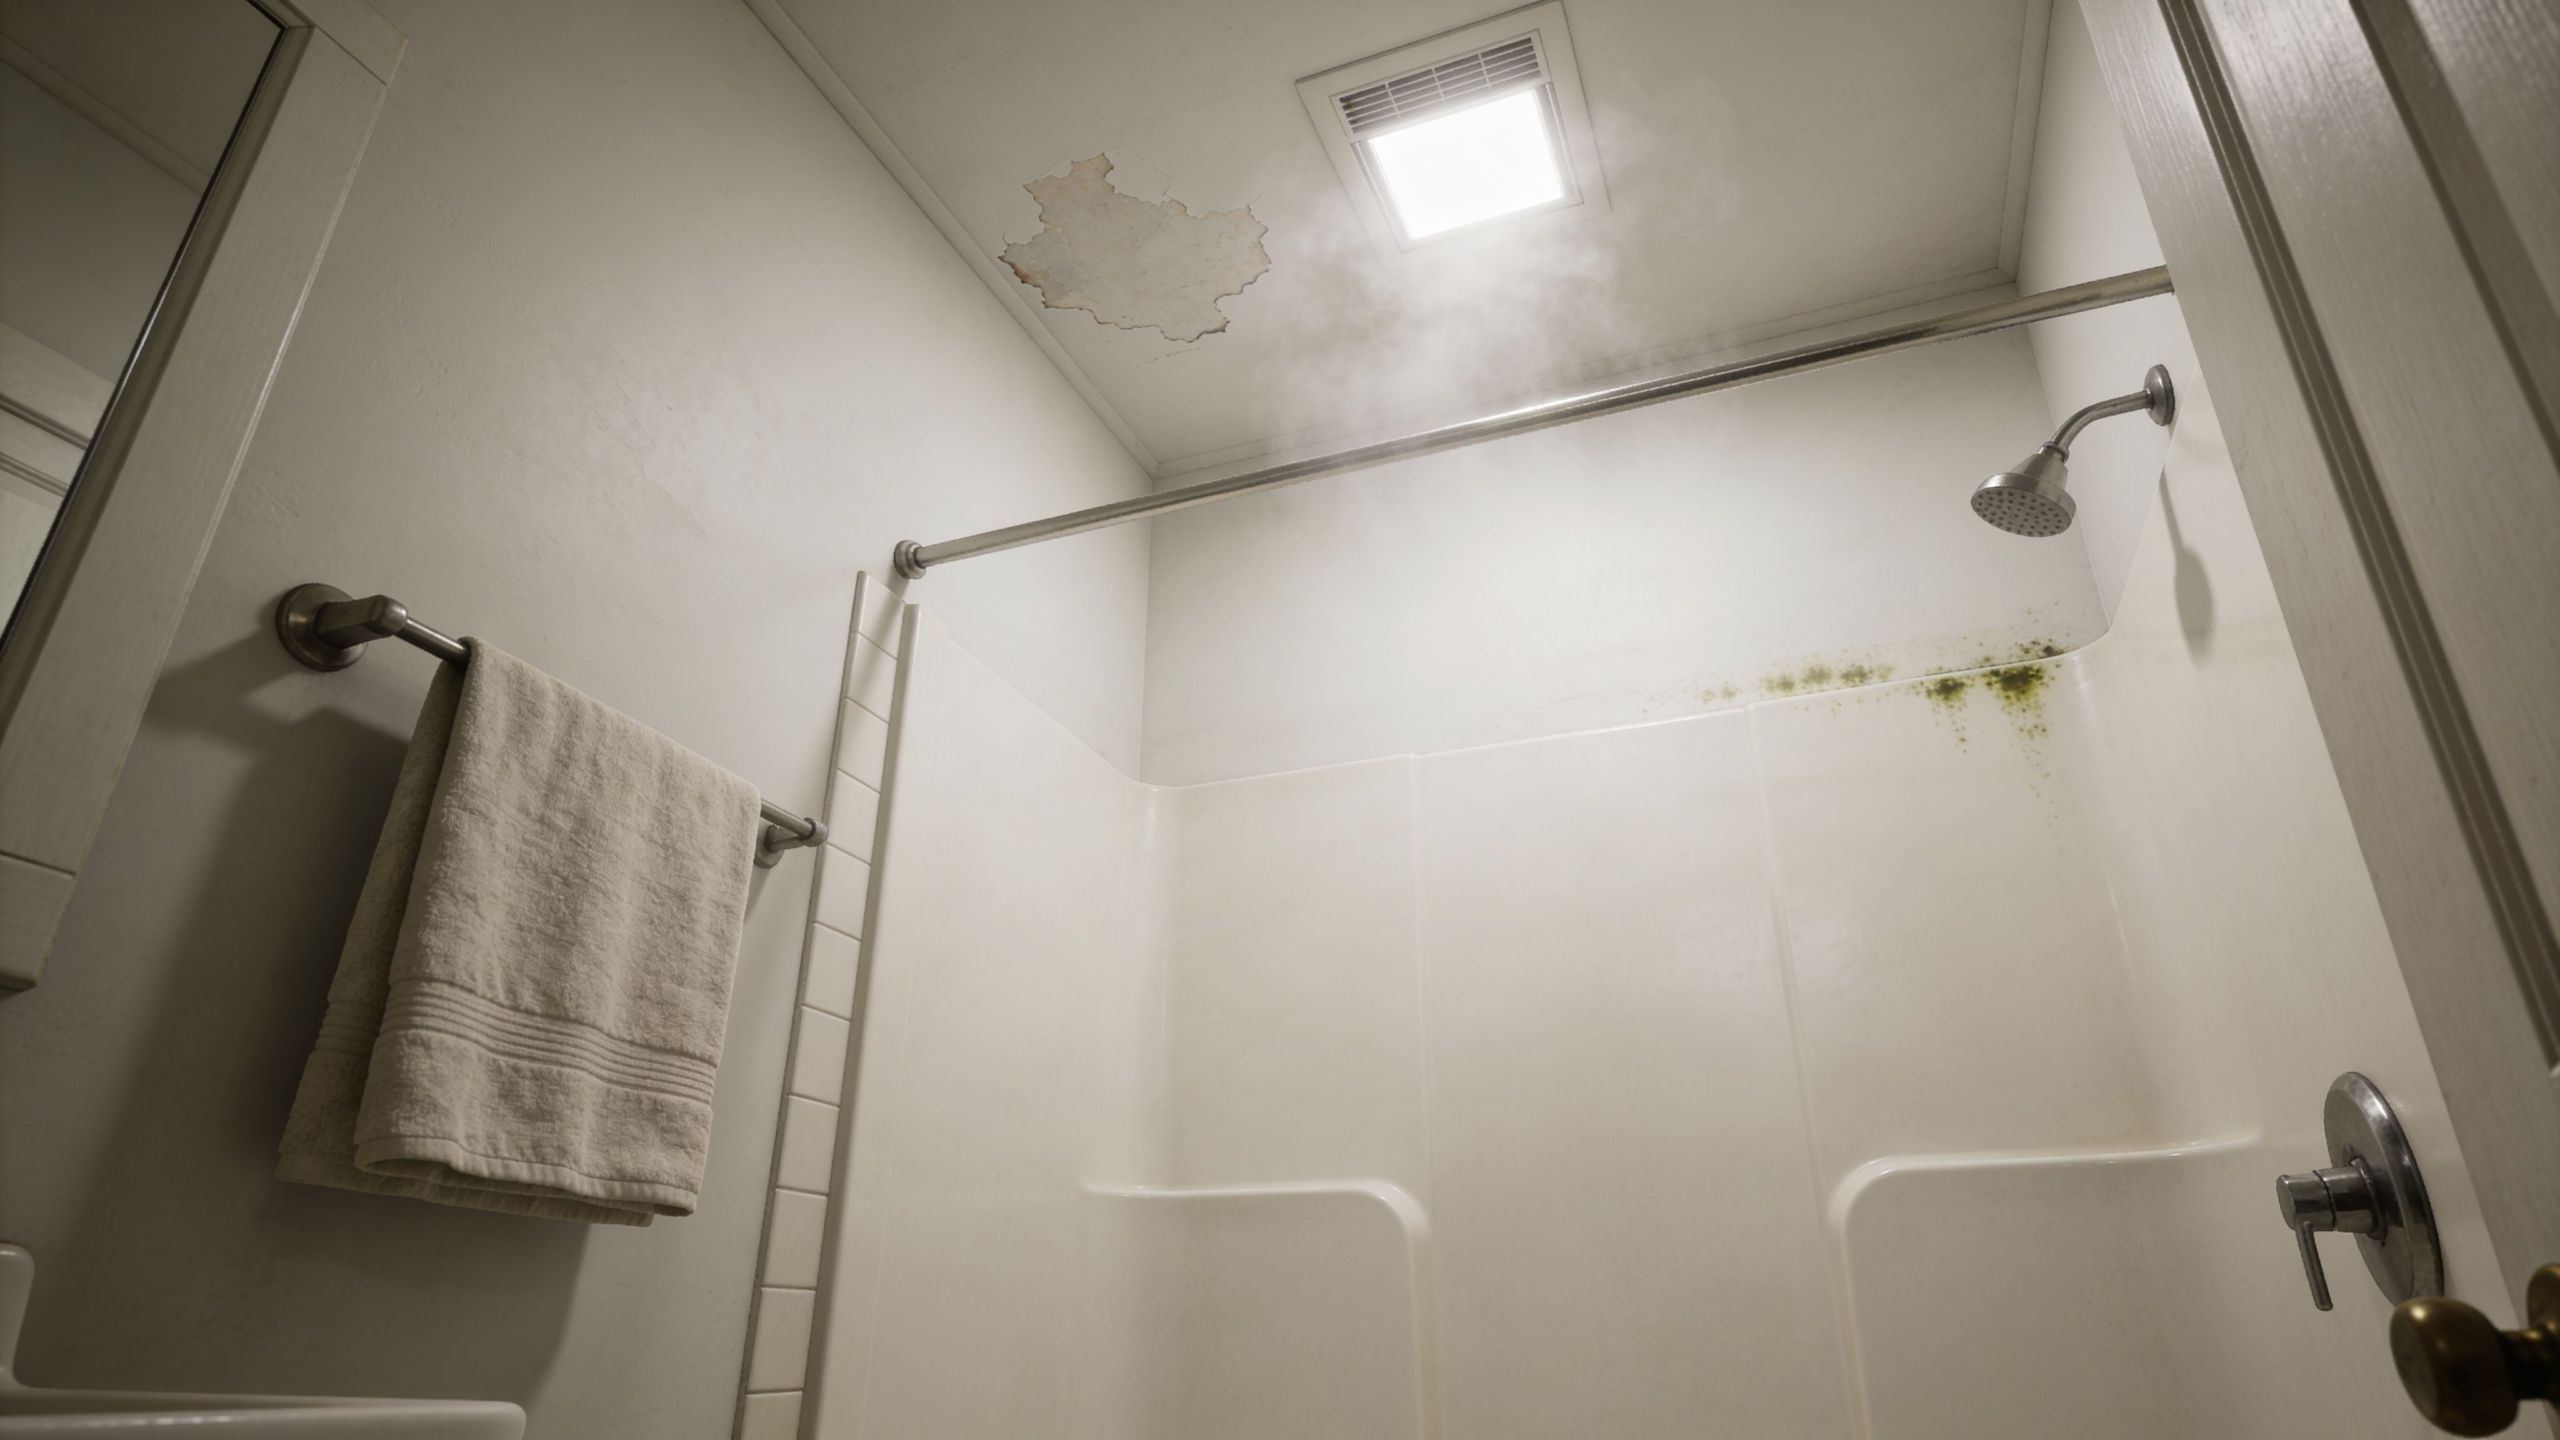
If you're staring at peeling paint above the shower, brownish drip lines on the ceiling, or those little black specks that keep coming back no matter how often you wipe them down, you're not dealing with a simple paint problem. You're dealing with a bathroom system problem.

That matters in Puget Sound homes. A bathroom in Kent, Seattle, or Tacoma doesn't live in the same conditions as one in a dry climate. We get long damp seasons, older housing stock, and a lot of bathrooms that were built before ventilation was treated like a real priority. So when people ask about the best paint for bathrooms, the honest answer isn't just a brand name. It's the right mix of prep, primer, paint, sheen, and moisture control.

Why Your Bathroom Paint Fails in the Puget Sound Climate

A common local scenario goes like this. The bathroom got painted a few years ago. It looked fine at first. Then the ceiling started spotting near the shower, the corners turned gray, and the wall by the tub began to bubble.

That doesn't always mean the painter used the wrong product. In many Puget Sound bathrooms, the bigger issue is trapped moisture. During showers, bathroom humidity can spike fast, and in our region that moisture often hangs around longer because the house already starts from a damp baseline.

A person touching peeling paint and mold on a bathroom wall near a bathtub.

Older homes between Tacoma and Seattle make this worse. A lot of them have undersized fans, no fan at all, or bathrooms that rely on a small window that barely helps in winter. That's why paint selection is critical in this market. One useful regional point from this bathroom moisture guidance for high-moisture areas is that bathroom exhaust fans can reduce humidity by 30-50%, which changes how hard the paint has to work.

Moisture beats weak systems

If the wall wasn't cleaned well, if mildew was painted over, or if the room stays damp for hours after every shower, even decent paint can fail early. The finish softens. Moisture gets behind it. Then you see peeling, blistering, or recurring mildew.

Practical rule: In a Puget Sound bathroom, paint isn't the first line of defense. It's one layer in the defense system.

That's also why it's smart to rule out hidden damage before repainting. If stains keep returning or the drywall feels soft, check for bigger moisture issues such as the warning signs covered in these wall water damage indicators.

What actually changes the outcome

The bathrooms that hold up usually have three things working together:

  • Better airflow: A fan that gets used after showers.
  • Correct surface prep: Clean, dry, solid walls with any mildew properly addressed.
  • A moisture-resistant coating system: Primer and finish paint matched to the room's conditions.

People often want one magic can of paint. In real bathrooms around Kent and the South Sound, that's not how long-term results happen.

Choosing the Right Paint Formula for Moisture and Mold

The label matters more than the color chip. For bathrooms, the key phrase to look for is 100% acrylic. That's the formula type that tends to hold up better when steam hits the walls day after day.

A strong bathroom coating also needs mildew resistance built into the formula. That doesn't mean you can paint over active mold and call it done. It means the dried paint film is better equipped to resist the conditions that help mildew take hold on the surface.

What a good bathroom formula is doing

In plain English, a quality bathroom paint should do four jobs:

  1. Resist moisture absorption
  2. Stand up to repeated cleaning
  3. Slow mildew growth on the paint film
  4. Keep its bond when the room cycles between damp and dry

Benjamin Moore Aura Bath & Spa is a clear example of that type of specialty formula. According to this product overview of bathroom paint performance, it uses a 100% acrylic formula and anti-microbial additives that achieved a 99.9% reduction in mold colony formation under ASTM D5590 testing. In a bathroom, that matters because condensation often settles on cooler walls and ceilings first.

Premium paint earns its keep in bathrooms

This is one room where bargain paint usually turns into expensive paint. Cheap interior wall paint may look fine on day one, but bathrooms punish weak coatings fast. They see steam, splashing, soap residue, and frequent wiping.

Here’s the practical difference between a standard interior paint and a bathroom-specific formula:

  • Standard wall paint: More likely to absorb moisture, mark up during cleaning, and fail sooner in a steamy room.
  • Bathroom-specific acrylic paint: Built for repeated humidity exposure and cleanup.
  • Premium specialty bathroom paint: Better fit when the room has poor ventilation, frequent use, or a history of mildew.

If you're also comparing options for ceilings, this guide to waterproof ceiling paint for bathroom areas is useful because the ceiling usually takes the first hit from rising steam.

Formula matters, but sanitation still matters

Even the right paint won't fix dirt, soap film, or hidden growth behind trim and caulk lines. Before repainting a commercial restroom, rental unit, or heavily used family bath, it helps to think beyond the visible wall surface. For cleanup habits and overlooked trouble spots, the WipesBlog tips for commercial cleanliness are a helpful outside reference.

A bathroom paint can resist a harsh environment. It can't compensate for a wall that was never properly cleaned, dried, or stabilized before coating.

One other practical note. A premium coating is often worth the upcharge in a bathroom because repainting this room is disruptive. You usually have tight spaces, lots of cut-in work, fixtures in the way, and family schedules to work around. If a better formula buys you a longer-lasting result, that's often the cheaper path overall.

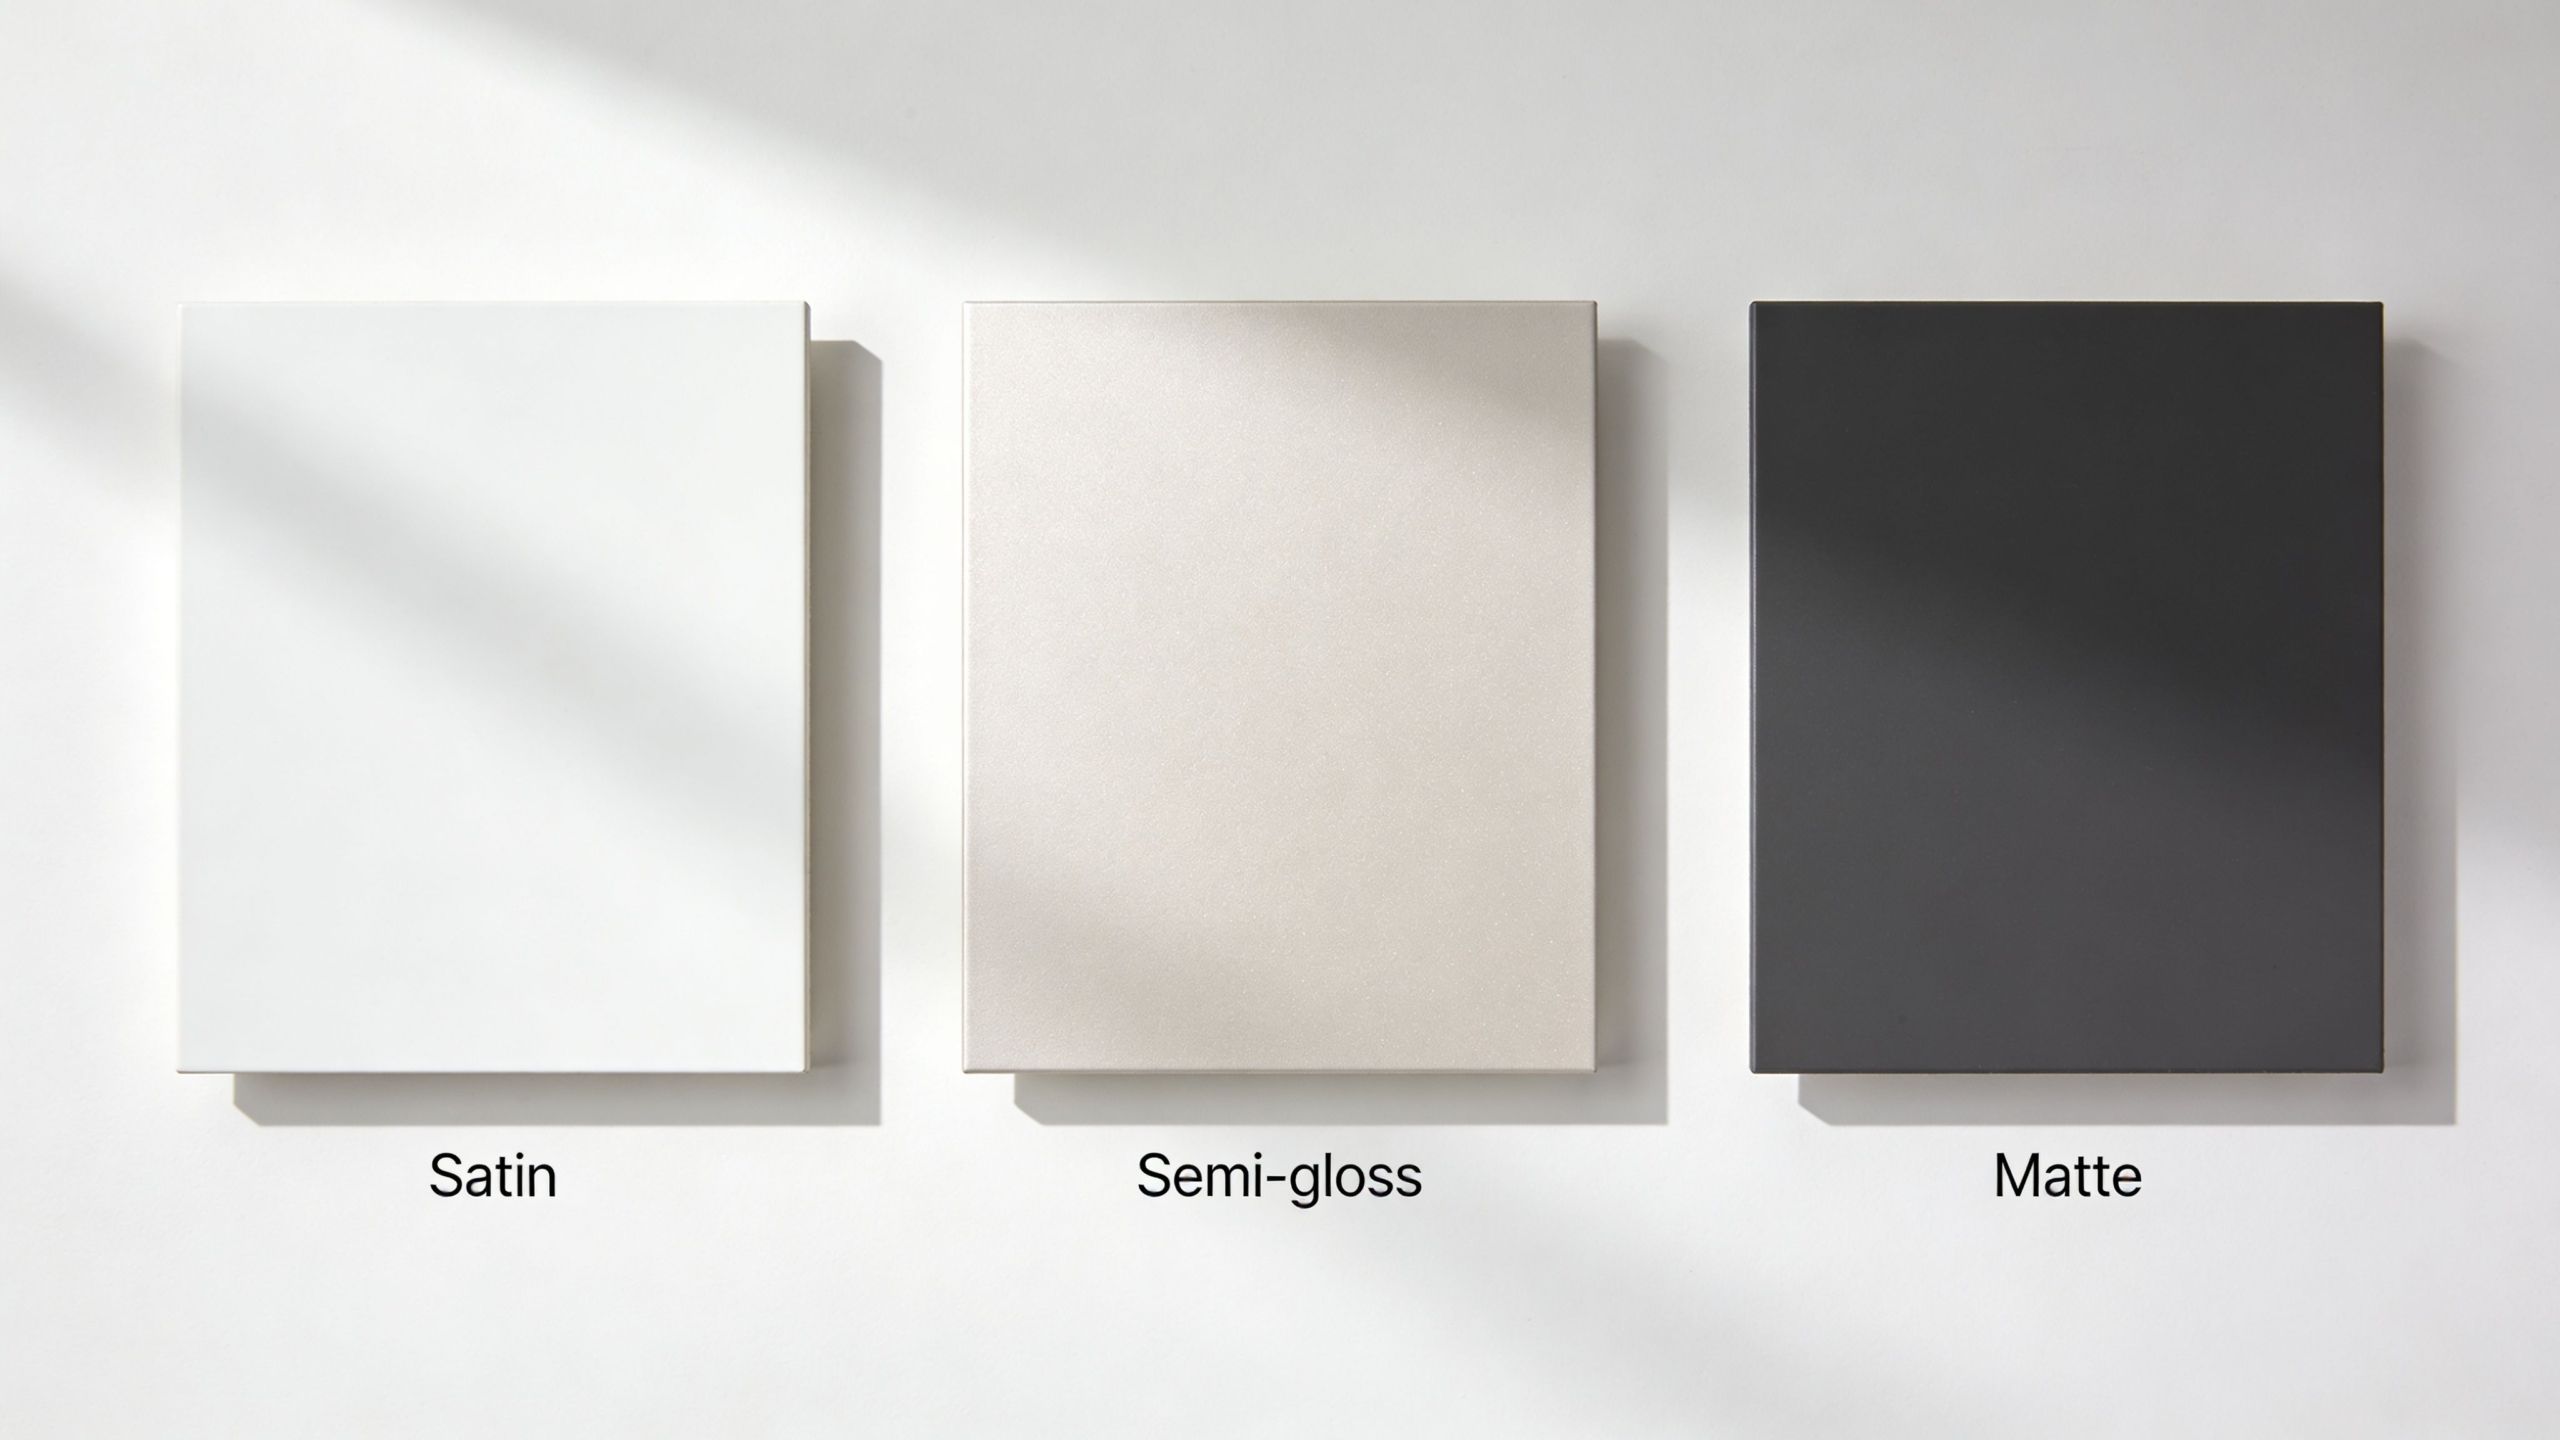
Decoding Paint Sheens from Matte to High-Gloss

One simple rule was traditionally taught. Bathroom equals semi-gloss. That advice isn't wrong, but it's incomplete.

Sheen affects how the paint looks, how easily it cleans, and how much wall texture it reveals. In bathrooms, it also changes how the surface handles repeated moisture exposure. The right answer depends on whether you're painting walls, trim, ceiling areas, or cabinetry, and whether the room is a bright primary bath or a small dim space in an older house.

An infographic chart displaying five different paint sheens suitable for bathrooms, ranging from matte to high-gloss finishes.

Traditional choice versus newer options

Semi-gloss has stayed popular for a reason. Sherwin-Williams Duration Home® is often recommended in semi-gloss for bathrooms, and this bathroom paint reference notes its 100% acrylic latex base and scrub resistance of more than 1,000 cycles per ASTM D2486. That kind of durability is useful when a family bathroom gets wiped down often.

But modern bathroom paint technology has changed the conversation. Some premium matte and low-sheen products now perform far better than old flat paints ever did. So the question isn't just "how shiny should it be?" It's "how much protection do you need, and how much texture are you willing to see?"

Paint sheen comparison for bathrooms

Sheen Durability & Moisture Resistance Hides Imperfections Best For
Matte Lower with standard paint, better only in specialty bathroom formulas Excellent Ceiling or walls when using a premium bathroom-specific product
Eggshell Moderate in lower-moisture baths Very good Powder rooms or bathrooms with lighter moisture load
Satin Strong balance of cleanability and softer appearance Good Most bathroom walls
Semi-gloss Very good for moisture and repeated cleaning Fair Family bathrooms, kids' baths, trim, doors
High-gloss Excellent surface toughness Poor Cabinets, vanities, selected trim

What works well in real bathrooms

A practical breakdown looks like this:

  • Use satin on walls when you want durability without a noticeably shiny look.
  • Use semi-gloss in harder-working bathrooms, especially where ventilation isn't ideal.
  • Use high-gloss selectively on cabinets or trim, not typically on every wall.
  • Use matte carefully and only when the product is specifically made for bathrooms.

The shinier the finish, the more it tends to show patches, sanding marks, and old wall repairs.

That's the trade-off many homeowners discover too late. They choose the most moisture-resistant sheen they can find, then hate how every seam and roller mark shows in daylight. In older Kent and Tacoma homes, where bathroom walls are rarely perfectly flat, satin or a specialty low-sheen bathroom paint often gives the better balance.

Proper Prep Work for a Lasting Bathroom Paint Job

Most failed bathroom paint jobs don't fail because the topcoat was terrible. They fail because the surface under it was dirty, damp, chalky, glossy, or unstable.

Prep is the part people rush because it isn't fun and it doesn't feel visible. But a long-lasting result is won or lost at this stage.

A professional painter applies masking tape to a wall above bathroom tiles to prepare for painting.

Start with cleaning, not painting

Bathrooms collect more than steam. They also collect hairspray, soap film, body oils, dust, and invisible residue that keeps new paint from bonding well.

A solid prep sequence usually includes:

  • Wash the surfaces: Remove soap scum and residue, especially near the vanity and shower.
  • Treat mildew correctly: Clean and address affected areas before any primer goes on.
  • Let the room dry fully: Paint over trapped moisture and you'll regret it.
  • Dull glossy surfaces: Light sanding gives the new coating something to grip.
  • Repair defects: Patch nail holes, soft drywall spots, and old failed areas.

Primer is not optional on problem walls

A good primer bridges the gap between the old surface and the new finish coat. In bathrooms with prior mildew staining, repairs, or patched drywall, skipping primer is one of the fastest ways to waste good paint.

The prep system matters even more in wet zones and heavy-moisture spaces. If your bathroom design includes areas that need stronger moisture protection, wet room waterproofing guidance is worth reviewing before the finish stage.

Here’s a useful visual on detailed prep and coating technique:

Where DIY jobs usually go sideways

The most common mistakes aren't dramatic. They're small shortcuts.

  • Painting over mildew stains: The spot comes back and the homeowner blames the paint.
  • Using a deglosser-free shortcut on glossy walls: The new coat doesn't bond as well.
  • Skipping repairs around failed caulk lines or soft drywall: The finish looks bad even if the color is nice.
  • Rushing recoat timing in a damp room: The film doesn't build the way it should.

Field note: If the wall feels cool and damp after cleaning, it's not ready. Wait. Bathroom painting rewards patience more than speed.

For homeowners, that's the point where hiring a drywall contractor or painter starts making sense. For facility managers, it's also why a repaint should be treated as maintenance work, not just decoration.

Smart Color Strategies for Small or Low-Light Bathrooms

A lot of bathrooms in older Puget Sound homes are short on natural light. Some have no window at all. Others have one frosted window that does almost nothing for half the year. In those rooms, color choice matters almost as much as product choice.

Lighter colors usually make the room feel cleaner and more open. Soft whites, warm off-whites, pale gray-greens, and muted blue tones tend to work well because they reflect available light without feeling harsh. In a small bathroom, that can make the room feel less boxed in.

Keep contrast under control

Heavy contrast can chop up a small bathroom. Dark walls with a bright white ceiling often make the ceiling feel lower. Painting the walls and ceiling in the same color family can make the room feel taller and calmer.

That doesn't mean every bathroom should be white. It means the visual transitions should be gentle. In a Seattle or Kent hallway bath with limited light, softer contrast usually reads better than bold color blocking.

Use sheen to help the room, not fight it

A little reflectivity can brighten a bathroom. Too much can make it feel cold and show every flaw in the drywall.

Good design choices often look like this:

  • Satin on walls when you want a clean, soft lift in low light
  • Semi-gloss on trim and vanity areas where durability matters
  • A coordinated ceiling color to reduce the chopped-up look
  • Simpler palettes in small footprints so the room feels quieter

In a small bathroom, color doesn't just set the mood. It changes the perceived size of the room.

If you're torn between warm and cool tones, look at the fixed finishes first. Tile, countertop, floor color, and lighting temperature should drive the paint decision. The best bathroom color is the one that makes those permanent materials look intentional.

Long-Term Maintenance and Cleaning Tips

A fresh bathroom paint job lasts longer when people treat it like a finish, not like tile. Painted walls need gentler care.

Start with ventilation habits. Run the fan during showers and keep it going after the room is empty. In homes where the fan is weak, leaving the door open after bathing also helps the room dry out faster.

Simple habits that protect the finish

  • Wipe splashes early: Water spots, soap, and toothpaste are easier to remove before they harden.
  • Use mild cleaners: Soft cloths and gentle soap are safer than abrasive pads.
  • Watch corners and ceilings: Those are usually the first places where moisture problems show up.
  • Check caulk lines: Failed caulk lets water get where paint can't protect it.

For commercial bathrooms and shared residential spaces, routine cleaning matters even more because the room doesn't get much downtime between uses. A maintenance mindset protects the paint and helps catch bigger issues before they spread.

Know the warning signs

If you see recurring spotting, persistent staining, bubbling, or a musty smell that doesn't go away, don't assume it just needs touch-up paint. Those clues often point to a moisture source, failed ventilation, or hidden deterioration behind the surface.

A good bathroom finish should be durable. It still needs dry conditions and reasonable care to stay that way.

Ensuring a Perfect Finish When to Hire a Pro

Some bathroom painting jobs are straightforward. Others are really repair projects wearing a paint-project label.

If the room has recurring mildew, peeling around the ceiling line, soft drywall, old water staining, or layers of previous paint failure, the smartest move is often to bring in a pro. The same goes for tall ceilings, occupied commercial restrooms, or bathrooms where downtime needs to be tightly managed.

A professional contractor in white overalls discussing renovation plans with a homeowner in a bright bathroom.

Why pro work holds up better

A professional approach usually catches the things that homeowners and maintenance staff are most likely to miss:

  • Moisture diagnosis: Is this steam, a leak, failed caulk, or damaged substrate?
  • Surface correction: Can the wall be painted, or does it need repair first?
  • Product matching: Which coating fits this exact room condition?
  • Application control: Proper film build, clean cut lines, and realistic dry times

That matters in Puget Sound because bathrooms here often sit in older structures with uneven walls, limited airflow, and a long history of patchwork fixes. What looks like "bad paint" is often a sign that the full assembly needs attention.

A realistic call on mold and mildew

If mildew is light and limited to the surface, cleanup may be manageable. If it keeps returning, covers larger areas, or seems tied to damaged drywall, it needs a more careful response. For general household guidance on cleanup methods, best way to clean mould is a useful outside resource.

Wheeler Painting & Restoration Services handles residential and commercial painting, repairs, waterproofing, and related construction work in Kent, Seattle, Tacoma, and nearby communities, which makes it a practical option when the bathroom needs more than a simple repaint.

A clean-looking finish isn't the same as a stable finish. The goal is a bathroom that still looks good after months of steam, not just the day the paint dries.

If you're comparing house painting near me, commercial painting services near me, or a residential contractor near me for a bathroom update, the right choice is the one that can evaluate the whole problem. Not just sell you a gallon of paint.


If your bathroom paint keeps failing, Wheeler Painting & Restoration Services can help you sort out whether the issue is paint choice, prep, ventilation, water damage, or a combination of all four. Reach out for an estimate or consultation if you want a clear plan for a bathroom that looks better and holds up in Puget Sound conditions.

Expert Guide to Staining Cedar Shingles in Wet Climates

You walk outside after a stretch of rain, look up at the cedar shingles, and see what every Puget Sound homeowner eventually sees. The color has gone flat. A few courses stay dark longer than the rest. Moss is trying to get comfortable near the lower edges, and the whole wall or roofline looks more tired than old.

That’s usually the moment people start searching for answers about staining cedar shingles. Some want to bring back color. Some are trying to stop further wear before they have to replace sections. Most are somewhere in the middle. They know cedar is worth saving, but they also know Western Washington is hard on exposed wood.

In Kent, Seattle, Tacoma, and the towns in between, cedar doesn’t fail because it’s a bad material. It fails when moisture gets trapped, prep gets rushed, or the wrong coating gets laid on a surface that never had a chance to dry properly. A good stain job respects the wood, the weather, and the way cedar behaves in a wet climate.

Why Proper Staining is Crucial for Puget Sound Homes

Cedar shingles can handle a lot, but the Puget Sound climate asks for discipline. Rain hangs around. Morning moisture lingers. Shaded walls dry slowly. Even when the sun finally comes out, ultraviolet exposure keeps working on the surface.

That combination is why staining cedar shingles is a protection job first and an appearance job second. A good finish helps slow moisture uptake, limits weathering, and keeps the surface from breaking down faster than it should. A bad finish, or a good finish applied at the wrong time, can lock in trouble.

Cedar is durable, but it still needs the right timing

Western Red Cedar contains natural tannins that help with durability and resistance to decay and insects. Those same tannins can create extractive bleeding and finish problems if you coat the wood too soon. Cedar shingles should be at a minimum moisture content of 15% before staining or painting, and for maximum durability with opaque finishes, an alkyd-oil-based primer on all sides before installation is a best practice, according to guidance on finishing cedar correctly.

That matters here more than people think. In Western Washington, shingles can look dry from the driveway and still hold enough moisture to cause blotching, discoloration, or early coating failure.

Practical rule: If the wood isn’t ready, the stain isn’t the problem. The schedule is.

Our climate punishes shortcuts

On a dry-climate house, a rushed stain job may limp along for a while. Around Seattle, Tacoma, and Kent, shortcuts show up faster. Moisture sits in overlaps, at butt joints, under courses, and along shaded elevations. If stain can’t breathe or the cedar wasn’t dry enough, the surface starts telling on the installer.

The most common problems look familiar:

  • Dark bleed marks that show through a fresh finish
  • Patchy absorption where some shingles drink the stain and others reject it
  • Premature peeling or bubbling on film-forming products
  • Mildew and moss regrowth in areas that stay damp

A lot of homeowners think the answer is “more product.” Usually it’s better prep and a finish that matches the wood and the climate.

Stain protects the investment, not just the look

Cedar is one of the few exterior materials that can still make a house feel warm and regional in a way manufactured products rarely do. That’s worth preserving. If you want broader background on how cedar assemblies perform over time, this comprehensive guide to cedar wood shake roofing is a useful companion read.

The local lesson is simpler. In wet Western Washington, a stain system only works when the installer respects moisture, tannins, and drying conditions. That’s what separates a finish that settles in and protects from one that starts failing before the homeowner even trusts it.

Preparing Your Cedar Shingles for a Lasting Finish

Most failed cedar jobs start long before stain hits the wood. The surface was dirty, too wet, partially rotted, or washed too aggressively. Prep decides whether the finish bonds, penetrates, and weathers evenly.

On cedar shingles, preparation isn’t glamorous, but it’s where the job is won.

Start with inspection, not washing

Before cleaning anything, walk the whole surface and look closely. Cedar shingles can hide trouble in plain sight, especially on north-facing walls and low roof sections that stay damp.

Check for:

  • Split or cupped shingles that won’t hold finish evenly
  • Soft areas that suggest rot
  • Loose fasteners or slipped pieces that need correction first
  • Old film-forming residue that may need removal before a new stain system
  • Moss-heavy sections where trapped moisture has been sitting too long

If you find old failing coatings, don’t stain over them and hope for the best. Surface removal comes first. If you need a practical reference for that part of the process, removing old paint the right way is the place to start.

A close-up view of a hand lifting a cedar shingle during a cedar shingle staining project.

Clean gently and keep water under control

A lot of DIY damage happens during washing. Cedar is softer than many homeowners expect, and shingles are thinner and more delicate than broad siding boards. If you gouge the face or force water behind the courses, you’ve created a new problem.

Wood restoration experts recommend a maximum of 1,500-2,000 PSI when washing cedar shingles, and in humid regions like Puget Sound, a 7-14 day dry time after washing is recommended so the wood can drop below 12% moisture, which helps prevent lap marks and tannin bleed on the new finish, as noted in this cedar washing guidance.

That drying window is one of the biggest differences between internet advice and field reality in Western Washington. You can’t wash on Saturday and assume Sunday is stain day just because the forecast looks decent.

If shingles still feel cool and damp in shaded sections, they probably aren’t ready.

A workable prep sequence for Puget Sound homes

A solid prep routine usually looks like this:

  1. Inspect first. Replace damaged shingles before cleaning so you’re not washing loose material and hoping it holds.
  2. Use a wood cleaner suited to cedar. Let the cleaner do the work instead of trying to blast dirt out with pressure.
  3. Rinse with control. Keep the spray angle and distance consistent so you aren’t shredding fibers or driving water uphill behind the courses.
  4. Let the house dry fully. In our climate, patience after washing is part of the application process.
  5. Recheck absorbency and surface condition. Weathered spots, repairs, and old exposed areas can all take stain differently.

If you’re comparing contractor pricing and trying to understand what washing costs usually cover, this overview of detailed Upstate SC washing costs is helpful for seeing how cleaning scope gets broken down, even though labor conditions differ from Western Washington.

Prep is where professionals separate themselves

Anyone can buy cleaner, rent a washer, and pick up stain. The hard part is reading the surface correctly. A professional notices where a wall dries last, where prior coatings are still hiding, where pollen and mildew will come back, and where repairs should happen before color ever enters the conversation.

That’s why a lot of cedar jobs look decent for a month and disappointing by the next wet season. The mistake wasn’t always the stain. It was what happened before it.

Choosing the Right Stain for Western Washington Weather

Picking the stain is the decision most homeowners focus on first. It’s important, but only after the wood is clean, sound, and dry enough to accept it. Once prep is handled, product choice determines how the shingles will age, how much grain you’ll see, and how much maintenance you’ll be signing up for.

On weathered cedar in damp climates like Puget Sound, experts favor microporous, water-repellent preservative stains over film-forming paints because traditional acrylics can trap water and lead to bubbling and failure. They also note that about 90% of the final result is determined before application begins in this weathered cedar finishing discussion.

A comparison chart outlining the pros and cons of different cedar stain types for Western Washington weather.

Semi-transparent versus solid stain

For most cedar shingle projects, homeowners narrow it down to two looks.

Finish type What it does well Trade-off
Semi-transparent stain Shows more of the cedar grain and texture Usually needs more frequent maintenance
Solid stain Hides more variation and gives a more uniform color Covers much of the natural grain character

Semi-transparent finishes tend to appeal to homeowners who love cedar for its texture and variation. Solid stains make more sense when the surface is weathered, patched, uneven in color, or when the design goal is a cleaner painted look without using a full film-forming paint.

Oil-based versus water-based products

Climate and substrate matter in this context. Penetrating oil-based stains usually perform well on weathered cedar because they soak into the wood rather than building a heavy surface film. That’s useful in a wet region where trapped moisture causes so many headaches.

Water-based products can still have a place, especially in solid-color systems, but they need the right surface and the right build. On cedar shingles, I’m always more concerned with whether the finish can move moisture out than whether cleanup is easier for the applicator.

“Breathable” isn’t marketing language on cedar in Western Washington. It’s a requirement.

Match the product to the wood, not just the color card

Cedar is a softwood, and that matters because absorption, movement, and weathering are different from denser species. If you want a quick primer on species behavior, this breakdown of hardwood vs softwood gives useful context for why cedar accepts finishes the way it does.

For homeowners comparing project types, some of the same selection logic carries over to fences and other exterior wood. This guide to the best stain choices for fences helps explain how exposure and maintenance shape product selection.

What usually works best here

In Western Washington, the best cedar shingle finish is usually the one that balances these three things:

  • Moisture management so shingles can release trapped dampness
  • Adequate UV protection so the surface doesn’t wash out too quickly
  • A maintenance plan the owner is able to follow

If the cedar is in good shape and you want the grain to show, a penetrating semi-transparent system is often the right fit. If the surface is blotchy, repaired, or you want a more uniform appearance, a solid-color system can make better sense. The wrong answer is usually a heavy film on damp wood.

Your Step-by-Step Guide to Applying Cedar Stain

Application day is where patience pays off. By this point, the hard part should already be done. The shingles are repaired, cleaned, dry, and ready to take stain evenly. Now the job is to apply enough product for protection without flooding the surface, creating lap marks, or leaving shiny spots that never soak in.

A close-up view of a person applying protective wood stain to cedar shingles with a brush.

Brush first if you want the best finish

According to Real Cedar finishing guidance, two coats of penetrating oil-based stain significantly extend service life over a single coat, brushing is the preferred method, and spraying followed by back-brushing is also effective. The same guidance warns against using steel wool or wire brushes because metal deposits can react with cedar’s natural chemicals and leave dark stains.

That lines up with what works in the field. Brushing gives you the best control over coverage, penetration, edges, and drips. It’s slower, but on shingles, slower often means better.

If the project is large and you spray, don’t stop there. Back-brushing matters because it works the stain into the surface, evens out heavy spots, and prevents that sprayed-on look where the finish sits unevenly on the face.

A practical application sequence

Use a repeatable system. Cedar rewards consistency.

  1. Work in the shade if possible. Direct sun speeds the surface dry and makes lap marks more likely.
  2. Start at the top and move down. That keeps drips from landing on finished sections.
  3. Keep a wet edge. Finish a natural section before stopping so you don’t leave visible overlap lines.
  4. Brush stain into the face and exposed edges. Shingles weather at edges first.
  5. Let the first coat absorb. Don’t rush the second coat if the surface is still rejecting product.
  6. Apply the second coat only where the wood will take it. Cedar has a limit. Excess product becomes a future problem.

Some homeowners ask when the weather is cooperative enough to do exterior work in our region. Timing matters as much as technique. If you’re planning the season, this guide to the best time to paint a house exterior is a useful companion.

Tools that help and tools that hurt

A few tools make cedar work cleaner. Others leave visible mistakes.

Helpful tools

  • Quality natural-bristle or stain brush for working product into texture
  • Pump sprayer or airless setup when paired with immediate back-brushing
  • Stiff bristle brush for cleaning dirt and loose fibers before refinishing
  • Moisture meter if you want confidence before coating

Tools to avoid

  • Steel wool
  • Wire brushes
  • Heavy roller-only application on textured shingles
  • Anything that encourages flooding the surface

Here’s a quick visual reference if you want to watch cedar stain application techniques before starting:

The difference between enough and too much

Most DIY cedar stain problems come from one of two extremes. Either the applicator gets timid and leaves a starved, uneven coat, or they lay it on like deck paint and assume more product equals more protection.

It doesn’t. Cedar should absorb the stain. Once it stops taking material, the extra product sits on top. That’s where you get shiny areas, slow drying, and uneven weathering. The goal is a fed surface, not a coated shell.

Good cedar staining looks quiet. Even color, no puddled edges, no glossy patches, no obvious stop lines.

Maintaining Stained Shingles and Troubleshooting Problems

A stained cedar surface doesn’t stay healthy on autopilot. It needs periodic cleaning, a watchful eye, and quick correction when small issues show up. That’s especially true on homes near trees, on shaded exposures, and in the long damp stretches that are normal around Seattle, Kent, and Tacoma.

Done right, maintenance is light work. Ignored too long, it turns into restoration.

What a maintenance routine should look like

A properly applied solid-color acrylic stain over an oil-based primer can last 10-15 years with maintenance, while skipping primer or relying on a self-priming product on weathered cedar often leads to bubbling and failure within 5-7 years. The same guidance notes that semi-annual cleaning with a water-repellent/mildewcide can extend service life by an additional 20-30%, according to this cedar siding maintenance reference.

That doesn’t mean every homeowner needs an elaborate checklist. Keep it practical:

  • Wash gently on a regular schedule so dirt, mildew, and organic buildup don’t become a film
  • Inspect shaded walls and lower courses where moisture lingers longest
  • Trim back vegetation that blocks airflow or keeps shingles wet
  • Touch up worn areas early before broad failure spreads

How to read common problems

Not every flaw means total failure. Cedar usually gives you warning signs.

Problem Likely cause What to do
Fading Normal weathering and UV exposure Clean and evaluate whether a maintenance coat is due
Mildew returning Persistent shade, moisture, or organic buildup Clean more consistently and improve airflow where possible
Bubbling or peeling Wrong product system or poor priming Remove failed material and rebuild the system correctly
Shiny spots Over-application Let them weather or correct during maintenance if they remain uneven

When stain wears thin, maintenance is straightforward. When stain peels, the repair gets expensive.

Don’t wait for full failure

Homeowners often wait until the whole elevation looks bad before acting. That’s understandable, but it’s not efficient. Cedar is easiest to maintain when the finish is still mostly intact and the issues are local.

A light cleaning and timely maintenance coat cost less effort than stripping widespread failure. On cedar shingles, small corrections made early usually preserve the texture and keep the next round of work simple.

When to DIY vs When to Call the Professionals at Wheeler

Some cedar shingle projects are reasonable DIY work. If the area is small, easy to reach, structurally sound, and you’re comfortable with ladders, prep, and patient application, you can get a respectable result.

The catch is that cedar punishes overconfidence. A job that looks straightforward from the yard can turn complicated fast once you find damaged shingles, stubborn old coatings, or surfaces that refuse to dry on your timeline.

A DIY project makes sense when

You’re probably a good candidate to handle it yourself if most of these are true:

  • The work is low-risk to access and doesn’t involve steep roof sections or difficult heights
  • The shingles are generally sound with only minor spot repairs
  • You have time to wait for dry conditions instead of forcing the project into a weekend
  • You’re willing to prep carefully and apply the stain methodically
  • You’re okay with maintenance work later if the first round needs touch-up

A man in workwear contemplates staining cedar shingles, next to a DIY stain kit box and supplies.

Call a professional when the risk goes up

A contractor is usually the better choice when any of these show up:

  • The home is multi-story
  • You’ve got active failure from an old coating
  • Sections of shingles need replacement before staining
  • The cedar stays shaded and damp for long periods
  • You want a uniform result across large elevations
  • You manage a commercial property and need reliable scheduling
  • You’d rather have one crew handle repairs, waterproofing, and finish work together

That last point matters more than people expect. Cedar projects often cross trades. The surface may need minor siding replacement, trim repair, waterproofing details, or broader exterior painting coordination. On residential homes that can save a lot of back-and-forth. On commercial buildings and tenant improvement work, it saves even more.

What professionals really bring to the job

The visible difference isn’t just cleaner brushwork. It’s sequencing. Pros know when not to wash, when not to stain, and when a “good enough” substrate will absolutely not be good enough in a month. They bring moisture awareness, repair judgment, finish compatibility, and the patience to stop when conditions aren’t right.

That’s what homeowners and facility managers are paying for. Not just labor. Fewer avoidable mistakes.

If you’re in Seattle, Kent, Tacoma, or anywhere in between and want a dependable team for cedar shingle staining, exterior painting, siding repairs, waterproofing, residential remodeling, or smaller-to-mid-size commercial renovation work, Wheeler Painting & Restoration Services is a practical local partner. Whether you need help deciding if your shingles can be restored or you want a full estimate for prep, repairs, and staining, their team can walk the property, explain the trade-offs clearly, and give you a plan that fits the building and the climate.

Transform Your Home: Kitchen and Bath Remodel

You’ve probably stood in your kitchen or bathroom lately and thought, “This room works, but not well enough.” Maybe the cabinet doors stick. Maybe the bathroom never quite dries out. Maybe the layout made sense years ago, but now it slows down every morning and every dinner.

That’s usually how a kitchen and bath remodel starts. Not with a dramatic design idea, but with daily friction.

For homeowners around Kent, Seattle, Tacoma, and the towns in between, remodeling also comes with a second feeling. Uncertainty. How big is this project really? What needs a permit? What should you spend money on first? And which materials hold up in a damp Puget Sound climate?

A good remodel gets clearer once you break it into parts. Scope first. Budget next. Then process, permits, materials, and contractor selection. When each piece makes sense, the whole project feels far less intimidating.

Defining Your Kitchen and Bath Remodel Scope

Most homeowners use the word “remodel” to mean everything from repainting cabinets to moving walls. That’s where confusion starts. If you can name the level of project you want, it becomes much easier to set expectations for cost, timeline, and disruption.

A split-screen comparison showing a rustic, worn kitchen before and after a modern luxury renovation.

Kitchen work remains a top priority for homeowners. In 2024 and 2025, kitchen remodels dominated the U.S. home renovation market, and 24% of renovating homeowners upgraded their kitchens, with a median spend of $22,000 and major remodels for kitchens under 200 square feet rising 9% year over year to $35,000, according to the 2025 Houzz and Home Study summary.

Cosmetic updates

This is the lightest version of a kitchen and bath remodel. The layout stays the same. Plumbing stays where it is. Electrical usually stays put too.

Typical cosmetic work includes:

  • Cabinet painting or refinishing to brighten an older kitchen without replacing the boxes
  • New hardware such as pulls, knobs, towel bars, and faucets
  • Fresh wall paint for better light reflection and moisture resistance
  • Mirror and light fixture swaps in a bathroom that feels dated
  • New backsplash or surface updates that change the look more than the structure

This level works well when the room functions fine, but looks tired. It’s often the right call for homeowners who want improvement without opening walls.

Pull-and-replace remodels

Often, in first-time remodels, you’re replacing the major parts of the room, but you’re not changing the footprint.

A pull-and-replace kitchen might include new cabinets, countertops, sink, flooring, and appliances, all in roughly the same places. In a bathroom, it might mean a new vanity, toilet, shower surround, tile, and lighting without moving the plumbing lines across the room.

This project type often gives the best balance of visual impact and construction control. You still get a major change, but you avoid some of the complexity that comes with structural changes.

Practical rule: If the sink, toilet, tub, and major appliances stay in the same locations, you’re usually looking at a simpler remodel category.

Full-gut custom renovation

This is the most involved form of a kitchen and bath remodel. Walls may move. Windows may change. Plumbing and electrical may be rerouted. Storage is often rethought from scratch.

Examples include:

  1. Removing a wall between a kitchen and dining room
  2. Expanding a small primary bath into an adjacent closet
  3. Reworking a cramped layout to add an island, larger shower, or better circulation
  4. Correcting old framing, uneven floors, or outdated systems discovered during demolition

In older Seattle and Tacoma homes, this level of work often uncovers hidden conditions that a simple update would never reveal.

If you're still deciding what your bathroom project should include, this guide to bathroom remodel planning can help you organize priorities before you start requesting bids.

Budgeting and Timelines for Your Puget Sound Remodel

Budgets get stressful when homeowners compare unlike projects. A cosmetic bathroom refresh and a full custom primary suite aren’t the same job, even if both get called a remodel. The more useful question is this: what level of work are you pricing?

For bathrooms, national benchmark data gives you a solid starting point. The 2025 Houzz Bathroom Trends Study reports a national median spend of $13,000, while major remodels rose to $22,000, and projects in large bathrooms of 100+ square feet averaged $25,000, according to the Houzz bathroom trends study.

What changes the price in Puget Sound

A remodel in Kent won’t always be priced the same as one in Seattle. Access, parking, delivery logistics, permit complexity, and the age of the house all affect labor and scheduling.

The biggest cost drivers usually include:

  • Cabinet type whether you’re repainting existing boxes, using stock options, or ordering custom cabinets
  • Surface selections such as quartz counters, tile layouts, specialty waterproofing, and finish details
  • Layout changes because moving plumbing and electrical adds labor, inspections, and coordination
  • House age and hidden conditions especially in older homes with outdated wiring, old piping, or uneven framing
  • Finish level from practical mid-range materials to highly customized design choices

Estimated Kitchen & Bath Remodel Costs in Puget Sound (2026)

Project Scope Kitchen Cost Range Primary Bath Cost Range Typical Timeline
Cosmetic update Lower than a full replacement project, often focused on paint, hardware, selected fixtures, and surface refreshes Lower than a major remodel, often focused on vanity, paint, fixtures, and limited tile work Shorter timeline with less disruption
Pull-and-replace Often aligns more closely with national median and midrange spending benchmarks, depending on materials and site conditions Often aligns near the national median to major-remodel benchmark range, depending on scope Moderate timeline
Full-gut custom remodel Can rise well beyond median benchmarks when layout changes, custom cabinetry, and structural work are involved Can rise above major-remodel benchmark levels when expanding the room or relocating plumbing Longest timeline and most coordination

That table is intentionally qualitative because real local pricing depends on field conditions, finish selections, and permit requirements. National medians are useful for orientation, but they aren’t a substitute for an on-site estimate in Western Washington.

If you want another planning tool before talking with a contractor, Harrlie Plumbing and Heating offers a helpful walkthrough to calculate your bathroom renovation budget. It’s a useful way to separate must-haves from nice-to-haves before selections begin.

Timelines are tied to decisions

Homeowners often think construction is what makes a remodel long. Sometimes it is. But delayed selections can slow a job just as much as demolition or inspections.

A kitchen and bath remodel usually moves faster when you decide these items early:

  • Cabinet layout
  • Tile size and pattern
  • Plumbing fixture style
  • Countertop material
  • Lighting locations
  • Paint and finish schedule

Early decisions protect your schedule. Waiting to choose tile, faucets, or cabinet hardware can stall later trades even when the room is otherwise ready.

For a more detailed breakdown of how project choices affect price, this page on kitchen remodel cost breakdown is a useful next step.

The Remodeling Process A Step-by-Step Guide

Most remodel anxiety comes from not knowing what happens next. Once you see the sequence, the project feels more manageable. The order matters because each trade depends on the one before it.

A seven-step visual guide outlining the professional process for a residential kitchen and bathroom remodeling project.

The first conversation and design work

A typical project starts with a site visit. You walk through what isn’t working, what you want changed, and what level of disruption you can tolerate.

Then the practical questions come out:

  • Can the layout stay the same?
  • Are the cabinets worth saving?
  • Does the bathroom need better ventilation?
  • Is that wall structural?
  • Are the finishes realistic for the budget?

This is also when measurements, photos, and product ideas start turning into a real plan. In a compact Seattle bungalow, that might mean using every inch carefully. In a larger suburban home near Tacoma, it might mean fixing circulation and storage rather than adding square footage.

For homeowners collecting inspiration, this guide for luxury kitchen remodels is useful because it helps translate broad style ideas into actual planning choices.

Permits, prep, and demolition

Once the scope is settled, permit needs are reviewed and job prep begins. In occupied homes, protection matters. Floors get covered. Dust barriers go up. Work zones are defined so the rest of the house stays livable.

Demolition is the part everyone notices, but it’s also diagnostic. Once old cabinets, flooring, or wall coverings come out, the house tells the truth. A wall may be out of square. The subfloor may slope. A bathroom may show signs of long-term moisture.

That’s not automatically bad news. It’s information you need before rebuilding.

Old homes often reveal their real condition only after demolition. Finding issues early is frustrating, but it’s still far better than covering them up and discovering them after the finishes are in.

Rough-in and inspection

This is one of the most important stages in the entire project. The rough-in phase is where new plumbing and electrical go into the framing before insulation and drywall cover everything.

The stakes are real here. The rough-in phase is a critical step, and failure to pass the mandatory post-rough-in inspection can delay a project by 1 to 2 weeks, while fixing mistakes after drywall can raise retrofit costs by 25% to 40%, based on the remodel process guidance from Bath Plus Kitchen.

Why homeowners get confused here is understandable. At this stage, the room can look unfinished and even messy, but it’s one of the most technical moments in the whole remodel. This is when outlet locations, sink lines, shower valves, lighting boxes, and vent paths must be correct.

Build-back and finish work

After rough-in passes inspection, the room starts looking like a room again.

That sequence usually includes:

  1. Drywall and wall prep so surfaces are flat, sealed, and ready for finish materials
  2. Flooring and tile work depending on the room and product order
  3. Cabinet and vanity installation with careful leveling and fastening
  4. Countertop templating and install after cabinets are set
  5. Fixture setting including sinks, faucets, toilets, appliances, and lighting
  6. Painting and trim for the final visual polish

Painting often happens later than homeowners expect. That’s because walls and trim can get bumped during cabinet, countertop, and fixture installation.

Final walkthrough and punch list

The last step isn’t just “done.” It’s review. Doors get checked. Drawers get adjusted. Caulk lines, paint touch-ups, hardware alignment, and fixture operation all get looked over carefully.

A good walkthrough gives homeowners time to ask small questions before they become long-term frustrations. Which shutoff controls what? How long should grout cure? Which surfaces need special cleaners? Those details matter.

Navigating Permits and Codes in Western Washington

Permits make many homeowners nervous because the rules can feel opaque. In reality, most permit questions come down to one issue. Are you replacing finish materials, or are you changing the building itself?

Work that often triggers permits

In Puget Sound cities such as Seattle, Kent, and Tacoma, permit requirements often come into play when a remodel changes systems behind the walls or alters the structure.

That usually includes:

  • Moving or adding plumbing lines
  • Changing electrical circuits, outlets, or panel-fed loads
  • Removing or modifying walls
  • Installing work that affects ventilation or other mechanical systems
  • Making structural changes tied to framing or openings

A kitchen and bath remodel that shifts sink locations, adds new lighting circuits, or opens a wall between rooms will usually involve permit review.

Work that may be more straightforward

Some updates are often simpler from a permit standpoint, though local interpretation still matters.

Examples can include:

  • Painting walls or cabinets
  • Replacing hardware
  • Swapping a faucet without relocating plumbing
  • Installing similar finish materials in the same footprint

Even then, homeowners shouldn’t guess. Local rules differ, and city requirements can change based on the details of the job.

Permit rules don’t exist to make projects harder. They exist so hidden work inside walls is installed safely and inspected before those walls get closed up.

Why local knowledge matters in Western Washington

Western Washington homes bring their own complications. Older neighborhoods may have aging infrastructure. Some houses have past remodels that weren’t documented clearly. Others need closer attention to moisture management, ventilation, and structural details common in this region.

Seattle’s review path can look different from Kent’s. Tacoma may ask different questions depending on the property and scope. That’s why local planning matters as much as design.

For homeowners, the practical takeaway is simple. Don’t build your remodel strategy around what a neighbor once did in a different city. Build it around your actual address, your actual scope, and current local requirements.

How a contractor helps

A contractor’s role here isn’t just paperwork. It’s coordination. Plans, permit applications, inspections, trade scheduling, and corrections all need to line up in the right order.

That helps prevent the most common permit-related problems:

  • Starting work too early
  • Missing an inspection
  • Closing walls before approval
  • Discovering code issues after finish materials are installed

Handled properly, permits become part of the process rather than a roadblock.

Smart Design and Material Choices for the Pacific Northwest

A beautiful room that can’t handle moisture is a short-term upgrade. In Puget Sound, good design needs to survive damp air, seasonal grime, heavy use, and the occasional surprise behind old walls.

That’s why material selection matters as much as color and style.

A rustic kitchen with wood cabinetry, stone fireplace hood, and a glass-topped island overlooking a rainy forest.

Start with moisture, not finishes

Bathrooms in particular need a moisture-first mindset. That means thinking beyond tile color and vanity style.

Look closely at:

  • Waterproofing behind wet areas so shower and tub surrounds are protected where you can’t see
  • Ventilation strategy to help surfaces dry after everyday use
  • Paint and wall products suited for humid conditions
  • Flooring transitions and seal points where water tends to collect or migrate

In the Pacific Northwest, these decisions affect longevity. They also affect maintenance. A room that dries properly is easier to keep clean and less likely to develop avoidable surface problems.

Kitchen layout should reduce friction

Many kitchens don’t fail because they’re ugly. They fail because they’re awkward. Not enough landing space near the sink. Refrigerator doors opening into traffic. Too many steps for simple tasks.

Effective kitchen prep zones need at least 36 inches of uninterrupted counter space, and optimized layouts can reduce injury risk by 30%, while poor layouts can increase prep time by 20% to 25%, according to the designer toolkit summarizing NKBA ergonomic guidance.

That number matters in everyday life. If you cook often, prep space isn’t a luxury. It’s workflow.

Materials that make sense here

A practical kitchen and bath remodel in Western Washington often favors materials that are durable, easy to clean, and stable in damp conditions.

Common smart choices include:

  • Quartz countertops for a hard, low-maintenance work surface
  • Porcelain or ceramic tile in bathrooms and mud-prone entries
  • Well-finished wood cabinetry with attention to seal quality around sinks and dishwashers
  • Mold-resistant paint systems in baths, laundry areas, and other high-moisture zones
  • Epoxy and specialty coatings in selected utility or high-wear areas where slip resistance and cleanability matter

If you’re comparing styles and formats before selecting bathroom surfaces, browsing a visual collection of tiles for your bathroom renovation can help narrow down what you like before visiting local showrooms.

Storage and cabinetry should fit the room, not fight it

Older homes around Seattle and Tacoma often have odd corners, tighter footprints, and less forgiving wall lines. That’s where smart cabinet planning earns its keep.

Instead of forcing standard storage into a difficult space, look for solutions like shallow-depth cabinets, vertical tray storage, pull-outs, and vanity drawers designed around plumbing. If you’re weighing door styles and cabinet construction options, this overview of types of cabinet is a good place to start.

One practical option homeowners in this area sometimes use is Wheeler Painting & Restoration Services for remodel work that overlaps with custom cabinets, drywall, painting, waterproofing, and specialty finishes. That can simplify coordination when the project needs both construction and finish work under one scope.

Here’s a useful visual if you’re still sorting through layout and finish ideas.

Good material choices aren’t about chasing trends. They’re about picking surfaces and systems that still work well after years of steam, spills, and heavy daily use.

Finding and Hiring the Right Residential Contractor

The contractor you choose affects every part of the remodel. Design clarity, scheduling, communication, permits, finish quality, and how problems get solved all depend on that relationship.

A polished estimate means very little if the communication is vague once work starts.

Questions worth asking before you sign

The best hiring conversations are specific. General promises don’t help much. Ask direct questions and listen for direct answers.

Use a checklist like this:

  • Licensing and coverage
    Ask whether the contractor is properly licensed, bonded, and insured in Washington for the type of work involved.

  • Local project experience
    Ask for examples of kitchen and bath remodel work in Kent, Seattle, Tacoma, or nearby communities with homes similar to yours.

  • Daily communication
    Ask who your point of contact will be, how updates are handled, and how often you’ll hear from the team.

  • Change management
    Ask what happens if demolition uncovers old plumbing, framing issues, or water damage that changes the scope.

  • Trade coordination
    Ask who schedules plumbers, electricians, tile installers, painters, and inspections so there’s no confusion later.

Don’t focus only on the bid total

Homeowners naturally compare prices first. That makes sense. But two estimates can look similar on the front page and be very different in the details.

Review whether the estimate clearly addresses:

Topic Why it matters
Scope detail Prevents assumptions about what is or isn’t included
Material allowances Reduces surprises when you start selecting actual products
Prep and protection Important if you’re living in the home during construction
Finish standards Helps define expectations for paint, tile, trim, and cleanup

A careful contractor should also be comfortable discussing long-term performance, not just appearance. That matters in bathrooms and utility areas where slippery surfaces and moisture can become real maintenance issues. One commonly overlooked topic is specialty floor protection. Data tied to high-moisture bath conditions shows epoxy floors can reduce slip hazards by 60% and maintenance costs by 30% over 10 years, based on the discussion in this bathroom angles and finish article.

Signs you’re talking to the right fit

A reliable contractor usually does a few simple things well:

  • They answer clearly instead of hiding behind vague language.
  • They talk through risks early rather than pretending every wall will open perfectly.
  • They explain sequencing so you know what happens next.
  • They document changes instead of handling major revisions casually.
  • They respect the fact that you live there and need predictability, not just craftsmanship.

That kind of steadiness matters even more than a polished sales pitch.

Begin Your Remodel with Wheeler Painting & Restoration

A kitchen and bath remodel feels much more manageable once you define the scope, understand the likely budget range, and know how the work unfolds from demolition to final walkthrough. Most of the stress comes from uncertainty. Clear planning removes a lot of that pressure.

For homeowners in Kent, Seattle, Tacoma, and nearby communities, the right path usually starts with a conversation about the house you have, not a generic online template. Older homes, damp weather, local permits, and layout limitations all shape the best solution.

If you’re ready to move from ideas to a practical plan, contact Wheeler Painting & Restoration Services for a no-obligation on-site consultation. A site visit can help you sort out what’s cosmetic, what’s structural, what needs permits, and what choices will give you a kitchen or bathroom that works better every day.

Frequently Asked Questions About Home Remodeling

Should I remodel the kitchen and bathroom at the same time

Sometimes yes, sometimes no. Doing both at once can reduce repeated disruption and create one coordinated design plan. But if you only have one full bathroom or if your kitchen is your home’s main gathering point, phasing the work may be easier on daily life.

How do I know if my remodel is too ambitious for my house

A project usually becomes too ambitious when the goals, budget, and house condition don’t align. If you want custom layout changes in an older home, leave room for hidden conditions and permitting. If your priority is function, a pull-and-replace remodel may deliver more value than a full reconfiguration.

Is it okay to buy my own fixtures and finishes

It can be, but only if the ordering is organized. Homeowners often run into delays when a faucet arrives without the right valve, tile comes in short, or cabinet hardware shows up late. Before buying anything, confirm lead times, quantities, compatibility, and return rules.

What should I decide before asking for estimates

Have a rough answer for these four items:

  • Project scope such as cosmetic, pull-and-replace, or full-gut
  • Priority list including what matters most if tradeoffs are needed
  • Style direction so bids reflect realistic finish expectations
  • Timing needs especially if you have travel, school, or family schedule constraints

Will I be able to live at home during the remodel

Often yes for smaller jobs. Sometimes no for larger ones. A hall bath refresh is very different from a full kitchen tear-out or a primary suite expansion. The deciding factors are access to water, cooking, dust control, noise, and how much of the house becomes an active work zone.


If you’re planning a kitchen, bathroom, or larger home improvement project in Kent, Seattle, Tacoma, or the communities in between, Wheeler Painting & Restoration Services can help you turn early ideas into a clear scope, realistic proposal, and organized build plan. Reach out to schedule an on-site consultation and take the next step with confidence.

Bathtub Surround Options: Choose Your Ideal Style

A lot of people start looking at bathtub surround options after the bathroom gives them a warning sign they can’t ignore. The grout stays dark no matter how much you scrub it. The old fiberglass surround looks stained and tired. A seam near the tub deck feels soft, or the caulk keeps peeling back in the same spot.

In the Puget Sound, those signs matter more than they might in a drier climate. In homes from Seattle to Tacoma, moisture problems rarely stay on the surface. Water gets into corners, window trim, wall cavities, and old framing. What looks like a cosmetic upgrade often turns into a decision about waterproofing, maintenance, and how long the remodel will hold up.

The good news is that there are solid options for almost every type of property. A rental unit in Kent needs something different than a custom primary bath in Seattle. A facility manager planning a tenant improvement has different priorities than a homeowner updating a 1990s alcove tub. The right surround depends on the wall condition, the level of use, the cleaning expectations, and whether you want the lowest upfront cost or the best long-term value.

Your Guide to Choosing a New Bathtub Surround

A typical call starts the same way. The bathroom still works, but the surround looks tired, the caulk keeps failing, or the walls never feel fully dry after baths and showers. In Puget Sound homes, that decision is rarely just about appearance. It is about choosing a system that stays clean, fits the condition of the room, and protects the wall assembly over time.

The best surround is usually the one that matches the property, the users, and the amount of maintenance you are willing to live with. A rental in Tacoma often calls for a durable, easy-clean panel system. A long-term family home in Seattle may justify solid surface or a properly built tile surround if the budget allows for the prep work behind it. Cheap finishes can look acceptable on day one and still become expensive if they stain, flex, or fail at the seams.

Material choice also affects installation time, repair options, and how forgiving the surround will be if the alcove is slightly out of square, which is common in older homes around Seattle, Everett, and Tacoma.

Here is a quick side-by-side look before getting into the details.

Material Installed Cost (Approx.) Lifespan Maintenance Puget Sound Pro/Con
Acrylic $1,200 to $2,500 10 to 15 years or longer with regular maintenance Low Good mold resistance and easy cleaning, but surface quality matters
Fiberglass $900 to $1,500 10 to 20 years Low to moderate Affordable and simple, but can scratch and fade
PVC or composite panels Qualitative only 5 to 10 years Low Fast, practical coverage, but shorter service life
Solid surface $2,000 to $3,500 Beyond 20 to 30 years Low Strong, repairable, and grout-free, but premium priced
Tile $2,500 to $5,000+ Qualitative only Medium Design flexibility, but grout and waterproofing details have to be right

Those ranges are useful for budgeting, but they do not tell the whole story. In practice, service life depends heavily on installation quality, cleaning habits, and whether the wall assembly behind the surround was built to handle regular moisture. I have seen lower-cost surrounds last well because the prep was done right, and I have seen expensive finishes fail early because the substrate and waterproofing were rushed.

Practical rule: Focus on the whole assembly, not just the finished face. The right surround has to suit the room, the wall condition, and the people using it every day.

Why Your Surround Matters More in the Puget Sound

A common Puget Sound remodel starts like this. A homeowner plans to swap an old tub surround, the demo begins, and behind the finish we find a window in the wet area, walls that are out of plumb, or drywall repairs from an old leak that never got fully corrected. That is why surround choice matters more here than a generic national guide usually admits.

In Western Washington, the surround is part of a wet wall system. It has to hold up in bathrooms that stay damp longer, in houses that often have older framing, and in alcoves that were not built to modern tolerances. Seattle, Kent, Tacoma, and the neighborhoods between them have a lot of bathrooms where the visible finish is only half the story.

A modern bathtub surrounded by white marble with a view of a rainy forest and lake outside.

Older homes create common failure points

Prefab surrounds can perform well, but only when the alcove is prepared correctly. In older Puget Sound homes, that prep is often the hard part.

The trouble spots are predictable:

  • Bottom seams where water sits and caulk breaks down first
  • Vertical corners where movement opens small gaps over time
  • Valve and spout penetrations that need careful sealing
  • Windows and trim inside the splash zone
  • Walls that are out of plumb or out of square and leave voids behind panels

I see this a lot in Seattle bungalows, Tacoma craftsman homes, and mid-century bathrooms across South King and Snohomish County. If a standard surround kit gets forced into a crooked opening, it may look fine at handoff and still develop leaks much sooner than the owner expects.

Moisture protection comes first

The most important job of a bathtub surround is keeping water out of the wall assembly. The finished face matters, but the bigger concern is what happens behind it.

Once water gets past the surface, repairs get expensive fast. Wet framing, damaged insulation, swollen trim, soft subflooring, and staining in the room next door are all common outcomes. For property managers, that can mean tenant disruption and repeat maintenance calls. For homeowners, it usually means a project that grows well beyond the tub alcove.

In the Puget Sound, a surround should be judged first on moisture control, then on appearance.

Local conditions change what works best

National articles tend to treat all bathrooms the same. Puget Sound bathrooms are not the same. Many need shimming, scribing, reframing, or custom trim work before the surround can be installed correctly, especially in older homes with settled walls and patched substrates.

That is one reason grout-free systems do well here. Fewer joints usually means fewer places for water to work in and fewer maintenance points for the owner. Tile can still be an excellent choice, especially if you want a period-appropriate look or a custom layout. But tile asks more from the installer and from the waterproofing plan behind it. If you want to compare tile options, start by matching the material to the room conditions, not just the style.

In this climate, a good-looking surround is not enough. A surround that fits the alcove properly, ties into a sound waterproofing system, and stays serviceable for years is the better investment.

A Detailed Comparison of Bathtub Surround Materials

In a Seattle or Tacoma bath remodel, the material decision usually comes down to one question. What will still look good and stay dry after years of daily use in a room that may already have uneven walls, old framing, and limited ventilation?

That is how I evaluate surrounds in the field. Price matters, but fit, service life, and how forgiving the material is in a real Puget Sound bathroom matter more.

A comparison chart outlining the pros, cons, costs, and durability of five popular bathtub surround materials.

Bathtub surround material comparison

Material Installed Cost (Approx.) Lifespan Maintenance Puget Sound Pro/Con
Acrylic $1,200 to $2,500 Often a solid mid-range service life Low Grout-free and easy to clean, but panel fit and backing matter
Fiberglass $900 to $1,500 Moderate if treated gently Low to moderate Budget-friendly, but easier to scratch and fade
PVC wall panels Qualitative only Usually shorter-term than premium options Low Good for fast coverage and custom fitting, but less durable
Solid surface $2,000 to $3,500 Long-term option Low Durable, repairable, and premium looking
Engineered stone $1,200 to $2,500 Qualitative only Low to moderate Attractive, but impact resistance can be a concern
Tile $2,500 to $5,000+ Can last a long time with proper assembly Medium Flexible design, but more joints and more labor

Acrylic surrounds

Acrylic is a practical choice for a lot of residential projects. It is lightweight, easy to clean, and usually faster to install than tile, which helps in occupied homes and rental turnovers.

The better acrylic systems have fewer seams and simpler trim details. That helps in our region, where small installation errors around corners, valve cuts, or window returns can turn into recurring maintenance problems. In older Puget Sound homes, I pay close attention to whether the alcove is square before recommending a panel kit.

Acrylic works well for:

  • Standard alcove tubs with predictable dimensions
  • Family bathrooms where low maintenance matters
  • Rental units that need a clean, durable finish without grout care

It is a weaker choice when:

  • The wall framing is badly out of plane and the installer tries to force a factory kit to fit
  • The material is thin and flexes under hand pressure
  • Fixture trim, edge trim, or caulk joints are treated as cosmetic details instead of water-control details

A good acrylic surround can hold up well for years. A thin kit over a poorly prepared wall usually does not.

Fiberglass surrounds

Fiberglass is usually the low-cost entry point. For a straightforward bath in a condo, basement unit, or basic hall bathroom, it can make sense.

The trade-off is wear. Fiberglass tends to scratch more easily, lose gloss sooner, and show hard use faster than acrylic or solid surface. In rental housing around Seattle and Tacoma, that often means the surround is still functional but already looks tired.

Fiberglass fits best when:

  • The budget is tight
  • The alcove is standard enough for a clean install
  • The owner accepts that appearance may age faster than structure

For long-hold ownership, I usually only recommend fiberglass when the budget leaves no room for a better panel system.

Solid surface surrounds

Solid surface is one of the best long-term values if the budget allows it. It feels more substantial than thin panel products, avoids grout maintenance, and can often be repaired if it gets scratched.

The product data is strong. Corian solid surface polymer in 1/2-inch (13 mm) thickness is listed with 6000 psi tensile strength, 1.5 x 10^6 psi tensile modulus, and 7890 psi flexural strength in this specification on solid surface shower and tub wall surrounds. The same source notes installed costs of $2,000 to $3,500 and lifespan beyond 20 to 30 years. It also notes 99% water impermeability post-install.

In practical terms, that means fewer maintenance calls, easier cleaning, and a surround that still feels solid years later. For homeowners planning to stay put, or property managers trying to reduce repeat turnover work, solid surface is often money well spent.

Best uses include:

  • Primary bathrooms where durability matters more than lowest first cost
  • Higher-end remodels that still need easy cleaning
  • Commercial or multi-unit settings where repairability has value

The main drawback is the upfront price. Still, compared with redoing a cheaper surround too soon, the math can work out in its favor.

To sort out whether a tiled look is worth the added joints and maintenance, it can help to compare tile options before choosing between true tile and large-format wall panels.

PVC and composite wall panel systems

PVC and other composite panels fill a specific niche. They install quickly, cover a lot of wall area, and can be useful when a bathroom needs a practical reset without the time and cost of tile.

High molecular PVC systems are specified at a minimum 0.090-inch sheet thickness, with ceiling-height models reaching about 82 inches from tub rail to ceiling and covering 100+ square feet in larger applications, according to these PVC tub and shower surround specifications. The same source notes that standard 60×30-inch 3-piece kits cover about 40 to 45 square feet, and that full-wall coverage can cut labor 20 to 30% versus custom tile.

That labor savings is useful in occupied units, insurance repairs, and commercial work where downtime costs money. Some systems also handle custom trimming better than off-the-shelf fiberglass units.

The trade-off is longevity and feel. Many of these products are better suited to utility-minded remodels than premium bathrooms, especially if the room gets hard daily use.

A good fit:

  • Rental properties
  • Basement or secondary bathrooms
  • Commercial washrooms where cleanability matters more than a custom finish

A poor fit:

  • High-end remodels
  • Homes where owners want the surround to feel substantial and age gracefully

Here’s a useful installation overview if you want to see how some systems are assembled in the field.

Tile surrounds

Tile remains a strong option, especially in older Puget Sound homes where walls are rarely simple and the bathroom may need custom cuts around windows, niches, sloped ceilings, or trim conditions. A good tile installer can solve design problems that prefab panels cannot.

Tile also asks more from the assembly. More joints mean more maintenance, and the finish is only as reliable as the substrate, membrane, and sealant work behind it. If you want a tile surround, make sure the installer also understands wet-area waterproofing in construction, not just layout and grout lines.

Tile makes the most sense when:

  • The bathroom has unusual dimensions
  • The design needs a custom layout or period-appropriate finish
  • The owner is willing to maintain grout and sealant joints

Tile causes trouble when:

  • Waterproofing is treated as a separate issue instead of part of the whole wall assembly
  • Cheap setting materials are used to save a little money upfront
  • Corner joints, tub transitions, and penetrations are finished carelessly

In Seattle craftsman homes and Tacoma foursquares, tile can be the right answer. It just has to be built correctly.

Engineered stone and cultured marble style systems

Engineered stone and cultured marble products sit between basic panel systems and premium solid surface. They can give a bathroom a cleaner, more upscale look than fiberglass or thin acrylic, often with fewer joints than tile.

Their weak point is impact performance and repair expectations. The solid surface specification cited above compares solid surface favorably against engineered stone in impact resistance, noting that solid surface is less likely to crack under normal residential impacts such as dropped shampoo bottles. That does not rule out engineered stone. It means the buyer should understand how the product behaves before choosing it.

These systems work best for owners who want an upgraded look without committing to a full tile installation. If the priority is maximum repairability and long service life, solid surface is often the better value.

Beyond the Panels Waterproofing and Backer Boards

A surround can only perform as well as the assembly behind it. If the wall system isn’t built for moisture, even a premium finish won’t save the bathroom.

That’s where many remodels go wrong. Homeowners focus on panel style, color, and edge trim. The contractor should be focused just as hard on the substrate, waterproofing layers, penetrations, and transitions at the tub flange.

A bathtub during the installation process showing framing and concrete support wall in a bathroom renovation.

What should be behind the surround

In wet areas, the usual conversation is between cement board, fiber cement board, and waterproof foam board systems. Each has a place. What matters is using a system designed for a wet wall and installing it completely.

Common good choices include:

  • Cement board for tile assemblies where rigidity and moisture tolerance matter
  • Fiber cement board when the installer wants a strong, stable tile backer
  • Waterproof foam boards such as KERDI-BOARD style systems for lighter, integrated waterproofing assemblies

What should raise concern is ordinary drywall inside a tub surround area. Even moisture-resistant drywall is not the same thing as a true wet-area assembly. Once water finds a path through a seam or penetration, the wall can deteriorate quickly.

For a plain-language overview of why this matters, this guide on what waterproofing means in construction is a useful starting point.

Waterproofing is a system, not a product

A lot of failures happen because people talk about “waterproof walls” as if one material handles everything. It doesn’t.

A reliable tub surround assembly usually includes several coordinated steps:

  1. Wall prep
    The framing is checked, shimmed, or corrected so the surround sits flat and drains the way it should.

  2. Backer selection
    The right board is installed for the chosen finish material.

  3. Seam treatment
    Joints, corners, and fastener penetrations are handled according to the system requirements.

  4. Tub-to-wall transition
    The detail at the tub flange is built so water returns to the tub, not behind it.

  5. Penetration sealing
    Valves, spouts, and accessory mounts are sealed without guesswork.

If the installer can’t explain the waterproofing sequence clearly, that’s a warning sign.

Where older bathrooms need extra attention

Puget Sound remodels often need more than standard prep. In older houses, the walls may bow, old finishes may hide damage, and windows inside the splash area may need a full waterproof trim strategy.

That’s one reason some “one-day install” promises fall apart on real remodels. The visible surround might go up quickly. The hard part is making sure the substrate is flat, stable, and dry enough for a long-lasting result.

A good surround installation looks simple when it’s finished. The work that makes it reliable is mostly the part you don’t see.

Important Design and Accessibility Considerations

A bathtub surround should look right in the room, but it also needs to work for the people using it. That includes how it feels to clean, how it handles daily wear, and whether the bathroom will still be practical years from now.

For bathtub surrounds, style and function must align. A glossy acrylic panel can brighten a small hall bath in Kent. A matte solid surface surround can create a more polished finish in a Seattle primary bath. Tile can add character in older Tacoma homes where a perfectly symmetrical panel layout may not suit the architecture.

A walk-in bathtub installed in a bathroom with safety grab bars and a beige tiled surround.

Design choices that age well

The safest design choice is usually the one that doesn’t fight the room. In practical terms, that means:

  • Large panels help small bathrooms feel less busy
  • Tile patterns add visual detail, but they also add maintenance points
  • Stone-look finishes can give a high-end appearance without the upkeep of natural stone
  • Neutral surround colors tend to stay relevant longer than highly specific trends

If the surround will sit next to a glass enclosure, it helps to think through those pieces together. Homeowners comparing configurations often find it useful to design your custom shower door before finalizing wall finishes, especially when trying to balance trim finishes, panel thickness, and door swing.

Accessibility starts behind the finish

Accessibility features should be planned before the walls are closed up. That’s true whether the project is for aging in place, post-injury recovery, or commercial use where safer access matters.

Grab bars, handheld showerheads, low-threshold entries, and seating all require backing and layout planning. Some surround materials make that easier than others. Tile gives flexibility for accessory placement, but the wall backing still has to be there. Solid surface and panel systems can look clean and modern, but they also need support points mapped out in advance.

Important questions to ask:

  • Will this tub or shower area need grab bars now or later?
  • Is there a user who has limited mobility or balance concerns?
  • Will a handheld shower make the space easier to use?
  • Should shelving be recessed, surface-mounted, or built in?

For households planning ahead, this page about a handicap accessible shower gives a good overview of what to think about before final design selections are locked in.

The best accessible bathroom doesn’t look institutional. It looks intentional, comfortable, and easy to use.

Practical comfort matters

A surround should also support everyday comfort. Shelf placement, cleaning reach, glare from glossy finishes, and how cold or warm a material feels all affect whether people end up liking the bathroom once the remodel is done.

That’s why the “best” bathtub surround option is rarely just a material decision. It’s a use decision.

DIY Installation vs Hiring a Professional Contractor

A bathtub surround can look straightforward on delivery day and still go sideways once the walls are open. I see that often in Seattle and Tacoma area homes, especially where an older bathroom has been patched a few times, the framing is out of square, or past moisture has softened the wall cavity around the tub.

A careful DIY install can work in the right setting. A basic acrylic or fiberglass kit in a newer home, with a standard alcove and solid, dry walls, gives you a fair shot. But the work has to be accurate from the substrate forward. Panel fit, fixture cutouts, adhesive, corner treatment, and tub-to-wall sealing all have to be right the first time, because small water-entry points rarely stay small in our climate.

When DIY can work

DIY is more realistic if the project looks like this:

  • Standard alcove tub with predictable dimensions
  • Walls that are dry and solid after demolition
  • No window in the wet area
  • No plumbing moves or framing repair
  • A surround system built for straightforward installation

Even with those conditions, attaching panels is only part of the job. Keeping water out of the wall assembly is what determines whether the installation holds up.

When a professional is the safer choice

Professional installation usually makes more sense in the kinds of bathrooms common around Puget Sound. Older homes often have bowed studs, plaster transitions, hidden rot at the tub flange, or layers of previous remodel work that were never corrected. Condensation and slow leaks also tend to leave more damage than homeowners expect.

Tile surrounds, custom panel layouts, in-shower windows, and accessibility upgrades raise the difficulty fast. So do tenant turns and primary bathrooms, where downtime and callbacks cost real money.

The expensive part of a failed install is rarely the surround itself. It is opening the walls again, replacing damaged backer, drying the cavity, repairing trim or flooring outside the tub area, and then reinstalling the surround correctly.

DIY mistakes usually do not show up on install day. They show up later at a seam, a corner, or the ceiling below the bathroom.

The practical decision

DIY can reduce labor cost up front. Hiring a contractor lowers the chance of leaks, manufacturer warranty problems, uneven panel lines, and tear-out work a year later.

For a low-use guest bath with simple conditions, DIY may be a reasonable choice. For a main bath, an older Seattle craftsman, a Tacoma rental, or any bathroom where moisture control matters more than first cost, professional installation is usually the better value.

If you are still weighing scope, budget, and how much risk makes sense for your property, this bathroom remodel planning guide will help you sort out those decisions before materials are ordered.

Finding the Right Remodeling Partner in the Puget Sound

The right contractor for a bathtub surround project isn’t just someone who can install panels or tile. You want a remodeling partner who understands moisture management, older regional housing stock, and the difference between a quick cosmetic fix and a durable bathroom assembly.

What to look for

A few things separate a dependable contractor from a risky one:

  • Local remodel experience
    A contractor who regularly works in Seattle, Kent, Tacoma, and the communities between them will be more prepared for older wall conditions, window details, and uneven framing.

  • Clear waterproofing approach
    Ask what goes behind the surround, how corners are treated, and how the tub-to-wall transition is handled.

  • Detailed written proposals
    Good proposals explain scope, not just price.

  • Relevant project examples
    Look for similar bathrooms, not just pretty finished photos.

  • Communication style
    Bathroom remodels go better when the contractor explains options plainly and flags issues early.

For anyone planning a larger bathroom update, this guide to bathroom remodel planning is a helpful checklist for the conversations you should be having before materials are ordered.

A good fit matters

Some companies are built for very large projects only. Others focus only on quick-turn bath systems. Many homeowners and property managers need something in between. They want a contractor who can handle small to mid-size remodels, tenant improvements, and moisture-related repairs without treating the project like an afterthought.

That’s especially important when the surround decision is tied to broader work such as drywall repair, trim replacement, waterproofing, painting, or floor restoration.

Frequently Asked Questions About Bathtub Surrounds

Can you install a new surround over existing tile

Sometimes, but it depends on the condition of the existing tile, the wall flatness, and whether there’s any hidden moisture damage. Covering tile can make sense in limited situations with certain panel systems. It’s a poor choice if the substrate is loose, uneven, or already leaking.

What’s the best bathtub surround option for a rental property

For many rentals, acrylic or a durable panel system is the practical choice because cleaning is easier and grout maintenance is reduced. The right answer still depends on turnover, expected wear, and whether the bathroom walls need correction before new materials go in.

How do you maintain a solid surface surround

Solid surface is one of the easier materials to live with. Regular cleaning with non-abrasive products usually does the job, and minor surface scratches can often be repaired rather than forcing a full replacement. That repairability is one reason many owners choose it for long-term value.

Are eco-friendly bathtub surround options available

Yes, but “eco-friendly” can mean different things. Some owners focus on longevity and choosing a material that won’t need replacement soon. Others care more about manufacturing content or the ability to repair instead of replace. In practice, the most sustainable option is often the one that stays watertight, lasts well, and avoids repeated tear-outs.

Is tile always the most upscale option

No. Tile can look excellent, but upscale doesn’t always mean best. A well-designed solid surface or slab-look panel surround can feel cleaner, more modern, and easier to maintain than a busy tile layout with a lot of grout joints.


If you’re weighing bathtub surround options for a home, rental, or commercial bathroom between Seattle and Tacoma, Wheeler Painting & Restoration Services can help you sort through the trade-offs. Their team handles residential remodeling, tenant improvements, waterproofing, and restoration work with the practical local experience these bathrooms require. Reach out for a consultation if you want a surround that looks good, protects the structure, and holds up in the Puget Sound.

Your Guide to the Best Waterproof Ceiling Paint for Bathrooms in 2026

If you live anywhere in the Puget Sound, from Tacoma up to Seattle, you know the constant battle against dampness. This fight is never more obvious than in the bathroom, where your ceiling is ground zero for moisture problems. The cloud of steam from a hot shower rises, condenses on the cool ceiling, and quietly begins to cause damage.

It's a problem we see all the time at Wheeler Painting. As a local residential contractor serving the Kent area, we know that without the right protection, that daily dose of humidity can turn a pristine ceiling into a peeling, stained mess. This guide will help you understand why the right paint is crucial and how to get a lasting result.

Why Standard Paint Just Can’t Keep Up in a Bathroom

Think of regular interior paint as a cotton t-shirt in a rainstorm—it’s just not made for that kind of moisture. It soaks it all in. Standard latex or flat-finish paints are porous, meaning water vapor can easily work its way through the paint film and into the drywall underneath.

Once moisture gets trapped, the paint’s bond with the ceiling starts to fail. Pretty soon, you’ll notice a few tell-tale signs of trouble that could lead to needing a full residential remodel if not addressed.

A damp, steamy bathroom shower area showing significant water damage, peeling ceiling paint, and mold growth.

  • Peeling and Bubbling: Trapped moisture physically pushes the paint off the surface, creating ugly blisters and peeling sheets.
  • Ugly Stains: Water can leave behind yellowish or brownish streaks as it evaporates, making the ceiling look old and dirty.
  • Mold and Mildew: This is the big one. Damp drywall is the perfect breeding ground for mold, which not only looks terrible but can also impact your home's air quality.

Let this go on for too long, and you're not just looking at a paint job anymore. You could be facing rotted drywall and a much more expensive visit from a drywall contractor.

How Waterproof Paint Creates a Real Defense

This is where a purpose-built waterproof ceiling paint changes the game. It acts less like a t-shirt and more like a high-quality raincoat for your ceiling—essential for homes and businesses in our area.

These paints are designed with special binders that form a tight, less-permeable surface. Instead of soaking in, moisture beads up on the paint and evaporates away. Critically, these formulas almost always include mildewcides—powerful additives that actively stop mold spores from taking hold and growing.

To give you a clearer picture, here’s a quick rundown of how different paints perform under the constant stress of a bathroom environment.

Paint Performance in High-Humidity Bathrooms

Paint Type Performance in High Humidity Resistance to Mold and Mildew Best Use Case
Standard Interior Paint Poor. Absorbs moisture, leading to peeling and bubbling. Low. Can actually feed mold growth. Living rooms, bedrooms, and dry areas.
"Bathroom" Paint Good. Moisture-resistant and more durable than standard paint. Moderate to High. Usually contains mildewcides. Guest bathrooms or low-steam powder rooms.
Waterproof/Epoxy Paint Excellent. Creates an impermeable barrier against water. High. Formulated to prevent mold and mildew growth. Master bathrooms, shower ceilings, and commercial spaces.

As you can see, choosing a true waterproof paint isn’t just about aesthetics; it's a practical investment in your property's longevity.

This is a vital first line of defense, but remember to look at the whole picture. Mold can also crop up in other damp spots, like around HVAC vents. For tips on that, check out this helpful Covenant Aire Solutions' mold guide.

Ultimately, using a top-tier waterproof paint is one of the smartest and most cost-effective forms of waterproofing you can do. For homeowners and facility managers here in Kent, WA, and across the region, it’s a non-negotiable step to protect your investment from our famously damp climate.

How Waterproof Paint Actually Works

Think of waterproof ceiling paint as a high-tech raincoat for your ceiling. A regular interior paint is more like a cotton sweatshirt—it’s going to get soggy. In the relentlessly damp climate we get here from Seattle to Tacoma, you need something specifically designed to keep the water out. But what exactly is going on inside the can that makes this paint so tough?

It all comes down to the paint’s unique formula. These aren’t your standard latex paints; they’re loaded with high-performance acrylic and epoxy resins. As the paint cures, these resins interlock to form a tight, continuous film across the surface. This creates a formidable barrier that stops water vapor from a steamy shower from ever reaching the drywall underneath. Moisture simply beads up on the surface and evaporates, instead of soaking in and causing damage.

The Science Behind a Moisture-Proof Barrier

The real measure of a paint's effectiveness against moisture is its permeability rating, or "perm rating" for short. It sounds technical, but it’s just a simple number that tells you how easily water vapor can pass through a material. The lower the perm rating, the better the barrier.

A standard interior latex paint lets moisture pass through pretty easily, giving it a high perm rating. In contrast, a true waterproof ceiling paint is engineered for a very low perm rating, creating a seal that's nearly impenetrable to steam and constant humidity.

This low permeability is what saves ceilings in bathrooms across the Pacific Northwest. It’s the difference between a ceiling that looks brand new for years and one that starts to stain, bubble, and peel after just a few damp seasons.

More Than Just a Barrier: It Fights Back

A great waterproof paint for a bathroom does more than just block water. It actively fights back against one of its worst side effects: mold and mildew. This isn't just a surface-level feature; it's built right into the paint's chemistry.

  • Mildewcides: These are EPA-registered antimicrobial agents blended directly into the paint. They create a surface that's hostile to mold spores, preventing them from ever getting a foothold. This protection doesn’t wear off; it lasts for the entire life of the paint job.

  • Fungicides: Working alongside mildewcides, fungicides target a wider variety of fungal growth, which is critical for keeping your bathroom’s air clean and healthy.

Bathroom ceilings face a constant battle with humidity. According to the EPA, mildew-resistant paints can slash mold growth by up to 90% in high-humidity areas—a vital stat for any home in the Puget Sound. You can get more professional insights on how paint combats moisture from painters who deal with it every day.

Water-Resistant vs. Waterproof: What's the Difference?

You’ll see plenty of paints on the shelf labeled "water-resistant" or "washable." And while they’re definitely a step up from basic wall paint, they aren't the same as a true "waterproof" formula. For any property owner looking for a real, long-term solution, knowing the difference is crucial.

Water-resistant paints are built to handle the occasional splash and can be wiped clean. They have some durability, but they simply can't hold up to the constant, high-humidity assault of a frequently used bathroom. Over time, they will fail.

Waterproof paints, on the other hand, are specifically formulated to create that impermeable barrier we talked about, designed for constant exposure to moisture. This is the only legitimate choice for a shower ceiling or in a commercial space like a gym locker room. For any project in our region, from a residential remodel in Kent to a commercial job in Seattle, choosing a true waterproof product is the only way to guarantee performance and avoid costly repairs down the road. At Wheeler Painting, we make sure the right material science is used to protect your investment.

Choosing the Right Finish for Your Bathroom Ceiling

Okay, you've decided on a top-notch waterproof ceiling paint for your bathroom. That’s a great first step, but now comes a decision that’s just as important: the finish. The paint's sheen isn't just a style choice; it plays a huge role in how well your ceiling stands up to moisture and how easy it is to clean.

Think of it this way: a paint's finish is like the armor on its surface. A flat, porous finish is like soft leather—it looks nice, but moisture can soak in. A glossier, harder finish is like a sheet of steel—water beads up and rolls right off. For anyone living in the damp Puget Sound region, from Kent to Seattle, getting this choice right is key.

Why a Little Shine Goes a Long Way in High-Moisture Areas

For years, the standard advice for bathroom ceilings has been to use a semi-gloss or satin finish, and for good reason. The more sheen a paint has, the smoother and less porous its surface becomes, creating a tougher barrier against moisture.

  • Semi-Gloss Finish: This has long been the champion for wet environments. Its noticeable shine comes from a tight, durable film that’s fantastic at repelling water. Steam from the shower beads up on it, and you can easily wipe away any mildew or grime without scuffing the paint. It’s our go-to for high-traffic commercial restrooms or a busy family bathroom that gets steamy every single day.

  • Satin Finish: This is the crowd-pleaser. Satin offers a much softer glow than semi-gloss but still packs a serious punch when it comes to moisture resistance and durability. It hits that perfect sweet spot between performance and a less reflective look, making it a reliable choice for most residential bathrooms.

On the other hand, traditional flat or eggshell finishes are usually a bad idea for a bathroom ceiling. Their chalky, matte texture acts like a sponge for moisture, which can lead to staining and mildew. They’re also notoriously difficult to clean; scrubbing often "burnishes" the surface, leaving ugly shiny patches. To get a deeper dive into how sheens work, you can learn more about selecting the right finish for ceiling paint in our other guide.

The New Guard: High-Performance Matte Finishes

For a long time, if you wanted a ceiling that could handle bathroom humidity, you had to live with some shine. But paint technology has come a long way. Now, you don’t have to sacrifice your modern, flat aesthetic for performance.

Big news for design lovers: major paint brands now offer specialty "bathroom paints" in a true matte finish. These aren't your grandpa's chalky flat paints. They're built with the exact same high-tech acrylic resins and mildew-fighting additives as their glossier cousins. You get that chic, non-reflective look without giving up an ounce of moisture protection.

Three rectangular paint sample boards displaying satin, semi-gloss, and matte finishes on a white surface background.

This is a game-changer for residential remodeling projects. You can finally have a bathroom with that sophisticated, velvety look that flows with the rest of your home's design, all while giving the ceiling the tough-as-nails protection it needs.

Making the Final Call for Your Space

So, what’s the right move for your property? For most homes we work on in the Tacoma area, a satin finish is the perfect all-rounder, delivering durability, washability, and a touch of elegance. If you’re a property manager dealing with a rental, a business with commercial renovations, or a bathroom with poor ventilation, the superior toughness of a semi-gloss is the smartest long-term play.

But if your heart is set on that contemporary, zero-shine look, a specialty matte bathroom paint is an fantastic choice. Just make absolutely sure the can says it's formulated for high-humidity areas. At Wheeler Painting, we walk our clients through these options every day, making sure the finish you choose not only looks beautiful but also provides the lasting protection your property deserves.

Knowing When Paint Alone Is Not the Answer

As professional painters who have served the damp Puget Sound climate for years, we've seen it all. A high-quality waterproof ceiling paint is a fantastic product, but it’s crucial to understand what it can—and can't—do. Think of it as the final layer of defense, not a structural fix.

Painting over a deeper moisture problem is like putting a fancy hubcap on a flat tire. It might look better for a little while, but it doesn’t solve the underlying issue. A lasting, quality paint job always starts with an honest assessment of what's really going on.

Surface Mildew vs. Deeper Structural Issues

The first step is figuring out if you have a simple surface problem or a sign of a much bigger headache.

  • Surface-Level Mildew: If you see small, dark specks on the paint, especially in corners or areas with poor airflow, that's often just surface mildew from humidity. After a thorough cleaning and proper prep, a fresh coat of waterproof ceiling paint is exactly what you need.

  • Deeper Structural Issues: On the other hand, if you’re seeing large, spreading brown or yellow stains, sagging drywall, or paint that’s bubbling and peeling off in sheets, you’re looking at an active water leak. These are red flags that demand immediate attention.

A common mistake we see is property owners trying to seal a leak with a coat of paint. It will not work. Water is persistent and will always find a way through, ruining the new paint and continuing to rot the drywall, framing, and insulation behind it.

When your ceiling shows signs of water damage, you have to stop the leak and repair the structure before a single can of paint is opened. For a better idea of what that repair process involves, resources explaining Portland area water damage solutions offer a great overview of the steps, which are very similar to what we handle here in the Seattle area.

The Overlooked Culprit: Poor Ventilation

Sometimes, the water isn't coming from a leak above, but from the air inside the room itself. Your bathroom's exhaust fan is your number one tool for getting all that hot, steamy air out before it condenses on your ceiling. If that fan is broken, too small for the room, or just never gets used, no paint in the world can win against constant condensation.

You'll know you have a ventilation problem if you see:

  • Mirrors, walls, and windows that stay fogged up long after a shower.
  • A room that always feels damp or clammy.
  • Visible water droplets forming and dripping from the ceiling.

Painting a ceiling in a bathroom with bad ventilation is a temporary fix, at best. All that moisture will just cause even the best waterproof paint to fail prematurely. For our commercial clients with facilities in the Kent-Seattle corridor, we stress that proper ventilation is absolutely non-negotiable for maintenance. The only real solution is to repair or upgrade the ventilation system first.

At Wheeler Painting, we're not just here to sell an interior painting job; we're here to provide a solution that lasts. If we spot signs of a leak or a failed fan during an estimate in Kent or Tacoma, we’re going to tell you upfront. Our goal is to be the trusted partner who ensures your facility maintenance or residential remodeling project is done right from the ground up. This approach is fundamental to what we do, and you can learn more about what waterproofing is in construction in our comprehensive guide.

The Professional Process for a Flawless, Lasting Finish

Choosing the right paint for your bathroom ceiling is only half the battle. The real secret to a finish that looks perfect for years and actively fights off moisture lies in the process—the meticulous, step-by-step method that separates a quick touch-up from a true professional job.

It’s a truth we’ve seen countless times in homes and businesses around Kent, Seattle, and across the damp Pacific Northwest: paint jobs that fail early almost always do so because of shortcuts taken during prep. Our entire process is built around getting it right the first time, saving property owners from the future headaches of peeling, bubbling, and mildew.

The Prep Work Foundation

You wouldn’t build a house on a shaky foundation, and the same principle applies to painting. The hard truth is that the majority of our time on any professional painting project is spent on preparation, long before a can of finish paint is even opened. For a high-humidity room like a bathroom, every single prep step is critical.

We always start with a deep clean. Over time, bathroom ceilings accumulate a nearly invisible film of residue from soap, hairspray, and steam. This film is the enemy of new paint, preventing it from grabbing hold. We thoroughly wash the surface to give the paint a truly clean slate to adhere to.

Next, we tackle any signs of past failure. This is where the real detail work happens:

  • Scraping: We meticulously scrape away any loose, peeling, or bubbling paint until we get back to a solid, stable surface.
  • Sanding: The edges of those scraped areas are then carefully "feathered" by sanding, which ensures there are no ridges or lines that will show through the final coat.
  • Patching: Any remaining divots, cracks, or imperfections are filled with a high-quality spackling compound, which is then sanded perfectly smooth once dry.

This transforms a damaged surface into a pristine, uniform canvas. Skipping this level of preparation is a guarantee that old problems will telegraph right through the new paint, and it will eventually peel all over again.

The following infographic shows how we diagnose moisture problems that might go deeper than just a coat of paint.

An infographic showing four steps to resolve moisture issues before using waterproof ceiling paint for bathroom projects.

Following this process ensures we’re providing a real solution, not just covering up a symptom of a larger issue like an undetected leak or inadequate ventilation.

Priming and Painting for Maximum Durability

With a perfectly prepped surface, it's time to prime. If there's one step you should never, ever skip in a bathroom, it's this one.

Think of primer as the ultimate handshake between the ceiling and the paint. It’s an adhesive that grabs onto the prepared surface and creates the perfect bond for the topcoat, ensuring it won't peel or blister under the stress of constant humidity.

We use a specific type of primer—one that is high-adhesion, stain-blocking, and mold-resistant. It seals the fresh patches, stops old water stains from bleeding through, and adds a powerful layer of defense against mildew. For anyone thinking about repainting a bathroom ceiling, recognizing the power of a quality primer is essential.

Finally, we get to the main event: applying the finish coats with precision and care.

  1. Cutting In: First, we use a brush to meticulously paint the edges where the ceiling meets the walls and around any fixtures. This creates a clean, sharp line.
  2. Rolling: Next, we roll out the ceiling with two thin, even coats of the waterproof ceiling paint for bathroom applications. Applying two thin coats is far more effective than one thick one, as it allows the paint to cure properly and build maximum durability.
  3. Drying and Curing: We make sure the area is well-ventilated during and after painting. While the surface might feel dry in a few hours, the paint needs several days to fully cure and harden into its moisture-resistant shell.

This methodical approach is how we deliver a flawless finish that stands up to the demands of time and moisture for homeowners and facility managers across the Tacoma area. It’s the professional difference that turns a paint job into a long-term investment in your property.

Protect Your Property and Hire a Seattle Area Pro

We’ve covered a lot of ground in this guide, but it all comes down to one simple truth: using a high-quality waterproof ceiling paint is a non-negotiable for any bathroom project here in the damp Pacific Northwest. It’s so much more than a finishing touch—it's a critical shield for your entire property.

By choosing the right paint, you're actively preventing the kind of deep, structural rot that comes from unchecked moisture. You're also protecting your family’s air quality by stopping mold in its tracks and, in turn, safeguarding your property's value. For anyone managing a home or commercial building from Kent to Tacoma, this isn't just an expense; it's one of the smartest investments you can make.

What Does a Professional Bathroom Ceiling Project Cost?

It’s the first question on every property owner's mind: what’s this going to cost? In the Seattle-Tacoma area, the price for a professional to paint your bathroom ceiling really depends on a few things: the size of the room, what kind of shape the ceiling is in now, and how much prep work is needed.

A small, simple bathroom with a ceiling that’s already in good condition will naturally be on the lower end. But if the job involves scraping away layers of old, failing paint, patching up water stains, and applying a specialized stain-blocking primer, the price will reflect the hours and skill needed to do it right.

A professional quote isn't just for a bucket of paint and a few hours of work. It’s for the peace of mind that comes from a meticulous process. It covers thorough prep, top-tier materials, and the expertise to ensure the finish lasts for years, saving you money on future repairs.

Hiring a true expert ensures every single step—from cleaning and scraping to priming and applying those final coats—is handled with precision.

Partner with a Trusted Local Contractor

You now have a solid understanding of the what, why, and how behind a durable bathroom ceiling. The next step is translating that knowledge into a beautiful, lasting result in your own property. If you’re a property owner, building owner, or facility manager in the Puget Sound region who values quality work and a stress-free process, we’re here to help.

Wheeler Painting is a trusted local provider of residential and commercial painting services. We are the perfect fit for facility managers and property owners looking for a smaller firm that specializes in mid-size tenant improvement and facility maintenance projects. We're not just experts in house painting near me; we're a full-service residential contractor near me and commercial construction near me team that intimately understands the unique challenges our local climate throws at our buildings. We've built our name on clear communication and an unwavering commitment to getting the job done right the first time.

When you bring us in for your interior painting or commercial renovations, you’re getting more than just painters. You’re gaining a dedicated partner who will protect your property as if it were our own.

Don't let a damp bathroom ceiling quietly turn into a much bigger, more expensive problem. Take the final step and have it handled by professionals who know exactly how to deliver a flawless, moisture-proof finish. If you're ready to protect your property and feel the confidence that comes with expert craftsmanship, contact Wheeler Painting today. We’ll be happy to schedule a consultation and provide a clear, detailed estimate for your project.

Frequently Asked Questions About Bathroom Ceiling Paint

As a local painting contractor here in the Puget Sound for many years, we've heard just about every question you can imagine when it comes to bathrooms. Here are some of the most common ones we get from homeowners and property managers, with straightforward answers to help you get your project right.

Can I Just Use Regular Interior Paint on My Bathroom Ceiling?

That's a question we hear a lot, and our answer is always a firm no. Think of regular paint like a dry sponge. The moment your shower steams up the room, that paint will soak up the moisture. Before you know it, you're looking at peeling, bubbling, and the perfect setup for mold and mildew to move in.

In a damp climate like ours in the Pacific Northwest, using a dedicated waterproof ceiling paint for your bathroom isn't a luxury—it's essential for a finish that actually lasts.

How Long Should I Wait to Use the Shower After Painting?

This is a big one. While the new paint might feel dry to the touch in just a few hours, it’s not ready for a steam bath just yet. The paint is still "curing," which is the chemical process where it hardens into a durable, moisture-blocking shell.

We always tell our clients to wait at least 48-72 hours before turning on the shower. Giving it that time ensures the paint performs as it should and protects your ceiling for years to come.

What’s the Best Paint Finish for a Bathroom Ceiling?

Traditionally, satin and semi-gloss were the go-to choices. Their slicker surfaces are fantastic at repelling water droplets and are incredibly easy to wipe clean.

The great news is that paint technology has come a long way. You can now find high-performance specialty bathroom paints in a beautiful, modern matte finish. This means you can get that stylish, non-reflective look without giving up an ounce of durability or mildew resistance.

Is "Bathroom Paint" the Same as "Waterproof Paint"?

Not necessarily, and it's a critical distinction. The term "bathroom paint" usually refers to a quality latex paint that's formulated to resist moisture and contains mildewcides to stop mold growth. It’s a huge step up from regular paint.

However, a true "waterproof" paint, often an epoxy-based formula, creates a much stronger, non-porous barrier. We typically recommend this for ceilings directly over a shower stall or in commercial facilities, small bathrooms, or older homes with poor ventilation. For more answers to common renovation questions, you might find these SitePro Bathrooms renovation questions to be a useful resource.

The most critical step isn't just the paint, but the preparation. A professionally painted bathroom ceiling relies on meticulous cleaning, scraping, patching, and priming to guarantee the new waterproof paint can form a perfect, lasting bond.


Ready to stop worrying about your bathroom ceiling? The expert team at Wheeler Painting has provided durable, professional interior painting and remodeling solutions for homeowners and businesses from Seattle to Tacoma for years. Contact us today for a straightforward consultation and a project handled with care. Learn more about our interior painting services at wheelerpainting.com.

Can You Paint Panelling? Transform Your Walls

You’re standing in a room in Seattle, Kent, Tacoma, or somewhere in between, looking at dark wall panelling that makes the whole space feel older, smaller, and heavier than it should. Maybe it’s real wood. Maybe it’s faux wood sheets from a past remodel. Maybe it’s in a family room, office, rental, lobby, or tenant space that needs to feel cleaner and more current without tearing everything apart.

The short answer is yes, you can paint panelling. In many cases, it’s one of the smartest upgrades you can make if the panelling is sound and you want a big visual change without a full demolition. For Puget Sound properties, that matters. Moisture, seasonal humidity, and long dry times can punish sloppy work, but painted panelling holds up well when the surface is cleaned, sanded, primed correctly, and coated with the right finish.

Transform Your Space You Can Paint Panelling

A lot of people assume panelling has to come out. That’s usually not true.

When the boards or panel sheets are stable, painting them is often the practical move. For homeowners and commercial property managers, painting existing wood paneling can save 50-70% versus full removal and replacement, and projects can finish in 2-4 days for 1,000 sq ft rooms instead of stretching into demolition and rebuild work that can take weeks, according to the verified data tied to panel painting background and restoration context. That same verified data also notes that dark pine paneling was prevalent in 25% of mid-century homes.

A smiling woman stands in a bright, modern living room with elegant wall paneling and city views.

In practice, the difference is dramatic. A room that felt dim and dated can start reading as bright, clean, and intentional once the orange or brown finish is gone. You don’t need to remove every panel to get there. You need the right prep, the right primer, and patience with the coating schedule.

When painting panelling makes sense

Painting is usually the better choice when:

  • The panelling is structurally sound. It’s attached well, not swollen, and not actively failing.
  • You want a cleaner look without major construction. That matters in occupied homes and active commercial spaces.
  • You’re updating on a budget. Labor and disposal costs add up fast when tear-out starts.
  • You want less disruption. Demolition creates dust, trim damage, drywall repair, and often follow-up trades.

Practical rule: If the panelling is ugly but solid, paint is usually the first option worth evaluating.

There are exceptions. If panels are water-damaged, mold-affected, delaminating, or hiding bigger wall problems, painting over them is only covering trouble. But when the substrate is stable, paint can turn a room around with far less mess.

For property owners comparing finishes, it also helps to understand whether your surface should be coated opaquely or left visible with a transparent finish. This paint or stain comparison for wood surfaces is useful when you’re deciding how much of the original material you want to show.

Your First Step Preparing Panelling for a Flawless Finish

Prep decides whether painted panelling looks professional or starts peeling around grooves, seams, and trim lines. Most failures happen before the first finish coat ever goes on.

The first thing to identify is the type of panelling you have. Real wood behaves differently from laminate-faced sheets, printed hardboard, veneer, or MDF trim systems. Real wood may bleed tannins. Laminate can resist primer if it isn’t sanded well. MDF drinks up coating and swells if edges are ignored.

Start with cleaning, not sanding

Old panelling holds years of dust, wax, smoke residue, hand oils, and cleaner buildup. If you sand that into the surface, you make the job harder.

Verified manufacturer-guideline data notes that prep using TSP solution removes 95% of stains, light 220-grit sanding improves adhesion by 80%, and with proper cleaning, groove-first priming, and coating sequence, paint adherence exceeds 98%. The same verified data notes that painting paneling reduces timelines by 70% compared to remodels in Puget Sound markets, as summarized in this painted wood paneling preparation reference.

A checklist of five steps for preparing wall paneling for painting, featuring illustrations of cleaning, filling, sanding, dusting, and taping.

A solid prep routine looks like this:

  1. Wash the walls first. Use a TSP solution or substitute, especially around lower wall areas, door casings, and switch plates.
  2. Rinse and dry. Cleaner residue can interfere with primer.
  3. Repair obvious damage. Fill dents, old nail holes, and chips where needed.
  4. Scuff-sand the whole field. Focus on the sheen, not heavy material removal.
  5. Vacuum and wipe down thoroughly. Dust left in grooves will show up in the finish.
  6. Mask adjacent surfaces. Floors, trim, outlets, and ceilings need protection.

Do you have to sand

In most cases, yes.

You don’t have to grind the panel flat. You do have to dull the existing finish so primer can grab. Glossy polyurethane and factory-finished hardboard are especially unforgiving if you skip this step. Light scuff-sanding with 220-grit is the sweet spot for many panelled walls because it cuts sheen without gouging the surface.

If you want a plain-language explainer on grit choice before you start, this guide on using 200-grit sandpaper for paint prep helps homeowners understand where a fine prep grit fits into a paint-ready surface.

Sanding isn’t about making the wall look rough. It’s about giving primer something to hold.

Know what you’re aiming for

There are really two finish paths:

Finish path What it looks like Prep intensity
Paint and keep the grooves You still see panel lines and texture Moderate
Fill grooves for a flatter wall look More modern, less obviously panelled Higher

If you’re painting over stained or sealed wood, extra care at the cleaning and sanding stage matters even more. This guide on painting over wood stain is worth reviewing because many panelled rooms have old stain systems under the clear coat.

Puget Sound prep reality

Western Washington slows people down for one simple reason. Surfaces don’t always dry when the clock says they should.

In homes near Seattle, Tacoma, and the damp corridor in between, panelling in basements, north-facing rooms, and older buildings can hold surface moisture longer than expected. That affects sanding dust, primer open time, and topcoat leveling. If the room feels cool and closed up, improve airflow before you start. A dry room is easier to prep and easier to paint well.

The Best Primers and Paints for Wood Panelling

If you ask whether can you paint panelling, the hidden question is usually this: what primer do I need so the old color, stain, or shine doesn’t come back through?

That’s the decision that separates a clean finish from a callback.

A collection of paint cans, primers, and painting tools displayed on a smooth white surface.

Match the primer to the panel surface

Not all panelling needs the same product.

  • Real wood with tannins often needs a stain-blocking primer. If you skip that, yellowing or brown bleed can come through your finish coat.
  • Glossy faux wood or laminate-faced panels need a high-adhesion primer after sanding.
  • MDF trim-style panelling needs sealing because raw or thirsty sections absorb coating unevenly.
  • Previously painted panelling still needs evaluation. If the old coating is soft, chalky, or failing, no primer can save bad substrate.

For many wood-panel jobs, shellac or oil-based stain blockers still solve problems that ordinary latex primers don’t. But they also come with trade-offs.

The fume issue matters in Western Washington

In small enclosed rooms, ventilation is not a side note. Verified data tied to indoor air quality states that a 2025 EPA report highlighted VOCs from oil-based products exceeding safe limits by 40-60% in rooms under 200 sq ft without mechanical ventilation, with 25% higher respiratory complaints in Pacific Northwest retrofits. That same verified data notes that oil-based products can take 24-48 hours to dry, and that low-VOC shellac primers such as BIN blocked tannins 95% effectively in Sherwin-Williams 2025 tests, while asthma rates were noted at 12% in Washington state in the same verified-data summary from the indoor air quality and primer discussion.

That matters if you’re painting a bedroom, office, basement room, or occupied commercial interior.

Health note: A strong primer might solve stain bleed and still be the wrong choice if the room has poor airflow and people are living or working in it during the job.

What works well in real rooms

A practical approach is to choose products by problem:

Surface condition Better primer choice Why
Wood stain bleeding through Shellac-based stain blocker Strong sealing performance
Slick but clean panel face Bonding primer Helps topcoat grip after sanding
Patchy repairs and mixed surfaces Quality acrylic primer Good tie-coat when heavy stain block isn’t needed
Small enclosed room with ventilation concerns Lower-odor shellac option where suitable Balances stain blocking with air quality concerns

For topcoats, interior latex in a satin finish is a dependable choice for many residential panelled walls because it gives some washability without exaggerating every defect. In higher-traffic commercial interiors, a tougher finish may make more sense, especially where walls get touched, bumped, or cleaned often.

Sheen matters more than many people think

Flat paint hides defects best, but it’s harder to clean. Semi-gloss is durable, but it can make every groove, patch, and lap mark more visible. Satin usually lands in the workable middle for panelled walls.

Before buying material, it helps to estimate quantity accurately, especially if you’re priming plus applying multiple coats. A simple paint calculator for room sizing can help you avoid underbuying or stacking extra gallons in the garage.

Product choice affects appearance and schedule

Cheap primer is expensive once you count rework. Thin topcoats can also struggle to hide dark panelling evenly, especially over repaired grooves or mixed porosity. The best finish comes from a system that works together: cleaner, sanded surface, correct primer, and a topcoat that levels well under local conditions.

That’s why painted panelling done right looks calm and uniform. Done wrong, it flashes, drags, stains through, and starts telling on itself when the light hits the wall.

How to Apply Paint for a Smooth Panelled Wall

Application is where homeowners either get a surprisingly good result or create a wall full of drips, flashing, and visible groove buildup. The method matters, but the sequence matters more.

A gloved hand uses a paint roller to apply a light-colored coat of paint onto wooden wall paneling.

Choose your finish style first

Before opening a can, decide whether you want to keep the panel grooves visible or fill them for a smoother wall look.

Keeping the grooves is faster and usually safer for DIY work. Filling them can look more current, but it adds labor and raises the chance of visible seam issues if the wall moves seasonally. In Western Washington, that movement is real. Humidity changes and older wall assemblies can telegraph weak filler work.

If you’re keeping the grooves

This is the simpler route.

Use a brush to cut into grooves and edges first, then follow with a roller on the flat faces. A 3/8-inch nap roller is a good practical choice on many panelled walls because it covers well without throwing too much texture. Work in manageable sections so the brushed areas and rolled areas blend together while still wet.

A reliable order looks like this:

  • Brush the grooves first. Don’t flood them.
  • Roll the panel faces next. Use light, even pressure.
  • Back-brush drips immediately. Groove buildup dries ugly.
  • Keep coats thin. Thick coats sag on vertical panel lines.

The cleanest panel jobs usually come from restraint. Too much paint at once is what creates ridges and drips in the channels.

If you want a flatter modern wall

Verified guidance for the groove-filling approach notes that glossy paneling should be cleaned thoroughly, then lightly sanded with 220-grit to create a 50-100 micro-texture profile, which boosts adhesion by 60-80%. That same verified data says skipping sanding causes 55% of peeling failures within 2 years, and recommends spot-priming seams and grooves first, drying 2-4 hours, then filling grooves with lightweight spackling, not hot mud, which cracks 70% of the time, as summarized in this Benjamin Moore paneling application guide.

That protocol exists for a reason. Groove filler fails when it’s applied over a slick, unprimed channel.

A pro sequence for filled-groove panelling

  1. Clean and dry the wall.
  2. Scuff-sand the entire surface.
  3. Spot-prime grooves and seams first.
  4. Fill grooves with lightweight spackling.
  5. Sand the filled areas flush.
  6. Vacuum and tack-cloth the wall.
  7. Prime the full wall.
  8. Apply two thin finish coats.

Here’s a walkthrough that can help you visualize the process in motion:

Brush, roller, or sprayer

Each tool has a place.

Method Best use Trade-off
Brush Grooves, corners, edges, small repairs Slow, easy to leave marks if overloaded
Roller Most wall fields Can miss deep channels without brushing first
Airless sprayer Very smooth finish, larger empty rooms, commercial spaces More masking, more setup, more overspray risk

For occupied homes, roller-and-brush is often the practical choice. For vacant interiors or tenant improvements where a very even finish matters, spraying can produce a cleaner look if the prep and masking are done properly.

Watch the wet edge

Most amateur problems come from overworking paint. They roll a section, go back into a half-drying area, then chase streaks that weren’t there a minute ago. In the Puget Sound climate, that gets worse in cool rooms where coatings stay open longer but don’t level evenly if airflow is poor.

Two habits help:

  • Box your paint in one bucket if you’re using more than one can, so color stays consistent.
  • Let coats dry fully before sanding or recoating, especially in damp rooms.

If your project includes trim, built-ins, or panel moulding details around the wall, this trim painting guide helps with cleaner transitions and sharper finish lines.

What a smooth result actually looks like

A pro-finished panel wall doesn’t look thick. It doesn’t have paint pooled in grooves. It doesn’t show patch halos where filler telegraphs through. It looks even, intentional, and quiet.

That’s the target. Not “covered.” Finished.

Painting Panelling Common Mistakes to Avoid

The biggest DIY mistake is thinking panelling is just another wall. It isn’t.

Panelling usually has sheen, grooves, old residue, hidden movement at seams, and sometimes a surface that absorbs paint unevenly. If you shortcut any of that, the wall tells on you later.

Mistake one skipping the primer logic

People often ask which paint is best, then buy topcoat before deciding what the panel surface needs. That’s backwards.

A dark stained wall may need stain blocking. A slick faux-wood wall may need adhesion help. MDF may need sealing before anything else. If the primer choice is wrong, the finish coat can still fail even if it looks decent on day one.

A beautiful finish coat can’t rescue bad prep or the wrong primer.

Mistake two treating MDF like solid wood

This one causes a lot of frustration on decorative panelling, trim walls, and newer millwork packages.

Verified MDF guidance says the right sequence starts with a primer coat first to seal the porous surface, because skipping that leads to blotchy results in 70-80% of DIY attempts. The same verified data says to lightly sand with 220-grit and caulk seams after priming dries in 4-6 hours, because caulk flexes with panel expansion and reduces cracking by 90% over rigid fillers like spackle, based on the verified summary from this MDF panelling paint method video reference.

That matches what contractors see in the field. MDF edges and faces don’t behave like sealed lumber. They soak up coating differently, and rigid seam repairs tend to print through or crack.

Mistake three rushing dry time in damp weather

In Western Washington, impatience costs people finish quality.

A room can feel dry and still be a poor painting environment if the air is cool, heavy, and stagnant. That shows up as dragging roller marks, slow cure, and dirt sticking to the surface before it hardens. If windows can’t be opened, use controlled airflow and keep the room conditions steady.

Mistake four overfilling grooves and sanding poorly

Homeowners chasing a smooth-wall look often overpack the grooves, then sand unevenly. The result is a wall that flashes under side light. You can see every repair line.

For groove filling, lighter applications with proper priming in between are safer than trying to bury the channels in one pass. And if a groove still reads slightly after primer, that’s often better than a heavy, obvious repair hump.

Mistake five using too much paint per coat

More paint doesn’t mean better coverage. It usually means more sagging.

Thin, even coats cure harder and look smoother on panel profiles. Heavy coats skin over, trap movement, and collect in every low point.

DIY vs Hiring a Pro for Your Puget Sound Home

A capable homeowner can absolutely paint panelling. If the room is small, the panels are in good shape, you’re keeping the grooves, and you’re comfortable cleaning, sanding, priming, patching, and cutting sharp lines, DIY can make sense.

DIY gets less attractive when any of these are true:

  • The room is occupied and ventilation is limited
  • The panelling is glossy, stained, or tannin-heavy
  • You want the grooves filled for a flatter wall look
  • The project includes high walls, built-ins, trim packages, or commercial scheduling
  • You need a predictable finish with minimal disruption

For homes and properties from Tacoma to Seattle, the climate is part of the decision. Dry times can stretch. Moisture can affect filler and primer performance. A room that looks simple can turn into several rounds of sanding, sealing, and touch-up if the substrate isn’t read correctly from the start.

Hiring a pro is often the more cost-effective choice when the goal is a guaranteed outcome, not just a completed task. Professional crews bring better surface diagnosis, better masking, cleaner groove work, sharper trim transitions, and application methods that fit the room. They also know when a panel system should be painted, repaired more extensively, or left alone until a broader remodel solves the underlying issue.

If you’ve been asking can you paint panelling, the honest answer is yes. The better question is whether you want to spend your weekends learning all the ways panelled walls can go wrong, or have the finish done once and done right.


If you’re in Kent, Seattle, Tacoma, or the communities in between and want help deciding whether to paint, repair, or fully update panelled walls, Wheeler Painting & Restoration Services can help you assess the surface, choose the right approach, and get a durable finish that fits your home, tenant improvement, or commercial renovation schedule.

Paint or Stain? Guide for Kent, Seattle, Tacoma

A lot of people in Kent, Seattle, and Tacoma end up at the same point. The deck boards are weathered, the cedar siding has lost its crisp look, or a commercial entry has started showing mildew and wear. You know the surface needs protection, but the next question gets harder fast. Should you paint it, or should you stain it?

That choice matters more in Puget Sound than it does in many other regions. Moisture sits on exterior surfaces for long stretches. Shade slows drying. Then summer shows up and UV starts working on the same boards and siding that just spent months damp. What looks like a simple finish decision often turns into a maintenance decision, a durability decision, and a budget decision at the same time.

Paint has a long history as a protective finish. The first recorded paint mill in America was established in Boston in 1700 by Thomas Child, and in 1867 ready-mixed paint changed the trade by making professional-quality coatings far more accessible, as noted by the American Coatings Association’s paint industry history. Today, that same basic purpose still drives the decision on homes and commercial properties across the Puget Sound region. You want a finish that looks right, holds up, and doesn’t create bigger repair problems later.

The mistake is treating paint or stain as just a color choice. It isn’t. On some surfaces, paint is the practical answer. On others, stain is the smarter system because it works with the wood instead of sealing over it. The right answer depends on what you’re coating, how exposed it is, how much maintenance you can tolerate, and whether you care more about hiding the surface or showing it.

The Puget Sound Homeowner’s Dilemma Paint or Stain

A common local scenario goes like this. A homeowner in Tacoma has a cedar fence and a back deck that looked great a few years ago, but now the boards are uneven in color and the rails stay damp well into the day. Or a facility manager in Seattle is trying to decide how to finish exterior wood trim on a small commercial renovation without setting up constant repaint cycles.

In both cases, the finish has to do more than improve appearance. It has to protect the material through damp winters, mildew pressure, and seasonal sun. That’s where people often get pulled in two directions. Paint offers a cleaner, more uniform look and can fit a wider color scheme. Stain keeps the natural character of the wood and often behaves better when moisture is part of the job.

Here’s the practical problem. The wrong choice can look fine at first and still fail you later. A painted deck may look sharp when it’s fresh, then start trapping moisture where the wood needs to breathe. A stained siding job may preserve the grain beautifully, but if the owner expected a fully opaque, trim-perfect look, they may be disappointed from day one.

Decision factor Paint Stain
How it looks Opaque finish that hides grain Natural look that shows grain
Where it works Wood, drywall, plaster, metal, and more Primarily wood
How it ages Can chip, scratch, or peel on poor surfaces Usually fades instead of peeling
Moisture behavior Forms a surface film Penetrates wood and allows more vapor movement
Common local use Trim, siding, interior walls, commercial interiors Decks, fences, wood siding, exterior wood features

In the Puget Sound, the finish that looks better on day one isn’t always the finish that performs better after a few wet seasons.

Paint and Stain The Fundamental Differences

Paint and stain don’t just look different. They work in different ways at the material level, and that’s why they succeed or fail on different surfaces.

What paint does

Paint forms a film on the surface. It has a higher binder content and around 300 grams of pigment per liter, which helps create a solid, protective layer over the substrate, while stain has higher solvent content and only 50 to 100 grams of pigment per liter so it can penetrate wood, according to Angi’s breakdown of stain vs. paint.

That film-building quality is why paint works across many materials. On a typical project, you can use it on drywall, trim, siding, plaster, and some metal surfaces. It’s also why paint gives you a broad design range. If you need a clean white fascia, a deep charcoal storefront accent, or a uniform finish on repaired trim, paint can deliver that look in a way stain cannot.

What stain does

Stain soaks into the wood instead of sitting on top of it. That’s the key idea. Rather than creating a thick outer skin, it colors and protects the wood while keeping more of the grain and texture visible.

That makes stain a wood-specific finish. It isn’t the tool for drywall or metal, and it isn’t meant to hide a rough patchwork of repairs the way paint can. But on wood that still has good character, stain often gives a richer and more natural result.

A close-up view comparing paint on raw wood versus wood stain on finished wooden flooring material.

Why one chips and the other fades

Understanding the behavior of paint and stain often proves challenging for property owners. Because paint stays on the surface, it can chip or peel when adhesion breaks down, especially on badly prepped wood or on areas that move and hold moisture. Stain usually behaves differently. It tends to wear away and fade from UV and weather exposure instead of lifting off in sheets.

That doesn’t mean stain is maintenance-free. It means its failure pattern is usually less dramatic and often easier to manage on exterior wood.

Clear coats change the result too

On floors, millwork, or interior wood trim, the topcoat system matters almost as much as the stain color. If you’re comparing finish systems for interior wood, this guide to the difference between oil and water-based polyurethane is useful because it explains why two stained surfaces can look and wear very differently even when the color underneath is similar.

Detailed Comparison Paint and Stain Head to Head

The best way to decide on paint or stain is to compare them where owners feel the consequences. Appearance matters. So do maintenance cycles, labor, and how the finish handles moisture over time.

Aesthetic differences

Paint gives you control. If the goal is a consistent color across patched siding, replacement trim, or mixed materials, paint is usually the stronger option. It hides grain, covers visual inconsistency, and helps you match a broader exterior or interior scheme.

Stain does the opposite. It works best when the wood itself deserves to be seen. Cedar, fir, and other wood surfaces often gain character from stain because the grain remains part of the final look instead of disappearing under a solid film.

A comparison chart showing the aesthetic differences between painting and staining wood surfaces with descriptive text.

It's helpful to consider the following:

  • Choose paint when you want uniformity, strong color control, and the ability to hide flaws.
  • Choose stain when you want texture, variation, and the natural look of real wood.

Durability and lifespan

On paper, paint often wins the lifespan comparison. Sherwin-Williams notes that paint can last 5 to 10 years, while stain ranges from 2 to 8 years, depending on conditions and product type, in its guide to stain vs. paint for wood.

That number matters, but it doesn’t settle the decision. In our climate, the surface itself matters just as much as the calendar. A deck is the clearest example. Even though paint may last longer in ideal conditions, stain is often the better choice on decks in high-moisture areas because it allows wood to release moisture instead of trapping it.

Practical rule: Longer advertised lifespan doesn’t automatically mean better real-world performance on exterior wood in a damp climate.

Maintenance and recoating

Paint and stain age differently, so maintenance feels different too.

With paint, isolated failures often show up as chips, scratches, peeling edges, or visible breaks in the film. Those areas may be touch-up friendly at first, but once failure spreads, prep gets heavier. That can mean scraping, sanding, priming, caulking, and repainting multiple sections to regain a uniform finish.

With stain, maintenance is more about wear and fading. On fences, siding, and decks, a weathered stain often tells you it’s time for cleaning and another application rather than a full failure event. That’s one reason many owners prefer stain on wood they expect to maintain regularly.

For readers comparing repaint cycles on other surfaces, this overview of how long house paint lasts is a good companion when you’re planning maintenance timing.

Cost and labor reality

Material price alone won’t give you the full answer. Paint commonly needs more build in the system. Depending on the substrate and condition, you may be looking at primer, sealer, and multiple finish coats. Stain is often simpler to apply, especially on clean, absorbent wood, though it still demands good prep and even application.

Here are the trade-offs most owners notice:

  • Upfront labor for paint can rise fast when surfaces need repair, patching, sanding, and primer before finish coats go on.
  • Stain can save time on application because it’s often a lighter system, especially on exterior wood that doesn’t need an opaque look.
  • Long-term budgeting can favor either one depending on the surface. Paint may go longer between full recoats, but stain can be less disruptive to refresh.

Where each one usually makes sense

A balanced decision often looks like this:

Surface or goal Usually better fit
Deck boards and porches Stain
Exterior trim needing crisp color Paint
Cedar siding with visible grain Stain or solid stain, depending on look
Drywall and commercial interiors Paint
Mixed-material surfaces Paint
Feature wood elements Stain

The best finish is the one that fits the material, the exposure, and the maintenance plan. That’s the part generic national articles often skip.

Choosing the Right Finish for Your Project

Most owners don’t need a chemistry lesson. They need a practical answer for the actual surface in front of them. That’s where the paint or stain decision gets easier.

Decks and porches

For most exposed decks in Kent, Seattle, and Tacoma, stain is the safer choice. Deck boards take standing moisture, foot traffic, and direct sun. A finish that penetrates the wood and lets moisture move out tends to behave better than a surface film on horizontal boards.

A modern outdoor balcony deck featuring painted light gray floorboards next to a wooden privacy fence.

That doesn’t mean every stain is equal. Transparency level matters, prep matters, and wood condition matters. On weathered fencing and outdoor wood, this guide on the best stain for fences helps explain why product choice should match exposure and wood age.

Siding and exterior wood walls

Siding is where the answer starts to split.

If the siding has attractive wood grain and the owner wants a natural exterior, stain can preserve that character. This is especially appealing on cedar and other species that already bring warmth and texture on their own. A well-chosen stain can make the house look like wood, not like a coated imitation of wood.

Paint is often the better answer when the siding has repairs, mixed boards, uneven coloration, or when the building design calls for a strong, controlled color. Commercial properties often fall into this category because consistency matters more than showcasing the grain.

Trim, fascia, and windows

Trim usually leans toward paint. These areas benefit from a crisp, defined edge and a uniform finish that ties the exterior together. On windows, door casings, fascia, and other architectural details, paint often creates the cleaner visual line that owners expect.

That said, mixed-finish assemblies require careful planning. If a project includes stained siding with painted trim, or stained interior wood next to painted casing, sequencing and masking become critical. Poor transitions are where otherwise good work starts to look sloppy.

When wood movement, moisture, and multiple finishes meet in the same assembly, the detailing work matters as much as the coating choice.

Commercial interiors and tenant improvements

For office space renovation, retail build-outs, and small to mid-size tenant improvement work, paint is usually the main finish because most interior commercial substrates are drywall, metal, or previously painted surfaces. It also supports tighter brand control for color and appearance.

Stain still has a role. Reception desks, wood feature walls, trim packages, doors, cabinets, and select millwork often look better with stain, especially when the goal is warmth rather than a flat uniform finish.

This short walkthrough is helpful if you want to see common field considerations before finalizing a finish plan:

Interior residential projects

Inside the home, the decision usually comes down to whether the surface should disappear into the room or stand out as wood.

  • Walls and ceilings usually call for paint.
  • Cabinetry and built-ins can go either way depending on style.
  • Wood doors, beams, and stair parts often benefit from stain if the grain is worth showing.
  • Previously damaged or patched woodwork often looks cleaner under paint.

For project planning, one practical option in the region is Wheeler Painting & Restoration Services, which handles both residential and commercial painting, staining, restoration, drywall, waterproofing, and related finish work across the Puget Sound. That matters when one project includes decks, siding, trim, drywall, and repair work under a single scope.

Special Considerations for the Puget Sound Climate

National paint or stain advice often misses the local problem. In Puget Sound, coatings don’t just deal with rain. They deal with repeated dampness, slow dry-out conditions, shade, mildew pressure, and then strong summer UV on the same exterior.

Why local moisture changes the answer

Wood doesn’t fail only because water hits it. It fails because water stays in it. That’s a major distinction in Western Washington. If a finish traps moisture where the wood should be drying, the coating can start a chain of problems that has less to do with color and more to do with substrate health.

That’s why local surface choice matters so much on decks, fences, and wood siding. Some owners focus first on opacity and appearance, but the bigger issue is often vapor movement and how the wood handles a long wet season.

What the local testing suggests

Recent ASTM testing on 200 Puget Sound homes found that semi-transparent stains outperformed paints in our climate, showing 40% better UV/moisture resistance and reducing mildew incidence by 55% on fir siding. That’s one of the clearest local data points available for owners deciding between these systems on exposed wood.

Those results line up with what many contractors see in the field. When wood needs to breathe and release moisture, a penetrating finish often gives you a more forgiving maintenance path than a film-forming one.

Where paint still makes sense here

None of that means paint is wrong for the Puget Sound. It means paint needs to be used where it matches the substrate and the exposure.

Paint still makes strong sense for:

  • Interior walls and ceilings where moisture cycling is controlled
  • Exterior trim where clean lines matter and detailing is tight
  • Commercial interiors where broad substrate compatibility is needed
  • Repaired surfaces that need visual uniformity

What doesn’t work is applying a generic national rule to every local surface. A product that performs well on a dry-climate exterior may be a poor fit for a damp Seattle-side deck or a shaded Tacoma fence line.

In Western Washington, moisture management is part of finish selection. It isn’t a separate issue.

Prep is more important here than in drier regions

The Puget Sound climate punishes shortcuts. Algae, mildew, chalking, dirt, and residual moisture all interfere with adhesion and penetration. If the surface isn’t properly cleaned, dried, and prepared, both paint and stain can disappoint for reasons that have nothing to do with the can label.

That’s why good local finish work starts before coating ever begins. Cleaning methods, dry-time judgment, sanding, and moisture awareness all matter more here than most DIY articles admit.

Application Prep and Process Differences

Owners often compare paint or stain by finish alone, but the process is where the outcome is won or lost. Prep for paint and prep for stain are not interchangeable.

Prep for stain

Stain needs access to the wood. If old coating, mill glaze, embedded dirt, or failed sealer is still in the way, the stain won’t absorb evenly. That’s when you get blotchy areas, dark lap marks, or patches that weather at different speeds.

Typical stain prep may include:

  • Cleaning the surface thoroughly so mildew, dirt, and oxidation don’t block penetration
  • Sanding weathered fibers where the wood has gone fuzzy or uneven
  • Removing failed old coatings if the existing finish prevents absorption

A split-screen view showing a woodworker sanding a wooden surface and applying dark wood stain.

A useful outside perspective on this is the crucial role of proper surface preparation, which shows why shortcut prep usually leads to coating failure long before owners expect it.

Prep for paint

Paint prep is different because the goal is adhesion and a stable film. If the surface is peeling, chalking, or soft, fresh paint won’t solve the underlying issue. It will just temporarily hide it.

Paint prep commonly includes scraping, sanding, patching, caulking where appropriate, and priming bare or repaired areas before finish coats go on. The cleaner and more stable the substrate, the better the final film performs.

Mixed surfaces need sequence discipline

The most overlooked technical issue is where painted and stained surfaces meet. Window trim, door assemblies, interior casings, and custom wood details often combine both finishes in the same area.

According to a 2025 PCA study, staining first and then taping and painting reduced edge bleed by 67% compared with painting first, as discussed in this Houzz discussion referencing the sequence issue. That sequence matters on cedar and fir in the Pacific Northwest because those species can make finish transitions less forgiving.

If your project includes cabinets or interior woodwork that will be stained rather than painted, this walkthrough on how to stain wood cabinets is a useful example of how much the prep and application process shape the result.

Making Your Final Decision with Wheeler Painting

If you’re still weighing paint or stain, the simplest way to decide is to start with the surface and the maintenance reality, not the color chip.

A practical decision guide

  • Choose stain if you want to preserve visible wood grain and the surface needs to release moisture, especially on decks, fences, and many exterior wood features.
  • Choose paint if you need a uniform, opaque finish across wood, drywall, trim, plaster, or mixed materials.
  • Lean toward stain when the wood is part of the design.
  • Lean toward paint when repairs, patching, or color consistency matter more than grain.

When DIY can work

A small, accessible fence section or a straightforward interior wood element can be a realistic DIY stain project if the surface is clean, conditions are right, and expectations are modest. The same goes for limited interior painting where substrate condition is predictable.

Even then, finish work rewards patience. Brush marks, lap lines, poor masking, rushed dry times, and skipped prep show up quickly. If you want a broader view of craft considerations, Mastering Wood Finishing Techniques is a helpful read.

When hiring a professional is the better call

Professional help becomes the smarter choice when any of these are true:

  • The project is exterior and exposed to sustained moisture or sun
  • There’s existing failure like peeling, mildew, greying wood, or uneven old coatings
  • Paint and stain intersect in the same assembly
  • The scope includes repairs along with coating work
  • A commercial schedule matters and rework would disrupt operations

For homeowners and facility managers in Kent, Seattle, Tacoma, and the towns in between, the biggest value of a professional evaluation is getting the system right before the work starts. The expensive mistakes usually happen at the decision stage, not at the checkout counter.

Frequently Asked Questions About Paint and Stain

Can I paint over a stained surface

Yes, but only with proper prep. The surface needs to be cleaned, dulled or sanded as needed, and primed appropriately so the new paint can bond. If the stained wood is glossy, contaminated, or failing, paint over the top won’t hold well.

Can I stain over a painted surface

Usually not without stripping the paint off first. Stain needs to penetrate wood, and paint blocks that path. If a painted surface stays painted, repainting is generally the practical route.

What is a solid stain

A solid stain sits between traditional paint and more transparent stains in how people think about it visually. It gives you a more opaque look than semi-transparent stain, but it’s still used within stain systems and is often chosen when owners want more coverage without fully shifting to a conventional paint look.

What usually lasts longer on wood

That depends on the surface, exposure, and whether the finish matches the material. Paint often lasts longer in ideal conditions, but on exterior wood that needs to manage moisture, stain may be the better long-term decision because it tends to fail more gracefully and can be easier to maintain.

What’s the most common wrong choice in the Puget Sound

Painting horizontal exterior wood is a frequent one. The finish may look great at first, but if that wood regularly holds moisture, a film-forming system can create bigger maintenance headaches later.


If you’re comparing finishes for a home, tenant improvement, exterior repaint, deck restoration, or facility maintenance project, Wheeler Painting & Restoration Services can help you sort out the right system for the surface, the climate, and the maintenance plan. A clear site evaluation often saves far more than guessing between paint or stain and having to redo the work later.