How to Repair Water Damaged Drywall in Your Puget Sound Home

That sinking feeling is universal. Whether you’re a homeowner or a business owner, finding a water stain, a soft spot, or a bulge in your wall is never a welcome discovery. When it comes to repairing water-damaged drywall, the most important thing is to act fast. You need to find and stop the water source immediately, figure out how bad the damage really is, and get things drying as quickly as possible. Taking these first steps within 24 hours can be the difference between a small patch job and a massive, expensive headache.

Your First Steps After Discovering Water Damaged Drywall
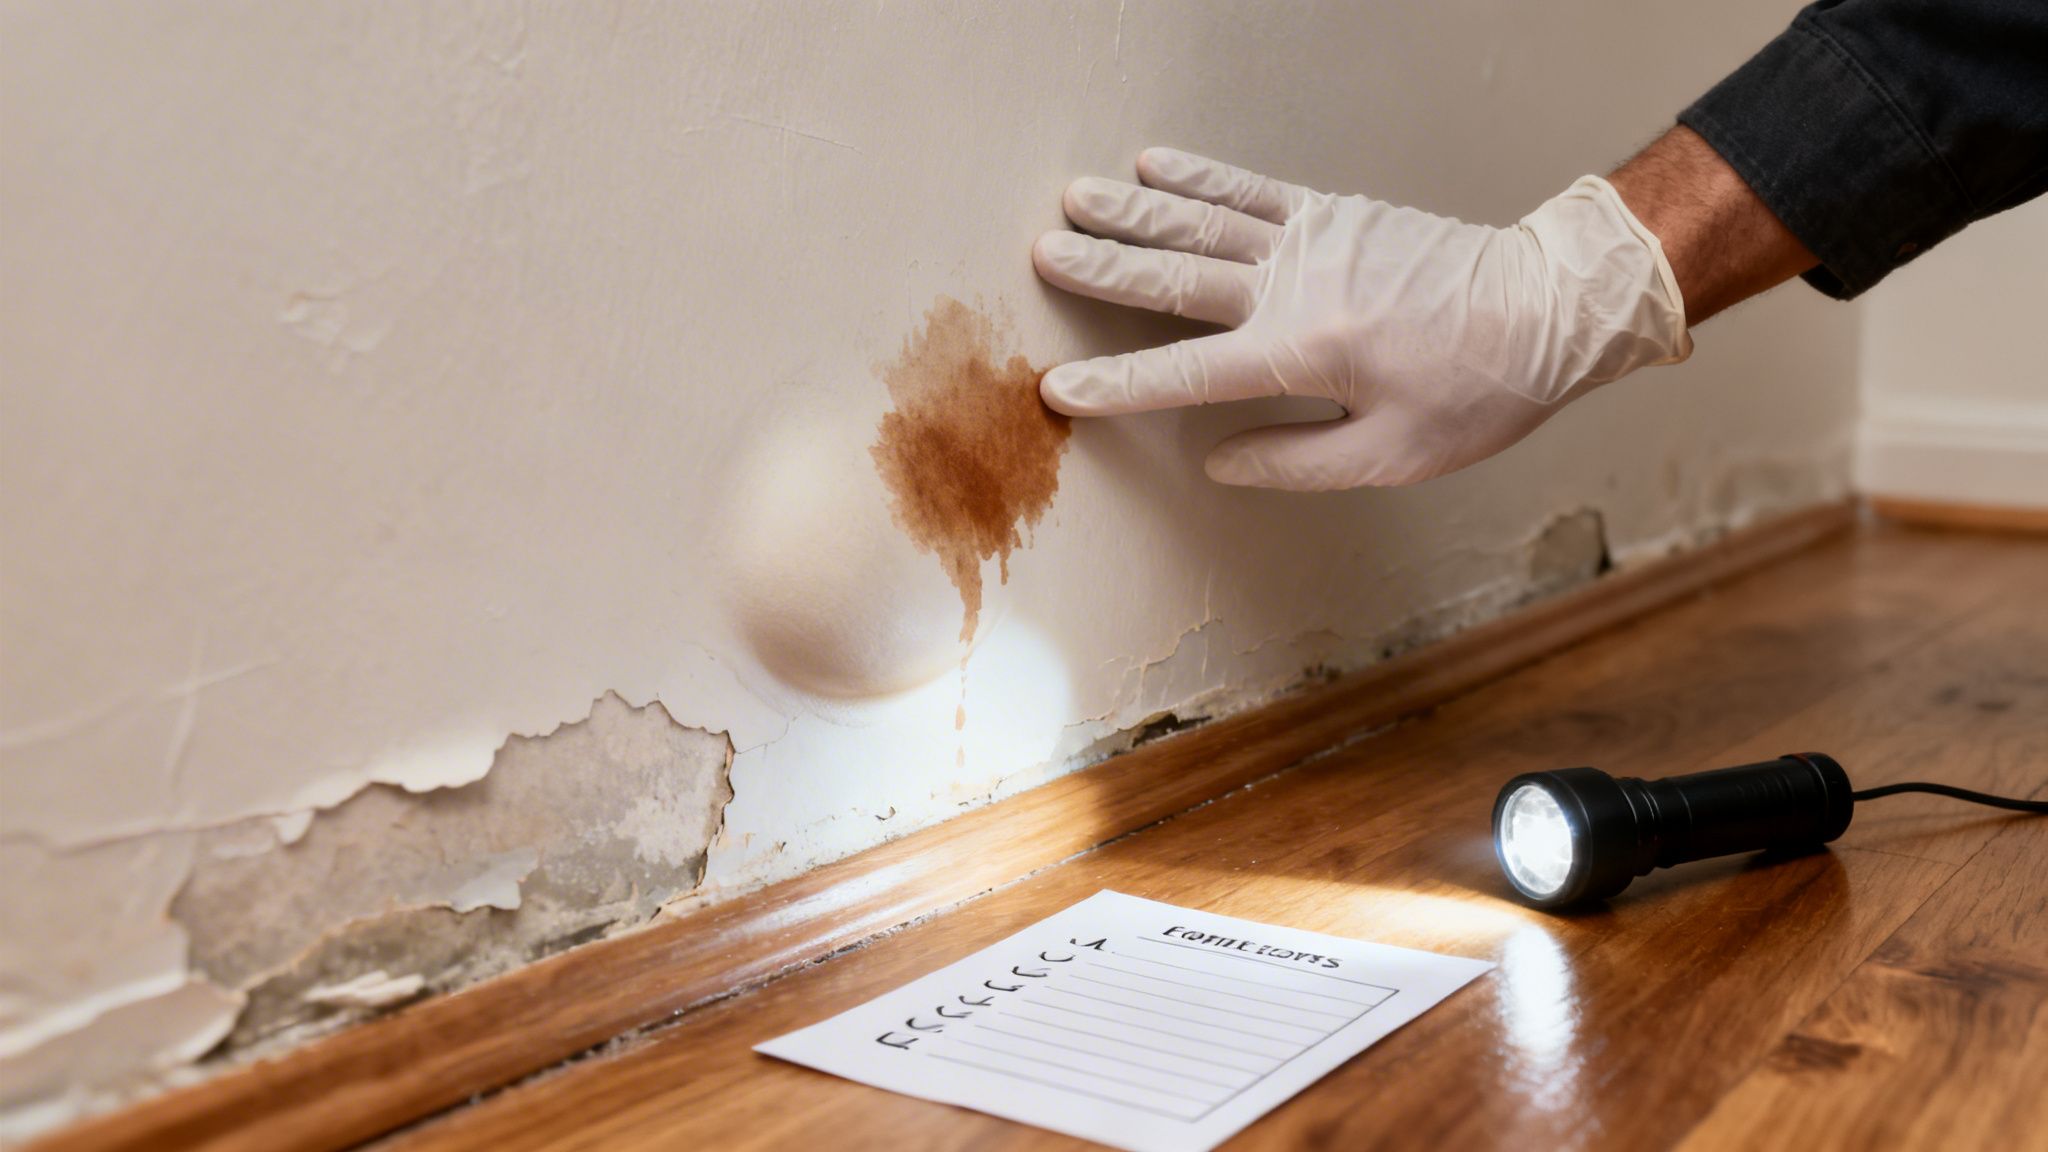
A gloved hand inspects a brown water stain and bubbling paint on a damaged wall with a flashlight.

Here in the Puget Sound, we’re no strangers to water. But seeing it inside your home or commercial property is a different story. Your immediate reaction matters more than you think. Before you even touch a putty knife or a paintbrush, you have to become a detective.

Find and Stop the Water Source

Water damage is always a symptom of a bigger issue. Sometimes the cause is glaringly obvious, like a burst pipe spraying water under the sink. Other times, it’s much sneakier—a slow, silent drip from a failed roof flashing that only shows up after weeks of our classic Western Washington drizzle.

Your investigation should start with the most likely culprits, depending on where the damage is located:

  • Ceilings or Upper Walls: Look up. Check the roof, attic, and any plumbing on the floor above. We’ve seen everything from missing shingles and bad flashing around vents to leaky pipes in the ceiling cause this kind of damage.
  • Walls Near Bathrooms or Kitchens: This is almost always plumbing-related. Inspect every fixture, supply line, and drainpipe. Common culprits are leaky dishwasher hoses, failing toilet wax rings, and loose connections under the sink.
  • Lower Walls or Basements: Check for foundation cracks, leaky basement windows, or failed appliances like water heaters and washing machines. Also, take a look outside—poor grading can send rainwater straight toward your foundation.

Once you find the source, shut the water off. Now. This could mean turning off the main water valve to your property or just the specific valve for a sink or toilet. If it's a roof leak, you might need to throw a tarp over the area as a temporary fix until a roofer can get out there.

Whether you're in a residential home or a commercial building, stopping the leak is the one step you cannot skip. Trying to repair drywall before you've fixed the source is a complete waste of time and money—the damage will just come right back.

Assess the Damage Severity

With the leak under control, it's time to gauge how bad things are. This is where you decide if you've got a weekend DIY project on your hands or if it's time to bring in a professional residential or commercial contractor. Use your eyes and your hands to check the area.

This is especially critical because water can wreck drywall—the primary wall material in over 96% of homes—incredibly fast. Restoration pros will tell you that even 1 inch of standing water can cause minor damage, while just 2 inches can compromise your insulation and wiring, creating a perfect environment for severe mold.

Use this quick checklist to help you categorize what you're seeing and feeling.

Water Damage Severity Checklist

Use this table to quickly assess the severity of your drywall water damage based on visual and physical signs.

Severity Level Visual Signs Drywall Feel Recommended Action
Minor Small, light-brown stain. Paint is discolored but not bubbling or peeling. Firm and solid. Likely a DIY repair after drying.
Moderate Larger, darker stain. Paint is starting to bubble or peel. Slightly soft or spongy when pressed. Borderline; consider a professional. Removal may be needed.
Severe Noticeable sagging or bulging. Wall is crumbling or falling apart. Possible musty odor. Very soft, saturated, and mushy. Call a professional immediately. Full removal is required.

After inspecting the area, you should have a much clearer picture of what you're up against. Anything that feels soft, spongy, or is showing any signs of a musty smell is a red flag.

Honestly, for anything beyond a small, firm stain, calling in a pro is the safest bet. They have the right equipment to dry the structure completely and ensure no hidden moisture is left behind. If you're facing moderate to severe damage, our team offers professional water remediation services to handle the problem correctly from start to finish.

Drying the Area and Tackling Mold

Okay, you’ve stopped the leak. That’s a huge first step, but don't relax just yet. Now the clock is ticking on a new problem: the water left behind. Especially here in damp Western Washington, moisture is mold’s best friend. Getting that wall bone dry isn’t just a good idea—it’s absolutely essential to prevent much bigger headaches down the road.

We’ve seen it countless times. The first instinct is to crack a window and point a box fan at the wet spot. It feels productive, but it’s rarely enough. That only skims the surface moisture off. It does almost nothing for the water soaked deep inside the drywall or, worse, trapped in the wall cavity. It’s like trying to dry out a waterlogged sponge by just blowing on it.

Getting Serious About Drying

To really win this fight, you have to create an environment where the wall has no choice but to dry out, and fast. This means aggressive airflow and pulling moisture out of the air itself. This is why professionals don't mess around with box fans; we bring in the heavy equipment.

  • High-Volume Air Movers: These are not your average fans. They're designed to blast a focused jet of air across a surface. This dramatically speeds up evaporation.
  • Low-Grain Refrigerant (LGR) Dehumidifiers: These are the real workhorses. An industrial dehumidifier pulls a massive amount of water vapor out of the air, creating an intensely dry atmosphere that literally sucks the moisture out of wet drywall, wood studs, and insulation.

The difference is stark. Without professional-grade gear, wet drywall can stay damp for weeks. Industry data shows that leads to mold growth in an estimated 70% of cases. With the right setup, we can get a wall back to safe, dry standards in just 3 to 5 days.

Spotting and Dealing with Mold

Even if you’re quick, mold can start showing up in as little as 48 hours. You have to know what you’re looking for. A little patch of discoloration isn't just an ugly spot; it's a potential health hazard that needs to be handled correctly.

Keep an eye (and nose) out for:

  • Visible Growth: Mold can be black, green, or even white. It often starts as little specks and grows in a circular pattern, sometimes looking fuzzy or even slimy.
  • That Musty Smell: You'll often smell mold before you see it. If you notice a persistent earthy, damp basement smell, that’s a huge red flag.

If it’s a tiny area of surface mold—we're talking smaller than your hand—you might be able to clean it yourself. But gear up first. Always wear PPE, including an N95 respirator mask, goggles, and gloves. For non-porous surfaces, a simple 1:10 bleach-to-water solution can work, but it won't kill the roots of mold that have penetrated porous drywall.

The single biggest mistake we see property owners make is sealing up a wall too soon. If you paint over drywall that’s still damp on the inside, you're essentially building a terrarium for rot and mold. It guarantees a hidden infestation that will cost way more to fix later.

If you find a large patch of mold or have any reason to believe it's growing inside the wall, stop what you're doing. This is no longer a DIY drywall job. It’s a hazardous material problem that requires a professional approach. Wheeler Painting provides full mold remediation services to properly contain, remove, and treat the affected area, making your home or business safe again. Trying to rip out moldy drywall yourself can send millions of spores airborne, turning a contained problem into a whole-property nightmare.

Taking Out and Replacing Water-Damaged Drywall

If you’ve assessed the damage and the drywall is soft, swollen, or just plain soaked, drying it out isn't an option. It has to go. This is where the real repair work kicks off—carefully cutting out the ruined material to make way for a seamless patch.

In any setting, from a home basement to a commercial space, getting this step right is crucial. A clean, precise removal is the only way to ensure the new wall is solid and the finish looks professional.

Gear Up: The Tools You’ll Need

Before you even think about cutting, grab your tools. Having everything on hand makes the whole process cleaner, safer, and so much faster. Trust us, a little prep work here will save you a massive headache later.

  • Stud Finder: Absolutely essential for finding the wood framing in your wall. Your new drywall patch needs something solid to screw into.
  • Utility Knife & Drywall Saw: A sharp utility knife is what you'll use to score your cut lines cleanly. For the actual cutting, a drywall saw (also called a jab saw) will be your best friend.
  • Measuring Tape & Carpenter's Square: Precision matters. These tools are for making sure your cuts are dead straight and the replacement piece fits perfectly.
  • Pry Bar & Hammer: Once the section is cut, you'll need these to gently coax the old, soggy drywall away from the studs.
  • Personal Protective Equipment (PPE): Don't even think about skipping this. At the very least, you need safety glasses for dust and an N95 mask. You do not want to breathe in drywall dust, or worse, hidden mold spores.

As you get ready to tear out the old material, keep the principles of mold prevention front and center. It's a critical part of the job.
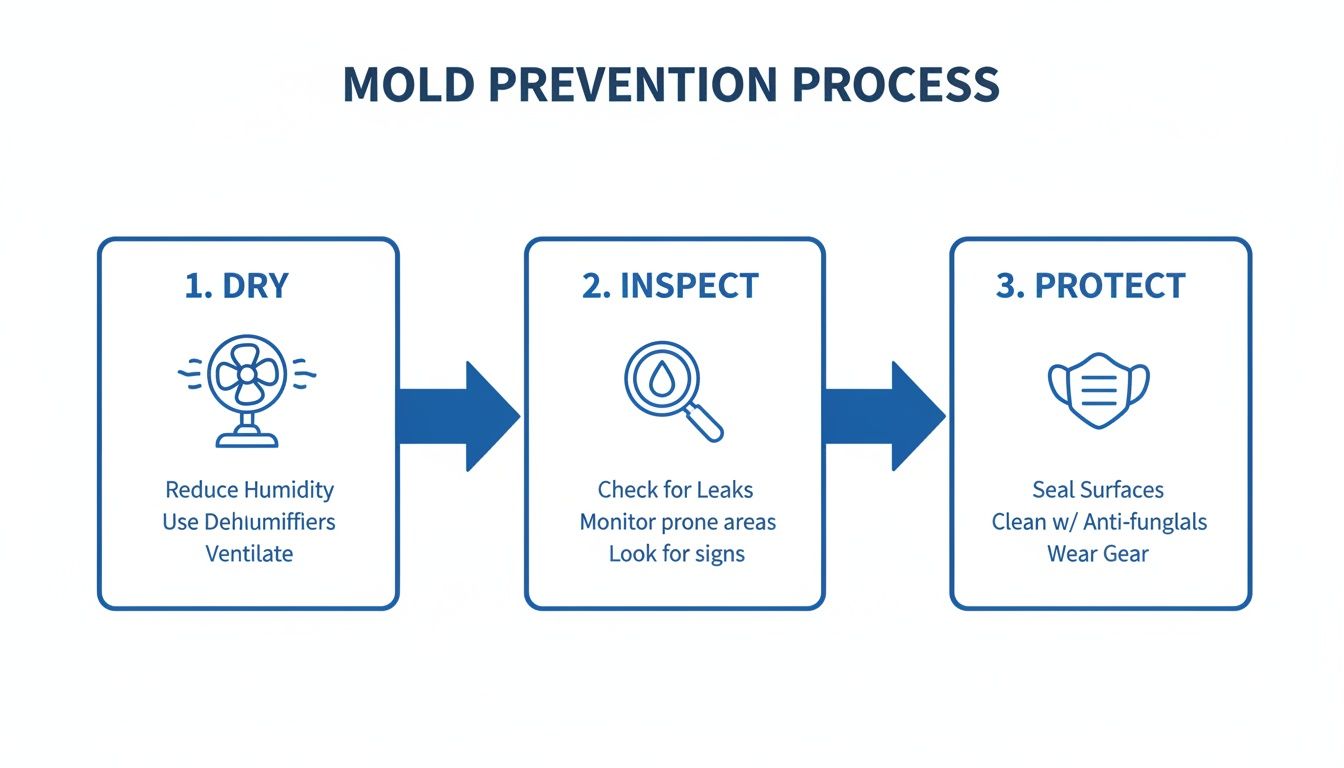
A flowchart illustrates a three-step mold prevention process: dry, inspect, and protect surfaces.

This simple process—Dry, Inspect, and Protect—is a great reminder that your work isn't finished just because the wet drywall is gone. You have to make sure the area is completely moisture-free before you close it back up.

Making the Cut and Pulling the Panel

With your tools laid out and safety gear on, it’s time to get to work. The key here is to be methodical, not destructive. If you just start ripping and tearing, you’ll end up damaging the good drywall around the patch and making more work for yourself.

First, figure out how much to remove. You need to cut out more than just the part that looks wet. Water has a nasty habit of wicking up inside the wall, so you need to go higher. This is where pros use what’s called a “flood cut.” It’s a horizontal cut made a good 12 to 24 inches above the highest point you see water damage.

A flood cut might seem like overkill, but it’s the professional standard for a reason. It’s the single best way to make sure you’ve removed every last bit of compromised drywall, preventing mold from coming back and ensuring your repair lasts.

Once you’ve marked your flood cut line, your next move is to create a clean square or rectangle. Use your stud finder to locate the studs on either side of the damaged zone. The ideal spot for your vertical cuts is right down the middle of a stud, which gives you a solid anchor point for attaching the new drywall. Use your carpenter's square and utility knife to score the lines deeply, then finish the job with your drywall saw.

Prepping for the New Drywall

After you’ve carefully pried out the damaged piece, stop and take a good look inside the wall cavity. Pull out any damp insulation. Now, you have to let the inside of the wall—the studs and the back of the drywall on the other side—dry out completely. This isn't a quick process; it can easily take a few days with fans and a dehumidifier running.

Here in the Puget Sound, we see this all the time. Even a minor leak can create major headaches for both homeowners and businesses. Restoration industry data shows that while water exposure under an inch might just leave a stain, anything over two inches almost always requires full replacement of the affected drywall. It’s the only way to head off structural problems and mold, which can start growing in as little as 24 hours. Proper removal and thorough drying of the wall cavity are simply non-negotiable. If you're weighing your options, you can get more detail on when to save and when to replace drywall.

Finally, measure the opening one more time and cut your new drywall panel to fit. You want a snug fit, but a piece that’s too tight will be a nightmare to install. A good rule of thumb is to aim for a small gap, about 1/8 of an inch, around the edges. You’ll fill this later with joint compound.

Making Your Drywall Repair Invisible
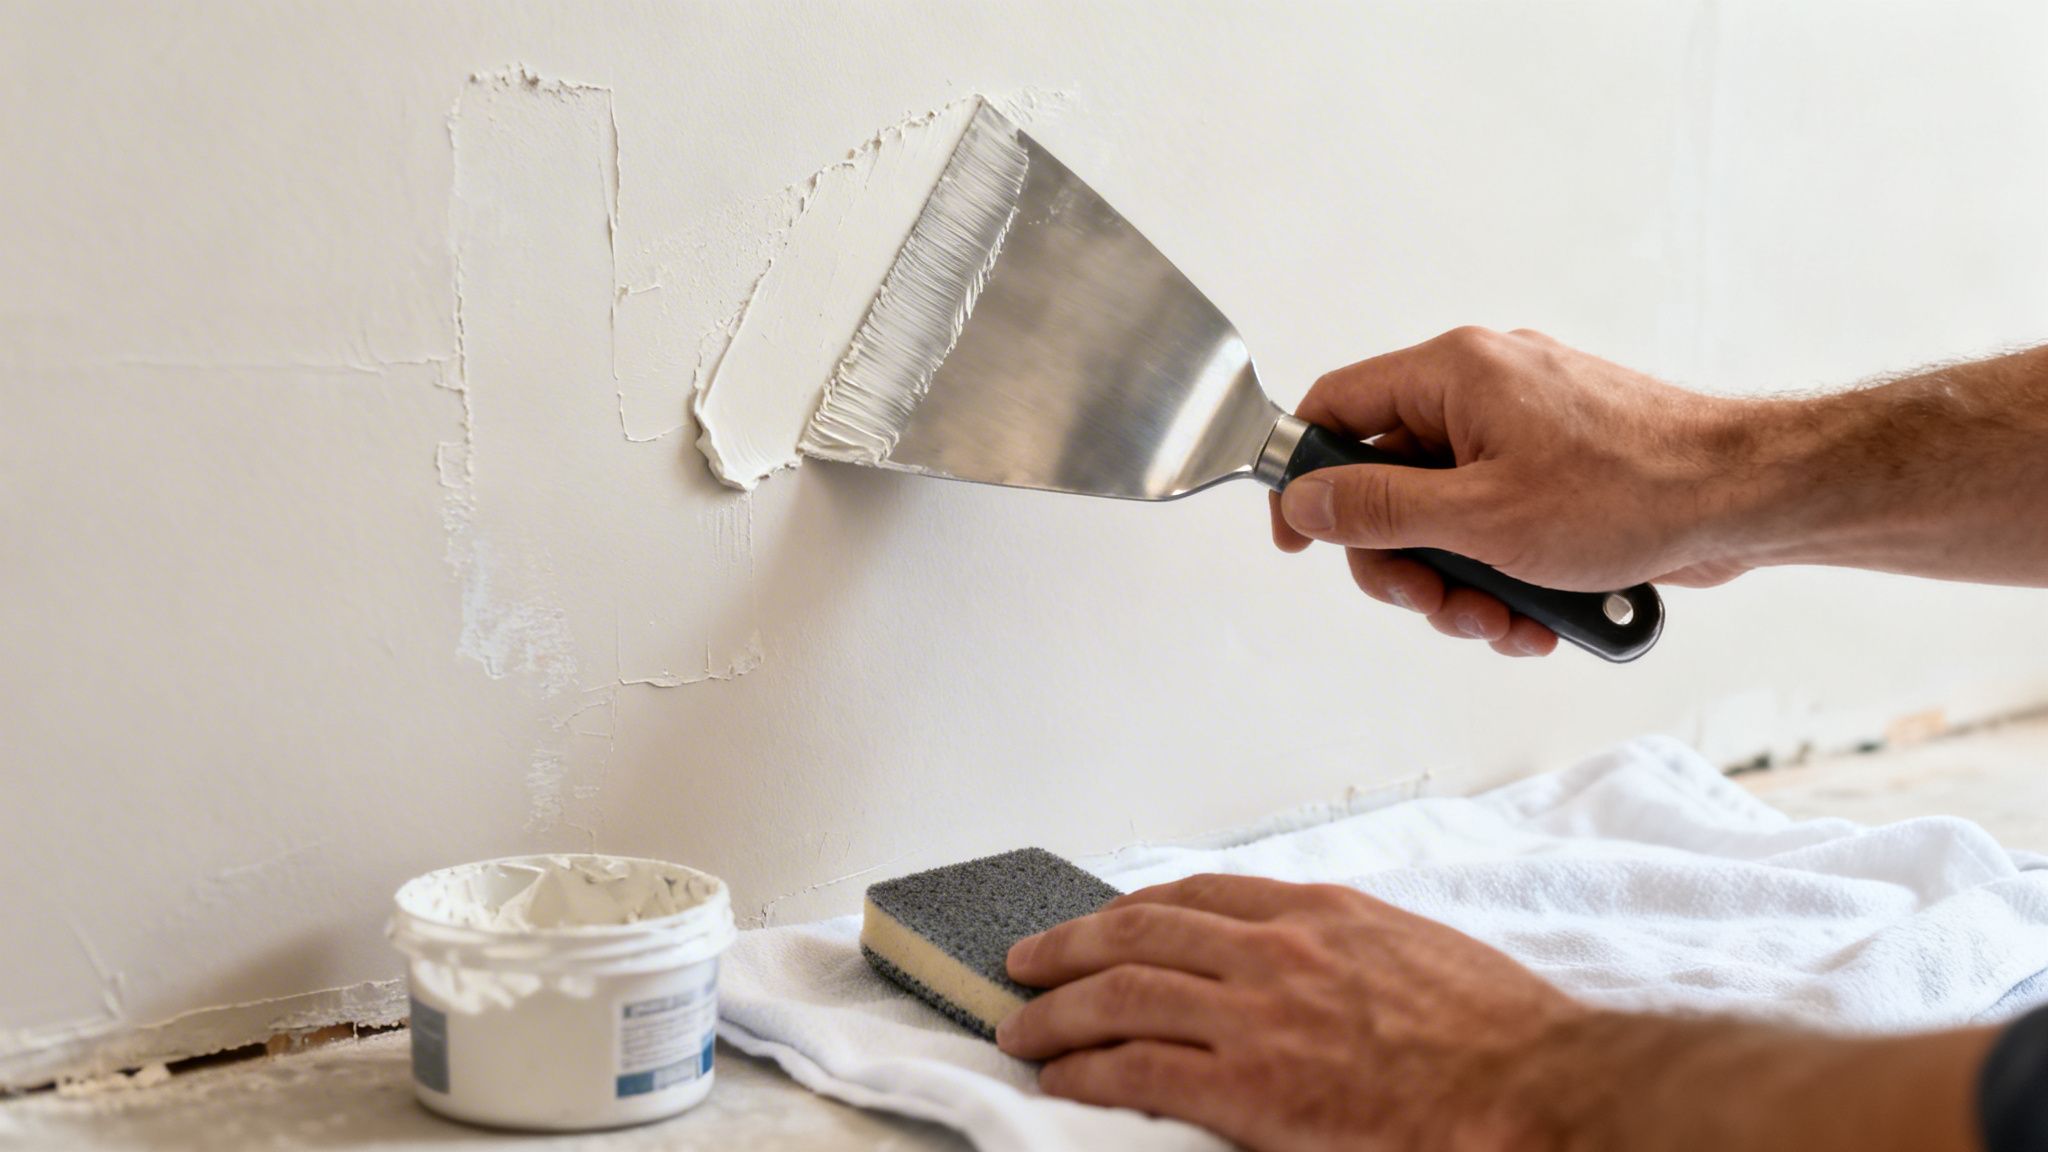
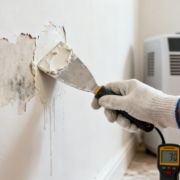
A worker uses a putty knife to spread white spackle on a damaged wall.

You can tell a drywall repair is good when you can't tell it was ever there. After you've cut out the soggy drywall and screwed in a new patch, the real work—the part that requires a bit of finesse—begins. This finishing stage is what separates a lumpy, obvious patch from a truly seamless repair that blends right into the wall.

As a local contractor working on everything from residential homes in the Puget Sound to busy commercial spaces, our goal is always the same: a flawless surface that looks like nothing ever happened.

Taping the Seams for a Crack-Proof Finish

First things first, you need to tape the joints where your new patch meets the old wall. This isn't just for looks; the tape provides critical reinforcement that keeps cracks from forming later as the building settles. You've got two main choices for tape.

  • Fiberglass Mesh Tape: This stuff is self-adhesive, which definitely makes it easier to apply if you're new to this. It's perfectly fine for flat runs, but it’s a bit thicker than paper tape, so you'll need more mud to hide it. We generally avoid it on inside corners because it doesn't fold well.
  • Paper Tape: This is the professional standard for a reason. Paper tape is stronger and lets you create a much flatter, smoother seam. It takes a bit more practice, though. You lay down a thin bed of mud, press the tape into it, and then pull your knife over it to squeeze out the excess from behind.

For the strongest, most invisible repairs—especially any involving corners—we always reach for paper tape. It delivers a superior result every time.

The Art of Mudding and Feathering

Now it's time to apply your joint compound, what we call "mud." The biggest mistake people make here is trying to do it all in one go. The secret to a perfectly smooth wall is applying multiple thin coats, not one thick, goopy layer that will just shrink, crack, and leave a big hump.

Apply your first coat just wide enough to cover the tape and fill in your screw dimples. Then, walk away and let it dry completely.

For the second coat, grab a wider drywall knife (if you used a 6-inch knife for the first coat, step up to a 10- or 12-inch for the next). Apply the mud a few inches past the edge of the first coat. This is a technique called feathering.

Feathering is the single most important skill for making a patch disappear. By making each layer of mud wider than the last and applying less pressure on the very outer edges, you create a gradual slope that's impossible to see.

After that second coat dries, sand it lightly and apply one final, thin skim coat, feathering it out even further to fill in any tiny scratches or imperfections.

Don't Skip the Primer and Paint

Once that last coat of mud is bone dry and you've given it a final, light sanding with fine-grit sandpaper, the wall should feel perfectly smooth to the touch. You’re almost there. But whatever you do, do not skip the primer.

New joint compound is like a sponge; it soaks up paint differently than the painted wall around it, which creates a dull, blotchy spot called "flashing."

For any water damage repair, a stain-blocking primer is absolutely essential. Even if the drywall is completely dry, water leaves behind mineral deposits that will eventually bleed through regular paint, and that ugly stain will reappear. A quality stain-blocking primer seals the patch and locks in any residual discoloration for good. We get into the nitty-gritty of this in our guide on priming sheetrock before painting.

Finally, you can paint. To make the repair truly vanish, you need to match both the paint color and the sheen. A matte touch-up on an eggshell wall will stick out like a sore thumb. If you don't have the original can, you can usually take a small chip of the old paint to the store for a perfect match. Two coats of paint, and your wall will look good as new.

When to Call a Professional Restoration Contractor

Every DIYer eventually hits a wall—sometimes literally. Knowing where to draw the line between a manageable weekend project and a job that’s spiraling out of control is the most valuable skill you can have. With water-damaged drywall, the stakes are particularly high.

Getting in over your head doesn't just lead to a botched repair; it can create a much bigger, more dangerous, and far more expensive disaster. For homeowners and facility managers here in the Puget Sound, recognizing the red flags early is key to avoiding a serious headache.

Spotting the DIY Deal-Breakers

Some situations are immediate red flags, signaling that the problem has graduated beyond a simple patch job. If you see any of these, it's time to put down the tools and call a team with the right experience and equipment for residential or commercial construction services.

  • The Damage Is Spreading: Is the water stain showing up across multiple drywall sheets, or worse, on different floors of your property? This isn't a small leak; it's a sign of a major water intrusion event that needs a professional, coordinated response to prevent serious structural issues.

  • You See or Smell Mold: Don't underestimate mold. If you spot fuzzy black, green, or white patches larger than a dinner plate, or you can't shake that musty, earthy smell, the contamination is likely deep inside the wall. Trying to scrape it off will release millions of spores into your property's air.

  • The Structure Looks Compromised: Do you see the ceiling bulging down? Does a wall look warped or feel spongy to the touch? This is a huge warning sign. It means water has soaked the structural framing, weakening its integrity. This is a genuine safety hazard that needs immediate attention from a commercial construction or residential contractor near you.

  • Water Is Near Electrical Components: This one is non-negotiable. If the water damage is near outlets, light switches, fixtures, or your breaker box, do not touch anything. Water and electricity are a deadly mix, and you need an expert to safely shut off power and assess the situation.

Water-damaged drywall isn't just an eyesore—it can be a serious blow to your wallet. Repair costs often land between $600 to $1,550 for a single incident, making it one of the pricier drywall fixes out there. You can explore more insights on drywall repair costs on Angi.com and see why doing it right the first time pays off.

The Value of a Single Point of Contact

When a pipe bursts or a roof leak turns into a major problem, the last thing you want is the stress of juggling multiple phone numbers. Finding a plumber, then a water mitigation company, then a drywaller, and finally a painter is an organizational nightmare.

This is where a full-service general contractor like Wheeler Painting makes all the difference. We serve as your single point of contact for the entire restoration, whether it's a residential remodel or a large-scale commercial renovation.

For a homeowner, it means a seamless, organized process from water extraction and demolition all the way through to flawless drywall finishing and painting. For a facility manager trying to get a retail build-out or office space back online, it means the project stays on track with one trusted partner to hold accountable. We handle all the coordination so you can focus on getting back to normal.

DIY vs. Professional Repair: When to Make the Call

Trying to decide if this is a job you can handle yourself? Sometimes a small stain is just a small stain, but other times it's the tip of the iceberg. This chart can help you decide when to roll up your sleeves and when to call us for a professional assessment.

Scenario Recommended DIY Approach When to Call a Pro (Wheeler Painting)
A Small, Faint Stain on the Ceiling Once you're 100% sure the leak is fixed and the spot is bone dry, you can try sanding, applying a stain-blocking primer, and repainting. If the stain bleeds through the new paint or the drywall feels even slightly soft or flexible, it's time for an expert to open it up.
Bubbling Paint on a Wall You might be able to carefully scrape the bubbles, sand the area smooth, prime, and repaint, if the drywall underneath is completely firm and dry. If the drywall feels spongy, the bubbling covers more than a square foot, or the paper facing is peeling off, a pro needs to cut out the bad section.
Saturated Drywall After a Flood Do not attempt. Floodwater is often contaminated ("black water"), and the sheer volume of moisture makes it unsafe for DIY remediation. Immediately. This is a job that requires professional demolition, high-powered drying equipment, certified mold treatment, and a structural check.

Ultimately, bringing in a professional restoration contractor is about more than just convenience—it's about peace of mind. It’s the confidence of knowing the job was done safely and correctly, protecting the long-term value of your property and the health of your family, employees, or customers.

A Few Common Questions About Drywall Repair

When you're staring at a soggy, water-stained wall, a million questions probably run through your mind. Here in the Puget Sound, our team at Wheeler Painting gets calls about this every day from homeowners and facility managers. Based on our experience, here are the honest answers to the questions we hear most often.

How Long Does It Really Take for Drywall to Dry?

This is always the first question, and the honest answer is: it depends. The timeline hinges entirely on how saturated the wall is and, just as importantly, your drying method.

If you just crack a window and hope for the best, a truly wet wall can take weeks to dry out. That’s far too long, blowing past the 48- to 72-hour window where you can prevent serious mold growth.

You might be able to speed things up with some house fans and a small dehumidifier, maybe getting a lightly damp wall dry in about 5 to 7 days. But when restoration pros show up, we bring the big guns—high-velocity air movers and commercial-grade dehumidifiers. This equipment doesn't just move air around; it creates an intensely dry, powerful vortex that pulls moisture from deep inside the wall cavity. With a professional setup, we can often get the structure properly dry in just 3 to 5 days, which is crucial for stopping mold in its tracks.

Can I Just Paint Over a Water Stain?

We see people try this all the time, and we get it—it looks like an easy fix. But slapping a coat of paint over a water stain is a shortcut that almost always backfires.

Even if the wall feels dry on the surface, moisture is often still trapped in the drywall panel or the insulation behind it. That's a perfect recipe for mold and rot. On top of that, the minerals and grime left behind by the water will eventually "bleed" right through regular paint, and your ugly stain will be back in a few weeks or months.

To do it right, there are no shortcuts. First, you have to be 100% certain the entire area is bone dry, not just the surface. Then, you absolutely must seal the spot with a quality stain-blocking primer designed specifically for this job. Only after that primer is cured can you finally paint, carefully matching the color and sheen so the repair disappears.

Will My Homeowners Insurance Cover This?

Whether insurance will pay for the repair comes down to one thing: where the water came from. As a general rule, most standard policies cover damage from "sudden and accidental" events. Think of a burst pipe, a washing machine hose that lets go, or water damage from firefighting efforts.

Where you'll run into trouble is with damage that happens over time from a lack of maintenance. A slow drip under the sink, seepage through a foundation crack, or a leaky roof that’s been ignored for years are typically excluded from coverage.

The moment you find water damage, your best move is to take plenty of photos and call your insurance agent to understand exactly what your policy covers.

Here in the Puget Sound, with our rainy climate, waiting to act on water damage is a costly mistake. We've seen it firsthand: a small, manageable repair can quickly spiral out of control. Waiting just a few extra days can give mold the foothold it needs, turning a straightforward drywall job into a complex and expensive remediation project. You can see how fast water damage costs can add up at QRestore.com to better understand the risk.

A professional contractor like Wheeler Painting can give your insurance company the detailed, itemized estimate and expert documentation they'll need to process your claim smoothly. It makes a world of difference in getting your property—and your life—back to normal.


Feeling overwhelmed by water damage? You don't have to tackle it alone. For over 30 years, Wheeler Painting has been the trusted local provider for homeowners and businesses across the Puget Sound, handling everything from emergency water dry-outs to flawless drywall repair, painting, and full-scale commercial construction projects. Let our team give you the peace of mind that comes from a job done right. Get in touch with us today for a consultation at https://wheelerpainting.com.
Average Cost of Painting Exterior of House: 2026 Guide to Pricing & Quotes

If you're asking about the average cost of painting the exterior of your house, you've come to the right place. It’s one of the first questions we hear from property owners, and for good reason. Nationally, you’ll see figures in the $3,500 to $7,500 range, but here in Western Washington, that's often just a starting point for residential projects.

For homeowners and business owners alike, our notoriously damp climate and local labor rates mean a quality paint job that actually lasts is going to cost more. Budgeting accurately from the get-go is key to avoiding surprises and making a sound investment in your property.

Your Quick Guide to 2026 Exterior House Painting Costs

Contractor inspects a white house, holding a clipboard and paint swatches, with a lake view.

Trying to nail down a budget for a big project, whether for your home or business, can feel overwhelming. Having a realistic ballpark figure makes all the difference. While those national averages are a decent benchmark, they don’t tell the full story for the Puget Sound.

The simple truth is, our weather demands more—more detailed prep work and higher-performance materials. It’s the only way to get a finish that will stand up to the rain and humidity year after year. To build trust and help you plan, we've put together some localized estimates based on our experience serving homeowners in the community.

Estimated 2026 Exterior Painting Costs for Puget Sound Homes

This table provides homeowners in Western Washington with realistic cost ranges for painting homes of different sizes, helping them create an initial budget.

Home Size (Square Feet) Number of Stories Estimated Cost Range (Puget Sound)
Small (1,200 – 1,800 sq. ft.) 1 Story $4,500 – $8,500
Medium (1,800 – 2,500 sq. ft.) 1-2 Stories $7,000 – $12,500
Large (2,500 – 4,000+ sq. ft.) 2-3 Stories $11,000 – $18,000+

Of course, these numbers are a launchpad, not a final destination. Your final quote will always depend on the unique character and needs of your property.

A professional paint job is more than just applying color; it’s about installing a protective shield for your home. In the Pacific Northwest, that shield needs to be tough enough to handle our persistent rain and moisture.

The real cost of painting your property’s exterior is shaped by a handful of key variables that go way beyond square footage. When an experienced estimator from a team like ours at Wheeler Painting comes out for a consultation, we’re looking closely at these factors:

  • The type and condition of your siding
  • The complexity of your building’s architecture
  • The amount of prep work required

Understanding what drives these costs is the first step toward getting a transparent quote you can trust. In the next section, we’ll break down each of these cost drivers one by one, so you’ll know exactly what to look for and feel confident investing in your home or commercial space.

Why Painting Costs Vary So Much Across the Country

Have you ever discussed home improvement or commercial renovation costs with someone in another state and had your jaw drop at their prices? It’s a common story. A business owner in the Midwest might mention paying half of what you were just quoted for a similar project right here in our area. This isn't just a coincidence—it's a reflection of real differences in what it costs to paint a building from one region to another.

These price gaps are tied directly to local economies, the cost of living, and, most importantly, the specific challenges posed by the regional climate. Putting a fresh coat of paint on a building in a dry, mild part of the country just isn't the same job as protecting a property from the constant moisture and temperature swings we get.

A National Look at Painting Prices

To get a better sense of where the Puget Sound market stands, it helps to zoom out and look at the bigger picture. When you look at recent data on exterior painting across North America, you see a huge range in what people are paying.

The numbers paint a clear picture of just how much prices can swing. Homeowners in the Far West are looking at an average of $4,500, with the New England area even higher at around $4,800. Now, compare that to the Plains states, where the average cost is just $2,300, or the Southwest at $2,400. If you're curious, you can explore more about these regional painting cost differences to see how different markets stack up.

What this tells us is that your zip code is one of the single biggest factors in your final bill. Property owners in coastal areas with a higher cost of living and more demanding weather almost always pay a premium.

Why the Pacific Northwest Is a Premium Market

Here in the Puget Sound, we’re not just part of that "Far West" category; we're at the higher end of it. The reason is simple: our climate. The relentless dampness, fog, and rain create an incredibly tough environment for any exterior finish.

When a paint job fails here, it doesn't just look bad—it can fail spectacularly. We’re talking about widespread peeling, bubbling, and, worst of all, moisture getting in where it shouldn't. That can lead to wood rot and serious structural damage. This isn't just about curb appeal; it's about protecting your investment.

In Western Washington, an exterior paint job is not just about aesthetics—it’s a critical layer of defense against the elements. Cutting corners on preparation or materials is a recipe for costly repairs down the road.

To deliver a paint job that will actually last through our wet seasons, a true professional has to be far more meticulous. It's a completely different standard of work. This includes:

  • Doing the Prep Work Right: This is the most critical step, and it's non-negotiable. It means thorough pressure washing to get rid of grime and mildew, followed by hours of scraping and sanding any loose paint. We then meticulously caulk every single gap and seam where water could find a way in.
  • Using High-Performance Materials: We rely on primers that are specifically designed to block stains and stop mildew. After that comes top-tier acrylic latex paint formulated to stay flexible and resist moisture. These premium products simply cost more, but they’re essential for a lasting finish.
  • Bringing in Skilled Experts: It takes a seasoned painter to apply these products correctly, especially with our unpredictable weather. They know how to work within those precious dry windows to make sure every coat bonds perfectly for maximum protection and longevity.

At Wheeler Painting, we don't just see ourselves as painters. We’re building and restoration specialists who live and work in the Puget Sound. We know that what we're really doing is installing a protective shield for your property—one that’s designed specifically for our local environment. That's why hiring a trusted, local provider who gets these nuances is an investment that provides real, long-term value for your home or commercial property.

The 7 Key Factors That Determine Your Final Cost

When homeowners or facilities managers ask for a quick, off-the-cuff estimate to paint their building, I have to explain that it's just not that simple. Think of it like buying a car. You know the base model has a certain price, but the final sticker reflects the engine you choose, the trim package, and all the other features that make it your car. The average cost of painting the exterior of a house or commercial building works the same way—it's a starting point, but the real price is in the details of your specific property.

A seasoned estimator doesn't just eyeball your property and pull a number out of thin air. We perform a deep dive into the specific factors that drive the cost, from labor and materials to the overall complexity of the job. Here are the seven biggest things we look at to build an accurate, reliable quote.

1. Building Size and Stories

This one might seem obvious, but there's more to it than just the total square footage. Of course, a larger building means more paint and more time on the job. But the number of stories is just as important, if not more so.

Painting a sprawling, single-story retail space is a completely different ballgame than tackling a three-story office building, even if they have the same square footage. Taller structures demand extensive ladder work, specialized scaffolding, or even aerial lifts. That extra equipment and the critical safety measures involved add complexity and time, which naturally increases the cost.

2. Siding Type and Condition

The skin of your building is a huge variable. Porous materials like older wood, stucco, or brick are thirsty—they can soak up a surprising amount of primer and paint compared to smoother surfaces like vinyl or modern fiber cement. Getting a durable, uniform finish on these materials simply requires more product.

Just as crucial is the current shape of your siding. Is the paint peeling and flaking off in sheets? If so, we'll need to budget a lot more time for surface preparation (more on that in a moment). A well-maintained property will always be less expensive to paint than one that's been showing its age for a few years.

3. The Critical Role of Prep Work

Here’s an industry truth that catches many people by surprise: 80% of a high-quality paint job is preparation. The actual painting is just the finishing touch. The real work—the part that ensures your new paint lasts for a decade instead of peeling in two years—happens before a can of finish paint is even opened.

Think of prep work like the foundation of a skyscraper. You can't see it when the building is finished, but it's the most important part ensuring the structure stands strong for decades. Rushing this step is a guarantee for failure.

For a professional crew, proper prep is non-negotiable and always includes:

  • Thorough Cleaning: Power washing to blast away years of accumulated dirt, mildew, and chalky paint residue.
  • Scraping and Sanding: Meticulously removing every bit of loose or failing paint to create a sound, bondable surface for the new coats.
  • Caulking: Sealing all gaps around windows, doors, and trim. This is your building's primary defense against moisture intrusion, a vital step in our damp Puget Sound climate.
  • Priming: Applying a high-quality primer to any bare wood or heavily stained areas to block stains and ensure the final color looks perfectly uniform.

4. Accessibility and Landscaping

How easy is it for us to get to the walls of your building? A property on a flat, clear lot is the dream scenario. But we often work on homes built into steep hillsides, or commercial facilities surrounded by dense, mature trees, or flanked by delicate garden beds that run right up to the foundation.

Our crews need to maneuver carefully around prized landscaping or set up complex scaffolding on sharply sloped ground. These logistical challenges take extra time and care, and that labor will be factored into the final quote.

The infographic below shows how regional economic factors already set a baseline cost, even before we start looking at your specific property's challenges.

Diagram illustrating the US regional painting costs hierarchy, categorizing states into high-cost and low-cost compared to the average.

As you can see, our location in the Pacific Northwest puts us in a higher-cost region to begin with. From there, the unique details of your property fine-tune the price.

5. Architectural Details and Trim

There’s a world of difference between painting a simple, modern retail building and a historic Craftsman bungalow loaded with detail. Every extra corner, window frame, corbel, and piece of gingerbread trim adds time to the job.

These intricate features can't be sprayed. They require painstaking "cutting in" by hand with a brush, which is one of the most meticulous and time-consuming parts of any paint job. The more complex your building's architecture, the more hours a painter will spend on this detailed work.

6. Quality of Paint and Materials

When it comes to paint, the old saying is true: you get what you pay for. It can be tempting to save a few hundred dollars on cheaper, economy-grade paint, but it's almost always a mistake. These paints have lower-quality resins and pigments, meaning they fade quicker, offer less protection from the elements, and will have you calling a painter again years sooner.

We only use premium-quality paints for a simple reason: they work. Top-tier products are engineered to fight off UV degradation, resist mildew growth, and stay flexible as your siding expands and contracts with the seasons. The upfront material cost is higher, but the investment pays for itself with a finish that looks better and lasts far longer. Of course, even the best paint needs the right weather, and you can see how we make that call in our guide on what temperature is too cold to paint an exterior.

7. Necessary Structural Repairs

Sometimes, a painting quote turns into something more. During the detailed inspection and prep phase, it’s not uncommon to find issues hidden beneath the surface—wood rot in a window sill, pest damage on a siding board, or failing flashing that’s letting water in.

Painting over these problems is malpractice. It traps moisture and guarantees that a small issue will become a massive, expensive repair down the road. This is where hiring a full-service residential and commercial contractor like Wheeler Painting is a huge advantage. Our in-house construction and restoration experts can properly fix any underlying rot or damage before we apply the first drop of paint, ensuring your investment is protected by a solid, healthy structure.

How Siding Material Impacts Your Painting Budget

Four panels showcasing exterior house materials: wood, white siding, cream stucco, and red brick.

The material on the outside of your property isn't just about curb appeal—it’s the canvas we work on, and every type has its own quirks. Thinking all siding is the same is like saying you can treat silk and canvas the same way. As professional painters, we know that’s not true. Each surface demands a specific approach to get a paint job that doesn’t just look good but actually lasts.

Different materials need their own unique prep work, primers, and paint formulas. This isn't just about looks; it's about the science of adhesion and durability. It’s a huge factor in why the average cost of painting the exterior of a house varies so much, even between buildings of the same size.

Painting Wood Siding

In the Pacific Northwest, classic wood siding is everywhere. We love its natural charm, but it's also one of the most demanding surfaces to paint. Wood is alive, in a way—it expands and contracts with the constant shifts in temperature and humidity. It’s also a magnet for moisture, which can quickly lead to peeling, cracking, and even rot if it isn't sealed perfectly.

Painting wood siding correctly is a meticulous job. We have to scrape and sand away every bit of failing paint, treat any mildew, and prime all the bare wood. We then use a top-tier, flexible acrylic paint that can move with the wood, preventing it from cracking under pressure and protecting it from our notoriously damp climate.

Painting Vinyl and Fiber Cement Siding

Vinyl siding is a popular low-maintenance choice, but painting it comes with a critical rulebook. The number one concern is heat. Dark paint colors can cause vinyl to absorb too much sun, which leads to warping, buckling, and irreversible damage. That's why we always use special vinyl-safe paints formulated with reflective pigments. This lets you choose a great color without worrying about your siding melting on a hot day.

Fiber cement, which many people know as Hardie Board, is a fantastic, stable material that holds paint beautifully. The key here is a deep cleaning to get rid of the chalky residue that builds up over time. Because it's a cement-based product, getting the priming and application just right is crucial for a long-lasting bond. If you have this type of siding, you might find our guide on painting Hardie Board siding helpful.

Painting Stucco and Brick Surfaces

Stucco and brick are what we call "thirsty" surfaces. They’re so porous they can drink up a shocking amount of paint if you don't seal them first. The process always starts with an intensive cleaning to remove dirt, grime, and efflorescence—that chalky white powder that often appears on masonry.

Painting brick or stucco isn't just a color change; it's a process of sealing a porous surface against the elements. Skipping the specialized masonry primer is like trying to build a house on sand—the final result simply won't last.

After it's clean, we apply a dedicated masonry primer or conditioner. This step is non-negotiable. It seals the surface, stops the paint from soaking in unevenly, and creates a solid foundation for the topcoats. This is what gives you that rich, uniform color and, more importantly, a robust barrier against moisture. Because of the specialized materials and extra labor, stucco and brick are usually on the higher end of the price spectrum.

Industry data shows just how much siding type can swing the final cost, with prices varying from $1,000 to over $12,000. Wood can be more budget-friendly ($1,000-$4,000), with vinyl in the middle ($3,000-$9,000), and stucco requiring a specific approach and budget ($1,500-$7,500). Brick is often the most expensive to paint, ranging from $4,000 to $12,000, simply due to the intense prep and materials needed. You can discover more insights about these siding cost differences to see the national trends, and we definitely see these same patterns right here in Western Washington.

DIY Painting vs Hiring a Professional Contractor

The idea of tackling your own exterior painting project is always tempting. On the surface, it looks like a straightforward way to save a good chunk of money. Before you start clearing out your weekends and heading to the hardware store, though, it pays to look beyond the price of a few cans of paint and understand what you’re really getting into.

What often starts as a simple cost-saving measure can quickly become a massive source of frustration. The truth is, a DIY paint job has a lot of hidden costs—in both time and money.

The True Cost of DIY Painting

The first surprise for most property owners is the sheer amount of equipment needed to do the job right. We’re not just talking about a few brushes and rollers. If you want a result that lasts, you need the right tools for every step.

  • Essential Equipment: You'll need a solid extension ladder (maybe more than one), a pressure washer for cleaning, and a whole collection of scrapers, sanders, caulk guns, drop cloths, and painter's tape. Don't forget safety gear like masks and goggles. This gear alone can easily add up to hundreds of dollars.
  • The Time Investment: This is the big one. Properly painting a building isn't a weekend project. For an average-sized home, the prep work—washing, scraping, sanding, and caulking—can easily take 40-60 hours. Then you have to add the actual painting time. You could be looking at giving up every weekend for a month or burning through a whole week of vacation.
  • Safety Risks: Working on ladders is no joke, especially when you're two stories up or on uneven ground. Thousands of people are injured in ladder-related falls every year. Without proper training and safety equipment, you’re taking a serious personal risk.
  • The Potential for Mistakes: This is where a DIY project can get really expensive. A little inexperience can lead to big problems. For example, using the wrong type of paint on vinyl siding can cause it to warp from the heat. If you don't prep the surface perfectly, you'll be watching your new paint start to peel in a year or two. These kinds of mistakes don't just look bad; they can expose your property to moisture and rot, turning your "money-saving" project into a major repair bill down the road.

The Value of Hiring a Professional Contractor

Hiring a professional contractor is an investment in getting the job done right—safely, efficiently, and with a result that will last. While the initial quote is higher than buying materials yourself, the value you get is about much more than just a coat of paint. It’s about peace of mind.

A professional contractor doesn’t just sell you a paint job; they provide a service that includes project management, safety compliance, and a guaranteed outcome. It transforms a complex, risky project into a straightforward, stress-free process for the property owner.

Here’s what you’re really paying for when you hire an experienced team like Wheeler Painting:

  1. Efficiency and Expertise: A professional crew moves fast. We can often complete a whole project in the time it might take a homeowner just to finish the prep work. Our teams have the skill to navigate tricky architectural details, solve problems on the fly, and work together efficiently whether it's a "house painting near me" or a major commercial project.
  2. Safety and Insurance: We are fully licensed and insured, which completely protects you from liability if an accident were to happen on your property. Our crews are trained in worksite safety, use professional-grade gear, and know how to manage the risks of working at height.
  3. Guaranteed Quality and Warranties: A reputable contractor will always stand behind their work. At Wheeler Painting, we provide a solid warranty for our services because we're confident in our process. We use the right products and the right techniques to deliver a beautiful finish that will protect your property for years to come.

As a full-service contractor for both residential and commercial properties, we bring a level of project management and reliability that a DIY approach simply can’t match, whether we're painting a family home or handling a complex retail build-out or office space renovation.

How to Get an Accurate and Trustworthy Painting Quote

Walking into a meeting with a painting contractor can feel a little intimidating, especially if you’re not sure what to ask. When the proposals start rolling in, it's easy to get lost in the details. But if you know what to look for, you can quickly cut through the noise and find a true professional you can trust.

This isn't just about getting a good price; it's about making sure you're comparing apples to apples. A thorough, detailed bid tells you a lot more about a contractor's work ethic and credibility than a lowball number ever will. Let’s walk through how to get a quote you can actually rely on.

Your Step-by-Step Checklist for Reliable Bids

To make a smart investment in your property, you need to be methodical. Following these steps helps you spot the difference between a rushed, cheap job and a fair price for quality work that will protect your home or business for years to come.

  1. Get Multiple Written Quotes: Never, ever go with a single verbal estimate. Your goal should be to get at least three detailed, written proposals from different local painting contractors. This gives you a realistic benchmark for your project’s market rate and immediately highlights any bids that are unusually high or suspiciously low.

  2. Ask Detailed Questions About Prep Work: Here's a pro tip: a painter's quality is directly tied to their commitment to preparation. Ask them to walk you through their exact process. Does their base price include power washing, scraping loose paint, sanding rough spots, caulking gaps, and priming bare wood? Anyone who gets vague here is probably cutting corners where it matters most.

  3. Verify Licensing and Insurance: This one is completely non-negotiable. A legitimate contractor will have no problem showing you proof of their current business license, liability insurance, and workers' compensation coverage. This is what protects you from being on the hook if an accident happens or your property gets damaged.

A trustworthy contractor welcomes questions about their credentials and process. If a painter is hesitant to provide proof of insurance or details about their prep work, consider it a major red flag.

By following this checklist, you’ll be in a much better position to understand what you're really paying for. It empowers you to see exactly why a comprehensive, no-surprise proposal from a contractor like Wheeler Painting stands out from vague or incomplete estimates. For those managing commercial properties, these factors are just as vital, and our commercial painting cost estimator offers a great starting point.

What to Look for in the Written Proposal

Once you have a few quotes in hand, it’s time to dig in. A professional proposal is much more than a final price—it’s a roadmap for your entire project.

Here’s what it absolutely must include:

  • Itemized Scope of Work: The estimate should clearly spell out every single step, from the initial power wash and prep all the way to the final coat of paint and site cleanup.
  • Specified Materials: The proposal needs to list the exact brand and product line for the primer and paint being used. "Premium paint" is far too vague; you want to see something specific, like Sherwin-Williams Emerald® or Benjamin Moore Aura®.
  • Clear Payment Schedule: You need to know the payment terms before you sign anything. A common, fair schedule is a third upfront for materials, a third at the project's halfway point, and the final third only after you’ve done a final walkthrough and are completely satisfied. Be very wary of any contractor who asks for a huge payment upfront.
  • Project Timeline: The quote should give you an estimated start date and a projected completion date. A good contractor will also mention how potential weather delays are handled.

Your Top Exterior Painting Questions Answered

Let's tackle a few of the questions we hear most often from property owners right here in Western Washington. Getting clear on these details can make planning your project a whole lot easier.

How Often Should I Paint My House Exterior in the Pacific Northwest?

Here in the damp PNW, a well-done exterior paint job should look great for 7 to 10 years. The key word there is well-done. The final lifespan really comes down to the quality of the prep work, the specific paint that was used, and your building's siding.

Keep an eye on the sides of your property that get the most abuse from sun and rain—they’ll almost always show wear and tear first. We tell our clients to do a quick walk-around every spring. If you spot any peeling, bubbling, or cracking, it's time to act. Catching those little issues early is the best way to stop moisture from creeping in and causing bigger problems.

Does My Choice of Color Affect the Painting Cost?

It absolutely can. This is a detail that surprises some property owners when they're working out the average cost of painting their house exterior or commercial building.

Think of it this way: trying to cover a dark navy blue with a light, creamy white is a tough job. It almost always requires an extra coat of high-quality primer or paint to get that perfect, even finish without the old color ghosting through. That adds to both material and labor costs. The same goes for complex color schemes. A building with three or four different colors for the trim, shutters, and doors simply takes more time, tape, and precision than a single-color project, which is reflected in the labor hours.

What Happens If You Find Wood Rot or Other Damage?

This is a fantastic question, and it really gets to the heart of why it’s so important to hire a licensed general contractor like Wheeler Painting, not just any painter. Our crew is trained to spot underlying problems, not just paint over them.

If we're prepping a building and find wood rot, siding replacement needs, or other issues, we hit the pause button. We’ll show you exactly what we've found and talk through the best way to fix it. Because we have deep expertise as a residential and commercial construction contractor, we can handle the repairs ourselves, the right way.

A professional contractor doesn't just apply color; they diagnose the health of your building's exterior. We will always explain the options, provide a clear change order for any required repair work, and get your approval before proceeding. This transparency protects your investment.

This process guarantees your beautiful new paint job is going onto a solid, healthy surface. It’s the only way to have real peace of mind that your home or business is truly protected for years to come.


Ready to transform your property with a team that offers both expert painting and comprehensive construction services? At Wheeler Painting & Restoration Services, we manage every detail to ensure a seamless, high-quality outcome for homeowners and businesses in our community. Contact us today to schedule your on-site consultation and receive a clear, detailed proposal. Learn more at https://wheelerpainting.com.

Tub to Shower Conversions: Modernize Your Bath Safely

More and more, we're seeing property owners in the Greater Puget Sound area decide their old bathtub has overstayed its welcome. They're swapping them out for spacious, modern showers, and it's a smart move that goes far beyond just a style update. Here in our local communities, a slippery tub edge isn't just an inconvenience—it can be a daily hazard for families and commercial tenants alike.

Why Puget Sound Home & Business Owners Make the Switch

From Seattle to Tacoma, the standard bathtub-shower combo is quickly falling out of favor, making way for the much more practical walk-in shower. This isn't about chasing a trend; it's a direct response to how we live and work today. For many homeowners, business owners, and facilities managers, the bathtub is an underused fixture taking up valuable square footage that could be put to much better use.

A tub-to-shower conversion reclaims that wasted space, instantly making a cramped bathroom feel more open, functional, and inviting. As a trusted local provider, Wheeler Painting is here to help you understand the process and make an informed decision for your residential or commercial property.

Beyond the Bathtub: Top Reasons for the Upgrade

When property owners call us about this project, their reasons usually boil down to a few key benefits that dramatically improve their daily routine and property value.

  • Safety and Accessibility First: This is, without a doubt, the number one reason. Stepping over a high tub wall every single day is a genuine slip-and-fall risk, particularly for older adults, anyone with mobility challenges, or even just someone nursing a temporary injury. A low-threshold or zero-entry shower removes that barrier, making the bathroom a much safer space for everyone, from your family at home to employees and customers at your business.

  • A Fresh, Modern Look: Let’s face it, a dated, clunky bathtub can make an entire bathroom feel stuck in the past. A beautiful walk-in shower, especially one with sleek frameless glass and contemporary tile, provides an immediate and dramatic update. It transforms the room from purely functional to a spa-like retreat you'll actually enjoy spending time in.

  • Less Time Cleaning: Nobody enjoys scrubbing a deep tub or fighting a losing battle with mildew in old grout lines. It's a chore. Thankfully, modern shower materials like solid surface panels and large-format tiles are specifically designed for easy maintenance, cutting your cleaning time way down—a huge benefit for both busy homeowners and commercial property managers.

To give you a clearer picture, here’s a quick summary of why so many local property owners are making this change.

Quick Look: Why Homeowners Make the Switch

Benefit Why It Matters for Puget Sound Properties Key Consideration
Enhanced Safety Our damp climate can increase slip risks; a low-entry shower provides a secure, daily solution for all ages. Perfect for anyone planning to "age in place" or for businesses needing ADA-compliant solutions.
Modern Aesthetics Updates the entire look and feel of your bathroom, moving away from dated fixtures to a clean, spa-like vibe. A great way to boost your home’s resale value or elevate the appeal of a commercial space.
Space Optimization Reclaims wasted square footage from an unused tub, making small Seattle bathrooms feel larger and more open. A walk-in shower can make a tight floor plan feel significantly more spacious and luxurious.
Easier Maintenance Modern, non-porous materials and fewer grout lines mean less scrubbing and fighting mildew. Choose materials like solid surface panels or large-format tiles to minimize cleaning chores.

This isn't just a project about looks; it's about making your property work better for you, right now and for years to come.

A Smart Move Backed by Real-World Numbers

This shift isn't just something we're noticing locally; it's part of a huge movement in property renovation. Tub-to-shower conversions are a major force in the bathroom fixture market, which was valued at a staggering $27.29 billion globally in 2025 and continues to climb. A big part of that growth is happening right here in North America.

It makes perfect sense. With 10,000 adults nationwide turning 65 every single day, the demand for safer, more accessible living solutions is exploding. If you’re curious about the bigger picture, you can explore more about these industry trends in the full market research report.

For most homeowners and property managers we talk to, the decision comes down to one simple question: "What will make my daily life better and my property more valuable?" A walk-in shower delivers convenience and safety that a traditional tub just can’t.

As a full-service residential and commercial contractor serving our local community, Wheeler Painting has seen this trend up close. The goal is always the same: create spaces that are both beautiful and incredibly functional. A tub-to-shower conversion is one of those rare projects that hits the mark on both fronts, offering immediate benefits and excellent long-term value. It’s simply a smart, practical upgrade that makes homes and businesses in our area better places to be.

A Step-by-Step Look at the Tub to Shower Conversion Process

Thinking about a major bathroom project can feel overwhelming. But a tub-to-shower conversion, when handled by an experienced residential or commercial contractor, is a very methodical and predictable process. Let's walk through each stage, from the first conversation to the final polish, so you know exactly what’s coming.

This whole journey usually starts with one of three main goals: making the bathroom safer, giving it a modern update, or simply creating more usable space.

A flowchart illustrating three key motives for tub to shower conversions: safety, modernizing, and space.

As you can see, the decision is almost always a practical one—a direct solution to a real-world need in your home or facility.

Step 1: Consultation and Design

Every great project starts with a good conversation. We'll come to your property to talk about what you want to achieve, take careful measurements, and get a feel for your vision. This is the time to lay it all out—whether your top priority is a safe, low-threshold entry for your home or an ADA-compliant solution for your office space.

From there, we’ll guide you through selecting materials that match your style and fit your budget. We'll look at shower pans, tile or wall surrounds, fixtures, and any custom features you have in mind, like a built-in bench or grab bars. Afterwards, you'll get a detailed proposal that clearly outlines the scope of work, timeline, and costs, so there are absolutely no surprises down the road.

Step 2: Demolition and Preparation

With a solid plan in place, the real work begins. The first priority is always protecting your property. Our crew will lay down floor protection and seal off the bathroom to keep dust and debris contained. Then, we get to work carefully taking out the old tub and any surrounding walls or tile.

Once the old tub is gone, we can truly see what we're working with. We'll inspect the existing plumbing and the condition of the subfloor to prepare for the new shower installation.

Demolition is more than just tearing things out; it's a phase of discovery. This is our chance to see what's behind the walls and under the floor, confirming we have a solid, problem-free foundation to build on.

Step 3: Plumbing and Waterproofing

This is arguably the most important stage for the long-term health of your bathroom. Our licensed plumber will reconfigure the drain and water supply lines for the new shower. This might mean moving the controls to a more convenient spot or raising the height of the showerhead.

Next comes the single most critical step: waterproofing. Here in our damp climate, proper waterproofing is non-negotiable. We install a comprehensive, multi-layered system, including a waterproof membrane on the walls and a sealed, pre-sloped shower pan. This creates a completely sealed-off "boat" that protects your property’s structure from water damage and mold. Cutting corners here is a recipe for disaster and very expensive repairs later on.

Step 4: Installation and Finishing Touches

Now that all the crucial behind-the-scenes work is done, you'll start to see the beautiful new shower take shape. The team will begin installing all the components you selected.

  • Shower Pan: The foundation of your shower is set perfectly level, ensuring every drop of water heads straight for the drain.
  • Walls and Tile: Your new tile or solid surface panels are installed over the fully waterproofed walls. Every seam is meticulously grouted and sealed for a watertight finish.
  • Fixtures and Glass: The showerhead, control valve, and any other hardware are installed. If your design includes a glass door or panel, it’s professionally fitted at this stage.

Finally, we handle all the finishing touches that bring the room together. The Wheeler Painting team will patch any drywall, then prime and paint to make the new shower look like it was always there. We finish with a final bead of caulk and a thorough cleanup, followed by a final walkthrough with you to ensure you’re 100% happy with your new shower.

Budgeting Your Tub to Shower Conversion in Our Area

Let’s get right to it—the money. For any of us living and working in the Puget Sound region, figuring out the budget is the first real step in any property improvement project. Converting that old tub into a new shower is a fantastic investment in your property’s value and daily life, but the final bill can land anywhere on a pretty broad spectrum.

The total cost really hinges on your vision. Are you looking for a quick and clean swap, or are you dreaming of a fully custom, spa-like walk-in shower? The answer will depend on the materials you choose, how much plumbing needs to be moved around, and what other touch-ups, like new drywall or paint, are part of the job.

Understanding the Cost Spectrum

Think of it this way: a basic conversion using a standard-sized acrylic or fiberglass unit is going to be your most straightforward, budget-friendly option. On the other hand, if you’re picturing a custom-tiled masterpiece with frameless glass and high-end fixtures for your home or retail build-out, you’re looking at a larger, more involved project with a higher price tag.

This isn't just a local trend; it's a huge shift in how people want their properties to function. The bathroom remodeling market, where tub to shower conversions are a major component, is set to hit USD 398.1 billion in 2024. Here in Western Washington, that translates to a typical cost starting around $3,000 for a basic switch. That number can easily climb to $15,000 or more for high-end custom work. If you're a numbers person, you can discover more insights about bathroom remodeling trends from this industry report.

Key Factors That Drive Your Project's Cost

So, what separates a $3,000 project from a $15,000 one? It all comes down to the materials, the amount of labor involved, and the overall complexity. Let's break down where the money goes so you can plan effectively for your residential or commercial renovation.

  • Shower System Type: The most direct route is a pre-fabricated shower kit, usually made of acrylic or fiberglass. They are efficient to install. A custom-tiled shower, however, gives you complete creative freedom but takes a lot more skilled labor for building the pan, applying layers of waterproofing, and meticulously setting the tile.

  • Materials and Fixtures: The tile itself—whether it's affordable ceramic, durable porcelain, or luxury natural stone—is a major cost factor. The same goes for the "jewelry" of the shower: the showerhead, valve, and handles. A simple, functional fixture set costs far less than a thermostatic valve system with a rainfall showerhead.

  • Plumbing and Electrical Work: If we can place the new shower drain exactly where the old tub drain was, we keep the plumbing costs down. But if you want to move the drain, shift the water lines to a different wall, or add fancy new lighting for your office space renovation, that will increase the labor and materials needed.

  • Waterproofing: This is the one area where you absolutely cannot cut corners. Proper, professional waterproofing is the single most important step to prevent leaks, rot, and mold down the road. Trying to save a few hundred dollars here can easily lead to tens of thousands in structural repairs later. It’s a classic "ounce of prevention" scenario.

A quick word of caution: while a DIY approach looks like a great way to save money, it’s a huge gamble. We've seen firsthand how improper waterproofing leads to devastating hidden water damage. Hiring a licensed, insured residential or commercial contractor near you protects your property and your investment.

To give you a clearer picture of how these choices add up, we've put together a table showing typical cost ranges for different parts of the project.

Estimated Cost Breakdown for Conversion Projects

This table helps illustrate how different choices and materials contribute to the final cost.

Cost Factor Budget-Friendly Range ($) Mid-Range and Custom ($) What Drives the Cost
Shower System $1,500 – $4,000 $4,000 – $10,000+ Prefabricated acrylic kits vs. custom tile, pan, and waterproofing labor.
Plumbing Work $500 – $1,500 $1,500 – $3,500+ Using existing plumbing vs. relocating drains or supply lines.
Fixtures & Glass $400 – $1,200 $1,200 – $5,000+ Standard fixtures and a curtain rod vs. designer faucets and frameless glass doors.
Finishing Work $300 – $800 $800 – $2,000+ Minimal drywall patching vs. extensive wall repair, texturing, and professional painting.

As you can see, your decisions directly shape the budget. The good news is that this flexibility allows you to design a project that fits both your aesthetic and your wallet.

At the end of the day, a tub to shower conversion is a smart, practical upgrade that adds real safety, style, and value to your property. By understanding these cost factors, you can make confident, informed decisions. A professional partner like Wheeler Painting will always provide a detailed, transparent estimate, so you know exactly where every dollar is going before any work begins.

Designing for Safety, Accessibility, and Modern Style

When you decide to convert your tub into a shower, you’re doing more than just a simple bathroom update. This is your opportunity to completely rethink the space, creating a bathroom that’s not only stylish but also perfectly adapted to your life and business needs, both now and in the future. It’s about blending smart, essential safety features with the modern design you’ve always wanted.

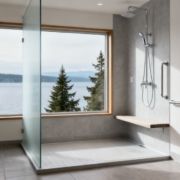
A modern accessible shower with grey tiles, grab bars, a built-in bench, and a rain showerhead.

For many local homeowners and facilities managers, this project is far more than cosmetic—it’s a critical step toward ensuring people can use the space safely and independently for years to come.

Prioritizing Safety and Aging-in-Place

Honestly, the biggest reason we see for tub-to-shower conversions is safety. This is especially true for homeowners who are planning to age in place or businesses looking to improve accessibility. With 76 million Americans set to be over 50 by 2030, the demand for barrier-free bathrooms is skyrocketing. People want to maintain their independence, and a safe bathroom is non-negotiable.

When you consider that over 60% of homes in the U.S. are more than 30 years old, it’s no wonder so many are finally ditching those bulky, high-sided tubs. You can read more about the bathroom remodeling market's growth to see just how big this trend has become.

A few key features are what truly make a walk-in shower a safer, more comfortable space for everyone:

  • Zero-Threshold Entry: A curbless or very low-curb shower pan gets rid of that high tub wall, which is one of the most common trip hazards. This seamless entry is a game-changer for anyone with mobility concerns and essential for ADA compliance in commercial renovations.
  • Built-in Bench or Seating: Adding a built-in or fold-down seat gives you a stable, comfortable spot to sit while showering. It reduces fatigue and dramatically lowers the risk of a slip or fall.
  • Strategically Placed Grab Bars: Forget the institutional-looking bars of the past. Today’s grab bars are stylish and functional. When we install them into reinforced wall blocking, they provide solid, reliable support right where you need it.
  • Handheld Showerhead: An adjustable handheld sprayer on a slide bar is incredibly practical. It allows you to direct the water exactly where you need it, whether you’re standing or sitting.

When you bring these elements together, you're not just remodeling a bathroom; you're creating a safe harbor. It’s less about preventing falls and more about providing genuine peace of mind and preserving dignity for every person using the space.

Embracing Modern Shower Styles and Trends

While safety is the foundation, your new shower is also a chance to seriously upgrade your bathroom's look and feel. Modern shower design has moved far beyond cramped, utilitarian stalls. We’re now creating open, spa-like retreats that become the true centerpiece of the room, whether in a private home or an upscale commercial facility.

For a deeper look at blending safety and style, you can learn more about designing a handicap-accessible shower in our detailed guide.

Here are a few of the most popular trends we’re incorporating into our projects right now:

  • Frameless Glass Enclosures: Using heavy, frameless glass doors and panels makes the whole bathroom feel bigger, brighter, and more open. It’s a clean, sophisticated look that gets rid of the visual clutter of old metal frames.
  • Luxurious Showerheads: A ceiling-mounted rain showerhead, invigorating body jets, or a thermostatic valve that keeps the water temperature perfectly consistent can turn a daily routine into a high-end spa experience.
  • Custom Niches and Storage: We love building tiled niches directly into the shower walls. They offer elegant, out-of-the-way storage for shampoos and soaps, eliminating the need for those clumsy shower caddies.
  • Large-Format Tiles: Big tiles on the walls and floor mean far fewer grout lines to scrub. This not only makes cleaning easier but also creates a seamless, expansive look that feels incredibly clean and modern.

Here at Wheeler Painting, we are a local residential and commercial contractor that specializes in helping property owners find that perfect balance between long-term safety and beautiful design. A tub-to-shower conversion is a smart investment that pays you back every single day in comfort, confidence, and lasting property value.

Waterproofing and Ventilation for Puget Sound Bathrooms

Here in the Pacific Northwest, we know a thing or two about rain. So when you're inviting more water inside your property with a new shower, managing it properly isn't just a good idea—it's everything. The long-term health of your home or commercial building hinges on two things that are easy to overlook: rock-solid waterproofing and smart ventilation.

Detailed cutaway of a shower's construction layers, including cement board, waterproof membrane, tile, shower pan, drain, and exhaust fan.

I always tell my clients to think of their shower as a small boat built right inside their bathroom. Every single seam, corner, and screw hole has to be perfectly sealed to keep water contained. Getting this wrong is one of the most expensive mistakes you can make, often leading to thousands in repairs from hidden rot, mold, and structural damage down the line.

The Layers of Protection Behind Your Tile

Behind the beautiful tile you see is where the real magic happens. This is the waterproofing system, and it’s far more than just a sheet of plastic. It’s a complete, integrated system designed to create a watertight basin from the ground up.

At Wheeler Painting, we are meticulous about this process. A bulletproof shower waterproofing system involves several key components working together:

  • A Flawless Shower Pan: This is the floor of your shower. We create a custom-sloped mortar bed or install a pre-formed pan that ensures every single drop of water is guided directly to the drain. The pan is then integrated with the drain assembly and sealed up the walls, forming the base of your "boat."
  • Continuous Waterproof Membranes: We go over the cement backer board with modern liquid-applied membranes or specialized fabric systems. This creates a seamless, monolithic barrier across the walls, covering every joint and screw head. Water simply can't get through it.
  • Expertly Sealed Details: The most vulnerable spots for leaks are always corners, seams, and built-in niches for shampoo bottles. These areas get extra layers of reinforcement and sealant to make them completely invulnerable.

Without this comprehensive system, water vapor can slowly work its way into your wall cavities, feeding mold and silently destroying your building's framing from the inside out. As a local commercial construction service, we've been called in to fix too many of these disasters; they are silent destroyers that a professional installation completely prevents.

Waterproofing isn't a product you buy off the shelf; it's a system that's meticulously built. A properly constructed shower has multiple layers of defense, so even if grout cracks years from now, your property's structure is still bone-dry and protected.

Clearing the Air: Why Ventilation is Non-Negotiable

Once the water is safely down the drain, you have to deal with the moisture left hanging in the air. A steamy, foggy bathroom isn't just annoying—it's the perfect breeding ground for mildew and peeling paint. In our damp local climate, a powerful exhaust fan is your single best defense.

It's not just about having a fan; it's about having the right fan for the size of your room, and making sure it's ducted properly to vent all that moisture straight outside—not into your attic.

What a Good Exhaust Fan Really Does

A high-quality fan does a lot more than just make a little noise. It actively pulls the warm, humid air out of your bathroom, and that simple action is critical.

  • It starves mold and mildew. By dropping the humidity level quickly after a shower, you remove the moisture that mold needs to grow on your grout, ceiling, and walls.
  • It protects your investment. Excess moisture wreaks havoc on finishes. It can make fresh paint fail, cause wood trim to warp, and even make wallpaper peel right off the wall.
  • It improves air quality. A dry bathroom is a healthier bathroom. Good ventilation reduces airborne spores and creates a much more pleasant space for family, employees, or customers.

A pro will calculate the right fan capacity for your room—measured in Cubic Feet per Minute (CFM)—to ensure it has the muscle to do the job right.

We take this stuff seriously because we've seen what happens when it's ignored. If you want to dive deeper into the technical side, you can learn more about our waterproofing solutions for wet rooms and see how we approach moisture management. At Wheeler Painting, we believe that proper waterproofing and ventilation are the foundation of a residential or commercial renovation that will look great and last for decades.

How to Hire the Right Local Remodeling Contractor

A tub-to-shower conversion is a significant investment, one that boosts your property's value and daily function. But honestly, the success of the whole project really comes down to the team you hire to build it. Choosing the right "residential contractor near me" or "commercial construction near me" isn't about chasing the lowest bid; it's about finding a genuine local partner who will protect your property, keep you in the loop, and deliver work they stand behind.

Here in our community, that means finding someone who truly gets the unique challenges of our climate, especially when it comes to waterproofing. A full-service contractor who handles everything—from the plumbing and framing to the final tile and paint—is your best bet for a seamless project with a single point of accountability.

Your Contractor Vetting Checklist

Before you sign on the dotted line, you’ve got to do your homework. Any contractor worth their salt will expect and welcome your questions, providing clear, straightforward answers. Use this checklist during your initial chats to make sure you're teaming up with a real pro.

  • Licensing and Insurance: The first thing you should ask is, "Are you licensed, bonded, and insured to work here?" Don't just take their word for it—ask for proof. Their license shows they meet state and local requirements, and insurance is what protects you from any liability if an accident happens on your property.

  • Specific Experience: Get right to the point: "How many tub to shower conversions have you actually done?" Ask to see a portfolio of their residential remodeling and commercial renovation work. This confirms they have hands-on, relevant experience with the specific plumbing, framing, and waterproofing challenges that come with these jobs.

  • Written Proposals: Never, ever move forward with just a verbal quote. A professional will give you a detailed written proposal that breaks down the entire scope of work, the specific materials they'll use, a project timeline, and a transparent payment schedule.

This kind of detailed paperwork protects both of you and makes sure everyone is on the same page from the get-go.

The Importance of Communication and Transparency

A great contractor does more than just the physical work; they communicate. From the first meeting to the final walkthrough, you should feel like you're being heard and kept informed. Look for a team that sets clear expectations about their daily work schedule, how they’ll manage dust and protect your property, and who your main point of contact will be.

A contractor’s willingness to answer your questions thoroughly and patiently is one of the best indicators of a successful project. If communication feels difficult before the job even starts, it will only get worse once demolition begins.

A trustworthy local partner will also be upfront about potential surprises. For example, they might explain that it's possible to find hidden water damage or old, failing plumbing once the old tub is out. A transparent contractor will talk about how they handle those "what-if" scenarios and even build contingencies into the estimate, minimizing the chance of sticker shock later.

For a more in-depth look at making the right hire, check out our guide on how to choose a general contractor.

At Wheeler Painting, we’ve built our reputation on trust and clear communication since 1991. Whether we're managing a complex commercial construction project or a residential tub to shower conversion, our goal is to make the process straightforward and stress-free for our clients in the community. We believe that providing detailed proposals and keeping an open line of communication is the only way to get your project done on time, on budget, and exactly how you envisioned it.

Answering Your Top Questions About Tub-to-Shower Conversions

It's smart to ask a lot of questions before you start a bathroom renovation. Here are the answers to the questions we hear most often from homeowners and business owners around the Puget Sound who are thinking about making the switch.

How Long Does a Tub to Shower Conversion Take?

Most of our tub-to-shower projects wrap up in 3 to 7 days. The exact timing really depends on the path you choose. If we're installing a beautiful pre-fabricated shower system, we can often hit the shorter end of that window.

A fully custom tile shower, on the other hand, might lean toward the longer end, especially if we need to move plumbing around. Either way, a professional contractor will give you a clear, day-by-day schedule so you know exactly what to expect and can plan around it.

Will This Project Hurt My Property's Resale Value?

We get this question all the time, and the answer is almost always a resounding "no." In fact, it usually does the opposite. As long as you have at least one other bathtub somewhere in the house, converting a secondary tub into a spacious, modern walk-in shower often increases your property's value.

In the current market, buyers and tenants are looking for updated, functional bathrooms. A well-done shower conversion can deliver a significant return on investment.

The real secret is balance. For a home, keep one bathtub for families with small kids, and upgrade the other bathroom to a sleek, accessible shower. That way, you appeal to the widest possible range of future buyers.

Can a New Shower Actually Fit in the Old Tub's Space?

Yes, absolutely. This is exactly what these conversions are designed for. Most tub to shower conversions are engineered to slot right into the alcove your old tub occupied.

A standard bathtub footprint is about 60 inches long and 30-32 inches wide, which is more than enough room for a comfortable, spacious shower. Sticking to this original layout is the key to making the project efficient and keeping costs down, as it avoids a full-scale bathroom redesign.

Is a Building Permit Required for This?

It really depends on the scope of the project. If we're just swapping out the tub for a shower stall and not touching the plumbing's location, you often don't need a permit.

However, the moment we start moving drains, adding new electrical for lighting, or touching any walls, a permit is almost always required. A reputable residential contractor or commercial construction firm will know the local codes inside and out and will manage the entire permitting process for you, ensuring everything is built to last and completely up to code.


Ready to see how a new shower could transform your bathroom? Whether it's a single residential project or a larger commercial upgrade, Wheeler Painting brings professionalism and quality craftsmanship to every job in our community. Schedule your free consultation with us today!

Top 7 Restoration Companies Near Me in Puget Sound (2026 Guide)

When disaster strikes your home or business in the Puget Sound area, the immediate aftermath can feel overwhelming. A burst pipe, a kitchen fire, or severe storm damage requires immediate action, but a quick search for "restoration companies near me" often returns a confusing and lengthy list of options. Who can you trust to respond quickly, handle insurance claims efficiently, and deliver high-quality craftsmanship to get your property back to normal?

This guide cuts through the noise. It is designed specifically for property owners, business owners, and facilities managers in Western Washington who need to make a critical decision under pressure. We provide a vetted roundup of top-rated restoration companies, breaking down their specific services, typical response times, and areas of expertise. Our goal is to give you clear, straightforward information to help you select a reliable local provider.

You will find detailed profiles for each company, allowing you to compare them on key criteria like certifications, service areas, and their approach to insurance. We'll explore what sets a great restoration partner apart, including those who offer full-scale residential and commercial construction services to see your project through from initial cleanup to final rebuild. This information will empower you to act decisively and confidently, turning a stressful situation into a well-managed recovery. We’ll show you exactly how to find the right team to bring your property back to its pre-loss condition, or even better than before.

1. Wheeler Painting & Restoration Services

Best for: Comprehensive, Single-Source Restoration and Construction

For homeowners and commercial property managers in Western Washington, finding a trustworthy partner after a disaster can be overwhelming. Wheeler Painting & Restoration Services stands out as a premier choice among restoration companies near me by offering a complete, single-source solution that extends from emergency response to full-scale reconstruction. With a foundation built on over three decades of local experience, the company serves as a general contractor, restoration specialist, and expert painter, eliminating the need to coordinate multiple vendors during a stressful time.

Their process is designed for clarity and client confidence. It begins with an on-site consultation to assess the damage, followed by a detailed written proposal that outlines the scope of work, timeline, and costs. This transparent approach is consistently praised in customer testimonials, where clients highlight the team's clear communication, meticulous craftsmanship, and ability to stay on schedule and within budget.

Why Wheeler Painting & Restoration Services Stands Out

What distinguishes Wheeler is its ability to manage the entire lifecycle of a project. They don't just mitigate the initial damage; they rebuild and refinish the property to a state that is often better than before. This integrated service model is a significant advantage for anyone facing complex repairs.

  • Residential Projects: For a homeowner whose property has suffered water damage from a burst pipe, Wheeler's team first handles the water extraction and drying. They then seamlessly transition to repairing drywall, replacing flooring, and performing any necessary structural work. Finally, their expert painters can restore interior finishes, from walls and ceilings to intricate cabinet refinishing.
  • Commercial Projects: A facility manager dealing with fire damage in an office building can rely on Wheeler for both the immediate cleanup and the subsequent tenant improvements. This includes everything from framing and electrical work to installing specialty coatings and executing a complete retail or office build-out, ensuring the space is ready for business operations with minimal downtime.

Client Insight: "They treated our home like it’s their own." This sentiment, echoed in multiple testimonials, captures the company's commitment to quality and respect for the client's property. It reflects a level of service that goes beyond simple repairs to deliver true peace of mind.

Navigating the Website and Services

The Wheeler Painting & Restoration Services website is straightforward and user-focused. Prospective clients can easily browse their extensive portfolio of residential and commercial projects, which showcases their capabilities in everything from kitchen remodels and siding replacement to large-scale commercial painting and institutional facility construction. While fixed pricing isn't available online due to the custom nature of restoration and construction work, scheduling an on-site consultation for a tailored estimate is simple.

Key Strengths:

  • One-Stop Accountability: Manages all phases of restoration, remodeling, and painting under one contract.
  • Proven Local Experience: Serving Western Washington since 1991 with thousands of completed projects.
  • Client-Centric Process: Emphasizes on-site consultations, detailed proposals, and consistent communication.
  • Strong Reputation: Backed by local testimonials praising reliability, quality, and on-time delivery.

Points to Consider:

  • Service area is limited to the Puget Sound region and Western Washington.
  • Accurate pricing requires scheduling an on-site consultation.

For anyone searching for "restoration companies near me" that can provide a reliable, start-to-finish solution, Wheeler Painting & Restoration Services offers a compelling and proven option.

Website: https://wheelerpainting.com

2. PureDry Restoration

For homeowners and property managers in the Greater Seattle and Snohomish County areas, PureDry Restoration has established itself as a reliable first-responder for property damage emergencies. This locally owned company is built around a promise of speed and efficiency, making it a strong contender when searching for "restoration companies near me." Their primary standout feature is a 24/7 dispatch system that commits to having a certified technician on the way to your property in 60 minutes or less, a critical factor in mitigating further damage from water, fire, or storms.

PureDry Restoration

PureDry’s approach is designed to simplify a stressful situation for the property owner. They manage the entire restoration process, from initial emergency mitigation and contents restoration to the final reconstruction. This end-to-end service model means you work with a single point of contact instead of coordinating between multiple contractors for water extraction, mold remediation, and then rebuilding. Their direct billing to all major homeowner insurance carriers further reduces the administrative burden on clients, as they handle the claims process directly.

What Makes PureDry Restoration Stand Out

The company’s reputation is backed by over 15 years of local service and a significant volume of positive customer feedback, with more than 400 reviews on Google alone. This extensive public track record offers valuable insight into their performance on recent jobs.

  • Service Model: Full-cycle restoration, including mitigation, contents pack-out and cleaning, and complete reconstruction services.
  • Emergency Response: A core promise of "on our way in 60 minutes or less" for urgent calls.
  • Certifications: Technicians are IICRC-certified, ensuring they follow industry-best practices for water damage, mold removal, and fire cleanup.
  • Technology: They use modern equipment like thermal imaging cameras to detect hidden moisture and advanced drying systems to expedite the recovery process.

Potential Considerations

While their comprehensive service is a major benefit, it's worth noting that during widespread regional weather events, such as major storms, the scheduling for the final reconstruction phase can sometimes extend due to high demand. Additionally, for highly specialized or large-scale industrial abatement projects, PureDry may refer clients to a partner company with specific expertise in that niche. However, for most residential and commercial property owners facing water, fire, or mold damage, PureDry offers a proven, streamlined, and fast-acting solution.

Website: https://puredry.com

3. Washington Water Damage & Cleaning Services

As a longstanding presence in the Puget Sound region, Washington Water Damage & Cleaning Services has built its name on rapid, effective mitigation. This company is a go-to for many residential and commercial clients in King, Pierce, and Snohomish Counties who need an immediate response to water, sewage, or fire emergencies. Their 24/7 availability makes them a key player for anyone searching for "restoration companies near me" when disaster strikes, ensuring a team is dispatched to begin the critical work of preventing further property loss.

Washington Water Damage & Cleaning Services

Washington Water Damage & Cleaning Services focuses intently on the initial stages of the restoration process. They excel at water extraction, structural drying, and addressing smoke and mold contamination. This specialized focus allows them to apply deep expertise to the most urgent phase of property damage control. Their services extend to contents pack-out and cleaning, securing and restoring personal belongings while the structural work is underway. This dual focus on both the building and its contents provides a sense of order for property owners during a chaotic time.

What Makes Washington Water Damage & Cleaning Services Stand Out

The company’s deep regional experience gives them an edge in understanding the specific challenges posed by the Pacific Northwest climate. Their emphasis on specialized drying techniques and moisture detection is particularly valuable in an area prone to water-related issues. They have a reputation for being a dependable first responder for property managers and homeowners alike.

  • Service Model: Focused primarily on emergency mitigation, cleaning, and contents restoration for water, fire, sewage, and mold.
  • Emergency Response: Provides 24/7 emergency services across its core service area of King, Pierce, and Snohomish Counties.
  • Technology: Uses thermal imaging cameras for non-invasive moisture detection to find hidden water pockets behind walls and under floors.
  • Specialized Services: Offers dedicated hardwood floor drying systems and detailed contents cleaning and storage services.

Potential Considerations

Because their core strength is in mitigation and cleaning, clients with extensive structural damage requiring a full rebuild may need to engage a separate general contractor for the reconstruction phase. While they manage the initial crisis effectively, the project may transition to another company for the final build-back. Companies offering a comprehensive water damage restoration service from start to finish can simplify project management. Additionally, detailed pricing information is not readily available on their website, requiring a direct call for estimates. For property owners facing a significant emergency, Washington Water Damage & Cleaning Services offers a reliable and experienced team to manage the initial cleanup and stabilization.

Website: https://www.waterdamagefix.com

4. Paul Davis Restoration of Greater Seattle

As the local franchise of a well-known national network, Paul Davis Restoration of Greater Seattle provides the best of both worlds: the resources and standards of a large corporation paired with the dedicated service of a local, Lynnwood-based team. For property owners searching for "restoration companies near me," Paul Davis offers a structured and highly responsive solution for residential, commercial, and large-loss incidents. A key part of their service promise is a documented 30-minute initial contact commitment, ensuring that every emergency call receives immediate attention, which is vital for securing a property and preventing secondary damage.

Paul Davis Restoration of Greater Seattle

The company’s system is built on process and accountability. They guide clients through every step, from the initial 24/7 emergency call for water, fire, or mold damage to coordinating directly with insurance adjusters and executing the final reconstruction. This complete service model is especially beneficial for commercial property managers and businesses facing operational disruptions, as it centralizes all communication and project management. Their team also handles complex tasks like contents pack-out and cleaning, an essential part of a comprehensive recovery, particularly after a fire.

What Makes Paul Davis Restoration of Greater Seattle Stand Out

Being part of a national organization gives this local team access to extensive training protocols, structured quality assurance (QA) programs, and a broad knowledge base. This institutional backing ensures their IICRC-certified specialists are equipped with proven methods for mitigation and repair.

  • Service Model: Full-scope restoration services for residential, commercial, and large-loss projects, including contents restoration and complete reconstruction.
  • Emergency Response: A formal commitment to make initial contact within 30 minutes of an emergency call and be on-site within four hours.
  • Certifications: Technicians are IICRC-certified, and the company operates under the rigorous standards of the national Paul Davis network.
  • Insurance Support: Provides direct assistance with insurance claims, including coordinating with adjusters to streamline the approval and payment process.

Potential Considerations

While the franchise model offers strong national backing, the client experience can sometimes vary by territory or during widespread, catastrophic events that strain local resources. Their website funnels inquiries through online forms for scheduling, and like most restoration firms, they do not publish instant pricing due to the unique nature of each damage scenario. However, for property owners who value a structured, process-driven approach with documented response standards, Paul Davis of Greater Seattle is a dependable and well-equipped choice for any property emergency.

Website: https://greater-seattle.pauldavis.com

5. ServiceMaster of Seattle

Backed by the power of a nationally recognized brand, the local ServiceMaster of Seattle franchise in Woodinville brings a wealth of standardized resources and training to properties across the region. This makes them a frequent consideration for those searching for "restoration companies near me" who value proven systems and extensive service capabilities. Available 24/7/365, their team is prepared to handle a full spectrum of property damage, from common water and fire emergencies to more specialized situations, serving both residential and commercial clients.

ServiceMaster of Seattle

ServiceMaster of Seattle operates on a full-service model, managing the crisis from the initial emergency call through to final reconstruction. This integrated approach means property owners have one point of contact for mitigation, contents pack-out, and the rebuilding process, which simplifies coordination during a stressful time. One of their unique offerings is a pre-loss planning program for commercial clients, helping businesses prepare for disasters before they happen. They also provide financing options, adding a layer of financial flexibility that can be crucial for unexpected, large-scale restoration projects.

What Makes ServiceMaster of Seattle Stand Out

The primary advantage of working with this franchise is the combination of local ownership with the support of a major national network. This ensures technicians are trained to consistent, high standards and have access to a deep pool of equipment and resources. Their service menu is also notably broad, extending beyond typical water and fire damage.

  • Service Model: Complete mitigation-to-reconstruction services for a single-provider experience.
  • Specialty Services: Offers cleanup for hoarding situations, trauma, and biohazards, plus robust odor control and disinfection services. Understanding the complete process, including what is involved in professional mold remediation services, is key for homeowners.
  • Commercial Focus: Provides commercial pre-loss planning (SRM) to help businesses minimize downtime and be prepared for emergencies.
  • Financial Support: The availability of financing options can be a significant benefit for clients facing out-of-pocket expenses or high deductibles.

Potential Considerations

Because it's a franchise model, the customer experience can sometimes vary from one location to another, and during widespread storm surges, appointment windows may be less precise due to system-wide demand. Additionally, specific pricing and exact availability are not published on their website, so you must contact them directly for a quote and scheduling. Nonetheless, for property owners who want the assurance of a large, established brand and need a wide range of services, including complex or specialty cleanup, ServiceMaster of Seattle is a formidable option.

Website: https://www.servicemasterofseattle.com

6. BELFOR Property Restoration – Seattle

For large-scale residential, commercial, and industrial property disasters, BELFOR Property Restoration operates as a global leader with a significant local presence in Tukwila. Their Seattle-area office is equipped to handle complex and large-loss events across Puget Sound and even into Alaska, making them a go-to choice when a project’s scale exceeds the capacity of smaller firms. When you search for "restoration companies near me" to address major damage, BELFOR’s extensive resources and 24/7 emergency response capabilities place them at the forefront for property managers and business owners facing significant disruption.

BELFOR Property Restoration – Seattle

BELFOR’s primary advantage lies in its fully integrated service model, which covers everything from initial emergency board-up and hazardous materials abatement to specialized recovery and final reconstruction. This single-provider workflow is particularly beneficial for complex commercial and multi-family projects, where coordinating separate contractors for mitigation, environmental services, and general contracting can create delays and communication breakdowns. Their in-house teams can manage asbestos, lead, specialized contents recovery, and full-scale rebuilding, providing a cohesive solution from start to finish.

What Makes BELFOR Property Restoration Stand Out

The company’s ability to deploy massive resources and specialized equipment sets it apart, especially during widespread regional emergencies. With decades of presence in Washington, their experience with large commercial and industrial losses provides a level of expertise that is difficult to match.

  • Service Model: A complete, in-house process that includes emergency mitigation, environmental services (asbestos, hazmat), specialized recovery for electronics and documents, and general contracting for reconstruction.
  • Emergency Response: 24/7 availability with the capacity to manage everything from a single-family home to a large industrial facility.
  • Certifications: Teams are highly trained and certified for a wide range of tasks, including hazardous materials handling and complex structural drying.
  • Technology: Access to an arsenal of industrial-grade equipment for document recovery, electronics restoration, and large-scale dehumidification and cleanup.

Potential Considerations

The sheer scale of BELFOR's operations means they may not be the most cost-effective or fastest option for smaller, straightforward residential jobs. Their resources are often prioritized for larger and more complex projects, and their minimum charges may be higher than those of smaller local competitors. During major regional events, scheduling for non-urgent or smaller projects might also face delays as they focus on large-loss commercial and industrial clients. However, for property owners and managers facing a catastrophic event, BELFOR provides unmatched capacity and a proven track record.

Website: https://www.belfor.com/us/en/belfor-seattle/

7. SERVPRO of Seattle Northwest

As one of the most recognized names in the restoration industry, SERVPRO of Seattle Northwest provides a dependable and structured response for property damage. This local franchise brings the power of a national network to Seattle and Eastside property owners, offering 24/7 emergency mitigation for water, fire, smoke, and mold damage. For those searching for "restoration companies near me" and valuing brand recognition and standardized procedures, SERVPRO is a formidable option. Their system is designed to handle everything from a single-family home loss to complex, multi-unit commercial incidents with practiced efficiency.

The primary strength of the SERVPRO model lies in its established processes, particularly concerning insurance claims. The company is well-known to insurance adjusters, which can often simplify the claims coordination and approval process for homeowners and commercial property managers. They are equipped to scale their response rapidly, drawing on a national catastrophe and surge support system if a major regional event, like a winter storm, overwhelms local resources. This ensures they have the manpower and equipment to address widespread damage across their service area.

What Makes SERVPRO of Seattle Northwest Stand Out

Backed by a nationally recognized training program and operational standards, this franchise offers a reliable baseline of service quality. Their familiarity with local Seattle weather patterns and building types adds a layer of regional expertise to their nationally proven methods.

  • Insurance Coordination: Well-established relationships with major insurance carriers and a deep understanding of the claims process.
  • Scalable Resources: Access to SERVPRO’s national disaster recovery network allows them to handle large-scale events and surges in demand.
  • Service Range: Capable of managing both residential and significant commercial property losses, from initial cleanup to final restoration.
  • Brand Standards: Operates under a consistent set of guidelines, ensuring a predictable and professional service experience for clients.

Potential Considerations

While the franchise model provides consistency, it's important to remember that crew experience and response times can vary between individual locations. During peak demand, the closest available team might be dispatched from a neighboring SERVPRO franchise to assist. Additionally, detailed pricing is typically provided only after an on-site inspection, as there is limited public information on standard rates. However, for property owners who prioritize a company with a proven system and strong insurance industry ties, SERVPRO of Seattle Northwest is a solid and widely available choice.

Website: https://www.servpro.com/locations/wa/servpro-of-seattle-northwest

Top 7 Local Restoration Companies Comparison

Provider Implementation complexity Resource requirements Expected outcomes Ideal use cases Key advantages
Wheeler Painting & Restoration Services Moderate — full-service local GC and specialty painting Skilled local crews, on-site consultations, specialty coatings capability Detailed craftsmanship, transparent timelines, tailored estimates Home remodeling, retail build-outs, office renovations, residential & commercial restoration One-stop local partner, decades of regional experience, strong client communication
PureDry Restoration Low–High — rapid mitigation to reconstruction IICRC-certified techs, 24/7 dispatch, modern drying & thermal-imaging Fast mitigation, contents restoration, insurance-friendly billing Emergency water/fire/mold response, insurance claims, fast arrival needs 60-min response commitment, direct insurance billing, proven local reviews
Washington Water Damage & Cleaning Services Low–Medium — focused on mitigation and cleaning Thermal imaging, hardwood/structural drying, contents cleaning/storage Quick mitigation, effective moisture detection, floor recovery Emergency mitigation, hardwood floor drying, contents cleaning/storage Broad in-house mitigation/cleaning, regional experience in Puget Sound
Paul Davis Restoration of Greater Seattle Medium–High — scalable to large-loss with franchise QA IICRC specialists, adjuster coordination, national franchise resources Standardized QA, rapid contact, coordinated insurance support Large-loss incidents, commercial/residential claims, insurer-driven projects National standards with local team, documented response-time commitments
ServiceMaster of Seattle Medium–High — mitigation through reconstruction, specialty services National training/resources, specialty cleanup teams, financing options Comprehensive restoration, specialty cleanups, reconstruction support Hoarding/odor/disinfection jobs, commercial pre-loss planning, complex residential losses Established brand standards, wide specialty menu, financing available
BELFOR Property Restoration – Seattle High — built for complex & industrial-scale incidents Deep in-house resources, environmental/hazmat capabilities, reconstruction crews Full-scale recovery for complex/large losses, hazardous abatement, contents recovery Industrial, multi-family, large commercial losses, hazmat incidents High capacity for complex jobs, integrated mitigation-to-rebuild workflow
SERVPRO of Seattle Northwest Medium — scalable mitigation with national surge support Local crews plus access to SERVPRO catastrophe resources, insurer coordination Scalable emergency response, insurer-friendly processes, surge capacity Residential/commercial emergencies, regional catastrophes, insurance claims Strong brand recognition, adjuster familiarity, network scalability

From Restoration to Renovation: Choosing a Partner for the Complete Project

Navigating the aftermath of property damage can be a stressful and fragmented process. Your immediate concern is stopping the damage, whether it’s from water, fire, or mold. As we’ve explored, companies like SERVPRO, BELFOR, and Paul Davis bring certified expertise to emergency mitigation, and specialists like PureDry focus intently on water removal. These are critical first steps.

However, once the initial crisis is contained, the real work of rebuilding begins. This is a pivotal point in your recovery journey and a key differentiator among the providers we've reviewed. Choosing a company that only handles the cleanup means you become the project manager for the reconstruction phase. You'll need to find, vet, and coordinate separate contractors for drywall, flooring, siding, and painting, adding layers of complexity, cost, and potential delays to an already difficult situation.

The Value of an Integrated Approach

A truly seamless recovery extends beyond simple restoration. It involves reconstruction, renovation, and finishing touches that make your property whole again. This is where a full-service general contractor who also specializes in restoration provides immense value.

Consider the benefits of a single, accountable partner:

  • Continuity of Service: The team that mitigates the damage already understands the full scope of what needs to be rebuilt. There is no knowledge gap or handover period.
  • Streamlined Project Management: One point of contact manages everything from the initial emergency call to the final coat of paint. This simplifies communication and reduces the burden on you as a property owner or manager.
  • Consistent Quality: With a single team overseeing the entire project, you can expect a consistent standard of workmanship from start to finish.
  • Efficiency and Speed: An integrated team can schedule trades and order materials more effectively, preventing the common delays that occur when coordinating multiple independent contractors.

Beyond Restoration: An Opportunity to Upgrade

While companies like ServiceMaster and Washington Water Damage excel at returning your property to its pre-loss condition, a disaster can also present an unexpected opportunity. Perhaps you want to do more than just repair; you might want to remodel the kitchen, reconfigure an office layout, or upgrade your exterior siding.

This is where Wheeler Painting & Restoration Services stands apart. With deep roots in both residential and commercial construction, they see the complete picture. Their ability to transition from emergency mitigation directly into a full-scale renovation or build-out is a significant advantage. Whether you’re a homeowner envisioning a new living space after a water loss or a business owner needing a complete office renovation or retail build-out after a fire, their integrated design-build process ensures your vision is realized efficiently and professionally.

Key Takeaway: When searching for "restoration companies near me," think beyond the immediate emergency. Ask potential partners about their capabilities for reconstruction and renovation. A company that can manage the entire project, from initial cleanup to final build, will save you time, money, and significant stress.

For anyone in Puget Sound and Western Washington, from homeowners to commercial facility managers, the right partner doesn't just fix the problem. They provide a clear path forward, turning a moment of crisis into an opportunity for improvement.


Ready to partner with a team that can handle your entire project, from emergency response to complete reconstruction? Contact Wheeler Painting & Restoration Services for a comprehensive consultation that covers not just restoration, but the full potential of your property's recovery and renovation. With decades of local experience in both residential and commercial construction, they are the trusted, full-service choice for seeing your project through to a successful completion.

Finding the Best Stain for Fences in Western Washington

When you’re trying to pick the best stain for your fence, the answer really depends on what you're trying to achieve. If you want serious durability and water repellency for our wet Pacific Northwest climate, an oil-based, semi-transparent stain is hard to beat. But if you're looking to completely refresh an older fence or get maximum UV protection, a solid-color stain is probably your best bet. It all comes down to finding that sweet spot between the look you want and the protection your fence desperately needs.

Protecting Your Fence in the Pacific Northwest Climate

For any property owner in Western Washington, a fence is a huge investment. It gives you privacy, adds a layer of security, and frames your home or business. But our local climate is notoriously tough on wood. The constant rain, high humidity, and even our seasonal sun exposure create a perfect storm that can wreck an unprotected fence in just a few years.

Staining your fence isn’t just about making it look nice—it’s the single most important thing you can do to protect it and make it last. A quality stain is your frontline defense against everything the PNW weather throws at it. A trusted local provider like Wheeler Painting can help you make the right choice for your home or commercial property.

Key Threats to Fences in Western Washington

Here in the Pacific Northwest, we know a thing or two about rain. But it’s the combination of threats that really does a number on wood fences.

  • Moisture Saturation: All that dampness soaks into the wood, causing it to swell and then shrink as it dries. This constant movement leads to warping, cracking, and splitting, which gives rot an open invitation.
  • Mold and Mildew: High humidity is the ideal breeding ground for mold and mildew. Before you know it, you’ll see those ugly black and green streaks that don't just look bad—they can permanently stain the wood.
  • Sun Damage (UV Rays): It's not just about the rain. Even our cloudy days let enough UV rays through to break down wood fibers. This is what turns a beautiful cedar fence gray and brittle over time.

A well-chosen fence stain does more than just add color. It actively pushes water away, contains fungicides to stop mold in its tracks, and uses pigments to shield the wood from damaging UV radiation. It's a proactive investment in your property's value.

Why Staining is a Smart Financial Decision

This protective quality is exactly why stained coatings dominate the global wood fencing market. It’s a massive industry—valued at USD 8.71 billion in 2024—and stained coatings make up USD 7.03 billion of that. The numbers don't lie. Professionals and property owners alike rely on stains to fight oxidation and preserve the wood's natural color, especially in demanding climates like ours. You can dig deeper into the data by checking out the full market research on wood fencing trends.

By applying the right stain, you can head off expensive repairs down the road and potentially double the life of your fence. This holds true whether you're a homeowner trying to protect your backyard oasis or a facilities manager tasked with maintaining perimeter fencing for a commercial property. Getting the timing right is just as important as the stain you choose. For more on that, take a look at our guide on the best time to paint your house exterior, as many of the same rules apply to staining.

Oil-Based vs. Water-Based Stain Performance

When it comes to protecting your fence, the first and most important choice you'll make is between an oil-based and a water-based stain. This decision is everything. It will dictate how well your fence weathers the relentless dampness we know all too well here in the Pacific Northwest. Let's move beyond a generic pro/con list and dig into how each type actually holds up against Western Washington’s specific challenges.

This is a core part of property maintenance. As the flowchart below shows, every property owner faces a clear choice: proactively protect your investment, or get ready for the much higher cost of replacing it down the road.

A flowchart guiding decisions on fence protection, from start to maintenance or replacement.

The takeaway is simple: in our wet climate, staining isn't just an aesthetic choice—it's the only way to ensure your fence lasts.

Understanding Oil-Based Stains

For decades, oil-based stains have been the go-to workhorse for exterior wood, and for good reason. They are formulated with natural oils, like linseed or tung, which are suspended in a solvent base. When you apply an oil-based stain, it doesn’t just sit on top; it soaks deep into the wood fibers.

This deep penetration is its superpower, especially in our climate. By saturating the wood from the inside out, the oil creates a robust, water-repelling barrier. For a fence in the Puget Sound that's constantly battered by rain and humidity, this is your best defense against rot and decay.

The numbers back this up. Oil-based wood stains represent 26.1% of the U.S. market, with USD 628.5 million in sales in 2024 and a projected 8.4% CAGR. Their ability to form a tenacious bond deep within the wood grain provides lasting color and adhesion that often outmatches water-based options, which is why exterior applications alone accounted for USD 2 billion in 2023. You can see more details in these industry-leading wood stain statistics.

Key Differentiator: The real strength of an oil-based stain is its deep penetration. It’s like conditioning leather—it nourishes the wood while building a resilient, water-repellent shield that’s exceptionally effective against our constant moisture.

However, this high performance comes with some trade-offs. Oil-based stains contain higher levels of volatile organic compounds (VOCs), which means a strong odor during application and a bigger environmental footprint. Cleanup requires mineral spirits, and the drying time is significantly longer—you'll often need a 24-48 hour rain-free window for it to cure properly.

The Rise of Modern Water-Based Stains

For years, water-based stains had a reputation for being unsuitable for tough outdoor jobs, but modern chemistry has completely changed the game. Today’s premium water-based (often called acrylic) stains are a fantastic alternative with their own distinct advantages.

Instead of penetrating like an oil, a water-based stain is engineered to form a protective, flexible film on the wood's surface. This flexibility is a huge plus in a climate with our temperature swings. As the wood naturally expands and contracts, the acrylic film moves with it, making it far less likely to crack, peel, or blister over time.

This surface-level protection also gives it superior color retention and UV resistance. Because the pigments are locked into that acrylic film, they are much less prone to fading from sun exposure.

For homeowners and business owners, the practical benefits are hard to ignore:

  • Faster Drying Times: Most are dry to the touch in a few hours, dramatically lowering the risk of a surprise rain shower ruining your work.
  • Low VOCs: The odor is much milder, making them a more pleasant and environmentally sound choice for homes and businesses.
  • Easy Cleanup: All you need is soap and water. This simplifies the entire project, whether you're a DIYer or a seasoned residential contractor.

While they don't soak in as deeply as oils, the best water-based stains create a tough, breathable barrier. This is a critical feature, as it allows any moisture vapor trapped inside the wood to escape, preventing the perfect conditions for mold and mildew to grow from within.


To make the decision clearer, here’s a direct comparison of how these two stain types perform in our wet environment.

Oil-Based vs Water-Based Fence Stains Performance in Wet Climates

Performance Factor Oil-Based Stain Water-Based Stain Best Use Case in the PNW
Water Repellency Excellent; penetrates deep to block water from within the wood fibers. Good to Excellent; forms a protective surface film that sheds water. Oil-Based: For maximum protection on older, weathered fences or those in extremely damp, shaded areas.
Durability Prone to cracking/fading over time, especially in direct sun. Requires reapplication every 2-3 years. Highly flexible; resists cracking and peeling. Better UV resistance means less fading. Reapplication every 3-5 years. Water-Based: For newer fences or those in sunny spots where flexibility and color retention are key.
Application Longer dry time (24-48 hrs), strong odor (high VOCs), requires mineral spirits for cleanup. Fast dry time (1-4 hrs), low odor (low VOCs), easy soap-and-water cleanup. Water-Based: Ideal for DIY projects or when you need to finish the job quickly with minimal disruption.
Mold/Mildew Can be susceptible to mildew growth if additives are not included. The breathable film allows moisture to escape, reducing the risk of mold growth from within. Both: Look for products with high-quality mildewcides, but water-based has a slight edge due to breathability.

Ultimately, for anyone prioritizing ease of use, environmental impact, and long-term color stability, a premium water-based stain is an outstanding choice for protecting a fence in Western Washington.

Choosing Your Stain Finish and Opacity

Once you’ve decided between an oil or water-based formula, the next big question is about appearance and protection. How much of that wood grain do you want to see? This choice, called opacity, is where you balance the look you want with the level of durability you need.

It's a practical decision. The opacity you choose determines how much the natural wood shows through, but it also dictates how much UV protection your fence gets. This is a crucial factor for any home or commercial property, especially with the kind of weather we get here. Your fence's age and condition will play a big part in this decision, too.

Three sets of wooden fence pickets showing solid, semi-transparent, and clear stain finishes.

Solid Color Stains: Maximum Protection, Total Transformation

Think of a solid color stain as being closer to paint. It completely covers the wood grain, creating an opaque, uniform finish. This makes it the undisputed champion for hiding imperfections and delivering the absolute best UV protection available. The pigments form a powerful shield against the sun, which is why solid stains last longer than any other option.

A solid stain is often the perfect solution for:

  • Older or Weathered Fences: If your fence has seen better days—with uneven coloring, old repairs, or different types of wood—a solid stain creates a clean, consistent surface that looks brand new.
  • Precise Color Matching: Need to match your company’s branding or your home’s trim? Solid stains can be tinted to virtually any color, offering total design control.
  • High-Traffic Commercial Areas: These coatings are tough. Their durability is ideal for the perimeters of retail centers, office parks, and busy businesses where fences see more wear and tear.

The demand for high-performance coatings like these is soaring. The global wood coatings market is expected to jump from USD 12.22 billion in 2025 to USD 17.83 billion by 2033. Much of that growth comes from powerful polyurethane resins, which made up 60.14% of coatings in 2025 and are a key ingredient in the toughest solid stains we use at Wheeler Painting for commercial painting services.

Semi-Transparent Stains: The Best of Both Worlds

For many property owners, a semi-transparent stain hits the sweet spot. It offers a beautiful compromise between protection and natural aesthetics. It has enough pigment to add rich color and provide substantial UV defense, but it’s still sheer enough to let the wood's unique grain and texture shine through.

This makes it our most popular request for homeowners and businesses who want to enhance their wood fence, not hide it. It's the perfect choice for a beautiful new cedar fence where you want that classic, high-quality wood look to be the star.

Key Insight: Here in the Pacific Northwest, a semi-transparent stain is our go-to for most deck & porch staining projects. It delivers the protection we need against our notorious rain and sun while preserving the authentic, rustic character of wood that defines so many of our local properties.

Because they have a good amount of pigment, semi-transparent stains are great at preventing wood from turning gray and brittle. If you're curious about the science, you can learn more by reading our guide on choosing a UV-resistant paint.

Clear Sealers: A Natural Look with a Trade-Off

Clear sealers, which are sometimes just called water repellents, contain almost no pigment. As the name implies, their main job is to repel moisture and stop water from soaking into the wood. They do this very well, but they offer virtually no protection from the sun’s damaging UV rays.

Without pigments to block the sun, the wood underneath will naturally weather and turn gray over time. This makes clear sealers a very specific choice. They’re best for situations where you actually want the wood to develop that silvery-gray patina as it ages, but you still need to protect it from rot and decay caused by moisture.

A clear sealer might be right for you if:

  • You have a new, high-quality wood fence like cedar or redwood.
  • You prefer a naturally weathered, rustic look for your property.
  • You're committed to more frequent reapplication (often yearly) to keep the water repellency effective.

Ultimately, the best stain for your fence comes down to what you value most. If maximum lifespan and color control are your top priorities for a commercial or older residential fence, a solid stain can't be beaten. But for that classic, protected wood look, a semi-transparent stain is the perfect middle ground.

Why Professional Prep is Everything for a Lasting Fence Stain

You can pick the absolute best stain on the market, but if you put it on a poorly prepped fence, it’s going to fail. It's a hard truth we've seen play out time and time again. Think about it—you wouldn't slap a coat of paint on a dirty, greasy wall inside your home. So why would you do it on an exterior fence that’s constantly battling rain, sun, and grime?

Proper prep isn't just a suggestion; it's the entire foundation for a finish that looks great and actually lasts. For a facilities manager trying to keep a large commercial fence looking sharp or a homeowner protecting their investment, cutting corners here is a guaranteed way to see peeling, blotchy color within a year. A professional crew knows the real work happens before a single drop of stain is even opened.

Man in safety glasses and gloves applies cedar stain to a wooden fence with an applicator.

Step 1: A Deep Clean to Eliminate Contaminants

Here in Western Washington, fences are a magnet for organic growth. Those green and black streaks aren't just an eyesore; they're mold, mildew, and algae actively eating away at the wood fibers. If you just stain over them, you’re essentially trapping the enemy inside. The growth will continue to flourish under the stain, eventually pushing the new finish right off the surface.

That’s why a professional cleaning is non-negotiable. We start with a specialized wood cleaner designed to kill every last organic spore. Then, we follow up with a careful power wash—not to blast the wood, but to gently strip away the dead growth, dirt, and weathered gray fibers. Getting this step right is exactly why clients often have us handle all their property's power washing needs at the same time.

Step 2: Patience is Key—Letting the Wood Dry Completely

After a thorough wash, the next step is the one that tests everyone's patience in our damp climate: waiting for the wood to dry completely. Applying stain to damp wood is a catastrophic mistake. The moisture gets trapped, preventing the stain from soaking into the wood pores. Instead of bonding, the stain just sits on top, ready to fail.

So, how long is long enough? Depending on the weather, a fence might need 24 to 72 hours—sometimes more—to dry out. A pro doesn't guess; we use a moisture meter to get a definitive reading. This single, patient step is what separates a quality job from a failure in the Puget Sound region.

A professional's most valuable tool is often patience. Waiting for the wood to dry completely is the single most critical factor in preventing stain failure in the Pacific Northwest. Rushing this step will compromise the entire project.

Step 3: A Light Sand to Open the Wood's Pores

Once the fence is clean and bone-dry, we often give it a light sanding. The goal here isn't to make the wood feel like a piece of furniture. It’s all about opening up the wood’s pores. The power washing process, while essential, can sometimes flatten the surface fibers, especially on older wood.

A quick scuff with the right grit sandpaper roughens the surface just enough to allow for maximum stain absorption. This ensures the stain penetrates deeply and evenly, which means you get richer color and a much stronger, more durable bond. It’s a small detail that makes a huge difference in the final look and longevity.

Step 4: The Art of a Flawless Application

Finally, it’s time to apply the stain, and how it’s done matters. A DIYer might reach for a roller and brush, but for a truly professional finish, we rely on a "spray and back-brush" method. This technique gives you the speed of a sprayer and the quality control of a brush.

It’s a two-person job that works like this:

  • Spray: The first person applies a thin, even coat of stain with a professional-grade sprayer, covering the area quickly.
  • Back-Brush: A second person follows immediately behind with a high-quality brush, working the stain into the wood grain, corners, and between the boards.

This system eliminates drips, prevents pooling, and forces the stain deep into every nook and cranny. The result is a beautiful, uniform finish that's built to withstand the elements. This is the kind of meticulous process that separates a professional project from a weekend attempt, ensuring you get the absolute best performance out of your stain.

Long-Term Maintenance and Stain Lifespan

Once your fence is beautifully stained, the next question is always the same: How long will it last? It’s a great question, especially here in Western Washington where the constant rain and surprisingly strong summer sun put any exterior finish to the test.

Thinking about maintenance right from the start isn’t just about planning—it’s about protecting your investment. A good stain job isn't a one-and-done deal. It’s the beginning of a simple care routine that keeps your fence looking great and prevents costly repairs down the road, whether for your home or at a commercial facility.

Expected Lifespan for Different Stain Types

The real-world lifespan of a fence stain comes down to two things: the quality of the product and its opacity. The more pigment a stain contains, the more UV protection it offers, and that's the single biggest factor in how long it will hold up.

Here are some honest timelines we’ve seen over the years in the Puget Sound region:

  • Solid Color Stains: These are your workhorses. Because they're opaque like paint, they provide a powerful barrier against sun and moisture. You can realistically expect a solid stain to last 5 to 7 years before needing a fresh coat.
  • Semi-Transparent Stains: This is the go-to for many who want to see the wood grain. They strike a nice balance but offer less UV defense, so you're looking at a shorter maintenance cycle—typically re-coating every 2 to 4 years.
  • Clear Sealers: With little to no pigment, these products are all about repelling water. They offer minimal UV protection, which means the sun will break them down quickly. Plan on reapplying a clear sealer every 1 to 2 years to keep the wood protected from moisture.

Keep in mind that a fence's exposure plays a huge role. A south-facing fence that gets direct sunlight all day may need attention sooner than one in a shaded, protected area.

Your Practical Maintenance Schedule

A little bit of attention each year goes a long way. A straightforward maintenance plan will dramatically extend the life of your stain, pushing back the need for a full re-staining project and keeping your property looking sharp.

Annual Inspection (Spring is the perfect time)
Take a slow walk along your fence line once a year. You’re looking for the first signs of wear:

  • Fading or Discoloration: Does one side look more washed-out than the other? This is usually the side that gets the most sun.
  • Peeling or Flaking: Look closely for any spots where the stain is lifting away from the wood. This is a clear sign the finish is starting to fail.
  • Mold or Mildew Growth: Check for those tell-tale green or black specks, especially in damp corners or areas shaded by trees.
  • Water Absorption: This is the key test. After it rains, does water bead up nicely on the surface? Or does it soak in and make the wood look dark and wet? If it’s soaking in, the seal has been compromised.

Gentle Annual Cleaning
Every spring, give your fence a quick bath. All you need is a garden hose, a soft-bristled brush, and a gentle, pH-neutral wood cleaner. This isn’t about aggressive scrubbing; it’s about rinsing away the winter’s accumulation of dirt, pollen, and mildew spores that can eat away at the stain.

This simple wash prevents grime from working its way into the finish and causing it to break down prematurely. When your annual inspection shows it's finally time for a professional re-coat, Wheeler Painting is ready to step in and get your fence’s protection and beauty fully restored.

Why Choose a Local Pro for Your Staining Project

Picking the right stain is just half the battle. The real test comes down to who applies it, because even the best product will fail if it's not put on correctly. While going the DIY route can seem like a good way to save money, a bad staining job in Western Washington often leads to peeling, blistering, and trapped moisture—problems that can cost a fortune to fix later.

Simply put, you need a contractor who knows our climate as well as they know their products. That local expertise is what makes all the difference.

Experience That Matters in the Puget Sound

Wheeler Painting & Restoration Services is more than just another name in the phone book. We've been staining fences and protecting properties right here in the Puget Sound area since 1991. That's over three decades of seeing exactly what our damp winters and surprisingly strong summer sun can do to wood.

This hands-on, local experience means we know which stains hold up and which ones don't. We've honed our application techniques specifically for this environment to ensure your fence gets the maximum protection possible. We’re not just a company; we’re your neighbors, committed to doing the job right.

Serving Both Residential and Commercial Needs

Whether it’s the fence around your backyard or the perimeter of a large commercial property, our team brings the same level of care and attention to detail. A properly maintained fence is just as important for a home's curb appeal as it is for a business's professional image.

  • For Homeowners: We protect your investment with a beautiful finish that enhances your property and stands up to the weather.
  • For Businesses: Facility managers rely on us for large-scale commercial painting and institutional painting because we deliver consistent, professional results that safeguard their assets without disrupting operations.

When you hire a long-standing local pro like Wheeler Painting, you’re getting a team that’s accountable to the community. We build our reputation on dependable work and clear, honest communication from the first meeting to the final inspection.

We manage the entire project from start to finish, making sure everything stays on schedule and on budget. From the initial on-site consultation to the detailed proposal and the final walkthrough, you’ll know you’ve picked a trusted partner for the job.

Ready to protect your investment with a flawless, durable finish? Whether you need professional fence staining, a residential remodel, or commercial construction services near you, the Wheeler Painting team is here to help. Contact us today for a comprehensive estimate and see why we've been a trusted name in Western Washington for over 30 years.

Common Questions About Staining Your Fence

If you're thinking about staining your fence, you've probably got a few questions. That's a good thing. Making the right choices upfront saves a lot of headaches later on. Here are the answers to some of the most common questions we get from homeowners and business owners around Puget Sound.

How Long Should I Wait to Stain a New Cedar Fence?

This is a big one. For a new cedar fence here in Western Washington, you’ll want to let it "weather" for 3 to 12 weeks before you even think about staining it. It might seem strange to leave beautiful new wood exposed, but this waiting period is non-negotiable.

New cedar is often slick with a "mill glaze" from the milling process and is also full of natural oils. Letting it sit allows the rain and sun to break down that glaze and wash away those surface oils. If you stain too soon, the product won't be able to penetrate the wood, leading to a weak finish that peels and fails in a hurry.

Can You Stain a Fence That's Already Been Painted or Stained?

Yes, you absolutely can, but be prepared for some serious prep work. If the fence was painted, the old paint has to come off—all of it. Stain has to soak into bare wood, and it simply can't get through a layer of paint.

If it has an old stain on it, the job involves a deep cleaning and usually a light sanding to open up the wood pores again. This is especially true if you're switching from a dark, solid stain to a lighter, semi-transparent one. It's a tough, labor-intensive process, and getting the prep right is what makes or breaks the final result.

Pro Tip: The best application method is what we call 'spray and back-brush.' We spray the stain on for speed and even coverage, but then immediately follow with a brush to work it deep into the wood's grain. This gives you the best of both worlds: efficiency and a durable, uniform finish without any drips.

How Often Will My Fence Need to Be Restained?

How long your stain lasts really comes down to the product you choose and how much weather it sees. Our damp climate is tough on wood finishes.

  • A quality solid stain is the most durable, typically lasting 5 to 7 years.
  • A semi-transparent stain, which lets the wood grain show through, will need a fresh coat every 2 to 4 years.

Keep in mind that a fence side that gets blasted by direct sun all afternoon will fade faster than a shaded side. A little preventative maintenance, like a gentle wash each spring, can go a long way in helping your stain last as long as possible.


Ready to protect your fence with a professional, long-lasting finish? Wheeler Painting & Restoration Services has been serving homeowners and commercial clients in the Puget Sound area for over 30 years.

Contact us today for a comprehensive estimate

Your Guide to a Handicap Accessible Shower in Puget Sound

Imagine starting your day without having to navigate a single obstacle. That’s the real benefit of a handicap accessible shower—it's a space designed for genuine independence, safety, and comfort. For homeowners, business owners, and facilities managers in our community, it transforms what could be a challenging part of the daily routine into something smooth and worry-free.

What Makes a Shower Handicap Accessible?

A standard shower, with its high curb and slick floor, can be a daily hazard for many. A truly accessible shower, on the other hand, is all about smart design that puts safety and ease of use first. It’s about removing those physical barriers so that anyone, regardless of their mobility, can use the space comfortably and with confidence.

For anyone planning a project here in the Puget Sound area, whether for a home or a commercial facility, understanding what goes into one of these showers is the first step. This isn't just about ticking boxes on a compliance form; it’s about creating a fundamentally safer and more inclusive experience. The goal is to give people the confidence to bathe on their own, whether they use a walker, a wheelchair, or just need a bit more stability on their feet.

Key Principles of Accessible Design

When you break it down, a handicap accessible shower is built on a few core ideas. Think of them less as "features" and more as practical, reassuring solutions to common problems.

  • Zero-Barrier Entry: This is perhaps the most important element. A curbless or "zero-threshold" entry means there's no lip or step to navigate. A wheelchair can roll right in, and the risk of tripping is virtually eliminated for everyone.
  • Sufficient Space: An accessible shower needs to have enough room to move around. This means plenty of space for a wheelchair user to turn comfortably or for a caregiver to assist without feeling cramped, a key consideration for both residential and commercial renovations.
  • Support and Stability: Safety is everything. Grab bars installed in strategic locations provide crucial support for sitting, standing, and moving around. A built-in or fold-down shower bench also offers a secure place to rest.
  • Ease of Use: Every control needs to be within easy reach from a seated position. This simple consideration, from the faucet handles to the handheld showerhead, makes a massive difference in allowing someone to maintain their independence.

By focusing on these principles, a handicap accessible shower transforms from a medical necessity into a feature of universal design—one that adds value, style, and safety to any property. It's an investment in quality of life.

Whether you're planning a residential remodel, an office space renovation, or a retail build-out, these elements are the foundation of a successful project. Working with an experienced local provider like Wheeler Painting & Restoration Services ensures that every detail is handled correctly, resulting in a shower that is safe, durable, and looks great.

Choosing the Right Accessible Shower Type for Your Needs

Once you have a handle on what makes a shower "accessible," the next big decision is picking the right type for your space. This isn't a one-size-fits-all situation. The best choice comes down to the specific mobility needs of the user, both for today and for the years ahead.

Think of it like buying a car. A person who uses a wheelchair full-time needs the equivalent of a spacious van with a ramp. Someone else might just need a reliable sedan with top-notch safety features for extra peace of mind. Your shower choice should be just as personalized.

This decision tree can help you start visualizing which path makes the most sense for your project.

Decision tree flowchart guiding selection of standard, assisted, or roll-in accessible showers based on user needs.

The main takeaway here is clear: for anyone who uses a mobility aid or needs a bit of help, a true accessible shower with features like barrier-free entry and grab bars is always the safer, more functional choice.

To help you compare the most common options we install for local homeowners and businesses, here’s a quick breakdown of roll-in showers, transfer showers, and tub-to-shower conversions.

Accessible Shower Type Comparison

This table offers a side-by-side look at the three main types of accessible showers, helping you match their features to your specific requirements.

Shower Type Best For Key Feature Typical Threshold Height
Roll-In Shower Full-time wheelchair users or those planning to age in place Completely flat, no-barrier entry 0 inches
Transfer Shower Individuals who can stand and pivot from a walker or wheelchair Built-in bench or seat for seated bathing 0.5 inches or less
Tub-to-Shower Conversion Homeowners wanting to replace a hazardous high-sided tub with a safer shower Dramatically improves safety and accessibility Varies (can be 0 to 3 inches)

Each of these designs solves a unique set of challenges. A roll-in shower offers maximum independence for residential and commercial users alike, a transfer shower provides stable, seated bathing, and a conversion project is a fantastic safety upgrade for almost any home. Let's look at each one in more detail.

Roll-In Showers for Maximum Accessibility

A roll-in shower is exactly what it sounds like—a shower designed for a wheelchair to roll right in. It has a completely flat, zero-threshold entry, meaning there’s no curb, lip, or barrier to overcome. This seamless design is the gold standard for independent living and is a cornerstone of our residential and commercial construction services.

For commercial spaces in Western Washington like hotels, gyms, or office buildings, a roll-in shower is a must-have for serving all patrons. In a home, it’s the ideal solution for anyone who uses a wheelchair full-time or wants the ultimate "age-in-place" design.

We've found that a roll-in shower gives wheelchair users the most freedom, often allowing them to bathe with little to no help. The open, spacious design also makes it far easier for a caregiver to assist without being cramped.

The minimum ADA-recommended size for a roll-in shower is 60 inches wide by 30 inches deep. This provides enough room for a wheelchair to enter and for the user to safely transfer to a shower seat if needed.

Transfer Showers for Seated Safety

A transfer shower is built for someone who can stand up from a wheelchair or walker and pivot onto a shower seat. Unlike a roll-in shower, these can have a very low curb—typically no more than half an inch high. This minimal threshold is great for containing water while still being easy to step over.

These are a very popular choice for residential remodeling where a completely flat floor isn't necessary or practical. The star of the show here is the built-in bench.

  • Integrated Seating: A sturdy, built-in bench is much safer than a freestanding, wobbly shower chair.
  • Smaller Footprint: Transfer showers are versatile and can often be designed to fit in the same space as a standard bathtub or small shower stall.
  • Enhanced Stability: When you pair the bench with well-placed grab bars, users have the confidence they need to move securely from their walker or wheelchair to the seat.

For many homeowners we work with in the Puget Sound area, a transfer shower hits that perfect sweet spot between improved safety and a more conventional bathroom aesthetic.

Tub-to-Shower Conversions

One of our most common accessibility projects is the tub-to-shower conversion. It involves removing a high-sided, traditional bathtub and replacing it with a much safer low-threshold or roll-in shower. This single change is one of the most powerful ways to reduce the risk of bathroom falls, since stepping over a 15-inch tub wall is a major hazard for anyone with mobility challenges.

A tub-to-shower conversion is a full-scale safety upgrade. As local contractors, our team at Wheeler Painting & Restoration Services handles the entire process—from demolition and installing a properly waterproofed shower pan to finishing the walls and installing grab bars to code. It’s a renovation that immediately makes a home safer, more functional, and more valuable.

Must-Have Design and Safety Features for Your Accessible Shower

A well-lit, handicap-accessible shower stall featuring grab bars, a built-in seat, and a handheld shower.

The real magic of an accessible shower isn't just its open design; it’s in the details. After you've decided on a roll-in or transfer style, a handful of specific features come together to create a space that’s truly safe, comfortable, and empowering. These aren't just add-ons; they are the non-negotiable elements that turn a standard shower into a personal sanctuary of independence.

Understanding how each component works is crucial. For homeowners and facility managers here in the Puget Sound, getting these features right from the start ensures your renovation delivers genuine safety and lasting value. Let's walk through the essential components that make an accessible shower actually work.

Strategically Placed Grab Bars

If there’s one feature you can't skip, it's grab bars. They are the single most important safety element in an accessible bathroom, providing vital support for almost every move—from getting in and out of the shower to simply adjusting your position on a bench. Where you put them isn't a guessing game; it’s a science.

  • Horizontal Bars: These are your mainstays for support when pushing up to stand or lowering down to sit. They should run along the side and back walls.
  • Vertical Bars: Placing a vertical bar near the shower entrance gives a steadying handhold right when you need it most—when stepping over a small threshold or pivoting.
  • Diagonal Bars: While not as common, these can be a big help for anyone who needs extra leverage to pull themselves up from a seated position.

The Americans with Disabilities Act (ADA) gives us a clear guideline: install grab bars between 33 and 36 inches from the shower floor. This height makes them easy to reach whether you’re standing or sitting. And this is not a DIY job—they must be professionally anchored into wall studs to withstand at least 250 pounds of force.

A Comfortable and Secure Shower Bench

A shower bench is a game-changer. It offers a stable place to sit for anyone who struggles with standing for long periods, has balance concerns, or just wants a more relaxing shower experience. It completely eliminates the risk posed by those wobbly plastic chairs that can slip out from under you.

A built-in or professionally installed fold-down bench is always the safer, more reliable choice. It’s integrated directly into the shower’s structure and built to handle significant weight, providing a solid foundation for bathing with confidence.

Fold-down benches are especially practical in commercial settings or bathrooms used by multiple people. They simply tuck away when not needed, freeing up space. For a truly custom project, a tiled, built-in bench can be designed to perfectly match the rest of the shower, creating a seamless, high-end look.

A Flexible Handheld Showerhead

An adjustable handheld showerhead mounted on a sliding bar is another absolute must-have. It provides a level of control that a fixed, wall-mounted showerhead just can't offer.

This simple feature allows you or a caregiver to direct the water precisely where it’s needed, which is invaluable when seated on a bench. Being able to bring the water to you, rather than having to maneuver your body under a fixed stream, makes bathing far easier and more dignified.

Slip-Resistant Flooring and Waterproofing

It's no secret that a wet shower floor is a major fall hazard. That’s why your choice of flooring is one of the most critical safety decisions you'll make. Modern non-slip tiles feature textured surfaces that give you excellent grip, even when wet and soapy. For a seamless and incredibly durable alternative, specialized epoxy coatings create a continuous, slip-resistant, and completely waterproof surface ideal for both residential and commercial applications.

Proper waterproofing is the unsung hero of any great accessible shower. You can learn more about how our professional techniques create a fully protected space in our guide on complete waterproofing for wet rooms.

Demand for these features is growing fast. In fact, the global market for handicap bathroom accessories is expected to grow at a compound annual growth rate (CAGR) of 7.5% through 2033. For property owners in Western Washington, this trend highlights the importance of working with a contractor who truly understands these products. A feature like a curbless entry, for example, can improve access for 100% of wheelchair users while also dramatically cutting down on fall risks for everyone.

Navigating ADA Guidelines and Puget Sound Building Codes

Trying to make sense of renovation rules can feel like learning a new language, especially when you’re building a handicap accessible shower. You'll hear about the Americans with Disabilities Act (ADA) and a whole host of local Puget Sound building codes. It’s a lot to take in, but we’re here to translate it for you in simple terms.

At their core, these regulations aren’t about creating hurdles. They exist for one simple, vital reason: to guarantee that the shower is truly safe and usable for anyone, regardless of their mobility. The ADA provides the national standard, and it serves as an incredible blueprint for residential projects, too.

ADA as the Gold Standard for Safety

For public and commercial construction—think hotels, gyms, or office space renovations—the ADA lays out legally binding rules. If you're a business owner or facilities manager in Western Washington, complying with these standards isn't a suggestion; it's the law. These guidelines cover everything from the minimum size of the shower stall to the exact height of the water controls.

Now, for a private home, the story is a little different. Your residential remodeling project isn't legally required to follow ADA rules. But here’s our professional take: treating the ADA as your guide is the smartest move you can make. It’s the best way to build a shower that’s not just accessible today, but safe and functional for decades.

Think of the ADA as a best-practice manual that's been perfected over years with real-world safety data. While your home doesn't need official ADA certification, our commercial and residential contractors build to these standards because they represent the peak of safety and function. It ensures your investment delivers true accessibility, not just the appearance of it.

Following these principles means your remodel will meet the highest level of universal design, making your property significantly safer and adding long-term value.

Key Dimensions and Requirements

The technical details are where a project can get tricky, but understanding the basics helps you see why certain measurements are so important. These aren't just arbitrary numbers; they are the dimensions that make a shower work for someone with mobility challenges.

Here are a few of the most critical specifications we build into our projects:

  • Roll-In Shower Size: The interior needs a clear space of at least 60 inches wide by 30 inches deep. This gives a wheelchair user enough room to roll in, turn, and operate the shower controls comfortably.
  • Transfer Shower Size: These are designed for someone to slide from a wheelchair onto a built-in bench. They require a minimum interior of 36 inches by 36 inches.
  • Grab Bar Placement: Grab bars are non-negotiable for safety. They must be installed 33 to 36 inches from the shower floor and be strong enough to support at least 250 pounds of force. This height is the sweet spot for providing support whether you're standing or seated.
  • Shower Bench Height: For transfer showers, the bench height is crucial. It must be 17 to 19 inches from the floor, which lines up perfectly with the seat of a standard wheelchair and makes transferring much safer and easier.

You Don't Have to Be the Expert

Feeling a little overwhelmed by all these numbers? That's completely normal. The good news is that you don’t need to memorize a single building code or ADA chapter. That’s our job.

As your local residential or commercial contractor, a team like ours at Wheeler Painting & Restoration Services handles all the technicalities. We manage the entire process, from creating a compliant design to pulling the right permits for your specific city or county in the Puget Sound region. We make sure every grab bar is anchored correctly and every floor is sloped for perfect drainage.

Your role is to share your vision for a beautiful, functional bathroom. We’ll handle the rest, ensuring the final result is safe, compliant, and everything you hoped for.

How to Budget for Your Accessible Shower in Western Washington

Alright, let's talk about the dollars and cents. When you're planning for a handicap accessible shower, figuring out the budget is just as important as picking out the tile. For anyone managing a home or commercial property here in Western Washington, getting a handle on the costs early on makes the whole project go a lot smoother, with no surprises down the road.

It helps to think of this as more than just a remodel. You're making a long-term investment in safety and independence, and you're adding real, measurable value to your property. The final price can swing quite a bit, so let's break down exactly what goes into it.

Key Cost Drivers for Your Project

The final number on an estimate depends on the scope of work and the materials you land on. Thinking about these elements one by one will give you a much clearer picture of where your money is going.

  • Project Scope: Are we simply swapping a tub for a shower within the same footprint? That's your most straightforward and budget-friendly option. If you're looking to move walls, reroute a lot of plumbing, or expand the bathroom for a retail build-out or residential remodel, the complexity and cost will naturally increase.
  • Material Choices: This is where you have a ton of control over the budget. High-end porcelain or natural stone tiles will have a very different price tag than classic, clean ceramic options. Likewise, a custom solid-surface wall system will be priced differently than standard tile work.
  • Plumbing and Fixtures: The plumbing work is a major factor. If we can tie into the existing water lines and drains easily, costs stay down. But if we need to move a drain to create a true curbless entry or install premium thermostatic fixtures, that requires more labor and materials.
  • Permit and Inspection Fees: Any remodel in the Puget Sound area that touches plumbing or structural elements is going to require permits. These fees vary from one city to the next, but they're a non-negotiable part of making sure your project is built to code and is completely safe.

A professional proposal from a trusted local provider like Wheeler Painting & Restoration Services is essential. We provide a detailed, line-by-line breakdown of every cost, so you have complete transparency and confidence in your budget before work ever begins.

Seeing the Bigger Picture

It’s not just you—we’re seeing a huge increase in demand for these kinds of renovations. It's part of a bigger shift toward making homes and commercial spaces more inclusive for everyone. In fact, the market for inclusive bathroom products is projected to hit $10.19 billion by 2025 and could soar to over $35 billion by 2030. For property owners in Western Washington, that's a strong signal that investing in these upgrades is a smart move. You can explore more about this growing market and what it means for property values.

Since 1991, Wheeler Painting & Restoration has been on the front lines of these projects. We know how to expertly integrate the features that matter—from fold-down seats and adjustable showerheads to incredibly durable, slip-resistant epoxy-coated floors that will stand up to years of daily use. Whether it's for a private home or a commercial construction project, we make a complex process feel straightforward.

Your Project Roadmap with a Local Contractor

Couple reviews bathroom renovation blueprints, selecting tiles and fixtures for a handicap accessible shower.

Turning the vision of a safe, accessible shower into reality can feel overwhelming. But when you team up with an experienced local contractor here in the Puget Sound, that big project suddenly becomes a clear, manageable process. It’s not just about getting the job done; it’s about having a single, accountable partner who ensures clear communication and reliable timelines from start to finish.

A renovation shouldn't be chaotic. It should feel like a genuine collaboration, where your needs are heard and your vision is respected every step of the way.

The Initial Consultation and Needs Assessment

It all starts with a conversation. A project manager from a trusted local company like Wheeler will meet you right where the project is happening. This isn't just about taking measurements; it's about listening to you. We want to understand the daily challenges, the specific mobility needs, and what you hope to achieve with the new space.

This is the perfect time to ask all your questions and really define what a successful project looks like. Are you planning for a wheelchair user who needs a roll-in shower, or would a transfer shower with a sturdy bench be the right fit? We’ll help you sort through these crucial decisions.

Collaborative Design and Material Selection

Once we have a clear picture of your needs, the fun part begins: the design. We bring our technical know-how, you bring your style, and together we create a plan. We'll guide you through selecting materials that are not only beautiful but also built for safety and long-term durability.

  • Flooring: We’ll look at options like handsome, textured non-slip tile or even a seamless, high-grip epoxy coating.
  • Fixtures: We'll find the perfect handheld showerhead, easy-to-operate controls, and grab bars that blend style with solid, reliable support.
  • Wall Surrounds: You can explore everything from timeless tile to modern, grout-free solid surface panels that are a breeze to maintain.

Every choice we make together is aimed at creating a space that looks and feels completely cohesive. We aim to show that function and style can go hand-in-hand in any residential or commercial renovation.

The goal here is simple: to prove that a handicap accessible shower doesn't have to look clinical. With the right materials, we can build a space that feels like a spa while delivering absolute peace of mind.

Detailed Proposal and Timeline

After we’ve nailed down the design, you’ll get a comprehensive proposal. Think of this as the blueprint for your project. It will provide a transparent, line-by-line breakdown of all the costs and a realistic construction schedule.

No surprises, no guesswork. You'll know exactly what to expect and when, making it easy to plan your budget and your time.

Construction and Final Inspection

This is where the plans on paper become a reality. Our professional crew handles everything—demolition, plumbing, waterproofing, and all the finishing touches—with skill and respect for your home or business. We pride ourselves on working efficiently to minimize disruption.

The need for these types of projects is growing fast. The global market for bathroom and toilet assist devices is set to become a $4.88 billion industry in 2025 and is projected to hit $6.48 billion by 2030. Since 1991, Wheeler Painting & Restoration Services has been a trusted leader for Puget Sound homeowners and businesses, guiding them through the entire process to create results that are durable, compliant, and beautiful.

When the work is done, we’ll do a final, thorough walkthrough with you. We want to make sure every single detail meets your expectations and our own high standards. That’s our promise of a job well done.

A Few Common Questions We Hear About Accessible Showers

As you get closer to starting your project, you're bound to have some questions. That’s a good thing. Building a handicap accessible shower is a big step toward making your property safer and more independent, and you should feel confident about every decision.

Here are some of the questions we answer most often for homeowners and business owners around the Puget Sound.

How Long Does an Accessible Shower Installation Take?

This really depends on the scope of your project. For a straightforward tub-to-shower conversion where we’re working within the existing bathroom footprint, we can often have the job wrapped up in just 3-5 days.

If you're planning a more extensive custom remodel—maybe moving a wall, rerouting significant plumbing, or doing complex tile work for a residential or commercial renovation—you should plan for a timeline closer to 1-3 weeks. A trusted local contractor will always give you a detailed project schedule before a single tool comes out, so you know exactly what to expect.

Can an Accessible Shower Actually Look Modern and Stylish?

Absolutely. The days of institutional-looking, clinical accessible fixtures are long gone. Modern design has completely caught up, blending crucial safety features with high-end style. You don’t have to choose between a bathroom that works for you and one that you love to look at.

  • Sleek Drains: We can install elegant trench-style drains that create a completely seamless, spa-like floor.
  • Designer Grab Bars: Many of the best grab bars now double as towel racks or built-in shelving, making them a stylish and functional part of the design.
  • Beautiful Materials: You have an incredible selection of gorgeous, non-slip tile and solid surface materials to match any aesthetic you're going for.

A well-designed accessible shower can—and should—be a beautiful focal point in your bathroom.

Is a Permit Required for This Kind of Remodel in Washington?

In almost every case across Western Washington, the answer is yes. A permit is usually required for any project that involves changing the plumbing or modifying structural elements. This isn't just bureaucratic red tape; it's an essential safeguard. It ensures all the work meets current building codes, protecting your safety and your property's value.

As your residential or commercial contractor, we handle that entire permitting process from start to finish. Having the right partner makes all the difference, and you can learn more about how to choose a general contractor in our detailed guide.

What’s the Difference Between “ADA Compliant” and “Accessible”?

This is a great question, and it’s a source of a lot of confusion. Think of it this way:

“ADA compliant” refers to a strict set of legally enforceable standards. These are the rules that public and commercial buildings must follow for any commercial renovations or construction.

“Accessible” or “universal design” is what we talk about for private homes. It’s the practice of applying those same safety principles and dimensions to a residential remodeling project.

While your home shower isn’t legally required to meet ADA code, following those guidelines is the absolute best practice. It’s the gold standard we use to make sure your shower is as safe, comfortable, and easy to use as possible.


Ready to transform your bathroom into a safer, more beautiful, and truly accessible space? The team at Wheeler Painting & Restoration Services has been serving Puget Sound since 1991, delivering expert craftsmanship for residential and commercial projects. Contact us today for a straightforward consultation and a detailed, transparent proposal.

Your Guide to Replacing a Shower in Puget Sound

Thinking about replacing a shower in your home or commercial property? It's a great way to update a dated bathroom, improve accessibility, or finally tackle nagging leaks and mold issues. But it's a lot more involved than just picking out new tile. A successful shower replacement hinges on solid planning and a clear understanding of the process, which can feel overwhelming. This guide is here to walk you through it, making you feel confident in your decisions.

Whether you're a homeowner in need of a residential contractor near you or a facilities manager looking for commercial construction services, we'll explain the process in simple, helpful terms.

Defining Your Shower Replacement Project

Before you fall in love with a high-end rain shower head or a specific tile pattern, the most important work happens on paper. A well-thought-out plan is what keeps a project on track, on budget, and ensures the end result is something you’ll love for years.

So, what are you trying to accomplish? Are you just swapping out a leaky, old fiberglass unit for a new one in an office restroom? Or are you dreaming bigger, picturing a spacious walk-in shower for your home that feels like a personal spa? Getting clear on your goals—whether it's a simple update or a full-blown transformation—will steer every decision you make.

Setting a Realistic Budget

Once you have a vision, it’s time to talk money. Budgeting for a shower replacement involves more than just the cost of the visible materials. From our experience serving the Puget Sound community, the real costs are often hiding behind the walls.

A common mistake is underestimating the full scope of expenses. Your budget needs to account for:

  • Materials: This includes the shower pan, wall materials (like tile or solid-surface panels), fixtures, glass, and all the crucial waterproofing membranes and sealants.
  • Labor: Unless you’re a seasoned pro, you’ll be hiring a contractor. This cost covers demolition, plumbing adjustments, installation, tiling, and finishing. For commercial projects, this may include coordinating multiple trades.
  • Permits: Depending on your city and the extent of the work (especially if you’re moving plumbing lines), a permit is often required. A trusted local provider will handle this, ensuring your project is fully compliant with local codes.
  • Contingency Fund: This is non-negotiable. Plan on setting aside an extra 15-20% of your total budget. You never know when you’ll open up a wall and find hidden water damage or old plumbing that needs immediate replacement, especially in older buildings.

To give you a clearer picture, here’s a breakdown of what you can generally expect to spend. These are averages, and costs can vary based on project complexity and material choices.

Shower Replacement Budget Snapshot

Expense Category Average Cost Range (DIY) Average Cost Range (Pro Install)
Materials (Pan, Walls, Fixtures) $800 – $3,500 $1,200 – $7,000+
Plumbing & Labor $0 (Self-performed) $1,500 – $4,000
Demolition & Debris Removal $100 – $300 $400 – $800
Permits & Inspections $150 – $500 $250 – $750
Contingency Fund (15-20%) $225 – $860 $500 – $2,500+
Total Estimated Cost $1,275 – $5,160 $3,850 – $15,050+

Remember, a higher-end custom tile job with premium fixtures will naturally sit at the top of these ranges, while a straightforward swap of a pre-fabricated unit will be more budget-friendly.

Creating a Practical Timeline and Plan

A detailed timeline is your best friend for managing expectations and minimizing how long your bathroom is out of commission. It all starts with the foundational planning process.

Shower project plan infographic showing define, budget, and plan stages with icons.

This process boils down to three key phases: defining your scope, setting your budget, and creating a step-by-step plan. A simple replacement might only take a few days, but a custom tile shower can easily stretch over a week or more, factoring in all the necessary prep, waterproofing, and tile setting.

Working with an experienced local pro like Wheeler Painting means you get a detailed schedule upfront. We coordinate all the necessary trades—plumbers, tile setters, electricians—to make the process as seamless as possible, whether it's a home remodel or a commercial facility construction project.

Of course, sometimes during planning, you might realize a bathtub better suits your needs. If that's the case, you can learn more about how to convert a shower to a bathtub in our guide on that topic.

Key Takeaway: The success of your shower replacement depends heavily on the initial planning phase. Rushing this stage often leads to budget overruns and compromises on quality. Take the time to define your scope, set a comprehensive budget, and consult with a professional.

By putting in the effort at the beginning, you set the stage for a smooth project that results in a beautiful, functional shower you can enjoy for years to come.


Choosing Materials That Last in the Pacific Northwest

When it’s time to pick materials for your new shower, you’re deciding on more than just the look. You’re choosing its durability and how much time you'll spend cleaning it. Here in the perpetually damp Pacific Northwest, moisture resistance isn't just a nice feature—it's essential for keeping mold and mildew at bay in both residential and commercial settings.

Making the right call now will save you from headaches down the road. Let’s walk through the most common choices we see property owners make, weighing the pros and cons so you can find a solution that looks great and holds up to daily use.

Shower Wall Surfaces

The shower walls take the brunt of the water. From classic tile to sleek, modern panels, each material brings its own unique balance of style, maintenance, and performance in our wet climate.

Porcelain and Ceramic Tile

Tile is the classic go-to for a reason; it offers endless design freedom. If you can dream it, you can probably do it with tile. For a shower, you'll want to lean toward porcelain, which is denser and less porous than ceramic, making it a champion in high-moisture zones. The real weakness of any tile job, though, is the grout.

  • What’s to love: You get a huge variety of colors, sizes, and patterns to create a truly custom look. Porcelain is incredibly tough and water-resistant.
  • What to watch out for: Those grout lines need regular cleaning and sealing to keep stains and mold from taking hold. Installation is a skilled craft—this isn't the place for a "good enough" job if you want it to be waterproof.

Our advice: If you love the tile look, go for the largest format tiles your space can handle. Fewer grout lines mean less cleaning. We also strongly recommend upgrading to a high-performance epoxy grout. It's stain-proof and resists mold, making it a brilliant investment for any shower.

Solid Surface Panels

For anyone who dreads cleaning grout, solid surface panels are a game-changer. These are large sheets of material, often acrylic or an engineered composite, that create a seamless and totally waterproof surface.

  • What’s to love: No grout lines means nowhere for mold and grime to hide. They are incredibly easy to wipe down and can often be installed much faster than tile, which is a great benefit for commercial renovations.
  • What to watch out for: The initial cost can be higher than a basic tile job. Your design choices are a bit more limited, though many modern options mimic natural stone or even tile patterns.

Shower Material Comparison

So, how do you choose? It usually comes down to aesthetics versus your tolerance for long-term maintenance. This table breaks down the key differences to help you decide what’s best for your property.

Material Type Pros Cons Best For
Porcelain Tile Highly durable, waterproof, and offers endless design options for a custom look. Grout lines require maintenance, and professional installation is critical for a leak-proof finish. Homeowners and commercial properties wanting a classic, high-end look and are prepared for routine cleaning.
Ceramic Tile A budget-friendly choice with a wide variety of styles and colors available. Less dense than porcelain; can be more prone to chipping and water absorption if the glaze is compromised. Projects with a tighter budget where a traditional tiled appearance is the goal.
Solid Surface Grout-free, making it extremely low-maintenance and quick to install. The initial cost is higher, and there are fewer custom design options compared to tile. Busy households, rental properties, and commercial facilities (like office space renovations or retail build-outs) where durability and easy cleaning are key.
Acrylic/Fiberglass Often the most affordable option, available as a single, integrated unit for fast installation. Can look and feel less premium. It's also more susceptible to scratching and can yellow over time. Quick bathroom updates, secondary baths, or projects where the budget is the primary concern.

Ultimately, a beautiful and functional shower can be achieved with any of these materials. The best one is simply the one that fits your lifestyle, budget, and design vision.

Selecting the Right Shower Pan and Fixtures

The shower pan—the floor of your shower—is arguably the most critical component. A failing pan is one of the most common and destructive sources of bathroom leaks.

  • Acrylic & Fiberglass Pans: These pre-fabricated bases are the industry standard for a reason. They are cost-effective, completely non-porous, and relatively straightforward to install correctly.
  • Custom Tiled Pans: A tiled shower floor gives you that high-end, seamless look. Be warned: this requires expert skill. A proper tiled pan involves a complex, multi-layered waterproofing system. One small mistake here can cause catastrophic water damage.

Finally, let's talk fixtures. Your showerhead, valve, and handle are the workhorses of your shower. Stick with reputable brands to ensure you get reliable performance. When picking a finish—whether it's chrome, brushed nickel, or matte black—think about how it will stand up to water spots and daily cleaning. Working with a professional ensures all these pieces fit together perfectly, from plumbing compatibility to a flawless final look.

Demolition: Uncovering What’s Really Behind Your Shower Walls

Before you can get to the exciting part—setting beautiful new tile or installing a sleek glass door—the old shower has to go. This demolition phase is more than just swinging a hammer; it's an investigation. This is the moment you finally see what’s been happening behind the walls, and for many older properties here in the Puget Sound, it’s when you discover the real scope of your project.

First, we shut off the water supply to the shower. Once the water is off, we remove the old showerhead, faucet handles, and the shower door.

Modern chrome shower faucet, beige tiles, and a shower drain sample on a wet surface.

Once the fixtures are out, it's time to tear out the old surround. This gets messy fast. We make sure to cover your vanity, toilet, and floor with heavy-duty drop cloths and have a plan for hauling away the debris.

The Big Reveal: Inspecting the Studs and Subfloor

With the walls stripped down to the bare studs, the real inspection begins. Don't rush this part. What you find now will dictate the next steps and determine whether your new shower lasts five years or twenty-five.

We see this all the time, especially in older buildings: slow, undetected leaks that have been silently rotting wood for years. Even a hairline crack in old grout can let just enough water in to cause major damage over time.

A shower remodel is one of the few times you get a clear look at your property’s framing and subfloor. Ignoring problems at this stage is the most expensive mistake a property owner can make. Addressing rot, mold, or bad plumbing now is non-negotiable for a lasting result.

This is your one shot to make things right before it all gets covered up again. We grab a good flashlight and closely examine every stud, the subfloor, and the surrounding insulation.

Common Problems to Look For

As you inspect the exposed shower bay, you're hunting for specific red flags. Spotting them now can save you thousands in structural repairs down the road.

  • Water Damage and Rot: Look for dark, stained wood on the studs or subfloor. A tell-tale sign of rot is wood that feels soft or spongy. Poke any suspicious-looking spots with a screwdriver; if it sinks in easily, that wood must be replaced.
  • Active Mold or Mildew: Mold isn't always black. It can be green, white, or even pinkish. Any drywall, insulation, or wood affected by mold has to be carefully removed and the area treated to ensure it doesn't come back.
  • Outdated or Failing Plumbing: This is the perfect time to assess your plumbing. Look for corrosion on copper pipes or heavy rust on old galvanized steel. Upgrading to modern PEX or new copper lines now is a smart investment.
  • Pest Damage: Damp, soft wood is a dinner bell for pests like carpenter ants and termites. Keep an eye out for tunnels in the wood or small piles of sawdust-like frass.

Finding and correctly fixing these hidden issues is what separates a DIY job from a professional-grade remodel. As a commercial and residential contractor, we use a detailed construction quality control checklist on every project to make sure nothing gets missed. This careful, methodical approach is the only way to guarantee the foundation for your new shower is solid and dry.

The One Step You Can't Afford to Get Wrong: Waterproofing

If there's one part of a shower replacement where you absolutely cannot cut corners, it's waterproofing. It’s easy to get excited about the tile and fixtures—the parts you'll see every day. But the most important work is hidden behind the walls. A single pinhole-sized leak in a bad waterproofing job can quietly cause thousands of dollars in mold and rot.

A person with a flashlight inspects severe mold behind a removed bathroom shower wall.

We tell every client to think of waterproofing as the foundation of the entire project. It's a meticulous system designed to create a completely sealed box that guarantees water stays exactly where it belongs.

Building a Bulletproof Water Barrier

Older showers used a flawed "water in, water out" system. Today, we use far superior methods that stop water right at the surface, just behind the tile. Here’s a look at how we build a truly modern, waterproof shower enclosure:

  • Start with the Right Board: We always use waterproof backer boards, like cement board or specialty foam panels. Unlike drywall, these materials won't rot or feed mold.
  • Seal Every Single Weak Point: Every screw head, seam, and corner is a potential point of failure. We meticulously cover them all with waterproof banding and specialized sealant to create one continuous surface.
  • Apply a Waterproof Membrane: Finally, we apply a liquid membrane (which cures into a seamless rubber barrier) or install a sheet membrane over the entire assembly. This is the final layer of defense that makes the shower truly watertight.

This modern approach ensures the structure behind your tile stays bone dry. It's the single biggest reason professionally built showers last for decades, a major concern for property owners here in the damp Puget Sound region.

Peace of Mind Is Priceless: An estimated 98% of basements will experience water damage at some point. While your shower isn't in the basement, the principle holds true: where there's water, there's always risk. Proper waterproofing is your best defense.

This Is a Job for a Licensed Pro

Installing a modern waterproofing system isn't just a matter of following steps; it requires real-world experience and precision. Nowhere is this more true than around the shower valve and plumbing penetrations.

A licensed professional knows how to install the valve flawlessly, tightening every connection and correctly integrating it into the wall. They have the experience to flash the valve body into the waterproofing membrane, creating a bombproof seal.

This is the one stage we always advise property owners against trying to DIY. A tiny mistake here won't show itself for months or even years. But when it does, you could be looking at a catastrophic failure that has rotted out your subfloor and walls.

Fixing a failed shower is far more expensive than building it right the first time. You can learn more about the detail involved by reading our guide on waterproofing a wet room. When you hire a trusted local provider, you’re buying confidence that the job meets code, protects your property, and will stand the test of time.

Bringing Your New Shower to Life

Once all the waterproofing is in, the satisfying work begins. This is when a messy construction zone transforms back into a bathroom—and you finally get to see your vision come together.

Whether you went with timeless tile or a sleek solid-surface system, this stage is all about precision. A pro's experience really shows here, making sure every cut is perfect and every line is true. The goal is a shower that doesn’t just look good on day one, but holds up beautifully for years.

Installing Your Chosen Shower Walls

How we tackle the walls depends on the material you picked. Each one demands a different approach to get that flawless, professional finish.

With a custom tile shower, we start by dry-fitting the layout to create a balanced look and avoid awkward, sliver-thin tiles in the corners. Once the plan is set, we mix the thin-set mortar and start setting the first course, using spacers to keep grout lines perfectly uniform.

Pro Tip for Tile: If you love the look of tile but hate scrubbing grout, pick the largest tiles that look right in your space. Fewer grout lines mean way less cleaning. Pair them with a high-performance epoxy grout, and your shower will be nearly stain-proof and incredibly resistant to mold.

If you chose solid surface panels, the game changes. We meticulously measure and cut the large panels, which are custom-fit to your shower walls and bonded with a high-strength adhesive. A perfect fit is essential to ensure every seam is tight before it gets sealed for good.

Achieving a Perfect Water-Tight Finish

With the walls up, the next job is to seal every single seam, corner, and hole. This is where a shower remodel can either succeed or fail.

Grouting and Sealing Tile

After the tile mortar has cured (24-48 hours is typical), it's time to grout. We work the grout into every joint, packing it in so there are no hidden air pockets. Then comes the tricky part: cleaning the excess haze off the tile face without pulling fresh grout from the joints.

Installing the Shower Door

A well-installed shower door is the final gatekeeper. The process looks something like this:

  • Measure and Mark: We take careful measurements to get the door frame perfectly plumb (vertically straight) and level.
  • Drill with Care: Drilling into brand-new tile or a solid panel requires special drill bits and a steady hand to avoid causing any chips or cracks.
  • Set and Seal: The frame is secured, the glass panels are carefully set, and a clean, continuous bead of high-quality silicone caulk is run along every edge of the frame.

The Final Details That Make the Difference

The project isn't done until the last little details are handled. These are the touches that separate a "finished" job from a professionally finished one.

Installing the Trim Kit

This means putting on the faucet handle, the escutcheon plate behind it, and the showerhead. We caulk the top and sides of the plate but always leave the bottom unsealed. This tiny gap allows any moisture that might get behind the plate to escape, preventing a hidden mold problem.

Final Caulking and Painting

Next, we caulk every transition point with 100% silicone: where the tile meets the shower pan, where the door frame hits the wall, and in all the corners. This flexible seal handles the tiny movements that naturally occur in a building.

Finally, a fresh coat of high-quality, mold-resistant paint goes on the surrounding walls. It’s the finishing touch that makes everything look clean and polished and adds one last layer of moisture protection. This focus on every detail ensures your new shower isn't just beautiful, but built to last.

Answering Your Shower Replacement Questions

A person in a glove applies white sealant with a caulk gun to a shower base.

If you're thinking about replacing your shower, you probably have a few questions. After decades of handling residential and commercial construction projects all over the Puget Sound, we've heard just about everything. Here are some straight answers to the questions we get asked the most.

How Long Does It Really Take to Replace a Shower?

This is always the first thing people want to know, and the honest answer is: it depends.

For a straightforward swap—pulling out an old prefabricated unit and putting in a new one—you're typically looking at 3 to 5 days. That’s assuming we don't find any major surprises.

A full custom tile shower is a different story. The process is much more involved, with demolition, plumbing, meticulous waterproofing, tiling, grouting, and sealing. Each of those steps has its own required curing time. For a custom job, a more realistic timeline is 7 to 12 days. A good contractor will always give you a clear schedule so you know exactly what to expect.

What Are the Most Common Hidden Problems?

Once we get the old shower out, the most common issues we find are water damage and mold. It's shocking how much rot can happen over the years from even a tiny, slow leak.

In older Puget Sound properties, we also frequently run into outdated and failing plumbing, like old corroded galvanized pipes that are waiting to cause a problem.

This is exactly why the demolition phase is so important. It's our one and only chance to uncover and properly fix these hidden issues before your beautiful new shower goes in. It’s a critical step that protects your investment.

Do I Need a Permit for a Shower Replacement?

More often than not, yes. Most local jurisdictions in our service area require a permit any time you alter plumbing supply lines or drains. If you’re doing a simple like-for-like fixture swap, you might not need one, but it’s always best to check.

This is one of the big advantages of hiring a licensed commercial or residential contractor. A professional firm like ours manages the entire permitting process for you, from the initial application straight through to the final inspection. It ensures your project is done right and fully up to code.

Can I DIY a Shower Replacement to Save Money?

We understand the temptation to save money. If you're handy, you could probably handle the demolition or the final painting.

However, we strongly caution anyone against DIY-ing the plumbing and waterproofing. A tiny mistake in either of these areas can lead to a catastrophic failure down the road—one that you might not discover for years. The resulting water damage can be incredibly expensive to fix.

Paying a professional to handle those critical stages isn't just buying labor; it's buying peace of mind and protecting the value of your home or commercial property.


Ready to transform your bathroom without the stress? Whether you're looking for a "residential contractor near me" or "commercial construction near me," the team at Wheeler Painting has the experience to handle your project with skill and precision. Contact us today to schedule your consultation.

How to Convert a Shower to a Bathtub: A Professional Guide

Swapping a stand-up shower for a bathtub is a popular home improvement project, but it’s more complex than a simple fixture exchange. At its core, the job involves removing the old shower, reconfiguring the plumbing to fit the new tub, and finishing with a fresh, waterproof surround. The primary phases are demolition, plumbing work, and meticulous waterproofing to ensure a lasting, beautiful result.

Should You Convert Your Shower Into a Bathtub?

Bathroom renovation plan with a chalk-drawn bathtub outline, tape measure, and blueprints.

Deciding to convert a shower into a tub is a significant choice for any homeowner. It's easy to feel overwhelmed by the decision, but the reasons for making this change are often very practical. Understanding the initial questions and the true scope of the project is the first step toward making a choice you’ll be happy with for years to come.

This isn't just a cosmetic update; it's a real investment in how you use and enjoy your home or property. The bathroom remodeling market reflects this, with projections showing massive growth from USD 412.8 billion in 2025 to USD 593.7 billion by 2035. People are placing more value on comfort and wellness, and turning an underused shower into a versatile tub is a perfect example of this trend.

Why Homeowners and Property Managers Make the Switch

The desire to convert a shower to a tub often comes down to a shift in needs or simply wanting a more relaxing, valuable space. As a local contractor serving the community, we see a few key motivators time and time again.

  • Growing Families: For homeowners, a bathtub is essential for bathing young children. It transforms bath time from a challenge in a stand-up shower into a simple, manageable routine.

  • Creating a Personal Retreat: After a long week, nothing beats a hot soak. Many homeowners and even tenants in commercial properties are looking to create a spa-like oasis to unwind and de-stress.

  • Boosting Property Value: If your home is the only one on the block without a tub, adding one can make it far more attractive to potential buyers, especially families. Having at least one bathtub is a huge selling point in the real estate market.

Before you get too deep into planning, ask yourself a critical question: Is this the only full bathroom in the house? Removing the only shower could complicate daily routines and potentially impact your home's value down the line. It's a factor that needs serious consideration.

Initial Questions to Answer

Before swinging a single hammer, you need to know if the project is feasible. Start with the basics. Do you have enough room for a standard tub? Most are 60 inches long, and stand-up showers are often built into smaller alcoves. You’ll need to measure carefully.

Next, think about your property's value. While adding a tub is usually a positive, removing the only walk-in shower in a home designed for accessibility could be a drawback for some buyers. Finally, be realistic about your budget and timeline. A professional conversion is a multi-day job involving plumbers, carpenters, and tile setters. Knowing the full scope helps set clear expectations from the start, whether for a residential home or a commercial renovation.

Nailing Down the Plan: Budget, Tubs, and Materials

Once you’ve decided to swap that standing shower for a proper bathtub, the planning phase begins. This is what separates a smooth, successful project from a series of headaches. A good plan isn't just about picking a tub you like; it’s about thinking through materials, understanding local costs, and making sure every choice works for your specific bathroom and budget. Let's walk through how we guide property owners to get these crucial details right.

Choosing the Right Bathtub Type

First, what kind of tub will you install? Your bathroom's layout is the biggest factor, but so is the style you're aiming for. In our experience with residential and commercial renovations, the choice almost always comes down to one of these three.

  • Alcove Tubs: This is the workhorse. An alcove tub is designed to fit neatly into a three-walled enclosure—often the exact space your old shower occupied. They’re practical, make waterproofing the walls straightforward, and the standard 60-inch length is a perfect fit for most conversions.

  • Freestanding Tubs: If you’re dreaming of a spa-like retreat, nothing makes a statement like a freestanding tub. They look incredible but demand more floor space. The plumbing is also more involved since the fixtures can't be mounted on the wall, which is something to factor into your budget.

  • Corner Tubs: If you have an unusual layout, a five-sided corner tub can be a brilliant way to maximize bathing space without consuming the whole room. We often see these in older homes or master suites with unique angles.

Selecting Your Bathtub Material

After you have a style in mind, it's time to think about the material. This decision is a balance of durability, feel, and cost. It’s no surprise the global bathtub market was valued at USD 11.91 billion in 2025; property owners have more high-quality options than ever. North America leads this trend, holding 36.51% of the global market share in 2025, showing how much we value these kinds of improvements. You can explore these bathtub market trends to see how new materials are changing the industry.

Here are the materials we install most often and what you can expect from them:

  • Acrylic: This is arguably the most popular choice today. It’s lightweight, available in many shapes, and its non-porous surface is easy to clean. It also retains heat well and resists chipping, making it a great all-around option.

  • Fiberglass: If the budget is tight, fiberglass is a common choice. It's the most affordable material and very lightweight, which can simplify installation. The downside is that it’s more prone to scratching and can feel less solid than heavier materials.

  • Cast Iron: The heavyweight champion. Coated in tough enamel, a cast iron tub can last a lifetime and holds heat better than any other material. But its durability comes with a major consideration: weight.

Pro Tip: Don't underestimate the weight of a cast iron tub. A standard model filled with water can easily top 1,000 pounds. Before we install one, our residential construction services team always inspects the subfloor. If there's any doubt, we reinforce the floor joists. It’s a critical step to prevent major structural problems down the line.

Creating a Realistic Local Budget

Now, let's talk numbers. Budgeting for a conversion in our service area means looking at the full picture, not just the price of the tub. Local labor rates and the age of local housing stock mean you must plan for both known and unknown costs.

A solid budget includes the tub and fixtures, professional labor, and a contingency fund for surprises.

Here’s a realistic cost breakdown for a project in our area:

Cost Component Typical Price Range What It Covers
Materials $500 – $3,000+ The tub itself, fixtures (faucet, drain), your new tile or wall surround, and all behind-the-scenes plumbing and waterproofing supplies.
Professional Labor $2,500 – $7,000+ This covers skilled work: demo, plumbing updates, tub setting, carpentry, tiling or panel installation, drywall repair, and painting.
Potential Hidden Costs $500 – $2,500+ This is your contingency fund for issues we might uncover after opening the walls, like rotted subfloor, outdated plumbing, or mold that needs remediation.

By thinking through these categories, you can create a budget that reflects the reality of your project, ensuring your conversion goes smoothly and results in a bathroom you’ll love.

Our Process for a Flawless Shower-to-Tub Conversion

With the plans in place, it's time for our team to get to work. Watching a cramped shower transform into a beautiful new bathtub is one of the most satisfying parts of our job. But achieving that result requires precision and expertise. Over the years, we've refined our process on countless residential and commercial projects, making sure every tub we install is built to last.

Here’s a look at how our professional team tackles a shower-to-tub conversion. It’s a detailed process where craftsmanship ensures the final result is beautiful, functional, and completely watertight.

Careful Demolition and Site Prep

The first step is always removing the old shower. This isn't about brute force; it's a careful deconstruction. We start by shutting off the main water supply and disconnecting the old fixtures. Then, we remove the shower surround piece by piece, whether it’s old tile or a fiberglass unit.

Our primary goal is to expose the wall studs and subfloor without damaging the surrounding drywall. This gives us a clean slate and, just as importantly, lets us inspect the bathroom's structure. It's common to find hidden moisture damage or mold—issues we can resolve now to prevent major headaches later.

Tackling the Plumbing: The Heart of the Conversion

Once the space is open, we address the most technical part of the job: the plumbing. A shower drain and a tub drain are in different locations. Getting this right is non-negotiable and truly defines the conversion.

  • Drain Relocation: Your shower drain is likely near the center, while the new tub’s drain will be at one end. To fix this, we cut into the subfloor, access the P-trap and drainpipe, and re-route everything to the new location. This is precision work that must meet local plumbing codes to ensure proper drainage and prevent leaks.

  • Water Supply Lines: The shower valve and head are set high on the wall. We lower the hot and cold supply lines to the correct height for the new combination tub and shower valve. This is also the perfect time to upgrade to a modern, pressure-balancing valve for enhanced safety and comfort.

A common DIY oversight is forgetting about the sheer weight of a new tub. A standard bathtub, once filled with water and a person, can easily weigh over 800 pounds. We always inspect the subfloor and add extra blocking between the floor joists to guarantee your floor can handle that load without shifting or sagging.

Framing and Subfloor Preparation

Before the new tub can go in, the subfloor must be perfect. We repair any damage found during demolition, paying close attention to the area around the old drain where water might have seeped in. We also ensure the floor is perfectly level. An unlevel tub is a significant problem—it won't drain correctly and can rock or creak.

Sometimes, we also need to adjust the wall framing. Alcove tubs require a snug, three-wall enclosure. Our carpenters will frame the opening to the exact size and install a solid ledger board along the back wall to support the tub’s rim.

A selection guide illustrating three bathtub types: alcove, freestanding, and corner designs with icons.

As you can see, an alcove tub is a natural fit for most shower conversions, while freestanding and corner tubs offer more creative freedom if the layout allows.

Setting the Tub and Building the Surround

With all the prep work done, it's time for the main event: setting the new bathtub. We carefully move the tub into the framed alcove, check that it's level in every direction, and secure it directly to the wall studs. Many tubs sit best in a bed of mortar, which we use to create a rock-solid foundation that eliminates any chance of flexing.

Once the tub is anchored, we hook up the new drain and overflow, meticulously testing every connection to ensure it’s 100% watertight. The last major step is installing fresh waterproof backer board for the new surround. This is the foundation for your tile or wall panels and is your primary defense against moisture.

Seeing how these steps come together in a real project can make all the difference. Take a look at the photos from one of our recent bathroom remodel projects to get a better sense of the transformation. It’s a complex job, but one that is incredibly rewarding when done right by a trusted local provider.

Finishing Touches: From Waterproofing to Polished Fixtures

A person's hands applying a white sealant around the edge of a bathtub and tiled wall.

Once your new tub is set, the real transformation begins. This is where we shift from heavy construction to the fine details you'll see and appreciate every day—the tile, the fixtures, and the flawless paint job.

But what you don't see is even more important. Behind those beautiful finishes lies the most critical element of the entire project: waterproofing. Getting this right is what separates a bathroom that lasts for decades from one that fails in just a few years.

Choosing Your Tub Surround: Tile vs. Panels

The walls surrounding your tub need to look great while standing up to a constant barrage of water. Your two main choices are classic tile or modern solid panels.

  • Classic Tile: There's a reason tile has been a bathroom staple for centuries. It offers limitless design freedom, from simple subway patterns to complex mosaics. We typically recommend porcelain or ceramic for their durability and variety. The only real-world drawback is that grout lines need proper sealing and maintenance to stay fresh and free of mildew.

  • Waterproof Wall Panels: For a sleek, modern look with minimal upkeep, solid wall panels are a fantastic option. Made from materials like acrylic or solid surface composites, they create a seamless, grout-free wall that’s incredibly easy to clean. No grout means no scrubbing.

Our Take: This often comes down to personal style and your willingness to perform maintenance. Tile gives you total creative control, while panels offer a clean, "set it and forget it" alternative. We can show you samples of both to help you decide what works best for your home and lifestyle.

Why Waterproofing Is Non-Negotiable

Living in a damp climate means we understand how crucial it is to keep water out. Proper waterproofing isn't just a suggestion; it's the single most important part of ensuring your investment doesn't lead to hidden rot and mold damage.

This is much more than a simple bead of caulk. A truly durable bathroom requires a complete, multi-layered system. Before a single tile is set, we install a waterproof membrane over the cement backer board. This creates an unbroken barrier that stops water from ever reaching your home's wood framing. We've honed our expertise in these advanced waterproofing techniques for wet rooms because we know what it takes to build a bathroom that can handle constant humidity. Every corner, seam, and plumbing cutout is meticulously sealed to create a completely watertight shell.

Drywall Repair, Paint, and Final Details

A conversion project always leaves some marks on the surrounding drywall. A true professional doesn't just hang the tile and leave; our job isn't done until the room looks perfectly finished. We take the time to expertly patch, sand, and re-texture any damaged areas so the repairs are completely invisible.

Next comes paint. In a bathroom, the right paint is crucial. We always use high-quality, moisture-resistant paint, typically in a satin or semi-gloss finish. These sheens are formulated to inhibit mold and mildew and are far easier to wipe down.

Finally, we install the "jewelry" of the bathroom: the new fixtures. This includes the tub and shower faucet, drain assembly, and any new lighting. Whether you've chosen a striking matte black or a timeless polished chrome, these final touches pull the whole design together.

Projects like these are a smart investment. With the bathtub and shower industry reaching USD 27.29 billion in 2025 and continuing to grow, homeowners and commercial property managers are clearly prioritizing comfort and spa-like amenities. You can learn more about this growing demand by reading the latest bath fixtures market trends on archivemarketresearch.com.

Why Hire a Local Contractor for Your Renovation

While a DIY shower-to-bathtub conversion might seem appealing, this project is loaded with potential pitfalls. It involves serious plumbing, potential structural changes, and waterproofing that must be perfect. One misstep can lead to catastrophic and expensive damage.

This is why bringing in a trusted, local contractor is a smart move. At Wheeler Painting, we know a bathroom remodel can feel overwhelming, whether it’s for your home, a retail build-out, or an office space renovation. Our job is to make the entire process clear and manageable, handling every detail so you get a beautiful new bathroom built to last.

Navigating Local Codes and Permits

One of the biggest hurdles for any DIYer is the maze of local building codes. As soon as you alter plumbing drains or supply lines—the core of this project—a permit is required. An experienced local contractor like Wheeler Painting already knows the specific rules for your city and manages the entire permitting process for you.

We handle everything from submitting plans to scheduling inspections. This not only keeps your project compliant but also guarantees your new bathroom is safe. That protects you from surprise fines and issues when it comes time to sell your property.

Think of a professional contractor as your single point of accountability. Instead of you juggling a plumber, carpenter, and tile setter for your residential or commercial renovation, one team manages everything from demolition to the final coat of paint. It removes the stress from your shoulders.

The Value of Local Experience

Working with a contractor who understands the challenges of our local climate is invaluable. The constant dampness makes expert-level waterproofing non-negotiable. We’ve spent decades perfecting our techniques because we’ve been called in to fix too many jobs where a small leak turned into thousands of dollars in hidden mold and structural rot.

Our local experience also means we know the homes and commercial buildings here. We can anticipate the unique quirks of a historic building or a modern facility, spotting things like outdated plumbing or framing that needs reinforcement before it becomes a surprise delay. This foresight keeps a project on time and on budget.

Here’s what a local pro really brings to the table:

  • Code Expertise: We know the specific plumbing and building codes for cities in our service area, ensuring your project sails through inspections.
  • Climate-Proof Methods: Our waterproofing systems and material choices are specifically designed to handle regional humidity.
  • Proven Local Suppliers: Our long-standing relationships with local suppliers often mean better pricing and quicker access to quality materials.
  • Community Reputation: As a local business, our name is everything. We’re accountable to our neighbors and committed to craftsmanship you can depend on.

Choosing the right team is the single most important decision for your project's success. For more advice, check out our guide on how to choose a general contractor.

Ultimately, converting your shower into a bathtub is a major investment. Hiring an experienced local contractor like Wheeler Painting protects that investment, ensuring a smooth process and a beautiful result you will enjoy for years to come.

Common Questions About Shower-to-Bathtub Conversions

Even with a solid plan, a few questions always pop up before starting a big project like this. It's a major change for your bathroom, and you want to be sure about the details. We've heard just about every question from homeowners and facilities managers in our area, so let's clear up some of the most common ones.

Our job is to provide straight answers and make you feel completely comfortable with the process, whether you’re remodeling your own home or upgrading a commercial space.

How Long Does a Conversion Actually Take?

For a standard project, a professional crew can typically complete a shower-to-bathtub conversion in about four to seven days. This timeline covers everything from demolition and plumbing to setting the tub, waterproofing, tiling, and installing fixtures.

Of course, the schedule can sometimes extend. If we’re waiting on custom materials or discover unexpected issues like subfloor damage after opening the walls, it might add time. We always communicate openly about any potential delays as soon as we identify them.

Will Converting My Shower to a Tub Increase My Home's Value?

In most situations, absolutely. This is especially true in family-oriented neighborhoods. Having at least one bathtub is a huge selling point for buyers with kids. If your home currently has zero tubs, adding one can provide a healthy return on your investment.

From our decades of experience as a residential contractor, we’ve seen that a well-done conversion doesn't just add to your home's price tag. It adds real functional and aesthetic appeal that buyers notice immediately, making your home a much stronger contender on the market.

What Are the Biggest Mistakes to Avoid?

The most destructive and expensive mistakes almost always come down to two things: improper plumbing connections and failed waterproofing. A tiny, slow leak from a poorly sealed drain can silently cause thousands of dollars in rot to your subfloor and the ceiling below.

It’s a nightmare scenario, but we see it. The most common issues we're called to fix are:

  • Poorly sealed drains: Leading to hidden leaks and structural rot.
  • Failed waterproofing: Once moisture gets behind the tile surround, it creates a breeding ground for mold and decay that requires a massive, costly tear-out to fix.

Hiring a professional for your shower-to-bathtub conversion is the simplest way to ensure these risks are completely off the table.

Is a Permit Required for a Shower-to-Tub Conversion in Washington?

Yes. Nearly every jurisdiction requires a permit for this kind of work because it involves altering your property's plumbing. Anytime you're changing supply and drain lines, the city wants to know about it. Skipping this step can lead to fines and major headaches when you eventually sell.

As a licensed general contractor, we manage the entire permitting process for you. We ensure every part of the job—from the pipes in the wall to the final faucet—is inspected and fully up to local building codes, giving you total peace of mind.


Ready to transform your bathroom with a beautiful new tub? The team at Wheeler Painting has been serving homeowners and businesses in our community for over three decades, delivering dependable craftsmanship on every residential and commercial construction project. Let our local experts handle the complexities so you can enjoy a stress-free renovation and a stunning result.

Schedule your on-site consultation today at wheelerpainting.com

Your Guide to the Commercial Painting Cost Estimator

As a facility manager or business owner, the last thing you want is a painting project that derails your budget. A bad estimate isn't just a minor headache; it can lead to project delays, surprise costs, and a lot of frustration. Using a commercial painting cost estimator is a great first step, but its real value comes from understanding what drives the numbers behind the scenes. This guide will help you feel less overwhelmed by the process and build your confidence in making the right choice for your property.

Why a Solid Painting Estimate is Non-Negotiable

Hands holding a tablet displaying a commercial painting cost estimator with paint samples and a roller.

Trying to budget for a commercial painting job can feel like guesswork. Whether you're refreshing a retail space, planning an office space renovation, or managing new facility construction services, a precise estimate is the bedrock of a smooth project. A flimsy budget doesn’t just strain your finances—it can throw off your entire operational timeline and create friction with stakeholders.

This is exactly why a detailed, professional approach to estimating is so critical. It goes way beyond just multiplying square footage by a generic dollar amount. A real estimate digs into the unique conditions of your property and the specific results you're aiming for, providing a clear and reliable plan.

Getting a Handle on the Financials

The U.S. painting industry has grown into a massive $49.0 billion market as of 2024, according to data from IBISWorld.com. For property managers and business owners in our local community, that context is key. It helps you realistically budget, knowing that a mid-sized commercial interior project of 10,000 sq ft can easily fall in the $30,000-$60,000 range when you account for quality labor and durable finishes.

This scale is precisely why a quick online calculator can't give you the full picture. It simply doesn't know the on-the-ground realities of your specific property that can swing a price one way or the other.

A professional estimate is more than a price—it's a project roadmap. It foresees challenges, allocates resources correctly, and ensures the final product meets both aesthetic and performance standards without costly surprises.

The Key Factors That Drive Your Budget

Several make-or-break factors will shape your final painting costs. We see it all the time—overlooking these details during planning is the number one cause of budget overruns. For a number you can actually count on, you have to factor in these variables:

  • Surface Preparation: What condition are the walls in? We're talking about more than just a few scuffs. Is there old, peeling paint? Water damage stains? Does siding replacement or significant drywall repair need to happen first? All that prep work is labor-intensive but absolutely essential for a finish that lasts.
  • Access and Logistics: High ceilings in a lobby, hard-to-reach exterior walls, or needing to paint around a fully operational business all add complexity. This often requires special equipment like lifts and careful, phased scheduling, which impacts the bottom line.
  • Type of Coatings: The paint for a standard office is completely different from what’s needed for a high-traffic warehouse floor demanding epoxy coatings. And for exteriors in our damp local climate, you need robust, waterproof coatings to prevent moisture intrusion.
  • Project Complexity: There's a world of difference between refreshing a simple, open-plan office and a complete retail build-out with a multi-color scheme. That intricacy translates directly into more labor hours.

When you understand these moving parts, you shift from making a rough guess to building a confident, data-driven budget. To get ahead of these issues, take a look at our guide on creating a construction quality control checklist to ensure no detail is missed. Adopting a proactive mindset, like we do at Wheeler Painting, turns what feels like an overwhelming task into a manageable process, setting your project up for success from day one.

Breaking Down a Commercial Painting Quote: What Are You Paying For?

When you get a commercial painting estimate, the final number can feel a bit like a mystery. But for a seasoned professional, that price is the result of a careful calculation, not guesswork. It’s far more than just slapping a cost per square foot on a room.

A truly professional quote breaks the job down into four key areas: labor, materials, surface prep, and equipment. Let's pull back the curtain on each one so you can understand exactly where your money is going.

Labor: The Biggest Piece of the Pie

Labor is almost always the single largest line item on any painting bid, and for good reason. Professional painting is a skilled trade. You're not just paying for someone to roll paint on a wall; you're paying for their efficiency, precision, and the huge amount of time spent on everything but painting.

So, how do we calculate those hours? It comes down to a few things:

  • Job Complexity: Painting a big, flat, empty warehouse wall is one thing. Painting a busy office with cubicles, trim, and high ceilings is another job entirely. Intricate work simply takes more time and focus.
  • Application Method: Spraying is incredibly fast for large, open spaces, but it demands a ton of time for masking off everything you don't want to be painted. Brushing and rolling are slower but give us the control needed for detailed areas.
  • Project Team: The number of painters we assign directly affects how long the project will take. We balance crew size to get the job done efficiently without getting in your way.

A good contractor looks at all these variables to estimate the total hours needed to deliver a finish that lasts.

Paint & Materials: The Foundation of a Lasting Finish

The specific primers, paints, and coatings chosen for your project directly influence the cost and, more importantly, the durability. Here in our local community, with our damp climate, skimping on material quality is a recipe for failure.

On an estimate, you'll see different materials listed, and each serves a critical purpose:

  • Primers: Think of primer as the essential foundation. It ensures the topcoat sticks, blocks stains, and gives you a smooth, uniform surface to work with. For new or repaired drywall, it's a non-negotiable step. You can learn more about why priming sheetrock before painting is crucial in our detailed guide.
  • Standard Paints (Latex/Acrylic): This is your workhorse for most interior walls and ceilings. The commercial-grade paints we use have much better coverage and scuff resistance than what you’d find at a big-box store for home use.
  • High-Performance Coatings: For tough environments—think warehouse floors, commercial kitchens, or healthcare facilities—we bring in the heavy hitters like epoxies and industrial urethanes. They stand up to chemicals, abrasion, and moisture but require specialized application, which affects both material and labor costs.

Now, let's look at how these components typically stack up in a commercial painting budget.

Breakdown of Typical Commercial Painting Project Costs

The table below gives you a general idea of how project costs are distributed. While every job is unique, this shows where the investment is concentrated.

Cost Component Percentage of Total Project Cost Key Factors
Labor 50% – 70% Project complexity, crew size, application method
Materials 20% – 30% Quality of paint, primers, specialized coatings
Surface Prep (Part of Labor) Condition of surfaces, level of repair needed
Equipment & Overhead 10% – 20% Lifts, scaffolding, insurance, project management

As you can see, the people doing the work are the biggest part of the equation. This is why a low bid often signals that corners are being cut somewhere—usually in the prep work.

The most expensive paint job is the one you have to do twice. Investing in the right materials and professional labor from the start saves you money and disruption in the long run.

Surface Preparation: The Work Before the Work

This is the part of the job clients often overlook but pros obsess over. Surface preparation can easily account for 40-60% of the total labor hours on a repaint project. It’s the unglamorous, meticulous work that determines whether your new paint job will peel in a year or look great for a decade.

If we don't do the prep right, even the best paint in the world will fail. This stage includes tasks like:

  • Pressure washing exteriors to blast away dirt and mildew.
  • Scraping and sanding all loose or failing paint.
  • Patching cracks and repairing damaged drywall.
  • Caulking gaps around windows and trim to seal out moisture.
  • Thoroughly cleaning walls to remove oils and contaminants that prevent adhesion.

Any detailed quote from a reputable local company like Wheeler Painting will clearly spell out the prep work involved. If a competitor's bid seems too good to be true, it’s often because they’re skipping these critical steps.

Equipment & Access: Reaching Every Surface Safely

Finally, the estimate has to account for the equipment needed to do the job safely and efficiently. For a simple, ground-floor office, that might just be ladders, plastic, and floor coverings.

But for more complex commercial projects, the needs change:

  • Scaffolding for working on multi-story building exteriors.
  • Scissor lifts or articulating boom lifts to reach high ceilings in warehouses, atriums, or gyms.
  • Containment and ventilation systems when working with strong coatings or in occupied buildings.

The rental, delivery, and setup costs for this gear are factored into the bid. By understanding these four core components, you can review any painting proposal with confidence, ask the right questions, and know exactly what you’re paying for.

How to Accurately Calculate Your Project's Square Footage

When you start thinking about painting costs, the first number that comes to mind is probably your building's floor space. But for a painter, that's one of the least important figures. What we really need is the paintable square footage—the actual surface area of every wall and ceiling getting a new coat.

Let's walk through how to calculate this yourself. Getting this number dialed in is the first real step in turning a vague project idea into a solid scope of work and a realistic budget.

Calculating Paintable Wall Area

Imagine you're looking at a 5,000-square-foot office space in our local area, with standard 10-foot ceilings. To get your wall area, you first need the perimeter, which is just the total length of all the walls you plan to paint.

For this, a laser measure is a professional's secret weapon. It’s dramatically faster and more accurate than a tape measure, especially when you’re navigating around furniture and cubicles. Once you have the perimeter, the math is simple.

Perimeter (in feet) x Ceiling Height (in feet) = Total Wall Square Footage

Let's say the main open area of our 5,000 sq. ft. office has a perimeter of 300 feet. The math looks like this:

  • 300 ft (Perimeter) x 10 ft (Height) = 3,000 sq. ft. of wall area

That gives you a great starting number before we refine it.

Accounting for Doors and Windows

Of course, you aren't painting over doors and windows, so we need to subtract them from the total. While some estimators might use a quick rule of thumb, taking a moment to measure them gives you a much more accurate figure.

  • A standard commercial door is about 21 square feet (3 ft x 7 ft).
  • A typical office window can be around 16 square feet (4 ft x 4 ft).

If our sample office has 10 doors and 20 windows, we can figure out the total deduction pretty easily:

  • Doors: 10 x 21 sq. ft. = 210 sq. ft.
  • Windows: 20 x 16 sq. ft. = 320 sq. ft.
  • Total Deduction: 530 sq. ft.

Now, we just subtract that from our initial wall area: 3,000 sq. ft. – 530 sq. ft. = 2,470 sq. ft. That final number is your true paintable wall surface. It's exactly what a pro uses to calculate the paint and labor needed for the job.

Don't Forget the Ceilings and Trim

Ceilings are easy to overlook but represent a massive surface area in most commercial jobs. The good news is that the calculation is usually straightforward—the ceiling's square footage is almost always the same as the floor's.

  • Ceiling Area = 5,000 sq. ft.

Trim, on the other hand, is a different beast. We measure things like baseboards, door casings, and window frames in linear feet, not square feet. This is always estimated separately because the detailed, precise work involved takes much more time and skill than rolling a flat wall.

These measurements all come together to form the basis of a complete quote, along with the crucial factors of labor and surface preparation.

A three-step process flow illustrating the components for a painting quote: labor, materials, and prep.

As you can see, a final estimate is a blend of the materials (which your square footage helps determine), the labor involved, and the prep work required to get a finish that lasts.

Pro Tip: Always plan for two coats of paint. Any professional-grade job is going to require two full coats to achieve the correct color depth, sheen, and durability. When you're estimating material needs, just double your final paintable square footage.

Putting It All Together for Your Estimate

Once you have these core numbers, you're in a great position. This "paintable square footage" is the key to understanding any commercial painting cost estimator or quote you might get.

Let's recap the totals for our example project:

  • Paintable Walls: 2,470 sq. ft.
  • Ceilings: 5,000 sq. ft.
  • Total Paintable Area: 7,470 sq. ft.

Having this figure, along with the linear feet of trim, provides the foundation for any professional estimate. When you come to a local contractor like Wheeler Painting with these numbers ready, it shows you’ve done your homework. It allows us to have a much more productive conversation from the get-go, focusing on other critical variables like surface condition, paint selection, and your project's unique logistical needs to build a truly reliable proposal.

How Property Type Shapes Your Painting Estimate

Three commercial buildings with different storefronts on a street, featuring retail, office, and warehouse spaces.

It’s a simple truth in our line of work: you can't price a warehouse paint job the same way you’d price a boutique retail store. The building’s day-to-day function is one of the biggest factors driving the final cost, influencing everything from the type of paint we use to how we schedule the work.

A one-size-fits-all estimate just doesn't cut it. An experienced local provider like Wheeler Painting knows that the materials, prep work, and techniques must be tailored to the building's use, foot traffic, and environment.

Retail Build-Outs and Renovations

In retail, looks are everything. A paint job is a core part of the customer experience, setting the mood and reinforcing the brand from the moment someone walks in. This is why these projects are often part of a larger commercial construction or renovation aimed at boosting sales, making it a critical service for any "commercial contractor near me."

Here’s what really drives the costs in a retail setting:

  • Durability and Finish: High-traffic hallways and checkout areas demand tough, scuff-resistant paints that are easy to wipe down. The specific sheen—from matte to semi-gloss—also affects material costs.
  • Branding and Color Schemes: Applying precise brand colors or complex, multi-tone designs takes far more skill, masking, and labor than a simple, single-color paint job.
  • Minimal Disruption: Painting almost always has to happen after hours or overnight. This premium scheduling avoids interrupting business but naturally increases labor rates.

For a retail project, a painter isn't just applying color; they're a partner in creating a space that attracts and retains customers.

Office Space and Corporate Environments

When painting an office, the goals are to create a productive atmosphere for employees and, crucially, to minimize downtime. An office space renovation in an occupied building adds a whole other layer of complexity compared to painting an empty new build.

Several factors will shape your final office painting quote:

  • Low-VOC and No-VOC Paints: Protecting employee health from harsh fumes is non-negotiable. We almost always use low-VOC (Volatile Organic Compound) or no-VOC paints, which can cost more than their conventional counterparts.
  • After-Hours Work: Just like in retail, office painting is typically a nights-and-weekends affair to avoid disrupting the workday. This scheduling requires careful planning and often comes at a premium.
  • Furniture and Obstacles: Maneuvering around cubicles, conference tables, and sensitive electronics is a huge time sink. The job involves tons of extra masking and shifting furniture, which adds significant labor hours.

A team that’s seasoned in office repaints knows the drill: get in, do flawless work, and have the space clean, fresh, and ready for the team on Monday morning.

A professional quote for a commercial property isn't just a price; it's a strategic plan. It considers how the space is used, who uses it, and what the paint needs to accomplish functionally and aesthetically.

Institutional and Industrial Facilities

Painting warehouses, schools, or healthcare facilities is a completely different ballgame. Here, aesthetics often take a backseat to performance, safety, and sheer durability. These projects are less about decoration and more about applying functional coatings as part of broader facility construction services.

Here’s what drives costs in these heavy-duty environments:

  • High-Performance Coatings: Industrial spaces often need specialized products like epoxy floor coatings for chemical resistance or safety markings. Institutional painting of a warehouse ceiling is a far cry from rolling drywall in an office.
  • Intensive Surface Preparation: Surfaces like concrete, steel, and cinder block are the norm. They frequently require heavy-duty prep work like pressure washing, sandblasting, or degreasing before any coating can be applied.
  • Accessibility and Scale: The massive, high ceilings in a warehouse mean renting scissor lifts or boom lifts. This adds equipment rental and specialized labor to the bottom line.

A generic online estimator might give you a rough idea, but it can't account for these critical details. Only a detailed, on-site assessment from an experienced local provider like Wheeler Painting can capture the nuances that ensure a project is done right and built to last.

Sample Commercial Painting Cost Ranges (Per Sq. Ft.)

To give you a better sense of how these factors translate into real numbers, here’s a look at typical cost ranges for different property types in our service area. Remember, these are estimates—your final price will depend on the specific conditions of your property.

Property Type Typical Cost Range (per sq. ft.) Primary Cost Drivers
Office Space $2.00 – $6.00 After-hours work, low-VOC paints, furniture/obstacles
Retail Store $3.00 – $8.00 High-durability paint, brand colors, off-hours labor
Warehouse/Industrial $1.50 – $5.00 High ceilings, specialty coatings (epoxy), surface prep
Medical/Healthcare $4.00 – $9.00+ Antimicrobial coatings, zero-VOC paint, strict containment

These figures show just how much the property's use can impact the budget. A medical facility, with its need for specialized coatings and strict protocols, sits at the high end, while a basic warehouse repaint is generally more straightforward and less costly per square foot.

When an Online Estimator Just Won't Cut It

Online painting cost estimators are a fantastic starting point. They can give you a rough ballpark figure for your budget and help you wrap your head around the potential investment.

But let’s be honest—these tools have a massive blind spot. They can’t see your building. And for a project that impacts your business's curb appeal and protects its very structure, a simple calculator can never replace a thorough, in-person walk-through with a seasoned pro from your community.

Calculators thrive on clean data: square footage, ceiling height, and generic surface types. The real world, however, is rarely so neat and tidy. An on-site evaluation is where a professional painter uncovers the hidden complexities that a digital tool will always miss.

What a Calculator Can't See

The real cost drivers in a quality paint job often have less to do with the paint itself and more to do with the prep work. This is where an experienced contractor earns their keep, spotting the subtle issues that can lead to paint failure and much more expensive repairs down the road.

An online form can’t ask about the faint signs of moisture seeping through a concrete block wall. It won't notice the hairline cracks in your stucco that, if ignored in our damp local climate, will inevitably become major headaches.

For example, when a Wheeler Painting expert is on-site, we’re trained to look for things a calculator can’t process:

  • Hidden Moisture Damage: We can spot the faint discoloration or slight bubbling paint that hints at a leak behind the wall. Just painting over it is a recipe for disaster—it traps the moisture, leading to rot and mold.
  • Substrate Condition: Is your siding getting that chalky film? Is the old paint peeling off in big sheets? The specific type of failure dictates the prep work, which could range from a simple power wash to extensive scraping, sanding, and priming.
  • Complex Architectural Details: An estimator might just see a wall. Our team sees the intricate trim, ornate cornices, or multi-level facades that demand painstaking handiwork and much more time.
  • Accessibility Challenges: A high ceiling is one thing. A high ceiling over an active production line or a grand staircase is a completely different logistical puzzle. We assess the real-world challenges of bringing in lifts and scaffolding while keeping your staff and our crew safe.

These are exactly the kinds of details that can turn a $30,000 online estimate into a $45,000 real-world project. A professional assessment is your best defense against those kinds of expensive surprises.

A professional contractor's most valuable tool isn't a paintbrush—it's their eyes. An on-site evaluation is your best investment for an accurate budget and a finish that actually lasts.

The True Value of an On-Site Evaluation

The goal of an on-site visit isn't to find problems just to drive up the price. It's about building a realistic project plan that guarantees a durable, long-lasting finish.

When one of our experts walks your property, they're shifting from being a simple painter to a problem-solver. Think of it as risk management for your investment.

This consultative approach is absolutely critical for larger jobs, especially those that might involve light construction. For instance, if we discover significant wood rot on an exterior during our assessment, our dual expertise as a general contractor comes into play. We can diagnose the root cause, propose a solid repair plan—such as siding replacement—and fold it seamlessly into the painting project. This saves you the headache of hiring and managing a separate company. If you're facing a more complex project like this, our guide on how to choose a general contractor can offer more insight.

At the end of the day, a free online calculator gives you a number. A professional, on-site consultation gives you a strategy, peace of mind, and a reliable partner. It ensures the quote you receive isn’t just a guess, but a comprehensive roadmap for getting the job done right.

Common Questions About Commercial Painting Costs

When you’re trying to budget for a major painting project, an online cost estimator can give you a decent starting point. But let's be honest, every building has its own quirks, and those ballpark numbers quickly lead to more specific questions.

Here at Wheeler Painting, we've had thousands of these conversations with clients in our local community. We believe in being upfront about costs from day one. To help you plan better, we’ve answered some of the most common questions that come up.

How Much Does It Cost To Paint A 10,000 Sq Ft Commercial Building Exterior?

This is probably the number one question we get, and the honest answer is: it depends entirely on the building. For a standard two-story commercial building in our service area, you could be looking at a range of $2.00 to $4.50 per square foot of the actual paintable surface—not the building's floor space.

So, why such a big window? A few key things will push the price to one end of that range or the other:

  • Building Condition: Is the paint peeling and bubbling? Is there mildew growing in the shady spots? We see a lot of that in our damp climate. Any good painter will tell you that extensive prep work like pressure washing, scraping, and spot priming is non-negotiable for a paint job that lasts.
  • Accessibility: This is a huge cost driver. If we can reach everything with ladders, the job is much simpler. But if the project requires scissor lifts or complex scaffolding to safely reach high or awkward areas, the cost for equipment and specialized labor goes up.
  • Material Choice: You can opt for a solid-quality paint, or you can invest in a premium, weather-resistant coating specifically formulated to stand up to years of Pacific Northwest rain. The better the product, the higher the material cost.

Ultimately, the only way to get a firm number is for a professional to see the building in person.

Does Working After Hours Or On Weekends Increase My Office Painting Cost?

Yes, it almost always will. When we have to work nights or weekends to avoid disrupting your business, our labor costs go up. This is a standard practice for "commercial painting services near me" in occupied spaces like offices, retail stores, or medical clinics where you can't have painters and wet paint around during business hours.

You can typically expect a labor premium of 20% to 50% for this off-hours work. While it adds to the budget, most business owners find the cost is well worth it to avoid any operational downtime and lost revenue.

A professional contractor should always be transparent about these premium rates. At Wheeler Painting, we work with you to create a schedule that minimizes disruption and will clearly outline any associated costs in our proposal so there are no surprises.

This way, you can make a clear-eyed decision that balances your budget with the needs of your business.

What Is The Cost Difference Between Standard Paint And Specialty Coatings?

The difference in price is significant, but so is the difference in performance. A gallon of a good commercial-grade latex paint might cost you $30 to $50. On the other hand, a gallon of a high-performance, two-part epoxy for a warehouse floor can easily run $80 or more.

But that’s just the cost of the materials. Applying specialty coatings is much more demanding and time-consuming. For example, prepping a concrete floor for an epoxy coating often involves heavy-duty machinery for diamond grinding or shot blasting—work that simply isn't needed for standard wall paint.

While the initial bill is higher, specialty coatings provide durability and chemical resistance that standard paints can't touch. For high-traffic areas or demanding environments like commercial kitchens, warehouses, or manufacturing plants, they are often the most cost-effective solution in the long run.

Why Is Surface Preparation Such A Large Part Of The Estimate?

Think of prep work as the foundation of the entire paint job. If the foundation is weak, it doesn't matter how great the rest of the structure is—it's going to fail. In painting, this phase is absolutely critical, and it's not unusual for prep to account for 40% to 60% of the total labor hours on a repaint project.

Proper preparation means we're doing the job right. It involves:

  • Thoroughly cleaning surfaces to get rid of dirt, grease, and mildew.
  • Scraping and sanding all failing paint to create a smooth, stable base.
  • Filling cracks, holes, and repairing other surface damage.
  • Applying the right primer to ensure the new paint bonds correctly.

Cutting corners on prep is the number one reason paint jobs fail prematurely. A low bid that skimps on prep might look good at first, but it will cost you far more down the road when the paint starts peeling in a year or two. A quality, trusted local contractor will never compromise on this step.


Ready to move from a rough estimate to a firm, reliable proposal for your commercial painting or construction project? The team at Wheeler Painting has been serving our local community for over three decades, delivering dependable craftsmanship on projects large and small. Contact us today to schedule your on-site consultation.

Waterproofing Wet Room: Your Guide to a Leak-Free Bathroom

When you're building a wet room for your home or commercial property, the most important part isn't the tile or the fixtures—it's what you can't see. True waterproofing is about creating a completely sealed, "tanked" enclosure. Every drop of water from your open shower has to be meticulously guided to the drain, which means applying specialized membranes and sealants to the entire floor and up the walls. This isn't just a step in the process; it's the foundation of a successful project, and getting it right builds trust and protects your investment.

Why a Small Leak Becomes a Huge Problem

A wet room is a fantastic, open-plan space, but it’s also a construction project with zero margin for error. Unlike a standard bathroom where a shower tray contains the water, a wet room’s floor and walls are constantly exposed. As a local contractor serving homeowners and businesses in our community, we've seen firsthand what happens when this is done incorrectly.

Even a single pinhole-sized leak in the waterproofing membrane can unleash a slow-motion disaster. Trapped moisture is a magnet for mold and mildew, which can seriously affect your property's air quality. Over months, that silent leak can cause structural rot in floor joists and wall framing, compromising the integrity of your home or commercial building.

The Real-World Cost of Cutting Corners

The fallout from a failed wet room isn't just an inconvenience; it's a financial nightmare for any property owner. Inadequate waterproofing is a major driver of insurance claims, accounting for 37% of all claims and contributing to over $13 billion in damages from water issues in the U.S. every single year.

This is why trusted local providers are so serious about the products they use. Liquid-applied membranes, known for creating a seamless, monolithic barrier, dominate the market with a 64.1% revenue share for good reason—they work. For commercial spaces and tenant improvements, which we handle often at Wheeler Painting, a properly waterproofed facility can reduce mold risks by up to 90%.

These numbers aren't just statistics; they tell a story. Investing in professional wet room waterproofing isn't just an expense—it's essential protection for your property.

A properly waterproofed wet room adds luxury and value. A poorly executed one becomes a liability that can cost tens of thousands in repairs, a reality we've seen firsthand. If you're already facing this situation, understanding the steps in professional water damage cleanup can be incredibly helpful.

Ultimately, the entire room needs to be "tanked." This means every corner, seam, and plumbing penetration is obsessively sealed against water. It's this level of detail that separates a beautiful, functional wet room from a catastrophic failure down the road.

Building a Solid Foundation with Planning and Surface Prep

A successful wet room doesn’t begin when the waterproofing goes on. It starts way before that, with careful planning and an almost obsessive focus on preparation. Think of it like building a house—if the foundation is off, everything you put on top of it will eventually fail. This is true for any project, from a simple home remodel to a large-scale commercial construction project.

A person uses a spirit level to check a concrete tile during wet room construction, with blueprints and a tape measure nearby.

The very first thing we do is a deep dive into the existing structure, or what we call the substrate. We’re talking about a thorough inspection of the floor and walls. You’d be surprised how many small issues, if ignored now, can mushroom into major failures down the road.

Assessing the Substrate and Framing

First things first, we check the bones of the room. Is the framing solid? Are the floor joists beefy enough to handle the weight of a new mortar bed and tile? Any bounce or flex in the floor is a major red flag. That movement, however slight, will inevitably crack tile grout and could compromise the waterproofing membrane over time.

For a residential home, this often means hunting for signs of old water damage or rot in the wooden subfloor. In a commercial space, we're usually looking at a concrete slab, making sure it’s stable, free of significant cracks, and ready for what comes next. The goal is simple: get all surfaces perfectly plumb (vertical) and level (horizontal) to create an ideal canvas.

The Importance of the Right Backer Board

With the framing confirmed to be solid, it's time to choose the right backer board. Let me be clear: standard drywall has absolutely no place in a wet room. It’s like a sponge. It will soak up moisture, swell, and completely fall apart, taking your expensive tile job with it.

Instead, we only use materials specifically engineered for these high-moisture areas. The main options are:

  • Cement Board: This is a long-time favorite for a reason. Made from cement and reinforcing fibers, it's incredibly tough and water just doesn't affect it.
  • Foam Core Backer Board: These panels are a newer option and a favorite for many installers. They're lightweight, easy to cut, and come with a waterproof foam core that membranes adhere to very well.
  • Fiberglass-Mat Gypsum Board: Think of this as the super-powered version of moisture-resistant drywall. It uses a fiberglass mat instead of paper, which is far better at resisting moisture and mold.

The best choice depends on the job, but the mission is always the same: build a stable, water-resistant surface before the first drop of waterproofing is even opened.

Any professional will tell you the same thing: a waterproofing membrane is only as good as the surface it's applied to. You need a substrate that is clean, dry, and totally free of dust for a permanent bond. Skipping this step is like trying to paint over a greasy, dusty wall—it’s just going to peel right off.

Final Surface Preparation for a Perfect Bond

Once the backer boards are up, the final prep begins. We fill every seam between the boards with a sealant approved by the manufacturer and then reinforce them with fiberglass tape. Every screw head is mudded over, and any little imperfection is smoothed out. You want a single, seamless surface.

Finally, we clean. And we mean meticulously clean. We vacuum up every speck of dust and wipe the entire area down. This attention to detail is what ensures the membrane gets a tenacious grip, creating that unbroken seal every wet room depends on. To see how this level of detail fits into a larger project, our construction quality control checklist provides helpful insights applicable to any residential or commercial renovation.

Choosing the Right Waterproofing System: A Practical Comparison

With the prep work behind you, we've come to the most critical decision for your wet room: the waterproofing system. This isn't just a minor detail—it's the core of the entire project. The system you choose will dictate the installation process, the final cost, and, most importantly, how well your wet room stands the test of time.

The right choice for a custom-tiled residential shower in a local home might not be the best fit for a high-traffic locker room in a commercial facility. Our goal is to walk you through the pros and cons of each, so you can make an informed decision for your project.

This matters more than ever. The demand for modern, spa-like wet rooms has exploded. The global market was valued at USD 6.4 billion in 2023 and is on track to hit USD 8.3 billion by 2028. Here in the U.S., it's a USD 1.8 billion market for 2024 alone, driven by weather patterns that demand truly robust solutions. You can dig into the numbers yourself in the full report on wetroom waterproofing solutions at MarketsandMarkets.com.

Let’s break down the main players.

Liquid-Applied Membranes

Think of a liquid-applied membrane as a thick, rubberized paint. You roll or brush it directly onto the backer board, floor, and walls. After a couple of coats, it cures into a seamless, flexible, and completely monolithic waterproof barrier.

Its biggest advantage is the lack of seams, which means no weak points. This is a huge benefit for tricky custom shapes, built-in benches, or multiple niches. However, its success is 100% dependent on the applicator. It must be applied to the correct thickness—no thin spots!—which takes a skilled hand and a bit of patience.

Sheet Membranes

Sheet membranes are essentially a big, waterproof blanket for your wet room. They come in rolls of material like modified bitumen or polyethylene, which are unrolled and bonded to the surfaces with a specialized thin-set mortar.

The beauty of a sheet membrane is its factory-controlled thickness. You know you're getting a consistent, uniform layer of protection across the entire space. This makes it a fantastic and reliable choice for large, simple layouts, especially in commercial projects like gyms or institutional facilities where durability is key. The challenge? The seams. Every overlap must be perfectly sealed. This is where professional precision really counts, as a single bad seam can compromise the whole system.

For both homeowners and facilities managers, here's the bottom line: neither system is universally "better." The right choice comes down to your room's layout, your budget, and the expertise of your installer. A trusted local provider will know exactly which system to specify for a guaranteed watertight result.

Choosing the right system involves weighing these trade-offs. To make it easier, here’s a side-by-side look at how they stack up.

Comparison of Wet Room Waterproofing Systems

System Type Best For Application Method Durability Relative Cost
Liquid-Applied Membrane Complex shapes, custom niches, and residential remodeling Roller, brush, or sprayer Good-Excellent (depends on application) Moderate
Sheet Membrane Large, flat areas and new commercial construction Bonded with thin-set mortar Excellent Moderate-High
Cementitious Coating Concrete and masonry subfloors Trowel-applied Excellent (but rigid) Low-Moderate

Ultimately, a conversation with a professional contractor will help you land on the perfect choice for your specific project's needs and long-term goals.

Cementitious Coatings

There's a third option you'll sometimes see: cementitious coatings. This is typically a two-part product—a cement-based powder mixed with a liquid polymer—that gets troweled onto the surface. It cures into a hard, incredibly tough layer that essentially becomes part of the concrete or masonry itself.

These coatings are rock-solid and bond exceptionally well to concrete, making them a great fit for basement bathrooms or commercial spaces with concrete subfloors. They also create an ideal surface for tile adhesive. Their main drawback is their rigidity; they don't have the flexibility of a liquid or sheet membrane, so they aren't suitable for wood-framed buildings that can shift or move over time. The concept is similar to some industrial floor systems, and if you're curious about heavy-duty surfaces, you might find our guide on the benefits of epoxy floor coatings interesting.

Getting the Details Right: Slopes, Drains, and Seams

When it comes to waterproofing a wet room, the big, flat surfaces are the easy part. The real test of a lasting job—and where most failures happen—is in the details. A perfect membrane on a poorly sloped floor is just a ticking time bomb.

We’ve seen it countless times in local homes and businesses: a beautiful new wet room that starts leaking within a year because someone overlooked how the drain was integrated or how the corners were sealed. Getting these small but crucial elements right is what separates a professional, worry-free installation from a future renovation nightmare.

The Unforgiving Logic of the Floor Slope

Every single drop of water in a wet room needs a clear path to the drain. That's the floor's number one job, and we achieve it by building in a very specific, subtle slope, often called the "fall."

The industry standard, and what we always aim for, is a 1/4-inch drop for every foot you move away from the drain. So, for a spot four feet from the drain, the floor needs to be one inch higher than the drain itself. It sounds simple, but it has to be perfect. Too shallow, and you'll get puddles that lead to scum buildup and create a slip hazard. Too steep, and the room will feel awkward and uncomfortable to stand in.

Don't ever let anyone tell you the slope is optional. A flawless waterproofing system can't defy gravity. A proper, consistent slope is your primary defense against standing water.

To get this right, we'll either float a custom slope with a specialized deck mud—a real craft—or use a high-quality, pre-sloped foam tray as the foundation.

Making the Drain Connection Watertight

With the slope set, all eyes turn to the drain. This isn't just a simple grate; it’s a multi-part component that must be perfectly fused with the waterproofing layer. We generally work with two types:

  • Point Drains: The classic round or square drain. To make these work, the floor has to slope towards the drain from all directions, creating a shallow, funnel-like shape.
  • Linear Drains: These long, sleek drains are usually set against a wall. They’re a fantastic choice for a modern look because they only need the floor to slope in one direction. This also makes it much easier to use large, beautiful tiles without a lot of complex cuts.

No matter the type, the most critical step is creating an unbreakable bond between the drain's flange and the waterproofing membrane. A weak seal here is probably the single most common cause of catastrophic wet room leaks.

Sealing Every Last Seam, Corner, and Opening

Your waterproofing is only as good as its weakest point. In any wet room, the weak points are always the seams and any place something pokes through the wall or floor. These are the areas that demand an almost obsessive level of detail.

Think about all the joints: where walls meet the floor, where two pieces of backer board come together, and around every pipe for your shower head and valves. Each one is a potential highway for water to get behind your walls.

A visual process flow of waterproofing systems showing sheet membrane, liquid applied, and cementitious coating steps.

While the overall approach varies between systems, as shown above, sealing the junctions is where the real skill comes in. Our process for creating a bulletproof seal is non-negotiable.

  • First, we treat every joint between backer boards and at all wall-to-floor corners with a manufacturer-specified sealant.
  • Next, we embed a specialized waterproofing band—a flexible fabric—into a thick coat of liquid membrane over every single seam and inside corner. This creates a durable, elastic joint that can handle the minor shifts and movements of a house without breaking the seal.
  • Finally, for every pipe or valve that penetrates the wall, we use pre-formed, engineered gaskets. These "pipe collars" create a perfect, watertight seal that's impossible to replicate with sealant alone.

Taking the time to get these details right is what our reputation at Wheeler Painting is built on. It’s a meticulous, hands-on process that ensures our clients get a wet room that’s not just beautiful, but built to last a lifetime.

Curing, Testing, and Tiling: The Final Hurdles

Alright, the membrane is down, and it looks perfect. It’s tempting to think you’re on the home stretch and ready for tile, but hold on. Rushing these next few steps is a classic mistake that can unravel all your careful work. This is where patience truly becomes a virtue.

A wet room floor undergoing a waterproofing test, filled with water, featuring a drain and ripples.

That freshly applied membrane isn't actually waterproof just yet. It needs to cure—a chemical process where the material hardens to gain its full strength and water-blocking power.

Give It Time to Cure Properly

Every waterproofing product has a specific cure time listed right on the bucket or in its technical data sheet. You have to follow it. This can be anywhere from 24 to 72 hours, sometimes even longer. It’s not just about waiting for it to be dry to the touch; it’s about letting the material fully cross-link and set up internally.

Our local, damp air is a major factor. That persistent humidity can significantly slow down the cure time for liquid-applied membranes. If the manufacturer suggests 24 hours under ideal conditions, we always add a little extra time on a damp day, just to be safe. Keeping a fan going to improve air circulation will definitely help.

Jumping the gun and tiling over a semi-cured membrane is one of the most common—and costly—DIY errors we see. The moisture from the tile adhesive can re-emulsify the membrane, creating weak spots that will eventually fail.

The Flood Test: Your Ultimate Quality Check

Once you're confident the membrane is fully cured, it's time for the moment of truth. The flood test is our non-negotiable quality control check, and it should be yours, too. It’s the only way to be 100% certain your waterproofing wet room is sealed tight before you cover it with expensive tile.

First, you'll need to plug the drain. Don't just stuff a rag in there; that won't work. Get a proper test plug that creates a completely watertight seal in the drain pipe.

Next, fill the entire shower pan with water until it’s at least two inches deep. Take a marker and draw a line right at the water level on the wall or framing. Now, you wait for a full 24 hours. This gives water plenty of time to find even the smallest pinhole or a weak seam that you might have missed.

After the 24 hours are up, check the water line. If it hasn't dropped (a tiny bit of evaporation is normal), you have a successful test. As a final precaution, we always check the ceiling in the room or crawlspace directly below for any hint of a drip or water stain. It’s about being absolutely sure.

Choosing the Right Thin-Set for Tile

You passed the flood test—congratulations! But there’s one last detail before you start mixing mortar. The tile adhesive you choose must be compatible with your waterproofing membrane.

Some thin-set mortars contain solvents or chemicals that can react with certain membranes, slowly degrading them over the years from behind the tile. Using the wrong product can even void the warranty on your waterproofing system.

The only way to know for sure is to check the membrane manufacturer's technical data sheet. They will always specify which types of adhesives are approved for use over their product. This ensures the tile, adhesive, and waterproofing function as a complete, integrated system, giving you total peace of mind for decades to come.

Your Top Wet Room Waterproofing Questions, Answered

Even with a solid plan, it's completely normal for property owners and facilities managers to have questions before diving into a wet room project. In our experience working with clients all over our community, getting these details straight from the start is the key to a stress-free project and real peace of mind.

Let's walk through some of the most common questions we get about waterproofing a wet room.

Can I Just DIY My Wet Room Waterproofing?

We understand—the temptation to save on labor costs is always there. But if there's one part of a residential or commercial renovation we’d urge you not to tackle yourself, it's this one. The risk is just too high.

A wet room isn't just water-resistant; it has to be a completely sealed, monolithic system. A single pinhole, a poorly sealed corner, or an improperly integrated drain can lead to catastrophic failure. The cost of tearing out a leaking wet room and repairing the structural water damage will dwarf any potential savings from a DIY job.

Professional contractors have the right tools, years of training, and the experience that comes from managing these complex details every day. When you hire an experienced team like Wheeler Painting, you're not just paying for labor; you're investing in accountability and a guarantee that it's done right the first time.

What Does Professional Waterproofing Actually Cost?

This is usually the first question people ask, and the honest answer is: it depends. The final cost for waterproofing a wet room is shaped by the room's size, the type of system we use, and the condition of the subfloor we're starting with.

As a ballpark figure, a standard residential wet room in our service area will typically run between $1,500 and $4,000 for the professional waterproofing stage. This covers all the materials and labor for the membrane application and detail work. It doesn't, however, include things like demolition, new plumbing, or the final tile installation.

Here’s what can swing that price:

  • System Choice: A liquid-applied membrane might have lower material costs, but it can be more labor-intensive to get the thickness just right. A sheet membrane system often costs more for materials but can be faster to install.
  • Room Complexity: A simple square room is straightforward. A bathroom with built-in benches, recessed niches for a residential home, or multiple stalls in a commercial facility requires much more time-consuming detail work.
  • Substrate Condition: If we discover the subfloor is rotten or needs significant leveling before we can even start, that prep work will add to the project cost.

We always provide a detailed on-site consultation to give you a firm, transparent proposal for your specific project, whether it's a home bathroom or a commercial locker room.

How Long Does the Waterproofing Process Take?

Patience is your best friend during this phase. Rushing the waterproofing is the number one cause of failure down the road. For the core waterproofing work, you should plan on about 2-4 days from prep to flood test.

Here's how that time usually breaks down:

  1. Day 1: We'll do the final surface prep and apply the first coat of a liquid membrane or install the sheet system.
  2. Day 2: This day is all about applying subsequent coats and meticulously detailing every seam, corner, and pipe penetration. This is where the expertise really shows.
  3. Curing Time: Now, we wait. Depending on the product and local humidity, a full cure can take anywhere from 24 to 72 hours. This can't be rushed.
  4. Flood Test: Once cured, we conduct a mandatory 24-hour flood test. We plug the drain and fill the shower basin with water to ensure it's absolutely watertight before a single tile gets laid.

All in, it’s best to block out 3 to 5 days for the entire waterproofing process. Only after a successful flood test can the tiling begin.

What Happens If a Finished Wet Room Leaks?

Discovering a leak after the tile is in and the fixtures are set is the absolute worst-case scenario. The repair is messy, disruptive, and expensive.

In nearly every case, a leak means we have to demolish all the tile and carefully remove the failed waterproofing membrane just to find the source. From there, the entire system has to be rebuilt from the substrate up. This is exactly why investing in a reputable, experienced contractor from day one is the smartest financial decision you can make.

Our meticulous process, sharpened over decades of serving our local community, is your best insurance policy against leaks. We build it right from the start to protect your investment for years to come.


Your home or commercial property deserves craftsmanship you can trust. At Wheeler Painting, we've spent over 30 years delivering reliable residential and commercial construction, renovation, and painting services to our community. From complex wet rooms to full-scale commercial renovations and retail build-outs, we handle every detail so you don't have to. Ready to start your project with a team that values quality and clear communication? Contact us today for a straightforward consultation and estimate.