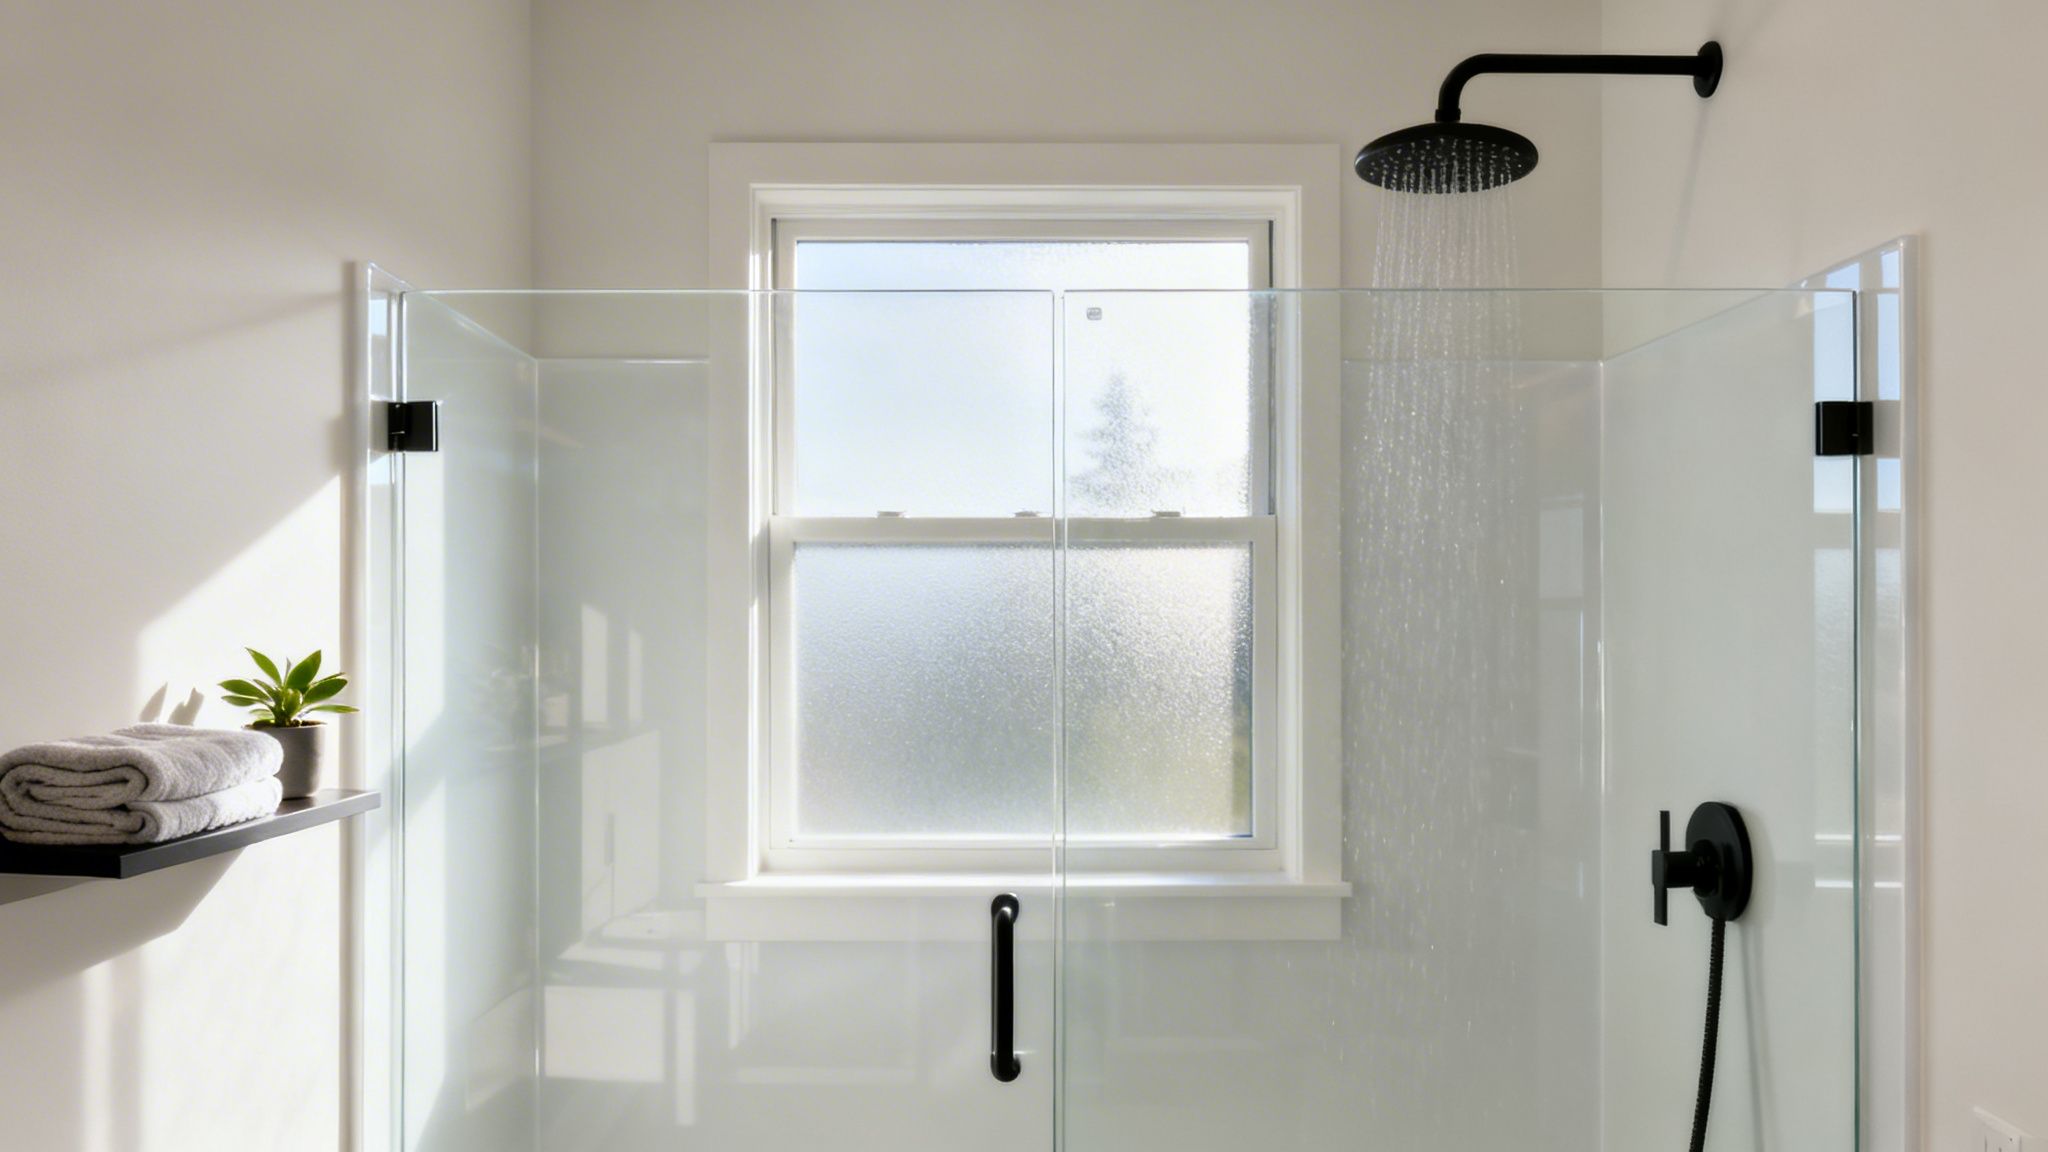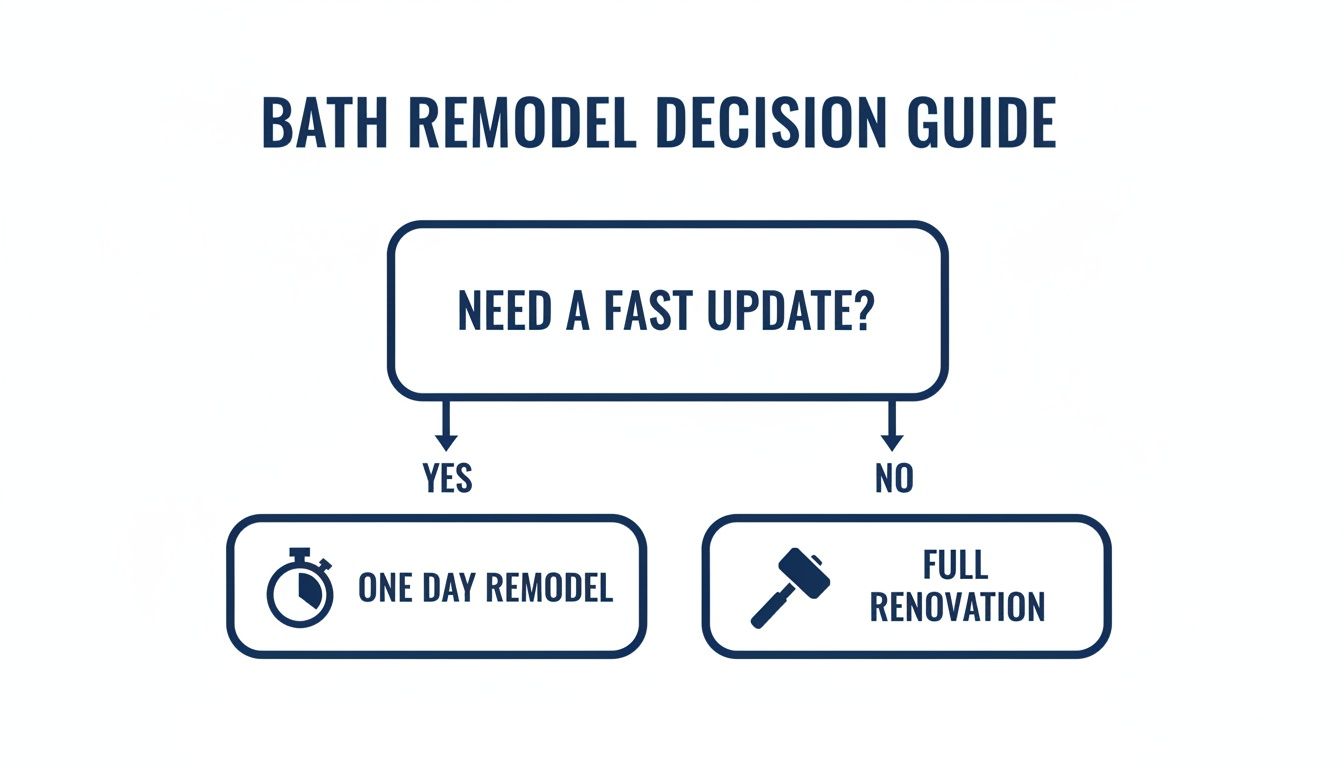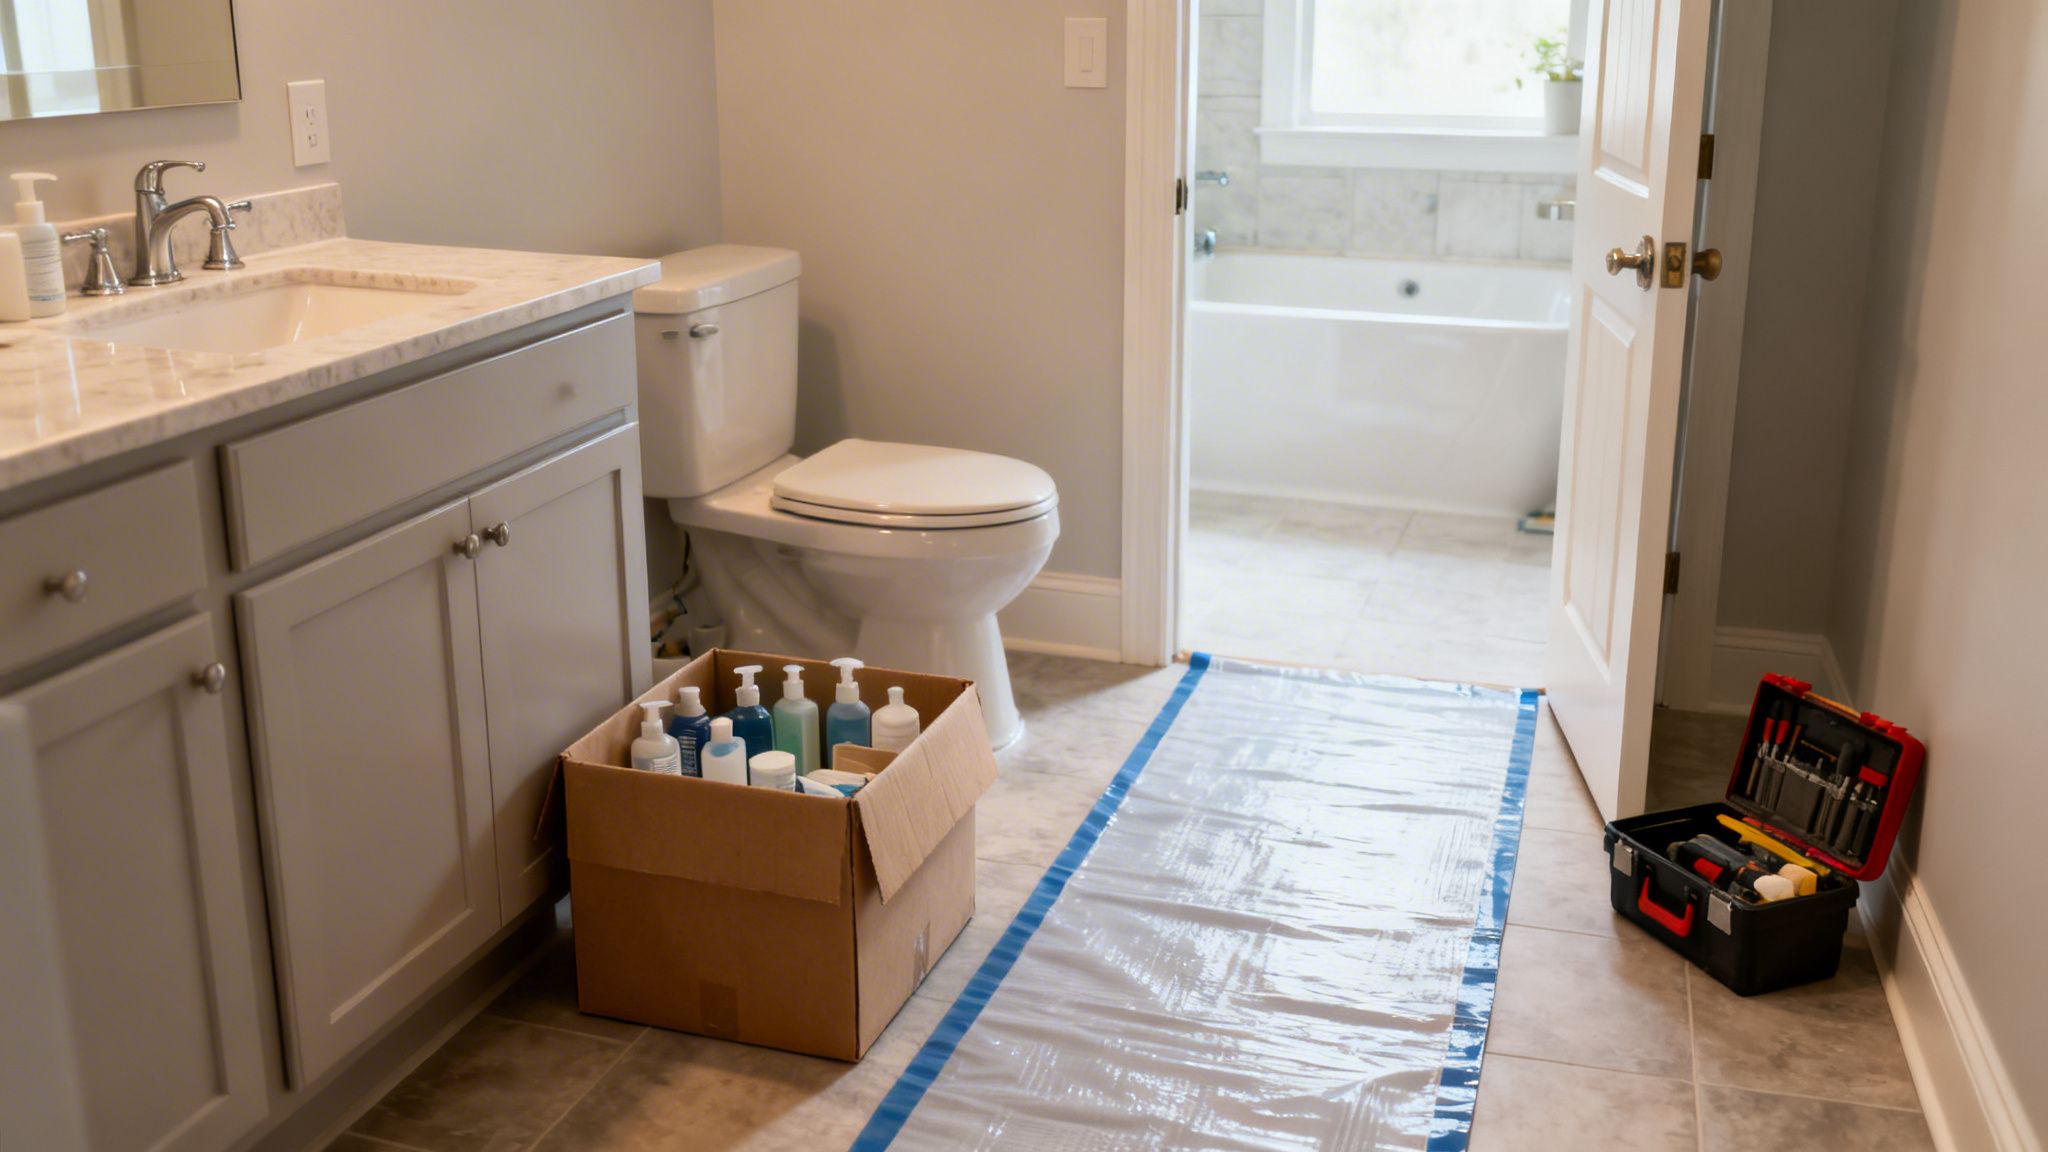
Your Seattle Guide To A Bath To Shower Conversion

Thinking about swapping out that old bathtub for a shower? You're not alone. This is one of the most popular home improvement projects we see across Kent, Seattle, and Tacoma, and for good reason. It’s more than a simple style update; it’s a practical upgrade that can completely change how you feel about your bathroom.

As a residential contractor, we at Wheeler Painting help property owners with these decisions every day. By getting rid of an underused tub, you can create a modern, spacious shower that’s safer, more functional, and a whole lot better suited to your daily life.

Why a Shower Conversion Is a Smart Upgrade for Your Home

All across the Puget Sound, from Seattle to Tacoma and Kent, we’re seeing more and more homeowners and property managers decide to ditch their old bathtubs for sleek, modern showers. It’s a shift that makes perfect sense for today’s lifestyles, where convenience, safety, and a touch of everyday luxury are top priorities. At Wheeler Painting, this is a conversation we have with our clients all the time. This isn’t just about making things look prettier—it's a smart investment in your property.

One of the biggest drivers behind this trend is the desire for a safer, more accessible bathroom. Let's be honest, stepping over a high tub wall every day can be a genuine challenge and a serious slip hazard, especially for those with limited mobility. A low-curb or walk-in shower eliminates that barrier, making it a crucial upgrade for anyone who wants to age in place safely and comfortably. For facility managers, this type of residential remodeling can make a property far more attractive to a wider range of tenants.

The Growing Demand for Larger Showers

The desire for big, spa-like showers has absolutely exploded. It's not just a feeling; the numbers confirm it. Recent industry studies show a huge shift in what homeowners want from a bathroom remodel. A solid 27% of homeowners are tearing out their master bathtubs with the specific goal of building a larger shower.

And what do they do with that new space? An overwhelming 91% of them make the shower footprint bigger, transforming a utilitarian spot into a personal retreat. We see this most often with homeowners over 54, who are wisely investing in features like non-slip floors and grab bars for long-term comfort and peace of mind. You can see all the data for yourself in the Houzz U.S. Bathroom Trends Study.

This all points to a bigger change in how we think about our homes. A beautifully designed shower is no longer an afterthought—it's a main feature.

We hear it from our clients constantly: their shower is more than just a place to get clean. They want to create a daily spa experience with rain heads, built-in benches, and gorgeous tile. It’s why a staggering 81% of people upgrading their master shower choose to make it bigger.

Boosting Your Home’s Appeal and Value

In the competitive Puget Sound real estate market, a well-executed bath to shower conversion can be a major selling point. Buyers today are looking for clean lines, practical design, and homes that are move-in ready. A modern, accessible shower checks all those boxes, appealing to everyone from young professionals to retirees.

  • Enhanced Functionality: Walk-in showers are simply easier to clean and maintain than tub-shower combos, which are notorious for grimy corners and stubborn grout lines. For facility and property managers, this means easier upkeep and maintenance.
  • Improved Aesthetics: A glass-enclosed shower opens up the entire room, making even a small bathroom feel brighter, larger, and more inviting.
  • Future-Proofing: When you add accessibility features, you’re not just planning for your own needs down the road. You’re also making your home far more attractive to a wider pool of future buyers or tenants.

At the end of the day, converting your bath to a shower is a strategic move. It improves your daily routine right now while adding real, lasting value to your home. It’s an investment in your comfort, your safety, and the long-term appeal of your property here in the Seattle area.

Getting Your Bath-to-Shower Project Off the Ground

Thinking about a bathroom remodel can feel overwhelming. We get it. But the secret to a smooth, headache-free project isn't some magic formula—it's just a solid, transparent plan. At Wheeler Painting, we've refined our process over countless residential construction projects in Kent, Seattle, and across the Puget Sound, breaking down every bath to shower conversion into clear, predictable phases. You'll know exactly what's happening from day one.

A bathroom renovation is so much more than picking out pretty tile. It’s a construction project that demands skilled demolition, precise plumbing, and, most importantly, bulletproof waterproofing. Our job as your local residential contractor is to manage all those moving parts, turning what could be a mess into an exciting upgrade for your home.

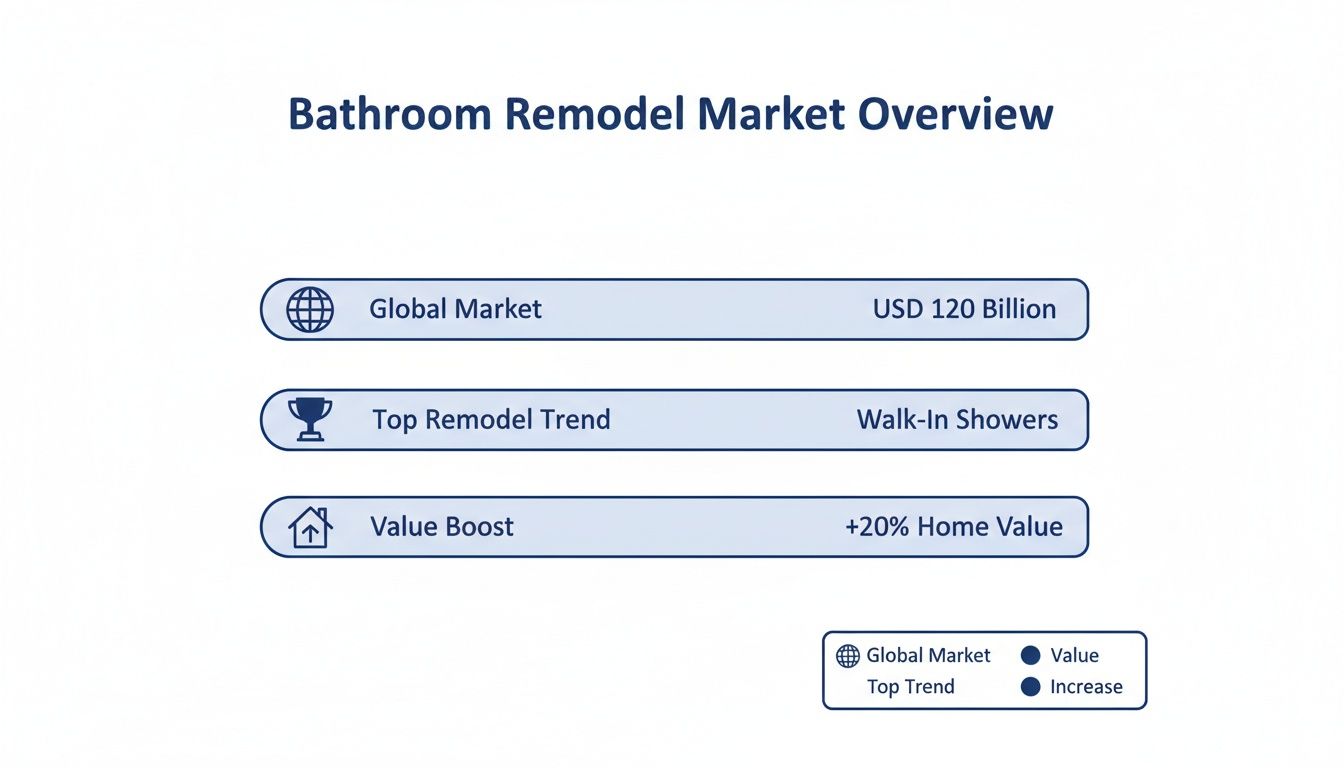
As you can see, swapping that old tub for a modern shower isn't just about looks. It's an investment in your safety, daily comfort, and your home's overall value.
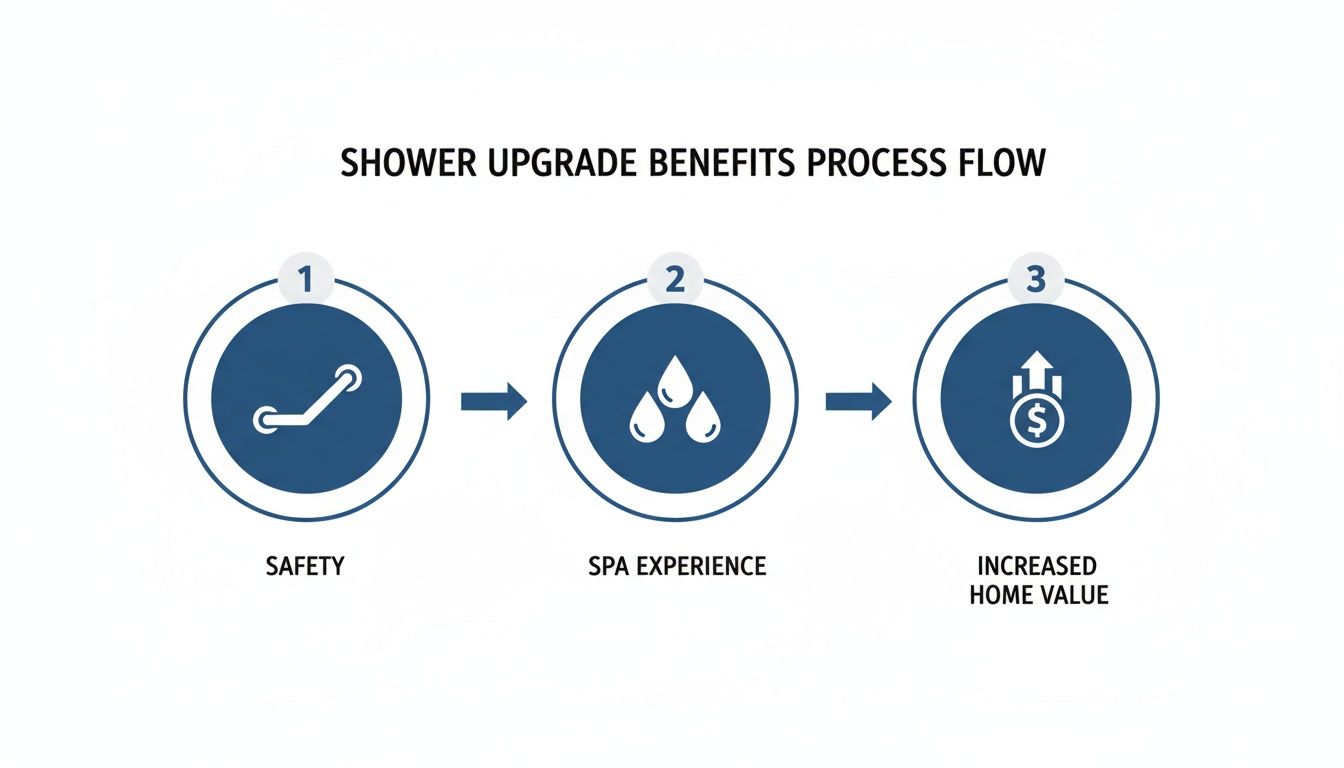
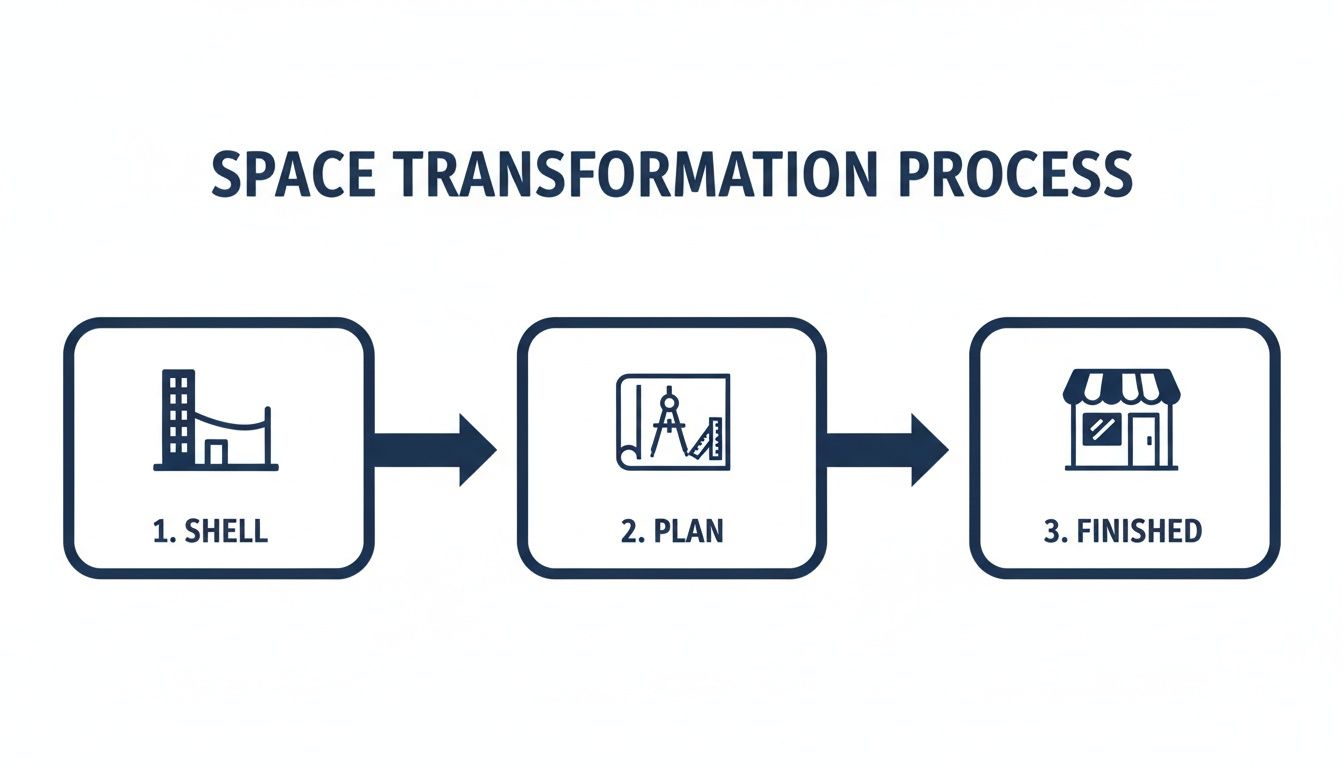
A process flow diagram illustrating three benefits of a shower upgrade: safety, spa experience, and increased home value.

This is why a well-executed shower conversion is one of the smartest updates you can make—it improves your life now and pays off later.

The Initial On-Site Consultation

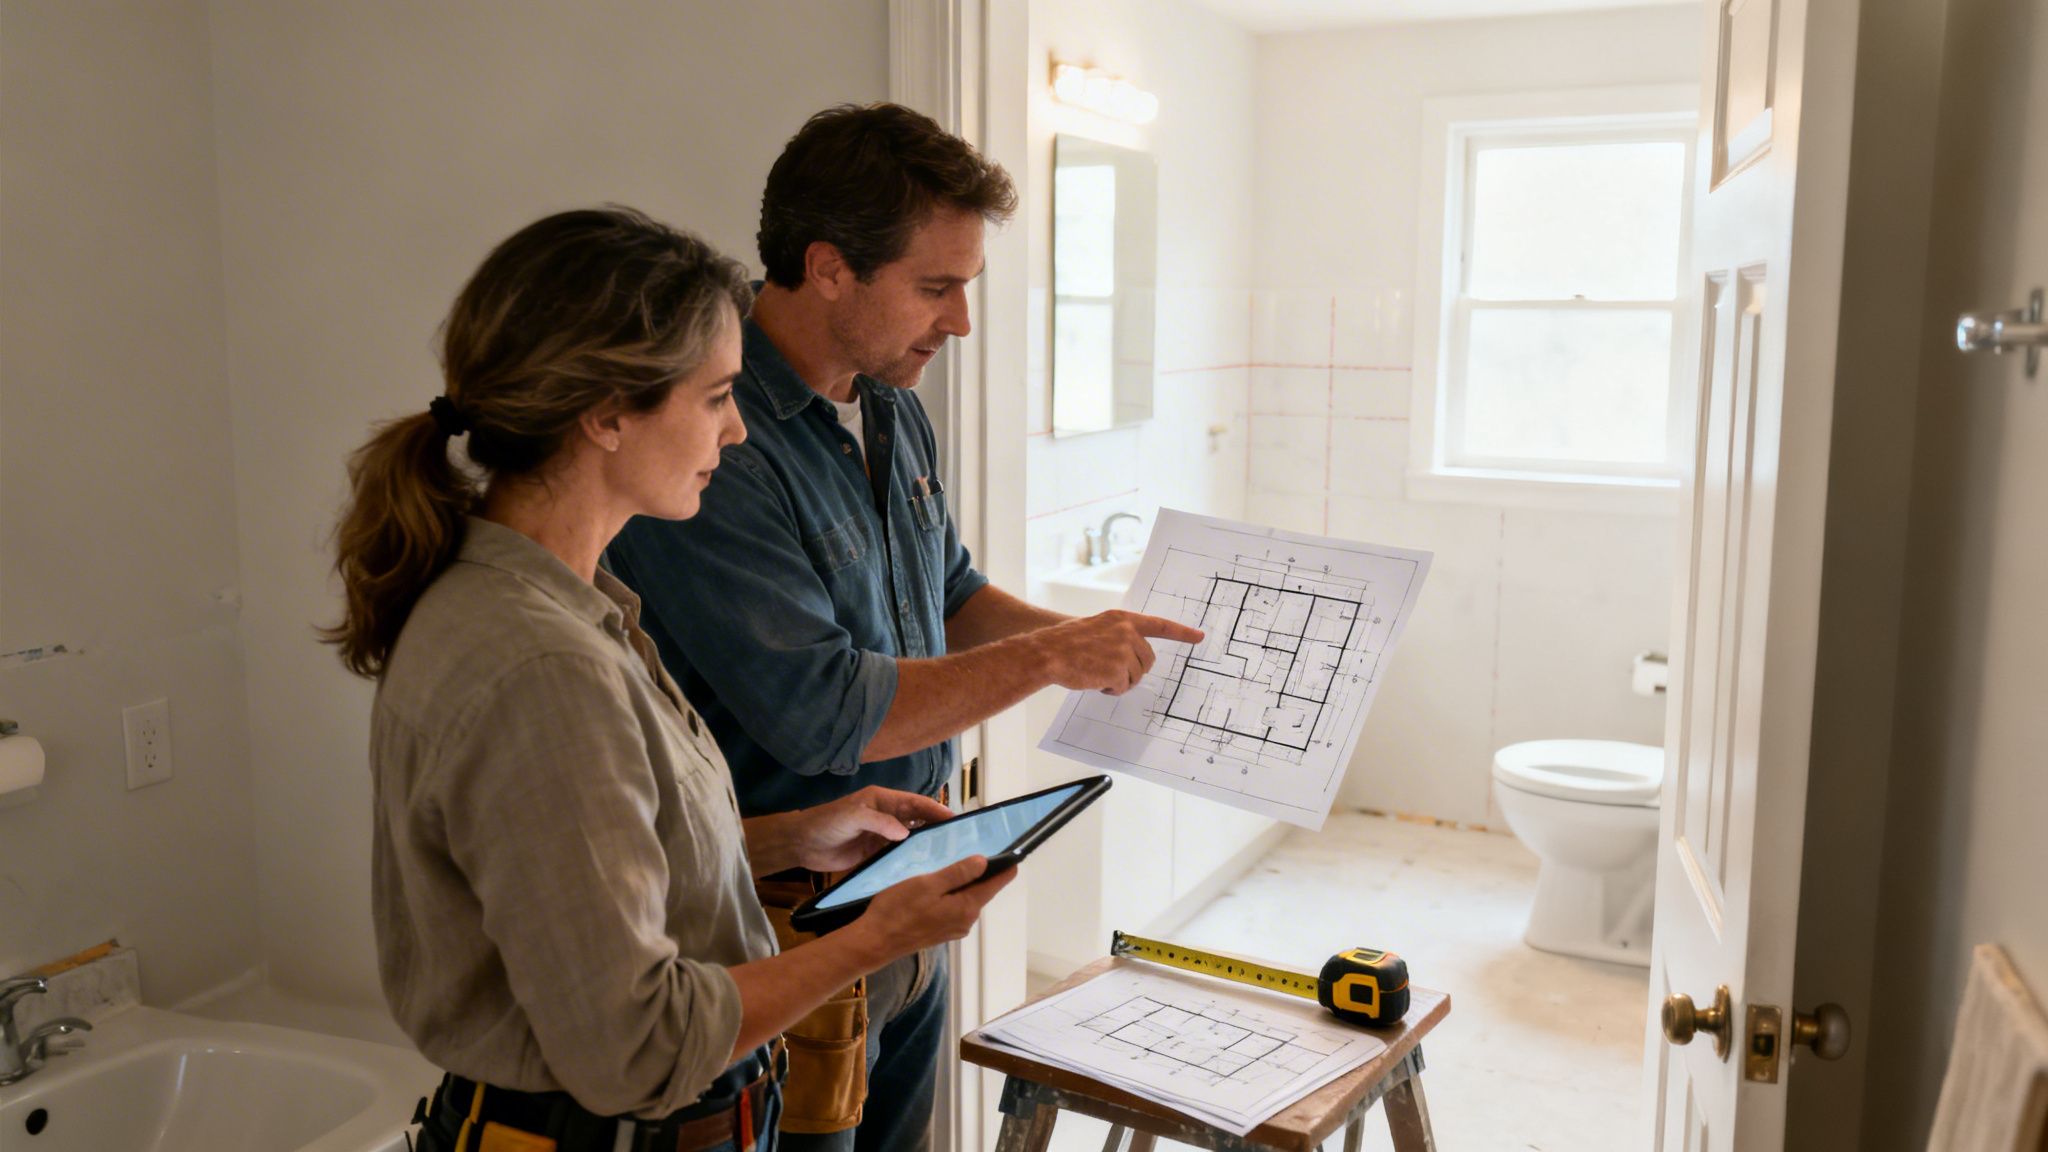
Every great remodel starts with a simple conversation. We'll come to your property, whether you're in Seattle, Tacoma, or anywhere in between, to see the space for ourselves. This is our chance to listen to what you want, measure everything up, and get a feel for what’s possible.

This in-person meeting is non-negotiable for us. It’s where we figure out the important stuff:

  • Your Vision: Are you aiming for a spa-like retreat with all the bells and whistles, or is the main goal a safe, accessible walk-in shower for a tenant or family member?
  • The Reality: We’ll take a hard look at your current tub, the walls, and where the plumbing is located to spot any potential curveballs early on.
  • First Ideas: We can start brainstorming materials, fixtures, and finishes that match your style and make sense for your budget.

This first step is all about getting on the same page so our proposal is spot-on. It lays the groundwork for a project that runs smoothly from demolition to final polish. If you're looking for more tips on how to prepare, check out our comprehensive guide to bathroom remodel planning.

Demolition and Plumbing Adjustments

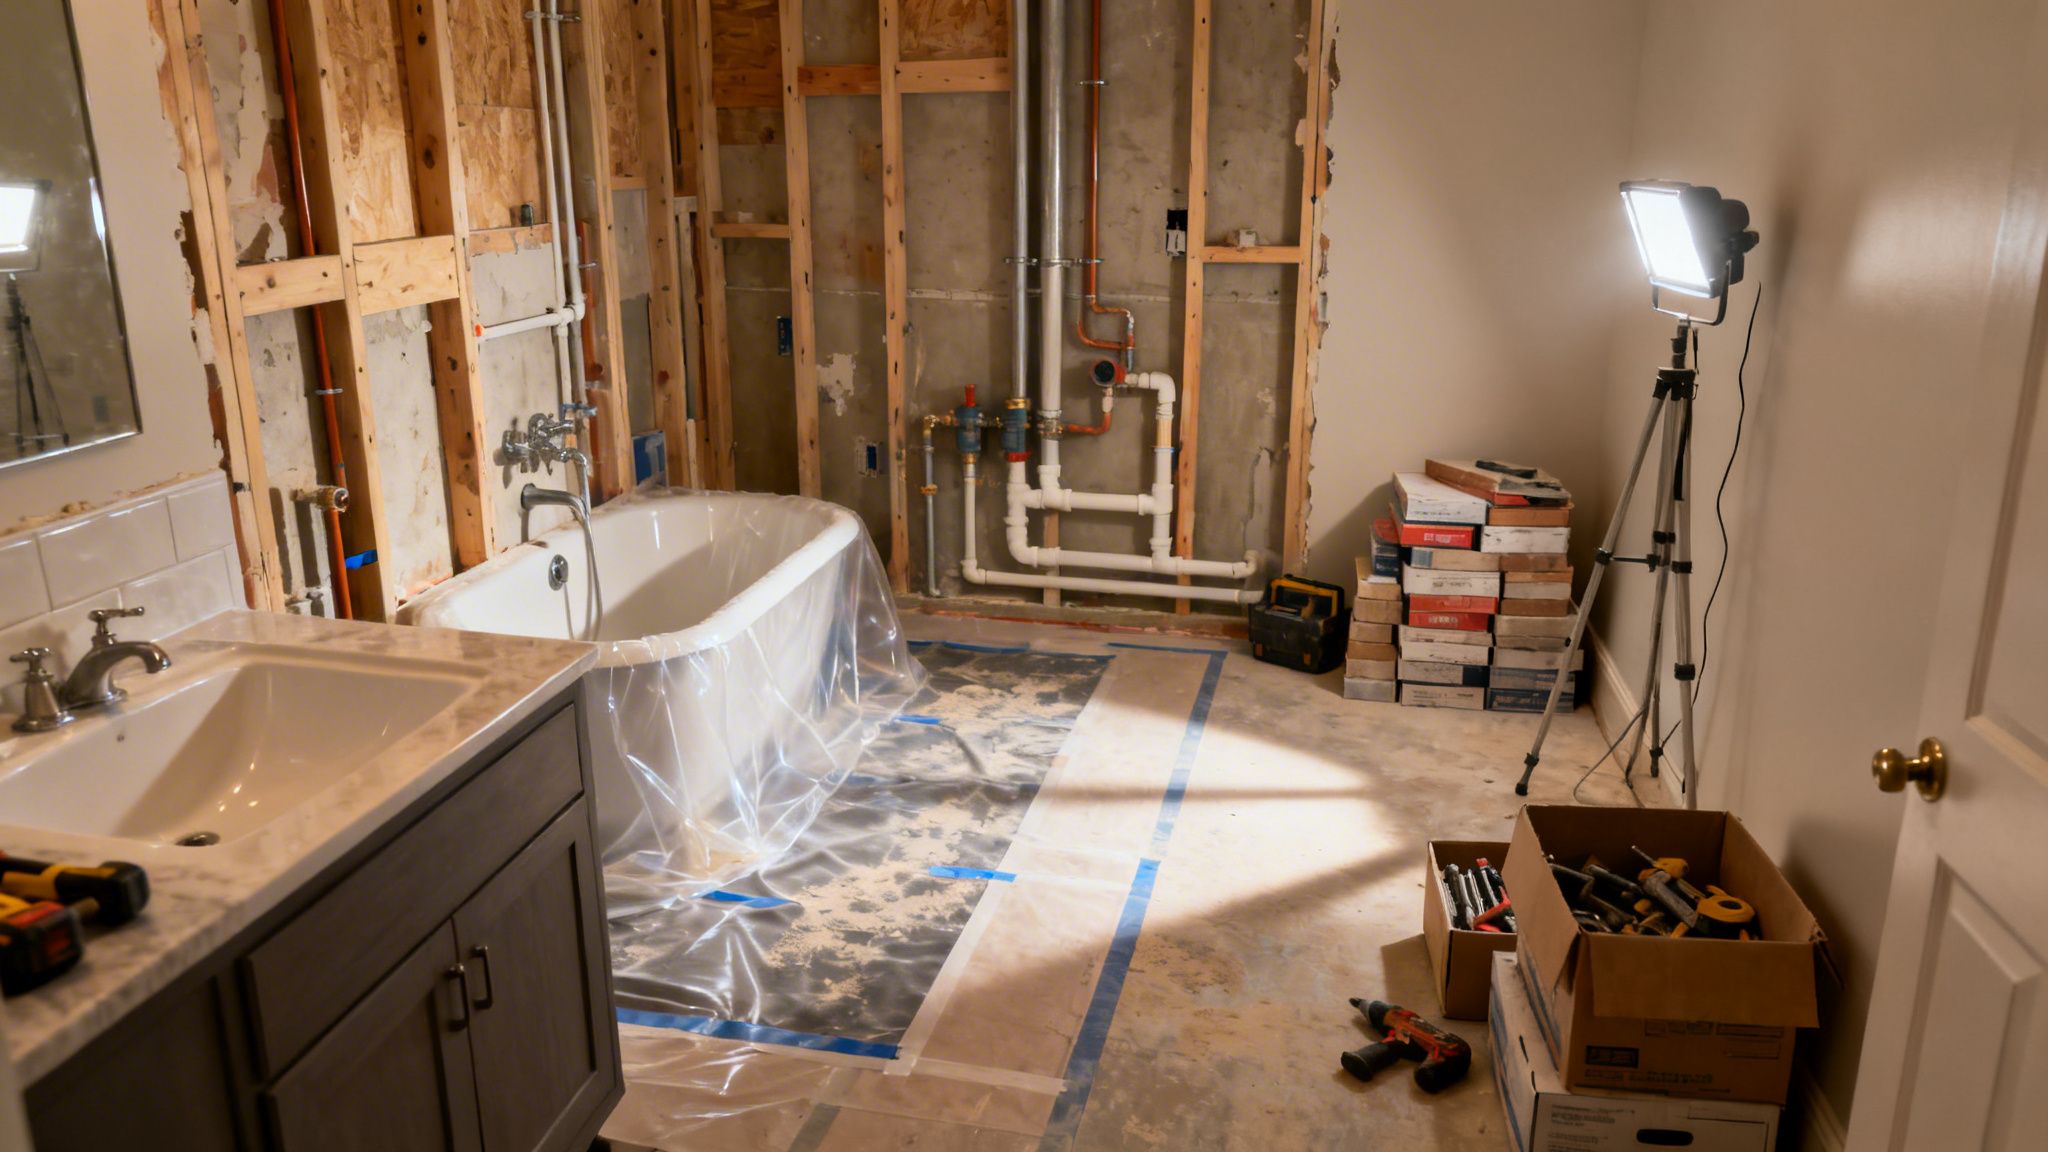
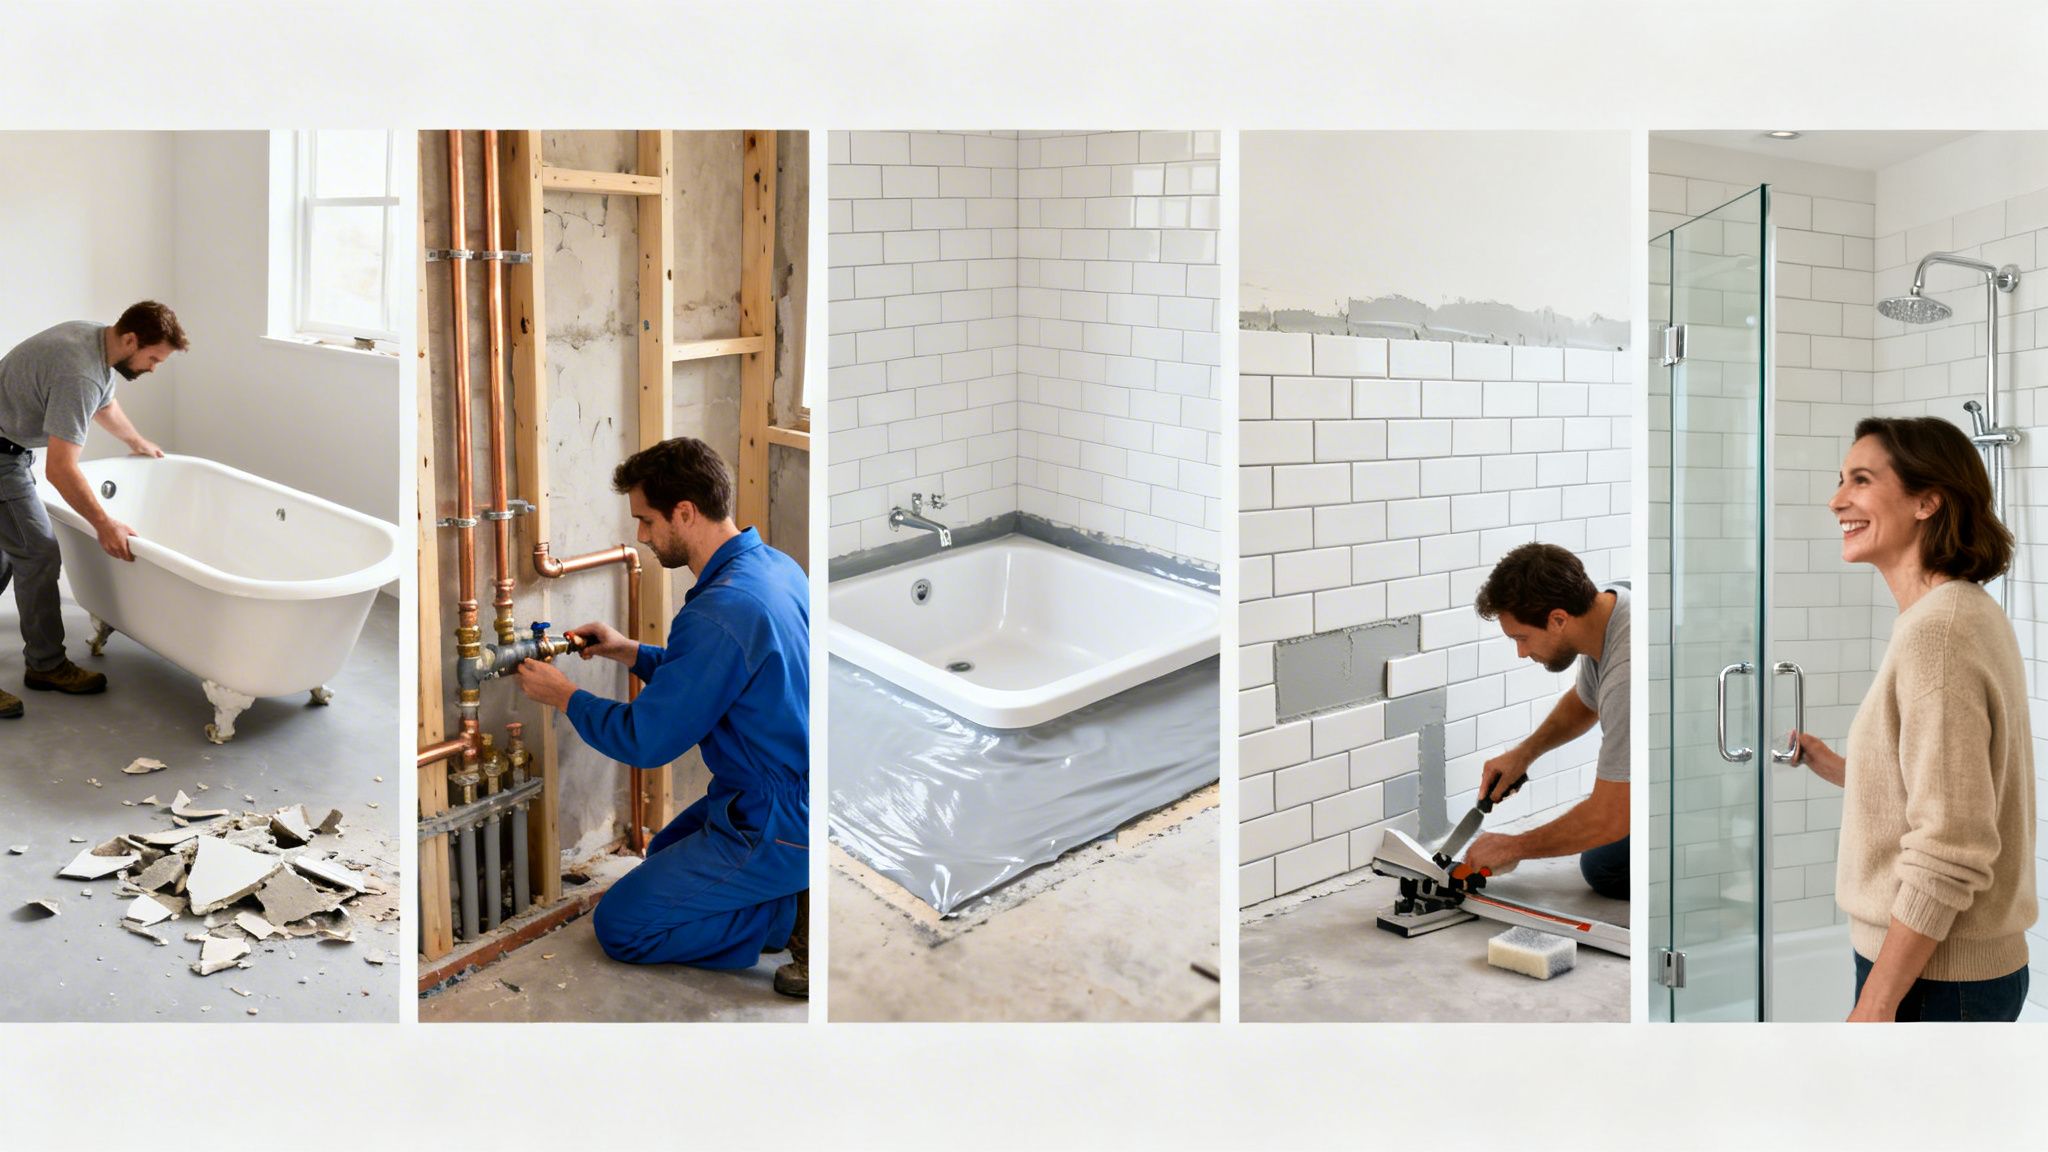
With a solid plan in hand, it's time to get to work. First things first: demolition. Our crew is meticulous about protecting your home. We seal off the bathroom to keep dust contained, then carefully remove the old tub, tile, and fixtures.

This is also where the real technical work begins. It’s almost a guarantee that the plumbing will need to be adjusted. The drain for a bathtub almost never lines up with where a new shower drain needs to go. As a licensed and insured contractor, we handle all the necessary plumbing work to ensure your new shower drains perfectly and is built to last.

A common DIY mistake we're often called in to fix is underestimating the plumbing. It’s not just about connecting a new drain. It's about getting the slope just right and tying it into the shower pan flawlessly. Get this wrong, and you’re setting yourself up for a leak that requires expensive floor repairs and replacements.

Waterproofing: The Most Important Step

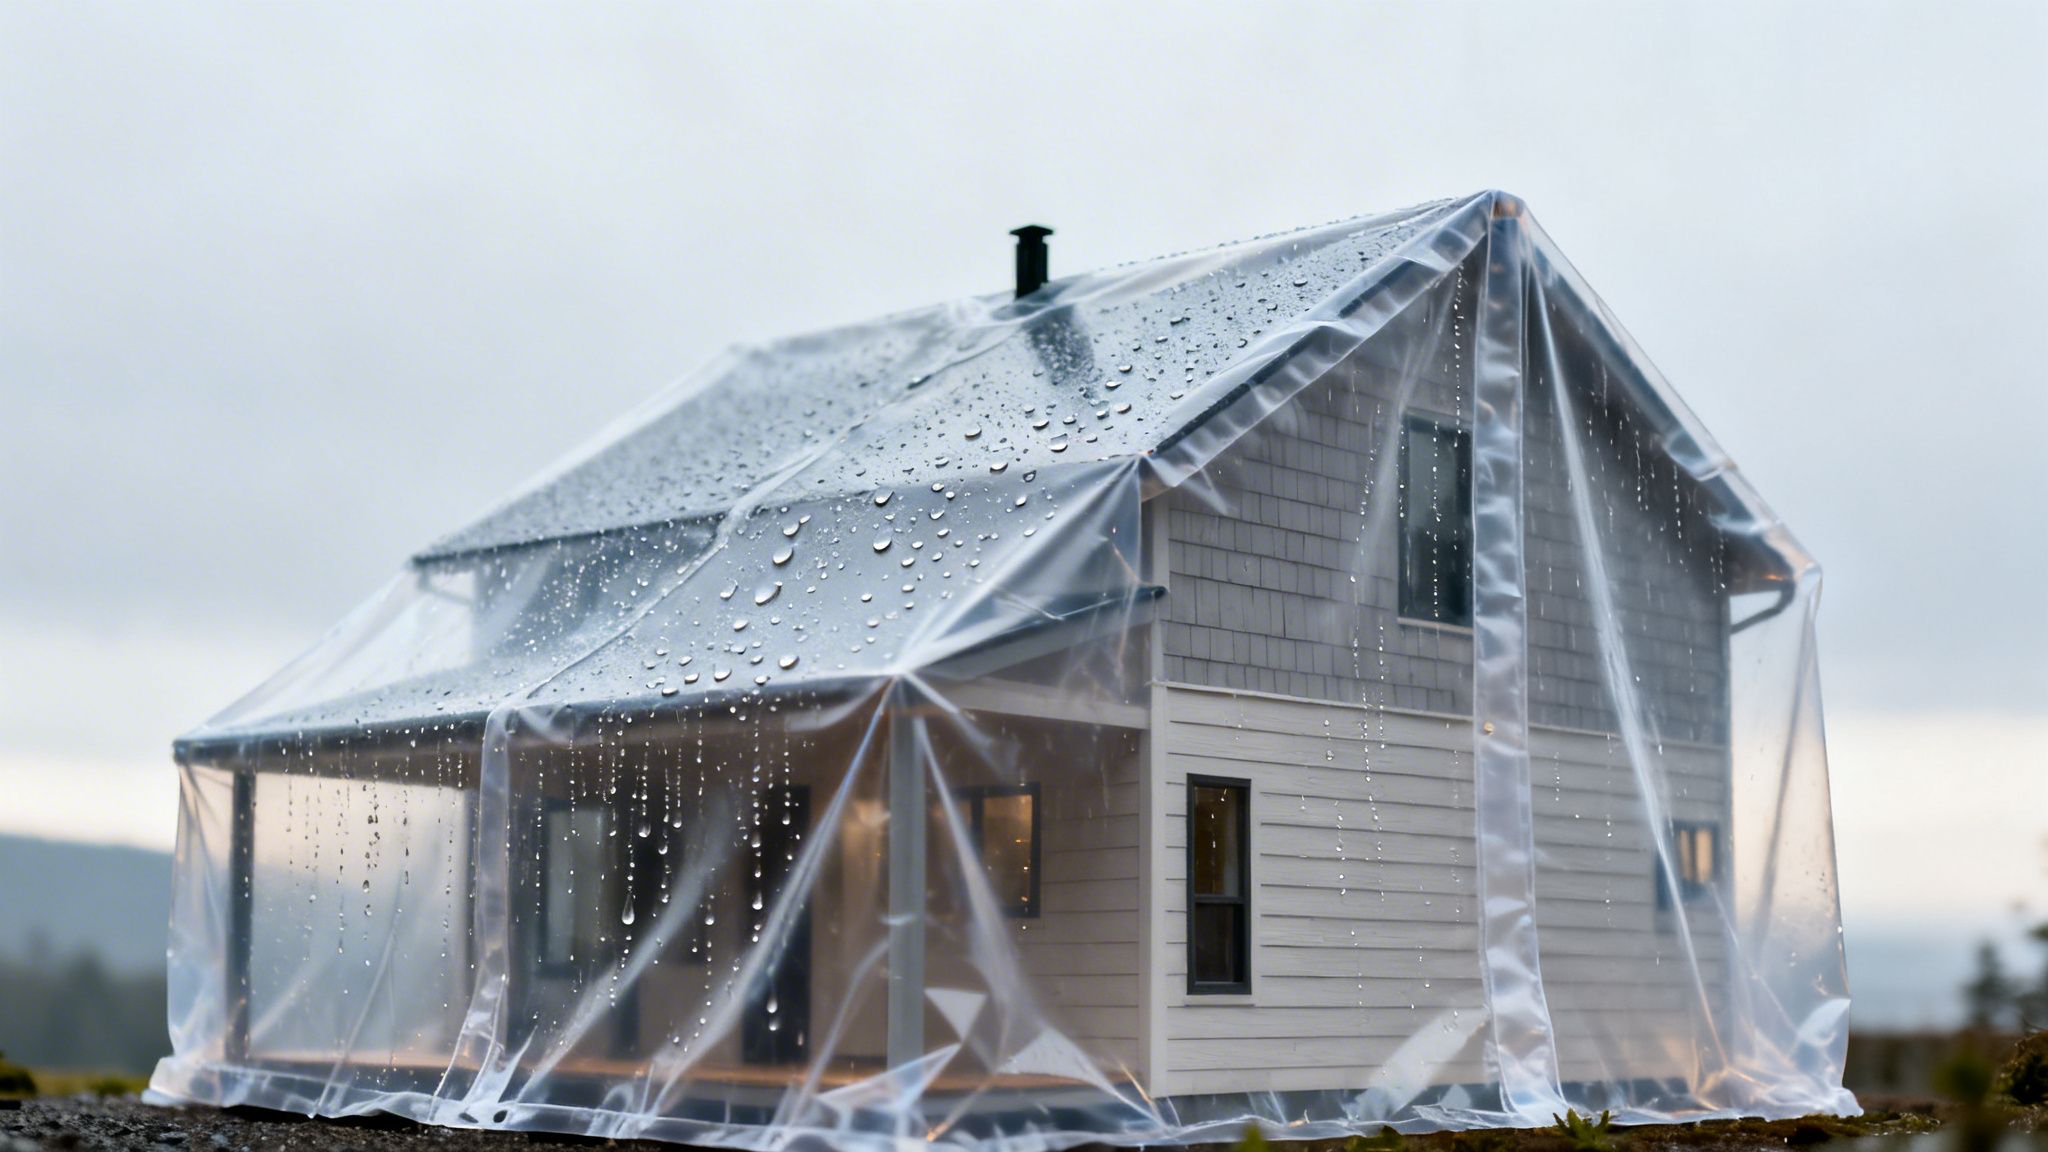
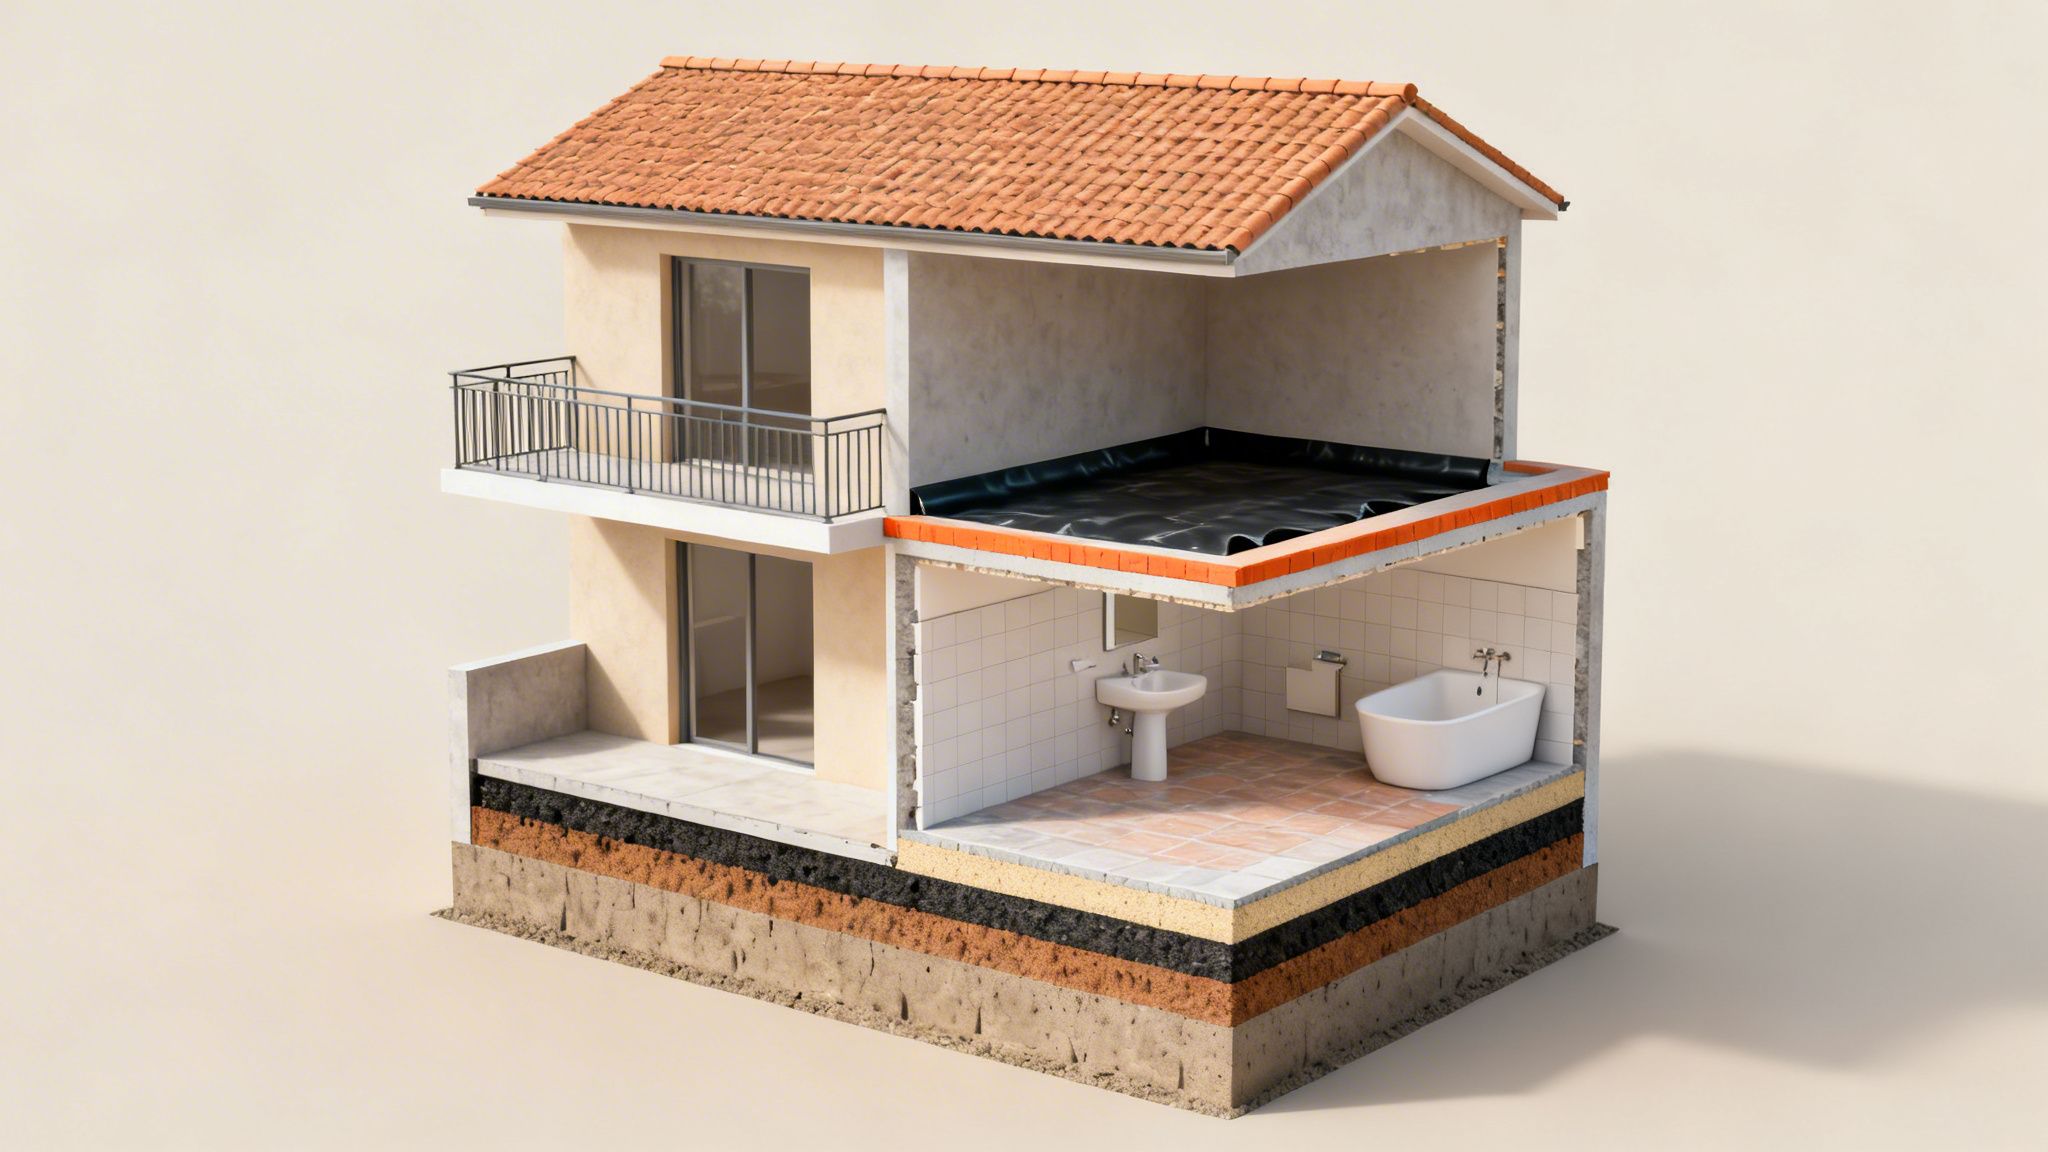
If there's one stage you absolutely cannot cut corners on, it's this one. Proper waterproofing is the only thing standing between your new shower and a slow, hidden leak that can cause thousands in structural damage and mold. We are obsessive about getting this right.

Our multi-layered approach ensures your shower is completely watertight:

  1. Solid Foundation: We start by inspecting the studs and subfloor. If we find any old water damage, we'll make any necessary floor repairs or replacements to ensure we're building on a solid, clean surface. This may involve wood and tile floor work.
  2. Waterproof Barrier: Next, we install a top-of-the-line waterproof membrane over the shower walls and floor. This creates a continuous, sealed envelope.
  3. Meticulous Sealing: Every single corner, seam, and hole for plumbing fixtures is carefully sealed. There can be no weak points.

This fanatical focus on building a leak-proof shower is what sets a professional job apart. It's the only way to guarantee your investment will look great and function perfectly for decades. As the global bathroom remodeling market continues to grow—projected to hit USD 615.6 billion by 2036—it’s clear that property owners are prioritizing functional, durable upgrades like this.

Navigating Seattle Area Permits And Building Codes

Let's talk about the part of a renovation that makes most property owners groan: permits. For a bath-to-shower conversion, the question we hear all the time is, "Do I really need one?" In the Seattle, Tacoma, and Kent areas, the straightforward, safe answer is yes, you almost certainly do.

It might feel like a simple swap, but this residential remodeling project dives deep into your home's critical systems—plumbing, electrical, and sometimes structural elements. A permit isn't just red tape; it's your assurance that the work is being done correctly and inspected by a third party. It’s the best defense you have against future disasters like hidden leaks, mold growth, or faulty wiring.

So, When Exactly Is a Permit Required?

In the Puget Sound region, the rules are pretty clear. Any time you alter your plumbing or electrical systems, the city wants to know about it. A tub-to-shower conversion hits these triggers every time.

You'll need a permit if your project involves:

  • Moving the drain. A tub drain is in a completely different spot than a shower drain. Relocating it is a non-negotiable part of the job and requires a permit.
  • Altering water supply lines. We’ll need to adjust the pipes to accommodate the new shower valve and head at the correct height, which is considered a system alteration.
  • Adding new electrical work. Planning on adding beautiful recessed lighting, a quiet exhaust fan, or maybe even luxurious heated floors? That requires an electrical permit.
  • Changing the bathroom's footprint. If you’re moving a wall to make that shower a bit bigger, a building permit is standard procedure.

Honestly, this is where a trusted local provider earns their keep. As a residential contractor near you, Wheeler Painting takes all the permit paperwork and coordination off your plate. We deal directly with the building departments in Seattle, Tacoma, and Kent so you don't have to. It's just part of doing the job right from the start.

Key Codes an Inspector Will Scrutinize

Building codes are not just suggestions—they are the minimum legal standard for safety and durability. While our team manages all the technical details, it helps to know what inspectors are looking for when they show up.

From our experience, here are the things they zero in on:

  • Waterproofing: This is the big one. An inspector will look for a continuous, unbroken waterproof membrane behind your tile and across the shower floor. One small mistake here can lead to a catastrophic failure down the road.
  • Shower Floor Slope: The floor can't be flat. It needs a precise slope, typically between 1/4 and 1/2 inch per foot, to guide every drop of water toward the drain. No pooling allowed.
  • Plumbing Vents: Your new shower drain needs to be properly vented. This is what allows it to drain quickly and prevents unpleasant sewer gases from entering your home.
  • Accessibility (ADA) Standards: If your design includes features like grab bars or a curbless, zero-threshold entry, they have to be done right. This means installing proper wood blocking inside the walls for support before the tile goes up, ensuring everything is secure and meets strict code requirements.

Navigating these rules is a core part of our expertise. When you work with Wheeler Painting, you can rest easy knowing your beautiful new shower is not only up to code but built to last for decades.

Choosing The Right Shower Materials For Your Home

Okay, this is where the fun really begins. After all the planning and measuring, you finally get to decide what your new shower will actually look like and feel like. This is the step where your vision starts becoming a reality.

The sheer number of choices can feel overwhelming, we get it. From the shower floor to the walls and fixtures, every decision matters. As a contractor who helps homeowners and property managers in the Seattle and Tacoma areas with these projects every day, our job is to cut through the noise. Let's break down the most common options so you can find that perfect sweet spot between style, budget, and long-term upkeep.
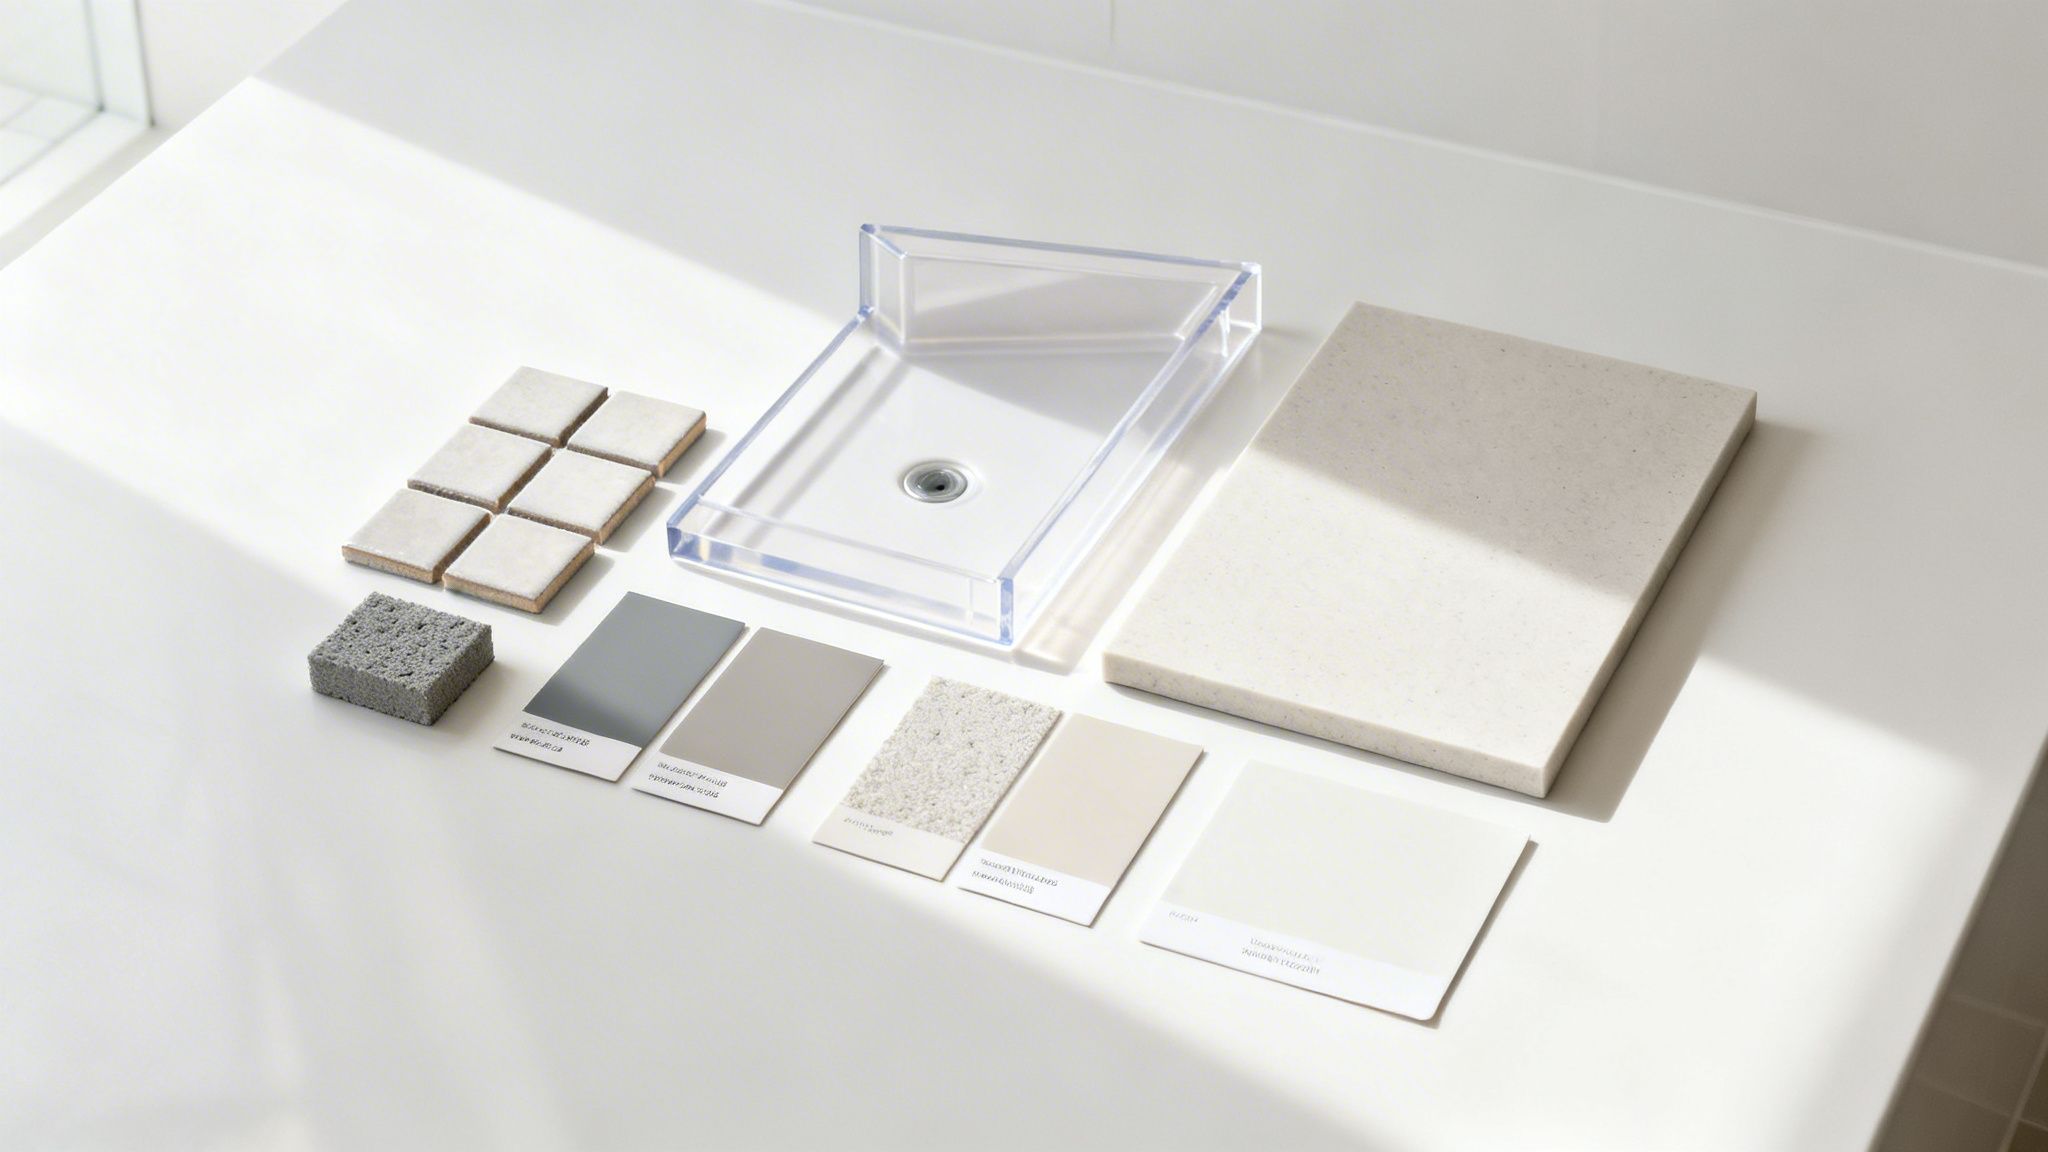
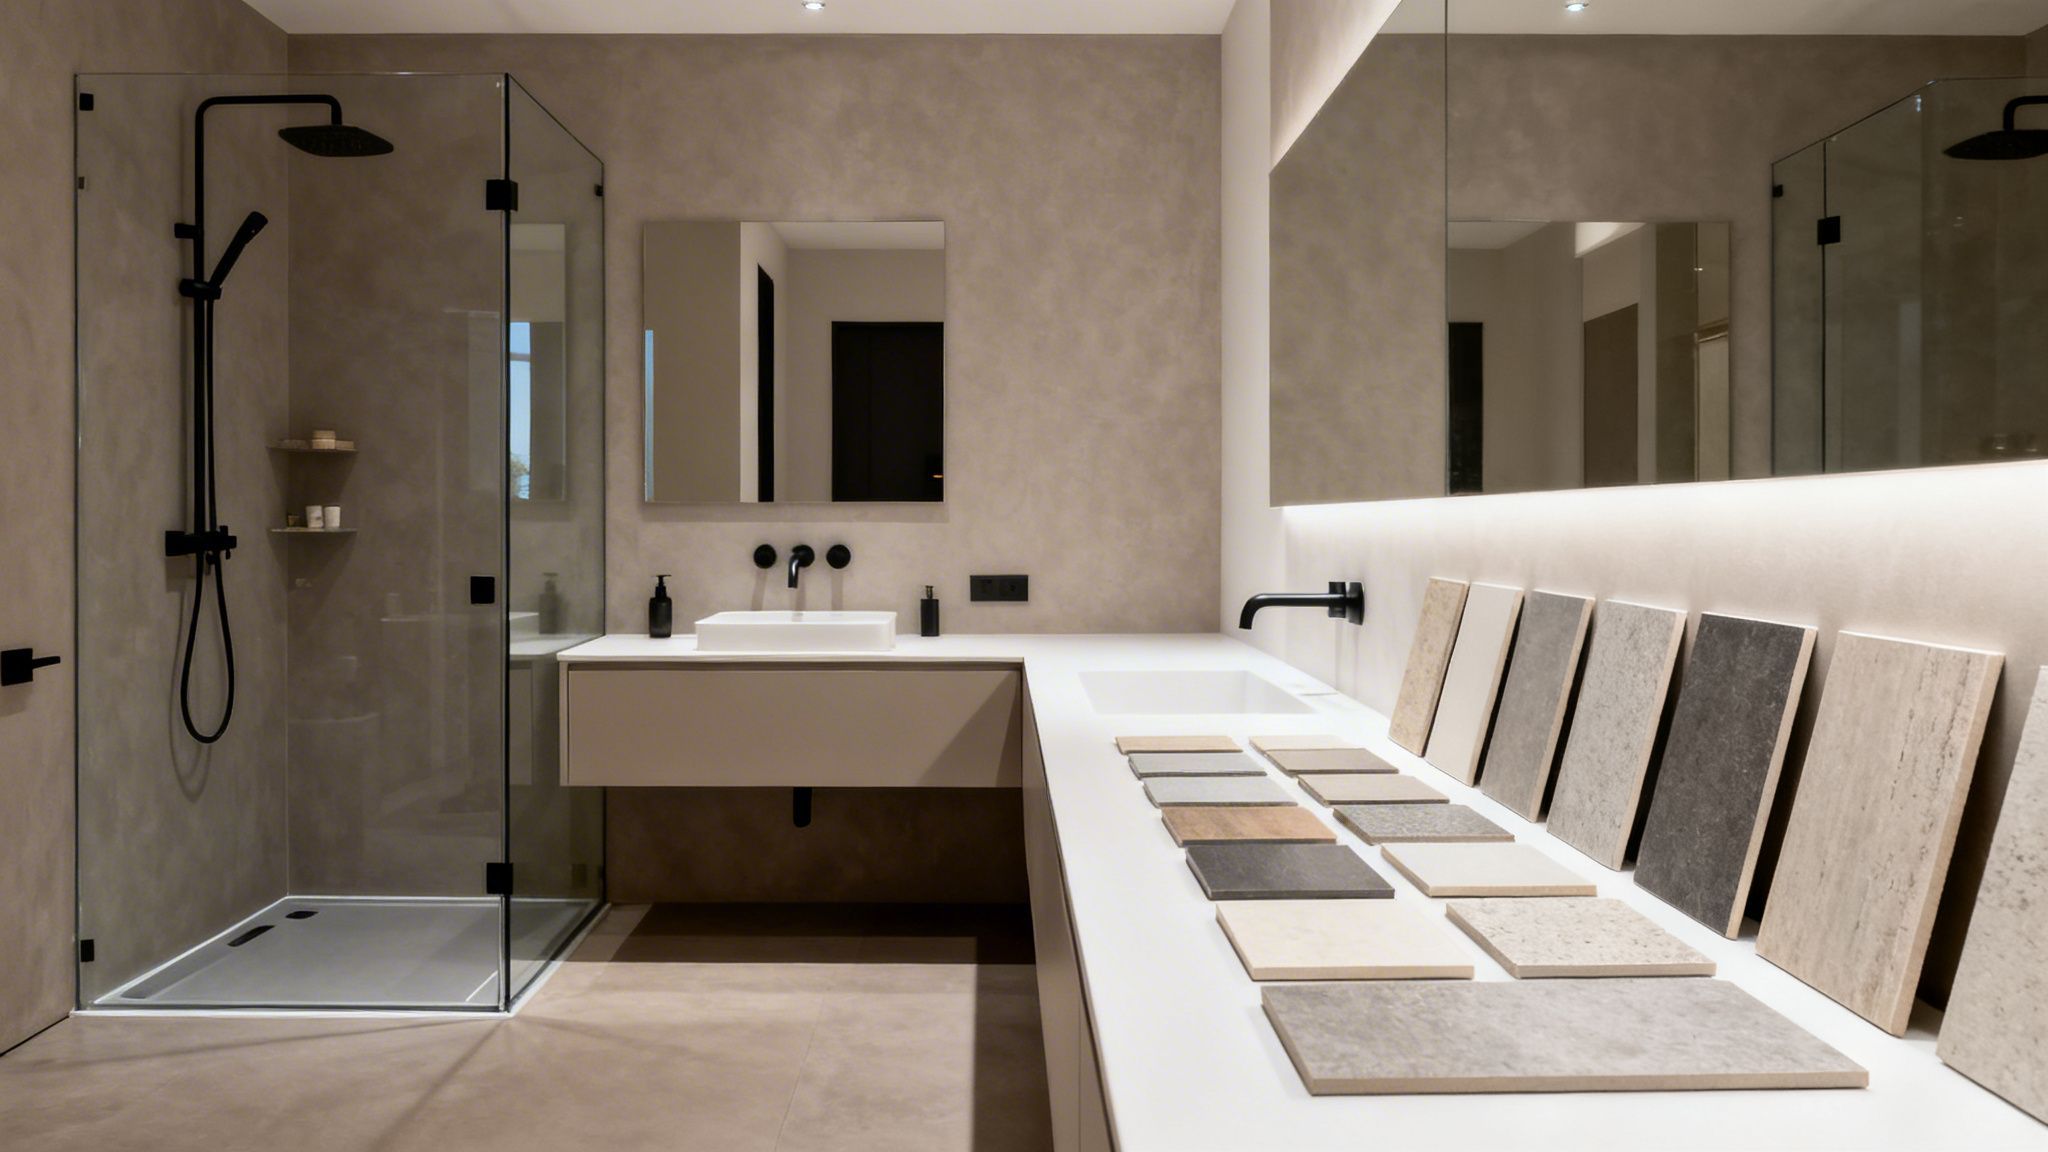
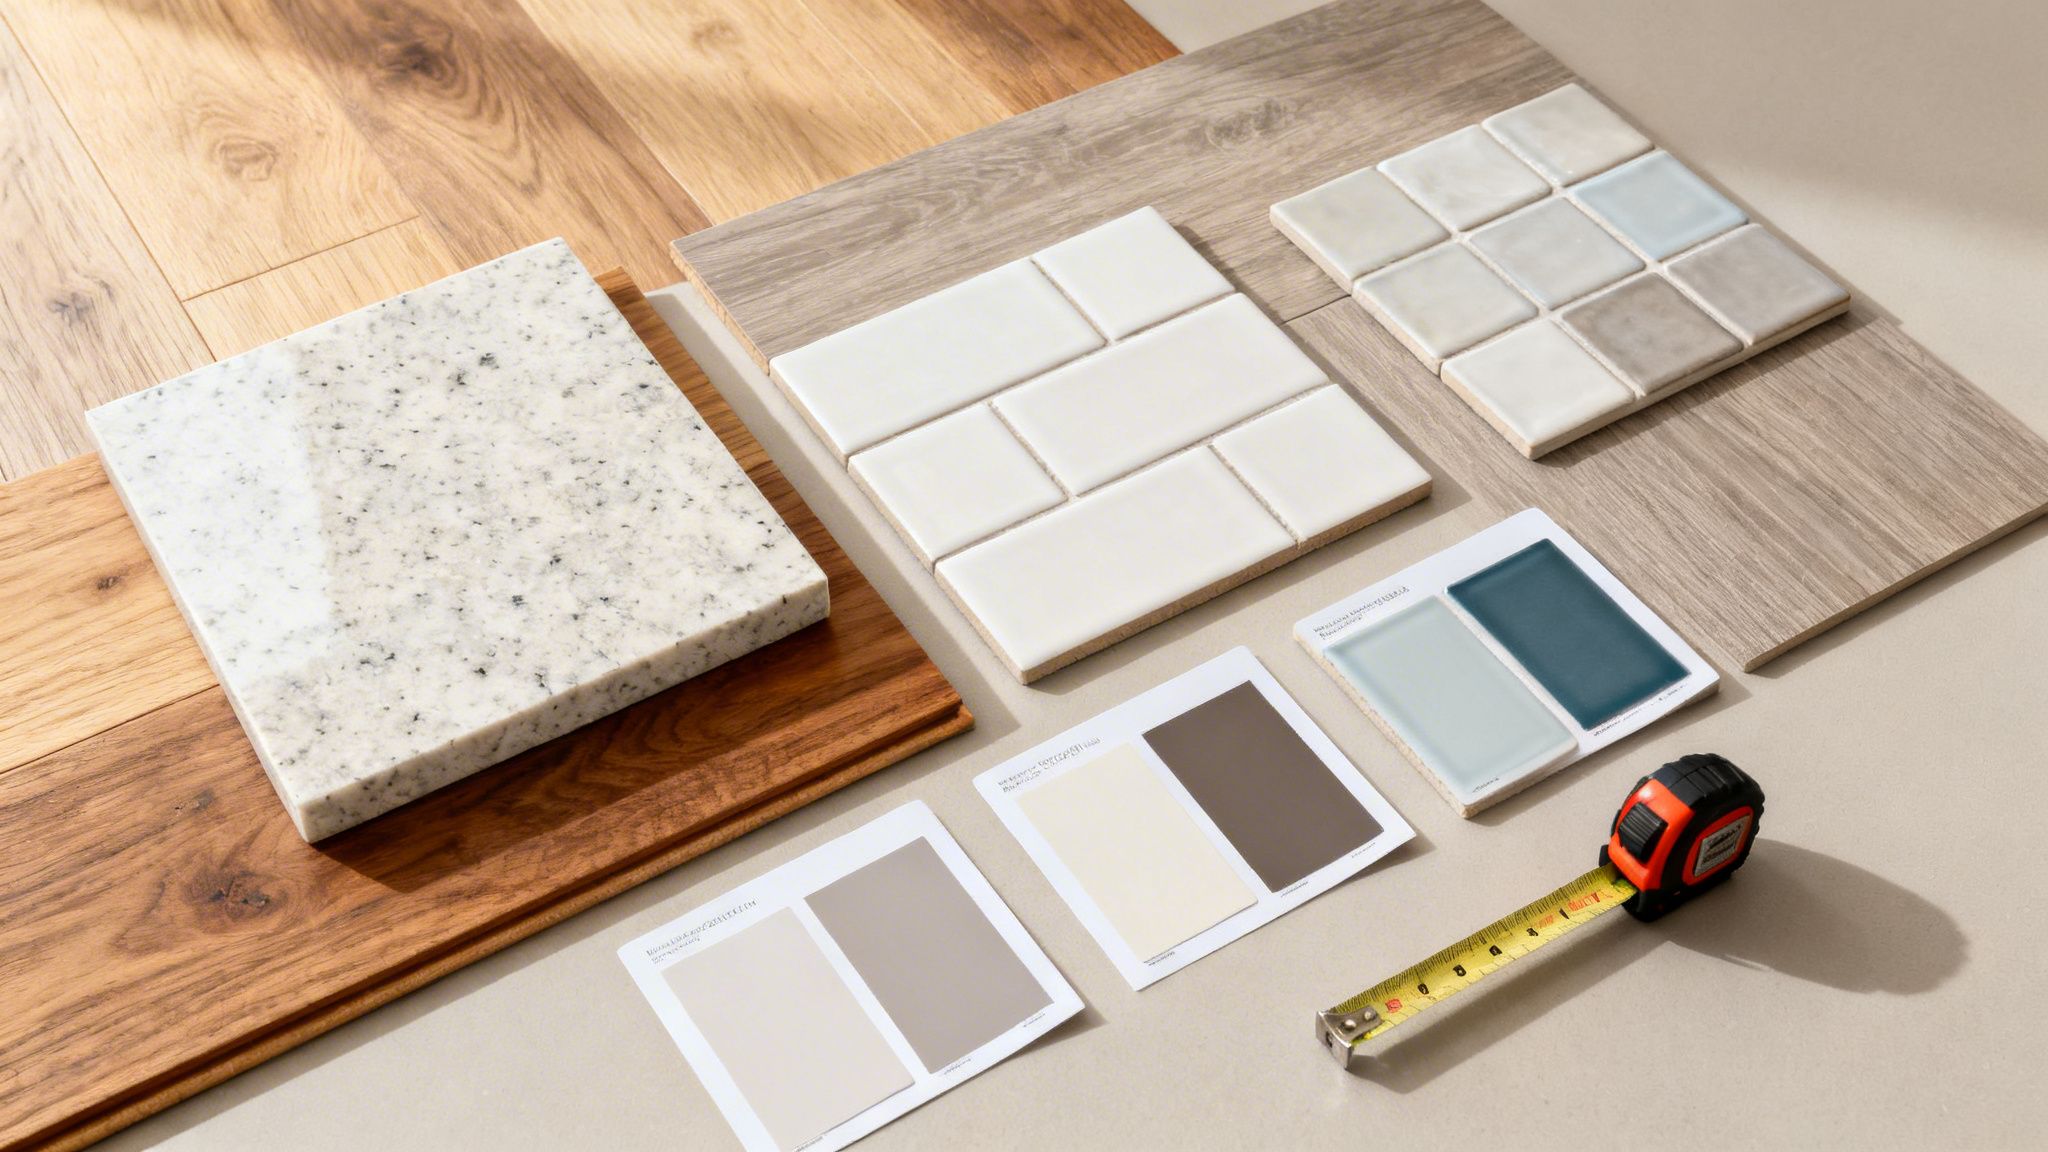
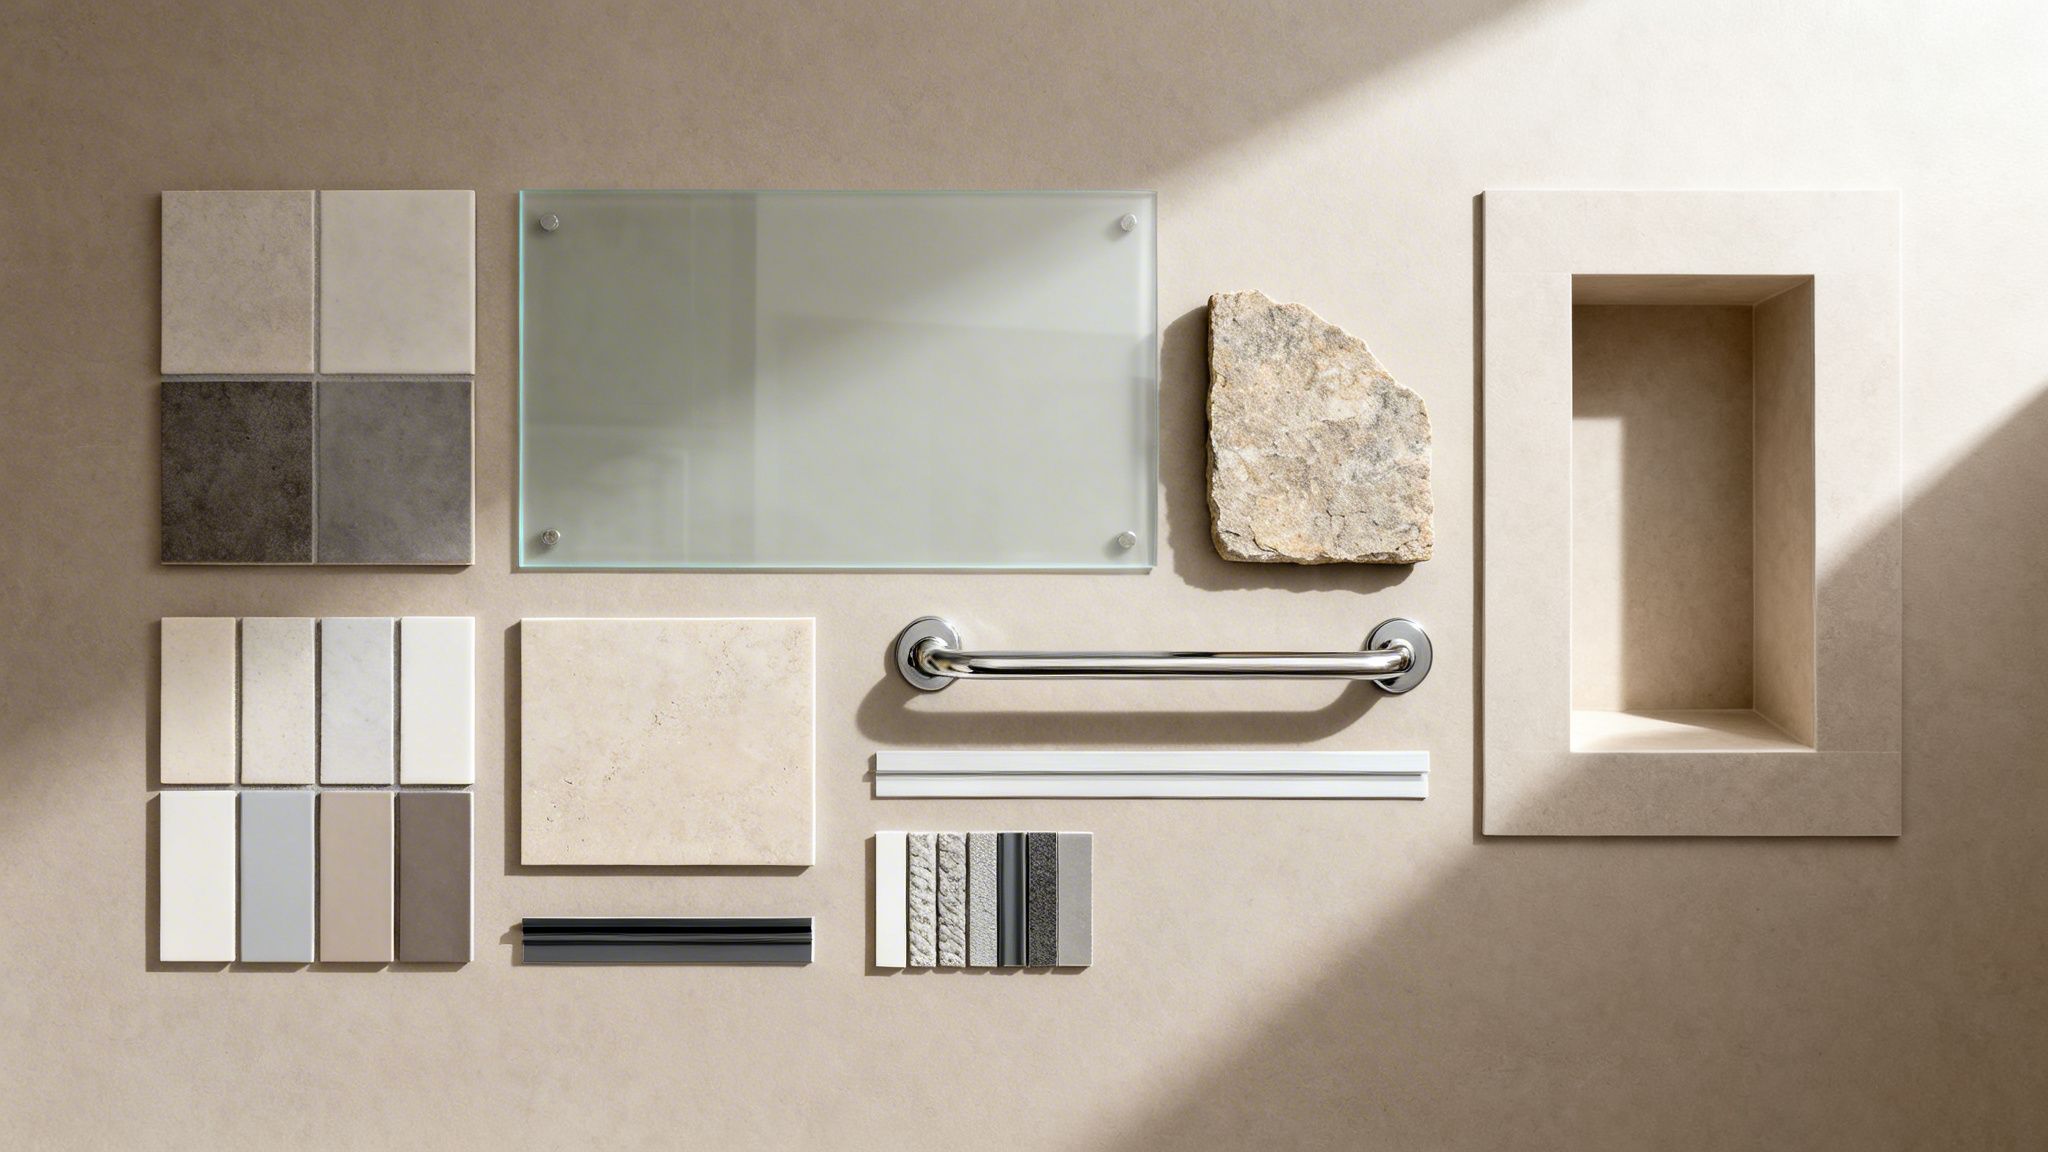
Various bathroom design samples, including tiles, color swatches, and a clear shower pan model.

Shower Floor Showdown: Custom Tile vs. Prefabricated Base

The very foundation of your shower is its base, or what we call the pan. It's the first thing you step onto, and it's a huge factor in both aesthetics and performance. You really have two main roads you can go down: a custom-tiled floor or a single-piece prefabricated base.

A custom-tiled shower floor gives you total creative control. Want a specific mosaic pattern or a color that perfectly matches your vanity? Tile makes it possible. This is the go-to for unique shower footprints or for anyone wanting a high-end, spa-like finish.

The trade-off, of course, is grout. Lots of it. Even with modern grouts, those lines are a magnet for grime and mildew, especially here in our damp Puget Sound climate. They simply require more consistent cleaning and facility maintenance.

If you’d rather skip the scrubbing, a prefabricated shower base is a fantastic option. Usually made of durable acrylic or fiberglass, these pans are a single, seamless piece. No grout lines means less cleaning and a significantly lower chance of leaks down the road. They’re also quicker and more cost-effective to install, which is a big win for many projects. The only real downside is that you’re limited to standard sizes and a handful of colors.

The decision you make on the shower floor sets the stage for the rest of the build. A custom tile pan involves a complex, multi-layered waterproofing process that takes time and skill. A prefab base streamlines everything. We always make sure our clients understand the maintenance side of things so they love their shower just as much five years from now.

Shower Walls: Classic Tile vs. Modern Solid Surface Panels

With the floor decided, let’s look up at the walls. Just like the base, your main options are traditional tile or the more contemporary solid surface panels.

Tiled walls are timeless for a reason. They offer the same limitless design freedom as a tiled floor, letting you create custom accent niches, borders, and patterns that are uniquely yours. For a lot of people, nothing beats the authentic, handcrafted look of real tile. But again, you have to be prepared for the reality of maintaining all those grout lines.

Lately, we've seen a huge surge in the popularity of solid surface panels. These are large, grout-free sheets made from materials like engineered stone or advanced composites. They create a sleek, modern aesthetic that is ridiculously easy to clean—a quick wipe-down is all it takes. Because they're 100% non-porous, they're also bulletproof when it comes to water protection.

While some worry they won't have the character of tile, today's high-quality panels do an amazing job of mimicking natural stone and other textures. To get a better feel for it, you can play around with AI bathroom design tools to see how different materials would look in your actual space before committing.

Use this table to weigh the key differences between common shower materials and find the perfect match for your bathroom remodel.

Comparing Shower Base And Wall Materials

Feature Custom Tiled Shower Prefabricated Base Solid Surface Panel System
Aesthetics Unlimited design freedom; classic, high-end look. Limited to standard sizes and colors; functional look. Sleek and modern; can mimic stone but less variety than tile.
Maintenance High. Requires regular grout cleaning to prevent mildew/stains. Low. Seamless, non-porous surface is easy to wipe clean. Low. No grout lines; a simple wipe-down is sufficient.
Cost Higher. Labor-intensive installation drives up the price. Lower. Cost-effective materials and faster installation. Mid-to-High. Varies by brand but typically between tile and prefab.
Durability Very durable if installed correctly, but grout is a weak point. Extremely durable and leak-resistant due to one-piece design. Highly durable and 100% waterproof; resistant to chips/stains.

Ultimately, choosing the right material comes down to a personal balance of what you want your shower to look like versus how much time you want to spend cleaning it.

Key Material Considerations

Thinking about the big picture, here’s what you should be weighing:

  • Aesthetics: Are you dreaming of a one-of-a-kind design that only tile can provide, or do you prefer the clean, minimalist look of solid panels?
  • Maintenance: How do you feel about cleaning grout? Be honest with yourself! A low-maintenance surface might be a better fit for a busy household or a rental property.
  • Budget: Custom tile work is a significant investment in skilled labor. Prefabricated and panel systems can often stretch your budget further.
  • Durability: Both tile and panels are built to last, but only if installed correctly. The real key to longevity is what’s behind the walls. A bulletproof waterproofing system is non-negotiable. You can read up on our approach and learn more about what waterproofing in construction involves.

At the end of the day, the best materials for your bath to shower conversion are the ones that fit your lifestyle and your vision for your Kent-area home. Our role is to present the options clearly and provide the expert installation to make it happen.

Finishing Your Shower With Fixtures And Doors

Now for the fun part. The demolition is done, the plumbing is set, and the waterproofing is solid. It's time to choose the finishing touches that really bring your new shower to life: the doors and fixtures.

This is where your personal style gets to shine. Think of these elements as the jewelry of your bathroom—they define the look, feel, and daily function of the space. A bath to shower conversion isn't just about swapping a tub for a pan; it's about creating a space you love to use every day.
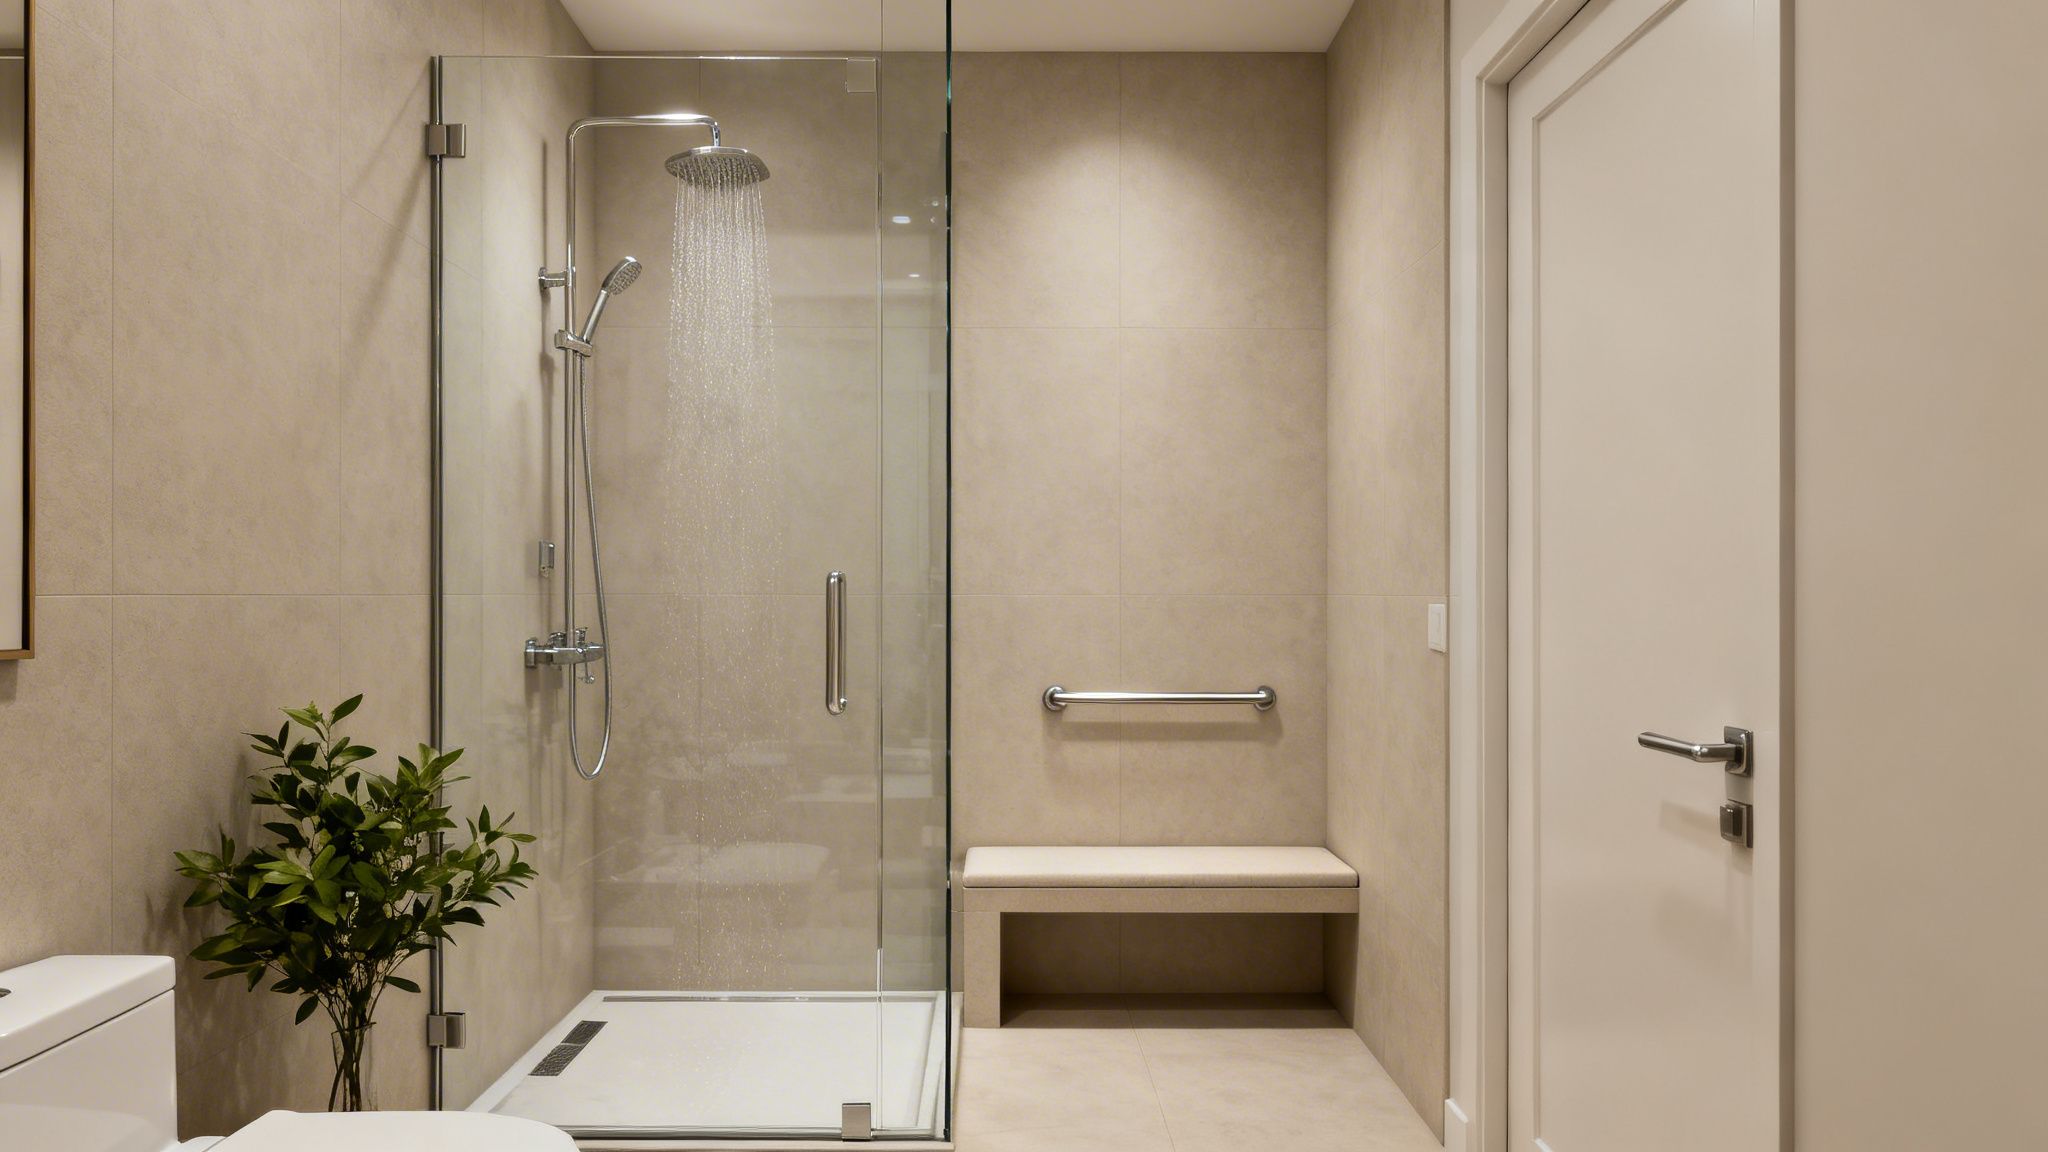
A clean, modern bathroom with a walk-in shower, a built-in bench, a grab bar, and a plant.

These final decisions are anything but minor. They determine how you start your morning, how easy the shower is to clean, and how the entire bathroom feels. A frameless glass door can make a tight space feel huge, while the right showerhead can feel like a daily trip to the spa. Let's walk through the options we see most often in Puget Sound homes.

Choosing the Perfect Shower Door

Your shower door is a major design element that also needs to be incredibly practical. The right choice depends on your bathroom's layout, your budget, and the look you're going for.

  • Frameless Glass Doors: This is the top choice for a reason. By eliminating the metal frame, you get a clean, minimalist look that makes the whole bathroom feel bigger and brighter. It’s the perfect way to show off that beautiful new tile you just installed.
  • Semi-Frameless Doors: A fantastic compromise. These doors give you a very clean look that’s similar to a frameless model but at a more accessible price point. They typically have minimal framing around the perimeter, but the door panel itself is clean glass.
  • Sliding Doors: If your bathroom layout is tight and a swinging door would hit the toilet or vanity, sliders are the solution. We've seen a huge rise in modern "barn door" style sliders, which look much more high-end than the old-school tracked doors you might be picturing.
  • No Door (Open Concept): A true walk-in shower is the peak of luxury and accessibility. Just be aware that it can make for a chillier shower experience since there's nothing to trap the steam. This works best in larger bathrooms where you have plenty of room to contain splashes.

After years of doing this, one of the biggest regrets we see from DIYers is an open-concept shower that's just too cold, especially during our chilly Washington winters. A frameless glass door often hits the sweet spot—it feels open but keeps you warm.

Selecting Your Shower Fixtures

Your fixtures are the hardworking parts of the shower, so you want to choose them for performance just as much as for looks. Here’s what you’ll need to decide on.

  • Showerheads: The sky's the limit here. A water-saving head is a smart choice for any home, while a big "rain" showerhead can provide a truly luxurious downpour. For ultimate flexibility, many of our Tacoma-area clients choose a dual system with a fixed overhead head and a separate handheld wand.
  • Valves and Controls: This is a decision you don't want to overlook. We highly recommend upgrading to a thermostatic valve. It lets you set an exact temperature and holds it steady, even if someone flushes a toilet or starts the dishwasher. It’s a game-changer for comfort and a crucial safety feature to prevent scalding.

Integrating Accessibility And Safety Features

One of the greatest advantages of a bath to shower conversion is the chance to create a safer, more accessible bathroom for today and for the future. Modern design means these features can be beautiful, not institutional.

  • Grab Bars: Forget the clunky, clinical bars of the past. Today's grab bars come in stunning finishes like matte black, brushed brass, and polished nickel to perfectly match your other fixtures. The key is that we install them with proper blocking inside the wall for rock-solid support.
  • Built-in Bench: A tiled bench is a must-have for anyone who prefers to sit while showering. It provides stability and comfort, turning the shower into a more relaxing and secure space.
  • Zero-Threshold Entry: By eliminating the curb, you create a seamless, "curbless" entry that's easy to walk into and fully accessible for a wheelchair or walker. It’s the ultimate in universal design.

Planning for these features from the very beginning is the key to a successful project. For a deeper dive, check out our guide on creating a handicap-accessible shower. As your local Kent contractor, we at Wheeler Painting specialize in building beautiful showers designed to support you safely for years to come.

How To Budget For Your Shower Conversion Project in 2026

Let's get right to it. The first question every homeowner in the Seattle area asks is, "So, what's this actually going to cost?" The honest answer is: it depends. But that's not a cop-out. The final price for a residential remodeling project like this really comes down to a few key decisions you'll make, and our goal here is to walk you through them so there are no surprises.

When we put together an estimate at Wheeler Painting, it's completely itemized. We want you to see exactly where your money is going, from the demolition down to the last tube of caulk, before we ever start work.

What Drives the Cost of a Shower Conversion?

The final number on your proposal is a mix of labor, the materials you choose, and sometimes, dealing with what we find behind the walls. It’s more than just the new tile and fixtures you see at the end.

For any project here in the Kent area, the budget really boils down to these four things:

  • The Teardown: Ripping out a lightweight, one-piece acrylic tub and surround is a relatively quick job. But if we're dealing with an old cast-iron tub that was mud-set into place with layers of heavy tile? That’s a completely different level of labor and disposal.

  • The Plumbing Puzzle: Your tub drain is in one spot, but a shower drain needs to be centered. The valve and showerhead also need to be raised from tub height to standing height. Simple moves are one thing, but if we have to reroute pipes through tricky framing, the plumbing costs will naturally go up.

  • Your Material Style: This is where you have the most direct control over the budget. A clean, high-quality prefabricated shower base and wall panel system is a very cost-effective and durable option. On the other end of the spectrum, you could have a fully custom-tiled shower pan with floor-to-ceiling natural stone, intricate mosaics, and built-in niches. This could even involve custom cabinets to reconfigure the space.

  • Fixtures and Glass: The hardware is the jewelry of your new shower. A beautiful, reliable showerhead and valve set in chrome might cost a few hundred dollars. A thermostatic system with multiple body sprays in a specialty finish like matte black or brushed gold can run into the thousands. The same goes for shower doors—a standard framed door versus a custom heavy-glass frameless enclosure is a significant price difference.

Here’s a piece of advice we give every single homeowner: plan for a 10-15% contingency fund. It’s not because we expect to find problems. It’s for your peace of mind. If we open the walls and discover old, hidden water damage or funky plumbing from a previous DIY job, that buffer means we can fix it the right way without derailing your budget.

How Long Will My Bathroom Be Out of Action?

The other big question is about time. It's a common myth that a bath-to-shower conversion is a quick weekend project. To do it properly and meet all building codes, especially with critical steps like waterproofing, it just takes more time.

Here's a realistic look at how a typical project unfolds:

  1. Planning & Ordering: We'll meet, finalize the plan, and get your materials ordered. This can take anywhere from 1 to 4 weeks, depending on how custom your tile and fixtures are.
  2. Demo & Rough-In: Once materials are on-site, our crew gets to work. Demolition, plumbing adjustments, and any framing changes usually take 2-4 days. A skilled drywall contractor may also be needed at this stage.
  3. Waterproofing & Walls: This is the most critical phase. We install the shower base, apply multiple layers of waterproofing, and get it inspected. Then, we install the tile or wall panels. This can take 3-7 days because drying and curing times are non-negotiable.
  4. Finishing Touches: Finally, we grout, install the glass door, and mount the fixtures. This last part takes about 1-2 days.

All in, you should realistically plan for your bathroom to be a construction zone for about two to three weeks. We know it's an inconvenience, but that timeline ensures every detail is handled correctly for a shower that will last for decades.

Your Top Shower Conversion Questions, Answered

If you’re thinking about a bath-to-shower conversion, you've probably got a few questions. It's a big decision! We've been doing this for homeowners, business owners, and property managers all over the Seattle and Tacoma area for years, and we've heard just about everything. Here are the honest answers to the questions that come up the most.

Will I Hurt My Home's Resale Value by Removing the Only Tub?

This is easily the number one concern we hear, and it’s a smart question to ask. The short answer? Probably not, especially here in the Puget Sound. While real estate agents used to say a home needed a tub, today’s buyers are often looking for a spacious, modern, and accessible walk-in shower.

A well-designed, professionally installed shower can actually be a major selling point. If you trade an old, cramped tub/shower combo for a beautiful walk-in, you're adding practical, daily value that most new buyers will appreciate far more.

How Long Will I Be Without a Bathroom?

No one wants their bathroom to be a construction zone forever. For a standard conversion, you can expect the project to take about one to three weeks from the start of construction.

This timeline can change based on the complexity of the job. For example, intricate custom tile work takes longer than installing a pre-fabricated shower surround. Major plumbing rerouting or waiting on city inspections can also add to the schedule. We always map out a detailed project calendar for you before we ever pick up a hammer, so you'll know exactly what to expect.

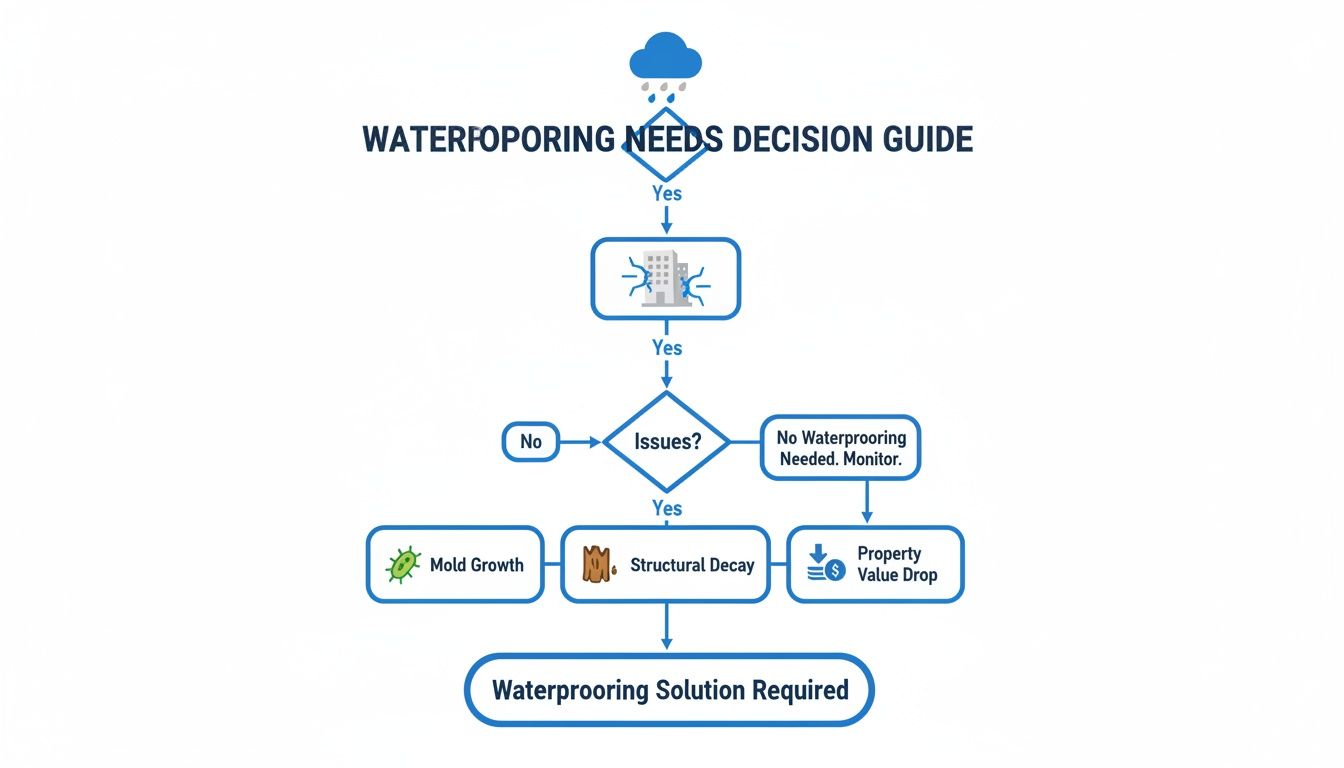
The most important part of this entire project is the waterproofing. I can't stress this enough. A tiny mistake here can go unnoticed for years, leading to hidden leaks that cause thousands in structural rot and mold damage. This is the biggest reason to go with a professional residential contractor near you—we guarantee a completely watertight system that protects your home.

Can I Just DIY This Project to Save Money?

Tackling a project yourself can be rewarding, but a shower conversion is one of those jobs where the risks are incredibly high. It’s not just about tiling a wall; it involves complex plumbing and waterproofing that have to meet very strict local building codes.

One small error—an improperly sealed drain or a punctured waterproof membrane—can lead to catastrophic failure down the line. We’ve been called in to fix DIY jobs that ended up costing the homeowner double. Hiring a licensed, insured professional protects your investment and gives you the peace of mind that the job is done right and will pass inspection.

How Can I Make the New Shower Safe for Aging in Place?

This is a fantastic question and something more and more homeowners are planning for. A walk-in shower is already a huge step up in safety from a high-sided tub. You can enhance it even further with a few key additions:

  • Zero-threshold entry to eliminate any tripping hazard.
  • A comfortable, built-in shower bench.
  • Strategically placed grab bars that are anchored into the wall studs.
  • Non-slip tile for the shower floor.

There’s a lot of great equipment out there designed specifically for this. For a more detailed look at your options, this guide to bathroom safety equipment for the elderly is a really helpful resource.


Ready to see what it would take to transform your bathroom into a space you’ll love? Wheeler Painting has been the go-to residential contractor for home improvements and remodels in Kent, WA, and the surrounding communities since 1991. We bring our expertise in residential and commercial construction to every project, no matter the size. Contact us today for a clear, no-pressure, on-site estimate and let’s start planning your new shower.
Top Types of Kitchen Cabinet Woods: A 2026 Guide

Your kitchen cabinets are more than just storage; they are a defining element of your room's character, durability, and overall value. For homeowners and business owners planning a remodel in areas from Kent to Seattle, selecting the right material is a critical first step. With the Pacific Northwest's unique climate, understanding the different types of kitchen cabinet woods and how they perform is essential for a long-lasting, beautiful result.

This guide breaks down the most popular and practical options, from timeless hardwoods like Oak and Maple to versatile engineered materials. We'll explore the specific characteristics of each, including hardness, grain patterns, and how well they accept stains and paint. Making an informed decision on your kitchen's foundation starts with understanding these materials. To dig deeper into the specifics, a great resource is Choosing the Right Hardwood for longevity and style.

Whether you're a homeowner in Tacoma embarking on a full residential remodeling project or a facility manager overseeing tenant improvements, knowing your wood options ensures your investment stands the test of time. As a trusted local contractor, Wheeler Painting provides the professional insights needed to navigate these choices, helping you start your project on a solid footing. We will cover the pros and cons of ten distinct materials, giving you the clarity needed to match the perfect wood to your design vision and functional requirements.

1. Oak (Red & White)

Oak stands as one of the most reliable and popular types of kitchen cabinet woods in North America, prized for its strength, availability, and classic appeal. It is a go-to hardwood for both large-scale manufacturers and custom cabinet makers throughout the Pacific Northwest. Oak is divided into two primary species, red and white, each offering unique characteristics for your kitchen remodel in the Seattle or Tacoma area. Red oak typically has a warmer, pinkish hue with a more pronounced, open grain, while white oak is lighter, often with golden or gray undertones, and features a tighter, more linear grain.

Characteristics and Suitability

Oak's strong grain pattern is its defining feature, making it an excellent choice for traditional and farmhouse kitchens, a style often seen in homes from Kent to Bellevue. Its Janka hardness rating is impressive, with red oak at approximately 1290 and white oak even higher at around 1360. This durability ensures it can withstand the daily wear and tear of a busy kitchen.

  • Red Oak: Known for its dramatic, wavy grain. It readily absorbs stains, but its porous nature can sometimes lead to a blotchy finish without proper preparation.
  • White Oak: Slightly harder and more water-resistant due to its closed-grain structure (tyloses). This makes it a superior option for kitchens with high humidity or frequent moisture exposure, a key consideration in the Puget Sound climate.

Finishing and Maintenance Tips

Proper finishing is crucial to bring out oak's natural beauty and protect it for years. To achieve an even finish, especially on porous red oak, applying a pre-stain wood conditioner is a critical first step. For homeowners looking to tackle this themselves, our guide on how to stain wood cabinets provides a detailed walkthrough. A water-based polyurethane topcoat offers excellent moisture resistance and durability without the yellowing that oil-based finishes can develop over time. Careful sanding between each coat of finish will create a smooth, professional-quality surface that is easy to clean and maintain.

2. Maple

Hard maple is a premium cabinet wood, prized for its fine, uniform grain and exceptional hardness. Native to North America, maple offers superior durability and stability, making it an excellent choice for high-use kitchen environments. Its light, creamy color provides a clean, bright canvas, making it a favorite for contemporary and transitional kitchen designs in high-end homes and commercial spaces from Seattle to Tacoma. This tight grain structure makes it suitable for both natural stains and flawless painted finishes, a quality valued by professional cabinet makers and painting contractors.

Characteristics and Suitability

Maple’s defining trait is its smooth, subtle grain pattern, which lends a refined and modern look to cabinetry. With a Janka hardness rating of around 1450, it is one of the more durable types of kitchen cabinet woods, easily resisting dents and scratches from daily activity. This resilience makes it a practical investment for busy family kitchens and high-traffic commercial settings. Its clean aesthetic is particularly well-suited for minimalist, contemporary, and transitional styles, offering a sleek alternative to more pronounced grains like oak.

  • Grain & Color: Features a fine, consistent texture with colors ranging from creamy white to a light golden hue. The subtle grain avoids overpowering the kitchen's overall design.
  • Stability: Maple is a very stable wood, less prone to shrinking and expanding with the temperature and humidity shifts common in the Puget Sound region. For optimal performance, it's still crucial to allow the wood to acclimate in the environment before installation.

Finishing and Maintenance Tips

Maple's non-porous surface creates a perfect base for paint, resulting in a smooth, even, and professional-grade finish without a heavy grain texture showing through. For those who prefer a natural look, a clear coat can protect the wood while highlighting its delicate beauty. However, natural maple can yellow over time when exposed to sunlight. To prevent this, it is essential to apply a high-quality, water-based polyurethane with UV protection. Partnering with an experienced residential contractor like Wheeler Painting ensures a durable and beautiful result, whether you choose a crisp white paint for a modern kitchen in Kent or a clear, natural finish for a transitional look in Tacoma.

3. Cherry

Cherry is an elegant hardwood highly valued for kitchen cabinets, known for its rich, warm reddish-brown color and fine, straight grain. It stands out among the various types of kitchen cabinet woods for its smooth texture and sophisticated appearance. Over time, cherry wood naturally darkens, developing a deeper, more lustrous patina when exposed to light, a prized characteristic that adds depth and character to upscale kitchens. This graceful aging process makes it a favorite for high-end residential renovations and luxury commercial build-outs from Tacoma to Seattle, where quality craftsmanship is paramount.

Characteristics and Suitability

Cherry’s defining trait is its beautiful color evolution and satiny finish, making it a perfect fit for traditional, transitional, and Arts and Crafts style homes. With a Janka hardness rating of around 950, it is softer than oak but still offers good durability for everyday kitchen use. Its workability allows for intricate details and clean lines, a feature often highlighted in custom cabinetry projects.

  • Color & Grain: Starts as a light pinkish-brown and deepens to a rich reddish-brown. The grain is fine, simple, and straight, though it can occasionally feature distinctive pitch pockets or mineral streaks.
  • Aging: The color change is a natural feature, not a flaw. Property owners in the Pacific Northwest should be aware that cabinets exposed to more sunlight will darken faster, so planning for this evolution is key to long-term satisfaction.

Finishing and Maintenance Tips

A proper finish on cherry wood both protects it and accentuates its natural warmth. While it takes stain well, many homeowners and designers in the Seattle area prefer a clear, natural finish to let the wood's inherent beauty shine and age gracefully. An oil-based finish can enrich the color, while a water-based polyurethane with UV inhibitors can help slow the darkening process if desired. To maintain a cohesive look, ensure all cabinet doors and fronts are from a similar batch to promote consistent color and grain patterns. Pairing these rich cabinets with warm metal hardware like bronze or copper creates a timeless and luxurious feel.

4. Hickory

Hickory is a native North American hardwood renowned for its dramatic grain variation, exceptional strength, and distinctly rustic character. Among the various types of kitchen cabinet woods, hickory stands out for its visual drama. It often features a pronounced contrast between its creamy white sapwood and darker, reddish-brown heartwood, sometimes within the same plank. This striking appearance has made it a popular choice for rustic, farmhouse, and even transitional kitchen designs, especially in Western Washington homes from Tacoma to Kent, where its authentic American character is highly valued.

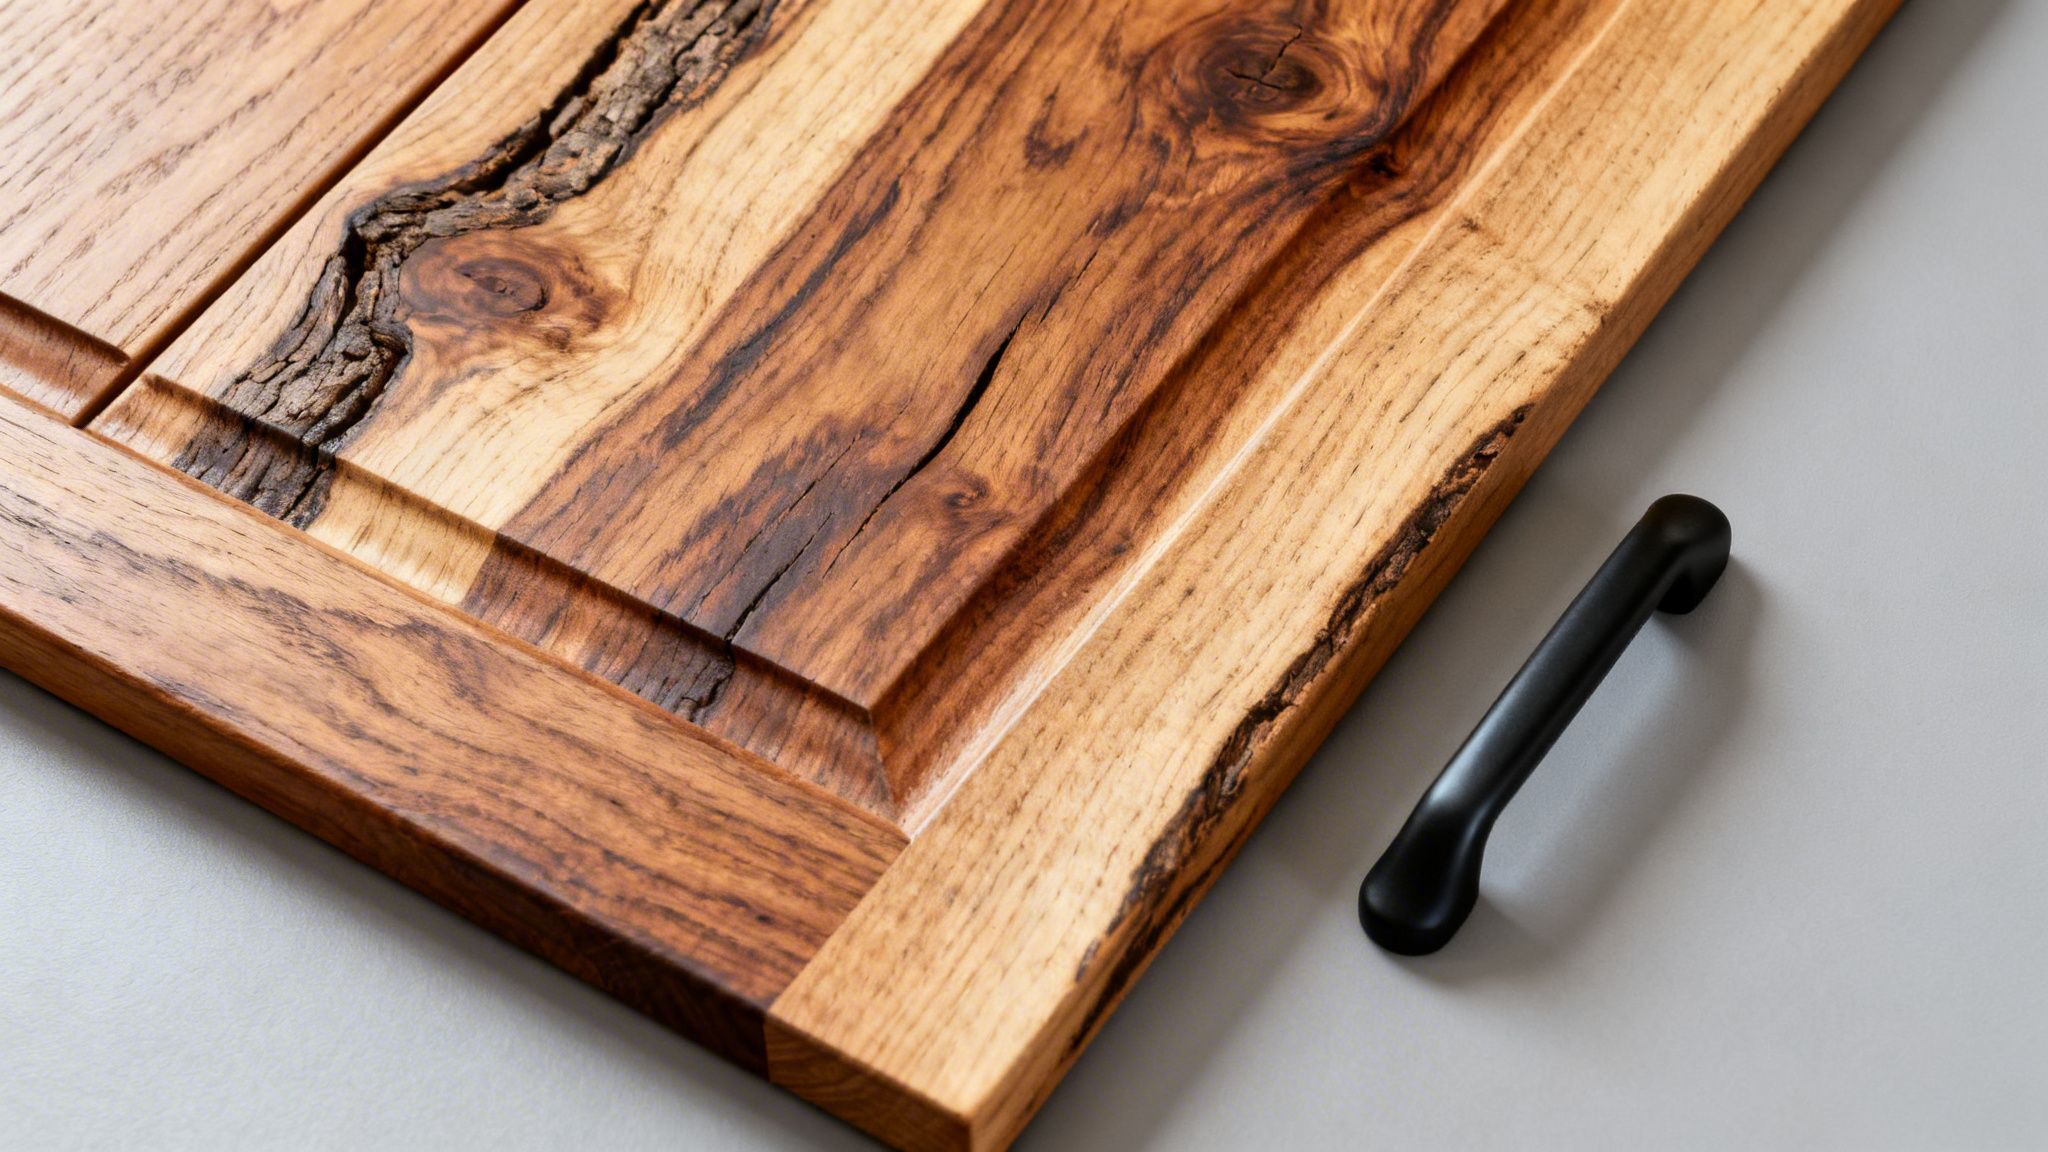
Beautiful natural wood kitchen cabinet door with visible grain and a minimalist black handle.

Characteristics and Suitability

Hickory's defining trait is its powerful, often unpredictable grain and color variation. With a Janka hardness rating of around 1820, it is one of the hardest and most durable domestic woods available, significantly surpassing oak and maple. This incredible toughness makes it a fantastic option for high-traffic kitchens and commercial spaces, ensuring it can resist dents, dings, and the general wear of a busy family or business.

  • Grain and Color: The strong visual contrast is hickory's signature. This natural variation is not a defect but a feature that gives each kitchen a unique, one-of-a-kind look.
  • Durability: Its exceptional hardness makes it a workhorse material, ideal for homeowners and facility managers who need cabinets that will stand the test of time and activity. It is well-suited for both traditional face-frame and modern frameless cabinet construction.

Finishing and Maintenance Tips

The key to a successful hickory kitchen is to embrace its natural character rather than try to hide it. Stains can sometimes appear blotchy due to density variations, so using a pre-stain wood conditioner is a good practice for a more uniform look. However, many property owners in the Seattle area prefer clear or light-toned finishes that celebrate the wood's inherent beauty. A matte or satin polyurethane topcoat protects the wood without creating a glossy sheen, preserving its rustic charm. For maintenance, a simple wipe-down with a soft, damp cloth is typically all that is needed to keep hickory cabinets looking their best.

5. Birch

Birch is a versatile, light-colored hardwood that offers exceptional value, making it a popular choice for kitchen cabinet woods. This fine-grained, sustainable domestic wood provides a clean, contemporary appearance that adapts well to various design aesthetics. Its smooth texture and uniform grain make it an outstanding candidate for both paint and stain, allowing for a high degree of customization. For budget-conscious residential or commercial renovations in the Pacific Northwest seeking quality without a premium price tag, birch presents an excellent mid-range solution.

Characteristics and Suitability

Birch has a Janka hardness rating of approximately 1260, placing it on par with red oak in terms of durability and resistance to dents and scratches. This makes it a dependable material for busy kitchens from Seattle to Kent. Its grain is typically straight or slightly wavy with a fine, even texture, which lends itself beautifully to modern, minimalist, and Scandinavian-inspired designs. Unlike the prominent grain of oak, birch's subtle pattern provides a smooth, uniform canvas.

  • Paint-Grade Quality: Its smooth surface and low porosity make birch one of the best woods for a painted finish. It requires less prep work to achieve a flawless, even coat compared to open-grained woods, making it a favorite for interior painting professionals.
  • Sapwood/Heartwood Variation: Birch lumber often includes both creamy white sapwood and reddish-brown heartwood. This combination can be used to create subtle visual interest in a natural finish or can be easily covered with paint or dark stain.

Finishing and Maintenance Tips

To achieve a professional-grade finish on birch, proper preparation is key. When staining, applying a pre-stain wood conditioner is essential to prevent a blotchy or uneven appearance, as birch can sometimes absorb stain inconsistently. It is an ideal wood for any painted cabinet project; its smooth surface creates a superior result. For homeowners and business owners in the moist Puget Sound climate, sealing birch cabinets with a high-quality polyurethane topcoat is critical to protect them from moisture, humidity, and staining. A well-sealed birch cabinet is easy to clean and will maintain its beauty for years, whether in a Tacoma residential home or a commercial office space renovation in Seattle.

6. Walnut

Walnut is a premium domestic hardwood celebrated for its rich, chocolate-brown color and sophisticated appearance. As one of the more luxurious types of kitchen cabinet woods, its use is often reserved for high-end, custom kitchen projects and upscale commercial interiors where its dramatic beauty justifies the investment. The fine, straight grain and natural luster make walnut a statement wood, ideal for luxury residential renovations and retail build-outs in areas like Seattle and Tacoma, where discerning clients seek exceptional quality and a standout design feature.

Characteristics and Suitability

Walnut's signature appeal lies in its deep color and smooth grain, which can range from straight to wavy and adds a layer of organic elegance to modern and contemporary designs. Its Janka hardness rating is around 1010, making it softer than oak but still durable enough for cabinet use with proper care. Its rich tones pair exceptionally well with light-colored countertops, such as marble or quartz, creating a striking contrast that is popular in designer kitchens and high-end office spaces.

  • Color & Grain: Black walnut features a deep brown heartwood, sometimes with purplish undertones and lighter sapwood. Its grain is typically fine and straight, providing a sleek, uniform look.
  • Best Use Cases: Perfect for creating a focal point, such as a statement kitchen island or a reception desk in a commercial space. It is also used in two-tone designs, paired with lighter woods or painted cabinets to balance its visual weight and cost.

Finishing and Maintenance Tips

The goal with walnut is to protect the wood without obscuring its stunning natural color. A minimal clear finish is often the best approach. A water-based polyurethane or a quality lacquer can provide excellent protection against moisture and wear while remaining crystal clear. To truly showcase its depth, consider installing under-cabinet lighting, which will highlight the grain and warm tones. Because of its premium nature and finishing requirements, working with a professional is highly recommended to ensure the final product is flawless. For a consultation on custom walnut cabinetry, our residential and commercial construction team can guide you through the process.

7. Alder

Alder, a hardwood native to the Pacific Northwest, has become a cherished material for kitchen cabinets, particularly for its warm, natural character and sustainable local sourcing. It presents a light tan to reddish-brown color with a straight, fine-grained texture that is subtle yet attractive. For property owners in the Puget Sound area looking to infuse their spaces with authentic regional charm, alder offers a beautiful and affordable solution. Its workability and consistent appearance make it a favorite for custom cabinet makers creating everything from rustic to transitional designs.

Characteristics and Suitability

Alder is one of the softer hardwoods, with a Janka hardness rating of around 590, making it susceptible to dents and scratches in a high-traffic kitchen. However, this softness also makes it easy to work with, allowing for intricate designs and detailing. Its fine grain provides a smooth surface that readily accepts stains and finishes, making it exceptionally versatile. For rustic or farmhouse styles, often seen in homes from Kent to Tacoma, "knotty" alder is a popular choice, where the natural knots are seen as character marks rather than defects.

  • Grain & Color: Features a straight, uniform grain with a consistent color that ranges from light honey to a reddish-brown. It closely mimics cherry when stained, offering a premium look at a lower cost.
  • Workability: Its softer nature makes it excellent for machining and sanding, resulting in a very smooth finish. This makes it a great candidate for both stained and painted cabinet projects.

Finishing and Maintenance Tips

To protect alder from the demands of a busy kitchen, a durable topcoat is essential. While it stains beautifully, applying a pre-stain wood conditioner will help prevent any potential for blotchiness and ensure a deep, even color. Medium to dark stains are particularly effective at adding richness and depth. For a long-lasting and protective finish, a high-quality polyurethane or conversion varnish is recommended. These finishes create a hard shell that resists moisture and daily wear, a crucial consideration for any residential remodeling or facility maintenance project in the Seattle or Tacoma area.

8. Ash

Ash is a light-colored hardwood that has become a favored option among the various types of kitchen cabinet woods, especially for property owners looking for an alternative to oak. Its attractive, open grain pattern creates significant visual interest but often presents a more refined and consistent appearance than oak's prominent grain. As a North American native hardwood, ash offers a great balance of durability, workability, and moderate cost, making it an excellent choice for custom and semi-custom cabinetry in homes and businesses from Seattle to Tacoma.

Characteristics and Suitability

The defining feature of ash is its straight, prominent grain and creamy light color, which lends itself beautifully to contemporary, modern farmhouse, and transitional designs. Its Janka hardness rating sits around 1320, placing it right between red and white oak in terms of durability, ensuring it can handle the demands of a busy kitchen. Its lighter tone can make a space feel larger and more open, a desirable quality in many Puget Sound homes and office spaces.

  • Grain and Color: The consistent, straight grain is less wild than red oak's, offering a clean yet textured look. Its natural pale-yellow or light-brown hue is perfect for creating a bright, airy aesthetic.
  • Workability: Ash is known for being strong yet flexible. It holds details well, accepts screws and nails without issue, and is a reliable material for residential contractors to work with, allowing for diverse door styles and designs.

Finishing and Maintenance Tips

To get the most out of ash, proper finishing is key, particularly because of its open-pored grain structure. Applying a pre-stain wood conditioner is a vital first step to ensure any stain is absorbed evenly and to prevent blotching. For a soft, contemporary look popular in modern farmhouse renovations, consider a whitewash or liming wax finish. This technique subtly highlights the grain while maintaining a light, neutral palette. To protect the surface and seal the open grain, multiple coats of a high-quality polyurethane are recommended, which also makes the cabinets easier to clean and more resistant to the moisture common in the Pacific Northwest climate.

9. Pine (Eastern & Knotty Pine)

Pine stands out as one of the most affordable types of kitchen cabinet woods, offering a distinct rustic charm. It's a softwood that appeals to those seeking an authentic, casual, or cottage-style kitchen. Pine is generally divided into clear-grained eastern pine and the more character-rich knotty pine. While knotty pine's swirling grain and prominent knots are its main appeal, these features require careful finishing to ensure longevity in a kitchen environment, a common need for budget-conscious updates in residential properties or smaller commercial spaces from Kent to Seattle.

Characteristics and Suitability

As a softwood, pine has a low Janka hardness rating, typically ranging from 380 to 420, making it susceptible to dents and scratches. This characteristic makes it better suited for upper wall cabinets rather than high-impact base cabinets. However, its prominent grain and knots are what define its appeal, creating an ideal canvas for farmhouse, cottage, and rustic designs that are popular in classic Pacific Northwest homes.

  • Eastern Pine: Features a straighter, more subtle grain with fewer knots, offering a cleaner look while still providing warmth.
  • Knotty Pine: Celebrated for its dramatic, rustic appearance. The knots can "bleed" resin, so sealing them with a shellac-based primer before painting or finishing is a critical step for any interior painting job.

Finishing and Maintenance Tips

Proper finishing is essential to protect pine from moisture and wear. Painting is often the best choice, as it provides a durable, easy-to-clean surface and can modernize the rustic look. If you prefer to showcase the wood's character, a heavy-duty polyurethane topcoat is mandatory to prevent damage. For a mixed-wood design, consider using a resilient hardwood for base cabinets and pine for an accent island or uppers. For those taking on a DIY project, learning about proper prep is key, and our guide on kitchen cabinet door painting offers valuable techniques. Due to its softness, regular maintenance involves gentle cleaning and prompt attention to any nicks or scratches.

10. Plywood & Engineered Woods (Veneer Panels)

While not a solid hardwood species, plywood faced with hardwood veneer is a foundational material in modern cabinet construction. Valued for its stability, resource efficiency, and cost-effectiveness, it has become a staple for residential and commercial projects alike. In addition to solid wood options, understanding what engineered wood is and its various forms, including veneer panels, is important for modern cabinet design. Engineered wood cores, like plywood or MDF, are constructed by layering or pressing wood fibers and adhesives, creating large, stable sheets that resist the warping and splitting common in solid wood, especially in the humid Puget Sound climate. These cores are then covered with a thin layer of real wood veneer, offering the exact appearance of solid wood at a much lower cost.

Characteristics and Suitability

The primary advantage of engineered wood is its dimensional stability. This quality makes it ideal for the large, seamless flat-panel doors and oversized island end-panels popular in contemporary and minimalist kitchens and office spaces from Seattle to Tacoma. Because the veneer can be any wood species, property owners can achieve the look of exotic or expensive woods like walnut or teak without the premium price tag.

  • Plywood Core: Consists of thin layers of wood (plies) glued together with alternating grain directions. It is strong, holds screws well, and offers good moisture resistance, making it a durable choice for cabinet boxes in both residential and commercial applications.
  • MDF/Particle Board Core: Medium-Density Fiberboard (MDF) provides an exceptionally smooth and uniform surface, perfect for painting. It is heavier and less moisture-resistant than plywood, often used in budget-friendly cabinet lines and tenant improvement projects.

Finishing and Maintenance Tips

The key to a long-lasting engineered wood cabinet is protecting it from moisture, particularly at the edges. Professional-grade edge banding is crucial to seal the core material and prevent swelling or delamination. The veneer surface can be stained and finished just like solid wood, allowing for a perfectly matched look throughout your space. A quality polyurethane topcoat will protect the veneer from scratches and daily wear. These materials pair well with a wide range of types of cabinet doors and styles, from sleek modern designs to more traditional looks, offering great design flexibility for any Kent home or Seattle office renovation.

Top 10 Kitchen Cabinet Woods Comparison

Wood Type Implementation Complexity Resource Requirements Expected Outcomes Ideal Use Cases Key Advantages
Oak (Red & White) Moderate — easy to machine and finish Widely available, affordable material Durable cabinets with prominent grain; good for stained or painted finishes Budget to mid-range traditional and transitional kitchens Affordable, strong grain character, reliable supply
Maple Higher — dense wood needs skilled machining and finishing Premium cost, requires experienced craftsmen Very durable, smooth uniform finish ideal for paint High-use, contemporary or painted cabinet projects Exceptional hardness, dimensional stability, excellent for paint
Cherry Moderate — workable but needs UV-protective finishing Premium pricing, limited availability Warm, elegant cabinets that deepen in color over time Upscale residential renovations and custom kitchens Rich patina with age, sophisticated appearance
Hickory Higher — very hard, requires careful machining and selection Moderate to premium cost, selection for consistency needed Dramatic rustic appearance with strong durability Farmhouse, rustic, and transitional kitchens Unique grain contrast, extremely durable
Birch Moderate — good workability for paint and stain Mid-range cost, sustainable domestic option Clean, contemporary look; takes paint and stain evenly Budget-conscious modern or Scandinavian-inspired kitchens Affordable hardwood, excellent for painted finishes
Walnut Moderate — requires expert finishing to showcase grain High cost, specialty sourcing Luxury, deep-colored cabinets that make visual statements High-end custom projects, statement islands, office renovations Rich natural color and luster, upscale aesthetic
Alder Low–Moderate — easy to machine but softer wood needs protection Affordable, locally sourced in Pacific Northwest Warm, regional character; softer and more dent-prone Casual, rustic, transitional kitchens with local appeal Budget-friendly, easy to finish, sustainable local option
Ash Moderate — open grain needs additional sealing/finish coats Moderate cost, less common than oak/maple Refined open-grain look with good durability Contemporary, modern farmhouse, transitional designs Oak-like grain with more refinement, versatile finishes
Pine (Eastern & Knotty) Low — very easy to machine, requires heavy-duty finish Lowest cost, widely available Rustic, cottage appearance; lower durability under heavy use Budget renovations, cottage/farmhouse styles, facility maintenance Most affordable, strong rustic character, easy to customize
Plywood & Engineered Woods (Veneer Panels) Low–Moderate — requires edge banding and moisture sealing Cost-effective, stable panels; veneer allows species appearance Stable, consistent large panels that mimic solid wood Modern flat-panel kitchens, tenant improvements, budget-conscious projects Superior dimensional stability, sustainable, consistent appearance

Bringing Your Vision to Life with an Expert Partner

Choosing the right material for your cabinets is a foundational step in any kitchen remodel, but it represents just one piece of a much larger puzzle. As we've explored the distinct characteristics of various types of kitchen cabinet woods, from the enduring strength of Oak and Hickory to the refined elegance of Cherry and Walnut, a clear theme emerges. The ultimate success of your project depends not just on the wood you select, but on the quality of craftsmanship that brings it to life. The journey from a raw slab of Alder or a sheet of engineered plywood to a beautifully finished and perfectly installed cabinet is complex, requiring a deep understanding of material behavior, finishing techniques, and structural integrity.

This is especially true in the unique climate of the Puget Sound region. Homeowners and property managers from Seattle to Tacoma must consider how seasonal humidity shifts can affect different woods. A material that performs well in a dry climate might warp or swell in our damp environment without proper sealing and finishing. This is where the value of professional guidance becomes undeniable. An experienced residential and commercial contractor can help you navigate these decisions, ensuring the wood you love is also a practical, long-lasting choice for your specific home or commercial space.

From Material Selection to Flawless Execution

The difference between a good project and a great one often lies in the details of execution. The most beautiful slab of maple can be undermined by poor construction, and a budget-friendly choice like birch can look exceptional with a professional-grade paint finish. The process involves much more than just picking a wood species.

Key considerations that a professional partner like Wheeler Painting manages include:

  • Proper Acclimation: Before installation, wood must be acclimated to your property's specific environment to prevent future shrinking or expanding. This is a critical step often overlooked in DIY projects, especially for properties in Kent and the surrounding moisture-rich areas.
  • Precision Finishing: Achieving a durable, even finish is an art form. It requires a controlled environment, professional-grade sprayers, and knowledge of how different stains and paints interact with various wood grains and pore structures.
  • Expert Installation: Ensuring cabinets are level, plumb, and securely fastened is essential for both function and longevity. A professional ensures that doors hang correctly, drawers glide smoothly, and the entire system can withstand daily use for years.

For business owners planning a tenant improvement or a retail build-out, these details are even more critical. The durability and appearance of your cabinetry directly impact your brand's image and operational efficiency. A professional contractor like Wheeler Painting provides the necessary project management to ensure your commercial renovation is completed on time, within budget, and to the highest standard, minimizing disruption to your business. We specialize in the smaller to mid-size facility maintenance and improvement projects that many larger firms overlook.

Why Expert Partnership Matters for Your Puget Sound Project

Ultimately, selecting from the many types of kitchen cabinet woods is about defining the aesthetic and functional heart of your space. Whether you're a homeowner dreaming of a modern kitchen remodel or a facility manager overseeing a multi-unit renovation, the goal is the same: a beautiful, durable result that adds value to your property.

Making that vision a reality requires a partner who can bridge the gap between design and construction. It requires a team that understands the local environment, specializes in both residential and commercial projects, and prioritizes clear communication. By working with a seasoned professional, you are not just buying custom cabinets; you are investing in a seamless process and a guarantee of quality craftsmanship that will stand the test of time. This frees you to focus on the exciting parts of your renovation, confident that the technical complexities are in expert hands.


Ready to transform your kitchen or commercial space with stunning, expertly crafted cabinets? The team at Wheeler Painting offers comprehensive residential remodeling and commercial construction solutions, from material selection and custom cabinets to professional finishing and installation. Contact us to discuss how we can bring your project in Seattle, Tacoma, or Kent to life with unmatched local expertise and build a lasting relationship for all your facility maintenance needs.

Repainting Your Bathroom Ceiling: A Guide for Kent & Seattle Area Property Owners

Painting a bathroom ceiling isn't just another item on your weekend to-do list. For homeowners and property managers, it’s one of the most demanding paint jobs in any building, thanks to a constant barrage of heat and humidity. A quick slap of paint won't cut it here; you need the right prep, the right materials, and a bit of know-how to prevent peeling, bubbling, and mildew growth for a finish that actually lasts. At Wheeler Painting, we've helped countless clients in the Kent and Seattle areas tackle this common facility maintenance headache.

Why Bathroom Ceilings Demand Special Attention

Think about it: the ceiling directly above a shower is probably the most abused painted surface in an entire home or commercial facility. For property owners here in Western Washington, from Seattle down to Tacoma, that constant dampness makes the battle against bathroom moisture a year-round affair. This is exactly where we see standard paint jobs fail time and time again.

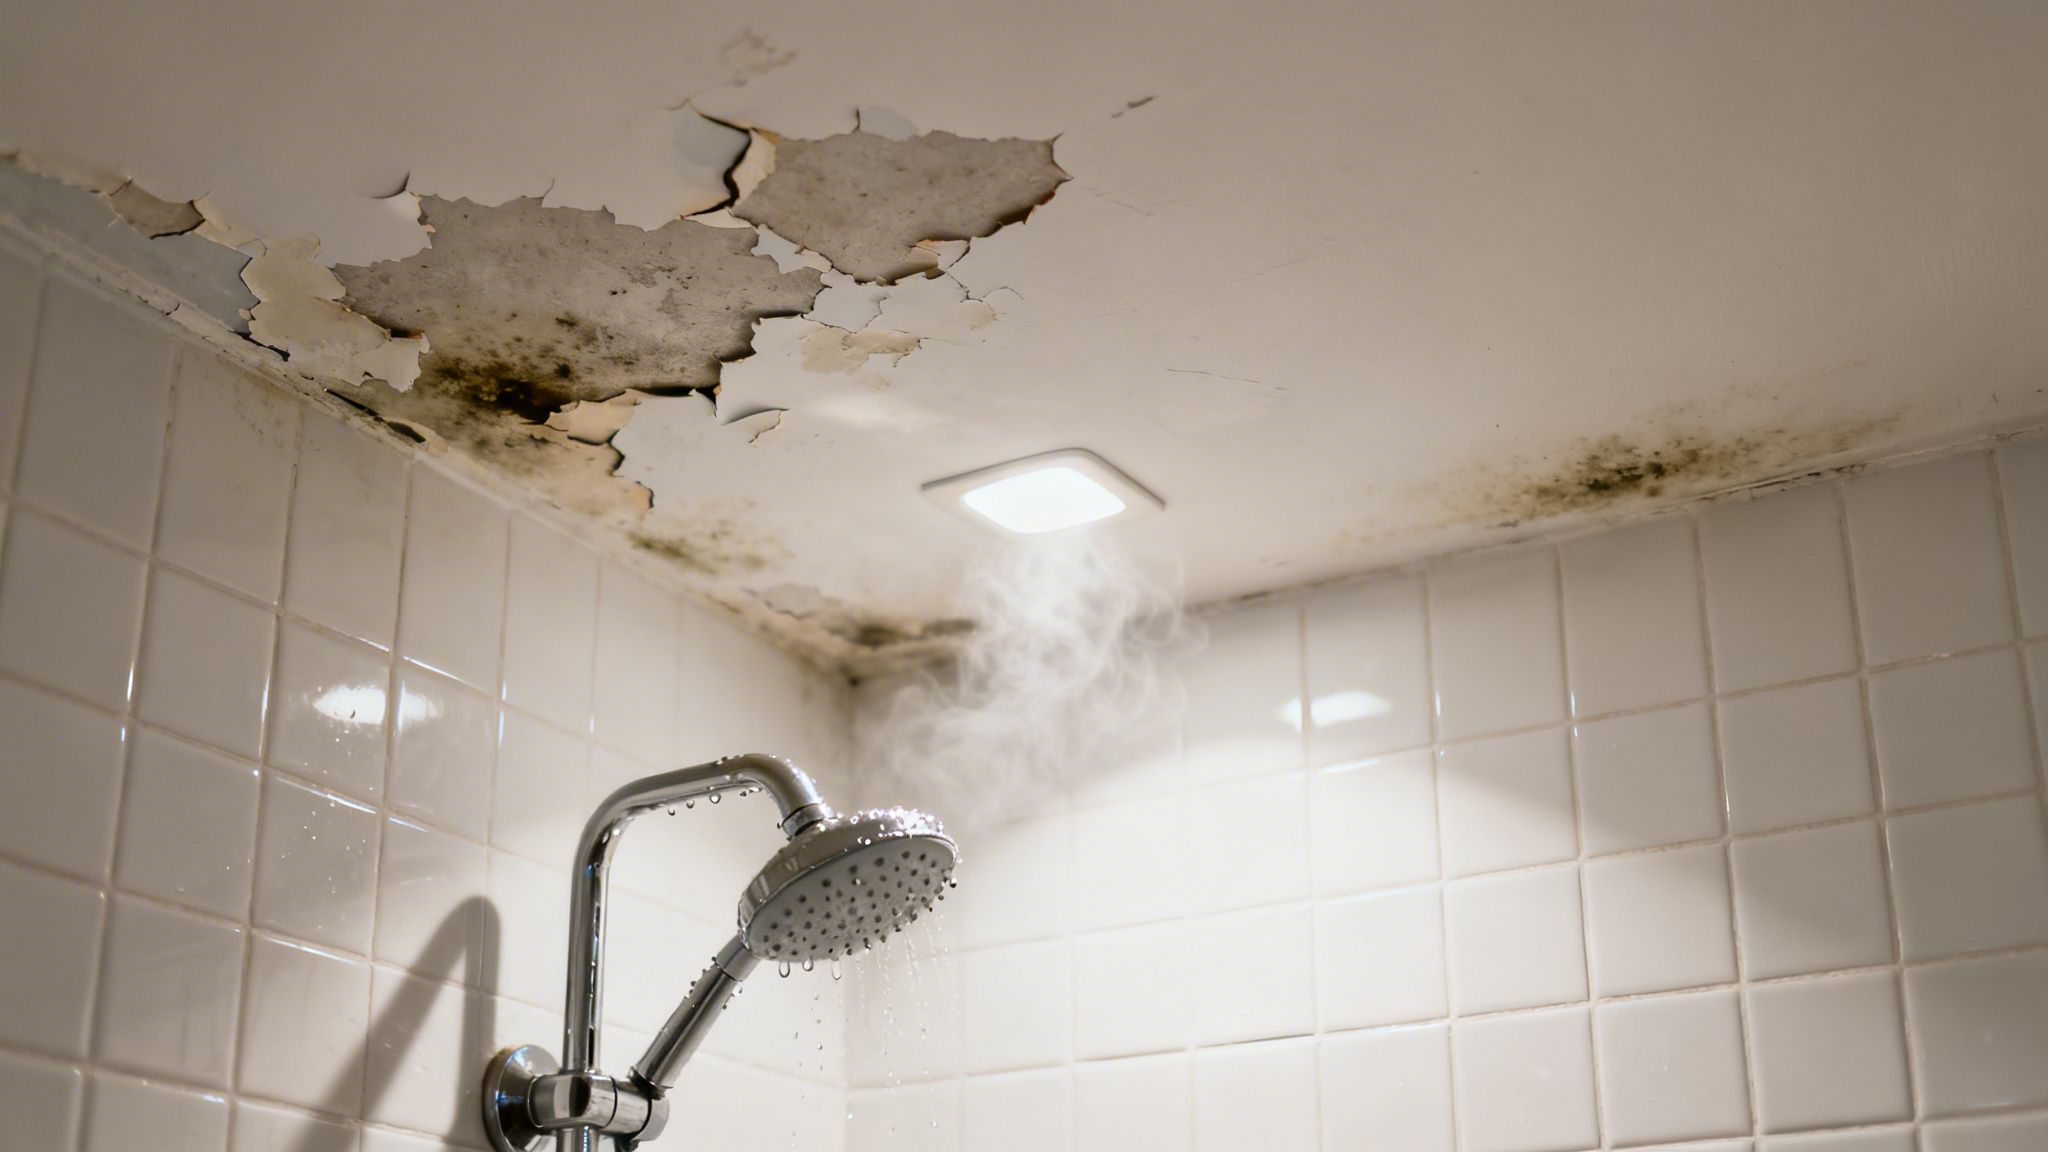
A damaged bathroom ceiling with peeling paint and black mold above a steaming shower head.

Unlike a bedroom or office, a bathroom ceiling endures a brutal cycle of steam and condensation every single day. That hot shower creates a perfect storm for paint failure as steam rises and settles directly overhead. It’s why so many homeowners and business owners in Kent and the surrounding communities call us about the same frustrating problems, often just a year or two after their last paint job.

The Science Behind Peeling Paint

Every time someone showers, the paint on the ceiling gets damp and swells slightly. As it dries, it contracts. This constant expansion and contraction eventually breaks the paint's bond, causing it to lose its grip and start peeling away from the drywall. This is a common issue for any residential or commercial painting project in a high-moisture area.

The stress is so intense that it destroys paint faster than anywhere else. In fact, the conditions are so harsh that some painting contractors won't even warranty their work in a bathroom. It’s the same reason paint bubbling is so common. If you’re seeing that, you might be curious about what causes paint to bubble on walls elsewhere, too.

Before you even think about painting, you have to play detective. Look closely for any signs of ceiling water damage, like persistent brown stains or sagging drywall. Those could point to a much bigger issue, like a leaky pipe or roof, that no amount of paint will fix.

At Wheeler Painting, we’ve seen it all. The key to a successful bathroom paint job is correctly diagnosing why the old paint failed. Was it poor ventilation? The wrong type of paint? Rushed prep work? As your local residential and commercial contractor, we address the root cause to ensure the problem doesn’t come right back.

Common Bathroom Ceiling Problems

The unique environment in a bathroom leads to a few signature issues. If you can spot them, you’re one step closer to fixing them for good.

Here’s what we typically see:

  • Mildew Growth: Those tell-tale black or gray spots are a classic sign of trapped moisture and poor airflow.
  • Surfactant Leaching: Ever notice sticky, brownish streaks running down the walls after a shower? That’s moisture pulling water-soluble ingredients (surfactants) out of the paint.
  • Peeling and Flaking: This is the most obvious sign of failure, where moisture has worked its way behind the paint film and completely broken its adhesion.

Tackling these problems means going beyond just scraping and painting. It requires a meticulous process that we've fine-tuned over thousands of residential and commercial projects to get it right the first time, from small home improvements to larger tenant improvement projects.

Your Blueprint For A Long-Lasting Finish

The secret to a bathroom ceiling that looks great for years isn't found in the paint can. It’s earned long before a brush ever touches the surface. All the real, lasting quality comes from the prep work. This is the foundation that separates a quick fix from a durable, professional finish, and it's a non-negotiable step on every project we do at Wheeler Painting.

First things first, you have to protect everything you don't want painted. Cover your vanity, toilet, tub, and floors with plastic sheeting or canvas drop cloths. Use painter's tape to secure the edges. A few extra minutes here will save you an hour of scraping dried paint drips later.

Clearing the Way for a Fresh Start

Once your bathroom is masked off, it's time to deal with the ceiling itself. Over time, bathroom ceilings get coated in a nearly invisible film of soap scum, hairspray, and other residues. Trying to paint over that grime is a surefire way to have your new paint fail, because it simply can't stick properly.

Grab a mild degreasing cleaner and mix it with some warm water. Using a sponge mop or a microfiber cloth on a pole, give the whole surface a good cleaning. Pay extra attention to the area right above the shower—that’s where the buildup is almost always the worst. After scrubbing, wipe the ceiling with a clean, water-dampened sponge to get rid of any soap residue.

Addressing Mildew and Minor Damage

Let the ceiling dry completely, then give it a close inspection. Look for any tell-tale black or gray spots, which signal mildew. You can't just paint over it; the fungus will work its way right through the fresh coat.

To kill it for good, you'll need a solution of one part bleach to three parts water, or a dedicated mildew killer.

  • Apply your solution directly to the mildew spots and let it sit for 10–15 minutes.
  • Gently scrub the areas, then rinse thoroughly with clean water.
  • Crucially, let the ceiling dry completely. This isn't a 30-minute job. It can take a full 24 hours, so be patient.

Next, hunt for any hairline cracks, peeling paint, or small dings. A good drywall contractor knows this step is vital. Take a putty knife and carefully scrape away any loose bits until you hit a solid, stable edge. Fill small cracks or holes with a lightweight spackling compound, smoothing it flush. Once dry, a light sanding is all it takes to make the patch disappear. If you're looking at more significant water stains or sagging, you may need to learn how to repair water-damaged drywall before you can move forward.

I can't tell you how many homes we've visited around Kent and Seattle where a property owner has to call us because a paint job started failing after just a few months. The number one culprit is always rushed prep work. Skipping a thorough cleaning or painting over live mildew guarantees the old problems will come right back. Taking your time on these foundational steps is the only way to ensure your repainting bathroom ceiling project actually lasts.

This careful, step-by-step preparation ensures you have a clean, solid surface that the primer and paint can bond to, giving you a finish that can handle the humidity for years.

Choosing The Right Paint And Primer

After all that careful prep work, picking the right products is what will make or break your bathroom ceiling paint job. We know the paint aisle can be a maze, but getting the primer and topcoat combination right is the secret to a finish that can actually handle the damp Puget Sound climate.

Why Primer Is Non-Negotiable

Seriously, don't even think about skipping the primer on a bathroom ceiling, especially after all the cleaning and patching you just did. A quality, stain-blocking, moisture-resistant primer is your most important tool here. As a full-service residential and commercial contractor, we consider this a critical step in any interior painting job.

It does a few critical jobs:

  • Creates a uniform base: This ensures your topcoat looks even and consistent.
  • Blocks stubborn stains: It locks in old water marks or anything else that might bleed through.
  • Seals new repairs: Primer ensures the paint sticks just as well to new spackle as it does to the old surface.
  • Provides a solid grip: It acts like double-sided tape, holding onto the drywall and giving the topcoat something to grab, which is key to preventing peeling.

For a bathroom, you absolutely need a primer designed to handle moisture. These products contain additives that stop mildew in its tracks. Even on brand new drywall, understanding why you should prime sheetrock before painting is a must for a long-lasting job.

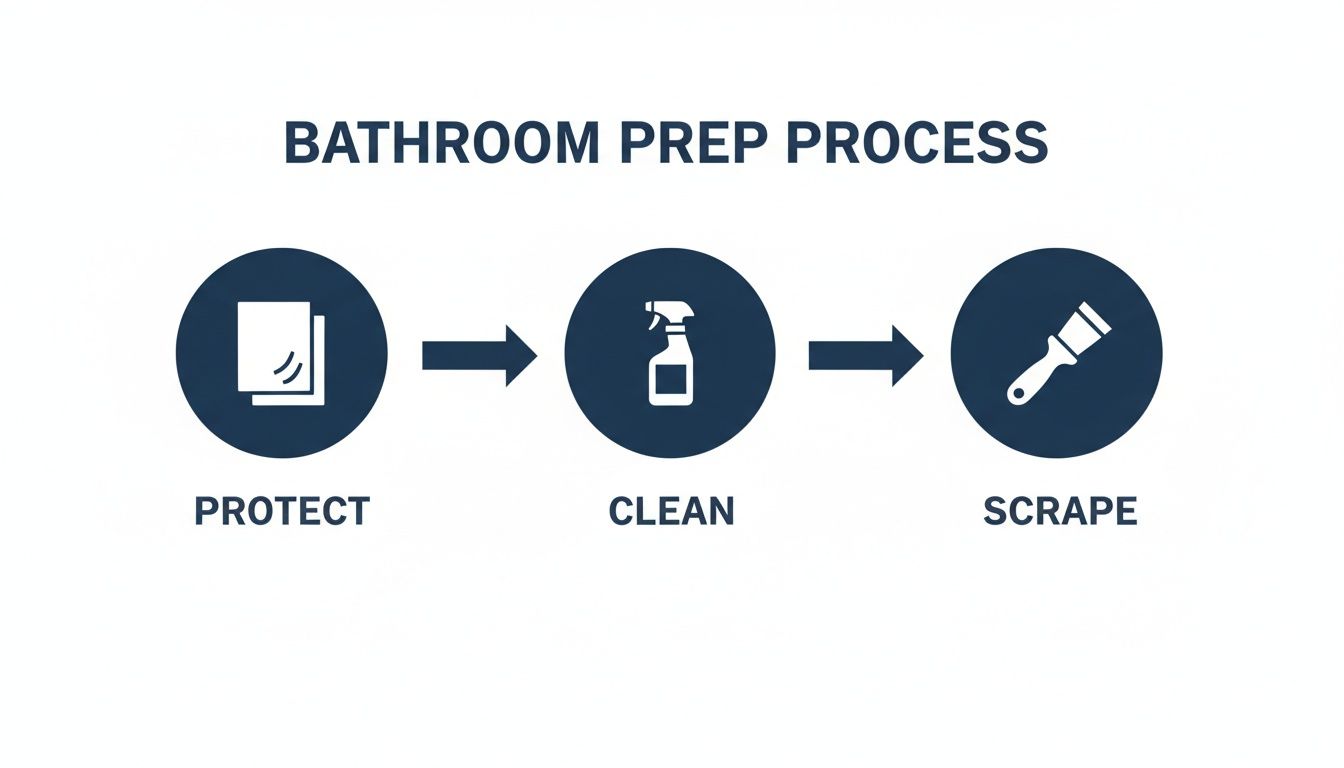
Infographic showing a three-step bathroom preparation process: protect, clean, and scrape.

These are the non-negotiables before you even crack open a can of primer. Protecting your fixtures, cleaning the surface, and scraping away any failures gives you the clean slate you need for a professional result.

Selecting Your Topcoat Sheen And Formula

Now for the paint itself. You’ll want a product specifically made for bathrooms or other high-humidity areas. Look for a label that says "kitchen & bath" or mentions mildew resistance. These paints contain mildewcide, an agent that actively prevents mold from taking hold. For anyone managing a property in places like Kent, Seattle, or Tacoma, this is a lifesaver.

The paint's sheen (its level of gloss) is just as important as the formula. For a bathroom ceiling, your best bets are satin or semi-gloss.

Bathroom Paint Sheen Comparison

Choosing a sheen isn't just about looks; it's about performance. A higher gloss level creates a tighter, less porous surface that's much better at repelling moisture. Here’s a quick breakdown of why this matters for a bathroom ceiling.

Sheen Durability Moisture Resistance Best For
Flat/Matte Low Very Low Not recommended. It absorbs moisture and is difficult to clean.
Eggshell Medium Low to Medium A slight step up, but still not ideal for direct steam exposure.
Satin High High A great choice. Offers a slight sheen, is very durable, and easy to wipe down.
Semi-Gloss Very High Excellent The gold standard for bathrooms. It's tough, highly moisture-resistant, and reflects light.

While a flat finish is great for hiding imperfections, in a bathroom it acts like a sponge for steam. This will almost guarantee stains and peeling. Sticking with a satin or semi-gloss finish is the professional choice for a reason.

A Pro Tip From The Field: At Wheeler Painting, we use satin or semi-gloss finishes on bathroom ceilings almost exclusively. That slight gloss provides a tough, washable surface that stands up to daily steam. It’s a small detail that makes a huge difference in how long the paint job lasts, whether it's for a home or a commercial renovation.

Of course, durability is only part of the equation. For aesthetic guidance, this guide on how to choose paint colors for your bathroom can help you tie the whole room together. By pairing a high-quality primer with a durable, mildew-resistant topcoat, you're setting your ceiling up for a beautiful finish that will last for years.

Getting That Pro Finish: Painting Techniques

Alright, the prep work is done. The patching is smooth, the mildew is gone, and your masking tape is straight. Now for the satisfying part—actually getting some paint on that ceiling. This is where your patience pays off and the real transformation happens. A few key techniques separate a decent DIY job from a truly professional one.

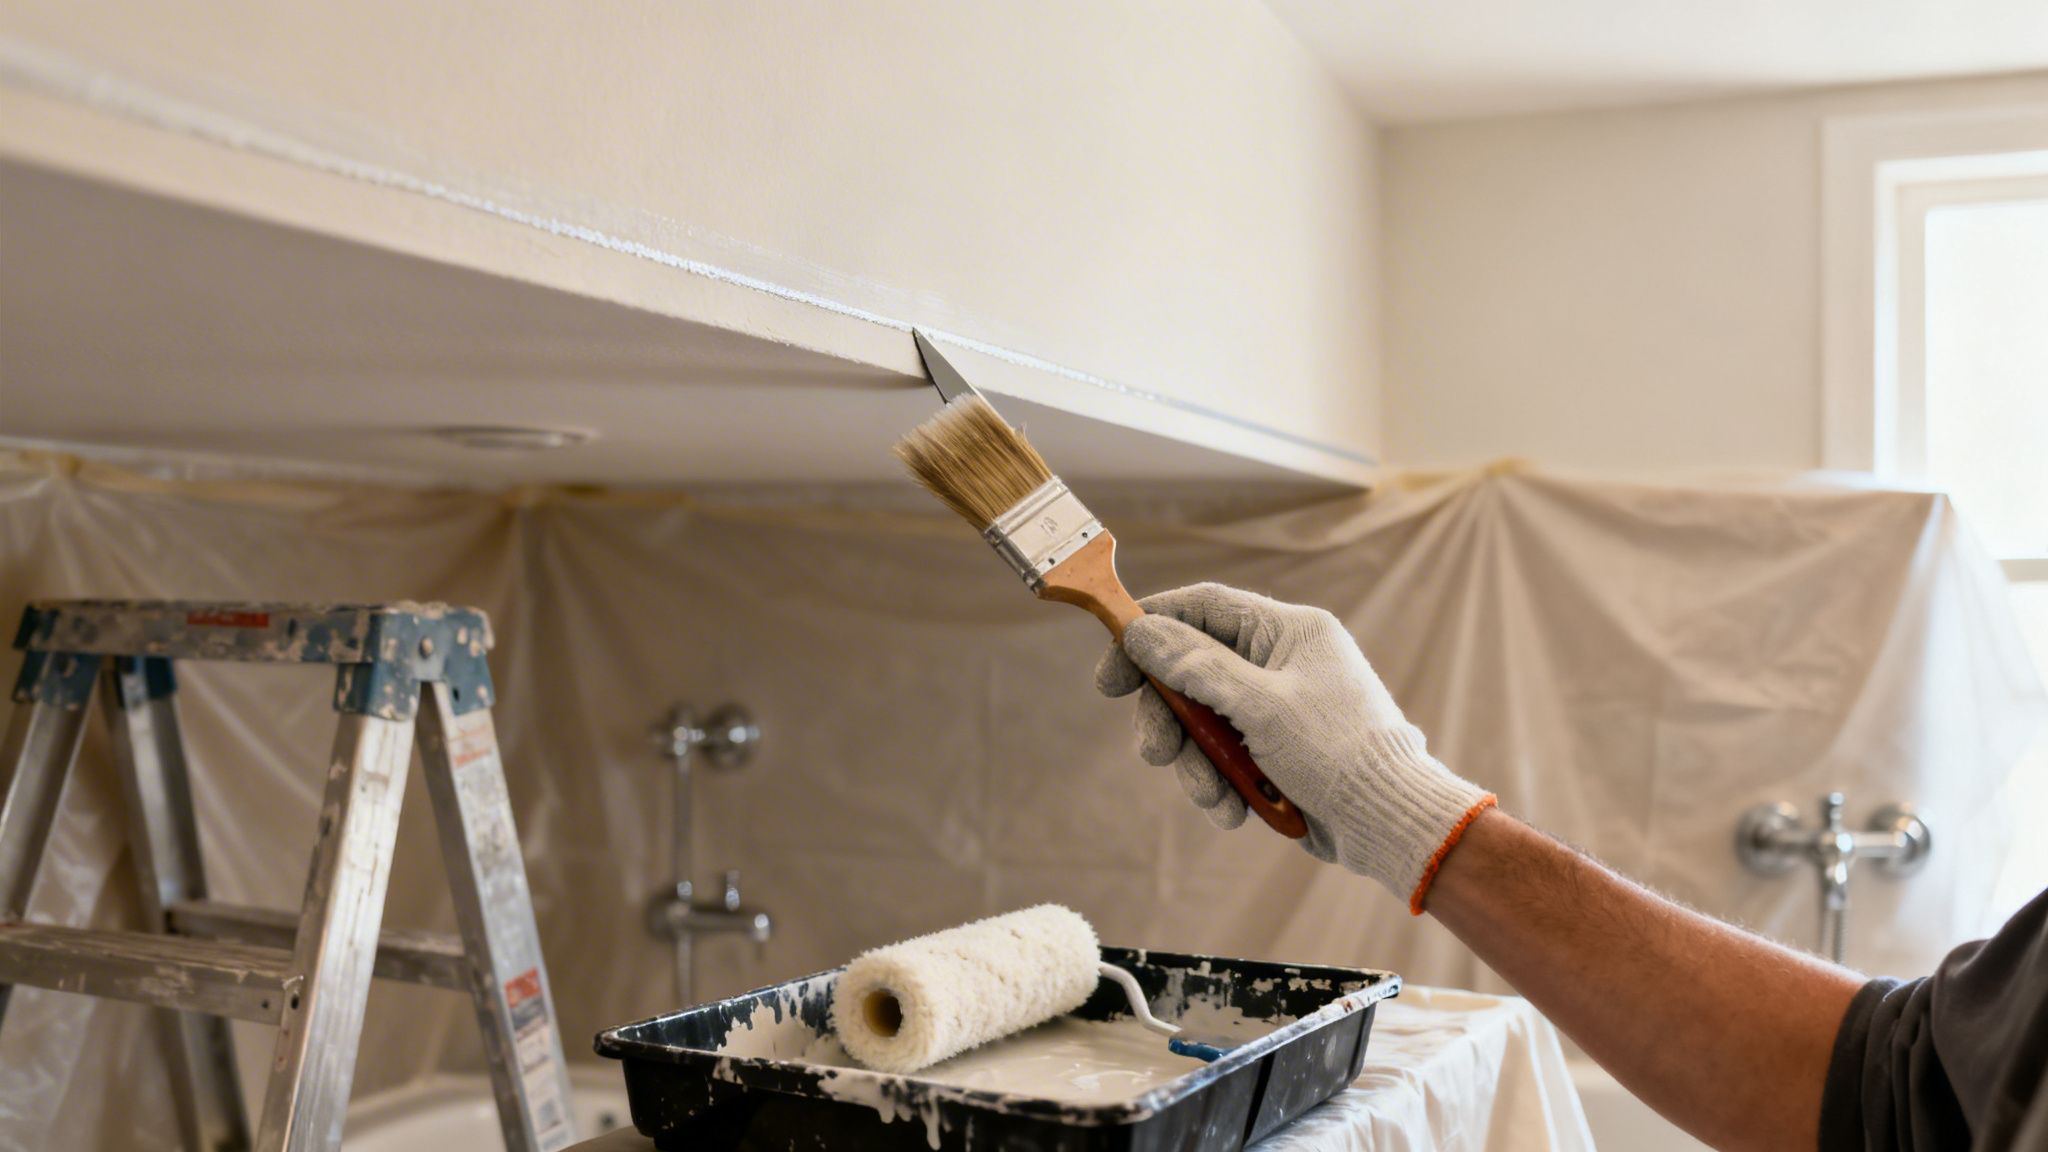
A person in a white glove uses a paintbrush to cut in white paint on a ceiling.

First, The "Cut-In"

Before a roller ever touches the ceiling, you have to "cut in." This just means using a brush to paint all the edges and corners where a roller can't reach cleanly—think along the walls, around your light fixture, and next to the exhaust fan. A crisp cut-in line is the hallmark of quality interior painting.

Grab a good-quality 2 to 2.5-inch angled sash brush. The angle gives you better control. Dip about the first third of the bristles into your paint and gently tap—don't scrape—the excess off on the inside of the can. Tapping keeps the paint loaded in the brush for a longer, smoother stroke.

Start your brushstroke about a half-inch from the wall line, then smoothly guide it into the corner. You're aiming to create a solid band of paint about 2-3 inches wide all the way around the ceiling's perimeter. This painted border gives your roller a target to roll up to without hitting the walls.

Professional Tip: If you're new to this, it’s completely fine to steady your painting hand with your other hand. Our crews providing commercial painting services in Kent and Tacoma do this by instinct, but for a first-timer, that extra stability is the secret to avoiding wobbly lines.

Rolling Without Streaks

With your edges done, it’s time to roll the main field of the ceiling. The number one mistake homeowners make is trying to stretch their paint too thin. This causes "lap marks," those ugly, streaky lines where the paint has started to dry before you overlap it. The key to avoiding this is to always maintain a wet edge.

For a smooth ceiling, a 3/8-inch nap roller is perfect. If you have any texture, jump up to a 1/2-inch nap. Get a roller screen for your bucket—it loads the roller much more evenly than a tray.

Here's the method that guarantees a beautiful, uniform finish:

  • Find a corner and start by rolling a large "W" or "N" pattern on the ceiling, roughly 3 feet by 3 feet.
  • Now, without lifting the roller, fill in that "W" with straight, parallel strokes that slightly overlap.
  • Once that section is fully covered, do a final "lay off." This means making a few very light passes with the roller in one single direction across the whole section to erase roller marks.
  • Move on to the next 3×3 section, repeating the process but always rolling back into the wet edge of the section you just finished.

Working this way, section by section, keeps the paint workable and prevents frustrating streaks. It’s a methodical approach, but the flawless result is well worth the effort.

Knowing When To Call a Professional

There's a real satisfaction that comes from tackling a project yourself. But after years in this business, we can tell you that the smartest property owners are the ones who know their limits. What looks like a simple paint job can quickly turn into a frustrating, costly ordeal.

So, how do you know when to put down the roller and pick up the phone? Certain problems are dead giveaways that you need professional help.

Signs You Should Hire a Pro

Persistent mildew is a classic. If you've scrubbed those black spots away multiple times only to see them creep back, you're not fixing the root cause. A professional painter can diagnose if this is a simple ventilation issue or part of a larger facility maintenance problem requiring waterproofing.

Another huge red flag is significant water damage. If you’re seeing sagging drywall, paint peeling in sheets, or growing water stains, you’re looking at symptoms of a bigger problem. A leak from the roof or a pipe needs a proper diagnosis and repair from a qualified residential or commercial contractor before any painting can begin.

And let’s not forget safety. Trying to paint a high ceiling in a cramped bathroom is a recipe for disaster without the right gear. Professionals come equipped with the proper equipment—and, just as importantly, the insurance—to handle these situations safely.

A professional painter doesn’t just cover up problems; we solve them. At Wheeler Painting, our experience with homes and commercial facilities across the Puget Sound has taught us how to diagnose the why behind paint failure. We bring a guarantee that the job is done right.

The Value of Professional Service

For homeowners, building owners, and facility managers in Tacoma, Kent, and the greater Seattle area, bringing in a team like Wheeler Painting & Restoration Services isn't just about getting a paint job. It's an investment in quality and peace of mind. We have access to commercial-grade primers and coatings you can't find at a big-box store, and we know exactly how to apply them for a flawless, durable finish perfect for any tenant improvement or residential remodeling project.

Ultimately, hiring a pro for your bathroom ceiling isn't admitting defeat—it's making a smart decision to protect your property. It ensures the work is done correctly, safely, and efficiently the first time. That means you get a beautiful result that will hold up for years, letting you focus on other things without worrying about what’s happening overhead.

Your Top Bathroom Ceiling Questions, Answered

When it comes to repainting a bathroom ceiling, a few questions pop up time and time again. As painters serving the Seattle area, we've heard them all. Here are our straightforward answers to the most common queries we get from homeowners and property managers.

How Long Should I Wait to Shower After Painting?

This is the big one. While new paint might feel dry in a few hours, it hasn't fully cured yet. Curing is the chemical process where the paint hardens and develops its final moisture-resistant shell.

We always tell our clients to hold off on hot showers for at least 24-48 hours. Firing up the steam too early is the quickest way to ruin a fresh paint job. Check the paint can for the manufacturer's specific recommendation, as some high-performance bathroom paints need even more time to get tough enough to handle the humidity. A little patience now prevents a lot of headaches later.

Can I Just Paint Over a Few Mildew Spots?

Absolutely not. This is probably the biggest mistake we see people make. Painting over mildew is like putting a rug over a stain—it doesn't solve the problem, it just hides it for a little while.

Mildew is a living fungus, and it will happily grow right through that new layer of paint, often coming back worse. You have to kill it first. Mix a solution of one part bleach to three parts water (or use a store-bought mildew killer), apply it, and let it sit. After a good rinse and letting it dry completely, you'll need to use a quality stain-blocking primer before you even think about your topcoat. It's the only way to be sure it's gone for good.

For many homeowners and property managers in the Kent and Tacoma areas, hiring a professional for a bathroom ceiling is a smart call. An expert ensures underlying moisture or mildew issues are properly resolved, not just covered up. We have the right tools and experience for a flawless finish, saving you time and ensuring it lasts—a wise investment in protecting your property.

What's the Right Way to Fix Peeling Paint?

Peeling paint is your ceiling's way of telling you there's an adhesion problem, almost always caused by moisture. Just painting over the peeling spot won't work; the new paint will just peel off with the old layer.

You have to get back to a solid foundation. Here's how:

  • Scrape: Use a putty knife or scraper to remove every bit of loose, flaking paint. Keep going until you only have paint with a solid, firm edge.
  • Sand: Feather the edges of the remaining paint to create a smooth transition from the painted to the bare areas. A thin skim coat of spackle might be needed.
  • Prime: This is the non-negotiable step. You must prime the repaired patches with a high-quality bonding or moisture-resistant primer. This gives your new paint something to grab onto.

Only after you've properly prepped the surface can you repaint the entire ceiling for a uniform, lasting finish.


Ready to skip the hassle and get a guaranteed professional result? The team at Wheeler Painting has been serving homeowners and businesses in the Puget Sound for decades, delivering durable, beautiful finishes for homes and commercial facilities. We are the local "house painting near me" and "commercial painting services near me" provider you can trust. Contact us today for a free, no-obligation estimate

Design Build vs General Contractor: Your 2026 Project Guide

When starting a renovation or construction project, one of the first decisions you'll make is choosing between design-build vs. a general contractor. It might sound technical, but the choice is simple: Do you want one unified team handling everything, or do you prefer to hire a separate designer and builder? A design-build firm offers a single, integrated team for both the creative design and the physical construction, all under one roof. The traditional general contractor route, on the other hand, means you hire an architect first, finalize the plans, and then find a builder to bring them to life.

Understanding this choice is the first step toward a successful project, and as your local Kent, WA, construction partner, we want to make the process feel clear and reassuring, not overwhelming.

Your Project's First Big Decision

Picking your project delivery model is one of the most critical decisions for your home or commercial property. It sets the foundation for communication, budget management, and the final timeline. For property owners, business owners, and facilities managers in the Seattle and Tacoma areas, getting this right from the start is the key to a smooth and successful project.

The path you choose determines who is responsible for what. With the design-build model, a single company takes ownership of the entire project, from the first sketch to the final walkthrough. This creates a single point of accountability, which naturally encourages better teamwork and simplifies communication for you.

In contrast, the classic general contractor approach, often called design-bid-build, splits these duties. You'll manage two separate contracts—one for the architect or designer and another for the general contractor who handles construction. While this can offer a wider range of initial design ideas, it often puts you in the middle, playing coordinator between the two separate teams.

Quick Comparison: Key Differences at a Glance

To make this clearer, let's break down the core differences in how each model handles project structure, accountability, and workflow.

Key Aspect Design-Build Model General Contractor Model
Team Structure A single, unified team handles both design and construction. Separate teams and contracts for the designer and builder.
Accountability One company is responsible for the entire project outcome. Responsibility is split between the architect and contractor.
Communication Streamlined communication with a single point of contact. Property owner or manager often coordinates between parties.
Timeline Faster project delivery due to overlapping design and build phases. Slower, sequential process (design, then bid, then build).
Cost Control Costs are more predictable with early builder input during design. Bidding may offer a low initial price, but risks cost growth and changes.

This table shows how the integrated nature of design-build contrasts with the segmented approach of the traditional model. Your preference for a single trusted partner versus separate specialists is a major factor in your decision.

This decision tree offers a great visual for weighing whether a unified team or separate specialists is the right fit for your project.

A flowchart explaining construction model selection criteria, comparing Design-Build and Design-Bid-Build options.

As the flowchart illustrates, the core of your decision hinges on whether you'd rather have a single, integrated partner or work with separate, specialized firms.

As a full-service residential and commercial contractor, Wheeler Painting has deep experience excelling within both models. We can guide your project in Seattle, Tacoma, or Kent, whether you need a single, accountable partner for a tenant improvement or a trusted builder to execute your existing residential remodeling plans.

Our flexibility means we're focused on making your project a success, no matter which path you take. To see how this works in practice, you might find our detailed guide on the design build project delivery method helpful.

Why Design-Build is Reshaping Modern Construction

If you’ve been involved in construction recently, you've probably noticed a major shift in how projects get done. The design-build model is rapidly becoming the preferred approach for projects all across Western Washington and the rest of the country. This isn’t just an industry trend; it’s a smarter, more efficient way to deliver a project from the first sketch to the final walkthrough.

For property owners and facility managers here in the Puget Sound, understanding this shift is crucial. It’s about making an informed decision for your next retail build-out or residential renovation, one that prioritizes efficiency and clear responsibility from start to finish.

Three male architects or engineers collaborating on blueprints in a modern office overlooking a city.

A National Shift with Local Impact

This isn't just a local trend. The growth of design-build is a nationwide story. Industry research shows that design-build is on track to represent over 47% of all construction spending in major non-residential markets by 2028. That's a huge leap from just a few years ago. You can review the findings on project delivery methods from industry research.

What this means for homeowners and commercial clients in Western Washington is clear: the market is moving away from the fragmented design-bid-build process. The reason is simple—design-build offers a more integrated and reliable path to a finished project, helping you feel reassured and in control.

The Power of Single-Source Accountability

At its heart, the appeal of design-build comes down to one thing: single-source accountability. Instead of juggling separate contracts for an architect and a builder, you have one unified team responsible for everything.

This setup puts an end to the "blame game" that often happens in traditional projects when design issues cause construction headaches. When one team owns both the design and the construction, everyone is pulling in the same direction—yours.

With a single contract and a single point of contact, the design-build model streamlines communication and decision-making. This ensures that your vision, budget, and schedule remain the central focus throughout the project lifecycle.

This unified approach is a game-changer for commercial projects, especially for:

  • Office space renovations in Seattle: Tight timelines demand seamless coordination. Design-build minimizes business disruption by getting your office space renovation done right the first time.
  • Retail build-outs in Tacoma: Getting doors open on schedule is non-negotiable. This model fast-tracks delivery so you can start generating revenue sooner.
  • Facility construction services for building owners: For facility maintenance and upgrades, you need a partner who understands the building inside and out. As a smaller firm, Wheeler Painting provides the focused attention needed for these mid-size tenant improvement projects.

Because the builder is at the table during the design phase, they provide real-world input on cost and constructability from day one. This early collaboration prevents expensive redesigns and ensures the final plans are not only inspiring but also practical and on budget.

Comparing Project Workflows and Team Responsibilities

How your project unfolds day-to-day depends entirely on the construction model you choose. The differences in workflow between the design-build and general contractor approaches are significant, and they directly shape communication, accountability, and the demands placed on you as the property owner.

Let's break down what the journey really looks like for each model in a clear, straightforward way.

The Traditional Path: Design, Bid, Then Build

The classic approach is what we call design-bid-build. It’s a very linear, sequential process. Think of it as a relay race, where one professional must completely finish their part before handing the project off to the next.

Your journey starts by hiring an architect or designer to create a full set of construction plans. This design phase often happens separately from the builder who will eventually have to make it a reality. Once the plans are finalized, you take them to market, asking several general contractors to bid on the job. You then select a contractor—often based on the lowest price—and only then does construction finally begin.

This sequence creates distinct, and sometimes challenging, handoffs. Your architect's job is mostly done right when your builder’s is just getting started.

The General Contractor Workflow in Action

So, what does this feel like for a property owner? Imagine you’re planning a commercial tenant improvement for a new retail shop in Kent. Following the traditional model, you hire a Seattle architect who designs a stunning layout.

With these finished plans, you go out for bids. A contractor looking at the job might realize a key material has a long backorder, or that a planned system is incompatible with the building. Because the builder had no input during design, these problems are only discovered now. This can force you back to the drawing board for redesigns and almost guarantees delays before work even starts.

In the traditional model, you become the central hub of communication. You are responsible for mediating any conflicts between the design plans and on-site realities—a role that can be time-consuming and stressful for busy property managers and homeowners.

The Design-Build Workflow: A Collaborative Approach

The design-build model swaps the relay race for a unified team sport. From the very beginning, your designer and builder are working together under a single contract, creating a seamless and integrated workflow. The process is fluid and overlapping, not a rigid sequence of steps.

Let’s apply this to a residential remodeling project in Tacoma. With design-build, our construction experts are in the room with the designer from the first conversation. When the designer suggests a custom island or removing a wall for your kitchen remodel, our team is right there to give instant feedback on structural needs, material costs, and the overall budget. This collaboration prevents surprises and ensures the final design is both beautiful and achievable.

This integrated approach completely changes the accountability structure:

  • No more finger-pointing. If there’s an issue, it’s on the single design-build firm to resolve it. The team works together to find a solution.
  • Change orders are drastically reduced. Because the builder provides feasibility checks during design, potential issues are caught on paper, not after construction has started.
  • Budget certainty is a priority from day one. The design is developed with real-time construction cost data. This means the budget is realistic from the start.

Understanding how project management in residential construction is structured can highlight the practical advantages of having one team. For Wheeler Painting, maintaining clear processes is everything. A detailed construction quality control checklist is central to our success, ensuring high standards are met no matter which model you choose.

Analyzing Project Costs and Budget Management

Two construction professionals discuss project delivery methods shown in diagrams on whiteboards.

When it comes to any home addition, commercial renovation, or facility maintenance project, the budget is where the rubber meets the road. How you manage costs shapes the entire experience. The choice between a design-build firm and a general contractor is one of the most significant financial decisions you'll make, and our goal is to help you feel confident in it.

How Design-Build Delivers Budget Certainty

The real financial power of the design-build model is cost predictability. From day one, the builder is at the table with the designer. As ideas take shape, the builder provides immediate, real-world cost feedback on different materials, methods, and design choices.

This early collaboration is your best defense against expensive redesigns. Instead of an architect handing off a finished plan that ends up being over budget, the integrated team finds creative solutions that honor your vision without breaking the bank.

With the design-build approach, potential budget conflicts are resolved on paper, where changes are simple. This is far better than discovering a problem in the field, where the only solution is often an expensive change order.

This is a huge advantage for business owners and facility managers in places like Seattle and Tacoma, who depend on reliable financial forecasting for tenant improvements and other commercial projects.

The Financial Risks of the Traditional Model

The traditional general contractor model (design-bid-build) has a tempting hook: competitive bidding. Once an architect completes the plans, you can send them to several contractors and pick the lowest price.

But that initial low bid can be misleading. The biggest financial trap in this model is that the contractor has no say in the design they are bidding on. They are pricing plans that may have hidden conflicts or impractical details. When those issues surface during construction—and they often do—it can trigger change orders, delays, and surprise costs.

Accurate estimates are critical, but they're only as good as the information provided. Modern construction estimating software helps, but even the best tools can't account for design flaws they don't know about.

A Data-Backed Look at Cost Savings

The cost advantage of design-build isn't just a feeling; the numbers back it up. Research has consistently shown that this integrated method leads to real savings. One comprehensive analysis found that, on average, design-build projects cost 6.1% less than their traditional design-bid-build counterparts. This is almost entirely due to the builder’s early involvement, which catches expensive issues before they happen. You can see the specifics in this federal research on project delivery cost comparisons.

Even more telling, that same research revealed that design-build projects have 5.2% less cost growth after construction begins. For a Puget Sound homeowner planning a remodel or a business owner building out a retail space, that statistic is huge. It translates to a lower risk of facing those dreaded, budget-busting surprises, giving you peace of mind that your initial cost estimate is far more likely to be your final cost.

How Each Model Impacts Your Project's Schedule

When it comes to any construction project, the timeline is everything. For a business owner in Seattle, every day of delay is a day you're not open. For a family in Tacoma, it's another day you're not able to enjoy your newly remodeled home. The path you choose—design-build or the traditional general contractor route—will have a massive impact on that schedule.

Think of the general contractor model as a relay race. The architect must finish their part (the design) completely before passing the project to the builder. This handoff and the step-by-step process naturally build pauses and potential delays into your project from the start.

The Design-Build Advantage: Overlapping Your Schedule for Faster Completion

Design-build throws out the relay race playbook and operates more like a unified team. Since the design and construction experts are on the same team from day one, their work can happen in parallel. This is where you see significant time savings.

For example, while the final details of the interior finishes are being decided, the team can already be working on site prep, foundation, and framing. We can get a head start on ordering materials with long lead times, like custom cabinets or specialty tile. This integrated approach can shave weeks, and sometimes even months, off a project's total duration.

One of the biggest reasons our local clients love the design-build process is the predictable schedule. By getting rid of the stop-and-start friction of the old model, you get a much smoother and faster journey from the first sketch to the final walkthrough.

More Than Just a Feeling: The Data on Faster Project Delivery

This isn't just a hunch; the speed advantage is backed by solid industry research. A comprehensive study found that the design-build method delivers 12% faster construction speed and an incredible 33.5% faster overall delivery speed compared to the traditional approach. You can dig deeper into how this integrated approach drives project efficiency.

This kind of acceleration is possible because everyone is collaborating from the very beginning. For a property owner, that speed means getting into your space sooner, spending less on project management, and seeing a faster return on your investment.

How This Plays Out on Real Puget Sound Projects

Let's ground this in some familiar local scenarios:

  • A Commercial Tenant Improvement in Kent: A retailer needs their new shop open for the holiday season. With design-build, we can fast-track permits and order custom fixtures while the final floor plan is being polished, hitting that critical opening date.
  • A Home Remodel in Tacoma: A homeowner needs their kitchen back to normal after a setback. The design-build model lets us begin demolition and structural work almost immediately, drastically cutting down on the time the family is displaced.
  • An Office Expansion in Seattle: A company needs to get a new floor ready for a team of new hires. The overlapping phases of design-build create a reliable schedule, which is essential for business planning and minimizing disruption to current operations.

If getting your project done quickly and on a predictable timeline is a top priority, the design-build model offers a clear, proven advantage. For projects all over the Puget Sound, that reliability is a complete game-changer.

Choosing Your Ideal Construction Partner in the Puget Sound

Split image showing an empty traditional construction site and a busy design-build project with workers.

Knowing the difference between the design-build vs. general contractor models is a great start. But the real key to a successful project is picking the right local partner to execute the plan. Your project’s outcome comes down to the experience, flexibility, and communication of the team you hire.

Here at Wheeler Painting, our decades of work as a full-service general contractor across the Puget Sound give us a unique perspective. We have the operational know-how to fit seamlessly into either system, always focusing on what makes the most sense for you and your project.

As Your Partner in a Design-Build Project

When you opt for the design-build route, you’re looking for a single, accountable leader. That's a role we step into with confidence. We manage every detail, from the first brainstorming sessions and cost estimates to the final construction and finishing touches, like interior painting or flooring.

This all-in-one approach is especially effective for projects where collaboration is key:

  • Commercial Tenant Improvements: We understand that downtime is lost revenue. We coordinate every detail to get your Seattle retail or office space ready for business, quickly and with minimal fuss.
  • Residential Remodeling: For a large kitchen overhaul or a home addition in Tacoma, our integrated team makes sure the design isn't just beautiful but also practical to build and within your budget.
  • Custom Decks and Patios: We blend creative vision with solid construction to build outdoor spaces that look great and last for years in our Pacific Northwest climate.

As Your Builder in a Traditional General Contractor Role

If you've already hired an architect and have a full set of plans, our role shifts. We become the dedicated residential contractor or commercial contractor tasked with bringing those plans to life. Our work across Kent, Seattle, and Tacoma shows our skill in translating complex blueprints into high-quality, finished spaces.

In this traditional model, communication is everything. We work closely with your design team to tackle any on-site issues immediately, keeping the project on track. As a "smaller" firm specializing in small to mid-size projects, we provide the focused attention that building owners, property managers, and facility managers are looking for.

Whether you need a single point of contact for the whole project or a skilled builder to execute existing plans, our promise is the same: to make your project straightforward and successful. We are your local expert for everything from siding replacement and custom cabinets to facility maintenance and floor repairs.

Our goal is simple: to build lasting relationships with our clients here in the Puget Sound. We do that by delivering solid, high-quality work and clear communication, project after project. For more on what to look for in a partner, take a look at our guide on how to choose a general contractor.

Common Questions About Construction Models

When you're deciding on a construction partner, it's natural to have questions. Here in the Puget Sound, homeowners and business owners often ask us about the practical differences between hiring a design-build firm versus a general contractor. Here are some of the most common questions, with our straightforward answers.

Which is Better for Smaller Projects?

For more contained projects—like interior painting, deck staining, or siding replacement—hiring a flexible residential contractor near me like Wheeler Painting is usually the simplest route. We can easily manage the entire job and handle any minor design details that come up without needing the formal structure of a full design-build agreement.

The design-build model really shines on larger, more involved projects like a full home addition, a major office space renovation, or a new retail build-out where the design and construction need to be perfectly in sync from day one.

Is There a Difference in Quality Between the Two?

Honestly, the quality of any project comes down to the craftsmanship of the team you hire, not the contract model. That said, the design-build setup has a built-in advantage for ensuring high quality.

When your designer and builder are part of the same team, everyone shares the same goal: a successful project. That single point of accountability eliminates the blame game, encourages creative problem-solving, and often leads to a better finished product.

In the traditional general contractor approach, quality relies on how well your architect and your builder—two separate companies—can communicate. No matter which path you take for your Seattle or Tacoma property, our team at Wheeler Painting brings the same unwavering commitment to craftsmanship to every job, from a simple drywall repair to a complex commercial renovation.

Can Wheeler Painting Recommend an Architect for Me?

Of course. After working as a contractor in Kent, Seattle, and Tacoma for decades, we’ve built strong relationships with some of the best architects and designers in the area. We know who does great work and is reliable.

If you feel the traditional design-bid-build path is the right fit for you, we’re happy to make introductions. Our main goal is to help you assemble a team that you trust and whose style matches your own, ensuring a fantastic result for your project.


Ready to figure out the best approach for your residential or commercial project? The team at Wheeler Painting has the local experience to guide you. Contact us today for a consultation, and let’s start planning together.

Transform Your Bathroom with a One Day Bath Remodel

Imagine this: you leave for work in the morning with a drab, dated bathroom and come home that evening to a sparkling new shower. It sounds like a dream, but for homeowners and property owners across the Puget Sound, it's the reality of a one-day bath remodel—a smart, efficient alternative to a traditional renovation that can drag on for weeks.

The Secret to a New Bathroom in Just One Day

A modern walk-in shower with a clear glass enclosure, black fixtures, and a frosted window.

So, how is this even possible? The magic isn't in cutting corners; it's in a focused, professional approach. Instead of a full gut job that tears your bathroom down to the studs, a one-day remodel concentrates exclusively on the “wet area”—your tub, shower, and the walls around them. This delivers the biggest visual impact without the weeks of dust, noise, and disruption.

It’s a game-changer for anyone in Seattle, Kent, or Tacoma who can’t afford to have their primary bathroom out of commission. The process usually involves one of these core updates:

  • Bathtub or Shower Replacement: A tired, cracked unit is swapped out for a pristine, high-quality acrylic model.
  • Tub-to-Shower Conversions: That old, high-sided tub you never use becomes a safe, modern, and accessible walk-in shower—a popular residential remodeling choice.
  • Durable Wall Surrounds: Old tile and crumbling grout are covered with beautiful, non-porous wall panels that are a breeze to clean.

The key is that everything is measured and custom-fabricated ahead of time. When our installation team arrives at your home, it’s all about precise, clean fitting, not weeks of demolition.

Fast, Focused, and Surprisingly Affordable

This targeted strategy also makes a one-day remodel incredibly cost-effective. A traditional, full-scale bathroom remodel can easily top $12,000, but a one-day project typically falls in the $7,500 to $22,500 range. You save big because the existing layout, plumbing, and electrical stay put.

By focusing on the part of your bathroom that sees the most wear and tear, you get a beautiful and highly functional new space with almost no interruption to your life. Take a look at how one-day remodel costs compare to traditional projects, and you'll see why it's such a popular choice for homeowners who want fast results without sacrificing quality—a solution we're proud to offer at Wheeler Painting.

How Can a Bathroom Be Transformed So Quickly?

It seems almost unbelievable, doesn't it? A complete bathroom transformation in a single day sounds more like a TV show gimmick than reality. But the secret isn't magic—it's all about meticulous preparation and focusing on what matters most.

The term "one-day" really refers to the on-site installation. The real work actually happens weeks before our team ever sets foot in your Kent or Tacoma home. It all starts when we take incredibly precise, digital measurements of your current bathtub or shower space. From there, we custom-fabricate your new acrylic bath system off-site, built to fit your bathroom down to the millimeter. It’s like having a bespoke suit made, but for your bathroom; it’s designed to slide perfectly into place over your existing footprint.

Smart Systems for Rapid Results

When installation day finally arrives, our technicians aren't showing up with a sledgehammer and a dumpster. There's no chaotic, dusty demolition. Instead, they're installing a finished product that was built just for you. This approach is what allows for such a stunning change without the headache of moving plumbing, re-routing pipes, or tearing down walls.

This is how we deliver on the one-day promise. We concentrate all our effort on the "wet area"—the tub and shower surround, which is the most used and most impactful part of the bathroom. It’s a method that has become a lifesaver for Puget Sound families who need a functional, beautiful upgrade without having their home turned into a construction zone for weeks on end. You can get a closer look at how we tackle these projects with our bathtub and shower conversions.

The One-Day Advantage: Cost and Efficiency

A traditional, midrange bathroom remodel can easily run you $26,000 or more. One-day remodels, on the other hand, offer a much more accessible price point. Because we're using pre-fabricated systems and a streamlined process, most projects land somewhere between $6,000 and $15,000. Our skilled teams can have the entire job done in just 8-10 hours because every component is designed for efficiency.

Part of that speed also comes from making smart choices on materials that work well together. For instance, knowing what flooring is best for bathroom remodels in our damp Puget Sound climate can prevent delays and future issues, making the whole process smoother.

The key is focusing on high-impact changes without messing with the bathroom's existing layout. This is why 75% of one-day projects stay under $15,000, putting a modern, worry-free bathroom within reach for more homeowners.

One Day Remodel vs. Full Renovation

So, you’re ready to update your bathroom, but you’re stuck on a big question: should you go for a quick one-day update or a full-blown, down-to-the-studs renovation? It’s a common dilemma for homeowners around Seattle, and honestly, the right answer really depends on what you’re trying to achieve.

A one day bath remodel is all about speed and precision. It’s the perfect choice if you're dealing with a specific problem—like a grimy, outdated shower or a cracked tub that’s seen better days. It's also a fantastic way to improve safety with a tub-to-shower conversion or add a quick burst of value to your home before selling. The entire focus is on the "wet area," which is where you get the most bang for your buck.

On the other hand, a full renovation is your ticket to total creative control. This is the path you take when you’re dreaming of a brand-new layout, moving plumbing, or creating a custom spa-like retreat from scratch. It’s a much bigger undertaking, but the payoff is a space that is completely, uniquely yours.

Scope and Timeline

The biggest difference between the two really comes down to scope. A one-day project is surgical, while a full renovation is an all-encompassing overhaul.

  • One Day Remodel: All the work happens right in your tub or shower space. We’re talking about replacing the old unit, fitting a new acrylic surround, and installing fresh fixtures. Because the plumbing and electrical stay put, the whole job can be done in just a matter of hours, not weeks.

  • Full Renovation: This means tearing everything out. We’re talking new floors, vanity, toilet, lighting—maybe even taking out a wall. A project of this scale requires coordinating plumbers, electricians, and tile setters, which is why it often stretches into several weeks or even months.

This handy chart can help you see which direction makes the most sense for your project.

A bath remodel decision guide flowchart comparing one day updates vs. full renovations.

As you can see, if getting it done fast and without a major disruption is your main goal, a one-day remodel is the clear winner.

To make the comparison even clearer, here’s a side-by-side look at the key differences.

One Day Remodel vs. Full Bathroom Renovation

Feature One Day Remodel Full Renovation
Timeline Typically 8-12 hours 3-8 weeks or more
Scope Focused on the wet area (tub/shower) Entire bathroom, including layout changes
Disruption Minimal; bathroom is usable same day Major; bathroom is unusable for weeks
Cost Significantly lower Substantially higher
Customization Limited to pre-selected styles & colors Nearly unlimited design freedom
Best For Fixing specific issues, safety updates, quick cosmetic lifts Complete redesign, changing layouts, high-end custom finishes

Ultimately, choosing the right path comes down to balancing your immediate needs with your long-term vision for the space.

Budget and Customization

Your budget and how much you want to personalize the space are, of course, huge factors. A one day bath remodel is much friendlier on the wallet, mainly because you're skipping the massive labor costs of demolition and re-routing plumbing. You get a clean, modern look without the sticker shock of a complete tear-out.

A full renovation gives you endless opportunities for customization—from intricate tile patterns to that unique vanity you saw online—but that level of freedom comes with a much higher price tag and a longer wait. A one-day project streamlines the process with a carefully chosen selection of high-quality, durable materials that are designed to look great and be installed efficiently.

At the end of the day, there’s no single "best" choice—only the best choice for you. As a trusted local contractor who has served homeowners and businesses across Kent, Tacoma, and the Puget Sound for years, we at Wheeler Painting have seen it all. We can walk you through the pros and cons of each approach to make sure the final result perfectly matches your goals, budget, and timeline.

Understanding Your One-Day Remodel Costs in 2026

So, what does a one-day bath remodel actually cost here in the Seattle-Tacoma area? It’s one of the first questions we get from local property owners, and for good reason. While the speed and convenience are huge draws, the affordability is what often seals the deal for homeowners.

Of course, there’s no single price tag. The final cost really depends on what you want to accomplish and the materials you choose. Your decisions are what shape the final bill.

What Influences the Final Price

The biggest factor, hands down, is the scope of the project. Are we talking about a clean, simple acrylic tub liner that fits right over your old, worn-out tub? Or are you dreaming of a full tub-to-shower conversion? That conversion involves more work, so naturally, it will sit at the higher end of the price range.

From there, the specific materials and features you select will layer into the cost. Think of it like customizing a new car—the base model is great, but the premium upgrades will add up.

  • High-end fixtures like a luxurious rain showerhead or a specific designer faucet.
  • Accessibility features that add safety and comfort, such as strategically placed grab bars or a built-in shower seat.
  • Glass door options, which can range from a standard sliding door to a show-stopping, heavy frameless glass enclosure.

Here's a number that really highlights the value: one-day bath remodels save homeowners money primarily by keeping the existing plumbing right where it is. That single decision avoids a massive amount of labor and materials, slashing project costs by 25-35% on average compared to a tear-out renovation.

Local Costs and How We Save You Money

In the Puget Sound market, we're fortunate to have competitive pricing compared to other big coastal cities. A full, down-to-the-studs bathroom renovation can easily run into the tens of thousands. A one-day remodel delivers a stunning new look for a fraction of that by being smarter and more efficient. We dive deeper into this topic in our guide to affordable bathroom remodel options.

At Wheeler Painting, our entire process was designed to give you that value without ever compromising on quality. We custom-fabricate your new tub or shower system in our workshop before we ever set foot in your home.

This simple step is a game-changer. It dramatically cuts down on the expensive on-site labor hours. Our team arrives with everything they need, ready to install quickly and with minimal disruption. We get in, get the job done beautifully, and get out—passing those efficiency savings directly on to you. It's how we deliver exceptional results for homeowners in Kent, Tacoma, and across the region.

How to Prepare for a Flawless Installation Day

A bathroom with a vanity, toilet, and tools, showing a clear protective floor sheet for a remodel.

The beauty of a one-day bath remodel is how little it disrupts your life. But a small amount of prep work from you can make a huge difference, helping our installation day go off without a hitch.

Think of it like clearing the runway before a plane takes off. By taking a few quick steps before we arrive, you ensure our team can get straight to work safely and efficiently. The result? You get to enjoy your beautiful new bathroom even faster.

Your Pre-Installation Checklist

To set us up for success, we suggest running through this simple checklist the night before we're scheduled to arrive.

  • Completely Clear the Bathroom: Please remove everything from the countertops, shower, tub surround, and floor. This includes shampoo, soap, toothbrushes, towels, bathmats, and any decorations. An empty bathroom protects your belongings and gives our crew the access they need.

  • Create a Clear Path: Our installers will be carrying large, custom panels and all their tools from our truck to your bathroom. Make sure there’s a clear walkway from the entrance of your home to the bathroom door. This means moving things like shoes, area rugs, or small furniture that could be tripping hazards.

  • Plan for Pets and Children: The safety of your family is paramount. The work can get a bit noisy, and we'll be moving around with tools and materials. It’s always best to keep children and pets safely away from the work area throughout the day.

Taking care of these few things allows our crew to put 100% of their focus on the craftsmanship, protecting your home and delivering the quality finish Wheeler Painting is known for.

Handling Debris and Clean-Up

People often ask about the mess. And it's a fair question! Removing an old tub or shower surround definitely creates some waste, so it's smart to think about managing construction debris.

The good news? We handle all of it. We pride ourselves on leaving your home as clean as we found it, and that includes hauling away and disposing of all project-related debris. You won’t have to worry about a thing. It’s a core part of the straightforward, full-service experience we provide for homeowners in Kent and Seattle.

Finding the Right Residential Contractor Near Me

The success of your one-day bath remodel really comes down to one thing: the team you hire. With so many contractors to choose from in the Seattle and Tacoma area, it can feel a little daunting. But honestly, picking the right partner is the most important decision you'll make in this entire process.

A top-notch contractor won't stumble over your questions; they'll have clear, confident answers. They should be able to immediately show you that they are fully licensed, bonded, and insured for residential work right here in Washington. This isn't just a piece of paper—it's your single biggest protection as a homeowner.

Key Questions to Ask Your Contractor

Before you even think about signing a contract, you need to get good answers to a few critical questions. Treat it like an interview, because that's exactly what it is. A true professional will appreciate your diligence.

  • Can I see your portfolio of recent projects? Any contractor worth their salt will be eager to show off their work. Ask to see examples of one-day bath remodels they've done locally in the Kent area.
  • What warranties do you offer? You need to know about the warranty on the materials (like the acrylic surround) and, just as importantly, the labor. A company that stands behind its work will have a solid warranty.
  • Do you specialize in bathroom remodels? A one-day project isn't a job for a general handyman. It takes a specialized skill set and deep experience with factory-fabricated systems to get it right.

Experience and Trust Are Non-Negotiable

There's no substitute for experience, especially with the specific materials used in these quick remodels. As a local firm, a seasoned team from Wheeler Painting understands the unique quirks of working in older Seattle homes just as well as they know the new construction styles in places like Kent and Tacoma. They’ve seen it all and know how to handle the unexpected.

An experienced contractor with a strong local reputation often has a better relationship with municipal inspectors. This can be a huge advantage, as permit approvals and final inspections are critical steps that can delay a project if not handled correctly.

At Wheeler Painting, we've always believed in total transparency. We've spent decades building our reputation by walking homeowners through every step, from the first design ideas to the final inspection. Our goal is to make your project feel straightforward and stress-free. For more tips on getting started, feel free to check out our guide on bathroom remodel planning. We're committed to delivering the high-quality work our Puget Sound community expects and deserves.

Common Questions About One Day Bath Remodels

Even after seeing the benefits, it’s smart to have a few questions before committing to a one day bath remodel. This is a big deal for your home, and you should feel completely confident in your decision. We hear a lot of the same questions from homeowners across Seattle and Tacoma, so we’ve put together some straight answers to help you out.

Are the Materials Durable?

Absolutely. This is probably the number one concern we hear, and for good reason. The answer is a definite yes.

The materials used in modern one-day systems are a world away from what you might be used to. We're talking about high-quality, non-porous acrylic that's built to resist all the usual suspects—chipping, cracking, and fading. Even better, because it’s a seamless surface, you can say goodbye to scrubbing grout lines. It’s naturally resistant to mold and mildew, making it a fantastic, low-maintenance solution for our damp Puget Sound climate.

What if You Find a Problem Behind My Old Tub?

That's a great question, and it’s where hiring a true professional like Wheeler Painting really pays off. It's not uncommon to pull out an old tub and find some hidden water damage or even rot underneath.

When that happens, we don't just cover it up. We stop, assess the situation, and fix it properly. As a full-service residential contractor, we have the in-house expertise to handle the structural and plumbing repairs needed to make sure your new bathroom is built on a solid foundation.

It's crucial to understand that not all "one-day" companies are equipped to handle these surprises. A company that only installs liners may not be licensed or skilled enough to perform necessary structural or plumbing repairs, which could lead to major problems down the road.

What Can’t Be Done in One Day?

It's just as important to know what a one-day remodel isn't. The magic of a single-day project is its focus on the "wet area"—the tub and shower enclosure itself. Anything beyond that scope moves you into a more traditional, multi-day renovation.

A one day bath remodel won't include:

  • Moving Walls or Changing Layouts: Knocking down walls or altering the bathroom's footprint is a major construction job.
  • Relocating Plumbing: If you want to move your toilet or sink, that requires significant plumbing work, permits, and inspections.
  • Extensive Electrical Work: Adding things like a new circuit for heated floors is a task for a full remodel.
  • New Flooring or Vanities: While we can certainly handle floor repairs and replacements or install custom cabinets as part of a larger project, they aren't part of the one-day package.

We believe in being completely upfront about what’s possible in a day. Our goal is to set you up for success with no surprises—just a beautiful new bath you can start enjoying that very evening.


Ready to see how a one-day remodel can transform your home? The team at Wheeler Painting is here to answer your questions and provide a clear, transparent estimate for your project. Contact us today to start planning your stress-free bathroom update. Learn more at https://wheelerpainting.com.

Puget Sound Bathroom Remodel Planning: Your Essential Guide

Thinking about remodeling your bathroom? It’s one of the best upgrades you can make to your property, and when done right, it's incredibly rewarding. But before you get lost in tile samples and faucet designs, successful projects—whether for your home or a commercial property—always start with one simple question: why?

Figuring out your core motivation is the single most important first step. Are you dreaming of a personal spa, need a more functional space for your growing family, or are you a facility manager needing to upgrade an office or retail space for accessibility and modern appeal? Your answer will guide every decision from here on out. This guide will walk you through the essential steps, from initial vision to final punch list, ensuring your project in the Kent, WA area is a success.

Getting Started on Your Puget Sound Bathroom Remel

A bathroom remodel isn’t just about knocking down walls and putting up new tile. It’s a serious investment in your property's value and, more importantly, in your daily life or business operations. Especially for property owners in hot markets like Seattle, Kent, or Tacoma, a smart remodel can deliver a fantastic return.

But let's not get ahead of ourselves. Nailing down your vision before a single hammer swings is what separates a smooth project from a stressful one. Getting this right prevents those expensive, last-minute changes and ensures the finished bathroom is one you'll actually love using every day.

First, Define Your "Why"

We always ask clients to start by thinking about the problems their current bathroom creates. What's not working for you? Is it cramped and cluttered? Outdated and impossible to clean? Or are you simply planning for the future?

Your answers point us in the right direction. For example:

  • Craving a Spa-Like Retreat? We'd probably look at a spacious soaking tub, maybe a multi-head shower system, and definitely things like heated floors and dimmable mood lighting.
  • Wrangling a Busy Family? The focus shifts to durability. Think dual sinks to end the morning rush hour, tough materials that can handle some abuse, and clever storage to hide all the clutter.
  • Planning for Accessibility? The layout is key. A curbless, walk-in shower becomes the centerpiece, along with well-placed grab bars, a comfort-height toilet, and maybe a wider doorway. This is a common need in both residential and commercial renovations.

Knowing what you truly need helps a contractor see beyond just a list of wants. It allows us to build a focused, practical plan that aligns your goals with your budget.

The Real Value of a Bathroom Remodel

It's no secret that bathroom projects are a smart investment. The market for remodels is huge—the global industry hit $398.1 billion in 2024 and continues to grow as people look to add personal touches and real value to their homes.

More importantly, a well-planned remodel can boost your home's value by as much as 60%, making it one of the highest-return improvements you can undertake. You can even explore more about these industry trends to see how projects like yours are shaping the market.

A thoughtfully planned remodel isn't just about aesthetics; it's about creating lasting value. By focusing on both timeless design and high-quality craftsmanship, you ensure your new bathroom will be enjoyed for years while also being a strong asset if you ever decide to sell your home in the Puget Sound area.

Alright, you've got your "why" figured out. Now comes the part where dreams meet reality: defining what you're actually going to do and how much it’s going to cost. Getting this right from the start is the single most important thing you can do to ensure your bathroom remodel is a success.

Why? Because the difference between swapping a vanity and moving a wall is massive, not just in dollars but in dust, disruption, and duration.

The first real decision you need to make is whether you're looking at a cosmetic facelift or a full-blown, down-to-the-studs renovation. This choice sets the stage for everything else. It’s the best way to keep "scope creep"—those little "while we're at it" additions that kill a budget—firmly in check.

Cosmetic Updates vs. Full Renovations

A cosmetic update is all about achieving a big impact with minimal demolition. Think of it as giving your bathroom a fresh new look without tearing into the walls. It’s faster, less expensive, and perfect for a space that already functions well.

  • A fresh coat of paint on the walls, ceiling, or even the vanity.
  • Replacing tired faucets, showerheads, and light fixtures.
  • Swapping out old cabinet pulls, knobs, and towel bars.
  • Upgrading your mirror or putting in a new vanity top (as long as you don't move the plumbing).

A full renovation, on the other hand, is a completely different animal. This is what you need when you're changing the bathroom's footprint, dealing with ancient plumbing and wiring, or fixing hidden problems like old water damage. It's common in commercial construction for retail build-outs or office space renovations.

  • Taking down walls to open up the space or create a new layout.
  • Moving the toilet, sink, or shower—a job that requires serious plumbing work.
  • Hiring a drywall contractor to hang and finish new walls and ceilings.
  • Tearing out the old floor for new tile or a combination of wood and tile floors.
  • Bringing the electrical system up to current code, a common necessity in older homes and commercial buildings around Kent, WA.

Knowing which path you’re on from the get-go manages expectations for both your timeline and your wallet. If you're trying to keep costs down, our guide to planning an affordable bathroom remodel has some great strategies.

Budgeting for Your Puget Sound Remodel

Let's talk money. In the Seattle-Tacoma area, remodel costs are a moving target, influenced by the scope of your project, the age of your house or building, and the quality of finishes you choose. A good budget is more than just a number; it’s a detailed plan.

We tell every client the same thing: You absolutely must have a contingency fund. Set aside 15-20% of your total budget for the unexpected. This isn't for a splurge on fancier tile. It’s for the surprises we will find when we open up a wall—like leaky pipes, mold, or shoddy framing from a previous job.

To give you a starting point for your planning, here’s a look at what different levels of remodels typically cost in our area for 2026.

Estimated Bathroom Remodel Costs in the Puget Sound Area (2026)

Remodel Tier Typical Scope of Work Estimated Cost Range
Basic / Cosmetic Paint, new fixtures (faucet, lights), new vanity top, hardware updates. No layout changes. $8,000 – $15,000
Mid-Range New tub/shower combo, new vanity & toilet, new tile floor & shower surround, updated lighting & ventilation. Minor plumbing/electrical adjustments. $18,000 – $35,000
High-End / Custom Full gut renovation, layout changes, moving plumbing/walls, custom walk-in shower, high-end fixtures & tile, radiant floor heat, custom cabinetry. $40,000 – $75,000+

Disclaimer: These are general estimates for professional remodels. Costs can vary significantly based on material choices, home condition, and contractor.

This infographic also gives a great snapshot of the bigger picture and why property owners are so focused on this space.

An infographic summarizing the bathroom remodel market, including global value, top trend, and home value increase.

It’s clear that a well-planned bathroom remodel isn't just an expense; it’s one of the smartest investments you can make in your home's value.

When you build your budget, be sure to break it down into these core components:

  • Materials: Tile, fixtures, paint, vanity, toilet, tub… everything you can see and touch. This category has the biggest cost variance.
  • Labor: The pay for the skilled pros who make it happen—plumbers, electricians, tilers, and your general contractor.
  • Permits: Non-negotiable for projects in Seattle, Tacoma, and surrounding cities that touch plumbing, electrical, or structural components.
  • Contingency Fund: That 15-20% buffer we talked about. Don't skip it.

By locking in your scope and building out a detailed, all-in budget, you move your project from a "someday" idea to a well-defined plan. This groundwork is what makes for a smooth project and a great partnership with a local pro.

Making the Right Calls on Layout and Materials

Once you've nailed down your budget and scope, we get to the fun part. This is where your vision starts to feel real—where abstract ideas become concrete choices about your bathroom's layout, fixtures, and finishes. We've seen it time and time again: the most successful remodels are the ones that perfectly marry beautiful design with day-to-day practicality.

A modern bathroom showroom featuring a walk-in shower, vanity, and a display of tile samples.

This stage is about so much more than just picking a tile that catches your eye. It's about crafting a space that genuinely works for you, your family, or your tenants. If you're in an older Seattle or Tacoma building, you know what we're talking about—those cramped, awkward layouts that just don't make sense. We can fix that.

Optimizing Your Bathroom Layout

The layout is the absolute backbone of a great bathroom. Sometimes, even the smallest tweaks can completely change how the room feels and functions. A good residential or commercial contractor should help you see possibilities you might not have even thought of.

Here are some layout strategies we often recommend:

  • Making the Most of Small Spaces: Floating vanities are a game-changer. They create the illusion of a bigger room and make cleaning a breeze. Wall-mounted toilets can also be a clever way to reclaim a few precious inches.
  • Designing a Functional Flow: Think through the daily routine. Is the towel hook exactly where you need it when you step out of the shower? If two people use the bathroom, can they get ready without a constant dance of bumping elbows? In a commercial setting, this means ensuring ADA compliance and smooth traffic flow.
  • Planning for the Future: We're seeing a huge demand for universal design. This doesn't mean your bathroom has to look clinical. It can be as simple as installing a comfort-height toilet or adding blocking in the walls now for grab bars you might want later. This is crucial for both residential remodeling and commercial renovations.

It's often the little details that make the biggest difference. Something as specific as mastering sconce height for perfect vanity lighting can elevate the entire room from just "done" to "designed."

Selecting Durable and Stylish Materials

Your material choices set the tone for the entire space, but in the damp Pacific Northwest, durability is just as crucial as style. You absolutely need materials that can stand up to moisture, resist mold, and handle daily wear and tear.

Flooring, for instance, makes up a huge part of the material decision, accounting for 27.3% of the market share. Property owners are gravitating toward slip-resistant, easy-to-clean options like porcelain and luxury vinyl tile. And with over 50% of U.S. homes now over 40 years old, accessible features like curbless showers are becoming a smart investment, sometimes boosting resale value by 5-10%.

Let's dive into some of the most important material choices for your Puget Sound bathroom.

Flooring, Fixtures, and Finishes

Here's a breakdown of what to prioritize for the core components of your new bathroom:

  • Flooring: You can't go wrong with porcelain or luxury vinyl tile (LVT). They're tough, 100% waterproof, and come in an endless variety of styles. Pro tip: For real comfort on those chilly Washington mornings, have radiant floor heating installed underneath.
  • Countertops: Quartz is our go-to recommendation. It's a non-porous, stain-resistant surface that gives you the elegant look of natural stone without all the high-maintenance headaches.
  • Fixtures: Look for faucets and showerheads with the WaterSense label to save water without sacrificing pressure. The finish—whether it's matte black, brushed nickel, or champagne bronze—is the jewelry of the room and pulls the whole design together.
  • Cabinetry: Don't just settle for off-the-shelf options. Custom cabinets let you use every single inch of space for smart storage, which is worth its weight in gold, especially in a smaller bathroom.

The Critical Role of Waterproofing and Ventilation

Listen, if there's one thing you can't afford to get wrong in our climate, it's waterproofing and ventilation. We can't stress this enough. Cutting corners here is a recipe for disaster. A gorgeous remodel can be completely undermined by hidden moisture that leads to mold, rot, and costly structural damage.

At Wheeler Painting, we are meticulous about moisture management. It starts behind the scenes, using proven systems and materials to create a fully sealed, waterproof envelope in showers and wet areas. Our expertise in creating a fully waterproofed bathroom is how we ensure your investment is protected for the long haul.

Just as important is a powerful, quiet ventilation fan that’s properly sized for the room and vented directly to the outside—not into your attic. This is your number one defense against the damp air that lets mold and mildew take hold, keeping your beautiful new bathroom feeling fresh and healthy for years to come.

Hiring the Right Contractor in Western Washington

You’ve mapped out your dream bathroom, but bringing it to life hinges on one person: your contractor. After all the design choices and budget spreadsheets, the success of your project truly rests in their hands. This is arguably the most critical decision in your remodel, and here in the Puget Sound area—from Seattle to Tacoma and Kent—partnering with a reputable, local general contractor is your best bet for a smooth process.

A couple discussing bathroom renovation plans, looking at blueprints and a digital tablet.

Finding the right pro isn't about chasing the lowest number. It's about finding a team you can communicate with, whose work you’ve seen and trust. A great contractor is more than just a builder; they're your project manager, your advocate, and your go-to problem-solver when the unexpected happens. Wheeler Painting is the ideal partner for building owners, facility managers, and property managers seeking a dedicated firm that specializes in small to mid-size tenant improvement and facility maintenance projects.

Where to Find and How to Vet Your Contractor

So, where do you start? The best leads often come from your own community. Talk to friends, neighbors, or coworkers who've had good remodeling experiences. Local building supply stores are another goldmine—they know which contractors are busy and consistently buying quality materials.

With a few names in hand, it's time to do your homework. In Washington State, a few non-negotiable credentials separate the pros from the risks. Before you even schedule a meeting, verify that they are:

  • Licensed: A contractor must hold a current license with the Washington State Department of Labor & Industries (L&I). You can—and absolutely should—look them up on the L&I website.
  • Bonded: The contractor’s bond is your financial safety net. It protects you if they fail to finish the job or skip out on paying their suppliers and crew.
  • Insured: This is twofold. They need liability insurance to cover any potential damage to your property and workers' compensation to cover their crew in case of injury. Without it, you could be held liable.

Don't be shy about asking for proof. Request to see their current license and insurance certificates. Any legitimate contractor will have these documents ready and will be happy you asked. This one step can save you from a world of financial and legal trouble.

Questions to Ask During the Consultation

Think of the initial consultation as a two-way interview. While they're sizing up the job, you should be sizing them up. Do you get a good feeling from them? Do they listen to your ideas and offer thoughtful feedback? Trust your gut.

As you assemble your team of tradespeople, it's also important to know how to find a good plumber, as their work is fundamental to your bathroom's long-term function. The same rigorous vetting applies to every specialist who sets foot in your home or on your property.

Come prepared with a list of questions for each contractor you meet. For a complete rundown, check out our guide on the questions you should always ask a contractor before making a final decision.

Reading Bids and Understanding the Contract

Once the walkthroughs are done, the bids will start rolling in. It's so easy to just scan for the price at the bottom, but that’s a rookie mistake. A good bid is a detailed blueprint for the project, clearly outlining the entire scope of work.

Lay the bids out and compare them line by line. Is one significantly cheaper? Look closer. It might be missing key items like demolition, debris hauling, or it might have quoted builder-grade fixtures when you discussed premium ones. The cheapest bid is often the one with the most holes, leaving you wide open for costly "change orders" down the road.

Your final line of defense is the contract. A contract that protects you should always include:

  • A Detailed Scope of Work: A complete description of every task and all materials being used.
  • Total Cost and Payment Schedule: Payments should be tied to specific project milestones, not arbitrary dates.
  • Project Timeline: An estimated start and completion date, with major phases outlined.
  • Change Order Process: A clear procedure for how any changes to the plan will be approved and priced.
  • Lien Waivers: These are critical. They are proof that the contractor has paid their suppliers and subcontractors, which prevents them from putting a lien on your property.

When you work with a trusted, local team like Wheeler Painting, you're not just hiring a crew—you're gaining a partner who is committed to quality and transparency, giving you peace of mind from demo day to the final, beautiful reveal.

What to Expect During the Construction Phase

All the planning is done, the decisions are made, and the start date is finally here. This is the moment the sledgehammer swings, and your old bathroom starts its journey to becoming the space you've been dreaming of. It’s also where things get loud, dusty, and a little chaotic before they get beautiful.

Knowing the typical flow of a renovation can seriously reduce your stress levels. It helps you understand what’s happening behind all that plastic sheeting, especially for homeowners and facility managers here in the Kent area who are new to the remodeling game.

A bathroom undergoing renovation with exposed wall studs, plumbing, a bathtub, vanity, and tools.

Before any walls come down, a good crew’s first job is protecting your property. They'll seal off the bathroom from the rest of your home or office to contain the inevitable dust storm and lay down protection for your floors and hallways. Then, the real fun begins.

The Order of Operations in a Remodel

While every bathroom has its own quirks, the construction work itself follows a pretty standard and logical path. Your project manager should give you a schedule, but this is the general sequence you can expect to see.

  • Demolition and Haul-Away: This is the deconstruction phase. Our crew will tear out everything that’s being replaced—fixtures, tile, the vanity, maybe even drywall. It's also the point of no return and, frankly, the most likely time for surprises. This is when we often discover things like hidden water damage or funky old wiring that needs to be brought up to code.
  • The "Rough-In" Work: If you’re changing the layout, this is when new walls get framed. Then, the plumbers and electricians take over, running new supply lines, drains, and wiring through the open walls and ceiling. This prepares the space for your new shower, toilet, vanity lights, and fan.
  • Key Inspections: This is a crucial, non-negotiable step. Here in Western Washington, an inspector from your city (be it Seattle, Tacoma, or elsewhere) must come out to approve the rough-in plumbing and electrical work. Nothing can be covered up until they give the green light.
  • Closing Up and Waterproofing: Once the inspections are passed, it’s time to close everything up. Insulation goes in, and fresh drywall is hung and finished. Critically, this is also when your contractor will apply modern waterproofing membranes in the shower and on the floor. Don’t let anyone skip this step!
  • Tile, Paint, and Fixtures: The fun part! This is where you really start to see the new bathroom take shape. The tile goes in, the walls get painted, and the major pieces like the vanity, toilet, and tub are installed.
  • The Finishing Touches (and the Punch List): The final stage is all about the details. Faucets and shower trim are connected, light fixtures and mirrors are hung, and hardware is installed. Afterward, you’ll do a final walk-through with your contractor to create a "punch list"—a short list of any minor adjustments or fixes needed before the job is officially complete.

How to Live Through the Dust

Let’s be honest: living at home during a major renovation isn't for the faint of heart. If this is your only bathroom, you absolutely need to have a temporary solution figured out beforehand. And even with the best containment, expect a fine layer of dust to find its way into nearby rooms. A little extra vacuuming is just part of the process.

It’s worth noting that the remodeling industry is always looking for ways to work more efficiently. Data shows that 80% of remodelers prioritize timeliness, as they know how disruptive a project can be for a family or business. Some newer methods, like using prefabricated shower systems, can even trim project timelines by up to 30% in the right situation. You can learn more about remodeling industry forecasts and financial breakdowns to see where the market is headed.

Our Pro Tip: Set up a standing weekly check-in with your project lead. This is your time to get updates, see the progress firsthand, and ask any questions. In our experience, consistent communication is the single best tool for keeping the project running smoothly and making sure you and your build team stay on the same page.

Your Top Bathroom Remodel Questions, Answered

After years of guiding homeowners and property managers through bathroom remodels in the Puget Sound, we've found the same critical questions come up time and time again. Let's cut through the noise and get you the straight answers you need to start planning with confidence.

How Long Will My Bathroom Remodel Actually Take?

This is the million-dollar question, isn't it? The honest answer is: it truly depends on the scale of your project.

If you're just looking for a quick refresh—maybe a new vanity top, updated fixtures, and a fresh coat of paint—you're in luck. This kind of cosmetic work can often be wrapped up in just one to two weeks. The disruption is minimal because we're not moving walls or messing with the core plumbing.

However, a full gut renovation is a different story. Once you start changing layouts, moving drains, or rewiring, the timeline naturally gets longer. For these bigger jobs, you should realistically plan for four to eight weeks, sometimes more. Why the big range? A few key things can stretch the schedule:

  • Material Lead Times: That gorgeous custom vanity or special-order tile you fell in love with? It could have a long lead time that we need to account for right from the start.
  • The Permit Process: Cities like Seattle and Tacoma have their own timelines for reviewing and approving permits. This administrative step happens before a single hammer is swung.
  • Hidden Surprises: This is the big one. Once we open up walls, we might find hidden mold, old plumbing issues, or wood rot that absolutely must be addressed. It's an unwelcome discovery, but fixing it properly is non-negotiable.

This is exactly why we build a detailed, transparent project schedule before we begin. Our goal at Wheeler Painting is to anticipate as much as possible so you always know what’s happening and what to expect next.

Do I Really Need a Permit for My Bathroom Remodel in Washington?

Yes, you most likely do. It’s tempting to see permits as just red tape, but in Washington State—and especially in cities like Kent, Seattle, and Tacoma—they are your assurance of safety and quality. Think of them as a system of checks and balances that protects your property and your investment.

You can breathe easy for simple cosmetic swaps. Painting, changing a faucet without altering plumbing lines, or swapping a light fixture usually don't require a permit.

But the moment you touch the bones of your building, a permit is required. This includes:

  • Moving the location of a toilet, sink, or shower.
  • Altering plumbing supply or drain lines.
  • Changing or adding new electrical circuits.
  • Removing or building walls (structural changes).

This is where hiring a professional really pays off. A licensed contractor, like our team at Wheeler Painting, manages the entire permitting process for you. We handle the applications, the plans, and the final inspections. You get the peace of mind knowing your beautiful new bathroom is also safe, fully compliant, and a true asset to your property’s value.

What's the Average Return on Investment for a Bathroom Remodel?

A well-planned bathroom remodel is consistently one of the smartest investments you can make in your property. Based on market trends, Puget Sound homeowners can typically expect to recoup 50-70% of their cost when they sell their home. For commercial properties, the return is measured in tenant satisfaction, improved brand image, and ADA compliance, which are invaluable.

While a high-end, super-customized bathroom might have a slightly lower direct financial ROI, its value often comes from an improved lifestyle and major "wow factor" in a competitive real estate market.

To get the best bang for your buck, focus on choices with wide appeal:

  • Go for Timeless Design: Steer clear of flash-in-the-pan trends. Classic choices in tile and fixtures will look great for years to come.
  • Prioritize Functionality: A layout that just works better is a huge selling point. Think better storage, more counter space, or a more accessible shower.
  • Demand Quality Workmanship: Nothing screams "bad investment" like sloppy tile work or a poorly installed vanity. Quality craftsmanship is an investment that always shows.

What Are the Biggest Mistakes I Should Avoid?

A successful remodel is all about the planning. The most expensive mistakes are almost always made before the first wall comes down.

The number one pitfall we see is jumping in without a detailed plan and a firm budget. This is a recipe for scope creep and serious financial stress. Right behind that is failing to set aside a 15-20% contingency fund. Trust us, you'll be glad you have it when an unexpected issue pops up.

Another common misstep is choosing materials based only on looks. That stunning-but-porous marble might not be the best choice for a busy family bathroom floor. In the damp Pacific Northwest, failing to invest in top-notch ventilation and waterproofing is a critical error that can lead to years of mold and rot problems. Lastly, don't buy all your materials before finalizing the design with your contractor—it's a surprisingly common mistake that leads to wasted money on fixtures that just don't fit.


Feeling more confident about your bathroom remodel planning? The right partner makes all the difference. For decades, Wheeler Painting has served homeowners and businesses in Kent, Seattle, and Tacoma, turning complex projects into straightforward, successful renovations. We are the trusted local choice for everything from residential remodeling to commercial construction and painting. If you’re ready to discuss your project, contact us for a consultation at https://wheelerpainting.com.

Your Guide to Commercial Build Out Services

So, you’ve leased a new commercial space in Kent, WA. It’s exciting, but when you walk in, you’re greeted by four concrete walls, a bare floor, and maybe a few wires hanging from the ceiling. This is what we in the industry call a "shell." A commercial build-out is the process of transforming that empty shell into a space that’s ready for business. It’s the journey from a blank canvas to a fully functional office, storefront, or facility.

As a local business owner or facility manager, the process might feel overwhelming. That's where a trusted partner comes in. A build-out covers everything that happens between getting the keys and opening your doors—from putting up walls and installing plumbing to painting and laying down flooring.

What Is A Commercial Build Out?

Think of a commercial build-out as custom-tailoring a suit, but for your business. The empty commercial space is the raw fabric. It has potential, but it isn't functional yet. A build-out is the entire construction process that shapes that raw space into a finished environment designed specifically for your operations.

This isn't just a simple paint job or a minor renovation. It's a full-scale construction project inside an existing building, managed by a contractor who coordinates every detail. The goal is to create a space that not only looks great but also supports your workflow, reflects your brand, and meets all safety codes in your local area, whether it's Seattle or Tacoma.

From Empty Shell To Finished Space

The scope of every build-out is different, but they all involve turning a blank canvas into a fully functional facility. This could mean creating individual offices, a bustling kitchen, a sleek retail floor, or a high-tech medical clinic.

A professional contractor will manage a wide range of services to bring the vision to life, including:

  • Interior Construction: Framing and erecting walls, installing ceilings, and building out the core floor plan.
  • Systems Installation: All the essentials like HVAC (heating, ventilation, and air conditioning), electrical wiring, data cables, and plumbing.
  • Flooring and Finishes: Laying your chosen flooring—be it tile, wood, or commercial-grade carpet—and handling all drywall, painting, and trim work.
  • Fixtures and Cabinetry: Installing light fixtures, bathroom components, custom reception desks, shelving, and any other built-in elements.

This process is the backbone of the commercial real estate world. In fact, the global market for commercial buildings, which depends on these essential services, is projected to hit $1,990.53 billion in 2026. This growth reflects a huge demand for new and updated spaces, from e-commerce warehouses to modern offices.

At Wheeler Painting, we've been guiding businesses through this journey in Kent, Tacoma, and Seattle since 1991. As a local contractor, our job is to make the complex feel manageable. We handle the blueprints, permits, and construction, so you can stay focused on your business.

Whether you're launching a new restaurant, expanding your office, or opening a boutique, professional commercial construction services are what make sure your space is built right, on time, and ready for business from day one.

The Commercial Build Out Process From Start To Finish

Taking on a commercial build-out can feel overwhelming, but with a clear roadmap, the process becomes much more manageable. At Wheeler Painting, we've spent decades refining our approach for businesses across the Puget Sound region, so you feel confident from the first phone call right up to your grand opening. We break every project down into five distinct, manageable phases.

This structured journey takes a raw building shell or an outdated floor plan and turns it into a fully customized storefront, office, or facility ready for business.

A three-step diagram illustrating the space transformation process for commercial build-outs, from shell to finished.

The image above gives you a bird's-eye view of how a build-out moves from a basic shell, through detailed planning, and finally to a polished, business-ready environment. It’s a simple illustration of our core promise: turning your vision into a functional reality.

Phase 1: Consultation and Design

Every great project starts with a simple conversation. During this initial phase, we sit down with you to truly understand your goals, day-to-day operational needs, brand identity, and budget. This goes beyond just aesthetics; it's about figuring out how the space needs to work for your team and your customers.

We’ll talk through everything—from the number of offices you need to the specific layout for a retail floor or the technical requirements of a commercial kitchen. Our team then translates those ideas into preliminary drawings and architectural plans. This collaborative design stage is all about making sure the final layout is perfectly aligned with your business objectives before a single hammer is swung.

Phase 2: Pre-Construction and Permitting

Once the design gets your stamp of approval, we shift into the critical pre-construction phase. This is where all the behind-the-scenes work happens that sets a project up for success. We perform a thorough site analysis, create a detailed project schedule, and lock in material selections.

A huge part of this stage is value engineering, where we comb through the plans to find smart ways to save money without sacrificing quality or the design you love. We also take on the complex process of securing building permits from local jurisdictions like Kent, Seattle, or Tacoma. Getting this paperwork handled correctly upfront is key to preventing costly delays later on.

Think of pre-construction as the foundation of your project. By locking in every detail and securing permits early, we eliminate surprises and create a clear path forward for the entire construction team.

Phase 3: Construction and Project Management

Now for the exciting part—this is where your vision starts to become a physical reality. Your dedicated project manager becomes your single point of contact, coordinating all the action on-site and keeping you in the loop every step of the way. We manage the construction process meticulously, ensuring everything follows the schedule and plans we agreed upon.

Key activities during this phase include:

  • Demolition: Carefully removing any existing walls, finishes, or structures that aren't part of the new plan.
  • Framing: Building the new interior walls that will define your offices, conference rooms, and other key areas.
  • MEP Installation: Coordinating licensed plumbers, electricians, and HVAC technicians to install all the essential mechanical, electrical, and plumbing systems.
  • Drywall and Painting: Hanging and finishing drywall to create smooth surfaces before our professional painters apply the final colors.

Our deep experience with the design-build project delivery method is a real asset here, ensuring seamless coordination between our design and construction teams for better efficiency and accountability.

Phase 4: Finishes and Fixtures

With the main construction work done, our focus shifts to the details that bring your brand’s personality and the space’s function to life. This is where your business's unique character really starts to shine through. Our skilled craftspeople work with absolute precision to install all the final elements.

The finishing stage typically involves:

  • Flooring Installation: Laying everything from durable LVP and wood and tile floors to commercial-grade carpet.
  • Custom Cabinetry and Millwork: Installing reception desks, breakroom cabinets, retail displays, and other custom-built features.
  • Light and Plumbing Fixtures: Setting up all final lighting, faucets, sinks, and other essential hardware.
  • Final Touches: Adding trim, hanging doors, and applying any specialty wallcoverings or finishes that complete the look.

Phase 5: Final Inspections and Handover

The project wraps up with a detailed walkthrough and the last round of inspections. We go over every inch of the build-out with you to create a "punch list"—a final list of any small items that need a touch-up. Our team addresses these points quickly to make sure the result meets our high standards, and more importantly, yours.

From there, we coordinate with city inspectors for final occupancy approval. Once all inspections are passed and you are 100% happy with the work, we officially hand over the keys. You're now ready to move in and prepare for your grand opening, confident that your new commercial space is built right and ready for business.

Build-Outs, Renovations, And Tenant Improvements Explained

In commercial construction, you’ll hear "build-out," "renovation," and "tenant improvement" thrown around, sometimes all in the same conversation. While they’re all related to transforming a commercial space, the differences matter. Getting the terms right helps you define your project's scope and communicate a clear vision to your commercial contractor near me.

It’s the first step toward a successful project, ensuring everyone is speaking the same language from day one.

The Build-Out: Creating Something From Nothing

A commercial build-out is exactly what it sounds like: building a finished interior from a completely raw, empty space. We usually start with what’s called a "grey shell"—basically just concrete floors, unfinished walls, and the main utility lines capped and waiting. From there, we build your business from scratch.

This is the most involved type of project. It’s a total transformation that includes:

  • Framing all the new interior walls to create offices, conference rooms, and hallways.
  • Installing brand-new HVAC, electrical, and plumbing systems from the ground up.
  • Putting in insulation, drywall, and ceilings.
  • Adding every last finish, from flooring and paint to light fixtures and cabinetry.

A great example is taking a vacant ground-floor unit in a new Seattle high-rise and turning it into a fully functioning coffee shop. This is where Wheeler Painting shines. We specialize in these smaller to mid-size commercial build out services that larger firms often pass on, giving your project the hands-on focus it needs.

The Renovation: Refreshing An Existing Space

A commercial renovation, on the other hand, breathes new life into a space that’s already been built out and occupied. The basic bones are there—walls, plumbing, and electrical are in place—but it’s time for an upgrade. The goal is to modernize, reconfigure, or rebrand the existing environment.

Renovation projects often involve a mix of demolition and new construction:

  • Taking down a few non-structural walls to create a more open, collaborative office.
  • Swapping out old lighting for modern, energy-efficient fixtures.
  • Tearing out worn-out flooring and giving the whole interior a fresh coat of paint.
  • Updating restrooms to meet current ADA standards.

Think of an outdated Tacoma office getting a complete facelift. We might add a custom breakroom, new paint, and sleek finishes to help a company attract top talent. This is a booming market; commercial renovation services are projected to jump from $1,598 million in 2026 to $2,621 million by 2032. It shows just how many businesses in Kent and across the region are investing in smart upgrades—a core specialty for our team. You can dive into the numbers in the latest market analysis.

Tenant Improvements: The Custom Fit

So, where do tenant improvements (TI) fit in? This is more of a catch-all term that describes any custom work a landlord does to prepare a space for a new tenant. It’s the critical step that makes a generic space perfect for a specific business.

A TI project can be a complete build-out (if the space is a raw shell) or a renovation (if the space just needs an update). The key difference is that the scope of work is defined by the lease agreement between the landlord and tenant, and it's often funded by a "TI allowance."

Whether your property needs a full build-out or a targeted renovation, Wheeler Painting is the perfect partner for facility managers and property owners in the Puget Sound area. As a nimble, focused firm, we provide the dedicated, hands-on service that these crucial facility maintenance projects demand.

Understanding The Costs Of A Commercial Build Out

Let's get right to the question on every business owner's mind: "How much is this going to cost?" It's the most important question, and the answer isn't a single number. Think of your final project cost as a puzzle—it's made up of several distinct pieces that all fit together.

From the square footage of your new office to the specific type of lighting you choose for your retail store, every decision shapes the final budget. Our job is to give you a clear map of these costs so you know exactly where every dollar is going, right from the start.

Calculator, material samples, and color swatches with a cost estimation document for project planning.

Hard Costs: The Physical Build

The bulk of your budget will be dedicated to hard costs. These are the straightforward, tangible expenses you can see and touch—the actual materials and the skilled labor needed to put them all together.

Here’s what drives your hard costs:

  • Size and Scope: It's simple math—a 10,000-square-foot office will require more materials and labor hours than a 2,000-square-foot cafe. Likewise, a project that starts with major demolition will naturally cost more than a simple cosmetic update.
  • Quality of Materials: This is where your choices make a huge difference. High-end finishes like custom millwork, imported stone countertops, and designer light fixtures will carry a higher price tag than standard, builder-grade options.
  • Labor: This covers the wages for the entire team of tradespeople bringing your vision to life—carpenters, electricians, plumbers, and painters. Labor rates can fluctuate based on the project's complexity and the current market in places like Seattle and Tacoma.

Another huge factor is the starting condition of the space. Are you leasing a "grey shell" (raw, unfinished space with concrete floors and exposed studs) or a "vanilla shell" (a space with ceilings, basic lighting, and primed walls already in place)? The former is a blank slate but requires a significantly larger investment to build out.

Soft Costs: The Behind-The-Scenes Expenses

Beyond the construction itself, you have soft costs. These are the essential, behind-the-scenes services and fees that make the project possible. They aren't as visible as new walls or flooring, but they are absolutely critical for a smooth, legal, and successful build out.

Think of soft costs as the project's brain and nervous system. They handle the planning, compliance, and legal framework that allows the physical construction to happen. Budgeting for them upfront prevents major headaches and delays down the road.

Common soft costs include:

  • Architectural and Design Fees: The cost for a professional to create the blueprints and detailed plans that act as the roadmap for the entire project.
  • Permit and Inspection Fees: Every city, from Kent to Tacoma, has its own schedule of fees for issuing building permits and conducting mandatory inspections.
  • Engineering Fees: If your project involves changing the building's structure, or requires a complex new HVAC or electrical system, you'll need a specialized engineer's stamp of approval.
  • Insurance and Legal Costs: These are non-negotiable protections for you, the property owner, and your contractor throughout the construction process.

A Transparent Approach To Your Budget

We've seen it all, and we know the best projects are the ones where everyone is on the same page financially. That’s why we provide detailed, itemized proposals that break down every single anticipated cost. No surprises, no guesswork—just a clear plan that empowers you to make smart decisions.

To help manage these details, we often rely on sophisticated tools like Exayard construction estimating software to ensure our projections are as accurate as possible from day one. This table breaks down the main factors that will influence your final budget.

Commercial Build Out Cost Influencers

Cost Factor Description Impact on Budget
Space Condition The state of the commercial space before work begins (e.g., grey shell vs. vanilla shell). High
Material Quality The selection of finishes, from flooring and lighting to fixtures and paint. High
Project Scope The extent of the work, from cosmetic updates to full-scale demolition and reconstruction. High
Design Complexity Intricate layouts, custom-built features, and unique architectural elements. Medium
Location Local labor rates, permit costs, and material availability in your specific city or region. Medium
Permits & Fees The costs associated with city permits, inspections, and engineering reviews. Low to Medium

Ultimately, a good contractor is a partner, not just a vendor. We actively practice value engineering, a process where we look for ways to reduce costs without sacrificing the quality or integrity of your design. This could mean suggesting an alternative material with a similar aesthetic for a lower price or re-working a construction sequence to be more efficient.

This collaborative approach ensures your vision comes to life on budget. To get a preliminary idea for your own planning, check out our easy-to-use commercial painting cost estimator and start building your budget today.

Navigating Permits And Building Codes In Washington

Let’s be honest—for most business owners, the maze of permits, codes, and inspections is the single most daunting part of a construction project. In Washington, especially, navigating the specific rules for cities like Seattle, Tacoma, or Kent can feel like a full-time job. Our job is to take that entire administrative headache off your plate so you can focus on your business.

Think of building codes not just as rules, but as a framework for protecting your investment. They ensure your space is safe for employees and customers, and that it’s built to last. Getting it wrong isn't an option. It can lead to failed inspections, expensive rework, and significant delays in opening your doors.

A building permit document on a clipboard, hard hat, and measuring tape on a white table.

Ensuring Full Compliance And Safety

As your general contractor, our responsibility goes beyond the physical construction. We make sure your commercial build out services are 100% compliant with all local and federal regulations. We don’t just build to your vision; we build to code.

Having been a part of the Puget Sound construction scene since 1991, we've built real, working relationships with the permitting offices and inspectors in the region. This isn't just a talking point—it's a critical advantage. We know the people, we understand the nuances of each jurisdiction, and we know how to prepare documentation that gets approved without a hitch.

We bake compliance into the project from day one. Instead of reacting to inspection issues, we design the project around local codes and the Americans with Disabilities Act from the start. This proactive approach prevents costly surprises and ensures your space is built right the first time.

Integrating ADA Requirements Seamlessly

One of the most important layers of compliance is the Americans with Disabilities Act (ADA). This is about much more than putting a ramp out front. It's about ensuring your commercial space is genuinely accessible to everyone.

We weave ADA requirements into the core design of your space, considering details like:

  • Accessible Entrances: Making sure doorways meet width standards and thresholds are low.
  • Clear Pathways: Designing intuitive layouts that are easy to navigate for all.
  • Compliant Restrooms: Building restrooms with the right clearances, grab bars, and fixture heights.

The Value Of Experienced Permit Management

Understanding the local commercial building permit requirements is step one. But successfully managing the process is what keeps your project on track and on budget. With the commercial services market projected to reach USD 10.32 trillion by 2030, avoiding permitting delays is more important than ever to stay competitive. You can read more about this market growth at Research and Markets.

Handing this over to an experienced team means you avoid the pitfalls that can derail a project. It's about getting you open for business on schedule, with the peace of mind that every "i" is dotted and every "t" is crossed.

Why Choose Wheeler Painting For Your Build Out Project

Picking the right contractor for your build out isn't just about hiring someone to put up walls—it's about finding a true partner you can trust with your vision and your investment. For business owners and facility managers across the Puget Sound, Wheeler Painting brings something different to the table: deep construction know-how combined with an expert's eye for painting and specialty finishes.

This unique blend means we manage your entire project under one roof, from the initial framing all the way to the final brushstroke. You get a single, accountable team dedicated to getting the job done right, eliminating the headaches of coordinating multiple contractors. We understand a build out can feel overwhelming, so we focus on clear communication and dependable craftsmanship to turn your goals into reality, on time and on budget.

Your Local Small-To-Mid-Size Project Specialist

Since 1991, Wheeler Painting has been a fixture in the local business community, helping companies in Kent, Seattle, and Tacoma transform their spaces. We intentionally focus on the small to mid-size projects that larger general contractors often pass over.

This specialization is our strength. It allows us to give your project the focused, personal attention it deserves. You’re not just another job number on a massive project board; you’re a valued partner, and your success is our priority.

We deliver on this promise with:

  • Integrated Expertise: Our ability to merge construction work with high-end painting and finishing means you get a seamless, top-quality result without juggling different vendors.
  • Transparent Communication: You can expect honest, frequent updates and straightforward proposals. We find that an informed client is a confident one.
  • Proven Reliability: With decades of local experience, we have a long history of delivering on our word and completing projects as promised.

Choosing Wheeler Painting means choosing peace of mind. We take the guesswork out of the process, providing a clear path from concept to completion for your commercial build out services.

Experience the difference of working with a local team that’s genuinely invested in your business. Let us handle the complexities of your build out so you can stay focused on what you do best.

Common Questions About Commercial Build-Outs

When you're thinking about a commercial build-out, a lot of practical questions come to mind. It's only natural. Getting straight answers is the first step, so let's dive into some of the most common questions we hear from business owners across the Puget Sound.

How Long Does a Typical Commercial Build-Out Take?

This is the big one, and the honest answer is: it depends. A simple cosmetic refresh of an existing office space renovation might take as little as 4-6 weeks. But if we're starting from a completely empty shell for a new restaurant or retail store, you're more likely looking at 3-6 months, sometimes longer.

The real drivers of your timeline are the complexity of your design, lead times for specific materials (like custom millwork or specialty flooring), and frankly, how quickly we can move through permitting in your specific city, be it Seattle, Kent, or Tacoma. A big part of our job in the beginning is to map all this out into a detailed, realistic schedule so you know exactly what to expect.

What’s the Difference Between a "Vanilla Shell" and a "Grey Shell"?

Think of it like this: a "vanilla shell" is a blank canvas that's already been prepped for you. The space is nearly ready for business, usually with finished ceilings, primed walls, basic lighting and HVAC, and a restroom that's up to code. It’s a great starting point.

A "grey shell", on the other hand, is completely raw. You’re literally starting with bare concrete floors, uninsulated exterior walls, and just the basic utility hookups for plumbing and power. A grey shell build-out is a much bigger undertaking, but it also gives you total freedom to create a space from the ground up. We can help you walk any potential property in the Puget Sound area and give you a clear-eyed assessment of what it will take to get it ready for business.

Can We Stay Open During a Renovation?

In many cases, yes. Keeping your doors open while we work is definitely possible, but it requires smart, strategic phasing. We can map out a plan to tackle the project in contained sections or schedule the noisiest work for your off-hours to keep disruptions to your team and customers at an absolute minimum.

A phased renovation in an occupied space is all about control and safety. It means creating secure barriers between the work zone and your public areas. As a contractor that’s handled these complex projects for years, we’re experts at managing the logistics so you can keep running your business.

Who Pays for a Tenant Improvement Build-Out?

Who foots the bill is a critical part of any commercial lease negotiation. Most of the time, the landlord will offer a "Tenant Improvement Allowance" (or TI Allowance). This is a set amount of money, often calculated per square foot, that they contribute toward the construction.

If your dream space costs more than the allowance to build, you as the tenant are generally responsible for covering the difference. We’re used to working with both tenants and landlords across the Seattle-Tacoma metro to keep projects on budget and ensure every dollar is tracked with complete transparency.


Ready to take your vision from blueprint to reality? The team at Wheeler Painting has been the go-to partner for businesses throughout the Puget Sound since 1991. Let's talk about your project and show you how our deep experience in commercial build-outs can make the whole process a success.

Schedule Your Free Estimate with Wheeler Painting

What Is Waterproofing in Construction and Why It Matters in Washington

Think of waterproofing as a seamless, high-performance raincoat for your building. That’s the simplest way to describe what waterproofing is in construction. It isn't just a single product but a complete system designed to stop water from getting inside your property—from the deepest corner of your foundation all the way up to the roof.

Especially here in the perpetually damp Puget Sound, from Seattle to Tacoma, this isn't a luxury upgrade. It’s an essential service for protecting your home or commercial building.

Understanding Construction Waterproofing and Why It Matters

A miniature house covered in clear plastic with raindrops, symbolizing waterproofing and protection.

At its heart, construction waterproofing is the process of making a building or structure completely impervious to water. This goes far beyond a simple coat of "water-resistant" paint. It requires specialized materials that are professionally applied to form a continuous, unbroken barrier that seals your property against moisture intrusion.

Just picture the constant drizzle in Seattle or the heavy seasonal downpours across Tacoma and Kent. All that water creates pressure against your building’s exterior. Without a solid defense, it's only a matter of time before moisture exploits tiny cracks and pores, seeping into your foundation, walls, and roof.

A Proactive Shield for Your Property

The most important thing to understand is that true waterproofing is proactive, not reactive. It’s about preventing water from ever causing damage in the first place, rather than cleaning up a mess after it happens. As a trusted local provider, Wheeler Painting installs systems that shield the very bones of your building, safeguarding its structural integrity for the long haul.

These systems are specifically engineered to combat a powerful force known as hydrostatic pressure. This is the pressure that groundwater exerts on a surface, like against your basement walls after a heavy rain. An effective waterproofing membrane is built to withstand this constant force, keeping your below-grade spaces dry and usable.

Key Takeaway: Waterproofing isn't the same as "water resistance." It's a comprehensive system engineered to block water, even under pressure, preventing the slow, expensive decay that moisture inevitably causes.

What Does Waterproofing Actually Protect?

For homeowners, business owners, and facility managers alike, a robust waterproofing system is one of the most critical investments you can make in your property. Let's get specific about what it's guarding.

Here's a quick look at the fundamentals and what they mean for your property's health and value.

Waterproofing at a Glance

Concept What It Means for Your Property
Impermeable Barrier Forms a continuous shield that completely blocks water, preventing it from seeping into porous materials like concrete and wood.
Hydrostatic Pressure Resistance Actively pushes back against the force of groundwater, keeping basements, foundations, and retaining walls dry.
Structural Protection Safeguards the building's core components from water-induced damage, ensuring long-term stability and safety.
Proactive Defense Stops moisture-related problems before they start, preventing costly repairs and preserving property value.

Ultimately, a professional system is your first line of defense against some very real and costly threats.

It directly protects your property from:

  • Structural Decay: Water is the enemy of building materials. It corrodes the steel rebar inside concrete and can cause foundations to crack and weaken over time.
  • Mold and Mildew Growth: By keeping the interior dry, you eliminate the dampness mold needs to thrive. This is a huge factor for maintaining healthy indoor air quality for your family or employees.
  • Interior Damage: Waterproofing prevents those telltale water stains on ceilings, peeling paint, and warped floors that signal a hidden leak.
  • Reduced Property Value: A building with a history of water problems is a major red flag for buyers. Protecting it from moisture damage is one of the surest ways to maintain its market value.

Understanding this core concept is the first step in protecting your home or commercial building. At Wheeler Painting, we've spent decades serving the local Kent community and surrounding areas, and we see proper waterproofing as a fundamental part of any quality residential remodel or commercial renovation. It's simply the smartest way to protect your most valuable asset.

Why Every Puget Sound Property Needs Effective Waterproofing

If you live anywhere from Kent to Seattle, you know the rain is a constant companion. For those of us who own or manage property, that steady drizzle is more than a minor annoyance—it’s a relentless force working against your building’s health and value. Proper waterproofing isn't just another box to check on a construction list; it's your primary line of defense against our unique, water-logged environment.

Our Pacific Northwest climate puts building materials to the test day in and day out. The combination of persistent moisture, high humidity, and punishing freeze-thaw cycles creates the perfect recipe for water intrusion. And water is patient. It will eventually find its way through the tiniest cracks in a foundation, the seams on a roof, or the very pores of your concrete.

The Real Cost of Unchecked Moisture

For a business owner, this might look like water creeping into a commercial foundation, quietly damaging your inventory or build-out. For a homeowner, it's that tell-tale damp, musty smell in the basement—a dead giveaway that water has already broken through. These aren't just small headaches; they're the opening act for far more expensive and destructive problems that require a professional residential contractor.

When you ignore those early warnings, you’re giving moisture a free pass to cause serious, and often hidden, damage:

  • Structural Rot: Wood framing, joists, and support beams start to decay, slowly but surely weakening the entire building.
  • Concrete Degradation: Water seeps in and corrodes the steel rebar inside concrete, causing it to expand, crack, and crumble from within. This is often called "spalling."
  • Poor Indoor Air Quality: Damp, dark spaces are a breeding ground for mold and mildew. Their spores get into the air, creating an unhealthy environment for everyone inside.
  • A Major Hit to Property Value: Nothing sends potential buyers or tenants running faster than signs of water damage. It’s a red flag that directly lowers what your property is worth.

A Smart Investment, Not Just a Repair

This is why professional waterproofing is one of the smartest investments you can make. It’s about being proactive and protecting your building for the long haul, especially here in Washington. By creating a seamless, impermeable barrier, you’re not just plugging a leak; you're stopping the chain reaction of damage before it can even start.

For anyone managing property from Tacoma to Seattle, the key is to stop thinking of waterproofing as a repair and start seeing it as preventative maintenance. It’s how you protect your asset’s value and ensure the building is a safe, healthy place for people to live and work.

This forward-thinking approach is becoming the standard in modern construction worldwide. The global market for waterproofing chemicals is expected to skyrocket past $44 billion by 2030—a massive jump from an estimated $11 billion in 2025. That kind of growth tells you just how critical this work is, particularly in wet climates like ours. At Wheeler Painting, our experienced team provides expert facility maintenance and construction services, applying these advanced solutions to protect everything from family homes to major commercial buildings. You can learn more about the market trends driving this shift to ensure structural durability.

When it comes down to it, investing in professional waterproofing is about protecting your property from the one thing we can always count on in the Puget Sound: water. It turns your building from a vulnerable target into a resilient fortress, ready to stand strong against our local weather for decades to come.

Exploring Common Waterproofing Materials and Methods

Alright, so we've established why waterproofing is so essential here in the damp Puget Sound region. The next logical question for a property owner is, how do the pros actually do it? Waterproofing isn't a one-size-fits-all product you grab off a shelf; it's a toolbox of specialized materials and application methods.

A seasoned residential or commercial contractor knows exactly which tool to pull out for the job at hand. Some situations call for a flexible, liquid-applied membrane, while others demand a tough, pre-formed sheet. The goal is always the same—create a seamless, watertight barrier—but the approach has to match the building, its materials, and the kind of water exposure it faces.

Liquid-Applied Membranes

Liquid-applied membranes are one of the most versatile tools in the waterproofing arsenal. Just like the name implies, these products are applied as a thick liquid that cures into a seamless, rubbery, waterproof layer that bonds directly to the surface. This makes them perfect for tricky areas with lots of penetrations, like a roof dotted with vents and pipes or a balcony with complex railing posts.

  • How They Work: Applied by roller, spray, or trowel, these liquids flow into every nook and cranny, creating a monolithic layer with no seams.
  • Best Uses: Roofs, balconies, mechanical rooms, planters, and podium decks.
  • Key Advantage: Their biggest strength is the lack of seams. Seams are the classic weak point in most waterproofing systems, and liquid-applied solutions eliminate them entirely.

This adaptability is why you see them used so often. For any facility manager or building owner, choosing the right material is a long-term investment. In fact, liquid-applied membranes were the top product segment in 2024, and for good reason—water intrusion is behind up to 40% of building damage worldwide. Using robust coatings is a direct defense against that decay.

Sheet Membranes

Another heavyweight in the waterproofing world is the sheet membrane. These are factory-made rolls of waterproof material—think thick sheets of rubber, plastic, or modified bitumen—that are rolled out and bonded to a surface. The seams are then sealed tight using powerful adhesives or, in some cases, heat-welded together to create a continuous barrier.

Sheet membranes are the workhorses for big, flat areas where you need maximum durability, like foundations and plaza decks. They offer a guaranteed, uniform thickness and incredible toughness. This makes them the go-to choice for below-grade applications where they have to withstand constant hydrostatic pressure—that’s the force of groundwater literally trying to push its way through the foundation.

As this chart shows, the stakes are high. A small moisture problem can quickly escalate into a major headache for any property owner.

A flowchart guiding waterproofing needs decision, showing issues like mold, structural decay, and property value drop.

When you see the direct line from moisture intrusion to structural decay and a nosedive in property value, you realize just how critical selecting the right waterproofing method really is.

Choosing the Right Waterproofing Method

With several options available, it can be tough to know which is right for your project. This table breaks down the common methods and where they shine, helping you match the solution to the specific area of your building.

Method Best For Key Advantage
Liquid-Applied Membrane Roofs, balconies, planters, complex shapes Creates a seamless, flexible layer with no weak points at joints.
Sheet Membrane Foundations, plaza decks, large, flat surfaces Extremely durable and provides consistent thickness to resist high pressure.
Cementitious Coating Basements, foundations, concrete water tanks Bonds directly with concrete and can be applied to interior (negative) surfaces.
Integral System New concrete construction (foundations, slabs) Makes the concrete itself waterproof from the inside out; a permanent solution.

Ultimately, the best choice depends on factors like the type of structure, exposure to water, and whether it's new construction or a retrofit. Often, a combination of methods provides the most complete protection.

Cementitious Coatings and Integral Systems

For concrete and masonry structures—think basements and foundation walls common in homes from Kent to Tacoma—cementitious waterproofing is a fantastic option. This is essentially a specialized mortar mix that gets applied to the surface. It bonds both chemically and physically with the concrete, creating a hard, dense, and completely waterproof finish.

Expert Insight: Cementitious coatings are brilliant for "negative-side" waterproofing. That means you can apply them to the inside of a basement wall to stop water from seeping through. It's an incredibly effective fix for existing buildings where excavating the outside isn't practical.

Finally, there are integral systems, which take a different approach entirely. Instead of creating a barrier on top of the concrete, they make the concrete itself waterproof. These are special chemical admixtures added to the concrete mix before it’s even poured. As the concrete cures, the admixtures form insoluble crystals that grow and fill the tiny pores and capillaries, permanently blocking any pathways for water.

Each method has its place, and a professional contractor knows how to evaluate a property and prescribe the right solution. This can range from waterproofing the entire building envelope to applying specialized masonry waterproofing and sealing solutions for materials like split-face block. For high-moisture interior spaces, a multi-layered approach is key. You can see how we tackle wet room waterproofing to get a better idea of how these techniques are combined in the real world.

Where Your Building Needs Waterproofing Most

Waterproofing isn't a one-size-fits-all solution you just slap on a building. It's a targeted defense system, and knowing where to apply it is half the battle. For property owners and facility managers here in the Puget Sound, from Kent to Tacoma, understanding your building's weak points is the key to preventing costly water damage.

Let's take a quick tour of a typical property, starting from the ground up, to see exactly where moisture is most likely to attack.

Detailed cross-section of a house showing various construction layers, including a bathroom, balcony, and roof structure with visible waterproofing.

Foundations and Basements

Think about your foundation and basement. They’re buried underground, constantly in contact with damp soil. After a good, long Seattle rain, that soil gets saturated, creating immense hydrostatic pressure—basically, the weight of all that water pushing relentlessly against your concrete walls. This is the single biggest threat to any structure sitting below ground level.

Without a solid waterproofing membrane on the outside, water will inevitably exploit tiny cracks and pores in the concrete. At first, you might just notice a damp, musty smell. Before you know it, you could be dealing with a full-blown flood and serious structural problems. Protecting your foundation isn't just a good idea; it's essential for your building's long-term health.

To get a closer look at how these systems work, you can check out our guide on how to waterproof basement walls.

Roofs, Balconies, and Decks

Now let’s head upstairs. Your roof, balconies, and decks bear the full brunt of the weather—rain, snow, and the sun’s harsh UV rays. While a roof is built to shed water, its real defense is the waterproofing layer hidden beneath the shingles or tiles. Any spot where something pokes through the roof, like a vent, skylight, or chimney, is a potential leak waiting to happen.

Balconies and decks are their own special headache. Not only do they need to be sloped perfectly to drain water away, but they also require a tough, seamless membrane to keep moisture out. If that membrane fails, it doesn't just rot the deck itself; it lets water seep directly into the living space or building frame below. This is why any project involving custom decks and patios has to start with a rock-solid waterproofing plan.

Expert Insight: In a commercial building, a small leak from a plaza deck seeping into the retail space below or a roof dripping into a server room can cause catastrophic business interruptions and financial losses. It’s a stark reminder of why proactive waterproofing is so critical for facility maintenance.

Interior Wet Areas

Waterproofing isn’t just for the outside. Some of the highest-risk areas are inside your building, where plumbing and daily use create a constant threat of moisture. These "wet areas" need their own dedicated waterproofing strategy to contain water and stop it from spreading to other parts of the structure.

A few key interior zones to watch:

  • Bathrooms and Showers: Don't be fooled—tile and grout are not waterproof. A membrane behind the shower walls and under the floor is the only thing preventing water from soaking into your wall cavities and subfloor. This is a key part of any residential remodeling project.
  • Mechanical Rooms: Boilers, HVAC units, and water heaters are all housed here. Leaks aren't a matter of if, but when. A properly waterproofed floor with good drainage is non-negotiable for commercial renovations.
  • Commercial Kitchens and Laundry Rooms: With constant spills and heavy water use, these spaces demand heavy-duty floor and wall waterproofing to prevent damage and keep things sanitary.

Here in the Pacific Northwest, our climate makes these measures even more critical. North America accounts for over 35% of the global waterproofing market, largely driven by repairs to existing buildings. That’s no surprise in the Puget Sound, where we often see more than 40 inches of rain a year, costing property owners millions in water damage repairs. For a building owner in Seattle or Tacoma, professional waterproofing isn't just an expense—it's a crucial investment in your property's resilience.

Warning Signs of a Waterproofing Failure

Your building talks. When it comes to water intrusion, it sends signals that range from screaming red flags to quiet, subtle whispers. The trick is learning to listen. Catching these signs early is the single most important thing you can do to stop a small, fixable issue from spiraling into a full-blown structural crisis.

This isn't about being paranoid; it's about being prepared. As a property owner or facility manager, knowing what to look for helps you protect your investment. Think of it as a routine health checkup for your building—one that can prevent a catastrophic diagnosis later.

Obvious Signs of Water Intrusion

Some signs of water damage are impossible to miss. They’re the big, flashing warning lights telling you that water has breached your defenses. If you spot any of these, it's time for immediate action.

These are the most urgent red flags:

  • Peeling, Blistering, or Bubbling Paint: When water gets behind paint, it pushes it away from the wall or ceiling. This is often the first and most visible sign of a hidden leak. This is a common call for exterior painting services.
  • Visible Mold or Mildew: See those dark, splotchy patches of black or green in corners or on walls? That's a direct result of ongoing moisture and a serious health concern that needs to be addressed right away.
  • Musty Odors: That damp, earthy smell in a basement, crawlspace, or even a closet is the unmistakable scent of mold and mildew. Your nose often detects a problem long before your eyes do.
  • Dark Stains or Discoloration: Those ugly yellowish or brown rings on a ceiling are the classic calling cards of a water leak. That's a clear sign that water has soaked through the drywall or plaster from above.

If you see these problems in your Kent, WA property, don't wait. Ignoring them guarantees that the damage—and the repair bill—will only get bigger.

Subtle Clues You Shouldn't Ignore

Not all warning signs are as dramatic as a stained ceiling. Sometimes, the evidence is much more subtle, requiring a sharp eye to catch. For detail-oriented homeowners and facility managers, spotting these early can literally save you thousands.

Keep an eye out for these less obvious indicators:

  • Efflorescence: Ever notice a white, chalky powder on your concrete or brick walls? That’s efflorescence. It happens when water seeps through the masonry, dissolves the natural salts inside, and leaves them behind on the surface as it evaporates. It’s a sure-fire sign water is moving through your foundation.
  • Warped or Cupped Floors: If your hardwood or wood and tile floors are buckling, separating, or feel uneven, they’re likely absorbing moisture from below—a common symptom of a leaky foundation or crawlspace issue.
  • Cracks in Foundations or Walls: While tiny hairline cracks can be normal, pay close attention to cracks that are growing, especially horizontal ones. These often point to serious hydrostatic pressure pushing against your foundation.
  • A "Spongy" Feeling Floor: Does a section of your floor feel soft or bouncy? This could mean the subfloor is rotting from a hidden, long-term leak and may require floor repairs.

Expert Insight: Foundations are particularly vulnerable, and understanding how to identify foundation water damage is crucial for property owners. Efflorescence is often the first visible symptom that your below-grade waterproofing system is under stress.

Catching these subtle signs is what diligent property maintenance is all about. It allows you to fix the root cause—the failing waterproof barrier—before it threatens the structural integrity of your entire building. Whether you manage a retail space in Seattle or own a home in Tacoma, acting on these clues is the smartest move you can make. If you suspect a problem, the first step is always to get a professional diagnosis from a local expert like Wheeler Painting.

Hiring the Right Waterproofing Contractor in Washington

Now that we’ve covered what waterproofing is and why it's so vital, let's talk about the single most important decision you'll make: choosing who to hire. When it comes to protecting your property from the relentless Washington rain, this isn’t a weekend DIY project. The risks of getting it wrong are simply too high.

An improper application can cause more harm than good. A seal that fails can trap moisture inside your walls, creating a perfect environment for rot and mold to thrive. Choosing the wrong material for the specific hydrostatic pressure pushing against your foundation could lead to a catastrophic failure down the road. This isn't just about slapping on a coating; it’s a science that requires a deep understanding of buildings, our local climate, and the right materials for the job.

Your Checklist for Finding a Puget Sound Pro

When you start looking for a “residential contractor near me” or “commercial construction near me,” you need a partner with a proven local track record. The unique challenges of our climate demand real-world experience. Don't trust your biggest asset to just anyone—use this simple checklist to find the right team.

Look for a contractor who has:

  • Deep Local Experience: A company that’s been working in Seattle, Kent, and Tacoma for decades knows our specific weather patterns and soil conditions inside and out.
  • Proper Licensing and Insurance: This is non-negotiable. It protects you from liability and proves the contractor meets Washington's standards for safety and quality.
  • A General Contractor's Capability: Water damage is rarely a simple fix. A true general contractor can manage the entire project, from finding the leak to full-scale restoration, including drywall contractor services and siding replacement.
  • A Proven Track Record: Always ask to see a portfolio of their work and read testimonials from other property owners or facility managers in your area.

Your Trusted Partner for Waterproofing Projects

At Wheeler Painting, we're more than just painters. We are a full-service general contractor with over 30 years of experience serving the Puget Sound community. We’ve built our reputation by making complex projects like tenant improvements and home renovations feel straightforward and stress-free for our clients. As a firm that specializes in smaller to mid-size facility maintenance, we give your project the focused, hands-on attention it deserves.

Wheeler Painting handles everything in-house, from the initial consultation and precise diagnosis to the final restoration and paint. This single point of accountability means you have one trusted partner managing your project from start to finish, ensuring a seamless and high-quality outcome.

Protecting your investment is our top priority. We bring together decades of hands-on knowledge, top-tier materials, and an unwavering commitment to quality craftsmanship. If you're ready to safeguard your property for the long haul, our team is here to help.

Feeling overwhelmed? Don’t be. Let our team of experienced professionals provide the guidance you need. Learn more about how to find the best waterproofing contractors near me and schedule a consultation today.

Frequently Asked Questions About Construction Waterproofing

When it comes to protecting your property, it's natural to have a few questions. We get calls all the time from homeowners and facility managers in Kent, Seattle, and Tacoma who are trying to get a handle on waterproofing. Here are some of the most common questions we hear, along with some straightforward answers.

How Long Does Professional Waterproofing Last?

That’s a great question, and the honest answer is: it depends. A high-quality waterproofing system can last anywhere from 10 years to the entire life of the building.

The real variables are the materials used, the quality of the workmanship, and how much abuse it takes from the elements. For example, a below-grade foundation system is shielded from sun and weather, so it’s engineered to last for decades. An exterior coating on a balcony, however, is constantly exposed and might need to be reapplied every 10 to 15 years to stay effective. Regular inspections are the key to getting the most out of any system.

Can Waterproofing Be Applied to an Existing Building?

Yes, absolutely. In fact, it’s one of the most common projects we do. This is often called remedial or retrofit waterproofing, and it’s a critical service for many older properties here in the Puget Sound.

Whether you're a homeowner finally tackling a damp basement or a facility manager needing to upgrade an older commercial building, it's entirely possible. At Wheeler Painting, we specialize in these kinds of facility maintenance and residential projects, applying modern solutions to existing structures to restore their defense against moisture.

What Is the Difference Between Waterproofing and Dampproofing?

This is probably the most important distinction to understand. The two are often confused, but they perform very different jobs.

The easiest way to think about it is this: dampproofing is like a light raincoat. It's a coating designed to resist moisture from damp soil, but it will fail the moment it faces actual water pressure. Waterproofing, on the other hand, is like a deep-sea diving suit. It’s a complete, robust system built to block both soil moisture and liquid water, even when it’s under significant hydrostatic pressure.

For our rainy climate in Washington, true waterproofing is absolutely essential for protecting basements, foundations, and any structure below ground level.

How Much Does Waterproofing Typically Cost?

The cost can swing pretty widely depending on a few key things: the total square footage, the type of area being treated (a roof has different needs than a basement), the specific materials chosen, and how much prep work is involved. Sometimes, complex excavation is needed, which adds to the cost.

For a typical home, you might see costs range from a few thousand dollars for interior basement work to much more for a full exterior excavation and sealing. Commercial jobs are usually priced by the square foot. The only way to get a firm number is to have a professional contractor come out, assess the situation on-site, and give you a detailed estimate.


Ready to protect your property from the persistent Washington rain? The team at Wheeler Painting has the local expertise to diagnose water intrusion issues and provide durable, effective solutions for your home or commercial building. Schedule your consultation with us today.

A Homeowner’s Guide to the Best Kitchen Remodeling in Puget Sound

A truly great kitchen remodel is about more than just a fresh look—it’s about creating a space that genuinely improves your daily life while adding real value to your home. It’s a careful balance of your personal style, smart, functional design, and durable materials that can stand up to our Pacific Northwest climate. Finding a residential contractor you trust is the key to bringing it all together, from the first sketch to the final reveal. At Wheeler Painting, our goal is to be that trusted local partner for homeowners in Kent, Seattle, and Tacoma, guiding you through the process with clarity and reassurance.

Starting Your Puget Sound Kitchen Remodel Journey

A couple reviews kitchen design blueprints and color swatches on a table by a window.

Does your kitchen feel like it’s fighting you every step of the way? A cramped layout, outdated appliances, or just a tired look can make the heart of your home feel less than welcoming. Taking on a remodel, especially in Western Washington, might seem overwhelming, but it’s a process that becomes exciting once you break it down into clear, manageable steps. This is your chance to reshape your home’s most important room into a space that works for you.

If you’re frustrated with your kitchen, you’re not alone. Many homeowners remodel simply because they can’t stand the old look anymore or because the kitchen is literally falling apart or just doesn’t function well. Here in the Puget Sound, where many of us live in older homes, an upgrade is one of the smartest investments you can make for your happiness and your property value.

First Things First: What’s Your “Why”?

Before you even think about tile or countertops, it’s important to get clear on your goals. What’s the main driver behind your project?

  • Do you need a more durable, family-friendly hub for your busy Tacoma household?
  • Are you dreaming of a sleek, modern kitchen for entertaining in your Seattle condo?
  • Is your priority creating an accessible, age-in-place design for the future?

Figuring out your "why" sets the entire tone for the project. When you’re clear on your motivation, every decision that follows becomes easier. Nailing down the fundamentals of how to plan a kitchen remodel from the outset is the single best way to avoid expensive changes and regrets later on.

A great remodel starts with a clear vision, a realistic budget, and the right contractor. Our goal at Wheeler Painting is to provide a reassuring roadmap, showing how a trusted local partner can turn your vision into reality without the typical stress.

What It Takes to Succeed in the Puget Sound

A successful remodel in our region means designing with local context in mind. We understand how to maximize natural light during our gray winters and choose materials that can handle our damp climate without warping or molding. It also means navigating the unique quirks of renovating older homes found throughout Kent, Seattle, and the surrounding areas.

As a dedicated residential contractor near you, Wheeler Painting has spent years helping homeowners through this exact process. We’re here to help you build a kitchen that’s not just beautiful, but perfectly suited to your life here in the Puget Sound.

Matching Your Vision With a Realistic Budget

It's the age-old dilemma of any remodel: how do you get the kitchen you’re dreaming of without a budget that gives you nightmares? Finding that balance is a critical part of planning a successful kitchen project. It’s easy to get swept away by glossy magazines, but a solid financial plan is what will actually get your project off the ground and over the finish line.

Before you think about materials, let's talk about how you really use your kitchen. The old "work triangle" concept is a bit dated. Today, we think in terms of work zones. Is your morning routine built around a dedicated coffee station? Do you need a baking zone with marble countertops for rolling out dough? Maybe a small desk area for homework or managing the household? Designing around your family's actual activities is what makes a new kitchen truly life-changing.

Defining Your Wants Versus Your Needs

Now for a dose of reality. It's time to get honest and make two lists: your absolute must-haves (needs) and the things that would be great to have (wants). This simple exercise is the key to keeping your budget from spiraling.

  • Needs: These are the non-negotiables. Think functional appliances that will last, enough cabinet space to end clutter, and a layout that finally solves the traffic jam in front of the fridge. In many older Puget Sound homes, this list often includes critical updates like replacing old plumbing or leveling a sloping floor.
  • Wants: This is the fun stuff! A high-end induction range, that stunning waterfall-edge countertop, or custom pantry inserts that feel like magic. These are the upgrades that bring in the "wow" factor.

Once your lists are made, you can build your budget around them. Fund all your needs first. This way, you won't fall in love with a pricey faucet only to discover you don't have enough set aside for essential floor repairs and replacements.

Building a Budget for Your Puget Sound Remodel

Budgeting for a kitchen remodel in the Seattle area means knowing where your money will likely go. Having a realistic breakdown from the start helps you make smarter decisions and avoid sticker shock.

The most important line item in your budget isn't for cabinets or countertops—it's your contingency fund. We tell every client to set aside 10-20% of the total project cost for the unexpected. When you open up walls in an older Puget Sound home, you never know what you'll find.

We've created a sample budget to give you a clearer picture of how costs are typically allocated for a mid-range kitchen remodel in our area.

Sample Kitchen Remodel Budget Breakdown for Puget Sound

Use this estimated cost allocation for a mid-range kitchen remodel in the Seattle area to help plan your finances effectively.

Expense Category Typical Cost Percentage Notes for Washington Homeowners
Cabinetry & Hardware 25-35% This is often the largest expense. Custom cabinets from local makers can increase this percentage.
Labor & Installation 20-30% Skilled labor is a sound investment in our market, and it's not the place to cut corners. This covers demo, install, and finishing.
Appliances 10-15% Prices vary wildly. Look for sales at local retailers to maximize your budget.
Countertops 10-15% Quartz and granite are popular and durable. The cost depends heavily on the material and complexity of the fabrication.
Contingency Fund 10-20% Crucial for older homes in Tacoma, Seattle, and surrounding areas. Covers surprises like mold, pests, or wiring issues.
Flooring 5-7% LVP (Luxury Vinyl Plank) is a popular, waterproof option for our damp climate.
Plumbing & Electrical 5-10% Bringing an older home up to current code can be a significant part of this.
Backsplash & Finishes 2-5% Includes tile, paint, and lighting fixtures. This is a place where you can often find savings without sacrificing style.

This table is a great starting point, but remember that every project is different. For an even more detailed analysis, check out our complete kitchen remodel cost breakdown. Knowing the real numbers behind material choices, like how much porcelain slabs cost for kitchen remodels, helps you make trade-offs that align with your budget.

Knowing Where to Save and Where to Splurge

A beautiful, functional kitchen isn't about buying the cheapest of everything. It's about being smart with your money.

  • Splurge: Spend your money on the things you touch and interact with every single day. A high-quality faucet, durable countertops, and solid cabinet hardware will make your kitchen a joy to use. The other big one? Don't skimp on your residential contractor. Good craftsmanship from a trusted local provider prevents expensive, frustrating problems down the road.
  • Save: Look for savings on items that are easier to change later. A simple, classic subway tile backsplash is inexpensive and timeless, but can be swapped out for something trendier in five years. You can also opt for reliable, well-reviewed appliances instead of the absolute top-of-the-line professional models.

Choosing Designs and Materials for the Pacific Northwest

A collection of home renovation samples including granite, wood flooring, various tiles, paint swatches, and a measuring tape on a table.

Now for the fun part—choosing the finishes that bring your new kitchen’s personality to life. In the Pacific Northwest, this is all about striking a balance between style, durability, and a sense of warmth that can stand up to our famously gray winter days.

It's no secret that kitchens aren't just for cooking anymore. They're the command center for homework, the hub for entertaining, and the heart of family life. A recent industry report confirms this, noting that 76% of homeowners now want larger, more open kitchens. This shift is a huge reason why the best kitchen remodeling projects focus on creating multifunctional spaces. If you're curious about where design is headed, you can discover more insights in the full 2026 Kitchen Trends Report.

Selecting Materials That Last

For homeowners from Kent to Tacoma, materials have to do more than just look good. They need to be resilient enough to handle moisture, heavy use, and the occasional dropped pot. It's a practical decision.

Here are a few of the most popular and reliable choices we consistently see in Puget Sound homes:

  • Countertops: Engineered quartz is still king. Its non-porous surface is a workhorse, fighting off stains and bacteria. Granite delivers natural, one-of-a-kind beauty with great heat resistance. Butcher block can introduce a wonderful warmth, but it requires a bit more upkeep.

  • Flooring: Luxury Vinyl Plank (LVP) is a true superstar in our climate. It’s totally waterproof, incredibly durable, and does a fantastic job mimicking the look of real wood and tile floors without the high price tag. Of course, hardwood is always a classic, but you'll want a top-tier finish to protect it from our damp environment.

  • Cabinetry: Cabinets form the architectural backbone of your kitchen. Shaker-style doors are a go-to for their timeless look that fits both modern and traditional homes. Investing in quality construction—think solid wood frames and soft-close hardware—is something you’ll appreciate every single day. We cover this in detail, so you might want to learn about the different types of cabinets available for your remodel.

Designing for Light and Flow

Any good Pacific Northwest kitchen design should obsess over one thing: natural light. Big windows, glass doors, or a well-placed skylight can absolutely transform a space.

You can then amplify that light with smart design choices. Lighter paint colors from a professional color consultation, a reflective backsplash, and even some open shelving can make a kitchen feel significantly brighter and more spacious.

When you're thinking about layout, picture your daily routine. An open-concept design that flows into the living or dining room is a game-changer for families and anyone who loves to entertain. It just makes life easier.

The Power of a Strategic Lighting Plan

A great lighting plan is every bit as critical as your countertop choice. You can't rely on one overhead light to do all the work. The best designs layer different types of lighting to create a space that’s both perfectly functional and full of atmosphere.

  • Ambient Lighting: This is your general, room-filling light, usually from recessed cans or a central fixture.

  • Task Lighting: This is the focused light you need for your work zones. Think under-cabinet strips that light up your counters for chopping and prep.

  • Accent Lighting: This is where you add a little personality and drama. Pendants over an island or in-cabinet lights to show off your favorite glassware are great examples.

Working with an experienced residential contractor like Wheeler Painting helps ensure all these pieces come together. We can guide you toward materials and designs that not only match your style but are also a perfect fit for life here in our beautiful corner of Washington.

Finding the Right Contractor in Puget Sound

If there's one piece of advice we can give homeowners, it's this: your contractor can make or break your entire kitchen remodel. They're the partner who determines the quality of the work, how smoothly the project runs, and ultimately, whether you're smiling or stressed at the end of it all.

This is especially true here in the Puget Sound. Our region is full of beautiful older homes that can hide surprises behind the drywall—outdated plumbing, quirky wiring, or unexpected structural issues. An experienced local contractor has seen it all before and knows how to handle it without derailing your project. Finding that right-hand pro in Kent, Seattle, or Tacoma is your ticket to a remodel you'll love for years.

Where to Find Reputable Local Pros

Finding a great contractor isn't about a single Google search. It’s about tapping into trusted networks to build a shortlist of real professionals. We always recommend starting with people, not just pixels.

  • Ask Around: Talk to friends, family, and neighbors who’ve had work done recently. Ask them the nitty-gritty: What was the communication like? How did they handle problems? Would you hire them again? A personal referral is worth its weight in gold.
  • Tap the Trade Network: The folks at your local lumberyard or specialty tile shop see contractors every day. They know who does quality work, who communicates well, and—just as importantly—who pays their bills on time.
  • Review Their Work (Critically): Once you have a few names, dive into their websites and social media. Look past the perfectly staged photos. Do their finished kitchens match the style and quality you envision? Scour reviews on multiple sites, not just the cherry-picked ones on their homepage.

After this initial legwork, you should have a solid shortlist of 3-4 potential candidates. Now it’s time to really put them to the test.

Don't Skip the Vetting Process

We can't stress this enough: never skip the vetting process, no matter how charming a contractor seems. A true professional will expect you to do your homework and will have all their information ready for you.

A contractor’s hesitation to provide their license, insurance, or references is the biggest red flag you can encounter. If they can't or won't provide this basic information, walk away immediately—no matter how low their bid is.

Before you even schedule a consultation, you can do some critical background checks. First, head over to the Washington State Department of Labor & Industries website to check their contractor status. This simple search confirms they are legally registered, bonded, and insured.

Next, ask for a copy of their insurance certificate. You're looking for two things: liability coverage (to protect your home from accidental damage) and workers' compensation (to protect you if a crew member gets injured on your property).

Finally, when they provide references, actually call them. Ask about the experience from start to finish. Was the crew respectful of their home? Did the project stay on schedule and on budget? And most importantly, how were problems resolved when they popped up?

The Value of a Full-Service General Contractor

For a project as complex as a kitchen remodel, hiring a full-service general contractor like Wheeler Painting is the smartest path forward. Think of it this way: instead of you trying to line up a plumber, an electrician, a drywall contractor, and a cabinet installer, a general contractor coordinates everything. We become your single point of contact and accountability for the entire job.

This integrated approach means we manage everything under one roof. We’re the ones pulling permits in Seattle, scheduling our trusted subcontractors in Tacoma, and overseeing the final hardware installation in your Kent home. It closes communication gaps and ensures every detail—from floor repairs and replacements to those perfect finishing touches—is executed as part of a cohesive plan. We handle the logistics so you can focus on the exciting parts of bringing your dream kitchen to life.

Navigating the Remodel From Demolition to Final Walkthrough

You’ve vetted the bids, checked the references, and hired your contractor. Now, the real fun begins. This is where the dust flies and your vision starts taking shape, turning all that planning into a tangible reality.

Knowing the sequence of events is the key to a low-stress remodel. It helps you understand what’s happening, why it’s happening, and what’s coming next. Let's walk through the typical construction flow for a Puget Sound kitchen.

The Construction Sequence: What to Expect

Every remodel has its own quirks—especially in our region's charming older homes—but the fundamental order of operations is pretty universal. A good contractor follows a logical path to keep the project efficient and on track.

Here’s a general roadmap of the process:

  • Prep and Containment: Before a single hammer swings, our crew will prep the site. This means sealing off the kitchen with plastic sheeting to control dust and laying down protection for your floors. It's a simple step, but it shows a contractor's respect for your home.
  • Demolition Day: This is the fastest and most dramatic part of the job. Old cabinets, countertops, appliances, and flooring are torn out and hauled away. If walls are coming down, this is when your space will suddenly feel huge (and very, very empty).
  • The "Rough-In" Phase: Once the space is stripped to the studs, the plumbers and electricians get to work. They’ll run new water lines, drains, and electrical wiring for your future layout. This is a critical stage that requires inspections from your local municipality—whether that’s Seattle, Bellevue, or Tacoma—to ensure everything is safe and up to code before any walls get closed up.

From Bare Walls to a Beautiful Kitchen

After the rough-in work passes inspection, the project really picks up steam. This is the exciting part where the visual elements you chose start coming together, and the empty shell begins to look like a kitchen again.

The infographic below illustrates the simple, three-step process that gets you to this exciting construction phase.

Three-step process diagram illustrating how to hire a contractor: find, vet, and hire.

As you can see, finding and vetting the right professional is the groundwork for a smooth and successful project.

Your Final Walkthrough: The Punch List
As work wraps up, you'll conduct a final walkthrough with your contractor. This isn't just a quick glance; it's your chance to create a "punch list." This is a detailed list of every minor correction needed, from a paint scuff to a sticky cabinet drawer. A true professional won't consider the job done until every single item is checked off to your 100% satisfaction.

Once the rough-in is complete, the finishing work begins in a very specific order:

  1. Drywall, Texture, and Paint: The walls are closed up with new drywall, which is then taped, mudded, and sanded for a smooth finish. After that, our professional painters apply a coat of primer, followed by the first layers of your chosen wall color.
  2. Flooring and Cabinetry: Next, your new flooring is laid down. With the floors in place, the crew will begin carefully installing your custom cabinets, which truly start to define the space.
  3. Countertop Templating and Installation: Your countertop fabricator will visit to make a precise digital or wood template of your cabinets. About a week or two later, they’ll return with the finished stone or quartz slabs for installation.
  4. Finishing Touches: This is the home stretch. Plumbers and electricians come back to install the sink, faucet, garbage disposal, and appliances. They'll also install light fixtures, outlets, and switches. The tile backsplash is one of the last items to go in, followed by cabinet hardware and any final interior painting touch-ups.

This process reflects a major shift in kitchen design. We're seeing more homeowners prioritize smart, functional layouts. In fact, studies show 76% of renovators are incorporating features like built-in pantries and dedicated storage to improve organization.

A well-executed remodel isn't just an upgrade for your lifestyle; it's a solid investment. With a national ROI often landing between 50-70%—and frequently higher here in the competitive Puget Sound market—it makes financial sense. You can read more about how future-proof kitchen designs are trending to see why this is one of the smartest places to put your money.

Answering Your Top Kitchen Remodel Questions

No matter how much planning you do, a few big questions always seem to pop up right before you’re ready to pull the trigger on a remodel. We get it. You want to feel confident before the work begins.

Here are the straightforward answers to the questions we hear most often from homeowners around Puget Sound.

How Long Will My Kitchen Remodel Actually Take?

This is the million-dollar question. The honest answer depends entirely on the scope of your project.

A quick cosmetic refresh—maybe some new paint, updated cabinet hardware, and a faucet swap—can often be completed in just 2 to 4 weeks.

But if we're talking about a full tear-out that involves moving walls, installing custom cabinets, and running new plumbing or electrical lines, you should realistically plan for 6 to 12 weeks. Sometimes, especially in older homes, it can take a bit longer.

A few things can stretch out a timeline:

  • Permitting: Getting the green light from local offices in Seattle, Tacoma, or Kent can sometimes be a waiting game.
  • Material Lead Times: If you've fallen in love with special-order cabinets or one-of-a-kind tile, their creation and shipping time is a major factor.
  • The "Surprise" Factor: You never truly know what’s behind a wall until you open it up. Discovering old rot or faulty wiring from a previous DIY job means we have to stop and fix it right, which takes time.

A good contractor, like Wheeler Painting, will provide a detailed project schedule before starting. This is your roadmap. It sets clear expectations and helps you plan your life around the construction.

What Kind of ROI Can I Expect on a Kitchen Remodel in Washington?

A kitchen remodel is almost always a smart investment, consistently ranking as one of the best projects for boosting your home's value. Nationally, you can expect to recoup 50-70% of the cost, but here in the competitive Puget Sound real estate market, a well-done kitchen can deliver an even higher return.

Here’s a little secret: a thoughtful, minor remodel often gets you a better percentage return than a massive, luxury overhaul. The goal is to make smart, timeless choices that you'll love living with and that will also appeal to a wide range of future buyers. An experienced residential contractor near you is your best asset here, helping you put your money where it will add the most real-world value.

Can I Actually Live in My House During the Remodel?

Yes, you can, but it takes some planning and a healthy dose of patience. The biggest hurdle, obviously, is having no kitchen.

Pro Tip: Set up a "survival kitchen" in your dining room, laundry room, or even the garage. A microwave, mini-fridge, coffee maker, and a stack of paper plates will be your best friends.

You also have to be prepared for the dust and noise. Even with the most careful crews, it's a construction zone. At Wheeler Painting, we go to great lengths to contain the mess by sealing off the work area, running dust extraction systems, and cleaning up thoroughly at the end of every single day. Good communication with your project manager is key to making it all bearable.

Do I Really Need a Permit for My Kitchen Remodel in Kent, WA?

Most of the time, yes. Here in Kent and across the Puget Sound region, you'll need a building permit for any project that alters your home’s structure, electrical, or plumbing systems.

That includes common jobs like:

  • Moving or knocking down walls
  • Relocating a sink or major appliance
  • Adding new outlets or changing the lighting layout

If you’re just doing simple cosmetic work, like painting the cabinets you already have or replacing a faucet in the exact same spot, you typically won't need a permit.

Any reputable, licensed contractor will manage the entire permitting process for you. It’s our job to ensure every bit of work is done safely, meets current building codes, and passes every inspection. This protects your family, your investment, and your home’s long-term value.


Starting a residential remodel is a huge undertaking, but you don’t have to go it alone. If you’re ready to create your dream kitchen with a team that believes in clear communication and expert craftsmanship, Wheeler Painting is here to help. As a local provider specializing in residential remodeling, we serve homeowners throughout Kent, Seattle, and Tacoma. Contact us today to schedule your on-site consultation and get started. Learn more and get your free estimate here.

Your Guide to a Bathtub Shower Conversion in Kent WA

Thinking about a change in your bathroom? For many homeowners and property managers across Kent, Seattle, and Tacoma, that bulky old bathtub is the first thing they want to see go. A bathtub-to-shower conversion is exactly what it sounds like: our team removes the existing tub and replaces it with a modern, walk-in shower, all within the same space.

It’s one of the most effective upgrades you can make to modernize a bathroom, improve its safety, and reclaim much-needed functional space. As local contractors serving our community, we at Wheeler Painting want to provide clear, helpful information to make your renovation decisions easier.

Is a Bathtub-to-Shower Conversion Right for Your Home?

If you're like a lot of people we talk to, your bathtub mostly just collects dust. It's a solution from a different era, and a walk-in shower often aligns much better with a busy, modern lifestyle. This isn't just about looks; it's a practical upgrade that can improve your property's value and, more importantly, make daily life easier.

This kind of project is all about making your space work for you. It's a fantastic solution for homeowners, business owners, and facilities managers facing common bathroom frustrations.

Common Reasons People Make the Switch

  • Better Safety and Accessibility: Let's face it, stepping over a high tub wall every single day is a tripping hazard. For seniors wanting to age-in-place in their Kent homes, or anyone with mobility concerns, a walk-in shower with a low- or zero-threshold entry is a game-changer for safety.

  • A More Spacious Feel: In the condos and older homes you find all around the Seattle area, bathrooms aren't always the biggest. A tub can feel massive and clunky, visually shrinking the room. Swapping it for a sleek, glass-enclosed shower immediately opens up the space and makes it feel much larger and brighter.

  • Way Easier to Clean: Who enjoys scrubbing a deep bathtub? It’s a real chore. Modern shower systems, especially those using solid surface or acrylic panels, are a breeze to maintain. With far fewer grout lines and non-porous surfaces, cleaning becomes a simple wipe-down, not a deep scrub—a key benefit for any busy homeowner or property manager.

  • A Clean, Modern Look: Nothing updates a dated bathroom faster than a walk-in shower. It gives the room a clean, contemporary, and almost spa-like atmosphere. In a competitive real estate market like Tacoma's, this is an update that seriously boosts your property's appeal and value.

A bathtub-to-shower conversion isn't just about swapping one fixture for another. It's about rethinking the function of your bathroom to create a safer, more efficient, and more enjoyable space for years to come.

As a trusted local residential contractor, we at Wheeler Painting see these transformations firsthand. Whether we’re helping a homeowner simplify their daily routine or a facility manager upgrade a commercial space, the goal is always the same: to build a bathroom that truly works for the people using it. You're turning a neglected corner into the functional heart of your bathroom—a straightforward path to a major quality-of-life improvement.

So, you’re ready to ditch the tub for a shower. That’s a great decision, but now comes the fun part: figuring out what kind of shower you want. For property owners here in the Kent, Tacoma, and Seattle areas, it’s not a one-size-fits-all answer. Your choice will come down to your budget, how quickly you need it done, and the final look you're going for.

Think of it this way: are you looking for a reliable daily driver, a super-safe and accessible vehicle, or a fully custom sports car? Each has its place. Your main options are prefabricated kits, low-threshold or barrier-free systems, and of course, the fully custom-tiled shower. Let's break down what makes each one unique so you can find the perfect fit.

This flowchart can help you start thinking about what’s driving your decision. Is it a need for more space, better safety, or a fresh new style?

Flowchart guiding decision-making for a home conversion, evaluating needs for more space and safer access.

As you can see, the best conversion is one that actually solves a problem for you, whether that's making your small bathroom feel bigger or ensuring you can use it safely for years to come.

To give you a clearer picture, here’s a quick comparison of the three main approaches to a bathtub-to-shower conversion.

Comparing Bathtub Shower Conversion Options

Conversion Type Best For Typical Cost Installation Time Design Flexibility
Prefabricated Kit Speed, tight budgets, and rental properties. $ 1-3 Days Low
Low/No-Threshold Safety, accessibility, and aging-in-place. $$ 3-5 Days Moderate
Custom Tiled Total design control and high-end finishes. $$$ 1-2 Weeks+ High

Each option has clear pros and cons, but this table should help you narrow down which path aligns best with your project goals. Let's dig into the details of each.

Prefabricated Shower Kits

If you want a straightforward, no-fuss solution, a prefabricated shower kit is your answer. These all-in-one systems usually come with a shower pan and a set of interlocking wall panels, typically made from durable acrylic or fiberglass.

  • Best For: Projects on a tight budget, rental properties where durability is key, or any situation where you need a fast turnaround.
  • Benefits: The installation is quick, meaning your bathroom is back in action in just a few days. Plus, the seamless panels have no grout lines, making them incredibly easy to wipe down and keep clean.
  • Drawbacks: What you gain in convenience, you lose in creativity. Your design options are limited to what the manufacturer offers, so you get a clean, functional look but not a unique, personalized feel.

Low-Threshold and Barrier-Free Showers

For many people, a bathtub shower conversion is all about making life easier and safer. This is where low-threshold and barrier-free showers really shine. They are the go-to standard for accessibility.

A low-threshold shower has a very small curb—usually just 2-4 inches high—that helps keep water in but is much easier to step over than the wall of a tub. A barrier-free (or curbless) shower takes it a step further, creating a completely flat entry from the main bathroom floor right into the shower.

A barrier-free shower is the ultimate solution for aging-in-place and universal design. It provides effortless access for wheelchairs and walkers, making it a powerful and long-term upgrade for any home.

These systems do more than just improve safety; they also create a sleek, modern look that can make your entire bathroom feel more open. A quality residential remodeling project like this can significantly improve daily life.

Fully Custom-Tiled Showers

If you're dreaming of a shower that's 100% you, then a custom-tiled build is the only way to go. This is the top-tier option where you have complete creative control, and every single detail is hand-picked by you and installed by a skilled professional.

With a custom shower, the sky's the limit.

  • Walls and Floors: Mix and match ceramic, porcelain, natural stone, or glass tiles to create any pattern or design you can imagine. We can even work with wood and tile floors to create a seamless transition.
  • Features: This is your chance to add practical luxuries like a built-in bench for relaxing, recessed niches for shampoo bottles, or even a multi-head shower system. We can also integrate custom cabinets into the overall bathroom design.
  • Glass Enclosures: The shower door is the finishing touch. You can even design your shower door online to see how different styles, from framed to fully frameless, will look in your space.

A custom build gives you a show-stopping, one-of-a-kind result. It does take more time and a larger investment because of the expert labor needed for proper waterproofing, tile setting, and finishing, but the final product is truly unmatched.

Budgeting for Your Bathtub-to-Shower Conversion Cost

Alright, let's talk about the bottom line. Figuring out the cost of a bathtub-to-shower conversion is one of the first and most important steps for any homeowner or property manager in the Seattle-Tacoma area. Here at Wheeler Painting, we're big believers in transparency. Our goal is to give you a clear, reassuring picture so you can plan your project confidently, without any surprises down the road.

The final price tag really depends on a few key things. Your bathroom remodel works the same way as any construction project, with your choices in materials, plumbing, and design dictating the investment.

This kind of project is a solid investment in your property. Interest in bathroom upgrades has never been higher, making it a smart choice for both residential homes and commercial properties looking to stay modern and competitive.

What Influences the Final Cost?

So, where does the money actually go? Three main areas will shape your budget. Each one gives you a chance to either be frugal or splurge on the features you really want.

  • Materials and Finishes: This is usually the biggest variable. A simple, off-the-shelf acrylic shower kit is your most budget-friendly option. On the other hand, if you’re dreaming of a custom-tiled shower with imported stone, a sleek frameless glass door, and high-end fixtures, you'll be looking at a higher price point.

  • Plumbing Complexity: The most straightforward and cost-effective job is one where we can use the existing drain and water supply lines. The minute you decide to move the showerhead to a different wall, add body sprays, or go for a curbless design that requires lowering the drain, the plumbing work gets more involved and adds to the labor costs.

  • Demolition and Construction: Popping out an old, one-piece fiberglass tub-and-shower unit is a pretty simple task. But if you're dealing with a heavy cast iron tub or want to remove a wall to expand the shower, the demolition and reconstruction will naturally take more time and effort. Our drywall contractor team can handle any necessary repairs or changes seamlessly.

Why an Itemized Proposal is Your Best Tool

Trying to juggle all these variables can feel overwhelming, which is why a detailed, itemized proposal is non-negotiable. A vague, one-line estimate for a "bathtub-to-shower conversion" is a red flag and leaves you wide open to surprise charges and misunderstandings.

A professional proposal from a trusted local contractor like Wheeler Painting breaks everything down, line by line. You'll see the costs for demolition, plumbing, tile, fixtures—everything. This transparency protects you, guarantees there are no hidden fees, and ensures we're all on the same page before any work begins.

This detailed plan is the bedrock of a successful project that stays on budget. When you understand where every dollar is going, you can make smart decisions. For more tips on smart financial planning, take a look at our guide on how to get an affordable bathroom remodel.

With a clear budget and a detailed plan, you're set up for a stress-free renovation and a beautiful new shower you'll love for years to come.

Your Step-By-Step Project Timeline

Let’s be honest, having a construction crew in your home or business can feel like a disruption. But knowing exactly what’s going to happen—and when—can turn a potentially stressful week into an exciting project. We’ve found that a clear, transparent process makes all the difference for the clients we work with across Kent, Seattle, and Tacoma.

From our first conversation to the final walkthrough of your new shower, we want you to feel completely in the loop. While every bathroom has its own quirks, most bathtub-to-shower conversions follow a pretty reliable schedule.

A multi-panel image illustrating the stages of a bathroom renovation, from installation to completion.

Typically, once our team starts the hands-on work, you can expect the entire conversion to take about 5 to 10 business days. Here’s a breakdown of what that timeline looks like day by day.

Phase 1: Prep and Demolition (Day 1-2)

The first couple of days are all about careful preparation and removal. Before any real work begins, we focus on protecting your property.

  • Protecting Your Space: Our crew lays down durable floor coverings and seals the work area with plastic sheeting to create a barrier, keeping dust and debris contained.
  • Careful Demolition: With the water shut off, we start the demo. This means taking out the old tub, the tile or wall panels around it, and the old fixtures. We work cleanly and efficiently, minimizing the disruption to your home or business.

Once that old tub is out of the way, we get our first good look at the subfloor, plumbing, and wall studs. This is our chance to spot any hidden issues, like old water damage or the need for floor repairs and replacements, and tackle them head-on.

Phase 2: The "Rough-In" for Plumbing and Electrical (Day 2-3)

With the space opened up, it's time to map out the new plumbing and any electrical updates. This is the technical backbone of your project, where our licensed trade partners make sure everything is perfectly placed and up to code for your new shower.
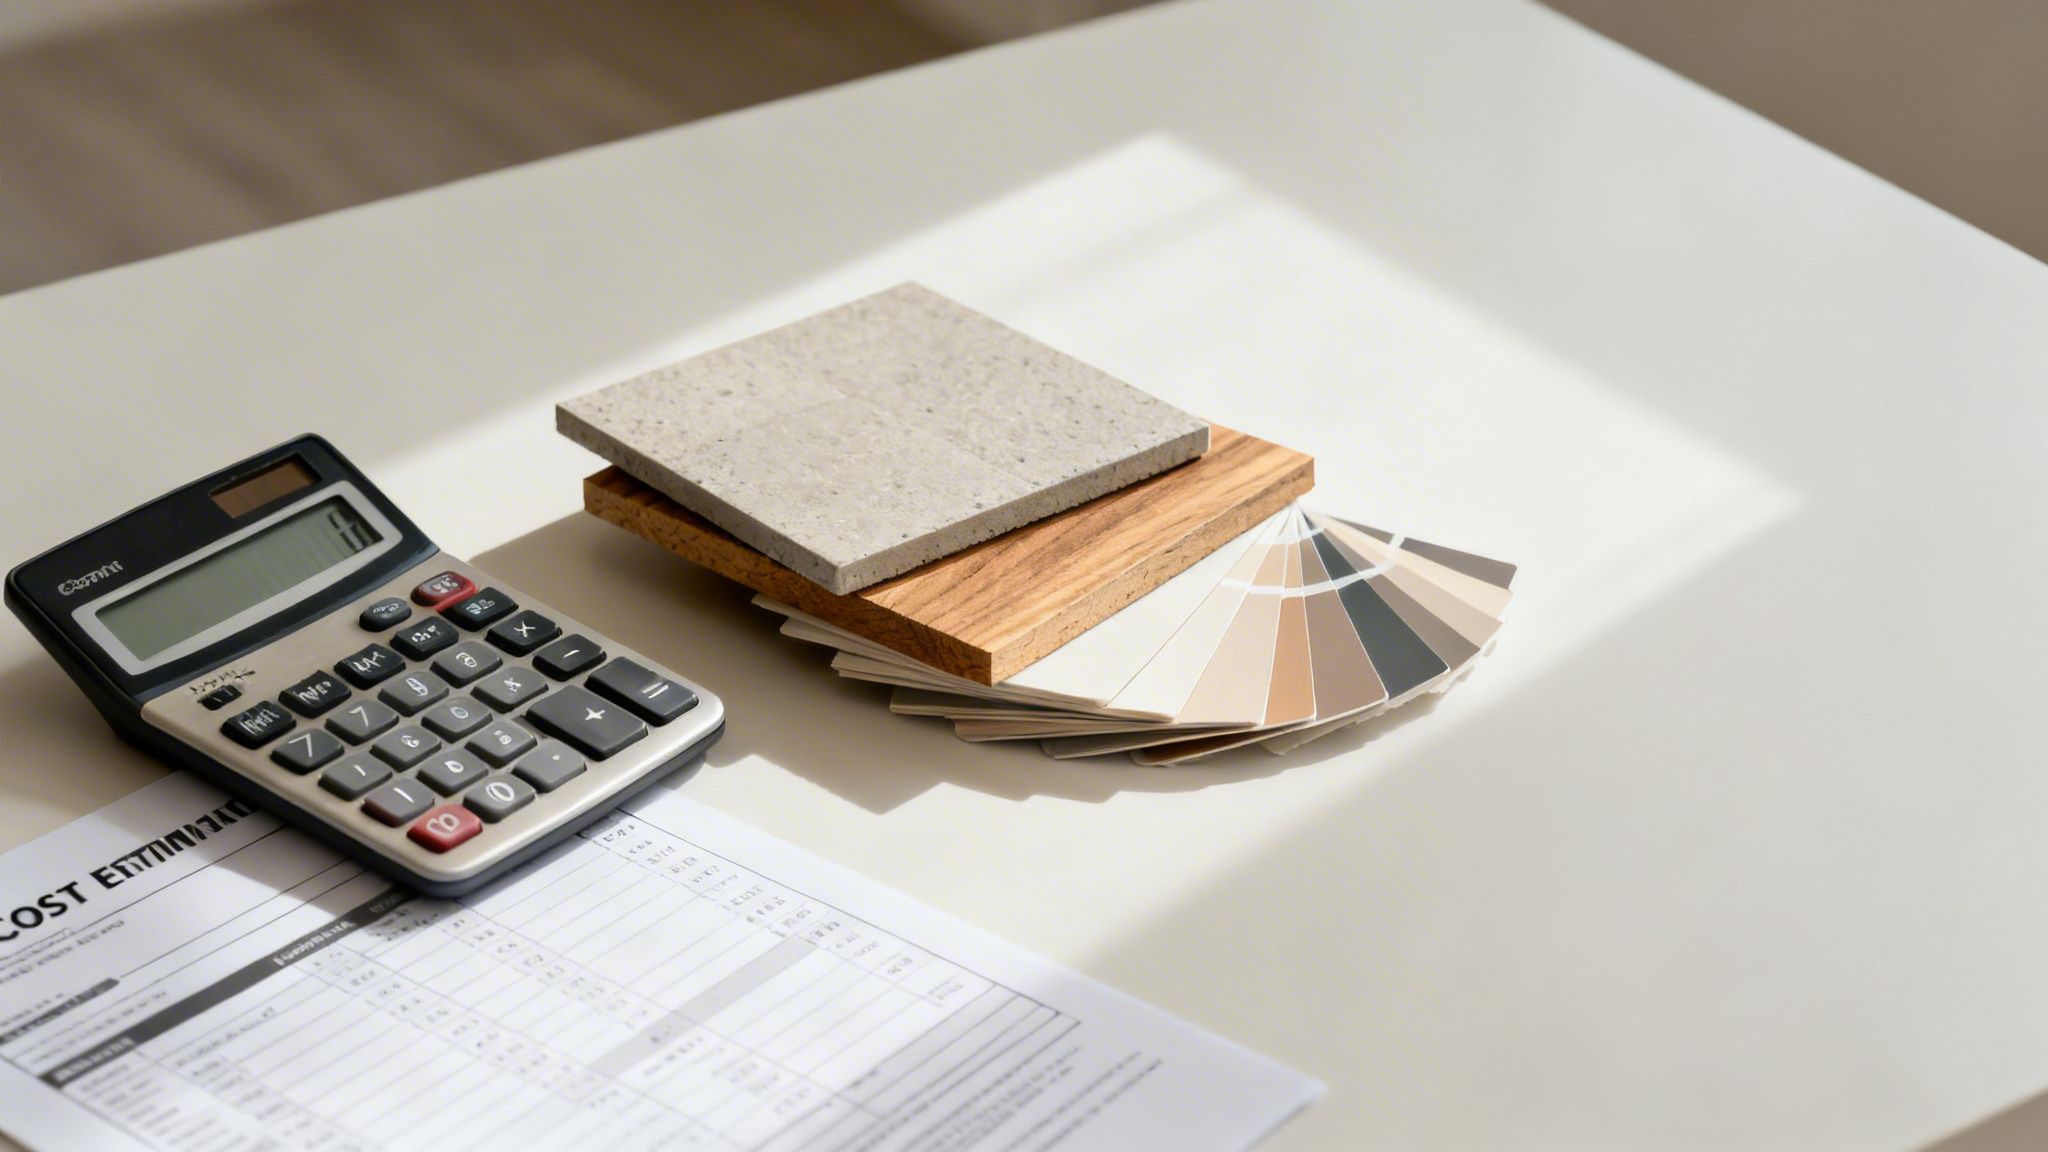
This stage is all about the behind-the-scenes work:

  • Moving the drain to the correct position for the new shower base.
  • Reconfiguring the hot and cold water lines for the new shower valve and head.
  • Running any new wiring needed for features like a new fan or better in-shower lighting.

This work behind the walls is, without a doubt, the most critical part of the entire job. Getting the plumbing and electrical right is non-negotiable for a shower that will last for decades without issues.

Phase 3: Installation and Waterproofing (Day 3-5)

Now you’ll start to see your new shower actually take shape. We begin by installing the shower pan (the floor or base), making sure it's perfectly level and solidly in place. If you've opted for a custom tile floor, this is when we'll build the sloped mortar bed that ensures proper drainage.

Right after that comes the single most important step for long-term durability: waterproofing. We apply a specialized waterproof membrane over the shower floor and up the walls, creating a seamless, bathtub-like shell. This is what protects your home's framing from moisture and prevents leaks down the road.

Phase 4: Walls, Tile, and Finishes (Day 4-8)

This is the fun part—when your design choices start coming to life. For a custom-tiled shower, our tile setters get to work, carefully placing each tile on the walls and floor. If you chose solid-surface or acrylic walls, we custom-fit and install the large panels for a clean, grout-free look.

The main steps here involve:

  1. Installing Wall Backer Board: We put up a moisture-resistant backer that provides a solid foundation for your tile or panels.
  2. Setting Tile or Panels: Your chosen materials are expertly installed according to the design plan.
  3. Grouting and Sealing: We fill the tile joints with grout and then seal everything to protect against stains and mildew.

Phase 5: The Final Fixtures and Walkthrough (Day 9-10)

We're on the home stretch! With all the construction done, our team focuses on the finishing touches. We'll install the showerhead, the valve handle and trim, and the beautiful glass door or enclosure you selected. Then, we turn the water back on, test every connection, and give the entire space a thorough, final cleaning.

The very last step is the final walkthrough. We'll meet with you, show you how all the new features work, and make sure every single detail is perfect. We don't consider the job done until you are 100% happy with your new shower.
Picking Materials: Where Your Vision Comes to Life

This is the fun part. It’s the point where your bathtub-to-shower conversion stops being an idea and starts becoming a reality you can see and touch. For property owners here in Kent and across the Puget Sound, choosing materials is all about striking that perfect balance between your personal taste, everyday practicality, and long-term durability.

The sheer number of options can feel overwhelming, but it's also where you can truly personalize your space. You're not just upgrading your bathroom; you're making a choice to improve one of the most-used spaces in your home or facility.

A flat lay of various bathroom design elements including tiles, glass, stone, a grab bar, and a shower niche.

Shower Walls: The Canvas for Your Design

Your shower walls are the main event. They cover the most surface area and set the visual tone for the entire bathroom. The biggest decision you'll make is between the endless creative possibilities of tile and the simple, clean look of solid panels.

  • Classic Tile (Ceramic & Porcelain): There’s a reason tile has been the go-to for bathrooms forever. It offers total creative freedom. You can go for a clean, timeless subway tile, a bold geometric pattern, or even a tile that mimics the look of wood or marble. The only real trade-off is the grout, which will need good cleaning and occasional sealing to keep it looking sharp.

  • Sleek Panels (Acrylic & Solid-Surface): If you're looking for something incredibly low-maintenance, this is it. These materials come in large, solid sheets, which means one thing: no grout lines. A quick wipe-down is all it takes to keep these non-porous surfaces clean, making them a fantastic choice for busy families or commercial facility maintenance.

  • Elegant Natural Stone: Nothing says "spa-like luxury" quite like real stone. Materials like marble, granite, or slate bring an organic, high-end feel into your home, with each piece having its own unique veining and character. Just know that stone is porous, so it needs to be properly sealed and maintained to prevent staining and water damage.

Getting the tile right is a big part of the job. For a deeper dive, this guide on how to choose bathroom tiles is a great resource.

Smart Features That Make a Real Difference

A truly great shower isn't just about the walls and floor. It’s the small, thoughtful details that improve your daily routine and make the space work for you.

When we plan a conversion, we're not just swapping a tub for a shower. We're thinking about how to build in convenience and safety from the very start, so your new shower serves you well for years to come.

Think about adding some of these popular and genuinely useful features:

  • Built-in Benches: A shower bench offers a sturdy place to sit and relax or a convenient ledge for shaving. It’s a small touch of comfort that also adds a layer of safety.
  • Recessed Storage Niches: Finally, you can ditch that rusty old shower caddy. We build these niches right into the shower wall, giving you a sleek, integrated spot for shampoo and soap that keeps everything tidy and within arm's reach.
  • Modern Grab Bars: Grab bars have come a long way. Today's options come in stylish finishes that match your shower fixtures perfectly. They provide essential stability and peace of mind, and we at Wheeler Painting know exactly how to anchor them securely into your wall framing for maximum support.

Why a Local General Contractor Is Essential

Thinking about managing your own bathtub-to-shower conversion? It’s tempting to think you can just hire a plumber and a tile setter and call it a day. But these projects are rarely that simple.

A proper conversion is a mini-construction project. It involves a whole team: someone for demolition, a carpenter to reframe walls, a plumber for the new drain and valve, and an expert for waterproofing and tiling. Each job has to happen in the right order. This is exactly why a good local general contractor isn't just a nice-to-have—it's the key to a successful project. For a homeowner, property manager, or building owner, this is the most reassuring way to approach any residential remodeling or commercial renovation.

The Value of a Single Point of Contact

When you hire a "residential contractor near me" like Wheeler Painting, you get a single, dedicated project manager. Instead of you trying to coordinate three or four different subcontractors (and their schedules), we handle everything.

We become your one and only call. From the first design sketch and pulling permits to scheduling every trade and passing the final inspection, it's all on us. If an unexpected issue pops up behind the old wall—and they often do—you have one person to talk to who is responsible for solving it.

Local Expertise in Kent, Seattle, and Tacoma

This is a big one, and it’s something people often don't think about until it's too late. Every city and county has its own set of rules. The building codes, permit paperwork, and inspection protocols in Kent are different from Seattle, which are different from Tacoma.

Our team works in these communities every day. We know the local regulations inside and out, which protects you from expensive mistakes and frustrating delays. It also means we’ve spent years finding the absolute best local plumbers, electricians, and tile setters—professionals we trust to do high-quality work in our clients’ homes and commercial facilities.

Hiring a local general contractor isn't just about managing schedules; it's about leveraging a deep understanding of regional building practices and a proven network of craftsmen to ensure your project is done right, the first time.

Navigating an Evolving Market

The home improvement and commercial construction industries are booming, and bathroom design trends are changing faster than ever. This growth translates into a flood of new products, materials, and technologies, which can be overwhelming for anyone.

A professional contractor keeps up with what’s new and, more importantly, what actually lasts. We can help you sort through the options, guiding you toward durable, high-quality finishes that fit your budget while steering you away from a flashy trend that will look dated in five years. If you want to dig deeper into this, our guide on how to choose a general contractor is a great resource.

Ultimately, bringing in a general contractor for your bathtub shower conversion turns a potentially chaotic process into a clear, managed one. It gives you peace of mind, protects your investment with quality work, and leaves you with a beautiful, functional shower built to last.

Common Questions About Bathtub Shower Conversions

If you're considering a bathtub-to-shower conversion, you probably have a few questions. That’s a good thing! We've heard just about all of them from homeowners and facility managers across Kent, Seattle, and Tacoma, so we’ve gathered the most common ones right here to provide straightforward, helpful answers.

Can I Really Convert My Tub to a Shower in the Same Space?

Yes, you absolutely can. In fact, most bathtub shower conversion projects are designed specifically to fit into the footprint your old tub leaves behind. This is usually a standard 60-inch by 30-inch or 60-inch by 32-inch alcove.

Working within that existing space is the most efficient and budget-friendly way to go. It means we don't have to tackle major plumbing moves or reconfigure the entire bathroom layout. When we come out for an on-site consultation, our team at Wheeler Painting takes meticulous measurements to guarantee your new shower will fit like a glove.

How Long Will My Bathroom Be Unusable During the Project?

This is always a top concern, and for good reason. A typical bathtub-to-shower conversion usually takes between 5 to 10 business days, from the first day of demolition to the final polish.

A simple prefabricated unit might land on the shorter end of that timeline, while an intricate, custom tile shower could take a bit longer. We make sure you're never in the dark. Before a single tool is lifted, we provide a detailed project calendar so you know exactly what’s happening and when. Our crew is committed to working efficiently and keeping the work area as contained as possible to minimize disruption to your home or business.

Is a Walk-In Shower a Good Investment for Resale Value?

Without a doubt. In competitive markets like Seattle and Tacoma, a modern, accessible walk-in shower is one of the smartest upgrades you can make for your home's value. It’s a feature that instantly catches the eye of potential buyers.

A well-executed bathtub shower conversion appeals to a broad range of buyers, from young families to those planning to age-in-place. As long as your home has at least one other bathtub, this upgrade enhances both its appeal and market value.

This kind of update signals that your home is modern, safe, and ready to live in. It's a small change that makes a huge difference in how your property stands out from the rest.

What Is the Main Difference Between an Acrylic and a Tiled Shower?

It really boils down to three things: maintenance, customization, and overall look. Each one has clear benefits, and the right choice depends on what you value most for your new shower.
  • Acrylic Showers: Think of these as sleek, seamless systems. They use large, solid panels that are totally waterproof and have no grout lines to scrub. This makes them incredibly easy to clean and a fantastic choice for busy households or commercial settings needing simple facility maintenance.
  • Tiled Showers: This is where you get unlimited creative freedom. You can pick any color, pattern, size, or texture to create a shower that is uniquely yours. The trade-off is that tile grout requires some upkeep, like occasional sealing, to keep it looking fresh and prevent mildew.

As your contractor, we'll sit down with you and talk through the real-world pros and cons of each. We’ll help you land on the material that fits your lifestyle, budget, and vision so you get a shower you love using every single day.


Ready to transform your bathroom with a beautiful, functional new shower? The team at Wheeler Painting has been proudly serving homeowners and businesses from Seattle to Tacoma and all the towns in between for decades. We manage every detail of your residential or commercial construction project, ensuring it is smooth, stress-free, and completed to the highest standards.

Contact us today to schedule your on-site consultation and receive a detailed, transparent proposal for your bathtub shower conversion. Let's build a better bathroom, together. https://wheelerpainting.com