Tag Archive for: puget sound painting

Shield Metal: Top Waterproof Paint for Metal in Puget Sound

If you're staring at rust on a deck railing in West Seattle, a metal door at a Bellevue storefront, or aging steel at a Tacoma facility, you're probably seeing the same pattern most property owners do. The paint starts bubbling. A few orange streaks show up at fasteners or welds. Then the problem spreads faster than expected because Puget Sound moisture keeps feeding it.

That's why generic paint advice usually falls short here. In Seattle, WA and Tacoma, WA, metal doesn't just need color. It needs a coating system that can handle damp air, repeated wetting, and in some locations, salt exposure. A can labeled for “metal” isn't enough by itself. Surface prep, primer choice, weather timing, film thickness, and maintenance all matter.

For homeowners searching for a residential contractor near me or property teams looking for commercial construction near me, this is one of those jobs where details decide whether the finish lasts or fails. The same practical thinking that applies to facility maintenance, tenant improvement, institutional painting, retail build-outs, roof repair, and office space renovation applies here too. Protect the substrate first. Then build the coating system around the actual conditions on site.

Protecting Your Puget Sound Property from the Elements

Metal in the Puget Sound climate rarely fails all at once. It usually starts in small areas that hold moisture longer than the rest of the surface. Balcony rails in Bellevue, WA. Steel siding on a Seattle, WA commercial building. Exterior stairs in West Seattle, WA. Once water gets under a weak coating, rust keeps moving.

A three-panel composite image showing a metal bridge railing, a corrugated metal wall, and apartment balconies.

Why generic metal paint advice fails here

A lot of people buy “metal paint” assuming that means waterproof. It doesn't. Metal paint is not universally waterproof; only paints explicitly labeled as water-resistant or waterproof can withstand extensive water exposure, as noted in this overview of metal paint selection.

That distinction matters in a region where surfaces may stay damp for long stretches. A decorative product might look fine going on, but if it isn't made for extended moisture exposure, it won't hold up on an exterior railing, a service door, or exposed structural steel.

Waterproofing is a system, not just a product

The coating is only one part of the job. The metal has to be cleaned properly, rust has to be treated correctly, and the application has to happen under the right site conditions. If any one of those steps is skipped, even a good product can fail early.

Practical rule: If a coating plan starts and ends with “just paint over it,” it's not a waterproofing plan.

That same system mindset helps with other exterior protection choices. If you're also trying to reduce weather exposure around the property, this guide to choosing outdoor storage is useful for keeping tools, cushions, and supplies out of the rain so moisture problems don't spread from neglected exterior zones.

For a broader look at envelope protection, construction waterproofing basics help explain where coatings fit and where they don't. That's especially useful on mixed-material properties with concrete, siding, trim, and metal all exposed to the same wet conditions.

The Critical First Step Surface Preparation

Most coating failures start before the first coat goes on. The problem isn't always the paint. It's the surface underneath it. If dirt, oxidation, grease, or unstable old coating stays in place, the new finish bonds to contamination instead of solid metal.

The preparation sequence is straightforward, but it has to be done thoroughly.

A five-step infographic illustrating the essential surface preparation process for applying waterproof metal paint.

What a proper prep sequence looks like

On most residential and commercial jobs, prep includes these core steps:

  • Inspect the surface first. Identify loose coating, rusted areas, failed caulk lines, open seams, and spots where water sits.
  • Wash and clean thoroughly. Remove dirt, chalk, grease, oils, and airborne residue before any mechanical prep starts.
  • Strip away what won't hold. Loose rust, scale, and peeling paint need to come off with a scraper, wire brush, grinder, or other appropriate tool.
  • Degrease before priming. This is especially important on handrails, doors, and service areas where oils from hands or equipment collect.
  • Prime fast after prep. Guidance for metal painting practice calls for immediate priming post-preparation, often within the same day, to avoid recontamination, as noted in the Illinois Urban Manual reference.

In the Puget Sound area, that last point matters more than many people realize. Cleaned steel can pick up moisture and contamination quickly, especially in shaded or marine-influenced areas.

A quick visual walk-through can help if you want to see the basics before tackling a project:

Active rust and white rust are not the same problem

Many do-it-yourself jobs run into trouble when people see “rust” and assume all corrosion gets the same treatment. It doesn't.

Active rust on steel is the flaky orange-red corrosion widely recognized. White rust on galvanized metal is a different condition and needs a different response. Guidance on painting exterior metal points out that these conditions require distinct treatments, including products like naval jelly for active rust and a specialized primer such as HP1550 for galvanized white rust, as described in Benjamin Moore's metal painting guidance.

That matters on local projects. A galvanized fence in Kirkland, WA and a steel stair rail in Snoqualmie, WA may both look weathered, but they shouldn't get the same prep plan.

White rust on galvanized metal fools people because it can look less severe than red rust. It still has to be treated correctly or the new coating can delaminate.

Where people usually cut corners

These are the mistakes that show up later as blistering, peeling, or rust bleed:

  • Painting over tight-looking rust that's still active underneath
  • Skipping detailed prep at edges and welds where failure often starts
  • Using the wrong primer for galvanized surfaces
  • Letting prepped metal sit too long before priming
  • Assuming one product works for every metal type

If you want a more detailed look at compatibility and prep concerns, this page on whether you can paint metal is a useful reference point. It helps separate what's possible from what lasts.

Selecting the Right Waterproof Coating System

A steel handrail in Bellevue and metal siding near Elliott Bay do not fail the same way, even if both get called a "waterproof paint" job. In the Puget Sound climate, the right answer depends on how long the metal stays damp, how much salt or road grime hits it, how much sun it gets in summer, and whether the coating has to handle movement as temperatures swing.

A guide showing how to select the right waterproof coating based on metal type and environmental exposure.

A lot of generic advice skips that. It treats metal paint like a single product choice. On real projects around Seattle and Tacoma, long-term performance comes from a coating system. Primer, build coats, topcoat, and jobsite conditions all have to match the substrate and the exposure.

What works best for different conditions

Here is a practical comparison of common coating systems for metal in Western Washington:

Coating system Best fit Main advantage Main limitation
Two-part epoxy Structural steel, industrial settings, areas that stay wet longer Tight moisture barrier and strong chemical resistance Sun exposure can chalk or degrade the finish without the right topcoat
Polyurethane topcoat system Exterior steel, railings, doors, and visible metal that needs color stability Better UV resistance and a harder finish Depends on the right primer and careful application
Water-based acrylic Lower-exposure metal with easier access for maintenance Lower odor and simpler cleanup Shorter margin for error in heavy moisture or corrosive conditions
Oil-based metal paint Exterior metal that needs a tougher water-resistant film Good film build and decent weather resistance Slower dry times and less forgiveness in damp conditions

Two-part epoxy remains a strong option where moisture exposure is severe. SPI Coatings product data describes epoxy systems designed for aggressive corrosion control, which is why they show up on tougher commercial and industrial work.

Matching the coating to the job

The substrate and the setting decide the system.

  • Steel stairs and handrails usually need a rust-inhibiting primer and a durable finish that can handle wet hands, abrasion, and frequent cleaning.
  • Commercial steel siding often benefits from a system with stronger moisture and chemical resistance, especially near loading areas, dumpsters, or traffic spray.
  • Metal roofs, flashings, and assemblies with more thermal movement need a finish coat with enough flexibility to move without cracking.
  • Galvanized metal needs products made to bond to galvanized surfaces. A standard steel primer can fail early even if the prep looked good.

This matters in local conditions. A decorative gate in West Seattle may deal with salt air and long damp mornings. A warehouse door in Tacoma may get hit with condensation inside and rain outside. Those are different failure patterns, so they need different coating choices.

If condensation is part of the problem, paint alone will not solve it. Moisture control inside the assembly matters too. This guide on how to insulate metal structures is useful for owners dealing with sweating metal in service buildings, shops, or utility spaces.

Primer and topcoat have to work together

Primer selection is where a lot of metal jobs go off course. Raw steel usually needs corrosion control first. Galvanized metal needs adhesion first. Exterior architectural metal often needs both, followed by a topcoat that can handle UV and standing moisture.

I tell clients the same thing on fence, railing, and metal trim projects. The can on the shelf is only part of the answer. Lasting protection comes from a full system built for that exact surface and exposure.

Flexible topcoats can help in the right setting, especially on exterior assemblies that see more movement or hairline cracking nearby. This overview of where elastomeric paint fits and where it does not helps clarify the difference. On metal, those products are situational, not universal.

Generic recommendations fail fast in the Puget Sound climate because they ignore how long metal stays wet here. The coating has to match the metal, the moisture load, and the use. That is how you keep a good-looking job from turning into rust bleed and peeling a year later.

Applying Waterproof Paint for Lasting Results

A metal gate in West Seattle can look ready by 10 a.m. after an overnight dry spell, then fail by next winter because the steel was still cool, the air stayed heavy, and moisture sat in the joints under the new coating. That is a common Puget Sound problem. Good application depends on timing, film control, and site conditions that generic paint advice usually skips.

The site conditions that matter

Application should start with the metal itself, not the weather app. In Bellevue and Tacoma, I have seen surfaces stay too cold in shade long after the air warms up, especially on north-facing railings, stair stringers, and shop doors. Dark metal can create the opposite problem and get hot fast in direct sun, which makes the coating skin over before it levels properly.

As noted earlier, manufacturers set temperature and humidity limits for a reason. If the steel is too cold, too hot, or carrying condensation, adhesion suffers and cure slows down. High humidity causes trouble too, especially near the water or during those gray mornings when everything feels damp even without active rain.

The condition of the metal at the hour you paint matters more than the forecast headline.

How the coating should go on

A lasting finish usually looks controlled and uneventful. The coat lays down evenly. Edges are covered without flooding the profile. Welds, bolts, and corners get extra attention because those are the first places water works its way in.

Use the application method the product allows, whether that is brush, roller, or spray, but keep the film consistent. Heavy coats are a shortcut that often backfires in Seattle area conditions. They sag, trap solvents, bridge over sharp edges, and stay soft longer than expected. On handrails, fence panels, and exterior metal trim, that often turns into premature peeling where the coating looked thickest.

A simple field routine helps keep the job honest:

  • Check surface temperature, not just air temperature
  • Look for dew or hidden moisture at seams, fasteners, and laps
  • Apply full, even coats instead of trying to finish in one heavy pass
  • Respect the recoat window listed for that system
  • Stop if conditions shift late in the day

Common failures during application

The repeat mistakes are predictable here. Crews start too early because the surface looks dry. They rush the build because rain is in the forecast. They miss residual moisture around joints, underside edges, and hardware where water hangs on longer than the flat field.

Heat creates problems too, even in Western Washington. A black steel enclosure in direct afternoon sun can make the coating tack off too fast, which hurts flow and can reduce bond strength. That is less common than cold, damp application conditions around Puget Sound, but it still shows up on exposed metal in places like Issaquah and south-facing commercial entries in Bellevue.

Waterproofing metal is not about getting paint on the surface. It is about getting the right film thickness, under the right conditions, over every place water will test first. That is the difference between a coating system that holds up and one that starts rusting at the corners after one wet season.

Curing, Testing, and Long-Term Maintenance

A coating that's dry to the touch isn't finished. Curing takes longer, and that's where a lot of otherwise solid jobs get damaged. Doors get used too soon. Railings get leaned on. Surfaces get washed down before the film has developed full hardness.

An infographic checklist for proper curing, testing, and long-term maintenance of waterproof coatings on metal surfaces.

What to do right after application

The first priority is protection. Keep traffic, impact, standing moisture, and harsh cleaning off the surface until the coating reaches full cure under the manufacturer's schedule.

Then inspect it carefully. Look for missed spots, thin edges, runs, fisheyes, and early loss of adhesion. Critical areas include corners, welds, joints, penetrations, and horizontal sections where water tends to sit.

A waterproof coating usually fails first at edges, fasteners, and transitions, not in the middle of a perfect flat panel.

A simple maintenance routine that works

Most property owners don't need a complicated program. They need a repeatable one. For apartment balconies in Bellevue, WA, commercial railings in Issaquah, WA, or service doors in Tacoma, WA, a basic inspection routine goes a long way.

Use a checklist like this:

  • Inspect at least once a year. Look for chips, scratches, cracking, rust bleed, and failed sealant near the coating line.
  • Clean off grime and pollutants. Dirt holds moisture against metal and hides early coating damage.
  • Check drainage points. Make sure water isn't pooling at base plates, sill edges, or horizontal trim.
  • Touch up small failures quickly. Minor damage is easier to stop before moisture spreads under the surrounding film.

Why maintenance matters more in Puget Sound

In drier climates, a neglected scratch might stay cosmetic for a while. Around Seattle, WA or West Seattle, WA, moisture tends to turn small coating damage into a larger repair. If you stay ahead of those failures, the system lasts longer and repairs stay manageable.

On high-exposure surfaces, owners should also pay attention to changes in building use. New irrigation overspray, added planters, blocked drainage, or altered landscaping can create wet conditions the original coating system wasn't designed to handle.

When to Call a Pro for Your Issaquah or Bellevue Project

Some metal painting jobs are realistic for an experienced do-it-yourselfer. A small gate or light-use railing in a protected location may be manageable if the prep is done correctly and the right coating is used. But many failures happen because the underlying issue isn't paint at all.

The signs paint alone won't fix it

If moisture is being driven by the building assembly, the coating won't solve the problem. Metal waterproofing fails when hydrostatic pressure or condensation persists despite coating, as paint cannot stop water ingress if the environment traps moisture. The same source notes that drainage defects account for 60% of metal corrosion cases in Western Washington, which is why repeat failures are common when owners treat paint as a one-step solution in commercial build-outs and maintenance settings, according to this waterproofing guide.

That matters on projects involving:

  • Balconies or rails below leaking decks
  • Metal near roof edges with chronic runoff
  • Commercial renovations with poor drainage
  • Retail build-outs where condensation is ongoing
  • Facility maintenance issues tied to trapped moisture inside walls or assemblies

When experience changes the outcome

Professional help makes sense when the project includes height, difficult access, specialty surface prep, coating compatibility questions, or active moisture problems. It also matters when the metal is part of a larger scope such as tenant improvement, office space renovation, institutional painting, siding replacement, drywall contractor work, floor repairs and replacements, or broader commercial renovations.

For homeowners, the trigger is usually uncertainty about the substrate. If you don't know whether you're dealing with steel, aluminum, or galvanized metal, or you can't tell whether the rust is active, the safest move is to have the surface assessed before coating starts.

For building owners and managers, it's usually about consequences. If coating failure affects safety, appearance, tenant operations, or long-term facility maintenance, shortcuts cost more than the initial savings.

If you're in Issaquah, WA, Bellevue, WA, New Castle, WA, Kirkland, WA, Snoqualmie, WA, or Seattle, WA and need help sorting out a metal waterproofing problem as part of a larger residential remodeling or commercial improvement scope, the best results come from treating the job like a system from the start.


If you need a practical plan for metal protection, waterproofing, tenant improvement, facility maintenance, or a larger residential or commercial project, Wheeler Painting & Restoration Services serves Tacoma, Seattle, Bellevue, Issaquah, New Castle, Kirkland, North Bend, Snoqualmie, and West Seattle with experienced construction, restoration, and coating support. Reach out to schedule a consultation and get a clear assessment of what your metal surfaces need to last in the Puget Sound climate.

Expert Exterior House Painting Guide for Puget Sound

After a long Tacoma winter, the warning signs usually show up all at once. A little peeling on the south wall. Caulk pulling away at a window. Faded trim that looked fine last summer and suddenly looks tired in April. In Bellevue, Issaquah, or North Bend, the pattern is the same. Months of damp air and slow drying expose every weak spot in an older paint job.

That's why exterior house painting in the Puget Sound isn't just about fresh color. It's a weatherproofing project. Paint is one of the outer layers that helps your siding, trim, and exterior details shed water, tolerate seasonal movement, and hold up longer between repairs. If that coating fails, moisture usually finds the opening first.

A lot of homeowners start thinking about repainting because they want the house to look better from the street. That matters. It also happens to line up with real value. Multiple surveys referenced in industry reporting found that repainting the exterior of a home can produce about a 51% to 55% return on investment, while some consumer-oriented analyses say curb-appeal improvements can increase perceived home value by 2% to 5%, according to industry reporting on exterior paint value. If you're weighing other pre-sale projects too, this roundup of best home improvements before selling is a useful companion read.

Your Guide to a Lasting Paint Job in the Pacific Northwest

A typical call starts with a homeowner noticing one ugly area and then realizing the issue is broader. Maybe the west-facing siding in Seattle has chalked out. Maybe the trim in Snoqualmie has hairline cracks and the lower boards near a downspout stay damp longer than the rest of the house. Homeowners aren't looking for a lecture. They need someone to explain what's failing, what can be saved, and what needs attention before another wet season.

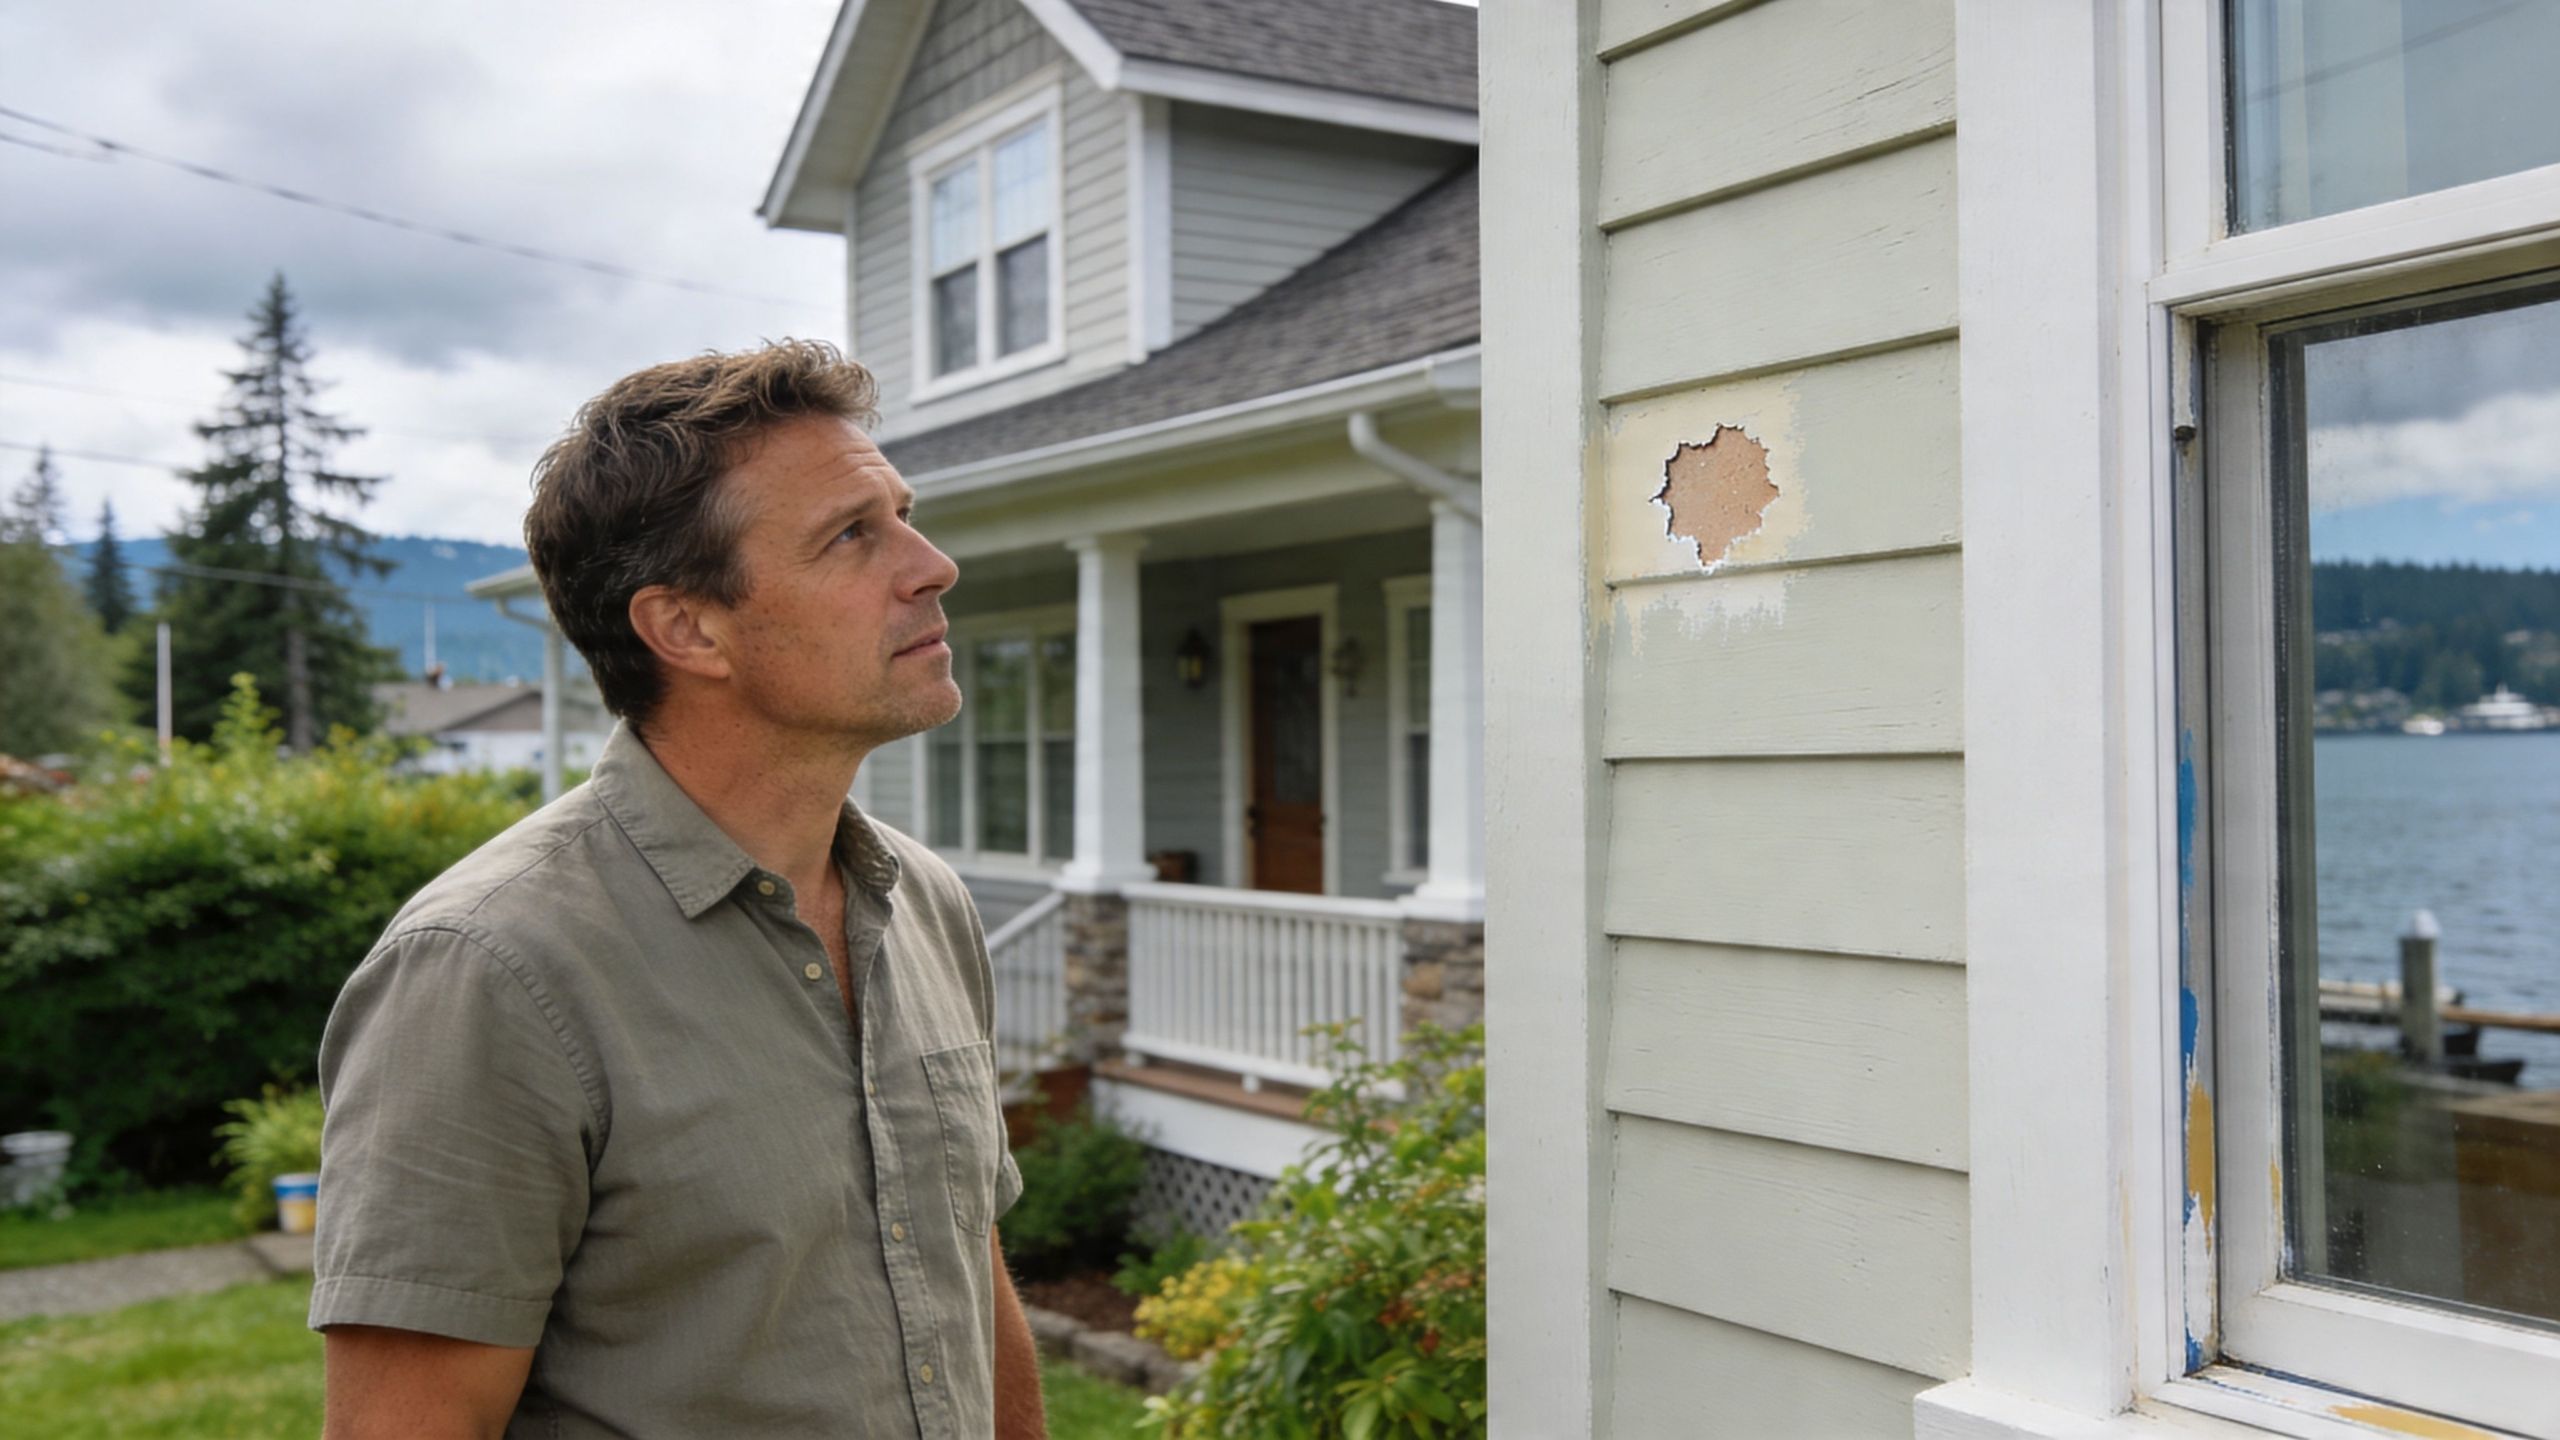
A man examines the damaged and peeling grey paint on the exterior wooden siding of a house.

In Western Washington, a lasting paint job comes down to three things. The substrate has to be sound. The prep has to be thorough. The weather window has to be right. If even one of those is off, the finish may still look good for a little while, but it usually won't age evenly.

What homeowners are usually balancing

Some want to stop visible deterioration before it turns into rot or siding replacement. Others are preparing for listing photos and showings. Commercial owners and facility managers often have a similar concern, just at a bigger scale. They want a property that looks cared for and stays protected without turning into a rolling maintenance headache.

That's also why broad advice from national articles often falls short here. Tacoma and the wider Puget Sound don't paint like drier climates do. A house can look ready from the driveway and still be holding too much moisture in the siding or trim.

Good exterior house painting doesn't start with a color fan. It starts with a close look at water, sun exposure, joints, and surface condition.

What a trustworthy process feels like

A good contractor should make the process less mysterious, not more. You should be able to ask why one wall needs more scraping, why another area needs primer, or why the schedule moved because of weather. Clear answers build confidence.

For homeowners who want a local team that also handles related work such as siding replacement, waterproofing, deck & porch staining, drywall contractor work, or broader residential remodeling, that broader construction background matters. Exterior painting touches a lot of adjacent issues. The more practical the advice, the better the outcome.

When to Paint Your House in the Puget Sound

The short answer is late spring through early fall, but a more specific answer is needed. In Tacoma, Seattle, Kirkland, and West Seattle, the question isn't just what month it is. The question is whether the surface is dry enough and warm enough, and whether it will stay that way long enough for the coating to cure properly.

A lot of failed paint jobs come from chasing the calendar instead of the conditions. You can have a sunny day in spring and still have siding that hasn't dried out. You can also get an early fall stretch that looks perfect, then run into cool mornings, condensation, and longer dry times that create adhesion problems.

The rules that actually matter

Major exterior specifications commonly require masonry and concrete to be at or below 11% moisture content, wood at or below 15%, and surface temperature at least 5°F above dew point before application. Painting is also commonly restricted below 50°F or during rain, fog, or mist, according to these exterior painting specifications.

Those numbers explain a lot about why painters in Western Washington watch the forecast so closely.

  • Wood moisture matters: If siding still holds too much moisture, paint can trap it. That often shows up later as blistering, peeling, or premature failure.
  • Dew point matters: A wall can feel dry to your hand and still be too close to condensation conditions for safe painting.
  • Morning shade matters: In neighborhoods with trees or tight lot lines, one elevation may stay cool and damp much longer than another.

What this means for scheduling

Homeowners often ask for a fixed start date months in advance. That makes sense for planning, but a good contractor will still leave room for weather calls. In the Puget Sound, flexibility is part of doing the job correctly.

For example, a home in New Castle with heavy shade may need a later daily start on one side of the house. A home in Bellevue with broad sun exposure may dry faster but still need timing adjustments for trim and caulked joints. Multi-day prep can also shift the coating schedule because washing, scraping, repairs, and spot priming all affect readiness.

A practical way to think about it is this:

Condition What a homeowner sees What a pro is checking
Cool spring morning “It looks dry” Surface temp, dew point, overnight moisture
Dry summer stretch “Perfect painting weather” Exposure differences by elevation
Early fall sunshine “Can we squeeze it in?” Shorter cure window, damp mornings, forecast stability

For a more local breakdown, this guide on the best time to paint house exterior is helpful if you're planning around Tacoma and the broader Puget Sound season.

Practical rule: In Western Washington, the right week matters more than the right month.

When waiting is the smart call

If a contractor says they want to delay because of rain, fog, low temperatures, or slow-drying siding, that's usually a good sign. Rushing exterior house painting in our climate often means paying twice. Once for the job, and again to correct it sooner than expected.

Five Signs Your Home's Exterior Needs Repainting

Not every aging paint job fails the same way. Some homes announce it loudly with peeling boards. Others just start looking dull, dusty, or slightly uneven until you get close and realize the coating is wearing out.

If you walk around your house once in spring and once at the end of summer, you'll usually catch the early signs before the damage gets expensive.

An infographic showing five common signs that a home's exterior paint needs to be repainted.

Peeling and blistering

Peeling is the obvious one. Paint lifts from the surface in flakes or strips, usually around vulnerable areas like lower siding courses, trim joints, window heads, and spots with repeated moisture exposure.

Blistering can look a little different. The paint bubbles or forms raised pockets before it breaks open. Around Puget Sound homes, that often points to trapped moisture or painting over a surface that wasn't dry enough.

Cracking, flaking, and chalking

Old paint loses flexibility over time. When that happens, it starts cracking instead of moving with the substrate. On wood trim, the cracks can look thin and shallow at first, then widen and turn into flaking edges.

Chalking is subtler. Rub your hand across the siding and you get a dusty residue. That means the paint film is breaking down. The house may still have color on it, but the coating isn't protecting like it should.

Fading and uneven color

Sun exposure hits each elevation differently. South and west walls usually show the wear first. Faded color is partly cosmetic, but it also tells you the finish is aging and becoming less resilient.

Watch for patchy appearance too. If some sections look washed out while protected areas still hold a richer tone, the coating is nearing the point where spot fixes may stop blending well.

On many houses, the first clue isn't total failure. It's inconsistency. One wall still looks decent, another doesn't.

Mildew, stains, and moisture marks

Dark streaks, green growth, and recurring staining are common in shaded or damp areas. Those signs don't always mean you need a full repaint immediately, but they do mean moisture is lingering on the surface.

Water stains near windows, trim seams, belly bands, or where siding meets flashing deserve extra attention. If storms have recently stressed the exterior, this storm damage recovery guide is a practical resource for understanding what to inspect beyond the paint itself.

Soft wood and failed joints

This is the sign people most want to avoid. If the trim feels soft, if caulk joints have opened, or if water has gotten behind the coating for a while, painting alone may not solve the problem. At that point, repairs come first.

A quick homeowner check helps:

  • Press suspect trim lightly: If it feels soft or crumbly, get it assessed before painting.
  • Look under windows: Failed caulk and drip areas often show up here first.
  • Check bottom edges: Lower trim and splash zones take repeated weather.
  • Inspect shade-heavy walls: Moss, mildew, and slow drying often show up there before anywhere else.

The Critical Role of Surface Preparation

Prep is where a paint job either earns its lifespan or loses it. Most disappointments in exterior house painting trace back to shortcuts taken before the finish coats ever touched the wall.

Homeowners usually notice the color and the cleanup. Painters notice the substrate. If the old coating is loose, if mildew is active, if joints are open, or if repairs were skipped, new paint can only hide that for so long.

A person wearing work gloves scraping old, peeling paint off wooden exterior house siding with tools.

Repaint specifications for institutional work require chemical mildew treatment, pressure cleaning, scraping all peeling paint, sealing exposed masonry, patching cracks, and caulking windows, doors, and other joints before priming and topcoating so the substrate is cleaned, stabilized, and sealed, according to these repaint specifications. That same logic applies to houses in Tacoma and across the Puget Sound. Different scale, same physics.

What prep looks like on wood siding

Wood tells the truth fast. If paint has lost adhesion, scraping has to remove what's loose. Not just the dramatic flakes. All the edges that have already let go.

After scraping, the surface usually needs sanding to feather transitions and improve primer hold. Then come repairs, spot priming, and caulking at the right joints.

On older homes, prep often includes:

  • Washing with intent: Removing dirt, spores, and chalk so primer sticks to the substrate, not the contamination.
  • Scraping beyond the obvious: Stopping at the first solid-looking edge often leaves weak paint behind.
  • Patching selectively: Good patching restores shape at minor defects. It doesn't replace rotten components.
  • Caulking the right gaps: Sealing joints around trim, windows, and doors helps keep water out. Some gaps should remain open for drainage and movement.

Fiber cement and similar composites

Fiber cement usually doesn't peel like neglected old wood, but it still needs clean, sound surfaces and attention at seams, cut edges, and fastener locations. The common mistake is treating it like a no-prep material. It isn't.

What matters most is stable substrate condition and manufacturer-aware prep. If you're dealing with this material specifically, guidance on painting Hardie board siding helps clarify where prep and coating choices differ from traditional wood.

Masonry and stucco issues people miss

Masonry, stucco, and cementitious surfaces bring a different problem set. Cracks, efflorescence, and alkalinity can all interfere with coating performance. If the wall is pushing salts or holding moisture, paint won't fix the root issue.

That's why surface sealing, crack treatment, and condition checks matter more than just adding more product. A house with minor hairline stucco cracking may need straightforward prep. A wall with repeated staining and active moisture intrusion needs a closer look before any finish coat goes on.

A quick visual helps explain the kind of labor homeowners rarely see in estimate line items:

Prep work that separates a durable job from a cosmetic one

A rushed crew can make a house look improved for a season. A careful crew spends time where the photos don't. Around butt joints, horizontal trim caps, end grain, exposed patch areas, and transitions where water tends to linger.

If you want paint to last in Western Washington, treat prep as the job. The topcoat is the final layer, not the fix.

For owners comparing bids, detail matters. One proposal may say “prep and paint.” Another may spell out washing, scraping, sanding, caulking, repairs, spot prime, full prime where needed, and finish coats. The second bid tells you more about what you're buying.

Choosing the Right Paint and Finish for Washington Weather

Most homeowners don't need to memorize product lines. They do need to understand why one paint performs better than another on a damp, variable exterior in Washington.

The short version is that flexibility, adhesion, and moisture resistance matter more than hype. Our climate asks coatings to handle wet stretches, brief drying windows, shifting temperatures, and a mix of sun and shade on the same house.

Paint type matters less than fit for the substrate

For most homes in the Puget Sound, quality exterior acrylic latex systems are the standard choice because they handle movement well and work across common residential substrates. They also fit the way modern repaint jobs are usually built, with cleaning, repairs, primer where needed, and finish coats matched to the material.

That doesn't mean every wall gets the same product. Wood trim, fiber cement, previously painted masonry, porch details, and detached structures may each need a slightly different approach. Product selection should follow the substrate and the condition, not just the brand preference of the crew.

If you also have gates, railings, or site features that need coating decisions, it can help to compare fence finish options so you can separate what works for wood from what works for metal.

Sheen is a maintenance decision

Homeowners usually choose sheen based on appearance first. That's fair, but sheen also changes how defects show up and how easy surfaces are to clean.

A practical breakdown looks like this:

Area Common direction Why it tends to work
Main siding Flat or satin Hides minor waviness and surface imperfections better
Trim Satin or semi-gloss Handles touch points, weather exposure, and cleanup better
Front door Higher sheen is common Adds durability and gives the detail more definition
High-visibility accent areas Case by case Depends on exposure, texture, and desired look

What works and what usually disappoints

Very flat finishes can look beautiful on certain homes, especially where you want a softer appearance. They can also show wear differently and may not be the easiest choice on high-contact trim details.

High-gloss sounds durable, but it reveals every patch, sanding mark, and framing irregularity underneath. On many older Tacoma and Seattle homes, that's not the friendliest choice unless the substrate is unusually smooth and the design calls for it.

A few grounded rules help:

  • Match sheen to visibility: The rougher the surface, the less forgiving a shiny finish will be.
  • Think about washing: Trim and doors benefit from finishes that clean more easily.
  • Respect the architecture: A craftsman in Tacoma may want a different visual feel than a newer Bellevue home with cleaner lines.
  • Choose for upkeep, not only day-one appearance: The prettiest sample board doesn't always produce the easiest exterior to live with.

For owners who want a simpler path, a contractor can narrow options by siding material, sun exposure, and how much maintenance you want to take on over time. That turns a paint-store decision into a building-envelope decision, which is what it really is.

DIY vs Hiring a Professional Painting Contractor

Some homeowners can do their own exterior painting well. That's true, especially on smaller, single-story houses with straightforward access and limited repair needs. The problem is that many people picture the painting part and underestimate the prep, the height work, and the planning around weather.

Exterior house painting is one of those jobs where the labor isn't just labor. It includes judgment. Which areas are sound enough to keep. Which need more scraping. Which gaps get caulked. Which damp-looking wall should wait another day.

An infographic comparing the pros and cons of DIY exterior house painting versus hiring a professional contractor.

When DIY makes sense

DIY is most realistic when access is simple and the house condition is stable. A detached garage, a low garden-facing wall, or a small single-story home with little peeling is a different project than a tall, weathered house in North Bend with complex trim and damp shade lines.

The upside of DIY is straightforward:

  • Labor savings: You may reduce out-of-pocket cost if you already have time and some equipment.
  • Schedule control: You can work evenings or weekends when it suits you.
  • Hands-on oversight: You know exactly what was done because you did it.

The downsides show up fast once the work begins. Washing, scraping, sanding, masking, ladder movement, staging, and cleanup take far longer than expected. If repairs appear mid-project, the learning curve gets steeper.

Where DIY usually runs into trouble

Height changes the whole calculation. So does complicated access around landscaping, sloped lots, porches, or second-story trim. Guidance on painting outside your house without scaffolding gives a good sense of how much access and safety planning is involved even before the coating starts.

Then there's consistency. Homeowners often do careful work on the visible front elevation, then get worn down by the repetitive prep on side and rear walls. That's when corners get cut. Not because they don't care, but because the workload is bigger than it looked at the start.

A DIY job usually succeeds or fails on stamina. Most people can paint a wall. Fewer want to scrape, sand, set ladders, and repeat that process around the whole house.

What hiring a professional changes

A professional crew brings systems. They stage the site, sequence the prep, coordinate material use, and keep production moving while still watching conditions. That matters on occupied homes and even more on properties with limited access or mixed repair needs.

Hiring a contractor also shifts safety risk away from the homeowner. Multi-story elevations, awkward rooflines, and long ladder days aren't minor issues. They're the part of the job that makes honest people decide they'd rather not spend their weekends twenty feet off the ground.

For homeowners or property managers comparing options, Wheeler Painting & Restoration Services is one local contractor that handles exterior painting along with related repair and restoration work in Tacoma and the surrounding Puget Sound region. That can be useful when a paint project overlaps with siding issues, waterproofing, or broader facility maintenance.

A balanced way to decide

Ask yourself a few plain questions:

  • Do you have the time: Not just a weekend. Enough time for prep, dry days, and cleanup.
  • Can you access every area safely: Especially upper trim, gables, and hard-to-reach sides.
  • Can you identify surface failures correctly: Paint failure and substrate failure aren't the same thing.
  • Will you still finish strong halfway through: Many DIY jobs start enthusiastically and slow down during prep-heavy stages.

If the honest answer is “probably not,” hiring a contractor is usually the cheaper stress decision in the long run, even if the upfront number is higher.

Hiring a Contractor and Understanding Costs in the Puget Sound

The estimate is where a lot of homeowners either gain confidence or lose it. A good exterior painting bid should answer practical questions before you have to ask them twice. What's being washed, scraped, primed, caulked, repaired, masked, and painted. What isn't included. How access is handled. How weather delays are addressed.

If a proposal feels vague, it probably is.

The average U.S. exterior house painting cost is around $3,177, or $1.50 to $4.00 per square foot, with a broader range of $600 to $7,700 depending on size, stories, and materials. Permits can add $200 to $300. More complex substrates can cost more, with brick exteriors commonly running $3,500 to $10,000, while wood siding averages $700 to $3,000, according to Angi's guide to exterior house painting cost. Those numbers are useful for setting expectations, but local bids in Tacoma, Seattle, Bellevue, and nearby cities still depend heavily on prep, access, and substrate condition.

Why one bid is higher than another

The cheapest number often assumes the lightest prep. That may be fine on a newer house in solid condition. It's not fine on an older exterior with active peeling, failed caulk, or moisture-prone details.

A more complete bid may include more labor because it accounts for what the house needs. On real jobs, price often moves because of:

  • Surface condition: Loose paint, rot repair, and failed joints increase labor.
  • Access difficulty: Multi-story work, steep grades, or tight clearances slow production.
  • Material type: Brick, wood, fiber cement, and trim-heavy homes each bring different prep needs.
  • Scope detail: Detached structures, doors, railings, shutters, and trim complexity add time.

Questions worth asking every contractor

A careful interview saves headaches later. Don't worry about sounding too detailed. Good contractors expect detailed questions.

Ask things like:

  • Are you properly licensed and insured for this work in Washington: You want a contractor who can explain coverage clearly.
  • What prep is included in writing: Washing, scraping, sanding, caulking, priming, patching, and cleanup should be specific.
  • How do you handle weather delays: In the Puget Sound, this is part of the job, not an exception.
  • What surfaces are excluded: Fences, decks, outbuildings, handrails, and doors should not be left ambiguous.
  • How is trim being bid: Is it only faced off, or fully wrapped around? That one question catches a lot of scope confusion.
  • What warranty is offered, and what voids it: Get the terms in plain language.

If two bids look similar on price but one is much clearer on scope, that clarity has value.

The trim detail many bids miss

The “faced off” versus “wrapped around” question sounds small, but it matters. A faced-off approach generally addresses the visible front face of trim. Wrapped-around trim includes the returns and exposed side edges where applicable. If that isn't defined at the bid stage, homeowners can end up expecting one level of finish while the contractor priced another.

That detail becomes especially important on craftsman-style homes, heavier window trim packages, porch posts, and decorative fascia where edge visibility changes throughout the day.

If you want a more detailed breakdown before requesting estimates, this page on the average cost of painting exterior of house is a useful planning resource.

A strong hire usually comes down to this. Clear scope. Real prep. Straight answers on insurance, scheduling, and warranty. In a damp climate like ours, trust grows from detail.


If you're planning exterior house painting in Tacoma, Seattle, Bellevue, Issaquah, Kirkland, New Castle, North Bend, West Seattle, or Snoqualmie, Wheeler Painting & Restoration Services can help you sort out timing, scope, prep needs, and next steps. A site visit and detailed proposal make it easier to understand what your exterior needs now, what can wait, and how to approach the work with fewer surprises.

Does Kilz Paint Kill Mold? The Truth Revealed

Kilz paint does not kill mold. KILZ MOLD & MILDEW Primer is designed to block stains and help prevent mold and mildew growth on its film after the surface has been properly cleaned, and it covers 300 to 400 square feet per gallon.

That distinction matters in Western Washington. In Seattle, Kent, Tacoma, and the communities between them, moisture sticks around long enough to turn a small bathroom spot or basement stain into a bigger repair if you treat a living mold problem like a paint problem. A lot of homeowners search “does kilz paint kill mold” because they want the fastest safe fix. That’s understandable. But the quick fix is often the expensive fix later.

A dark patch on drywall, a musty smell near a window, bubbling paint in a laundry room. Those are the moments when people reach for primer and hope they can seal the issue away. Sometimes the stain does disappear for a while. The mold itself doesn’t.

That Unsettling Spot A Homeowner's Guide to Mold

You notice a spot on the wall that wasn’t there before. Maybe it’s in a corner of the bathroom, behind a dresser on an exterior wall, or near a ceiling line after a leak. In the Puget Sound climate, that kind of discovery puts people in a hurry, and hurry often leads to the wrong product for the wrong job.

The first step is identifying what you’re looking at. Not every dark stain is mold, and not every mold issue stays visible. If you need a basic visual primer on warning signs, this guide on how to identify mold in your home is a useful starting point for understanding what deserves a closer look.

Why the confusion happens

Kilz has a strong reputation in painting for a reason. It’s known for sealing surfaces, blocking stains, and helping create a clean base for finish paint. So homeowners assume it must also solve mold. That leap makes sense on the surface, but it mixes up two different jobs:

  • Paint prep: hiding stains, improving adhesion, creating a uniform finish
  • Mold remediation: removing contamination and addressing the moisture source

Those are not interchangeable.

Practical rule: If the problem is alive, paint alone won’t solve it.

That matters even more in homes and commercial spaces around Seattle and Tacoma, where damp air, limited ventilation, and wet seasons can keep building materials from drying the way owners think they have. A wall may look dry and still hold the conditions mold needs.

What property owners should focus on first

Before anyone talks about primer, topcoat, or repainting, the right questions are simple:

  1. What caused the moisture?
  2. Is the surface porous, like drywall or wood?
  3. Has the spot come back after cleaning or painting?
  4. Is there a musty odor even where you can't see staining?

If you skip those questions and go straight to coating, you risk hiding the evidence while the substrate keeps deteriorating. That’s where a modest repair can turn into drywall replacement, trim replacement, insulation work, or a larger restoration scope.

For homeowners looking for a house painting near me contractor, or facility managers comparing commercial painting services near me, this is one of the biggest distinctions to understand. A good painter should know when a paintable surface is a remediation issue first.

The Critical Difference Between Covering Stains and Killing Mold

Think of mold like weeds in a garden. If you mow the tops off, the bed looks cleaner for a little while. The roots are still there, and they come back. Painting over mold works the same way.

A primer can hide discoloration. It can't undo growth embedded in the material.

Mold is not just a stain

Mold is a living organism. On porous materials such as drywall, plywood, and wood trim, it can grow below the visible surface. That’s why the stain you see is often only part of the problem.

According to restoration guidance summarized by CEO Restoration on Kilz and mold, Kilz does not kill mold; its primary function is to seal surfaces and block stains rather than eliminate mold spores or roots. The same source notes that in damp climates like the Puget Sound, where humidity averages 70 to 80% annually, full remediation before priming is the standard, not an extra step.

An infographic comparing painting over mold versus proper remediation to illustrate why mold requires complete removal.

What primer is actually designed to do

Primer has a different job description. It helps with:

  • Stain blocking: covering water marks, tannin bleed, smoke residue, and similar discoloration
  • Adhesion: helping finish paint bond to slick or patched surfaces
  • Surface sealing: creating a more uniform base coat

Even specialized products such as KILZ MOLD & MILDEW Primer are preventive, not curative. The product documentation requires the existing mold to be removed first by washing with a mildew remover, rinsing, and drying. Its protective function applies to the primer film after proper prep.

Mold remediation removes the problem. Primer protects the finished surface after the problem is gone.

Why this matters on real jobs

On a sound, dry, cleaned substrate, a mold-resistant primer can be a smart part of a paint system in bathrooms, laundry rooms, utility spaces, and other moisture-prone areas. On an actively contaminated wall, it becomes camouflage.

That difference separates a finish that lasts from one that peels, blisters, or stains through again.

For residential remodeling, tenant improvement, or facility maintenance work, an experienced contractor earns trust in such instances. Anyone can roll on a stain blocker. The harder skill is knowing when the substrate isn’t ready for paint yet.

What Really Happens When You Paint Over Mold

The short version is simple. You hide the symptom and keep the problem.

Once primer and paint go over active mold, the growth is harder to see, but it hasn’t been resolved. On porous surfaces, the material underneath can keep deteriorating while the room looks “fixed” from the doorway.

A close-up view of peeling paint on a wall revealing a patch of black mold and moss.

The hidden cost of the quick fix

Restoration expert Adam Ross explains that applying KILZ directly over mold creates a concealed growth medium because the primer can't penetrate porous substrates where mold roots embed. He also notes that when professionals later have to correct that mistake, full primer removal may be required, which can increase remediation costs by 30 to 50% compared with proper initial cleanup, as discussed in this video analysis of painting over mold.

That extra work matters on both homes and commercial properties. Instead of cleaning and rebuilding once, crews may need to strip coatings, reopen walls, and replace materials that could have been addressed earlier.

What owners usually see later

The return signs are familiar:

  • Peeling or cracking paint: the coating loses bond as the underlying surface stays compromised
  • Recurring staining: discoloration shows back up through the finish
  • Soft drywall or damaged trim: the substrate weakens while moisture remains trapped
  • Persistent odor: the room still smells musty even after repainting

In offices, retail spaces, and tenant improvements, this can also create scheduling headaches. A “done” wall ends up back on the repair list, often after furniture is in place or the space is occupied.

A surface that looks clean isn't the same as a surface that's healthy.

Why the structure matters

Mold problems aren't only cosmetic. If moisture keeps feeding growth, wallboard, sheathing, trim, and adjacent finishes can all suffer. The cost doesn't come from the can of primer. It comes from deferred correction.

That’s why a seasoned residential contractor near me or commercial construction near me partner should be blunt about what paint can and cannot do. The financially responsible move is often the less convenient one at the start. Remove the contamination. Dry the assembly. Then rebuild and paint.

The Right Way A Guide to Mold Remediation Before Painting

A lot of Puget Sound homeowners call after trying the cheaper route first. They cleaned the spot, rolled on primer, and the wall looked fine for a few months. Then the stain came back, the paint started to lift, and a small repair turned into drywall replacement, trim work, and another round of painting.

That is the cost of a quick fix in a damp climate. The money rarely gets lost on paint. It gets lost when moisture stays in the assembly long enough to damage materials you could have saved with the right sequence.

A professional in a hazmat suit and respirator mask remediates mold growth on a damp residential wall.

Start with the moisture source

Every sound remediation plan begins with one question. Why did this area stay wet long enough to grow mold?

The answer is usually a roof leak, plumbing leak, condensation, weak bath ventilation, window sweating, or moisture moving up from a crawlspace or basement. Until that source is corrected, cleanup has a short shelf life. Paint can hide the evidence for a while, but it cannot change the conditions inside the wall or ceiling.

If water damage is part of the picture, this guide on how to repair water damaged drywall shows why stained or swollen gypsum often needs replacement instead of cosmetic patching.

Remove what can't be saved

Often, homeowners hesitate, and I understand why. Cutting out drywall feels more expensive than wiping a surface down and sealing it.

But porous materials are usually the line between a repair that lasts and one that comes back. If mold has worked into drywall, insulation, ceiling tile, carpet pad, or other absorbent materials, surface cleaning alone may leave contamination behind. In practical terms, that means a wall that looks better now can still fail later.

A proper scope often includes:

  1. Containment of the affected area to keep dust and spores from spreading through the house.
  2. Controlled removal of contaminated porous materials that cannot be cleaned reliably.
  3. Detailed cleaning of nearby structural or finish surfaces that are still sound.

That approach protects more than appearance. It helps prevent hidden moisture damage from reaching framing, trim, flooring edges, and adjacent finishes.

Dry first, then rebuild

Drying is not a formality. It determines whether the next phase holds up.

After removal and cleaning, the area needs time and airflow to reach a dry, stable condition before any primer, texture, or paint goes back on. If that step gets rushed, the new coating can trap the same moisture pattern that caused the problem, and the homeowner pays twice. Once for the original repaint. Then again for tear-out and repair when the finish fails.

Field advice: If the wall cavity or surface is still damp, stop there. Rebuilding over moisture is how small mold jobs become larger restoration jobs.

Rebuild for service, not just appearance

Once the area is clean and dry, rebuilding can start. That may include replacing drywall, reinstalling insulation, patching, sanding, priming, repainting, and repairing trim or other finishes affected by the moisture event.

The goal is a wall or ceiling that performs the way it should, not one that appears clean on handoff day. For Puget Sound homeowners, that is the better financial decision. Spending more on proper remediation up front is often what avoids the bigger bill for repeat repairs, hidden decay, and broader structural work later.

Using Mold-Resistant Primers and Paints Correctly

A lot of Puget Sound homeowners reach this stage and assume the hard part is over. The wall looks clean, the leak has been addressed, and a can labeled mold-resistant seems like the final answer. Used correctly, it is a useful finish step. Used as a shortcut, it becomes one more cost layered on top of a problem that still has to be fixed.

Mold-resistant primer is a protective coating, not a cure. These products are designed to help resist mold and mildew growth on the dried paint film after the surface has been properly cleaned, repaired, and dried. They can also help block residual staining so the finish coat looks uniform instead of patchy.

That matters because homeowners often confuse three separate jobs. Cleaning removes contamination. Drying prevents the same moisture pattern from returning right away. Primer helps the new paint system bond, block stains, and hold up better in damp rooms.

What these primers are actually good for

On the right substrate, mold-resistant primer earns its keep. I use it where humidity is part of normal living conditions and where a failure will cost more than a simple repaint.

Good examples include:

  • Bathrooms and laundry rooms with regular condensation
  • Kitchen walls and ceilings that need stain blocking as well as moisture resistance
  • Utility spaces with cool surfaces that collect damp air
  • Repaired drywall areas where new patches need to be sealed before painting

If you're deciding whether a repaired surface needs primer at all, this guide on whether you have to prime sheetrock before painting covers the basics well.

Where homeowners waste money

The common mistake is buying a specialty primer to avoid a proper inspection. In this climate, that gets expensive fast. If a bathroom fan is undersized, a window trim joint is leaking, or a wall cavity is still holding moisture, the coating may look fine for a short stretch while damage continues behind it.

Then the bills get larger. Drywall softens. Trim swells. Flooring edges can start taking on moisture. What could have stayed a targeted cleanup and repaint turns into tear-out, finish carpentry, and sometimes framing repairs.

That is the trade-off. A better primer is worth the money after remediation. It is wasted money if it is covering an active moisture problem.

Practical do's and don'ts

Situation Do Don't
Light residual staining after cleanup Use a stain-blocking primer matched to the surface Assume the finish coat will hide it
Repaired drywall in a damp room Prime before painting so the patch seals and paints evenly Skip primer and expect uniform sheen
Bathrooms and laundry areas Use mold-resistant coatings as part of the paint system Rely on paint instead of ventilation
Recurrent spotting or musty odor Pause and investigate the moisture source Keep repainting the same area

If there is any doubt about whether the problem is larger than the visible staining, get clarity before spending money on finish materials. professional mold inspections can help determine whether you are dealing with a surface issue or a hidden building moisture problem. In Puget Sound homes, that decision often separates a smart preventative expense from a much larger repair later.

When to Call a Professional Puget Sound Remediation Expert

Some mold issues are small and straightforward. Others are signs of hidden moisture, damaged materials, or a broader building problem. The hard part for most owners is knowing which one they have.

If the spot keeps coming back, if the wall feels soft, or if the odor is stronger than the visible damage suggests, it's time to stop thinking like a painter and start thinking like a restoration contractor.

A large patch of black mold growing on a white basement block wall next to a measuring tape.

Signs the problem is beyond a simple cleanup

Use professional help when any of these apply:

  • The affected area is larger than 10 square feet
  • A strong musty odor persists, even where staining is limited
  • Mold returns after cleaning or repainting
  • Someone in the building has respiratory concerns
  • The source may be hidden, such as behind cabinets, inside wall cavities, or around HVAC pathways

For owners who want a better sense of what an inspection process can involve, this overview of professional mold inspections is helpful background.

Why a single accountable contractor matters

On real projects, the problem isn't only mold. It's coordination. Someone has to evaluate the damage, remove compromised materials, repair the affected areas, and restore the finish so the space is usable again.

That’s where a contractor who handles remediation and restoration under one roof can save owners time, confusion, and rework. Instead of bouncing between separate trades, you get one scope and one chain of responsibility. If you need a local starting point, mold remediation services should include both cleanup and the repair work that follows.

Here’s a practical walkthrough that helps illustrate when a problem needs more than surface treatment:

For facility managers, retail tenants, and homeowners in the Seattle to Tacoma corridor, that's often the difference between a contained repair and a repeat problem that interrupts operations later.

Frequently Asked Questions About Mold and Painting

Can I use bleach instead of remediation?

Bleach isn't a reliable stand-alone solution for mold in porous materials. The issue isn't just what sits on the surface. If the material itself is contaminated, cleaning alone may not solve it.

How do I know if mold is behind the wall?

A musty smell, repeated staining, bubbling paint, or a spot that returns after cleaning are all warning signs. Hidden mold usually reveals itself through recurring symptoms, not one obvious patch.

Will homeowners insurance cover mold?

That depends on the cause of the loss and the terms of the policy. Coverage questions often turn on whether the issue came from a sudden covered event or a longer-term moisture problem, so this guide on does homeowners insurance cover mold can help you frame the right questions before you file a claim.

The key takeaway is simple. Paint products have a role in prevention and finishing. They are not a substitute for removing active mold and correcting the moisture source.


If you've found mold, recurring stains, or moisture damage in your home or commercial space, Wheeler Painting & Restoration Services can help you address the problem the right way. Their team serves the Puget Sound with residential and commercial restoration, repairs, and painting, so you don't have to patch over a deeper issue and pay for it twice later.

Can You Paint Panelling? Transform Your Walls

You’re standing in a room in Seattle, Kent, Tacoma, or somewhere in between, looking at dark wall panelling that makes the whole space feel older, smaller, and heavier than it should. Maybe it’s real wood. Maybe it’s faux wood sheets from a past remodel. Maybe it’s in a family room, office, rental, lobby, or tenant space that needs to feel cleaner and more current without tearing everything apart.

The short answer is yes, you can paint panelling. In many cases, it’s one of the smartest upgrades you can make if the panelling is sound and you want a big visual change without a full demolition. For Puget Sound properties, that matters. Moisture, seasonal humidity, and long dry times can punish sloppy work, but painted panelling holds up well when the surface is cleaned, sanded, primed correctly, and coated with the right finish.

Transform Your Space You Can Paint Panelling

A lot of people assume panelling has to come out. That’s usually not true.

When the boards or panel sheets are stable, painting them is often the practical move. For homeowners and commercial property managers, painting existing wood paneling can save 50-70% versus full removal and replacement, and projects can finish in 2-4 days for 1,000 sq ft rooms instead of stretching into demolition and rebuild work that can take weeks, according to the verified data tied to panel painting background and restoration context. That same verified data also notes that dark pine paneling was prevalent in 25% of mid-century homes.

A smiling woman stands in a bright, modern living room with elegant wall paneling and city views.

In practice, the difference is dramatic. A room that felt dim and dated can start reading as bright, clean, and intentional once the orange or brown finish is gone. You don’t need to remove every panel to get there. You need the right prep, the right primer, and patience with the coating schedule.

When painting panelling makes sense

Painting is usually the better choice when:

  • The panelling is structurally sound. It’s attached well, not swollen, and not actively failing.
  • You want a cleaner look without major construction. That matters in occupied homes and active commercial spaces.
  • You’re updating on a budget. Labor and disposal costs add up fast when tear-out starts.
  • You want less disruption. Demolition creates dust, trim damage, drywall repair, and often follow-up trades.

Practical rule: If the panelling is ugly but solid, paint is usually the first option worth evaluating.

There are exceptions. If panels are water-damaged, mold-affected, delaminating, or hiding bigger wall problems, painting over them is only covering trouble. But when the substrate is stable, paint can turn a room around with far less mess.

For property owners comparing finishes, it also helps to understand whether your surface should be coated opaquely or left visible with a transparent finish. This paint or stain comparison for wood surfaces is useful when you’re deciding how much of the original material you want to show.

Your First Step Preparing Panelling for a Flawless Finish

Prep decides whether painted panelling looks professional or starts peeling around grooves, seams, and trim lines. Most failures happen before the first finish coat ever goes on.

The first thing to identify is the type of panelling you have. Real wood behaves differently from laminate-faced sheets, printed hardboard, veneer, or MDF trim systems. Real wood may bleed tannins. Laminate can resist primer if it isn’t sanded well. MDF drinks up coating and swells if edges are ignored.

Start with cleaning, not sanding

Old panelling holds years of dust, wax, smoke residue, hand oils, and cleaner buildup. If you sand that into the surface, you make the job harder.

Verified manufacturer-guideline data notes that prep using TSP solution removes 95% of stains, light 220-grit sanding improves adhesion by 80%, and with proper cleaning, groove-first priming, and coating sequence, paint adherence exceeds 98%. The same verified data notes that painting paneling reduces timelines by 70% compared to remodels in Puget Sound markets, as summarized in this painted wood paneling preparation reference.

A checklist of five steps for preparing wall paneling for painting, featuring illustrations of cleaning, filling, sanding, dusting, and taping.

A solid prep routine looks like this:

  1. Wash the walls first. Use a TSP solution or substitute, especially around lower wall areas, door casings, and switch plates.
  2. Rinse and dry. Cleaner residue can interfere with primer.
  3. Repair obvious damage. Fill dents, old nail holes, and chips where needed.
  4. Scuff-sand the whole field. Focus on the sheen, not heavy material removal.
  5. Vacuum and wipe down thoroughly. Dust left in grooves will show up in the finish.
  6. Mask adjacent surfaces. Floors, trim, outlets, and ceilings need protection.

Do you have to sand

In most cases, yes.

You don’t have to grind the panel flat. You do have to dull the existing finish so primer can grab. Glossy polyurethane and factory-finished hardboard are especially unforgiving if you skip this step. Light scuff-sanding with 220-grit is the sweet spot for many panelled walls because it cuts sheen without gouging the surface.

If you want a plain-language explainer on grit choice before you start, this guide on using 200-grit sandpaper for paint prep helps homeowners understand where a fine prep grit fits into a paint-ready surface.

Sanding isn’t about making the wall look rough. It’s about giving primer something to hold.

Know what you’re aiming for

There are really two finish paths:

Finish path What it looks like Prep intensity
Paint and keep the grooves You still see panel lines and texture Moderate
Fill grooves for a flatter wall look More modern, less obviously panelled Higher

If you’re painting over stained or sealed wood, extra care at the cleaning and sanding stage matters even more. This guide on painting over wood stain is worth reviewing because many panelled rooms have old stain systems under the clear coat.

Puget Sound prep reality

Western Washington slows people down for one simple reason. Surfaces don’t always dry when the clock says they should.

In homes near Seattle, Tacoma, and the damp corridor in between, panelling in basements, north-facing rooms, and older buildings can hold surface moisture longer than expected. That affects sanding dust, primer open time, and topcoat leveling. If the room feels cool and closed up, improve airflow before you start. A dry room is easier to prep and easier to paint well.

The Best Primers and Paints for Wood Panelling

If you ask whether can you paint panelling, the hidden question is usually this: what primer do I need so the old color, stain, or shine doesn’t come back through?

That’s the decision that separates a clean finish from a callback.

A collection of paint cans, primers, and painting tools displayed on a smooth white surface.

Match the primer to the panel surface

Not all panelling needs the same product.

  • Real wood with tannins often needs a stain-blocking primer. If you skip that, yellowing or brown bleed can come through your finish coat.
  • Glossy faux wood or laminate-faced panels need a high-adhesion primer after sanding.
  • MDF trim-style panelling needs sealing because raw or thirsty sections absorb coating unevenly.
  • Previously painted panelling still needs evaluation. If the old coating is soft, chalky, or failing, no primer can save bad substrate.

For many wood-panel jobs, shellac or oil-based stain blockers still solve problems that ordinary latex primers don’t. But they also come with trade-offs.

The fume issue matters in Western Washington

In small enclosed rooms, ventilation is not a side note. Verified data tied to indoor air quality states that a 2025 EPA report highlighted VOCs from oil-based products exceeding safe limits by 40-60% in rooms under 200 sq ft without mechanical ventilation, with 25% higher respiratory complaints in Pacific Northwest retrofits. That same verified data notes that oil-based products can take 24-48 hours to dry, and that low-VOC shellac primers such as BIN blocked tannins 95% effectively in Sherwin-Williams 2025 tests, while asthma rates were noted at 12% in Washington state in the same verified-data summary from the indoor air quality and primer discussion.

That matters if you’re painting a bedroom, office, basement room, or occupied commercial interior.

Health note: A strong primer might solve stain bleed and still be the wrong choice if the room has poor airflow and people are living or working in it during the job.

What works well in real rooms

A practical approach is to choose products by problem:

Surface condition Better primer choice Why
Wood stain bleeding through Shellac-based stain blocker Strong sealing performance
Slick but clean panel face Bonding primer Helps topcoat grip after sanding
Patchy repairs and mixed surfaces Quality acrylic primer Good tie-coat when heavy stain block isn’t needed
Small enclosed room with ventilation concerns Lower-odor shellac option where suitable Balances stain blocking with air quality concerns

For topcoats, interior latex in a satin finish is a dependable choice for many residential panelled walls because it gives some washability without exaggerating every defect. In higher-traffic commercial interiors, a tougher finish may make more sense, especially where walls get touched, bumped, or cleaned often.

Sheen matters more than many people think

Flat paint hides defects best, but it’s harder to clean. Semi-gloss is durable, but it can make every groove, patch, and lap mark more visible. Satin usually lands in the workable middle for panelled walls.

Before buying material, it helps to estimate quantity accurately, especially if you’re priming plus applying multiple coats. A simple paint calculator for room sizing can help you avoid underbuying or stacking extra gallons in the garage.

Product choice affects appearance and schedule

Cheap primer is expensive once you count rework. Thin topcoats can also struggle to hide dark panelling evenly, especially over repaired grooves or mixed porosity. The best finish comes from a system that works together: cleaner, sanded surface, correct primer, and a topcoat that levels well under local conditions.

That’s why painted panelling done right looks calm and uniform. Done wrong, it flashes, drags, stains through, and starts telling on itself when the light hits the wall.

How to Apply Paint for a Smooth Panelled Wall

Application is where homeowners either get a surprisingly good result or create a wall full of drips, flashing, and visible groove buildup. The method matters, but the sequence matters more.

A gloved hand uses a paint roller to apply a light-colored coat of paint onto wooden wall paneling.

Choose your finish style first

Before opening a can, decide whether you want to keep the panel grooves visible or fill them for a smoother wall look.

Keeping the grooves is faster and usually safer for DIY work. Filling them can look more current, but it adds labor and raises the chance of visible seam issues if the wall moves seasonally. In Western Washington, that movement is real. Humidity changes and older wall assemblies can telegraph weak filler work.

If you’re keeping the grooves

This is the simpler route.

Use a brush to cut into grooves and edges first, then follow with a roller on the flat faces. A 3/8-inch nap roller is a good practical choice on many panelled walls because it covers well without throwing too much texture. Work in manageable sections so the brushed areas and rolled areas blend together while still wet.

A reliable order looks like this:

  • Brush the grooves first. Don’t flood them.
  • Roll the panel faces next. Use light, even pressure.
  • Back-brush drips immediately. Groove buildup dries ugly.
  • Keep coats thin. Thick coats sag on vertical panel lines.

The cleanest panel jobs usually come from restraint. Too much paint at once is what creates ridges and drips in the channels.

If you want a flatter modern wall

Verified guidance for the groove-filling approach notes that glossy paneling should be cleaned thoroughly, then lightly sanded with 220-grit to create a 50-100 micro-texture profile, which boosts adhesion by 60-80%. That same verified data says skipping sanding causes 55% of peeling failures within 2 years, and recommends spot-priming seams and grooves first, drying 2-4 hours, then filling grooves with lightweight spackling, not hot mud, which cracks 70% of the time, as summarized in this Benjamin Moore paneling application guide.

That protocol exists for a reason. Groove filler fails when it’s applied over a slick, unprimed channel.

A pro sequence for filled-groove panelling

  1. Clean and dry the wall.
  2. Scuff-sand the entire surface.
  3. Spot-prime grooves and seams first.
  4. Fill grooves with lightweight spackling.
  5. Sand the filled areas flush.
  6. Vacuum and tack-cloth the wall.
  7. Prime the full wall.
  8. Apply two thin finish coats.

Here’s a walkthrough that can help you visualize the process in motion:

Brush, roller, or sprayer

Each tool has a place.

Method Best use Trade-off
Brush Grooves, corners, edges, small repairs Slow, easy to leave marks if overloaded
Roller Most wall fields Can miss deep channels without brushing first
Airless sprayer Very smooth finish, larger empty rooms, commercial spaces More masking, more setup, more overspray risk

For occupied homes, roller-and-brush is often the practical choice. For vacant interiors or tenant improvements where a very even finish matters, spraying can produce a cleaner look if the prep and masking are done properly.

Watch the wet edge

Most amateur problems come from overworking paint. They roll a section, go back into a half-drying area, then chase streaks that weren’t there a minute ago. In the Puget Sound climate, that gets worse in cool rooms where coatings stay open longer but don’t level evenly if airflow is poor.

Two habits help:

  • Box your paint in one bucket if you’re using more than one can, so color stays consistent.
  • Let coats dry fully before sanding or recoating, especially in damp rooms.

If your project includes trim, built-ins, or panel moulding details around the wall, this trim painting guide helps with cleaner transitions and sharper finish lines.

What a smooth result actually looks like

A pro-finished panel wall doesn’t look thick. It doesn’t have paint pooled in grooves. It doesn’t show patch halos where filler telegraphs through. It looks even, intentional, and quiet.

That’s the target. Not “covered.” Finished.

Painting Panelling Common Mistakes to Avoid

The biggest DIY mistake is thinking panelling is just another wall. It isn’t.

Panelling usually has sheen, grooves, old residue, hidden movement at seams, and sometimes a surface that absorbs paint unevenly. If you shortcut any of that, the wall tells on you later.

Mistake one skipping the primer logic

People often ask which paint is best, then buy topcoat before deciding what the panel surface needs. That’s backwards.

A dark stained wall may need stain blocking. A slick faux-wood wall may need adhesion help. MDF may need sealing before anything else. If the primer choice is wrong, the finish coat can still fail even if it looks decent on day one.

A beautiful finish coat can’t rescue bad prep or the wrong primer.

Mistake two treating MDF like solid wood

This one causes a lot of frustration on decorative panelling, trim walls, and newer millwork packages.

Verified MDF guidance says the right sequence starts with a primer coat first to seal the porous surface, because skipping that leads to blotchy results in 70-80% of DIY attempts. The same verified data says to lightly sand with 220-grit and caulk seams after priming dries in 4-6 hours, because caulk flexes with panel expansion and reduces cracking by 90% over rigid fillers like spackle, based on the verified summary from this MDF panelling paint method video reference.

That matches what contractors see in the field. MDF edges and faces don’t behave like sealed lumber. They soak up coating differently, and rigid seam repairs tend to print through or crack.

Mistake three rushing dry time in damp weather

In Western Washington, impatience costs people finish quality.

A room can feel dry and still be a poor painting environment if the air is cool, heavy, and stagnant. That shows up as dragging roller marks, slow cure, and dirt sticking to the surface before it hardens. If windows can’t be opened, use controlled airflow and keep the room conditions steady.

Mistake four overfilling grooves and sanding poorly

Homeowners chasing a smooth-wall look often overpack the grooves, then sand unevenly. The result is a wall that flashes under side light. You can see every repair line.

For groove filling, lighter applications with proper priming in between are safer than trying to bury the channels in one pass. And if a groove still reads slightly after primer, that’s often better than a heavy, obvious repair hump.

Mistake five using too much paint per coat

More paint doesn’t mean better coverage. It usually means more sagging.

Thin, even coats cure harder and look smoother on panel profiles. Heavy coats skin over, trap movement, and collect in every low point.

DIY vs Hiring a Pro for Your Puget Sound Home

A capable homeowner can absolutely paint panelling. If the room is small, the panels are in good shape, you’re keeping the grooves, and you’re comfortable cleaning, sanding, priming, patching, and cutting sharp lines, DIY can make sense.

DIY gets less attractive when any of these are true:

  • The room is occupied and ventilation is limited
  • The panelling is glossy, stained, or tannin-heavy
  • You want the grooves filled for a flatter wall look
  • The project includes high walls, built-ins, trim packages, or commercial scheduling
  • You need a predictable finish with minimal disruption

For homes and properties from Tacoma to Seattle, the climate is part of the decision. Dry times can stretch. Moisture can affect filler and primer performance. A room that looks simple can turn into several rounds of sanding, sealing, and touch-up if the substrate isn’t read correctly from the start.

Hiring a pro is often the more cost-effective choice when the goal is a guaranteed outcome, not just a completed task. Professional crews bring better surface diagnosis, better masking, cleaner groove work, sharper trim transitions, and application methods that fit the room. They also know when a panel system should be painted, repaired more extensively, or left alone until a broader remodel solves the underlying issue.

If you’ve been asking can you paint panelling, the honest answer is yes. The better question is whether you want to spend your weekends learning all the ways panelled walls can go wrong, or have the finish done once and done right.


If you’re in Kent, Seattle, Tacoma, or the communities in between and want help deciding whether to paint, repair, or fully update panelled walls, Wheeler Painting & Restoration Services can help you assess the surface, choose the right approach, and get a durable finish that fits your home, tenant improvement, or commercial renovation schedule.

How Long Does House Paint Last? A Puget Sound Guide

TL;DR: Exterior paint in the Puget Sound lasts 5 to 7 years, while interior paint lasts 5 to 10 years on average. Those are only starting points. In Seattle, Tacoma, and Kent, rain, humidity, shade, and surface prep can shorten or stretch that lifespan in a big way.

If you're asking how long does house paint last, you're probably already seeing something that doesn't look right. Maybe the south side still looks decent, but the shaded wall has green staining. Maybe the trim is failing before the siding. Maybe an interior bathroom ceiling started looking tired long before the bedroom walls did.

That disconnect is normal in Western Washington. Generic national advice often assumes a drier climate, more sun, and fewer moisture cycles. Around Puget Sound, paint doesn't just age from time. It ages from wet siding, long damp mornings, mossy exposure, limited drying time, and surfaces that hold moisture longer than people expect.

A paint job is part finish and part protective shell. When that shell starts to weaken, the question isn't only cosmetic. It's whether the coating is still doing its job.

Is It Time to Repaint Your Puget Sound Property?

A homeowner in the Seattle area often notices the change gradually. First it's a little fading near the entry. Then the trim starts to look rougher than the field siding. After another wet season, a few spots begin to peel, and now the whole house looks older even if the structure is still in good shape.

A man looking at peeling paint on the exterior siding of a light green house.

Property managers in Kent and Tacoma run into the same thing from a different angle. One building in the portfolio holds up fine, another starts showing mildew staining and edge failure sooner than expected, even though both were painted around the same time. The difference usually comes down to exposure, maintenance, and how well the original prep matched the building.

What homeowners usually notice first

The early signs aren't always dramatic:

  • Uneven color: One elevation fades or dulls faster than the others.
  • Dirty-looking walls: The paint film starts trapping grime, mildew, or airborne residue.
  • Peeling around joints: Trim corners, window heads, and lower siding courses often show trouble first.
  • A rough or chalky feel: The coating no longer feels sealed and stable.

A house can look only slightly worn and still be overdue for repainting in a wet climate. The coating often fails at edges and vulnerable details before broad walls look bad from the street.

That matters because repaint timing in Puget Sound is rarely just about curb appeal. It's about catching failure before moisture gets deeper into wood trim, siding edges, and caulk lines.

Why local guidance matters more than generic advice

A national blog may tell you paint should last a long time, and sometimes that's true in dry climates. But Seattle, Tacoma, and Kent aren't dry climates. Shaded walls stay wet longer. Moss and mildew are real maintenance issues. Marine air, tree cover, and repeated rain events all change the lifespan of a coating.

For owners searching for house painting near me or commercial painting services near me, the useful answer isn't a single number. It's whether your building is aging normally for this region or showing signs that need attention sooner.

The Real Lifespan of Exterior Paint in Washington

For wood siding in humid regions like Puget Sound, high-quality latex or acrylic paint typically lasts 5 to 7 years before significant degradation, and 100% acrylic latex formulations with mildewcides can extend that to 7 to 10 years on properly primed cedar or fir siding common in Western Washington, according to this paint lifespan guide for humid climates.

An infographic detailing the average lifespan of exterior house paint on various surfaces in Washington state.

Those numbers are the most useful baseline for our area because they match what owners experience here. Wet winters, mild but persistent moisture, and long shaded periods can wear on a paint film differently than intense inland heat does.

Why Puget Sound exteriors fail sooner than people expect

Exterior paint in Western Washington usually doesn't fail for one reason alone. Several things happen at once.

  • Moisture sits longer: Siding, trim, and caulk joints don't dry as quickly after rain.
  • Mildew grows on shaded faces: North and east elevations often look older first.
  • Wet-dry cycling stresses the film: Wood moves, coatings flex, and weak areas open up.
  • UV still matters: Even with cloud cover, sun breaks down binders over time and contributes to chalking.

The result is a coating that may look passable from the driveway but is already weakening at the details that matter most.

Practical rule: In Puget Sound, the wall that stays damp longest usually tells the truth about the condition of the paint job.

Siding material changes the timeline

Not every exterior surface behaves the same. Wood siding is the biggest concern because it absorbs and releases moisture. Cedar and fir, both common in Western Washington, can perform well when they are properly primed, sealed, and painted with the right product, but they also punish shortcuts.

Fiber cement is generally more stable than wood, so the paint film usually has an easier job. Brick and masonry present a different challenge. They don't move like wood, but they can hold moisture and telegraph failures if the wrong coating is used or if drainage issues are ignored.

Trim and doors often fail before broad siding fields because they take more abuse. Sun exposure, hand contact, sprinklers, and sharp edges all work against them. That's why a house can need selective repainting on details before the main body fully reaches end of life.

Paint grade isn't optional here

In this climate, the difference between a lower-grade exterior paint and a true 100% acrylic latex product isn't academic. Better binders hold up longer under damp conditions, and mildewcides help protect the surface where mildew pressure is persistent.

Cheap paint can look acceptable when it first goes on. What it usually doesn't do well is keep its film strength after repeated moisture exposure. Once the film weakens, blistering, peeling, and edge failure start showing up where water intrusion is already trying to happen.

A better coating still won't save a bad prep job. But in Seattle, Kent, and Tacoma, lower-grade paint narrows your margin for error fast.

Timing matters too

Even the right product can underperform if it's applied under poor conditions. Surfaces need time to dry, and the work window matters more here than in many other regions. If you're comparing repaint timing, Wheeler's guide on the best time to paint a house exterior is useful because scheduling around moisture exposure is part of getting the full life from the coating.

For building owners looking for a residential contractor near me or support with facility maintenance, this is the takeaway. Exterior paint lasts longest when the siding condition, product selection, and weather window all line up. If one of those pieces is off, the clock starts running early.

How Long Interior Paint Lasts Room by Room

Inside the building, the right question isn't just how long does house paint last. It's which room are we talking about. Interior paint wears according to traffic, moisture, cleaning frequency, and how people use the space.

A minimalist living room with a beige sofa, wooden coffee table, and a burnt orange accent wall.

According to this interior paint lifespan reference, high-traffic areas like hallways and kitchens typically need repainting every 3 to 5 years, bedrooms and living rooms usually last 7 to 10 years, and bathrooms often last only 3 to 4 years because high humidity breaks down paint polymers.

High-traffic rooms wear out first

Hallways, stairwells, entry areas, break rooms, and active common spaces take constant contact. People brush walls, move furniture, carry bags, and leave marks that cleaning can't always solve without also wearing the finish.

Kitchens also age faster, but for a different reason. It's less about bumps and more about residue, cleaning, and moisture in the air. Even in a well-kept home, kitchen walls work harder than bedroom walls do.

For commercial interiors, this same pattern shows up in corridors, tenant entries, and shared use areas. An office with controlled use may hold paint well. A retail space or active common hallway usually won't.

Low-impact rooms can go much longer

Bedrooms and living rooms usually keep their appearance longer because they don't deal with the same daily abuse or humidity load. That doesn't mean they're maintenance-free. Sunlight, furniture scuffs, and lifestyle still matter. But these rooms generally age more slowly and more evenly.

Guest rooms are the classic example. They often look good long after the rest of the house has obvious wear because they don't see the same use.

Here's a simple planning view:

Room type Typical paint life Main reason
High-traffic areas 3 to 5 years Contact, scuffs, repeated cleaning
Kitchens 3 to 5 years Heat, moisture, residue
Bathrooms 3 to 4 years Humidity and repeated moisture
Bedrooms and living rooms 7 to 10 years Lower wear and lower moisture

Bathrooms are their own category

Bathrooms deserve separate treatment because humidity changes everything. Repeated showering introduces moisture that weakens adhesion over time, and poor airflow makes the problem worse. In Puget Sound homes, where ambient moisture is already part of daily life, a bathroom without good ventilation can age paint quickly.

That doesn't always start as peeling. It may begin as dullness, patchy sheen, or recurring surface discoloration that returns after cleaning.

A quick visual example helps here:

What owners should do with this information

Use room-by-room repaint cycles for planning, not panic. If a hallway looks tired after a few years, that doesn't mean the whole house or whole tenant suite needs repainting at once. It means the maintenance schedule should reflect real use.

  • Prioritize active zones: Entry halls, corridors, and kitchens usually need attention first.
  • Budget bathrooms separately: Moisture-prone rooms rarely stay on the same cycle as dry rooms.
  • Match finish to function: Washability and moisture resistance matter more in workhorse spaces.
  • Think by occupancy type: A family home, office suite, and retail build-out all wear differently.

For owners managing commercial construction near me searches or planning tenant improvement work, that's often the practical path. Repaint where use demands it, not just where the calendar says you should.

Four Key Factors That Determine Paint Durability

Paint lifespan isn't controlled by paint alone. Four things decide whether a coating holds up or disappoints in Western Washington: the product, the prep, the environment, and the application itself.

Four geometric pillars displaying textures representing surface preparation, paint quality, environmental climate, and application skill factors.

When those four line up, paint lasts closer to its full potential. When one fails, the whole system gets weaker.

Paint quality

Material selection matters most when the surface is exposed to moisture, abrasion, or cleaning. On exteriors, stronger acrylic binders are better suited to a damp climate. Indoors, the right finish helps walls resist scuffs, washing, and humidity.

This isn't about buying the most expensive can on the shelf. It's about using a coating that fits the substrate and the environment. A bargain product on a demanding surface often costs more later because the repaint cycle comes sooner.

If UV exposure is part of the problem, especially on sun-hit walls, doors, or trim, it helps to understand how UV-resistant paint fits into the bigger durability picture.

Surface preparation

Prep is where long-lasting jobs are won or lost. A surface can look paintable and still be a bad candidate for coating if it's dirty, chalky, damp, unstable, or carrying hidden failure at joints and edges.

On exterior work, prep may involve washing, scraping, sanding, spot priming, caulk replacement, and in some cases carpentry or siding replacement before paint begins. On interiors, prep often means drywall repair, stain blocking, patching, and making sure the substrate is clean enough for proper adhesion.

If mildew is painted over instead of removed, or if damp siding is coated because the schedule is tight, the finish usually tells on that shortcut later.

For owners comparing cladding options on future projects, this guide to siding materials is useful background because the substrate itself affects how hard the paint system has to work.

Environmental exposure

Puget Sound weather creates a slow, persistent kind of wear. Rain is obvious, but the harder issue is often extended dampness. Shaded walls, overgrown landscaping, clogged gutters, and splash-back near grade all keep surfaces wetter longer.

Indoors, the environmental issue is usually ventilation. Bathrooms, laundry areas, kitchens, and commercial wash zones punish coatings when airflow is poor. That doesn't always produce immediate failure. It often gradually shortens the useful life until the room suddenly looks older than the rest of the building.

A few examples show how exposure changes outcomes:

  • South-facing trim: More sun, more UV stress, faster fading.
  • North-facing siding under trees: More shade, more mildew pressure, slower drying.
  • Bathroom ceilings: Repeated humidity load, especially when fans are weak or rarely used.
  • Retail entries: Frequent touch points, frequent cleaning, higher wear.

Application skill

Even good paint on a well-prepped surface can underperform if it's applied poorly. Thin coverage, rushed dry times, missed caulk failure, sloppy cut lines around joints, and bad timing with weather all shorten the life of the coating.

Application skill also includes knowing when not to paint yet. In this region, patience matters. A surface that still holds moisture shouldn't be coated just because the calendar says the crew is due on site.

For smaller residential work and mid-size facility maintenance, Wheeler Painting & Restoration Services is one option owners use when they need painting tied to broader repair scope such as drywall, trim repair, waterproofing, or tenant improvement, where durability depends on the whole assembly being addressed rather than just the finish coat.

Your Puget Sound Paint Inspection Checklist

A good inspection doesn't require specialty equipment. You can learn a lot just by walking the property slowly and checking the same trouble points a contractor checks first. The goal isn't to diagnose every technical issue. It's to spot whether the paint is still protecting the building or just covering it.

What to look for outside

Start with the elevations that stay wet longest, then move to trim, doors, and lower siding.

  • Chalky residue on the surface: Rub your hand lightly across the paint. If color dust transfers easily, the binder may be breaking down.
  • Blistering or bubbling: Raised areas often point to trapped moisture or adhesion failure.
  • Cracking or alligatoring: When paint loses flexibility, it can split into a cracked pattern instead of moving with the substrate.
  • Peeling at edges and joints: Check butt joints, trim corners, window heads, and horizontal transitions.
  • Mildew or dark staining: In Puget Sound, persistent staining on shaded walls often signals prolonged moisture exposure, not just dirt.

What to look for inside

Interior problems usually show up where moisture, cleaning, or repeated contact are concentrated.

Area Warning sign What it often means
Bathroom walls or ceiling Dull, patchy, or peeling finish Moisture stress or weak ventilation
Hallways and entries Scuffs that won't clean off Finish is worn, not just dirty
Kitchen walls Staining or uneven sheen Residue buildup and repeated washing
Window-adjacent walls Fading or patchiness Surface is aging unevenly

Walk the building in daylight if you can. Early failure is easier to spot when raking light shows sheen changes, raised edges, and surface texture.

A few places people miss

Some of the most useful inspection spots aren't the largest walls. They're the details.

  • Below gutters and downspouts: Overflow and splash patterns often show here first.
  • At the bottom edge of siding: Ground moisture and poor drainage stress these areas.
  • Door frames and thresholds: Repeated use and weather exposure hit these hard.
  • Behind shrubs: Airflow drops, drying slows, and mildew pressure rises.

If you see multiple signs at once, cleaning and touch-up may not be enough. At that point, it helps to understand whether the surface needs localized prep or full coating removal. This overview on how to remove old paint gives a useful starting point for what that process can involve.

Extend Your Paint's Life With Practical Maintenance

Most paint jobs don't fail overnight. They lose life in small steps. A little mildew that isn't cleaned. A gutter overflow that keeps soaking one wall. A bathroom fan that never quite clears the room. Maintenance works because it interrupts those small problems before they become coating failure.

Exterior habits that help

You don't need to baby your exterior paint, but you do need to keep water and organic buildup from sitting on it too long.

  • Wash siding carefully: Remove surface grime and mildew without damaging the paint film. If you're deciding how often to pressure wash your house, use methods that clean the surface without forcing water into joints or behind siding.
  • Keep gutters and downspouts working: Overflowing gutters shorten paint life fast, especially at fascia, trim, and lower walls.
  • Trim back vegetation: Shrubs and tree branches reduce airflow and keep walls damp.
  • Handle failed caulk early: Small openings around trim and penetrations can turn into paint failure if water keeps getting in.

Interior habits that matter

Interior maintenance is usually about moisture control and gentle cleaning.

  • Use bath fans consistently: Let surfaces dry out after showers.
  • Clean with mild products: Aggressive scrubbing can burnish or wear the finish.
  • Touch up damage early: Small chips and scuffs are easier to deal with before they collect dirt and expand.
  • Watch recurring stains: If a mark keeps returning, the issue may be moisture, not paint alone.

Store leftover paint the right way

Touch-up paint is only helpful if it's still usable. According to Consumer Reports on leftover paint storage, leftover latex paint can remain usable for up to 10 years if stored correctly. Warning signs include bulging cans, a thick rubberlike film on the surface, or paint that fails to mix uniformly. If you're unsure, test it on cardboard before putting it on the wall.

That advice matters for homeowners doing phased room updates and for property managers holding stock for routine touch-ups. Good labeling helps too. Keep the room name, color, sheen, and date on the lid so the paint is useful later, not a guessing game.

Hiring a Professional vs DIY Painting A Cost and Quality Guide

DIY painting can make sense for a small, simple room with sound walls and easy access. It gets harder when the project includes exterior prep, moisture problems, ladder work, repaired substrates, or color matching across a larger property.

The hidden cost in DIY usually isn't the roller cover or brush. It's time, prep, and rework. Most paint failures people blame on product quality are really prep failures, application timing issues, or skipped repairs underneath the coating.

When DIY is usually reasonable

A do-it-yourself approach is often workable when:

  • The surface is already sound: No peeling, moisture damage, or patching issues.
  • Access is straightforward: Standard walls, limited masking, no major safety concerns.
  • The stakes are low: A secondary room or light refresh where minor imperfections are acceptable.

When professional work usually pays off

Hiring a contractor is the better value when the building needs more than color change.

  • Exterior painting in Puget Sound: Moisture timing, mildew treatment, and substrate condition matter too much to guess at.
  • Commercial or occupied spaces: Scheduling, protection, workflow, and finish consistency matter.
  • Projects tied to repairs: Drywall work, trim replacement, waterproofing, and surface correction should be handled as one scope.
  • Difficult surfaces: High walls, failing wood trim, older coatings, and detail-heavy exteriors need experience.

Professional painting isn't just about getting paint onto a surface. It's about knowing what has to happen before and after the coating so the job lasts.

For owners comparing bids, the smart question isn't "What's the cheapest way to get color on the wall?" It's "Which approach gives this building the longest useful life with the fewest callbacks?"

Protect Your Investment With a Professional Assessment

In Seattle, Tacoma, Kent, and the towns in between, paint life depends less on generic timelines and more on moisture, exposure, prep quality, and maintenance. Exterior coatings on wood siding often live in the 5 to 7 year range in our climate, while interior paint can last far longer or wear out much sooner depending on the room and how it's used. The difference is local conditions.

If your property is showing mildew, blistering, chalking, peeling, or uneven wear, a careful inspection is the right next move. It helps you decide whether you need cleaning, repairs, touch-up work, or a full repaint.


If you'd like a practical, no-pressure evaluation of your home, facility, office, or tenant space, contact Wheeler Painting & Restoration Services to discuss the condition of the surfaces, likely causes of wear, and the most sensible next step for your property.

Can You Paint Panelling? Transform Your Walls

You’re standing in a room in Seattle, Kent, Tacoma, or somewhere in between, looking at dark wall panelling that makes the whole space feel older, smaller, and heavier than it should. Maybe it’s real wood. Maybe it’s faux wood sheets from a past remodel. Maybe it’s in a family room, office, rental, lobby, or tenant space that needs to feel cleaner and more current without tearing everything apart.

The short answer is yes, you can paint panelling. In many cases, it’s one of the smartest upgrades you can make if the panelling is sound and you want a big visual change without a full demolition. For Puget Sound properties, that matters. Moisture, seasonal humidity, and long dry times can punish sloppy work, but painted panelling holds up well when the surface is cleaned, sanded, primed correctly, and coated with the right finish.

Transform Your Space You Can Paint Panelling

A lot of people assume panelling has to come out. That’s usually not true.

When the boards or panel sheets are stable, painting them is often the practical move. For homeowners and commercial property managers, painting existing wood paneling can save 50-70% versus full removal and replacement, and projects can finish in 2-4 days for 1,000 sq ft rooms instead of stretching into demolition and rebuild work that can take weeks, according to the verified data tied to panel painting background and restoration context. That same verified data also notes that dark pine paneling was prevalent in 25% of mid-century homes.

A smiling woman stands in a bright, modern living room with elegant wall paneling and city views.

In practice, the difference is dramatic. A room that felt dim and dated can start reading as bright, clean, and intentional once the orange or brown finish is gone. You don’t need to remove every panel to get there. You need the right prep, the right primer, and patience with the coating schedule.

When painting panelling makes sense

Painting is usually the better choice when:

  • The panelling is structurally sound. It’s attached well, not swollen, and not actively failing.
  • You want a cleaner look without major construction. That matters in occupied homes and active commercial spaces.
  • You’re updating on a budget. Labor and disposal costs add up fast when tear-out starts.
  • You want less disruption. Demolition creates dust, trim damage, drywall repair, and often follow-up trades.

Practical rule: If the panelling is ugly but solid, paint is usually the first option worth evaluating.

There are exceptions. If panels are water-damaged, mold-affected, delaminating, or hiding bigger wall problems, painting over them is only covering trouble. But when the substrate is stable, paint can turn a room around with far less mess.

For property owners comparing finishes, it also helps to understand whether your surface should be coated opaquely or left visible with a transparent finish. This paint or stain comparison for wood surfaces is useful when you’re deciding how much of the original material you want to show.

Your First Step Preparing Panelling for a Flawless Finish

Prep decides whether painted panelling looks professional or starts peeling around grooves, seams, and trim lines. Most failures happen before the first finish coat ever goes on.

The first thing to identify is the type of panelling you have. Real wood behaves differently from laminate-faced sheets, printed hardboard, veneer, or MDF trim systems. Real wood may bleed tannins. Laminate can resist primer if it isn’t sanded well. MDF drinks up coating and swells if edges are ignored.

Start with cleaning, not sanding

Old panelling holds years of dust, wax, smoke residue, hand oils, and cleaner buildup. If you sand that into the surface, you make the job harder.

Verified manufacturer-guideline data notes that prep using TSP solution removes 95% of stains, light 220-grit sanding improves adhesion by 80%, and with proper cleaning, groove-first priming, and coating sequence, paint adherence exceeds 98%. The same verified data notes that painting paneling reduces timelines by 70% compared to remodels in Puget Sound markets, as summarized in this painted wood paneling preparation reference.

A checklist of five steps for preparing wall paneling for painting, featuring illustrations of cleaning, filling, sanding, dusting, and taping.

A solid prep routine looks like this:

  1. Wash the walls first. Use a TSP solution or substitute, especially around lower wall areas, door casings, and switch plates.
  2. Rinse and dry. Cleaner residue can interfere with primer.
  3. Repair obvious damage. Fill dents, old nail holes, and chips where needed.
  4. Scuff-sand the whole field. Focus on the sheen, not heavy material removal.
  5. Vacuum and wipe down thoroughly. Dust left in grooves will show up in the finish.
  6. Mask adjacent surfaces. Floors, trim, outlets, and ceilings need protection.

Do you have to sand

In most cases, yes.

You don’t have to grind the panel flat. You do have to dull the existing finish so primer can grab. Glossy polyurethane and factory-finished hardboard are especially unforgiving if you skip this step. Light scuff-sanding with 220-grit is the sweet spot for many panelled walls because it cuts sheen without gouging the surface.

If you want a plain-language explainer on grit choice before you start, this guide on using 200-grit sandpaper for paint prep helps homeowners understand where a fine prep grit fits into a paint-ready surface.

Sanding isn’t about making the wall look rough. It’s about giving primer something to hold.

Know what you’re aiming for

There are really two finish paths:

Finish path What it looks like Prep intensity
Paint and keep the grooves You still see panel lines and texture Moderate
Fill grooves for a flatter wall look More modern, less obviously panelled Higher

If you’re painting over stained or sealed wood, extra care at the cleaning and sanding stage matters even more. This guide on painting over wood stain is worth reviewing because many panelled rooms have old stain systems under the clear coat.

Puget Sound prep reality

Western Washington slows people down for one simple reason. Surfaces don’t always dry when the clock says they should.

In homes near Seattle, Tacoma, and the damp corridor in between, panelling in basements, north-facing rooms, and older buildings can hold surface moisture longer than expected. That affects sanding dust, primer open time, and topcoat leveling. If the room feels cool and closed up, improve airflow before you start. A dry room is easier to prep and easier to paint well.

The Best Primers and Paints for Wood Panelling

If you ask whether can you paint panelling, the hidden question is usually this: what primer do I need so the old color, stain, or shine doesn’t come back through?

That’s the decision that separates a clean finish from a callback.

A collection of paint cans, primers, and painting tools displayed on a smooth white surface.

Match the primer to the panel surface

Not all panelling needs the same product.

  • Real wood with tannins often needs a stain-blocking primer. If you skip that, yellowing or brown bleed can come through your finish coat.
  • Glossy faux wood or laminate-faced panels need a high-adhesion primer after sanding.
  • MDF trim-style panelling needs sealing because raw or thirsty sections absorb coating unevenly.
  • Previously painted panelling still needs evaluation. If the old coating is soft, chalky, or failing, no primer can save bad substrate.

For many wood-panel jobs, shellac or oil-based stain blockers still solve problems that ordinary latex primers don’t. But they also come with trade-offs.

The fume issue matters in Western Washington

In small enclosed rooms, ventilation is not a side note. Verified data tied to indoor air quality states that a 2025 EPA report highlighted VOCs from oil-based products exceeding safe limits by 40-60% in rooms under 200 sq ft without mechanical ventilation, with 25% higher respiratory complaints in Pacific Northwest retrofits. That same verified data notes that oil-based products can take 24-48 hours to dry, and that low-VOC shellac primers such as BIN blocked tannins 95% effectively in Sherwin-Williams 2025 tests, while asthma rates were noted at 12% in Washington state in the same verified-data summary from the indoor air quality and primer discussion.

That matters if you’re painting a bedroom, office, basement room, or occupied commercial interior.

Health note: A strong primer might solve stain bleed and still be the wrong choice if the room has poor airflow and people are living or working in it during the job.

What works well in real rooms

A practical approach is to choose products by problem:

Surface condition Better primer choice Why
Wood stain bleeding through Shellac-based stain blocker Strong sealing performance
Slick but clean panel face Bonding primer Helps topcoat grip after sanding
Patchy repairs and mixed surfaces Quality acrylic primer Good tie-coat when heavy stain block isn’t needed
Small enclosed room with ventilation concerns Lower-odor shellac option where suitable Balances stain blocking with air quality concerns

For topcoats, interior latex in a satin finish is a dependable choice for many residential panelled walls because it gives some washability without exaggerating every defect. In higher-traffic commercial interiors, a tougher finish may make more sense, especially where walls get touched, bumped, or cleaned often.

Sheen matters more than many people think

Flat paint hides defects best, but it’s harder to clean. Semi-gloss is durable, but it can make every groove, patch, and lap mark more visible. Satin usually lands in the workable middle for panelled walls.

Before buying material, it helps to estimate quantity accurately, especially if you’re priming plus applying multiple coats. A simple paint calculator for room sizing can help you avoid underbuying or stacking extra gallons in the garage.

Product choice affects appearance and schedule

Cheap primer is expensive once you count rework. Thin topcoats can also struggle to hide dark panelling evenly, especially over repaired grooves or mixed porosity. The best finish comes from a system that works together: cleaner, sanded surface, correct primer, and a topcoat that levels well under local conditions.

That’s why painted panelling done right looks calm and uniform. Done wrong, it flashes, drags, stains through, and starts telling on itself when the light hits the wall.

How to Apply Paint for a Smooth Panelled Wall

Application is where homeowners either get a surprisingly good result or create a wall full of drips, flashing, and visible groove buildup. The method matters, but the sequence matters more.

A gloved hand uses a paint roller to apply a light-colored coat of paint onto wooden wall paneling.

Choose your finish style first

Before opening a can, decide whether you want to keep the panel grooves visible or fill them for a smoother wall look.

Keeping the grooves is faster and usually safer for DIY work. Filling them can look more current, but it adds labor and raises the chance of visible seam issues if the wall moves seasonally. In Western Washington, that movement is real. Humidity changes and older wall assemblies can telegraph weak filler work.

If you’re keeping the grooves

This is the simpler route.

Use a brush to cut into grooves and edges first, then follow with a roller on the flat faces. A 3/8-inch nap roller is a good practical choice on many panelled walls because it covers well without throwing too much texture. Work in manageable sections so the brushed areas and rolled areas blend together while still wet.

A reliable order looks like this:

  • Brush the grooves first. Don’t flood them.
  • Roll the panel faces next. Use light, even pressure.
  • Back-brush drips immediately. Groove buildup dries ugly.
  • Keep coats thin. Thick coats sag on vertical panel lines.

The cleanest panel jobs usually come from restraint. Too much paint at once is what creates ridges and drips in the channels.

If you want a flatter modern wall

Verified guidance for the groove-filling approach notes that glossy paneling should be cleaned thoroughly, then lightly sanded with 220-grit to create a 50-100 micro-texture profile, which boosts adhesion by 60-80%. That same verified data says skipping sanding causes 55% of peeling failures within 2 years, and recommends spot-priming seams and grooves first, drying 2-4 hours, then filling grooves with lightweight spackling, not hot mud, which cracks 70% of the time, as summarized in this Benjamin Moore paneling application guide.

That protocol exists for a reason. Groove filler fails when it’s applied over a slick, unprimed channel.

A pro sequence for filled-groove panelling

  1. Clean and dry the wall.
  2. Scuff-sand the entire surface.
  3. Spot-prime grooves and seams first.
  4. Fill grooves with lightweight spackling.
  5. Sand the filled areas flush.
  6. Vacuum and tack-cloth the wall.
  7. Prime the full wall.
  8. Apply two thin finish coats.

Here’s a walkthrough that can help you visualize the process in motion:

Brush, roller, or sprayer

Each tool has a place.

Method Best use Trade-off
Brush Grooves, corners, edges, small repairs Slow, easy to leave marks if overloaded
Roller Most wall fields Can miss deep channels without brushing first
Airless sprayer Very smooth finish, larger empty rooms, commercial spaces More masking, more setup, more overspray risk

For occupied homes, roller-and-brush is often the practical choice. For vacant interiors or tenant improvements where a very even finish matters, spraying can produce a cleaner look if the prep and masking are done properly.

Watch the wet edge

Most amateur problems come from overworking paint. They roll a section, go back into a half-drying area, then chase streaks that weren’t there a minute ago. In the Puget Sound climate, that gets worse in cool rooms where coatings stay open longer but don’t level evenly if airflow is poor.

Two habits help:

  • Box your paint in one bucket if you’re using more than one can, so color stays consistent.
  • Let coats dry fully before sanding or recoating, especially in damp rooms.

If your project includes trim, built-ins, or panel moulding details around the wall, this trim painting guide helps with cleaner transitions and sharper finish lines.

What a smooth result actually looks like

A pro-finished panel wall doesn’t look thick. It doesn’t have paint pooled in grooves. It doesn’t show patch halos where filler telegraphs through. It looks even, intentional, and quiet.

That’s the target. Not “covered.” Finished.

Painting Panelling Common Mistakes to Avoid

The biggest DIY mistake is thinking panelling is just another wall. It isn’t.

Panelling usually has sheen, grooves, old residue, hidden movement at seams, and sometimes a surface that absorbs paint unevenly. If you shortcut any of that, the wall tells on you later.

Mistake one skipping the primer logic

People often ask which paint is best, then buy topcoat before deciding what the panel surface needs. That’s backwards.

A dark stained wall may need stain blocking. A slick faux-wood wall may need adhesion help. MDF may need sealing before anything else. If the primer choice is wrong, the finish coat can still fail even if it looks decent on day one.

A beautiful finish coat can’t rescue bad prep or the wrong primer.

Mistake two treating MDF like solid wood

This one causes a lot of frustration on decorative panelling, trim walls, and newer millwork packages.

Verified MDF guidance says the right sequence starts with a primer coat first to seal the porous surface, because skipping that leads to blotchy results in 70-80% of DIY attempts. The same verified data says to lightly sand with 220-grit and caulk seams after priming dries in 4-6 hours, because caulk flexes with panel expansion and reduces cracking by 90% over rigid fillers like spackle, based on the verified summary from this MDF panelling paint method video reference.

That matches what contractors see in the field. MDF edges and faces don’t behave like sealed lumber. They soak up coating differently, and rigid seam repairs tend to print through or crack.

Mistake three rushing dry time in damp weather

In Western Washington, impatience costs people finish quality.

A room can feel dry and still be a poor painting environment if the air is cool, heavy, and stagnant. That shows up as dragging roller marks, slow cure, and dirt sticking to the surface before it hardens. If windows can’t be opened, use controlled airflow and keep the room conditions steady.

Mistake four overfilling grooves and sanding poorly

Homeowners chasing a smooth-wall look often overpack the grooves, then sand unevenly. The result is a wall that flashes under side light. You can see every repair line.

For groove filling, lighter applications with proper priming in between are safer than trying to bury the channels in one pass. And if a groove still reads slightly after primer, that’s often better than a heavy, obvious repair hump.

Mistake five using too much paint per coat

More paint doesn’t mean better coverage. It usually means more sagging.

Thin, even coats cure harder and look smoother on panel profiles. Heavy coats skin over, trap movement, and collect in every low point.

DIY vs Hiring a Pro for Your Puget Sound Home

A capable homeowner can absolutely paint panelling. If the room is small, the panels are in good shape, you’re keeping the grooves, and you’re comfortable cleaning, sanding, priming, patching, and cutting sharp lines, DIY can make sense.

DIY gets less attractive when any of these are true:

  • The room is occupied and ventilation is limited
  • The panelling is glossy, stained, or tannin-heavy
  • You want the grooves filled for a flatter wall look
  • The project includes high walls, built-ins, trim packages, or commercial scheduling
  • You need a predictable finish with minimal disruption

For homes and properties from Tacoma to Seattle, the climate is part of the decision. Dry times can stretch. Moisture can affect filler and primer performance. A room that looks simple can turn into several rounds of sanding, sealing, and touch-up if the substrate isn’t read correctly from the start.

Hiring a pro is often the more cost-effective choice when the goal is a guaranteed outcome, not just a completed task. Professional crews bring better surface diagnosis, better masking, cleaner groove work, sharper trim transitions, and application methods that fit the room. They also know when a panel system should be painted, repaired more extensively, or left alone until a broader remodel solves the underlying issue.

If you’ve been asking can you paint panelling, the honest answer is yes. The better question is whether you want to spend your weekends learning all the ways panelled walls can go wrong, or have the finish done once and done right.


If you’re in Kent, Seattle, Tacoma, or the communities in between and want help deciding whether to paint, repair, or fully update panelled walls, Wheeler Painting & Restoration Services can help you assess the surface, choose the right approach, and get a durable finish that fits your home, tenant improvement, or commercial renovation schedule.

How Long Does House Paint Last? A Puget Sound Guide

TL;DR: Exterior paint in the Puget Sound lasts 5 to 7 years, while interior paint lasts 5 to 10 years on average. Those are only starting points. In Seattle, Tacoma, and Kent, rain, humidity, shade, and surface prep can shorten or stretch that lifespan in a big way.

If you're asking how long does house paint last, you're probably already seeing something that doesn't look right. Maybe the south side still looks decent, but the shaded wall has green staining. Maybe the trim is failing before the siding. Maybe an interior bathroom ceiling started looking tired long before the bedroom walls did.

That disconnect is normal in Western Washington. Generic national advice often assumes a drier climate, more sun, and fewer moisture cycles. Around Puget Sound, paint doesn't just age from time. It ages from wet siding, long damp mornings, mossy exposure, limited drying time, and surfaces that hold moisture longer than people expect.

A paint job is part finish and part protective shell. When that shell starts to weaken, the question isn't only cosmetic. It's whether the coating is still doing its job.

Is It Time to Repaint Your Puget Sound Property?

A homeowner in the Seattle area often notices the change gradually. First it's a little fading near the entry. Then the trim starts to look rougher than the field siding. After another wet season, a few spots begin to peel, and now the whole house looks older even if the structure is still in good shape.

A man looking at peeling paint on the exterior siding of a light green house.

Property managers in Kent and Tacoma run into the same thing from a different angle. One building in the portfolio holds up fine, another starts showing mildew staining and edge failure sooner than expected, even though both were painted around the same time. The difference usually comes down to exposure, maintenance, and how well the original prep matched the building.

What homeowners usually notice first

The early signs aren't always dramatic:

  • Uneven color: One elevation fades or dulls faster than the others.
  • Dirty-looking walls: The paint film starts trapping grime, mildew, or airborne residue.
  • Peeling around joints: Trim corners, window heads, and lower siding courses often show trouble first.
  • A rough or chalky feel: The coating no longer feels sealed and stable.

A house can look only slightly worn and still be overdue for repainting in a wet climate. The coating often fails at edges and vulnerable details before broad walls look bad from the street.

That matters because repaint timing in Puget Sound is rarely just about curb appeal. It's about catching failure before moisture gets deeper into wood trim, siding edges, and caulk lines.

Why local guidance matters more than generic advice

A national blog may tell you paint should last a long time, and sometimes that's true in dry climates. But Seattle, Tacoma, and Kent aren't dry climates. Shaded walls stay wet longer. Moss and mildew are real maintenance issues. Marine air, tree cover, and repeated rain events all change the lifespan of a coating.

For owners searching for house painting near me or commercial painting services near me, the useful answer isn't a single number. It's whether your building is aging normally for this region or showing signs that need attention sooner.

The Real Lifespan of Exterior Paint in Washington

For wood siding in humid regions like Puget Sound, high-quality latex or acrylic paint typically lasts 5 to 7 years before significant degradation, and 100% acrylic latex formulations with mildewcides can extend that to 7 to 10 years on properly primed cedar or fir siding common in Western Washington, according to this paint lifespan guide for humid climates.

An infographic detailing the average lifespan of exterior house paint on various surfaces in Washington state.

Those numbers are the most useful baseline for our area because they match what owners experience here. Wet winters, mild but persistent moisture, and long shaded periods can wear on a paint film differently than intense inland heat does.

Why Puget Sound exteriors fail sooner than people expect

Exterior paint in Western Washington usually doesn't fail for one reason alone. Several things happen at once.

  • Moisture sits longer: Siding, trim, and caulk joints don't dry as quickly after rain.
  • Mildew grows on shaded faces: North and east elevations often look older first.
  • Wet-dry cycling stresses the film: Wood moves, coatings flex, and weak areas open up.
  • UV still matters: Even with cloud cover, sun breaks down binders over time and contributes to chalking.

The result is a coating that may look passable from the driveway but is already weakening at the details that matter most.

Practical rule: In Puget Sound, the wall that stays damp longest usually tells the truth about the condition of the paint job.

Siding material changes the timeline

Not every exterior surface behaves the same. Wood siding is the biggest concern because it absorbs and releases moisture. Cedar and fir, both common in Western Washington, can perform well when they are properly primed, sealed, and painted with the right product, but they also punish shortcuts.

Fiber cement is generally more stable than wood, so the paint film usually has an easier job. Brick and masonry present a different challenge. They don't move like wood, but they can hold moisture and telegraph failures if the wrong coating is used or if drainage issues are ignored.

Trim and doors often fail before broad siding fields because they take more abuse. Sun exposure, hand contact, sprinklers, and sharp edges all work against them. That's why a house can need selective repainting on details before the main body fully reaches end of life.

Paint grade isn't optional here

In this climate, the difference between a lower-grade exterior paint and a true 100% acrylic latex product isn't academic. Better binders hold up longer under damp conditions, and mildewcides help protect the surface where mildew pressure is persistent.

Cheap paint can look acceptable when it first goes on. What it usually doesn't do well is keep its film strength after repeated moisture exposure. Once the film weakens, blistering, peeling, and edge failure start showing up where water intrusion is already trying to happen.

A better coating still won't save a bad prep job. But in Seattle, Kent, and Tacoma, lower-grade paint narrows your margin for error fast.

Timing matters too

Even the right product can underperform if it's applied under poor conditions. Surfaces need time to dry, and the work window matters more here than in many other regions. If you're comparing repaint timing, Wheeler's guide on the best time to paint a house exterior is useful because scheduling around moisture exposure is part of getting the full life from the coating.

For building owners looking for a residential contractor near me or support with facility maintenance, this is the takeaway. Exterior paint lasts longest when the siding condition, product selection, and weather window all line up. If one of those pieces is off, the clock starts running early.

How Long Interior Paint Lasts Room by Room

Inside the building, the right question isn't just how long does house paint last. It's which room are we talking about. Interior paint wears according to traffic, moisture, cleaning frequency, and how people use the space.

A minimalist living room with a beige sofa, wooden coffee table, and a burnt orange accent wall.

According to this interior paint lifespan reference, high-traffic areas like hallways and kitchens typically need repainting every 3 to 5 years, bedrooms and living rooms usually last 7 to 10 years, and bathrooms often last only 3 to 4 years because high humidity breaks down paint polymers.

High-traffic rooms wear out first

Hallways, stairwells, entry areas, break rooms, and active common spaces take constant contact. People brush walls, move furniture, carry bags, and leave marks that cleaning can't always solve without also wearing the finish.

Kitchens also age faster, but for a different reason. It's less about bumps and more about residue, cleaning, and moisture in the air. Even in a well-kept home, kitchen walls work harder than bedroom walls do.

For commercial interiors, this same pattern shows up in corridors, tenant entries, and shared use areas. An office with controlled use may hold paint well. A retail space or active common hallway usually won't.

Low-impact rooms can go much longer

Bedrooms and living rooms usually keep their appearance longer because they don't deal with the same daily abuse or humidity load. That doesn't mean they're maintenance-free. Sunlight, furniture scuffs, and lifestyle still matter. But these rooms generally age more slowly and more evenly.

Guest rooms are the classic example. They often look good long after the rest of the house has obvious wear because they don't see the same use.

Here's a simple planning view:

Room type Typical paint life Main reason
High-traffic areas 3 to 5 years Contact, scuffs, repeated cleaning
Kitchens 3 to 5 years Heat, moisture, residue
Bathrooms 3 to 4 years Humidity and repeated moisture
Bedrooms and living rooms 7 to 10 years Lower wear and lower moisture

Bathrooms are their own category

Bathrooms deserve separate treatment because humidity changes everything. Repeated showering introduces moisture that weakens adhesion over time, and poor airflow makes the problem worse. In Puget Sound homes, where ambient moisture is already part of daily life, a bathroom without good ventilation can age paint quickly.

That doesn't always start as peeling. It may begin as dullness, patchy sheen, or recurring surface discoloration that returns after cleaning.

A quick visual example helps here:

What owners should do with this information

Use room-by-room repaint cycles for planning, not panic. If a hallway looks tired after a few years, that doesn't mean the whole house or whole tenant suite needs repainting at once. It means the maintenance schedule should reflect real use.

  • Prioritize active zones: Entry halls, corridors, and kitchens usually need attention first.
  • Budget bathrooms separately: Moisture-prone rooms rarely stay on the same cycle as dry rooms.
  • Match finish to function: Washability and moisture resistance matter more in workhorse spaces.
  • Think by occupancy type: A family home, office suite, and retail build-out all wear differently.

For owners managing commercial construction near me searches or planning tenant improvement work, that's often the practical path. Repaint where use demands it, not just where the calendar says you should.

Four Key Factors That Determine Paint Durability

Paint lifespan isn't controlled by paint alone. Four things decide whether a coating holds up or disappoints in Western Washington: the product, the prep, the environment, and the application itself.

Four geometric pillars displaying textures representing surface preparation, paint quality, environmental climate, and application skill factors.

When those four line up, paint lasts closer to its full potential. When one fails, the whole system gets weaker.

Paint quality

Material selection matters most when the surface is exposed to moisture, abrasion, or cleaning. On exteriors, stronger acrylic binders are better suited to a damp climate. Indoors, the right finish helps walls resist scuffs, washing, and humidity.

This isn't about buying the most expensive can on the shelf. It's about using a coating that fits the substrate and the environment. A bargain product on a demanding surface often costs more later because the repaint cycle comes sooner.

If UV exposure is part of the problem, especially on sun-hit walls, doors, or trim, it helps to understand how UV-resistant paint fits into the bigger durability picture.

Surface preparation

Prep is where long-lasting jobs are won or lost. A surface can look paintable and still be a bad candidate for coating if it's dirty, chalky, damp, unstable, or carrying hidden failure at joints and edges.

On exterior work, prep may involve washing, scraping, sanding, spot priming, caulk replacement, and in some cases carpentry or siding replacement before paint begins. On interiors, prep often means drywall repair, stain blocking, patching, and making sure the substrate is clean enough for proper adhesion.

If mildew is painted over instead of removed, or if damp siding is coated because the schedule is tight, the finish usually tells on that shortcut later.

For owners comparing cladding options on future projects, this guide to siding materials is useful background because the substrate itself affects how hard the paint system has to work.

Environmental exposure

Puget Sound weather creates a slow, persistent kind of wear. Rain is obvious, but the harder issue is often extended dampness. Shaded walls, overgrown landscaping, clogged gutters, and splash-back near grade all keep surfaces wetter longer.

Indoors, the environmental issue is usually ventilation. Bathrooms, laundry areas, kitchens, and commercial wash zones punish coatings when airflow is poor. That doesn't always produce immediate failure. It often gradually shortens the useful life until the room suddenly looks older than the rest of the building.

A few examples show how exposure changes outcomes:

  • South-facing trim: More sun, more UV stress, faster fading.
  • North-facing siding under trees: More shade, more mildew pressure, slower drying.
  • Bathroom ceilings: Repeated humidity load, especially when fans are weak or rarely used.
  • Retail entries: Frequent touch points, frequent cleaning, higher wear.

Application skill

Even good paint on a well-prepped surface can underperform if it's applied poorly. Thin coverage, rushed dry times, missed caulk failure, sloppy cut lines around joints, and bad timing with weather all shorten the life of the coating.

Application skill also includes knowing when not to paint yet. In this region, patience matters. A surface that still holds moisture shouldn't be coated just because the calendar says the crew is due on site.

For smaller residential work and mid-size facility maintenance, Wheeler Painting & Restoration Services is one option owners use when they need painting tied to broader repair scope such as drywall, trim repair, waterproofing, or tenant improvement, where durability depends on the whole assembly being addressed rather than just the finish coat.

Your Puget Sound Paint Inspection Checklist

A good inspection doesn't require specialty equipment. You can learn a lot just by walking the property slowly and checking the same trouble points a contractor checks first. The goal isn't to diagnose every technical issue. It's to spot whether the paint is still protecting the building or just covering it.

What to look for outside

Start with the elevations that stay wet longest, then move to trim, doors, and lower siding.

  • Chalky residue on the surface: Rub your hand lightly across the paint. If color dust transfers easily, the binder may be breaking down.
  • Blistering or bubbling: Raised areas often point to trapped moisture or adhesion failure.
  • Cracking or alligatoring: When paint loses flexibility, it can split into a cracked pattern instead of moving with the substrate.
  • Peeling at edges and joints: Check butt joints, trim corners, window heads, and horizontal transitions.
  • Mildew or dark staining: In Puget Sound, persistent staining on shaded walls often signals prolonged moisture exposure, not just dirt.

What to look for inside

Interior problems usually show up where moisture, cleaning, or repeated contact are concentrated.

Area Warning sign What it often means
Bathroom walls or ceiling Dull, patchy, or peeling finish Moisture stress or weak ventilation
Hallways and entries Scuffs that won't clean off Finish is worn, not just dirty
Kitchen walls Staining or uneven sheen Residue buildup and repeated washing
Window-adjacent walls Fading or patchiness Surface is aging unevenly

Walk the building in daylight if you can. Early failure is easier to spot when raking light shows sheen changes, raised edges, and surface texture.

A few places people miss

Some of the most useful inspection spots aren't the largest walls. They're the details.

  • Below gutters and downspouts: Overflow and splash patterns often show here first.
  • At the bottom edge of siding: Ground moisture and poor drainage stress these areas.
  • Door frames and thresholds: Repeated use and weather exposure hit these hard.
  • Behind shrubs: Airflow drops, drying slows, and mildew pressure rises.

If you see multiple signs at once, cleaning and touch-up may not be enough. At that point, it helps to understand whether the surface needs localized prep or full coating removal. This overview on how to remove old paint gives a useful starting point for what that process can involve.

Extend Your Paint's Life With Practical Maintenance

Most paint jobs don't fail overnight. They lose life in small steps. A little mildew that isn't cleaned. A gutter overflow that keeps soaking one wall. A bathroom fan that never quite clears the room. Maintenance works because it interrupts those small problems before they become coating failure.

Exterior habits that help

You don't need to baby your exterior paint, but you do need to keep water and organic buildup from sitting on it too long.

  • Wash siding carefully: Remove surface grime and mildew without damaging the paint film. If you're deciding how often to pressure wash your house, use methods that clean the surface without forcing water into joints or behind siding.
  • Keep gutters and downspouts working: Overflowing gutters shorten paint life fast, especially at fascia, trim, and lower walls.
  • Trim back vegetation: Shrubs and tree branches reduce airflow and keep walls damp.
  • Handle failed caulk early: Small openings around trim and penetrations can turn into paint failure if water keeps getting in.

Interior habits that matter

Interior maintenance is usually about moisture control and gentle cleaning.

  • Use bath fans consistently: Let surfaces dry out after showers.
  • Clean with mild products: Aggressive scrubbing can burnish or wear the finish.
  • Touch up damage early: Small chips and scuffs are easier to deal with before they collect dirt and expand.
  • Watch recurring stains: If a mark keeps returning, the issue may be moisture, not paint alone.

Store leftover paint the right way

Touch-up paint is only helpful if it's still usable. According to Consumer Reports on leftover paint storage, leftover latex paint can remain usable for up to 10 years if stored correctly. Warning signs include bulging cans, a thick rubberlike film on the surface, or paint that fails to mix uniformly. If you're unsure, test it on cardboard before putting it on the wall.

That advice matters for homeowners doing phased room updates and for property managers holding stock for routine touch-ups. Good labeling helps too. Keep the room name, color, sheen, and date on the lid so the paint is useful later, not a guessing game.

Hiring a Professional vs DIY Painting A Cost and Quality Guide

DIY painting can make sense for a small, simple room with sound walls and easy access. It gets harder when the project includes exterior prep, moisture problems, ladder work, repaired substrates, or color matching across a larger property.

The hidden cost in DIY usually isn't the roller cover or brush. It's time, prep, and rework. Most paint failures people blame on product quality are really prep failures, application timing issues, or skipped repairs underneath the coating.

When DIY is usually reasonable

A do-it-yourself approach is often workable when:

  • The surface is already sound: No peeling, moisture damage, or patching issues.
  • Access is straightforward: Standard walls, limited masking, no major safety concerns.
  • The stakes are low: A secondary room or light refresh where minor imperfections are acceptable.

When professional work usually pays off

Hiring a contractor is the better value when the building needs more than color change.

  • Exterior painting in Puget Sound: Moisture timing, mildew treatment, and substrate condition matter too much to guess at.
  • Commercial or occupied spaces: Scheduling, protection, workflow, and finish consistency matter.
  • Projects tied to repairs: Drywall work, trim replacement, waterproofing, and surface correction should be handled as one scope.
  • Difficult surfaces: High walls, failing wood trim, older coatings, and detail-heavy exteriors need experience.

Professional painting isn't just about getting paint onto a surface. It's about knowing what has to happen before and after the coating so the job lasts.

For owners comparing bids, the smart question isn't "What's the cheapest way to get color on the wall?" It's "Which approach gives this building the longest useful life with the fewest callbacks?"

Protect Your Investment With a Professional Assessment

In Seattle, Tacoma, Kent, and the towns in between, paint life depends less on generic timelines and more on moisture, exposure, prep quality, and maintenance. Exterior coatings on wood siding often live in the 5 to 7 year range in our climate, while interior paint can last far longer or wear out much sooner depending on the room and how it's used. The difference is local conditions.

If your property is showing mildew, blistering, chalking, peeling, or uneven wear, a careful inspection is the right next move. It helps you decide whether you need cleaning, repairs, touch-up work, or a full repaint.


If you'd like a practical, no-pressure evaluation of your home, facility, office, or tenant space, contact Wheeler Painting & Restoration Services to discuss the condition of the surfaces, likely causes of wear, and the most sensible next step for your property.

How to Remove Old Paint Like a Pro in Puget Sound

That cracked, peeling paint isn't just an eyesore—it's the only thing standing between you and a beautiful, durable finish. For homeowners and business owners alike, getting rid of that old layer is the most important part of any paint job. The process comes down to four core methods: good old-fashioned manual scraping, chemical stripping, heat application, and media blasting. Choosing the right one depends on what you're working with and the size of your project.

Your Guide to Removing Old Peeling Paint

A metal scraper removes peeling light green paint from wooden house siding, with paint flakes on a towel.

Whether you're a homeowner tackling a weekend project or a facilities manager planning a major refresh, knowing how to properly remove old paint is the key to success. When you strip and prep a surface the right way, your new coat of paint will adhere properly, look fantastic, and hold up for years to come. This guide is designed to give you a clear, practical path forward, helping you feel less overwhelmed by the process.

We'll break down the tools and techniques we use in the field, because a professional-grade finish starts with understanding the fundamentals—especially here in the demanding Puget Sound climate. Our goal is to provide simple, helpful terms to build your confidence.
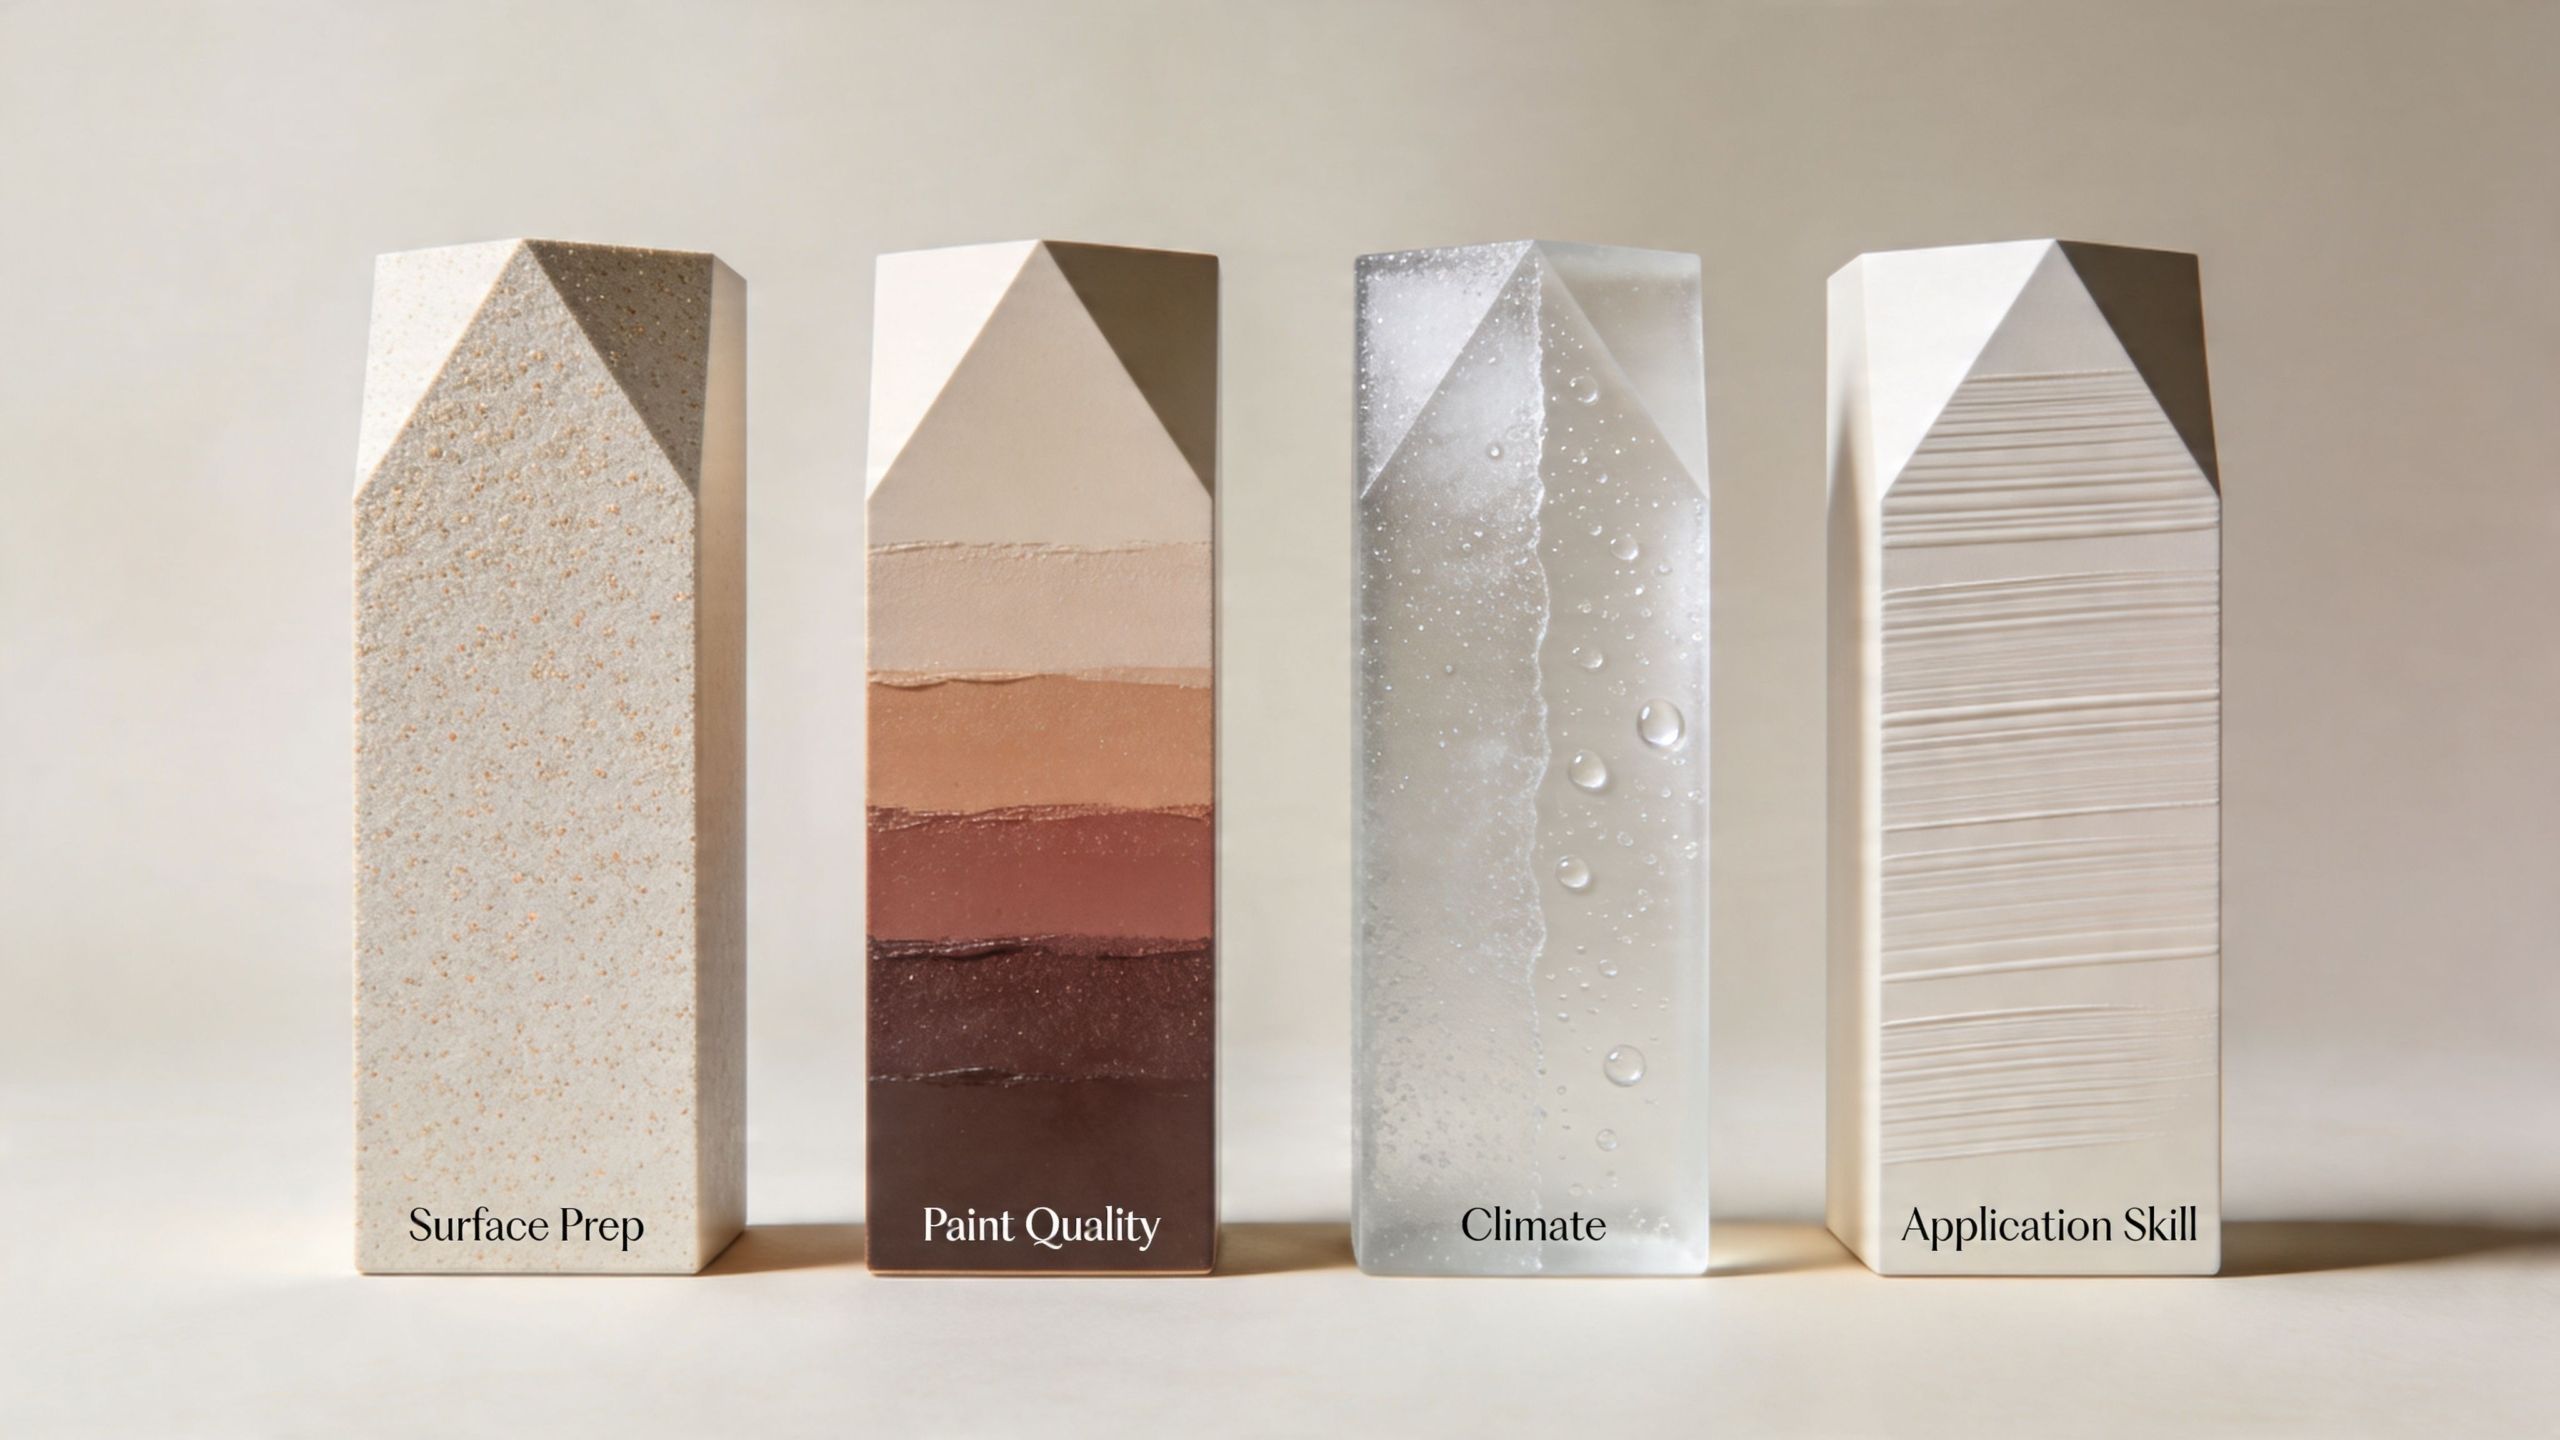
Understanding Your Options

Before you grab a scraper or can of stripper, it helps to see the big picture. Every method has its place, from small residential touch-ups to large-scale commercial renovations.

Here's a quick look at how these methods compare.

Paint Removal Methods at a Glance

Method Best For Difficulty Level Key Tools
Manual (Scraping/Sanding) Small areas, already flaking paint Low Scrapers, sanders, wire brushes
Heat Guns Multiple paint layers on wood, metal Medium Heat gun, scrapers, respirators
Chemical Strippers Intricate details, metal surfaces Medium Stripper, brushes, scrapers, PPE
Media Blasting Large exterior surfaces, industrial jobs High (Pro-level) Blasting equipment, compressor, media

As you can see, the right tool for the job really depends on the situation. Let's dig a little deeper into these options.

  • Manual Methods (Scraping & Sanding): This is your go-to for small patches where paint is already failing. It’s straightforward but labor-intensive.
  • Heat Guns: These are great for softening thick, stubborn layers of old paint on durable surfaces like wood siding, making it much easier to scrape away.
  • Chemical Strippers: Perfect for furniture with intricate details or for removing paint from metal without causing damage. The chemicals do the hard work of dissolving the paint's bond.
  • Media Blasting: This is the heavy-duty, professional option for huge projects, like stripping an entire commercial building or cleaning industrial equipment.

The key is matching the method to the surface material, the number of paint layers, and the scale of the job. A heat gun might be ideal for vintage wood trim but a poor choice for drywall.

Choosing the wrong method doesn't just waste time—it can permanently damage the surface underneath. We've seen it happen. A simple repaint can quickly turn into a costly repair, which is a real risk for historic homes and commercial buildings alike.

As a local general contractor serving Western Washington since 1991, we’ve handled it all. From restoring classic Puget Sound homes to prepping large retail spaces for a new look, our team at Wheeler Painting & Restoration Services knows how to pick the right strategy. We're sharing our hands-on experience here to help you get started with confidence.

Safety First: Prepping Your Work Area Like a Pro

Before a single flake of old paint comes off the surface, your most important job is setting up a safe and contained workspace. We can't stress this enough. Whether you're working on a bathroom in your home or a large commercial space, this step is non-negotiable. It’s how we protect our crew, and it’s how you’ll protect yourself, your family, or your employees from potential hazards.

The biggest concern is always lead-based paint. If your property was built before 1978, you have to work under the assumption that it's there. The EPA's data is sobering: a staggering 87% of homes built before 1940 contain lead paint. The moment you scrape, sand, or heat that paint, you can release toxic dust and fumes. This is a serious risk that requires careful management.

Identifying and Dealing with Lead Paint

So, what's the first move? Test for lead. You can find an EPA-recognized lead test kit at most hardware stores. They're straightforward to use and give you a clear answer on the spot.

If that test comes back positive, the game changes. You are now dealing with hazardous material, and there are strict federal and local rules for handling and disposal. Honestly, for most property owners, this is the point where you should put the tools down and call in a certified professional. At Wheeler Painting, our teams are fully trained and certified in lead-safe practices. We have the proper equipment and knowledge to manage the risk correctly from start to finish.

Your Personal Protective Equipment (PPE) Checklist

Even if you’ve ruled out lead, paint removal is messy work. You'll be dealing with dust, debris, and potentially strong chemicals. Your PPE is your personal shield. The gear you need depends on the removal method you choose.

  • Respirator: For any kind of sanding or dry scraping that creates dust, an N95 or P100-rated respirator is a must. If you're using chemical strippers, you absolutely need a respirator with organic vapor cartridges to protect your lungs from fumes.
  • Eye Protection: Don't even think about starting without it. Safety glasses are good; sealed goggles are better. They'll keep paint chips, dust, and chemical splashes out of your eyes.
  • Gloves: For scraping and sanding, a pair of heavy-duty work gloves will do. For chemical strippers, you need chemical-resistant gloves—usually butyl or nitrile—to prevent skin burns.
  • Coveralls: A simple set of disposable coveralls keeps dust and chemicals off your skin and clothes. This makes cleanup easier and prevents you from tracking contaminants through your home or job site.

When the job is done, it's just as important to follow the right steps for removing personal protective equipment (PPE) to avoid spreading any contaminants.

Containing the Mess

Proper containment is what separates professionals from amateurs. It protects the rest of your property and makes the final cleanup much easier.

First, remove everything you can from the room—furniture, rugs, décor, and equipment. For heavy items you can't move, cover them completely with thick plastic sheeting and tape down every seam.

Next, cover the floor with a quality drop cloth (canvas works well) and extend it several feet beyond your work area. If you're inside, use plastic sheeting and tape to seal off doorways and shut down any HVAC vents. You do not want dust getting into your ventilation system.

Pro Tip: When you lay down drop cloths, overlap them by at least a foot and tape them together. This small detail prevents dust and paint chips from getting into the cracks while you work.

It's also interesting to see how the industry is shifting toward safer products. There's a growing demand for more effective paint removers, with a push toward sustainable, bio-based solvents. The market is projected to see a 3.7% CAGR through 2030 as these newer, safer formulas become standard. This is great news for both professionals and DIYers. You can learn about the paint remover market's growth and see how these trends are shaping the products we use.

Choosing Your Removal Method From Scraping to Stripping

Alright, your space is prepped and you're ready to tackle that old paint. Now for the real question: how are you going to get it off? The path you choose impacts your timeline, budget, and the quality of your final finish. From basic scraping to heavy-duty media blasting, let's walk through the options so you can pick the right tool for your project.

But first, a crucial safety check. Before you touch a single paint chip, you have to think about lead. This is non-negotiable, especially in Western Washington where we have so many beautiful older homes and commercial buildings.

Flowchart guide on lead paint safety, determining risk based on house construction year and suggesting test kits.

Use this guide as your starting point. The rule is simple: if the building was constructed before 1978, you must test for lead before you do anything else.

Manual Scraping and Sanding

This is the foundation of paint removal, relying on good old-fashioned elbow grease. It’s the natural starting point for nearly any project, especially where paint is already peeling, bubbling, or cracking.

You'll want to tackle any loose, flaky areas on wood, metal, or drywall with this method first. Even if you plan to use another technique later, you always start by scraping off the easy-to-remove sections.

Your go-to tools here will be a 5-in-1 painter's tool, a set of pull scrapers with various blade profiles, and a stiff wire brush. Once the loose paint is gone, you can move on to sanding—a power sander for large, flat areas and flexible sanding sponges for getting into detailed curves.

A pro tip: Don't force a flat scraper on a curved piece of trim. You’ll just end up gouging the wood. Match your scraper’s shape to the surface. It takes a little more time but ensures a clean removal and avoids a repair job.

Using a Heat Gun

When you're facing multiple, stubborn layers of paint, a heat gun can work wonders. By applying high heat (often 750 to 1,000°F), the paint softens and bubbles, letting you peel it away with a scraper.

Imagine stripping an old door with five coats of paint. Scraping it cold would be an exercise in frustration. With a heat gun, you can often lift those layers in long, satisfying sheets.

Be warned, though: heat guns pose a very real fire risk, especially on old, dry wood. More importantly, they can vaporize lead paint, creating toxic fumes you can easily inhale. This is why the EPA's RRP rule strictly limits their use on pre-1978 properties.

Never use a heat gun on:

  • Drywall or plaster, as it can easily scorch the surface.
  • Vinyl siding, which will melt almost instantly.
  • Any surface near flammable materials like drapes or insulation.

Applying Chemical Strippers

For intricate surfaces—think detailed crown molding, antique furniture, or ornate metal railings—chemical strippers are often the best solution. They work by dissolving the paint’s bond, doing the hard work for you.

You'll generally find two types:

  1. Solvent-Based: These are the traditional, fast-acting strippers. They're incredibly effective but release potent fumes (volatile organic compounds or VOCs). If you use them, you need fantastic ventilation and a respirator rated for organic vapors.
  2. Caustic-Based: These are often sold as thick pastes. They work more slowly—you might apply the product, cover it, and let it sit for hours. They have lower VOCs but can be messy to clean up and may darken some woods.

If a business owner needs to restore an old, ornate metal gate at their property's entrance, a chemical stripper is the perfect choice. It gets into every detail without the abrasion of sanding, preserving the metalwork.

Media Blasting

When the job is huge, professionals turn to media blasting. This process uses a high-pressure airstream to shoot abrasive particles (the "media") at a surface, literally blasting the paint off.

This is absolutely not a DIY technique. It requires expensive, specialized equipment and a skilled operator to avoid destroying the underlying surface. For a facilities manager stripping a large concrete warehouse or a steel-framed industrial building, however, it’s the fastest and most efficient option.

Common media types include:

  • Sand: The classic choice, but creates hazardous silica dust.
  • Soda: Gentle and cleans the surface simultaneously.
  • Walnut Shells: A biodegradable option that’s great for softer materials.
  • Glass Beads: Used for creating a fine, polished finish on metal.

For massive commercial renovations or removing tough industrial coatings, nothing matches the power of media blasting. For most home projects, it’s overkill. When a project feels overwhelming, that's your cue to call in a professional. At Wheeler Painting, we have the experience to handle everything from residential home improvement services to those big "commercial construction near me" projects, ensuring the right method is used safely and effectively.

Mastering Surface-Specific Removal Techniques

Not every surface is created equal. Using the wrong paint removal technique can turn a simple project into a costly repair. A method that works beautifully on rugged wood siding might ruin delicate interior drywall. This is where experience pays off—knowing which tool and technique to use for the job at hand.

Whether you're a homeowner in the Puget Sound area or a facility manager overseeing a commercial renovation, let’s walk through the right way to tackle the most common surfaces. These are the field-tested strategies we use every day to get professional results.

Preserving Wood Siding and Trim

Wood is probably the most common material people need to strip, from exterior siding to historic interior trim. The goal is always to get the old paint off without gouging or splintering the wood.

For flat, exterior wood siding, a combination of scraping and sanding is often your best bet. Start with a sharp pull-scraper to lift away all loose, peeling paint. Once the bulk of it is gone, an orbital sander with medium-grit paper will smooth out the remaining paint edges.

The secret to handling curved or detailed trim is to ditch the flat scraper. You'll inevitably dig into the wood. Instead, invest in a scraper set with multiple blade profiles—concave, convex, and pointed. Matching the blade to the trim's contour makes all the difference.

If you’re facing thick layers of paint on old wood, a heat gun can be helpful, but you must be careful. It softens the paint for easy removal but is also a fire hazard, especially with the aged wood found in many historic Western Washington homes. Always keep a water spray bottle handy to mist the area.

Tackling Metal Railings and Fixtures

From wrought-iron fences to steel handrails in a commercial building, metal presents its own challenges. The main goal here is to strip the paint completely while prepping the surface to prevent rust—a constant battle in our damp climate.

For metal, especially ornate pieces, chemical strippers are often the most practical choice. A gel-based stripper clings to vertical surfaces like railings, dissolving multiple paint layers without the abrasive damage of sanding. Apply the stripper, let it work, and then use scrapers and wire brushes to clear away the softened paint. To learn what comes next, our guide on how to properly paint metal surfaces has you covered.

After stripping, it’s critical to clean the metal to remove all chemical residue. Any leftover stripper will ruin your new primer and paint. Wipe the surface down with mineral spirits or the recommended solvent, then apply a rust-inhibiting metal primer as soon as possible.

Stripping Porous Masonry Like Brick and Concrete

Brick and concrete are tough, but their porous nature means paint can seep deep into the surface, making it difficult to remove without scarring the material.

For light paint jobs, a pressure washer paired with a specialized masonry cleaner can sometimes work. But for a fully painted brick wall, you'll likely need a caustic-based chemical stripper. These thick pastes are applied to the surface and covered with paper or plastic, letting them sit for up to 24 hours. This poultice method actually draws the paint out from the brick's pores.

It's a messy, patient process, but it's the surest way to strip paint from brick without damaging it. For huge projects, like an entire commercial facade, media blasting with a gentle abrasive might be the answer, but that's a job strictly for professionals.

Handling Delicate Interior Surfaces

When you move indoors to surfaces like kitchen cabinets and drywall, you need a much lighter touch. Aggressive scraping, high heat, or harsh chemicals can easily ruin these materials.

  • Drywall: Never use a heat gun or caustic strippers on drywall. The heat can scorch the paper, and moisture from strippers will weaken the gypsum core. The right way is to carefully scrape any peeling paint, then use a sander to feather the edges. You may need to skim-coat the area with joint compound to get a perfectly smooth surface.

  • Kitchen Cabinets: If you're stripping paint from wood cabinets, a quality solvent-based stripper is a good choice. It works faster and is less likely to raise the wood grain than water-based options. Ensure you're in a well-ventilated space and wearing a respirator with organic vapor cartridges.

  • Windows and Glass: Getting old paint off glass panes without scratching them is a common headache. You can learn some great techniques on how to remove paint from window glass like a pro.

This demand for proper paint removal is huge. The global paint remover market hit $1.805 billion in 2023 and is on track to reach $3.179 billion by 2033, spurred by post-pandemic renovation booms. Here in Puget Sound, where regional data suggests 40% of commercial spaces need a refresh every 5-7 years, calling in a pro like Wheeler Painting helps you avoid the 25% failure rate from chemical burns or residue common in DIY jobs.

Prepping for a Flawless New Coat of Paint

A person's hand wiping sawdust from a wooden trim with a cloth, preparing it for painting.

Getting all that old paint off feels like a huge win, but the job’s not over yet. What you do next is what separates a decent DIY paint job from a professional finish that lasts. This final prep work creates the perfect canvas for your new coat of paint.

We've seen it countless times—property owners get impatient here. Rushing this step is a surefire way to watch your new paint start failing in less than a year. A clean, smooth, and properly prepared surface is the foundation of a great paint job, whether you're updating a room or tackling a large commercial project.

Clean and Neutralize the Surface

After stripping, your surface is likely covered in dust, paint flakes, and possibly chemical residue. The first thing you need to do is get it completely clean. This is non-negotiable if you used a chemical stripper, as any leftover residue will ruin your primer.

A simple wipe-down with warm water and a powdered detergent usually does the trick, followed by a clean water rinse. For wood that's been chemically stripped, we often recommend a final rinse with a vinegar-and-water solution to neutralize any lingering chemicals.

This whole process of stripping old coatings is a massive business. The global paint remover market hit roughly $6.8 billion in 2023, driven by a boom in renovation projects. In North America alone, the market is worth about $2.0 billion, as property owners—especially in places with tough weather like the Puget Sound—look for better ways to refresh their buildings. You can see more on the trends shaping the paint remover market on datainsightsreports.com.

Make Those Necessary Repairs

Now that the surface is bare and clean, you can see every little flaw. This is your chance to fix them. It's tempting to paint over dings, gouges, and cracks, but they will show through the new paint.

  • For Wood: Use a high-quality, sandable wood filler and a putty knife to fill any gouges, old nail holes, or cracks. Overfill the spot slightly to allow for shrinkage, then sand it perfectly flush.
  • For Drywall: Use spackling or joint compound for small holes and cracks. For larger repairs, use drywall tape with your compound to prevent cracks from returning.
  • For Masonry: On brickwork, repair any crumbling mortar joints. For concrete, fill cracks with a dedicated masonry patching compound. This is key to preventing water intrusion.

Taking the time to make these small repairs is what creates that flawless, uniform look. It’s the difference between a project that looks "finished" and one that looks professionally executed.

Sand Smooth and Prime for Success

Even after patching, your surface probably isn't perfectly smooth. A final sanding creates a uniform texture for the paint to grip. For most surfaces, a quick pass with fine-grit sandpaper (180-220 grit) is all you need. The goal isn't to remove more material, but to "scuff" the surface.

Wipe away all sanding dust with a tack cloth. Now, you're ready for the most important step before painting: primer. A good primer does three critical jobs:

  1. Seals the Surface: It prevents porous materials like bare wood or fresh drywall mud from soaking up your expensive topcoat.
  2. Improves Adhesion: It gives the new paint a solid surface to grab onto, which is your best defense against peeling.
  3. Blocks Stains: It prevents any stubborn stains or tannins from bleeding through and ruining your new paint color.

Choosing the right primer is key, especially after patching drywall. If you’re working with sheetrock, our guide can walk you through the specifics of whether you need to prime sheetrock before painting. Follow these prep steps, and you're guaranteeing a new paint job that won't just look incredible—it will last.

When to Call a Professional for Your Project

There's a real satisfaction in tackling a project yourself, but with paint stripping, it's crucial to know the difference between a manageable task and a job best left to the pros. Sometimes, the smartest move is knowing when to step back to protect your property, your schedule, and your health.

The biggest non-negotiable is the potential for lead-based paint. If your home or commercial property was built before 1978, you must assume lead is present until proven otherwise. Once lead is confirmed, the project becomes a hazardous material abatement. Federal and local laws have specific, strict rules for handling this to prevent toxic dust from contaminating your property and harming people.

For projects involving lead paint, hiring an EPA Lead-Safe Certified firm like Wheeler Painting & Restoration Services isn't just a good idea—it's essential for safety and compliance. We have the specialized training, containment systems, and disposal methods to manage the risk correctly.

Assessing Project Scale and Complexity

Beyond the critical issue of lead, the sheer size and complexity of the job can quickly overwhelm even the most ambitious person. Stripping a single piece of furniture is one thing; stripping the entire exterior of a multi-story building is another beast entirely. The time, labor, and specialized equipment required for large-scale work are often more than a property owner can manage.

Think about these real-world scenarios where calling a pro makes all the difference:

  • Large Commercial Spaces: We often work on retail build-outs and office space renovations where thousands of square feet of surfaces need stripping on a tight deadline. Our crews use equipment like industrial media blasters to get the job done efficiently, minimizing downtime for the business.
  • Multi-Story Exteriors: Working high up on ladders and scaffolding isn't just difficult, it's dangerous. Our teams are fully trained, licensed, and insured for working at height, which takes all that risk off your shoulders.
  • Intricate Historic Details: Old homes are filled with beautiful, often irreplaceable, woodwork. Trying to strip a century-old mantle or detailed crown molding without the right touch can easily lead to permanent damage. This work demands a finesse that only comes from years of experience.

Hiring a professional team means you're not just paying for labor; you're paying for a guaranteed result. You get the benefit of our experience and avoid the common pitfalls that can ruin a surface. For these bigger jobs, knowing how to choose a general contractor is your first step toward a successful project.

The Value of Professional Efficiency

Finally, you have to ask yourself what your time is worth. A project that could consume all your weekends for a month is often something our crew can complete in just a few days. For business owners and facility managers in the Puget Sound, that speed is everything—it means less disruption and a faster return to business as usual.

When you bring in Wheeler Painting, you're investing in a smooth, streamlined process. We handle the assessment, the messy removal work, and the proper disposal of all waste. You're left with a clean, perfectly prepared surface, ready for its new finish. For any significant residential or commercial construction near me project, calling in the experts is the smartest and safest decision you can make.

Your Paint Removal Questions, Answered

Over the years, we've heard just about every question there is when it comes to stripping old paint here in the Puget Sound. It’s a job that seems straightforward but can quickly get complicated. Here are some of the most common things people ask us, with straightforward answers from our experience in the field.

Can I Just Paint Over Old Peeling Paint?

This is probably the number one question we get, and the answer is always a firm no. You should never paint over peeling, cracking, or bubbling paint.

Think of it this way: the new paint needs something solid to stick to. If the layer underneath is already failing, your fresh coat has a weak foundation and will start to peel right along with the old stuff, often in a matter of months. You'll just end up with a bigger, more expensive problem. Proper prep means removing all the unstable paint first.

How Do I Know if I Have Lead Paint?

This is a critical safety question. If your house or commercial building was built before 1978, you should assume it has lead-based paint until you prove otherwise.

The only way to be certain is to test for it. You can pick up an EPA-recognized lead test kit at most hardware stores for a quick check.

For a definitive answer, especially before a large project, hiring a certified professional to conduct an inspection is the safest route. This is particularly important for facilities managers or business owners responsible for employee and public safety.

What Is the Fastest Way to Remove Paint From a Large Area?

Everyone wants to find the quickest method, but the "fastest" way really depends on the job. For a DIYer tackling a large, flat surface like wood siding, the most efficient approach is often a combination of scraping the loosest flakes off, then using a power sander.

However, for large-scale commercial renovations or industrial jobs, media blasting is almost always the quickest and most thorough method. This isn't a DIY task—it requires specialized equipment and a skilled operator who knows how to strip the paint without damaging the substrate. It's our go-to for big concrete walls or structural steel.


Feeling overwhelmed by a paint removal project? Whether it’s a historic home restoration or a large-scale commercial space, Wheeler Painting & Restoration Services has the expertise to handle it safely and efficiently. Let our team deliver a perfectly prepped surface for a flawless finish. Contact us today for a professional consultation.

How to Choose Exterior Paint Colors for Your Property

Choosing a new exterior paint color can feel like a major decision for any property owner, but it doesn’t have to be overwhelming. This guide is designed for homeowners and commercial property managers, moving beyond generic advice to tackle the real challenges of selecting colors that look fantastic under our often-gray skies and complement the beautiful stone, brick, and natural scenery that define our region's architecture.

The process boils down to three main phases: evaluating your property's permanent features, considering how light and location affect color, and testing your top choices before you make the final call. A little thoughtful planning makes all the difference and ensures a professional, lasting result.

A three-step guide for choosing the perfect paint, including evaluation, consideration, and testing phases.

Following this simple process helps you avoid expensive mistakes and feel confident that you’ll be thrilled with the final look, whether for your home or business.

Start With a Clear Vision

Before looking at paint chips, take a moment to define your goal. Are you hoping for a classic, timeless feel that will look great for decades? Or are you aiming for something more modern and eye-catching to attract customers or enhance your home's curb appeal? Knowing your objective helps narrow down the countless options from the very start.

For most properties, a neutral palette is a stylish and safe bet. Market data consistently shows that achromatic colors—think white, gray, and black—make up around 74% of all exterior color choices. There's a good reason for this. Neutrals have incredible staying power and are a proven way to boost curb appeal for both residential and commercial buildings. You can explore these global color trends to see how they align with what we see locally.

Our goal is to walk you through a proven process so you can land on a color scheme you'll love for years. We'll cover how to:

  • Work with your property’s fixed architectural elements.
  • Understand our unique Pacific Northwest light.
  • Build a cohesive palette of body, trim, and accent colors.
  • Test colors effectively to make a final decision.

Let's demystify this process and give you the confidence to completely transform your property's exterior.

Look at What You Can't Change

Detail of a home's exterior with brick, white siding, dark roof, white windows, and green shrubs.

Before you even think about picking up a paint chip, take a slow, deliberate walk around your property. It's easy to fall in love with a color in a vacuum, but the most impressive paint jobs are the ones that feel like they belong—the ones that work in harmony with the parts of your home or building you aren't painting.

These permanent features are your starting point. We're talking about things like brick or stone accents, the color of your roof shingles, vinyl window frames, and even your concrete driveway. One of the biggest mistakes property owners make is trying to ignore these fixtures, which almost always results in a final look that feels slightly off.

The key is to stop fighting these elements and start working with them. When you learn to see their underlying tones, you can choose paint colors that make the whole property look cohesive and professionally designed.

Find the Undertones in Your Fixed Features

Every material, from stone to asphalt, has a color temperature. The first step is to get up close with your property’s most prominent features and determine if they lean warm, cool, or neutral.

A classic red brick facade, for instance, is packed with warm orange, terracotta, and brown undertones. It’s going to look fantastic with colors that share that warmth—creamy off-whites, mossy greens, or rich tans. On the other hand, a building with cool-toned gray stonework or a slate-blue roof will feel much more at home with crisp whites, deep navy blues, or sleek charcoals.

The secret to a beautiful exterior is to let your property's existing materials guide the decision. Don't try to force a color you love if it clashes with your roof or stonework. Listening to what's already there removes the guesswork and guarantees a more balanced, intentional result.

Your Property's Unchangeable Checklist

Grab a notepad and walk your property. Taking a quick inventory of these "forever" features is the best way to build a solid foundation for your color palette.

  • Roofing: Take a good look at your shingles. Are they a warm brown, a cool gray, black, or perhaps a reddish clay color? A brown roof practically begs for warmer body colors, while a black or gray roof is more of a blank slate, giving you more flexibility.
  • Stone or Brick: This is where the magic is. Look closely at the variations within the material itself. Try to pull out the least dominant color—that subtle gray fleck in your granite or the deep plum-brown in your brick—and consider using it as an accent. It's a pro-level trick for creating a sophisticated palette.
  • Window Frames: White vinyl windows are easy—they go with anything. But if you have beige, tan, or bronze frames, they have very distinct undertones that your trim color must coordinate with.
  • Driveways and Paths: Don't forget the ground! The color of your concrete, pavers, or asphalt is part of the big picture. A reddish brick walkway can influence your color choices just as much as the siding can.

Once you have a handle on these foundational colors, you've essentially created a pre-approved palette to guide your choices. It makes the whole process feel less intimidating and sets you on the right path to a finished look that truly celebrates your property's character.

Master Color in Pacific Northwest Light

A house exterior with multiple gray and blue paint swatches, overlooking a serene lake and evergreen trees.

The quality of light here in the Pacific Northwest is unique, and it has a massive impact on how exterior paint colors actually look on a building. We don’t get the bright, direct sun you find in other parts of the country. Our light is almost always soft and filtered through a persistent layer of cloud cover.

This unique light can dramatically mute colors, making them appear grayer, cooler, or less vibrant than they do on a tiny paint chip under a store’s fluorescent lights.

It’s the reason a cheerful light blue that looked perfect online can suddenly feel chilly and stark on a home in Western Washington. In the same way, a subtle off-white might get completely washed out by the overcast sky, losing all the warmth and character you fell in love with. The secret to choosing the right exterior paint in our climate is learning to work with our specific light, not against it.

Embrace a Darker, Warmer Approach

After years of providing painting services in our community, we can tell you a reliable strategy is to lean just a bit darker and warmer than your gut tells you.

If you’re stuck between two shades of gray, the one with a subtle warm undertone will almost always look better, resisting that cold, clinical feel. If you're looking at a beige, the one that seems a little too "tan" indoors often mellows out into the perfect creamy neutral once it's outside.

This doesn't mean you’re stuck with dark, moody colors. It's about compensating for the cool, muting effect of our light. By choosing a color with a bit more depth and warmth, you’re making sure it holds onto its personality when it's up on your walls.

A color’s undertone is its most important characteristic in the Puget Sound. A gray with a hint of green or brown will feel grounded and natural, while a pure, cool gray can sometimes appear flat or even slightly purple in our diffuse light.

The Non-Negotiable Step: Testing on Every Side

We can’t stress this enough: the single most critical part of this process is testing large paint samples directly on your property. A tiny paint chip is completely useless for making a final decision. To truly understand how a color will live and breathe, you have to see it in its final environment.

For any home or commercial building, we always recommend painting large swatches—at least two-by-two feet—on different sides of the structure.

A color will look completely different on the south-facing wall that gets sun all day compared to the constantly shaded north-facing side. It’s also crucial to paint samples right next to permanent features like your window trim and any stone or brick accents to see how they play together.

Watch those samples for several days. Look at them in the bright morning light, at midday, and during the soft glow of dusk. Does the color hold up, or does it wash out? Does it turn an unexpected shade in the afternoon? This step removes all the guesswork and ensures your decision is based on reality, not a showroom fantasy.

Getting this right is also key to timing your project. You can learn more about when to schedule your work by reading our guide on the best time to paint your house exterior.

Create a Balanced Three-Part Color Scheme

A stunning exterior is never just about one color. It’s the result of a carefully chosen palette where every shade works together to create a cohesive, polished look. The best-looking properties almost always follow a classic three-part approach, which is the secret to achieving that professional, custom-designed feel.

This strategy breaks the project down into three distinct, manageable parts:

  • Field Color: This is your main event, the color that covers the siding and makes up the bulk of your property's appearance. It sets the entire mood.
  • Trim Color: Used on elements like window and door frames, fascias, and roof eaves, the trim color’s job is to create definition and outline the architecture.
  • Accent Color: This is where you get to have a little fun. The accent is that final pop of color on the front door, shutters, or another special feature that you want to draw attention to.

Thinking in these three layers simplifies the whole process. Instead of being paralyzed by options, you can focus on finding three colors that tell a single, beautiful story.

The 60-30-10 Rule for Exteriors

So, how do you get the balance right? A timeless design principle that works wonders for exteriors is the 60-30-10 rule. It’s a simple ratio that helps create visual harmony.

Think of it like this: your main field color should cover about 60% of your property’s surface. The trim color should take up roughly 30%, providing that crucial contrast and definition. The final 10% is reserved for your accent color, delivering just enough personality without overwhelming the design.

This ratio ensures that no single color dominates the others, resulting in a look that’s balanced and easy on the eyes.

A well-executed three-part color scheme makes a property look intentional and thoughtfully planned. It’s the same strategy our color consultants use to instantly boost curb appeal for homes and businesses all over the Puget Sound region.

Bringing Your Palette to Life

Visualizing how these colors will actually look together is the most important step. For a classic Puget Sound Craftsman, you might see an earthy sage green on the body (field) paired with a warm, creamy off-white trim. A rich, welcoming burgundy on the front door (accent) provides that perfect finishing touch.

Another popular Northwest look is a deep, moody blue-gray for the field color, contrasted with crisp, bright white trim. From there, a vibrant marigold yellow or even a cheerful aqua on the front door can add a modern, unexpected twist.

We've put together a few examples to help you see how different combinations work for various architectural styles.

Style Field Color Example Trim Color Example Accent Color Example
Craftsman Earthy Green (SW 6178 Clary Sage) Creamy Off-White (SW 7008 Alabaster) Deep Red (SW 7594 Carriage Door)
Modern Dark Charcoal (SW 7069 Iron Ore) Bright White (SW 7757 High Reflective White) Natural Wood Stain (on door/beams)
Tudor Warm Greige (SW 7036 Accessible Beige) Dark Brown/Black (SW 7069 Tricorn Black) Forest Green (SW 6208 Pewter Green)
Mid-Century Muted Blue-Gray (SW 6246 North Star) Soft White (SW 7005 Pure White) Bright Orange (SW 6632 Geyser)

Building your palette this way gives every color a purpose. It’s truly the difference between just painting your property and designing its exterior to highlight its best features.

The Critical Importance of Testing Samples

Three paint swatches: cream, light green, and dark green, tested on a house's beige siding.

Here's the single biggest—and most common—mistake property owners make: relying on a tiny paint chip from the hardware store. Those little one-inch squares simply cannot show you how a color will behave across the entire surface of your building out in the real world.

The only way to know for sure is to test large samples directly on your property. This is the step that removes all the guesswork and prevents the expensive regret of choosing a color that looks completely different than you imagined. It’s what gives you total confidence before we open the first gallon.

An Action Plan for Accurate Sampling

Effective sampling is all about seeing the color in context. It’s a straightforward process that makes sure your final decision is based on reality, not just a hopeful guess from a swatch.

For the best results, paint big swatches—at least two-by-two feet—on multiple sides of your building. A color can look completely different on the sun-drenched south wall compared to the shady north wall. Seeing that variation is key.

Make sure you place these test swatches right next to the things that aren't changing:

  • Your window trim and fascia boards
  • Any brick, stone, or rock accents
  • Your roofline, if possible

Watching how the new color interacts with these fixed features is essential for creating a cohesive, professional look.

Live with your samples for at least two to three days. Look at them in the bright morning light, at high noon, and as the sun sets in the evening. This is the only way to see how the color shifts and adapts to our region's unique, often-changing light.

Research Before You Commit

Taking your time here is smart and aligns with what we see across the industry. Property owners in the Puget Sound area often spend three to four months researching before kicking off an exterior paint project, doing everything from gathering inspiration to vetting contractors.

For instance, national data from a study on exterior paint color trends from Accio shows that blue is a massively popular choice, with 62% of Americans preferring it. But even the "safest" color needs to be tested on your specific property, with its unique lighting and materials.

This testing phase is also the perfect time to think about the technical side of things, like the ideal temperature for application. If you’re curious about how our seasons affect the work, check out our guide on what temperature is too cold for exterior painting. Getting the timing right is crucial for ensuring the paint adheres properly for a durable, long-lasting finish.

Why Professional Application Makes the Difference

Choosing the perfect color is a huge part of the process, but all that careful planning can go to waste if the paint isn’t applied correctly. A professional paint job is so much more than just brushing on a new color—it’s a long-term investment in protecting your home or commercial building from the notoriously damp Western Washington climate.

The real secret to a paint job that lasts? It all comes down to surface preparation. This is where professional contractors shine. The painstaking work of cleaning, scraping, sanding, and priming is what makes or breaks the final result. It’s this foundational step that ensures the new paint adheres properly and can stand up to years of rain and shifting temperatures. Cutting corners on prep is the fastest way to see your investment peel, bubble, and fail.

Expertise Beyond the Brush

Beyond meticulous prep work, a seasoned painting crew brings technical knowledge that most property owners simply don't have. It's the details that make a big difference in the end, whether for a home, an office space renovation, or a retail build-out.

  • Sheen Selection: The finish you choose is about more than just looks; it's about performance. A durable satin finish is fantastic for siding because it has a slight sheen that's easy to clean. For trim, a crisp semi-gloss creates a tough, protective shell that stands up to the worst of the weather.
  • Product Knowledge: The paint market is always evolving. A pro knows exactly which formulas are best for fighting off mildew, resisting UV fading, and blocking moisture in our unique climate. They’ve seen what works and what doesn't, so you don’t have to learn the hard way.

The global exterior paint market is expected to hit USD 84.5 billion by 2035, largely because of huge leaps in paint technology and durability. You can read more about the expanding exterior paint market on futuremarketinsights.com. Having an expert on your side means you get access to the best products that truly protect your property.

Partnering with an expert team ensures your investment is protected and your vision is realized with precision and quality, from the initial color consultation through to the final, flawless coat.

Ultimately, hiring a professional turns a good color choice into a beautiful, long-lasting finish that protects your property for years. To see how a trusted local provider makes all the difference, learn more about our exterior painters near you and see our commitment to craftsmanship firsthand.

Still Have Questions? Here Are a Few Common Ones

Making the final decision on your property's new color scheme can feel daunting. It's completely normal to have a few last-minute questions. Here are some of the most common things homeowners and business owners ask us right before a project begins.

How Can I Pick a Color That Won't Look Dated in a Few Years?

This is a big one. For a look with real staying power, you can't go wrong by taking cues from the Pacific Northwest landscape itself. Think about the colors that define our region: earthy greens, the deep blues of the Sound, and the versatile, misty grays and greiges of our skies. These shades just belong here and rarely look out of place.

Does that mean you have to play it safe? Not at all. If you're drawn to a bolder, trendier color, use it as an accent. The front door is the perfect spot for a pop of personality. It's a small, high-impact area that's incredibly easy and inexpensive to repaint down the road when you're ready for a change.

Should My Building Color Match My Neighbors?

The goal here is harmony, not conformity. Take a walk around your block and get a feel for the neighborhood's overall vibe. Are the colors generally warm and earthy? Cool and modern? Crisp and traditional?

Choosing a palette that complements the surrounding homes or businesses creates a cohesive, attractive streetscape that benefits everyone. You can absolutely express your own style while still ensuring your property looks like it belongs. It’s about fitting in while still standing out just the right amount.

What's the Best Paint Finish for Our Rainy Climate?

This is a crucial question in the damp Puget Sound. The right paint sheen isn't just about looks—it's your property's first line of defense against moisture.

  • For Siding: We almost always recommend a satin or low-lustre finish. This gives you the perfect balance: it offers a durable, moisture-resistant surface that’s easy to clean, but without the harsh glare of a shinier finish.

  • For Trim & Doors: For all the details—trim, window frames, doors, and fascia—a semi-gloss finish is the professional standard. It provides maximum durability for these high-touch, high-exposure areas and creates a subtle, crisp contrast that really makes your architectural features pop.


Ready to bring your vision to life with a flawless, durable finish? The expert team at Wheeler Painting offers professional color consultation and exterior painting for residential and commercial properties throughout the Puget Sound. Contact us today for a free, no-obligation estimate!